

Miele KWL 4912 S Operating And Installation Manual
Operating and installation instructions
Wine storage unit
KWL 4712 S ed
KWL 4912 S ed
To avoid the risk of accidents or
damage to the appliance, it is
essential to read these instructions
before it is installed and used for the
first time.
G
M.-Nr. 06 813 570

Description of the appliance. . . . . . . . . . . . . . . . . . . . . . . . . . . . . . . . . . . . . . . . . 4
Miele{home. . . . . . . . . . . . . . . . . . . . . . . . . . . . . . . . . . . . . . . . . . . . . . . . . . . . . . 6
Optional accessory. . . . . . . . . . . . . . . . . . . . . . . . . . . . . . . . . . . . . . . . . . . . . . . 6
Caring for the environment. . . . . . . . . . . . . . . . . . . . . . . . . . . . . . . . . . . . . . . . . . 7
Warning and Safety instructions . . . . . . . . . . . . . . . . . . . . . . . . . . . . . . . . . . . . . 8
Switching on and off . . . . . . . . . . . . . . . . . . . . . . . . . . . . . . . . . . . . . . . . . . . . . . 11
Before using for the first time. . . . . . . . . . . . . . . . . . . . . . . . . . . . . . . . . . . . . . . . . 11
Safety lock . . . . . . . . . . . . . . . . . . . . . . . . . . . . . . . . . . . . . . . . . . . . . . . . . . . . . . . 11
Switching off for longer periods of time . . . . . . . . . . . . . . . . . . . . . . . . . . . . . . . . . 12
The optimum temperature and humidity . . . . . . . . . . . . . . . . . . . . . . . . . . . . . . 13
Temperature. . . . . . . . . . . . . . . . . . . . . . . . . . . . . . . . . . . . . . . . . . . . . . . . . . . . . . 13
Safety features . . . . . . . . . . . . . . . . . . . . . . . . . . . . . . . . . . . . . . . . . . . . . . . . . 13
Setting the temperature . . . . . . . . . . . . . . . . . . . . . . . . . . . . . . . . . . . . . . . . . . 13
Temperature range . . . . . . . . . . . . . . . . . . . . . . . . . . . . . . . . . . . . . . . . . . . . . . 14
Temperature display . . . . . . . . . . . . . . . . . . . . . . . . . . . . . . . . . . . . . . . . . . . . . . . 14
Temperature display brightness . . . . . . . . . . . . . . . . . . . . . . . . . . . . . . . . . . . . 14
Humidity level . . . . . . . . . . . . . . . . . . . . . . . . . . . . . . . . . . . . . . . . . . . . . . . . . . . . 15
Constant humidity (Dynamic cooling) button m . . . . . . . . . . . . . . . . . . . . . . . 15
Air filtering with the active charcoal filter . . . . . . . . . . . . . . . . . . . . . . . . . . . . . . . . 16
Storing wine bottles. . . . . . . . . . . . . . . . . . . . . . . . . . . . . . . . . . . . . . . . . . . . . . . 17
Wooden shelves. . . . . . . . . . . . . . . . . . . . . . . . . . . . . . . . . . . . . . . . . . . . . . . . . . . 17
Descriptive labels . . . . . . . . . . . . . . . . . . . . . . . . . . . . . . . . . . . . . . . . . . . . . . . . . 17
Maximum capacity. . . . . . . . . . . . . . . . . . . . . . . . . . . . . . . . . . . . . . . . . . . . . . . . . 17
Door lock . . . . . . . . . . . . . . . . . . . . . . . . . . . . . . . . . . . . . . . . . . . . . . . . . . . . . . . . 17
Alarm. . . . . . . . . . . . . . . . . . . . . . . . . . . . . . . . . . . . . . . . . . . . . . . . . . . . . . . . . . . 18
Temperature alarm. . . . . . . . . . . . . . . . . . . . . . . . . . . . . . . . . . . . . . . . . . . . . . . . . 18
Door alarm . . . . . . . . . . . . . . . . . . . . . . . . . . . . . . . . . . . . . . . . . . . . . . . . . . . . . . . 18
Activating the alarm system. . . . . . . . . . . . . . . . . . . . . . . . . . . . . . . . . . . . . . . . . . 18
Switching the alarm off early . . . . . . . . . . . . . . . . . . . . . . . . . . . . . . . . . . . . . . . . . 18
Defrosting. . . . . . . . . . . . . . . . . . . . . . . . . . . . . . . . . . . . . . . . . . . . . . . . . . . . . . . 19
Cleaning and care . . . . . . . . . . . . . . . . . . . . . . . . . . . . . . . . . . . . . . . . . . . . . . . . 20
Cleaning the outer casing, the interior and accessories . . . . . . . . . . . . . . . . . . . . 20
Ventilation gaps . . . . . . . . . . . . . . . . . . . . . . . . . . . . . . . . . . . . . . . . . . . . . . . . . . . 21
Door seal . . . . . . . . . . . . . . . . . . . . . . . . . . . . . . . . . . . . . . . . . . . . . . . . . . . . . . . . 21
Metal grille at the back of the appliance . . . . . . . . . . . . . . . . . . . . . . . . . . . . . . . . 21
Active charcoal filter . . . . . . . . . . . . . . . . . . . . . . . . . . . . . . . . . . . . . . . . . . . . . . . 21
Contents

Problem solving guide . . . . . . . . . . . . . . . . . . . . . . . . . . . . . . . . . . . . . . . . . . . . 22
Noises . . . . . . . . . . . . . . . . . . . . . . . . . . . . . . . . . . . . . . . . . . . . . . . . . . . . . . . . . 24
How to save energy . . . . . . . . . . . . . . . . . . . . . . . . . . . . . . . . . . . . . . . . . . . . . . . 25
After sales service . . . . . . . . . . . . . . . . . . . . . . . . . . . . . . . . . . . . . . . . . . . . . . . . 27
Electrical connection. . . . . . . . . . . . . . . . . . . . . . . . . . . . . . . . . . . . . . . . . . . . . . 28
Electrical connection U.K. . . . . . . . . . . . . . . . . . . . . . . . . . . . . . . . . . . . . . . . . . . . 28
Installation . . . . . . . . . . . . . . . . . . . . . . . . . . . . . . . . . . . . . . . . . . . . . . . . . . . . . . 29
Location . . . . . . . . . . . . . . . . . . . . . . . . . . . . . . . . . . . . . . . . . . . . . . . . . . . . . . . . . 29
Climate range . . . . . . . . . . . . . . . . . . . . . . . . . . . . . . . . . . . . . . . . . . . . . . . . . . 29
Ventilation. . . . . . . . . . . . . . . . . . . . . . . . . . . . . . . . . . . . . . . . . . . . . . . . . . . . . . . . 29
Installation . . . . . . . . . . . . . . . . . . . . . . . . . . . . . . . . . . . . . . . . . . . . . . . . . . . . . . . 29
Aligning the appliance. . . . . . . . . . . . . . . . . . . . . . . . . . . . . . . . . . . . . . . . . . . . . . 29
Changing the door hinging. . . . . . . . . . . . . . . . . . . . . . . . . . . . . . . . . . . . . . . . . 30
Contents
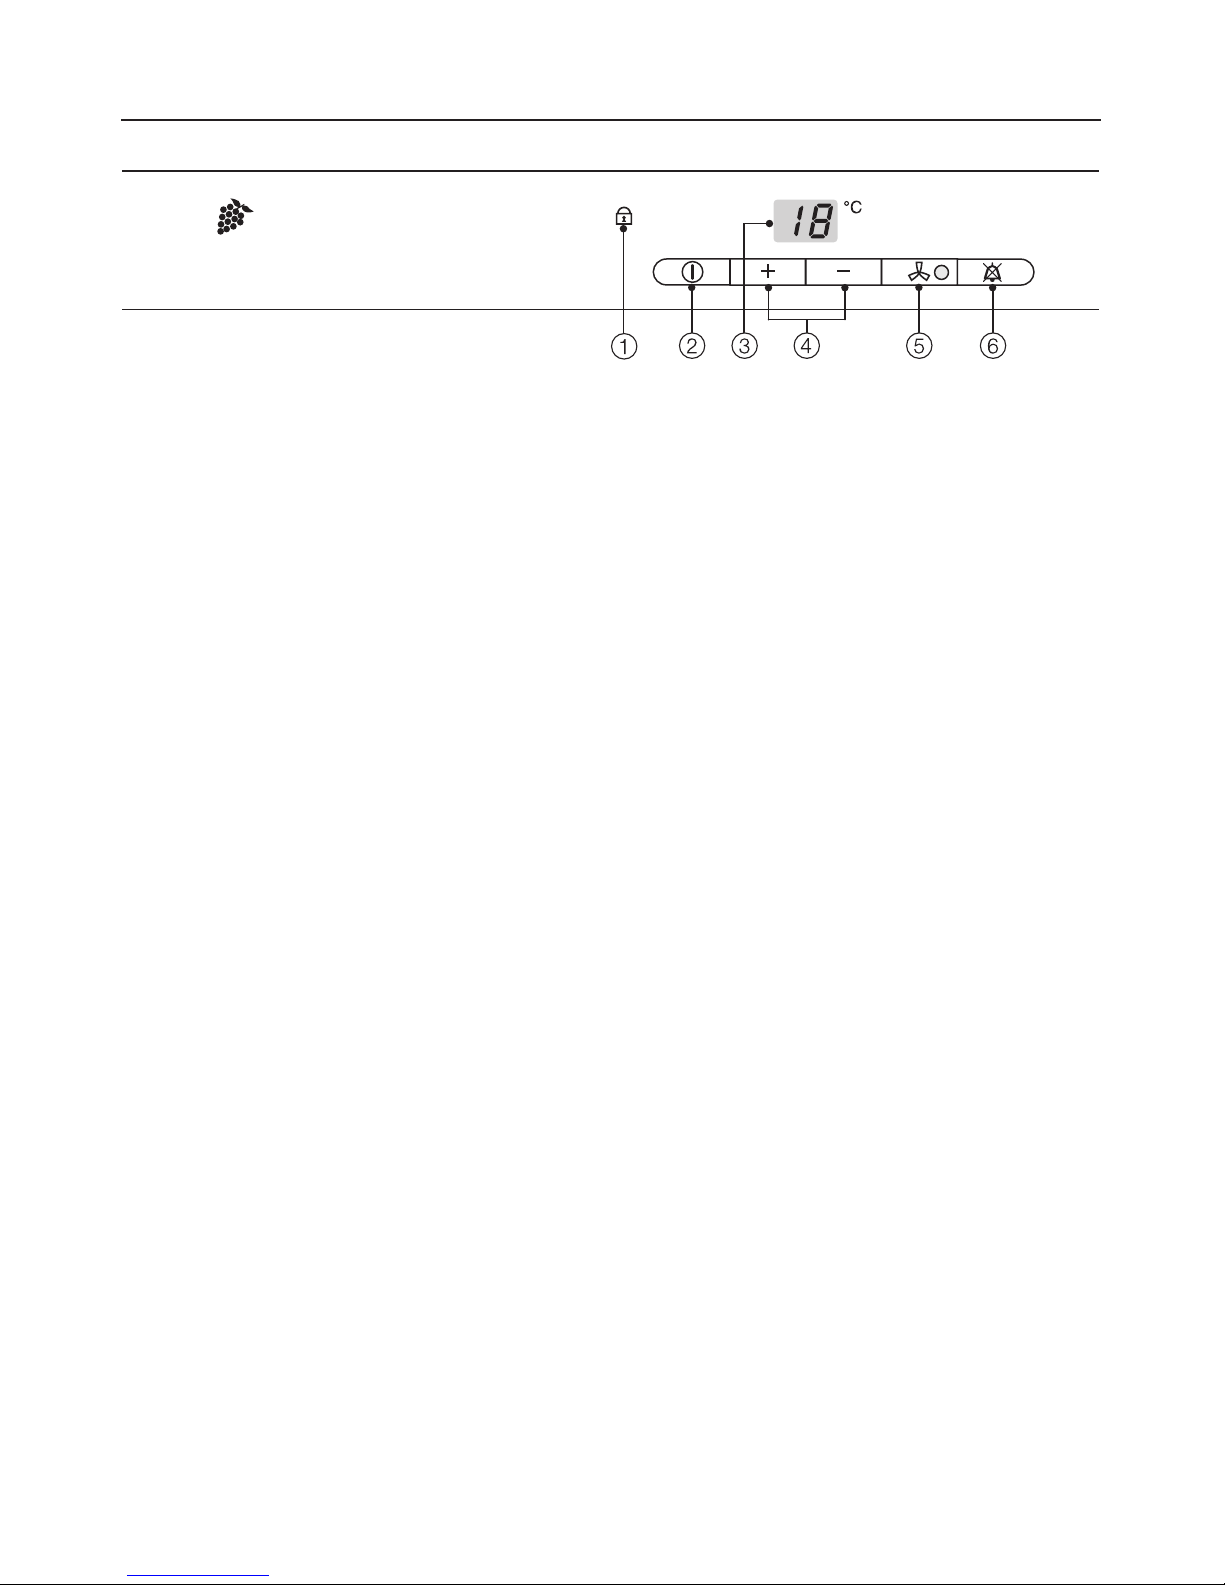
a Safety lock indicator light
b On/Off button
c Temperature display
d Temperature selector buttons
(+ for warmer; – for colder)
e Constant humidity (Dynamic cooling)
button with indicator light
f Alarm off button
Description of the appliance
4
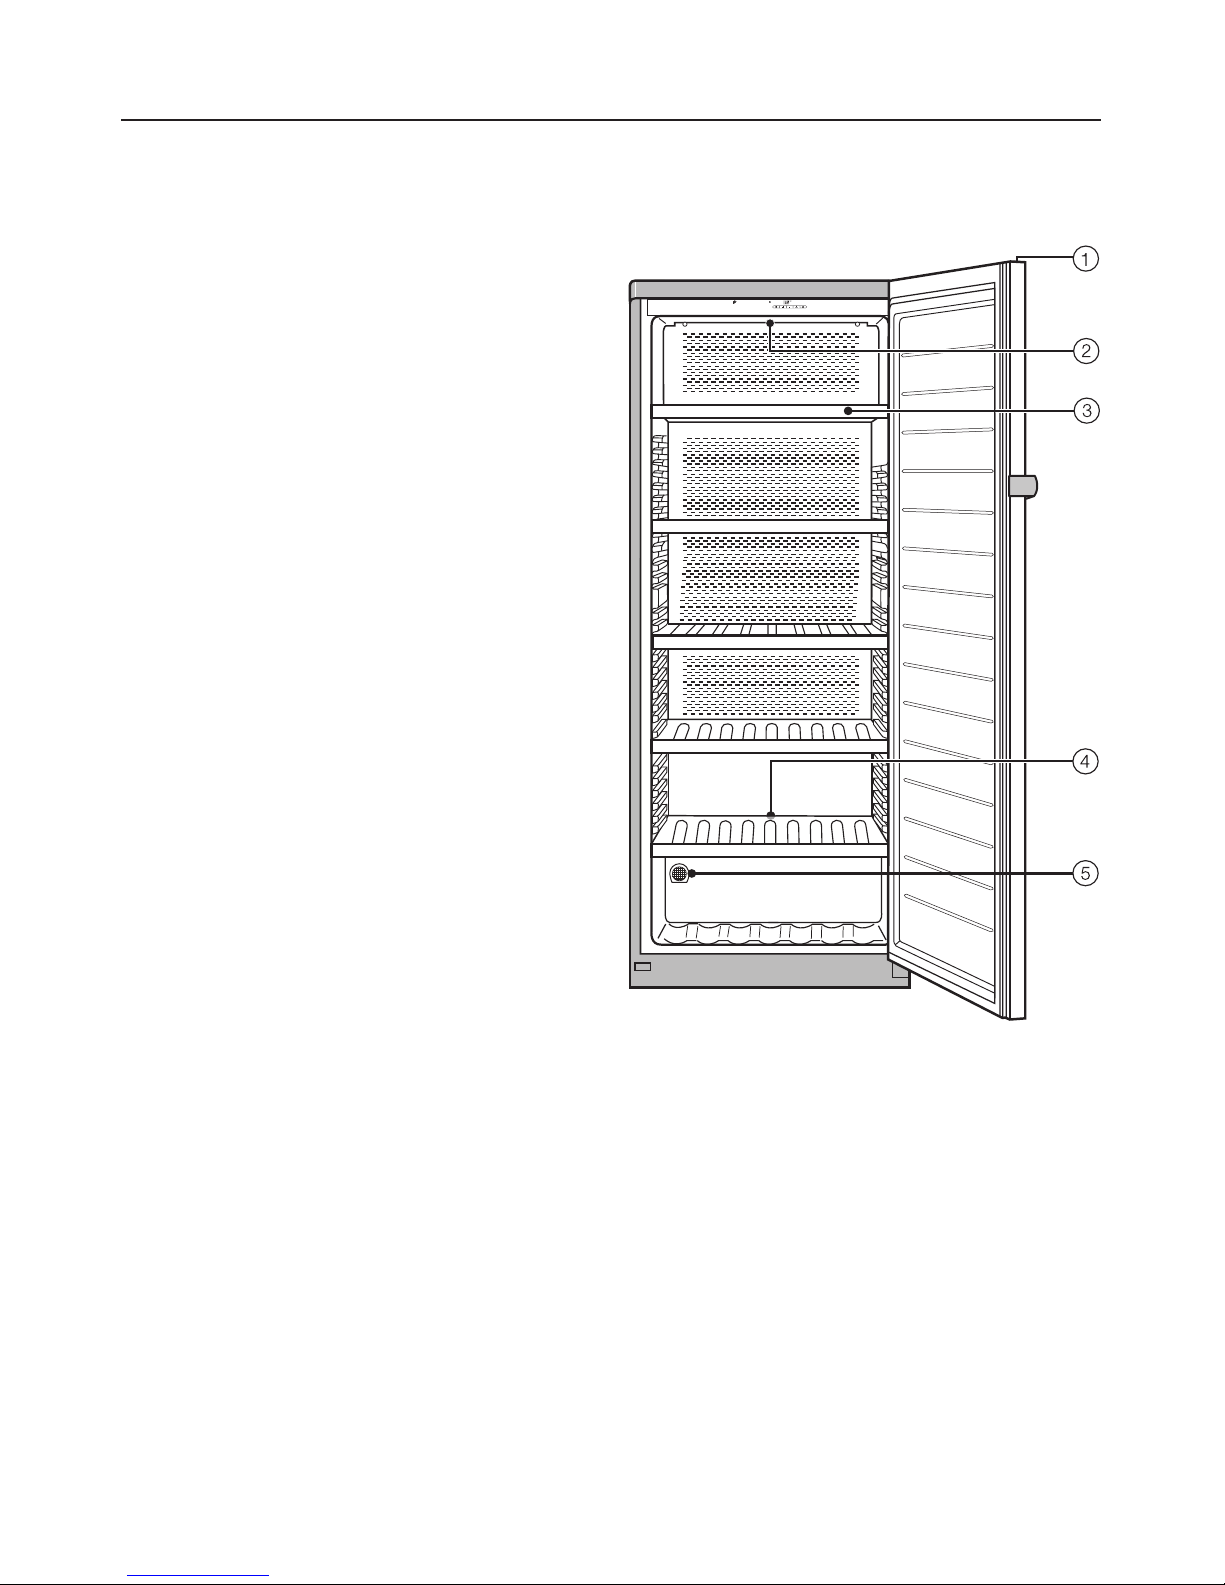
a Door lock
b Interior lighting
c Wooden shelf with shelf edge trim for
descriptive labels
d Condensate channel and
drain hole
e Active charcoal filter
Description of the appliance
5

Optional accessory
The Miele|home system enables you
to check information about your wine
storage unit at any time.
For example, if a temperature alarm,
power cut or other fault message
occurs, this information will be relayed
directly to the Miele|home system.
You will need a Miele|home master
appliance (e.g. the Miele|home
InfoControl) and your appliance must
be fitted with Communication module
(XKM 2000 KF) to benefit from this
feature.
Please refer to the leaflet supplied with
the Miele|home Communication
module for details on how to install it
and on how to sign it on to your
Miele|home system.
The Miele|home master appliance is
supplied with its own operating
instructions.
Miele{home
6
Disposal of the packing
material
The transport and protective packing
has been selected from materials which
are environmentally friendly for
disposal, and can normally be
recycled.
Ensure that any plastic wrappings,
bags etc. are disposed of safely and
kept out of the reach of babies and
young children. Danger of suffocation!
Rather than just throwing these
materials away, please ensure that they
are recycled.
Disposal of your old appliance
Please ensure that the appliance
presents no danger to children while
being stored for disposal.
It should be unplugged or
disconnected from the mains electricity
supply by a competent person. The
plug must be rendered useless and the
cable cut off directly behind the
appliance to prevent misuse. See the
"Warning and Safety" section of this
booklet for further details.
Electrical and electronic appliances
often contain materials which, if
handled or disposed of incorrectly,
could be potentially hazardous to
human health and to the environment.
They are, however, essential for the
correct functioning of your appliance.
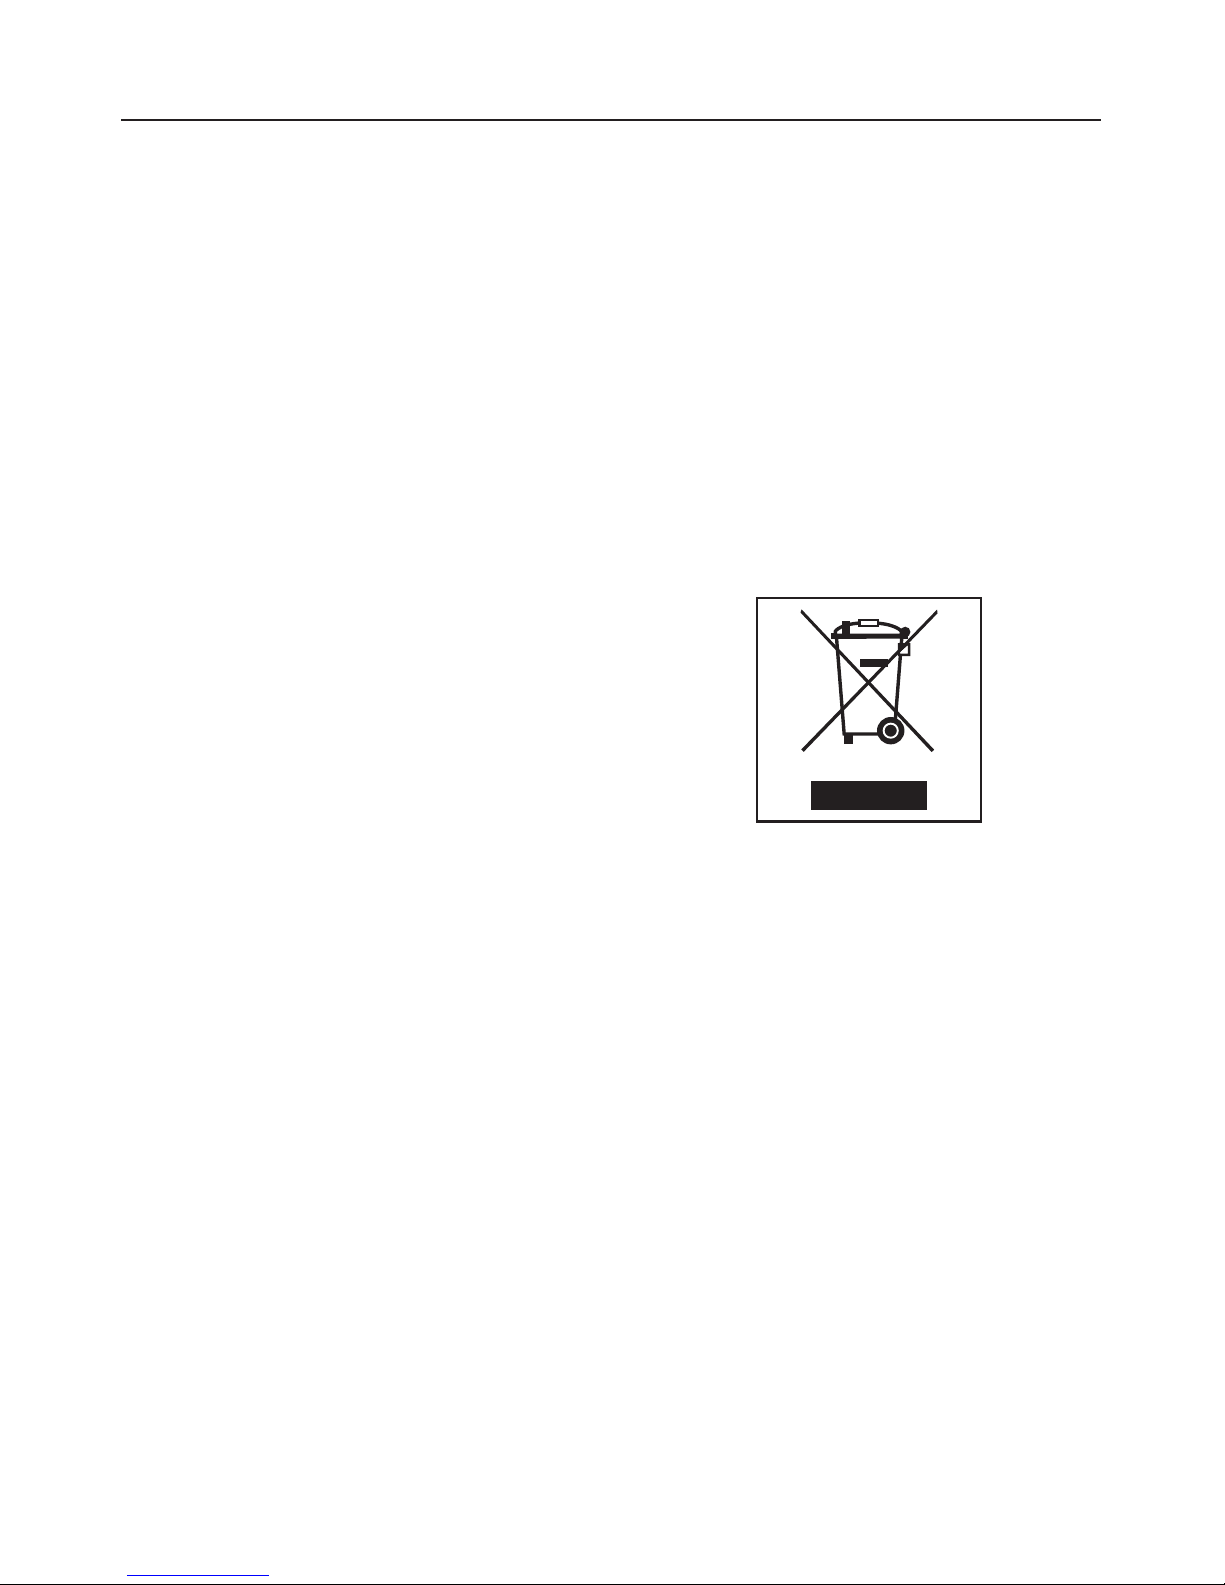
Please dispose of your old appliance at
your local community waste collection /
recycling centre and not with your
household waste.
Take care not to damage the pipework
at the back of it before or during
transportation to an authorised
collection depot.
In this way, refrigerant in the pipework
and oil in the compressor will be
contained, and will not leak out into the
environment.
Caring for the environment
7

This appliance complies with all
relevant legal safety requirements.
Improper use of the appliance can,
however, present a risk of both
personal injury and material
damage.
To avoid the risk of accidents and
damage to the appliance, please
read these instructions carefully
before installation and before using
it for the first time. They contain
important notes on the installation,
safety, operation and care of the
appliance.
Keep these instructions in a safe
place and pass them on to any
future user.
Correct usage
This appliance is intended for
domestic use only for storing wine.
Any other usage is not supported by
the manufacturer and could be
dangerous. The manufacturer cannot
be held liable for damage resulting from
incorrect or improper use or operation.
Technical safety
This appliance contains the coolant
Isobutane (R600a), a natural gas
which is environmentally friendly. It is,
however, flammable and care must be
taken during transportation and setting
up of the appliance that no parts of the
cooling system are damaged. Leaking
coolant can damage the eyes.
In the event of any damage:
- avoid open fires and anything which
creates a spark,
- disconnect from the mains,
- air the room in which the appliance is
located for several minutes and
- contact the Service Department for
advice.
The more coolant there is in an
appliance, the larger the room it
should be installed in. In the event of a
leakage, if the appliance is in a small
room, there is the danger of
combustible gases building up.
For every 8 g of coolant at least 1 m
3
of
room space is required. The amount of
coolant in the appliance is stated on the
data plate inside the appliance.
Before connecting the appliance to
the mains supply, make sure that
the rating on the data plate
corresponds to the voltage and
frequency of the household supply.
This data must correspond in order to
avoid the risk of damage to the
appliance. If in any doubt, consult a
qualified electrician.
Warning and Safety instructions
8

The electrical safety of this
appliance can only be guaranteed
when continuity is complete between
the appliance and an effective earthing
system which complies with local and
national safety regulations. It is most
important that this basic safety
requirement is present and tested
regularly and where there is any doubt,
the household wiring system should be
inspected by a qualified electrician.
The manufacturer cannot be held liable
for damage or injury caused by the lack
of or inadequacy of an effective
earthing system (e.g. electric shock).
Safe operation of the appliance is
only assured if it has been installed
and connected in accordance with
these operating and installation
instructions.
This equipment may only be used
in mobile installations such as
ships, caravans, aircraft etc. if a risk
assessment of the installation has been
carried out by a suitably qualified
engineer.
Installation work, maintenance and
repairs may only be carried out by
suitably qualified and competent
persons in accordance with national
and local safety regulations.
Repairs and other work by unqualified
persons could be dangerous and the
manufacturer will not be held liable.
Ensure current is not supplied to the
appliance until after maintenance or
repair work has been carried out.
The appliance is only completely
isolated from the electricity supply
when:
–
it has been switched off at the wall
socket and the plug has been
withdrawn, or
–
the fuse from the fused spur
connection unit is withdrawn, or
–
the mains fuse is withdrawn, or
–
the screw-out fuse is removed (in
countries where this is applicable).
Do not connect the appliance to
the mains electricity supply by an
extension lead.
Extension leads do not guarantee the
required safety of the appliance (e.g.
danger of overheating).
Use
Never store explosive materials in
the appliance. Thermostats
switching on may produce sparks
which could present a fire hazard.
Flammable compounds could explode.
Do not use any electrical
equipment in this appliance.
Danger of sparking and explosion!
Do not use any oils or grease on
the door seal, as these will cause
the seal to deteriorate and become
porous with time.
Do not block the ventilation gaps in
the appliance as this would impair
the efficiency of the appliance, increase
the electricity consumption and could
cause damage to the appliance.
Warning and Safety instructions
9

The appliance is designed for use
within certain climate ranges
(ambient temperatures), and should not
be used outside this range. The climate
range for your appliance is stated on
the data plate inside the appliance.
Installing it in a room with too low an
ambient temperature, e.g. a garage,
can lead to the appliance switching off
for longer periods so that it cannot
maintain the required temperature.
Do not use a steam-cleaning
appliance to clean this appliance.
Pressurised steam could reach the
electrical components and cause a
short circuit.
To avoid the danger of children
accidentally locking themselves in
the appliance, do not store the key for
the door lock near the appliance and
keep it out of the reach of children.
In countries where there are areas
which may be subject to infestation
by cockroaches or other vermin, pay
particular attention to keeping the
appliance and its surroundings in a
clean condition at all times. Any
damage which may be caused by
cockroaches or other vermin will not be
covered by the appliance guarantee.
Disposal of your old appliance
Before disposing of an old
appliance, first make the door latch
or lock unusable.
This way you will prevent children from
accidentally locking themselves in and
endangering their lives.
Before disposing of an old
appliance, unplug it and render the
plug useless. Cut off the cable directly
behind the appliance and at the plug to
prevent misuse.
Be careful not to damage any part
of the pipework whilst awaiting
disposal, e.g. by
– puncturing the refrigerant channels
in the evaporator.
– bending any pipework.
– scratching the surface coating.
Splashes of refrigerant can damage the
eyes.
The manufacturer cannot be held
liable for damage caused by
non-compliance with these Warning
and Safety instructions.
Warning and Safety instructions
10
Before using for the first time
The stainless steel surfaces have a
layer of protective foil to prevent
scratching during transportation.
^
Do not remove this foil until the
appliance has been installed or built
in. Start at one of the upper corners.
^
Treat stainless steel surfaces with a
conditioning agent for stainless steel,
such as Neoblank (available from the
Miele UK Spare Parts Department).
Follow the manufacturer’s instructions
on the label.
^ Clean the inside of the appliance and
the accessories with warm water and
a little washing-up liquid, and then
dry with a soft cloth.
Important:
To ensure the correct functioning of
the appliance, let it stand for
between 1½ and 2 hours after
transporting it to its final location
before connecting it to the mains.
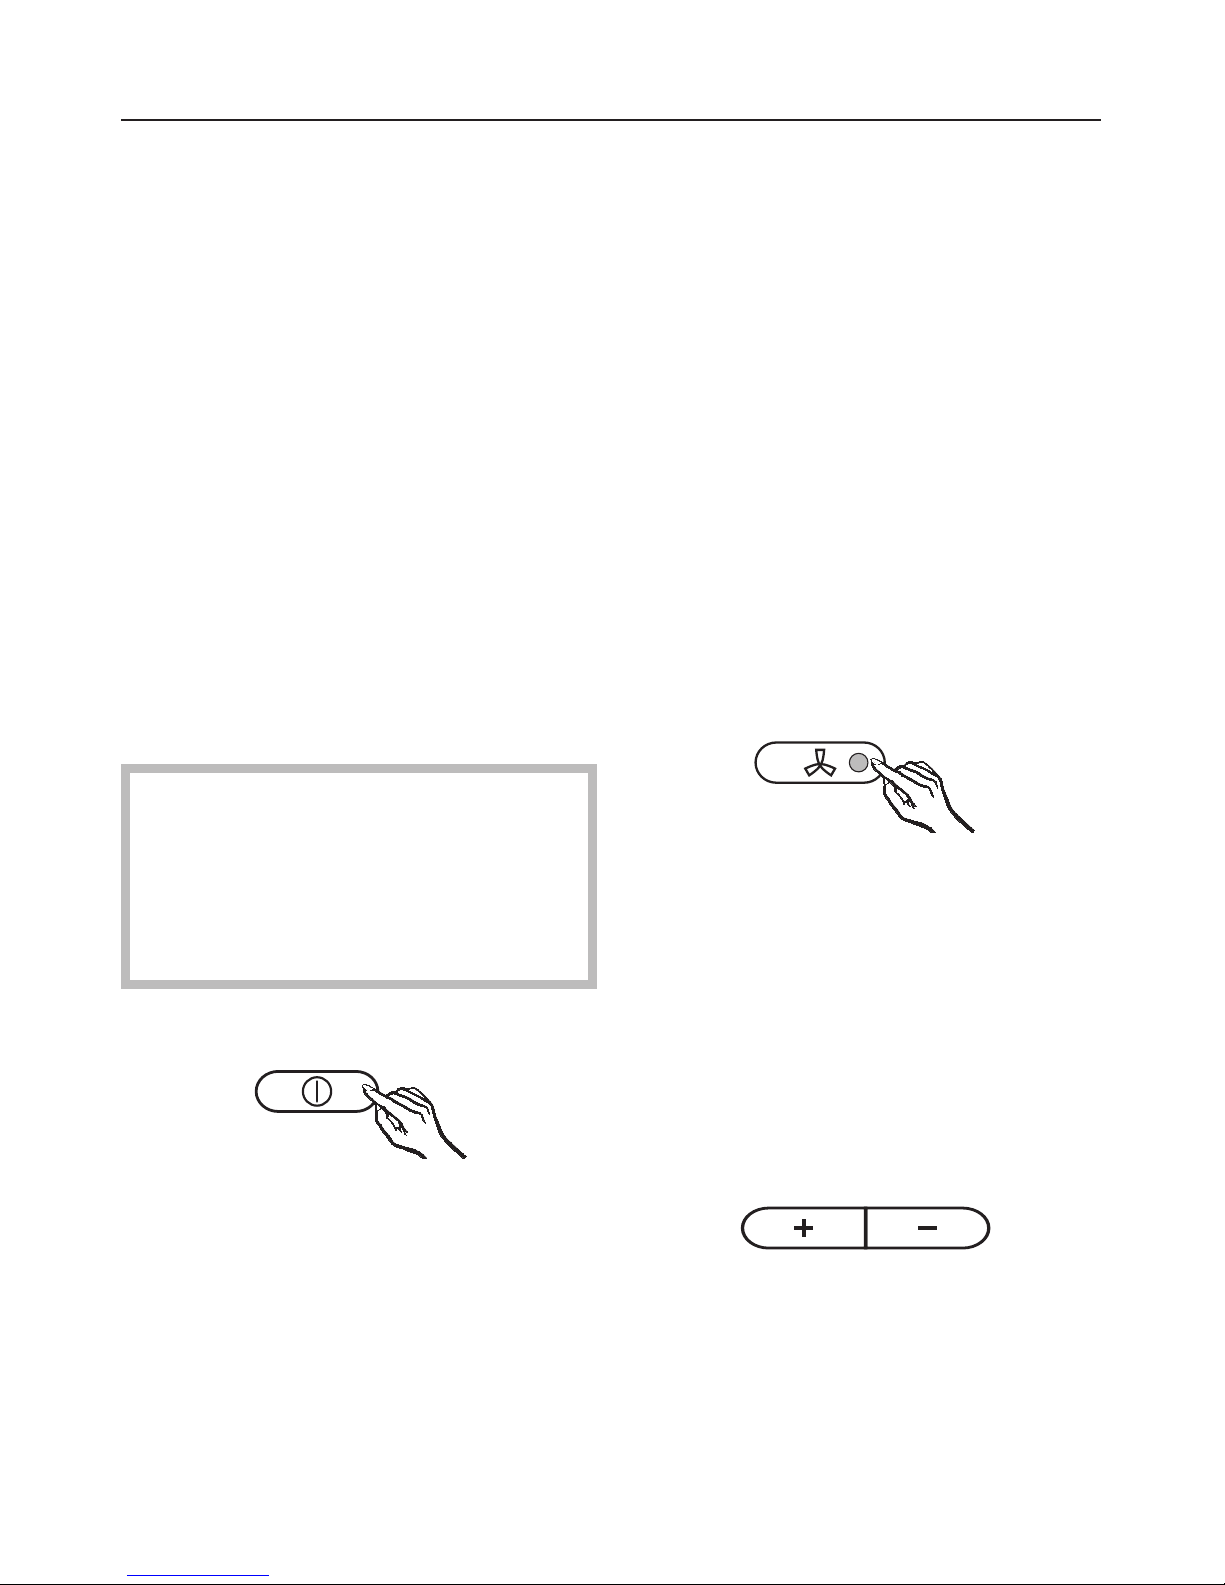
Switching on
^
Press the On/Off button briefly until
the temperature display lights up or
flashes.
The appliance will start to cool, and the
interior lighting will come on when the
door is opened.
Switching off
^
Press the On/Off button briefly until
the temperature display becomes
dark.
The temperature display will go out and
the cooling process will be switched off.
(If this does not happen, the safety lock
is still activated).
Safety lock
The safety lock can be activated to
prevent the appliance being switched
off inadvertently.
Activating or de-activating the safety
lock
^ Press and hold the constant humidity
button for approx. 5 seconds.
The constant humidity button indicator
light will start flashing and a
; will flash
in the temperature display.
^
Press the constant humidity button
again.
; will light up constantly in the display.
^
You can now choose between
; 0
and
; 1 by pressing the temperature
selector buttons:
0: the safety lock is de-activated,
1: the safety lock is activated.
Switching on and off
11
 Loading...