

Page 1
Operating and Installation Instructions
Freezer
To prevent accidents and damage to the appliance, you must read all
instructions before installing for using the appliance.
M.-Nr. 10 117 220en-US
Page 2

Contents
IMPORTANT SAFETY INSTRUCTIONS.................................4
Guide to the appliance ............................................10
How to save energy ...............................................13
Turning the appliance on and off ....................................15
Before first use....................................................15
Operating the appliance ............................................15
Turning the appliance on............................................15
Turning the appliance off............................................16
Turning off the appliance in Sabbath mode ...........................16
Turning off for longer periods of time ..................................16
The right temperature .............................................17
Temperature display ...............................................17
Sets the temperature ...............................................18
Using SuperCool .................................................19
Temperature and door alarm .......................................20
Temperature alarm ................................................20
Door alarm .......................................................21
Selecting additional settings .......................................22
Safety lock 0 .....................................................22
Temperature unit (Celsius or Fahrenheit) ...............................23
Acoustic signals ) ................................................25
Display brightness s...............................................26
Sabbath mode ¬ ..................................................27
Adjusting the interior fittings .......................................29
Freezer drawers on telescopic runners .................................29
Shelves .........................................................29
Freezing and storing food..........................................30
Maximum freezing capacity..........................................30
Freezing food.....................................................30
Before placing food in the freezer ..................................30
Placing food in the freezer ........................................30
Defrosting .......................................................31
Cooling drinks quickly ..............................................32
Using the cool pack................................................32
Making ice cubes .................................................33
Ice cube maker with integrated ice cube tray ............................33
2
Page 3

Contents
Turning the ice cube maker On/Off ....................................34
Making a large amount of ice cubes ................................34
Changing the size of the ice cubes .................................35
Setting the water quantity ...........................................35
Turning the ice cube maker On/Off with the On/Off button ..................36
Automatic defrosting..............................................37
Cleaning ........................................................38
Rinsing the ice cube maker ..........................................39
Cleaning the ice cube tray...........................................40
Setting the cleaning position ......................................40
Interior and accessories ............................................43
Ventilation slits ....................................................44
Door seal ........................................................44
Frequently asked questions ........................................45
Noises ..........................................................54
Lead free certificate ...............................................55
Service / Warranty ................................................56
Warranty ......................................................56
Information for dealers/showrooms..................................57
Demo mode r.....................................................57
Caring for the environment.........................................61
Plumbing........................................................62
Information regarding the water connection .............................62
Electrical connection..............................................65
Installation information ............................................67
Side-by-side......................................................67
Location .........................................................67
Climate class ..................................................67
Ventilation .......................................................68
Ventilation slits ....................................................69
Before installation .................................................70
Installation dimensions ............................................71
Adjusting the door hinge ..........................................72
Changing the door hinging .........................................73
Installing the appliance ............................................77
Installing the custom door front .......................................85
Contact details ..................................................91
3
Page 4
IMPORTANT SAFETY INSTRUCTIONS
When using the appliance, follow
basic safety precautions, including
the following:
Read all instructions before
installation and use to prevent
accidents and machine damage.
This appliance conforms to current
safety requirements. Inappropriate
use can, however, lead to personal
injury and damage to property.
They contain important notes on
installation, safety, use and
maintenance. Miele cannot be held
liable for non-compliance with these
instructions.
Keep these instructions in a safe
place and pass them on to any
future owner.
Correct use
This appliance is intended for use in
~
domestic households and similar
working and residential environments.
It is not intended for outdoor use.
It must only be used as a domestic
~
appliance to store deep-frozen food,
freeze fresh food, and make ice.
Any other usage is not supported by
the manufacturer and could be
dangerous.
This appliance is not suitable for
~
storing and keeping cool medicines,
blood plasma, laboratory preparations
or other such materials or products.
Incorrect use of the appliance for such
purposes can cause deterioration of the
items stored. The appliance is not
suitable for use in areas where there is
a risk of explosion.
Miele cannot be held liable for damage
resulting from improper or incorrect use
of the appliance.
The appliance can only be used by
~
people with reduced physical, sensory
or mental capabilities, or lack of
experience and knowledge
if they are supervised whilst using it or
have been shown how to use it in a safe
way and recognize and understand the
consequences of incorrect operation.
Safety with children
Children should be supervised in
~
the vicinity of the appliance.
Children ages eight and up may
~
only use the appliance oven without
supervision if they have been shown
how to use it in a safe manner, and if
they are able to recognize and
understand the potential risks of
improper use.
Children must not clean or service
~
the appliance unless they are under
supervision.
4
Page 5
IMPORTANT SAFETY INSTRUCTIONS
Children should be supervised when
~
they are near the appliance. This
appliance is not a toy! To avoid the risk
of injury, do not allow children to play
with it or to use the controls. They will
not understand the potential dangers
posed by it. They should be supervised
whenever you are working in the
kitchen.
Ensure that any packing material is
~
disposed of safely and kept out of the
reach of children. Danger of
suffocation!
Technical safety
The coolant system is tested for
~
leaks.
This appliance contains the coolant
~
isobutane (R600a), a natural gas which
is environmentally friendly. Although it
is flammable, it does not damage the
ozone layer and does not increase the
greenhouse effect.
The use of this coolant has, however,
led to a slight increase in the noise level
of the appliance. In addition to the
noise of the compressor, you might be
able to hear the coolant flowing around
the system. This is unavoidable, and
does not have any adverse effect on
the performance of the appliance.
Care must be taken during the
transportation and setting up of the
appliance that no parts of the cooling
system are damaged. Leaking
refrigerant can damage the eyes.
In the event of any damage:
avoid open flames and anything that
–
creates a spark
disconnect the appliance from the
–
electrical power supply
air the room in which the appliance is
–
located for several minutes
contact Miele Technical Service
–
The more coolant there is in an
~
appliance, the larger the room in which
it should be installed. In the event of a
leakage, there is the danger of
combustible gases building up if the
appliance is in a small room.
For every8gofcoolant at least 1 m
room space is required. The amount of
coolant in the appliance is stated on the
data plate inside the appliance.
To avoid the risk of damage to the
~
appliance, make sure that the
connection data (fuse rating, frequency
and voltage) on the data plate
corresponds to the household supply.
Check that this is the case before
connecting the appliance. Consult a
qualified electrician if in any doubt.
Be certain your appliance is
~
properly installed and grounded by a
qualified technician. To guarantee the
electrical safety of this appliance,
continuity must exist between the
appliance and an effective grounding
system. It is imperative that this basic
safety requirement be met. If there is
any doubt, have the electrical system of
the house checked by a qualified
electrician.
3
of
5
Page 6
IMPORTANT SAFETY INSTRUCTIONS
If the power cord is damaged, it
~
must be replaced by a Miele authorized
technician in order to protect the user
from harm.
Do not connect the appliance to the
~
electrical supply with a power bar or
extension cord. These are a fire hazard
and do not guarantee the required
safety of the appliance.
Do not use the appliance in areas
~
where there may be moisture or
splashing water (e.g., garages, laundry
rooms, etc.).
Moisture can reach the electrical
components and cause a short circuit.
This appliance is not to be used in
~
non-stationary locations, such as ships.
Do not use a damaged appliance. It
~
could be dangerous. Check the
appliance for visible signs of damage.
To ensure safe operation, use the
~
appliance only when it is installed.
The appliance must be
~
disconnected from the electrical supply
during installation, maintenance and
repair work, and installation work on the
water connection. The appliance is only
completely isolated from the electrical
supply when:
–
The circuit breakers on the electrical
service panel are tripped.
–
The screw-type fuses on the
electrical service panel have been
removed.
–
The power cord has been
unplugged.
Pull on the plug and not on the cord
when removing it from the outlet.
Installation, repair and maintenance
~
work should be performed by a Miele
authorized service technician in
accordance with national and local
safety regulations and the provided
installation instructions.
Contact Miele’s Technical Service
Department for examination, repair or
adjustment.
The ice cube maker is not intended
~
to be used with a hot water supply line.
Repairs and other work performed
~
by unauthorized persons could be
dangerous and may void the warranty.
Defective components should only
~
be replaced by Miele original parts.
Only with these parts can the
manufacturer guarantee the safety of
the appliance.
Proper use
The appliance is designed for use
~
within a certain climate range (ambient
temperatures), and should not be used
outside this range. The climate range
for your appliance is stated on the data
plate inside the appliance.
Installing it in a room with too low an
ambient temperature, e.g., a garage,
will lead to the appliance turning off for
longer periods so that it cannot
maintain the required temperature.
WARNING! Danger of damage from
~
overheating. May restirct operation.
Keep ventilation openings, in the
appliance enclosure or in the built-in
structure, clear of obstruction.
6
Page 7
IMPORTANT SAFETY INSTRUCTIONS
If you store fatty or greasy foods in
~
the appliance or the appliance door,
make sure that no oil or grease leaks
onto the plastic parts of the appliance.
This can cause the plastic to crack and
break.
Do not store explosive materials in
~
the appliance or any products
containing propellants (e.g., spray
cans). Electrical components could
cause flammable vapors to ignite.
Danger of fire and explosion.
Do not operate any electrical
~
equipment (e.g., an electric ice cream
maker) inside the appliance.
Danger of sparking and explosion!
Do not store cans or bottles
~
containing carbonated drinks or liquids
which could freeze in the freezer
section. The cans or bottles could
explode. Danger of injury and damage
to the appliance!
When cooling drinks quickly in the
~
freezer section, make sure bottles are
not left in for more than one hour;
otherwise they could burst, causing
injury and damage!
Do not take ice cubes out with your
~
bare hands and never place ice cubes
or popsicles in your mouth straight from
the freezer section. The very low
temperature of the frozen ice or
popsicles can cause frost burn to the
lips and tongue. Danger of injury!
Do not refreeze partially or fully
~
defrosted food. Consume defrosted
food as soon as possible, as it will lose
its nutritional value and spoil if left for
too long. Defrosted food may only be
refrozen after it has been cooked.
When eating stored food, there is a
~
danger of food poisoning.
Storage times will depend on several
factors, including the freshness and
quality of the food, as well as the
temperature at which it is stored.
Observe the manufacturer's "use-by"
dates and storage instructions!
Use only genuine original Miele
~
parts. If parts or accessories from other
manufacturers are used, the warranty
may become invalid.
Never handle frozen food or the
~
metal parts of the appliance with wet
hands. Your hands may freeze to the
frozen food or to the metal. Danger of
frost burn!
7
Page 8

IMPORTANT SAFETY INSTRUCTIONS
Cleaning and care
Do not use any oil or grease on the
~
door seals.
They can cause the seals to deteriorate
over time.
Never use a steam cleaner to clean
~
the appliance.
The steam can reach the electrical
components and cause a short circuit.
Never use a pointed or sharp-edged
~
object to
remove frost or ice
–
– separate frozen foods or remove ice
trays
This will damage the evaporators,
causing damage to the appliance.
Do not place electric heaters or
~
candles in the appliance to defrost it.
These can damage the plastic parts.
Do not use defrosting sprays or
~
de-icers
as they could contain substances
which could damage the plastic parts
or which might cause the build-up of
gases and pose a danger to health.
Rinse the ice cube maker and the
~
water pipes:
–
before using for the first time
–
if the ice cube maker hasn't been
used for a long time
–
regularly if the ice cube maker is
constantly on (at least once a month)
to remove ice residues and prevent
the water pipes from becoming
blocked
before turning off the ice cube maker
–
for a long period of time
Transport
Always transport the appliance in an
~
upright position and in its original
transport packaging to avoid damage
in transit.
The appliance is very heavy and
~
must be transported by two people.
Danger of injury and damage!
Disposal of your old appliance
There is a risk of suffocation.
~
Children playing can shut themselves in
and suffocate.
– Take the door(s) off.
– Remove the drawers.
– Leave the storage shelves in the
appliance so that children cannot
easily climb into the appliance.
Danger of electric shock.
~
–
Cut off the plug from the power cord
and discard.
–
Cut off the power cord from the
discarded appliance. Dispose of
separately from the appliance.
Ensure during and after disposal
~
that the appliance isn't stored in the
vicinity of gasoline or other flammable
vapors and liquids.
8
Page 9
IMPORTANT SAFETY INSTRUCTIONS
When disposing of the appliance,
~
ensure that the refrigeration circuit is
not damaged to prevent uncontrolled
escape of the refrigerant it contains
(data on type plate) and oil.
Take care not to damage any part of
~
the cooling system, for example by
puncturing the coolant channels in
–
the evaporator,
kinking any pipework,
–
scratching the surface coating.
–
Caution: Spraying coolant can damage
the eyes.
SAVE THESE
INSTRUCTIONS AND
PASS THEM ON TO ANY
FUTURE USER
9
Page 10
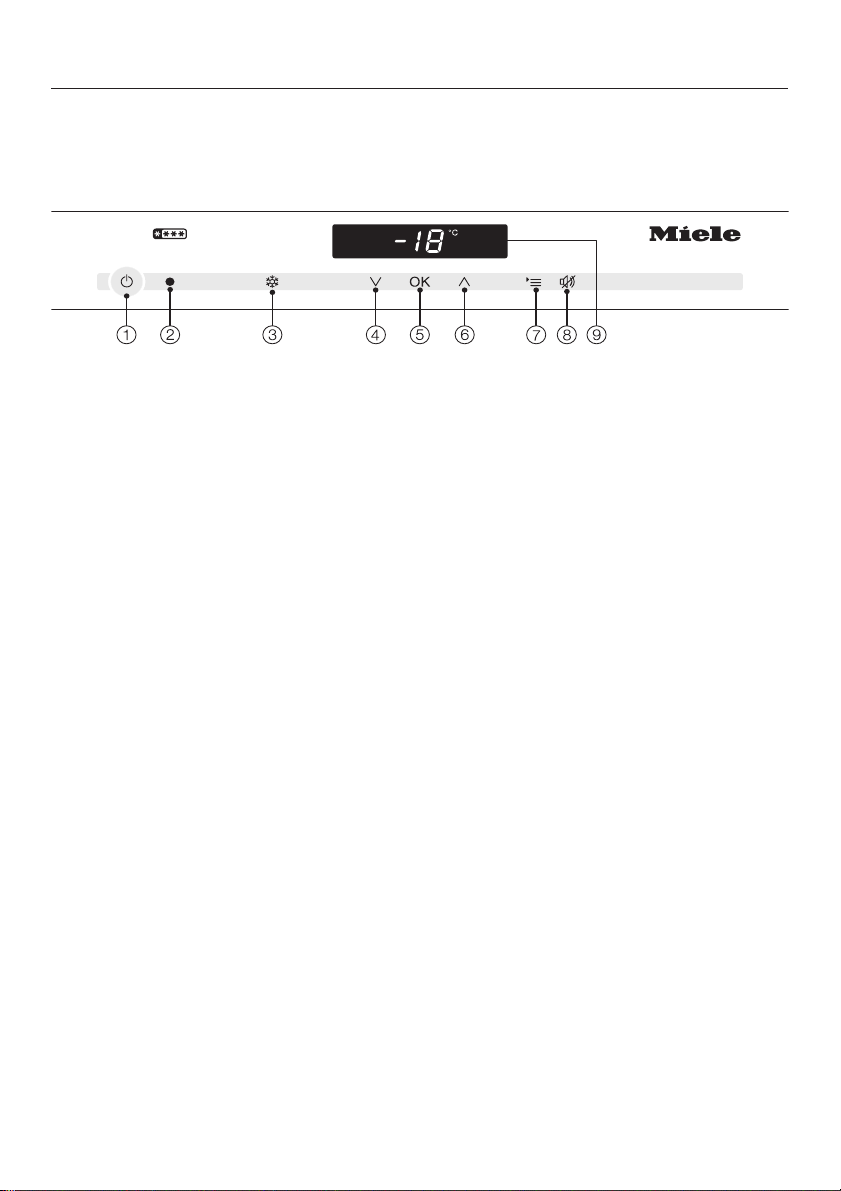
Guide to the appliance
Control panel
a For turning the entire appliance on
and off.
b Optical interface
(for Service use only)
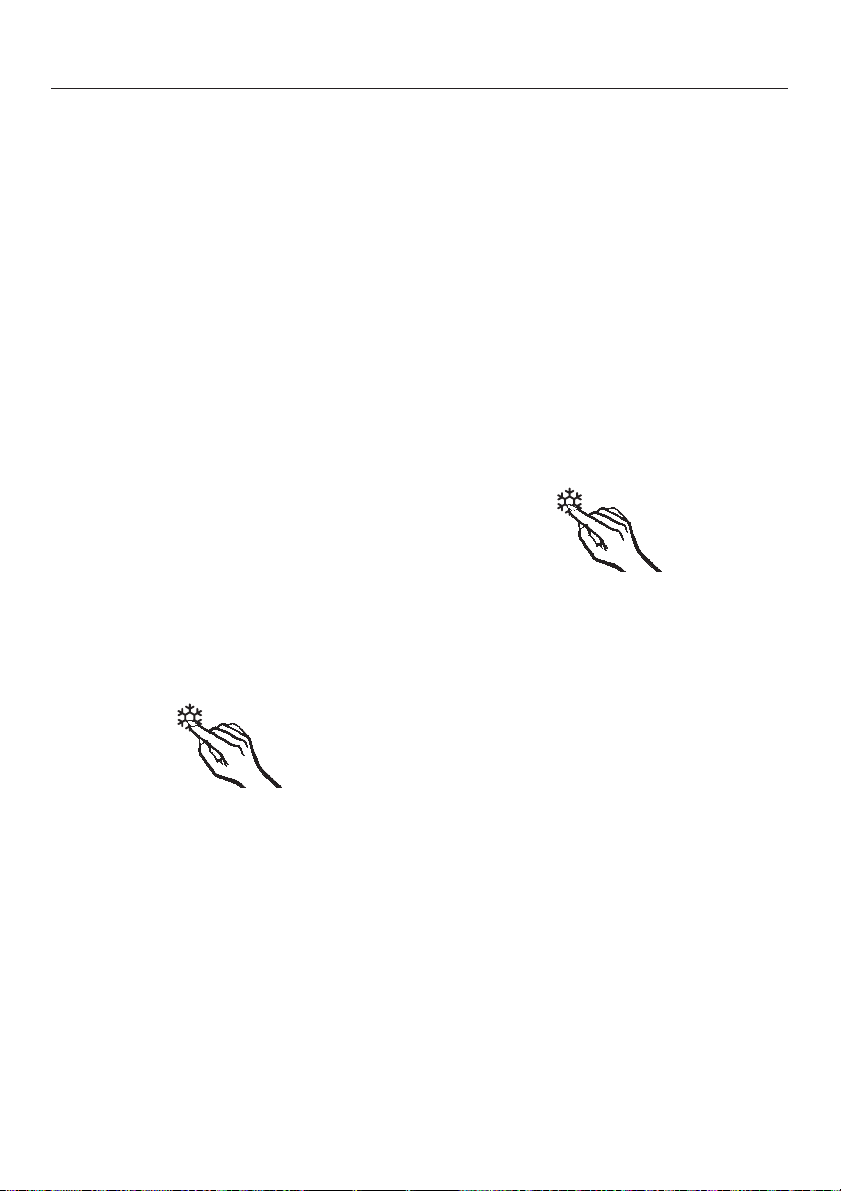
c For turning the SuperCool function
on and off
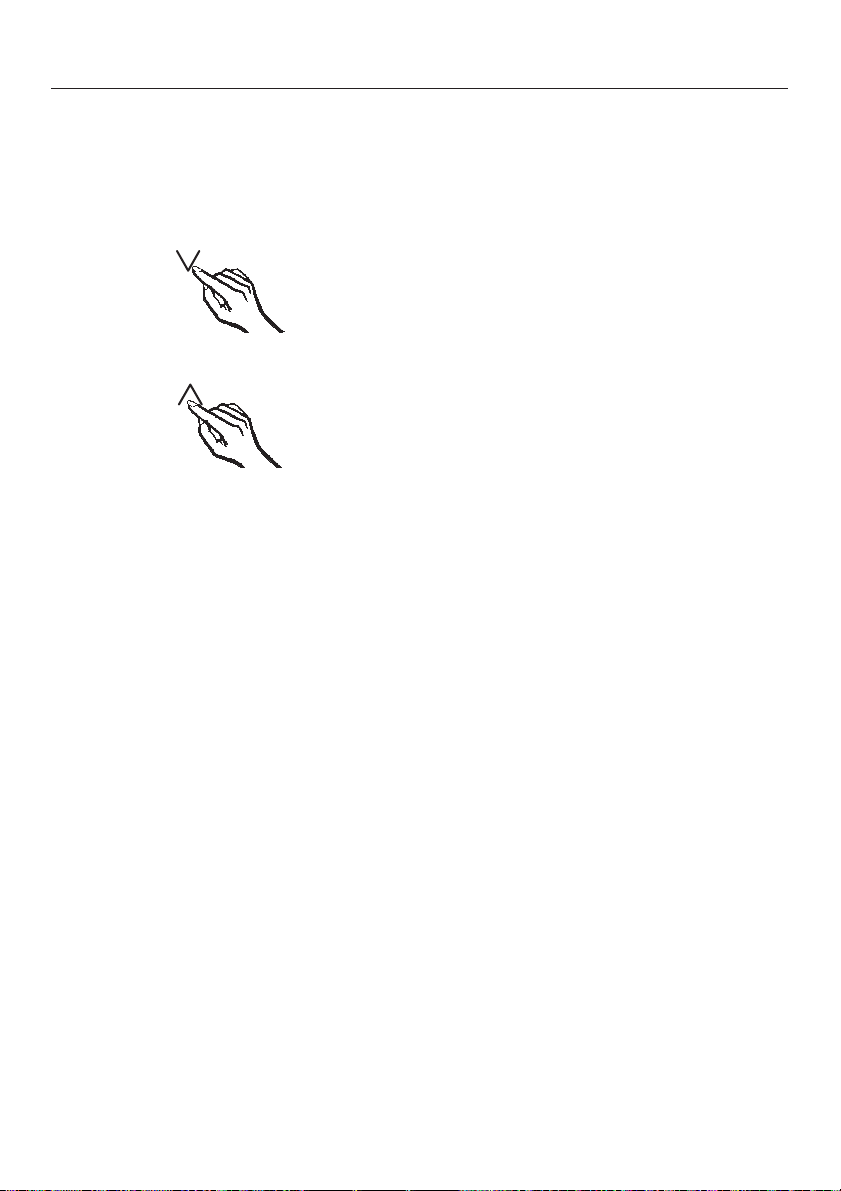
d For setting the temperature
(X for colder), selection button in
settings mode.
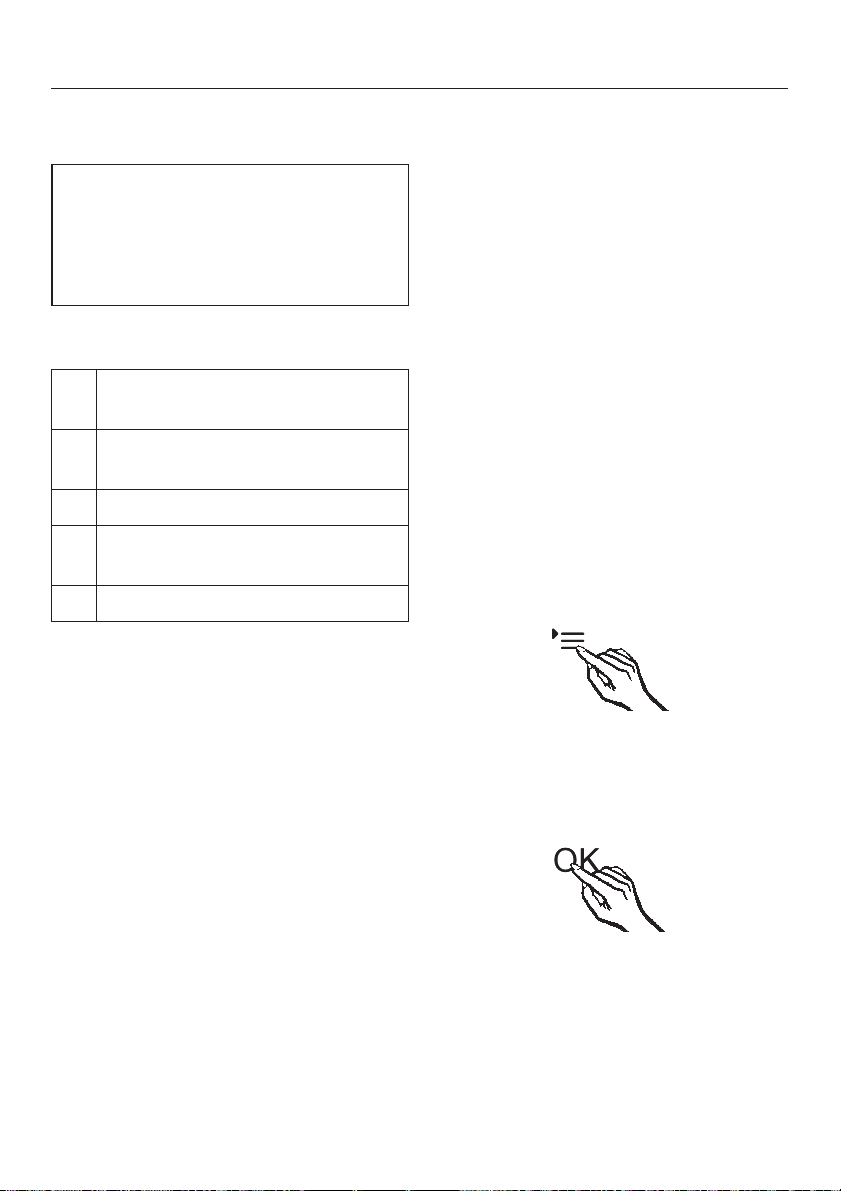
e For confirming a selection (OK
button)
f For setting the temperature
(Y for warmer), selection button in
setting mode.
g For accessing or leaving
settings mode
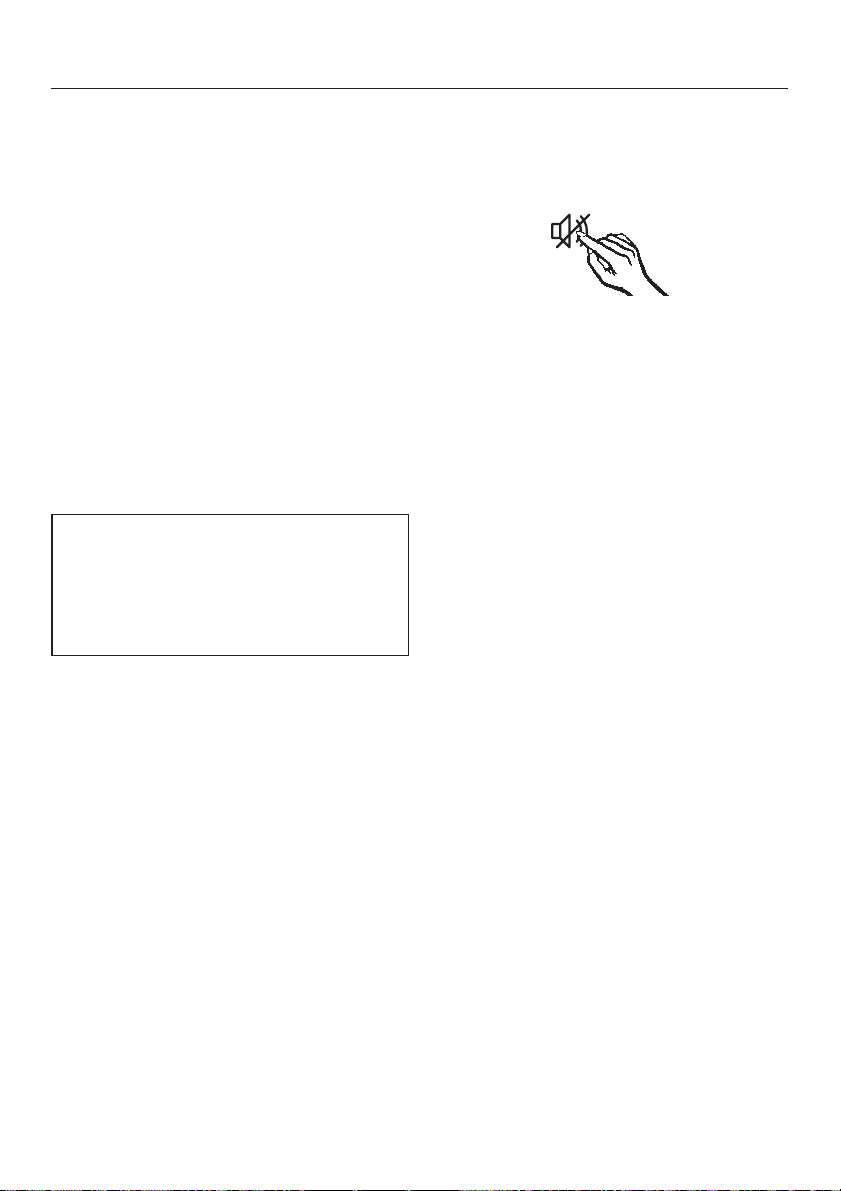
h For turning off the door alarm
i Display with temperature and
symbols (symbols only visible in
settings mode, in the event of an
alarm/message; see table for
explanation of symbols)
10
Page 11
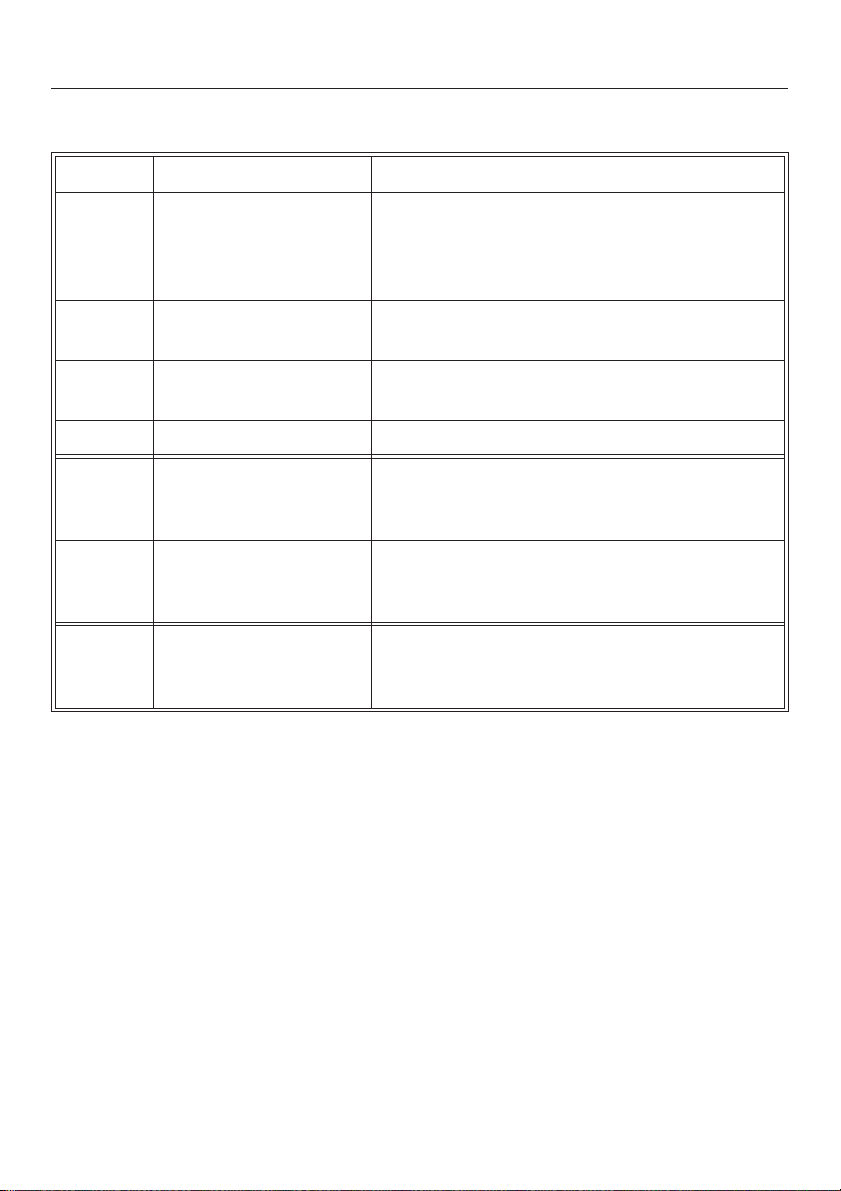
Guide to the appliance
Explanation of symbols
Symbol Meaning Function
0 Safety lock Prevents the user from unintentionally
turning off the appliance, adjusting the
temperature, turning on the SuperCool
functions or entering settings.
) Acoustic signals Selection options for the keypad tone and
the door and temperature alarm tones
s Display brightness
settings
¬ Sabbath mode For turning Sabbath mode on and off
t Power supply Confirms that the appliance is connected to
; Alarm Illuminates when the door alarm is activated;
r Demo Mode
(only visible when
Demo mode is active)
For adjusting the brightness of the display
the electricity supply when it is not turned
on; flashes when there is a power cut
flashes in case of a temperature alarm,
power failure, and additional fault messages
For turning off Demo mode
11
Page 12
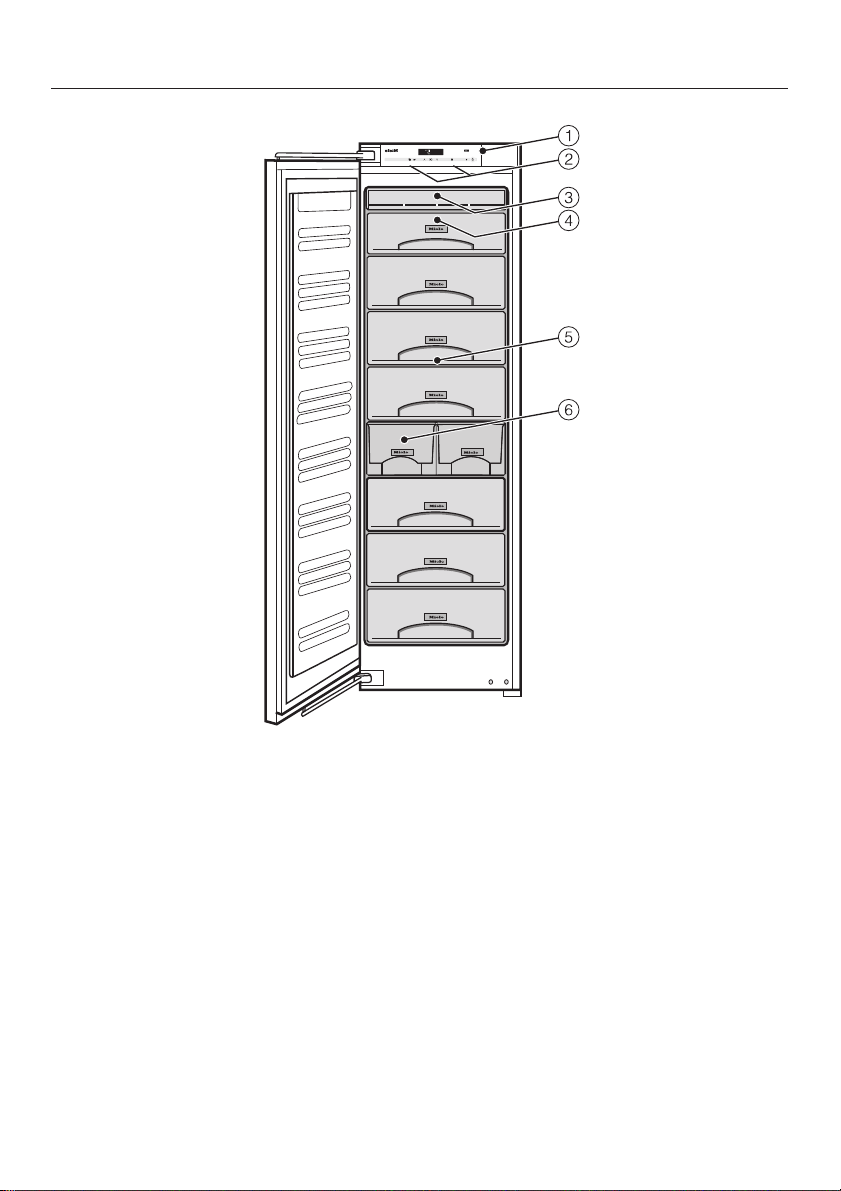
Guide to the appliance
a Control panel
b Interior lighting
c Frost-free unit
d Top freezer drawer, can also be used as a freezing tray
e Freezer drawers
f Ice cube drawer with automatic ice cube maker
12
Page 13

How to save energy
Installation /
maintenance
Temperature
setting
Normal
energy consumption
In a well-ventilated room. In an enclosed,
Protected from direct
sunlight.
Away from heat sources
(radiator, range/oven).
Where the room temperature
is ideal, i.e., around 68°F
(20°C).
Do not block the ventilation
openings, and keep them
free of dust.
0°F (-18°C) in the freezer
section
Increased
energy consumption
poorly ventilated room.
In direct sunlight.
Near a heat source (radiator,
range/oven).
Where the room temperature
is higher.
Where the ventilation
openings are blocked and
full of dust.
With a low temperature
setting: the colder the
temperature in the freezer
section, the higher the
energy consumption.
13
Page 14
How to save energy
Normal
energy consumption
Use Drawers and shelves arranged
as they were when the
appliance was delivered.
Only open the doors when
necessary and for as short a
time as possible.
Store food in an organized
way.
When shopping, use a cooler
box or bag and place the food
in the appliance as soon as
possible.
Replace items removed from
the appliance as soon as
possible before they warm up.
Allow hot food and drinks to
cool down before placing
them in the appliance.
Increased
energy consumption
Frequent opening of the door
for long periods will cause a
loss of coldness. The
appliance works harder to
cool down and the
compressor runs for longer
periods.
Hot food or food at room
temperature raises the
temperature inside the
appliance.
The appliance works harder to
cool down and the
compressor runs for longer
periods.
14
Store food covered or
wrapped.
Do not overfill the appliance in
order to allow the air to
circulate.
The evaporation or
condensation of liquids will
cause a loss of coldness.
Page 15
Turning the appliance on and off
Before first use
Packaging material
Remove all packaging material from
^
the inside of the appliance.
Cleaning
Please refer to the relevant
instructions in the "Cleaning and
care" chapter.
Clean the inside of the appliance and
^
the accessories.
^ Clean the ice cube maker:
After selecting the "Rinse ice cube
maker" setting, the ice cube maker
and the water pipes are rinsed
automatically with water.
Operating the appliance
The appliance is operated with the use
of touch keys activated by a finger.
A tone will sound each time a button is
touched. You can deactivate this, if you
wish (see "Selecting additional settings
- Acoustic signals").
Turning the appliance on
Once the appliance has been
connected to the electrical supply, the
power supply symbol t will appear in
the display after a short while.
Touch the On/Off button.
^
The power supply symbol t goes out
and the temperature appears in the
display.
Two bars will flash in the display while
the current temperature is above 32°F
(0°C).
The appliance begins to cool.
The temperature display and the alarm
symbol ; will flash at the same time
until the required temperature is
reached.
When the appliance door is opened,
the interior lighting comes on and the
LED lighting becomes brighter until it
reaches its maximum brightness.
To enable the temperature to get
sufficiently cold inside the appliance,
allow the appliance to run for a few
hours before placing food in it.
15
Page 16
Turning the appliance on and off
Turning the appliance off
Touch the On/Off button.
^
If this does not work, the safety lock
is activated.
The temperature will go out and the
power supply symbol t will appear.
The cooling process will be turned off.
Turning off the appliance in Sabbath
mode
The appliance can be turned off
directly at any time.
^ Touch the On/Off button.
The temperature will go out and the
power supply symbol t will appear.
Turning off for longer periods
of time
If the appliance is not needed for a
longer period of time:
turn the appliance off,
^
unplug the power cord or trip the
^
circuit breaker,
empty the ice cube drawer,
^
close the water shut-off valve,
^
If the appliance is not needed for a
longer period of time:
^ clean the appliance, and
^ leave the door slightly ajar to air out
the appliance.
If, during a long absence, the
appliance is turned off but not
cleaned out and the doors are left
shut, there is a danger of bacteria
and odors building up inside the
appliance.
The interior lighting goes out and the
cooling is turned off.
When the appliance is turned back
on again, Sabbath mode is
deactivated.
16
Page 17

The right temperature
It is very important to set the correct
temperature for storing food in the
appliance. Bacteria will cause food
which is not stored at the correct
temperature to deteriorate rapidly.
To freeze fresh food and to store frozen
food for a long time, a temperature of
0°F (-18°C) is required. Partially
defrosted or fully defrosted food must
not be re-frozen. Food may be re-frozen
once it has been cooked.
The temperature in the appliance will
rise for the following reasons:
– if you open the door frequently or
keep it open too long,
– if you put too much food in it,
– if you put food in it that is too warm,
– if the room temperature is too high.
The appliance is designed for use
within a certain climate range (room
temperature range) and should not
be used outside this range.
Temperature display
In normal operation the temperature
display shows the average, current
temperature in the freezer.
Depending on the ambient temperature
and the temperature setting, it can take
the appliance a few hours to reach the
temperature required and for this
temperature to then be shown as a
constant temperature in the display.
17
Page 18
The right temperature
Sets the temperature
Use the two buttons underneath the
^
display to set the temperature.
By touching the button:
the temperature will get colder
–
– the temperature will get warmer
While the temperature is being set, the
temperature value will flash.
When you touch the buttons, you will
see the following changes in the
display:
– When first touched: The last
temperature selected flashes.
Approximately 5 seconds after you
release the button, the actual
temperature value in the appliance will
be displayed.
When you have adjusted the
temperature, wait for approx. 6 hours
if the appliance is not very full and for
approx. 24 hours if the appliance is
full before checking the temperature
display, as it will take this long for the
appliance to reach the temperature.
If, after this amount of time, the
temperature is too high or too low,
adjust it again.
Possible setting values for the
temperature
The temperature can be adjusted from
5°F to -18.4°F (-15°C to -28°C).
–
Each subsequent touch of the
button:
The temperature value adjusts in 1°
steps.
–
Keeping your finger on the button:
The temperature changes
continuously.
18
Page 19
Using SuperCool
For best results, turn on SuperCool
before putting fresh food into the
freezer.
Fresh food will be frozen quickly, so
that the nutritional value, vitamin
content, appearance and taste are
maintained.
Exceptions:
if you have already put frozen food
–
into the freezer.
when freezing up to 4.5 lb (2 kg)
–
fresh food daily.
Turning on SuperCool
When freezing small quantities of food
in the freezer, the SuperCool function
should be turned on 6 hours
beforehand. When freezing the
maximum load of food, the SuperCool
function should be turned on 24 hours
beforehand.
Turning off SuperCool
The SuperCool function will turn itself
off automatically after approx. 65 hours.
The quantity of fresh food placed in the
freezer will determine the duration
before the SuperCool function turned
off. The SuperCool ª symbol will go out
and the appliance will run at normal
cooling capacity again.
To save energy, the SuperCool function
can be turned off once a constant
temperature of 0°F (-18°C) is reached
inside the freezer section. Check the
temperature inside the appliance.
^ Touch the SuperCool button so that it
is no longer highlighted in yellow.
The appliance now continues
running at normal cooling capacity.
^
Touch the SuperCool button so that it
is highlighted in yellow.
The temperature in the appliance
now begins to fall since it is
operating at maximum cooling
capacity.
19
Page 20

Temperature and door alarm
Your appliance has been fitted with a
warning system which ensures that the
temperature in the freezer section
cannot rise unnoticed and to avoid
energy being wasted if the door is left
open.
Temperature alarm
If the freezer temperature becomes
too warm, the alarm symbol ; for the
freezer flashes in the display and an
alarm will also sound.
The point in time at which the appliance
detects a temperature range as too
warm depends on the selected
temperature.
However, if the temperature in the
freezer remains above 0°F (-18°C)
for a long time, check that the frozen
food has not started to defrost. If it
has, check that the food is safe to
use and if it is, then use it as soon
as possible or cook it before
freezing it again.
Turning off the audio alarm
If the audio alarm bothers you, it can be
silenced.
The audio and visual signals are
triggered, for example:
– when the appliance is turned on and
the temperature in the freezer differs
greatly from the set temperature,
– when too much warm air flows into
the appliance, for example, when
food is being re-arranged or taken
out,
–
when freezing large amounts of food
at once,
–
when there is a loss of power,
–
when the appliance is defective.
The alarm will stop and the alarm
symbol ; will go out as soon as the
temperature has dropped down to the
correct level again.
^ Touch the button to turn off the
temperature alarm.
The alarm will stop and the alarm
symbol ; will continue to flash until the
temperature has dropped down to the
correct level again.
20
Page 21
Temperature and door alarm
Door alarm
An alarm will sound if the door is left
open for too long. The alarm symbol ;
will light up.
The amount of time until the door alarm
is triggered depends on the setting
selected and can be either 2 minutes
(factory default) or 4 minutes. However,
the door alarm can also be turned off
(see "Additional settings - Acoustic
signals").
As soon as the door is closed, the
audio alarm is silenced and the alarm
symbol ; will disappear from the
display.
If no audio alarm sounds even
though a door alarm is available, then
the audio alarm has been turned off
in settings mode (see "Additional
settings - Acoustic signals").
Turning off the audio alarm
If the audio alarm bothers you, it can be
silenced.
Touch the button to turn off the door
^
alarm.
The audio alarm will stop.
The alarm symbol ; will continue to
be displayed until the door is closed.
21
Page 22
Selecting additional settings
Certain appliance settings can only be
selected in the settings mode.
While you are in settings mode, the
door alarm and any other fault
messages are suppressed
automatically, but the alarm symbol
; lights up in the display.
Available settings
0 Activating and deactivating the
safety lock
°C°FSelect the temperature unit
(Celsius or Fahrenheit)
) Turning acoustic signals On/Off
s Changing the brightness of the
display
¬ Turning Sabbath mode On/Off
These settings are described in greater
detail below.
Safety lock 0
The safety lock can be activated to
prevent:
the appliance being turned off by
–
mistake,
the temperature being changed by
–
mistake,
selection of the SuperCool function,
–
settings being adjusted by mistake (it
–
is only possible to deactivate the
lock).
This prevents the appliance being
turned off or settings adjusted without
your knowledge, by children, for
example.
Activating and deactivating the
safety lock
22
^
Touch the settings button.
All symbols available for selection will
appear in the display and the 0 symbol
flashes.
^
Touch the OK button to confirm your
selection.
The last selected setting flashes in the
display and the 0 lights up.
Page 23
By touching the X or Y button, you
^
can now select whether the safety
lock is activated or deactivated:
0: the safety lock is deactivated
1: the safety lock is activated
Touch the OK button to confirm your
^
selection.
The selected setting will be adopted
and the 0 symbol will flash.
Selecting additional settings
Temperature unit (Celsius or
Fahrenheit)
The temperature can be displayed in
either Fahrenheit °F or Celsius °C.
The factory default is Fahrenheit °F.
Setting the temperature display to
Celsius
^ Touch the settings button.
All symbols available for selection will
appear in the display and the 0 symbol
flashes.
^ Touch the settings button to leave the
settings mode.
Otherwise the appliance will exit the
settings mode automatically after
approximately one minute.
The 0 symbol will appear in the
display when the safety lock is
activated.
^ Touch the buttons for setting the
temperature (X or Y) repeatedly until
°C and °F flash in the display.
^
Touch the OK button to confirm your
selection.
°F flashes in the display.
23
Page 24
Selecting additional settings
By tapping the X or Y button you can
^
now select °C.
Touch the OK button to confirm your
^
selection.
The selected setting will be adopted.
^ Touch the settings button to leave the
settings mode.
Otherwise the appliance will exit the
settings mode automatically after
approximately one minute.
The temperature will now be displayed
in Celsius.
Touch the buttons for setting the
^
temperature (X or Y) repeatedly until
°C and °F flash in the display.
Touch the OK button to confirm your
^
selection.
°C flashes in the display.
^ By tapping the X or Y button you can
now select °F.
Setting the temperature display to
Fahrenheit
^
Touch the settings button.
All symbols available for selection will
appear in the display and the 0 symbol
flashes.
24
^
Touch the OK button to confirm your
selection.
The selected setting will be adopted.
^
Touch the settings button to leave the
settings mode.
Otherwise the appliance will exit the
settings mode automatically after
approximately one minute.
The temperature will now be displayed
in Fahrenheit.
Page 25
Acoustic signals )
The appliance has acoustic signals
such as the sensor tone and the door
and temperature alarms.
You can turn the button tone or the door
alarm acoustic alarm on or off, but you
cannot deactivate the temperature
alarm.
There are four settings to choose from.
Option 3 is set the factory, i.e. the
button tone and the door alarm are
turned on.
Turning acoustic signals On/Off
^ Touch the settings button.
All symbols available for selection will
appear in the display and the 0 symbol
flashes.
Selecting additional settings
By touching the X or Y button you
^
can now select:
0: button tone off; door alarm off
1: button tone off; door alarm on
(after 4 minutes)
2: button tone off; door alarm on
(after 2 minutes)
3: button tone on; door alarm on
(after 2 minutes)
^ Touch the OK button to confirm your
selection.
The selected setting will be adopted
and the ) symbol will flash.
^
Touch the buttons for setting the
temperature (X or Y) repeatedly until
the ) symbol flashes in the display.
^
Touch the OK button to confirm your
selection.
The last selected setting flashes in the
display and the ) lights up.
^
Touch the settings button to leave the
settings mode.
Otherwise the appliance will exit the
settings mode automatically after
approximately one minute.
25
Page 26
Selecting additional settings
Display brightness s
You can adjust the brightness of the
display to suit the light conditions in the
room.
The display brightness can be changed
in increments from 1 to 3. The factory
default setting is option 3, maximum
brightness.
Changing the brightness of the
display
^ Touch the settings button.
All symbols available for selection will
appear in the display and the 0 symbol
flashes.
By touching the X or Y button, you
^
can now alter the brightness of the
display:
1: dimmest setting
2: medium setting
3: brightest setting.
^ Touch the OK button to confirm your
selection.
The selected setting will be adopted
and the s symbol will flash.
^
Touch the buttons for setting the
temperature (X or Y) repeatedly until
the s symbol flashes in the display.
^
Touch the OK button to confirm your
selection.
The last selected setting flashes in the
display and the s lights up.
26
^ Touch the settings button to leave the
settings mode.
Otherwise the appliance will exit the
settings mode automatically after
approximately one minute.
Page 27
Selecting additional settings
Sabbath mode ¬
The appliance offers a Sabbath mode
for the purposes of religious
observance.
The following are turned off:
the interior lighting when the door is
–
opened,
all acoustic and optical signals,
–
the temperature display,
–
the SuperCool function (if previously
–
selected).
The following can be selected:
– the settings sensor for turning off
Sabbath mode
– and the On/Off button,
The Sabbath mode function will turn
itself off automatically after approx. 120
hours.
Temperature regulation is limited in
Sabbath mode.
Ensure that the doors are properly
closed, as optical and acoustic
alarms are turned off. Any power
failure during this time is not shown in
the display. After a power failure, the
appliance restarts in Sabbath mode.
Turning on Sabbath mode
Touch the settings button.
^
All symbols available for selection will
appear in the display and the 0 symbol
flashes.
^ Touch the buttons for setting the
temperature (X or Y) repeatedly until
the ¬ symbol flashes in the display.
^ Touch the OK button to confirm your
selection.
The last selected setting flashes in the
display and the ¬ lights up.
^
By touching the X or Y button, you
can now turn on Sabbath mode. To
do this, select setting 1.
27
Page 28
Selecting additional settings
Touch the OK button to confirm your
^
selection.
The selected setting is applied, the ¬
symbol lights up.
As soon as the ¬ symbol goes out in
the display after about 3 seconds,
Sabbath mode is turned on.
Turn off Sabbath mode after the
^
Sabbath has passed.
Turning off Sabbath mode
^ Touch the settings button to leave
Sabbath mode.
The temperature will appear in the
display and the interior lighting will
come on.
28
Page 29

Adjusting the interior fittings
Freezer drawers on telescopic
runners
Some of the freezer drawers are on
telescopic runners and can be
removed for filling, emptying or
cleaning purposes.
^ Pull the drawer out as far as it will go.
^ Holding the sides of the drawer at the
back, lift it up and then forwards and
out.
Push the runners back in again to
avoid damaging them.
Shelves
The shelves can be removed.
Lift the shelf slightly at the front and
^
then pull it forwards and out.
Take care when cleaning the
appliance that you do not wash the
special lubricant out of the
telescopic runners. Wipe them with
a damp cloth only.
Inserting the fruit and vegetable drawer
^
Push the runners back in completely
and then place the drawer on them.
^
Push the drawer into the appliance
until it clicks into position.
29
Page 30

Freezing and storing food
Always follow USDA guidelines on
food safety.
WARNING!
Danger of fire
Do not use electrical appliances
inside the food storage
compartments of the appliance,
unless they are of the type
recommended by the manufacturer.
Maximum freezing capacity
To ensure that fresh food placed in the
freezer freezes through to the core as
quickly as possible, the maximum
freezing capacity must not be
exceeded. The maximum freezing
capacity for freezing within a 24-hour
period is given on the data plate:
"Freezing capacity ....Ibs/24 hrs."
Freezing food
Fresh food should be frozen as quickly
as possible so that the nutritional value
of the food, its vitamin content,
appearance and flavor are maintained.
Before placing food in the freezer
When freezing more than
^
4.5 lb (2 kg) of fresh food, turn on the
SuperCool function some time before
placing food in the freezer (see
"Using SuperCool").
This helps food which is already
stored in the freezer to remain frozen.
Placing food in the freezer
The following maximum loading
weights must not be exceeded:
– Top freezer drawer = 11 lb (5 kg)
– Freezer drawer = 55 lb (25 kg)
– Shelf = 77 lb (35 kg)
Unfrozen food should not touch
frozen food as this will cause frozen
food to begin to thaw.
^ When placing items in the freezer,
ensure that the packaging and
containers are dry to prevent them
from sticking together when frozen.
–
Freezing small amounts of food
Place the food in the upper freezer
drawers.
Never re-freeze partially or fully
defrosted food. Defrosted food may
only be re-frozen after it has been
cooked.
30
^
Place the food flat in the bottom of
the freezer drawer so that it freezes
through to the core as quickly as
possible.
Page 31

When removing the upper freezer
drawers, please note:
The bottom drawer must always
remain in the appliance.
When placing food on the shelf,
make sure that you do not block the
ventilation slits in the back wall of
the appliance. They are important
for trouble-free operation of the
appliance and normal energy
consumption.
Freezing the maximum amount
–
(see data plate)
^ Remove the upper freezer drawers.
^ Place the food flat on the upper
shelves so that it freezes through to
the core as quickly as possible.
Once frozen:
^ Place the frozen food in the freezer
drawer and push it back in.
Freezing and storing food
Defrosting
Frozen food can be thawed in various
ways:
in the microwave
–
at room temperature
–
in the refrigerator (as it thaws, the
–
frozen food will help cool the other
food in the refrigerator)
in a steam oven
–
Flat pieces of partially thawed meat or
fish can be placed directly into a hot
skillet.
Meat and poultry (e.g. hamburger,
chicken, fish fillets) may not come into
contact with other foods while
defrosting. Catch the defrosting liquid
and dispose of it carefully.
Fruit can be thawed at room
temperature, either in the packaging or
in a covered bowl.
– Large items
If you wish to freeze large items such
as a turkey or ham, the shelves
between the drawers can be removed.
^
Remove the upper freezer drawers
and carefully lift and slide out the
shelves.
Most vegetables can be cooked while
still frozen. Just put straight into boiling
water or hot fat. The cooking time is
slightly less than that of fresh
vegetables due to changes in the cell
structure.
Never re-freeze partially or fully
defrosted food. Defrosted food may
only be re-frozen after it has been
cooked.
31
Page 32

Freezing and storing food
Cooling drinks quickly
When cooling drinks quickly in the
freezer, make sure bottles are not left
in for more than one hour; otherwise
they could burst.
Using the cool pack
The cool pack prevents the
temperature in the freezer rising too
quickly in the event of a power cut. This
can help prolong the storage time.
Place the cool pack in the top drawer
^
of the freezer section.
The cool pack will be at its most
effective after it has been in the
freezer for approx. 24 hours.
In the event of a power failure:
^ Place the frozen cool pack directly on
top of the frozen food in the front of
the top drawer.
When placing fresh food in the freezer,
use the cool pack to separate the fresh
food from the food which is already
frozen so that the frozen food does not
begin to thaw.
The cool pack can also be used to
keep food or drinks cool for a short
period of time in a cooler box or bag.
32
Page 33

Making ice cubes
For the automatic ice cube maker to
operate it must be connected to the
water supply.
Ice cube maker with integrated
ice cube tray
The automatic ice cube maker b is
located in the a ice cube freezer
drawer.
As soon as the ice cube maker is
turned on, the ® symbol lights up in
the display and the indicator light
illuminates on the ice cube maker.
Rinse the ice cube maker along with
the water pipes:
– before installation,
– if the ice cube maker has not been
used for a longer period of time
– during regular daily use (at least
once a month) to remove ice
residues from the system (this will
avoid a blockage in the water pipes)
and
– before the ice cube maker is to be
turned off for a long time.
See "Cleaning and care - Rinse the
ice cube maker" on how to select
this function.
Ensure the ice cube drawer is empty
before turning on the ice cube
maker.
An ice cube tray c where ice cubes
are produced is integrated in the ice
cube maker b.
The ice cube tray automatically empties
into the drawer as soon as ice cubes
are produced.
33
Page 34

Making ice cubes
Turning the ice cube maker
On/Off
Touch the settings button.
^
All symbols available for selection will
appear in the display and the 0 symbol
flashes.
Touch the buttons for setting the
^
temperature (X or Y) repeatedly until
the symbol for the ice cube maker ®
flashes in the display.
^ Touch the OK button to confirm your
selection.
^ Touch the X and Y buttons to set the
ice cube maker:
0: Ice cube maker is turned off
1: Ice cube maker is turned on
^ Touch the OK button to confirm your
selection.
The selected setting will be adopted.
^
Touch the settings button to leave
settings mode,
or
^
close the appliance door.
The electronics will otherwise switch to
normal operation after one minute.
Make only the number of ice cubes
required in your household with the
ice cube maker.
The drawer must be completely shut
for ice cubes to be produced.
After the appliance is turned on for
the first time it can take up to 24
hours for the first ice cubes to drop
out of the ice cube maker and collect
in the drawer.
Thereafter, when the ice cube maker
is turned off and then on again it will
take up to a maximum of 6 hours for
ice cubes to be produced.
The ice cube maker can be turned off
independently of the freezer section if
you do not want the appliance to
make any ice cubes.
If the ice cube maker is turned off,
the ice cube drawer can be used as
an extra drawer for freezing fresh
food and storing frozen food.
Making a large amount of ice cubes
The amount of ice cubes which the
appliance makes depends on the
temperature in the freezer section. The
lower the temperature, the more ice
cubes are produced within a certain
time frame. At a temperature of 0°F
(-18°C), approx. 2 lbs (1 kg) of ice
cubes will be produced within 24 hours.
34
Ice cube production is halted
automatically as soon as the ice cube
drawer is full.
Page 35

Making ice cubes
If you require a large quantity of ice
cubes,
replace the full ice cube drawer with
^
the drawer beside it on the right.
The ice cube maker will begin to
produce ice cubes again as soon as
this new drawer has been placed in
position and closed properly.
Changing the size of the ice cubes
The size of the ice cubes depends on
the quantity of water being taken in.
You are able to set this quantity
according to your wishes.
Setting the water quantity
The size of the produced ice cube
depends on the water pressure and set
water intake time of the ice cube maker.
If, for example, the ice cube maker
only makes small ice cubes, the water
pressure is low. To produce larger ice
cubes, the water quantity of the ice
cube maker must be increased. A
medium-sized water quantity (E3) has
been set at the factory.
Touch the buttons for setting the
^
temperature (X or Y) repeatedly until
the symbol for the ice cube maker ®
flashes in the display.
Touch the OK button to confirm your
^
selection.
The X and Y buttons can be used to
^
set whether the water quantity is to
be changed:
0: Ice cube maker is switched off
1: Ice cube maker is switched on
2: Set the water quantity
3: Ice cube tray cleaning position
4: Rinse the ice cube maker
^ Touch the OK button to confirm your
selection.
^ Touch the X and Y buttons to set the
required water quantity (E1 to E8):
E1: small quantity
E8: large quantity
^ Touch the OK button to confirm your
selection.
The selected setting will be adopted.
^
Touch the settings button to leave
settings mode,
The setting can only be selected if
the ice cube maker is turned on.
^
Touch the settings button.
All symbols available for selection will
appear in the display and the 0 symbol
flashes.
or
^
close the appliance door.
The electronics will otherwise switch to
normal operation after one minute.
35
Page 36

Making ice cubes
Turning the ice cube maker
On/Off with the On/Off button
Open the ice cube drawer slightly.
^
^ Press and hold the On/Off button a
on the ice cube maker
– until the indicator light comes on.
The symbol for the ice cube maker
® will appear in the display. The ice
cube maker is now on.
– until the indicator light goes out.
The symbol for the ice cube maker
® will disappear from the display.
The ice cube maker is now off.
^
Close the ice cube drawer.
36
Page 37

WARNING! Risk of injury and
damage.
Do not use mechanical devices or
other means to accelerate the
defrosting process, other than those
recommended by the manufacturer.
The appliance is equipped with a
"NoFrost" system for automatic
defrosting as needed.
The moisture generated in the
appliance collects on the condenser,
and is automatically defrosted and
evaporates periodically.
This automatic defrosting system
enables the freezer to remain
permanently ice-free, but the food
stored in the freezer will not defrost.
Automatic defrosting
37
Page 38

Cleaning
WARNING!
Danger of electric shock.
Unplug refrigerator or disconnect
power.
Danger of fire.
Do not damage the refrigerant
circuit.
Do not let water get into the
electronic unit.
Cleaning water must not get into the
drain hole.
Do not use a steam cleaner to clean
the appliance. Steam could reach
electrical components and cause a
short circuit.
Information regarding cleaning
agents
To better maintain your appliance
avoid the following:
cleaning products containing soda,
–
ammonia, acid or chloride
lime removers
–
abrasive cleaning products, such as
–
scouring powder, scouring liquid, or
pumice stones
cleaners containing solvents
–
stainless steel cleaners
–
– dishwasher detergent
– oven sprays
– hard, abrasive sponges and
brushes, such as pot scrubbers
– eraser sponges
The data plate located inside the
appliance must not be removed. It
contains information which is
required in the event of a service call.
38
– sharp metal scrapers
Glass cleaners may be used to
clean the exterior. However do not
allow them to sit or "puddle", this can
cause damage to the surface.
Remove the cleaner promptly.
Cleaning and conditioning agents
used inside the appliance must be
food safe.
Use warm water and liquid dish soap.
The following pages contain
important information on cleaning.
Page 39

Rinsing the ice cube maker
Rinse out the ice cube maker and
the water pipes:
– before using for the first time,
– if the ice cube maker has not been
used for quite a while,
– regularly (at least once a month) if
it is constantly being used, to
remove any ice residues and
therefore avoid an blockages in the
water pipes, and
– before switching the ice cube
maker off for an extended period of
time.
Cleaning
Ensure the ice cube drawer is empty
before selecting the "Rinse the ice
cube maker" setting. The water will
otherwise flow onto the contents of
the drawer.
"Rinse the ice cube maker" can only
be selected when the ice cube
maker is switched on.
^ Touch the settings button.
All symbols available for selection will
appear in the display and the 0 symbol
flashes.
^ Touch the buttons for setting the
temperature (X or Y) repeatedly until
the symbol for the ice cube maker ®
flashes in the display.
After selecting "Rinse the ice cube
maker," the ice cube maker b and the
water pipes will automatically be rinsed.
The ice cube tray will turn to the
cleaning position so that it can be dried
by hand.
The water is collected in the ice cube
drawer a.
^
Touch the OK button to confirm your
selection.
^
The required setting can be selected
by touching the X and Y buttons:
0: Ice cube maker is switched off
1: Ice cube maker is switched on
2: Set the water quantity
3: Set cleaning position for the ice
cube tray
4: Rinse the ice cube maker
39
Page 40

Cleaning
Touch the OK button to confirm your
^
selection.
The selected setting will be saved. The
ice cube maker symbol ® will flash in
the display and the indicator light will
flash on the ice cube maker as long as
the ice cube maker is being rinsed.
You will hear the ice cube tray turning
to a slanted position.
Wait until the rotation has stopped
^
before continuing.
The ice cube maker will then turn off.
^ Carefully remove the ice cube drawer
which is now filled with water. Then
empty and clean it.
The ice cube tray is not removable
and can only be cleaned when in
place.
^ Dry the ice cube tray b with a soft
cloth.
Cleaning the ice cube tray
Clean the ice cube maker:
– before switching off the ice cube
maker for an extended period of
time,
– regularly to remove any ice and
water residues.
If you have already selected the
setting "Rinse the ice cube maker"
(see "Rinsing the ice cube maker"),
the ice cube tray will already be in
the cleaning position.
As soon as the ice cube maker is
turned on, the ice cube tray rotates
back to its original position.
40
The ice cube tray b is not removable
and can only be cleaned when in
place. You can therefore place the ice
cube tray in the cleaning position.
Setting the cleaning position
The setting can only be selected if
the ice cube maker is turned on.
^
Empty the ice cube drawer.
Page 41

Touch the settings button.
^
All symbols available for selection will
appear in the display and the 0 symbol
flashes.
Touch the buttons for setting the
^
temperature (X or Y) repeatedly until
the symbol for the ice cube maker ®
flashes in the display.
Touch the OK button to confirm your
^
selection.
^ The required setting can be selected
by touching the X and Y buttons:
0: Ice cube maker is turned off
1: Ice cube maker is turned on
2: Set the water quantity
3: Set cleaning position for the ice
cube tray
4: Rinse the ice cube maker
Cleaning
Remove and clean the ice cube
^
drawer.
The ice cube tray is not removable
and can only be cleaned when in
place.
^ Clean the ice cube tray b.
As soon as the ice cube maker is
turned on, the ice cube tray rotates
back to its original position.
^ Touch the OK button to confirm your
selection.
The selected setting is saved and you
will hear the ice cube tray moving into a
slanted position.
^
Wait until the rotation has stopped
before continuing.
The ice cube maker will then switch off.
The symbol for the ice cube maker ®
will disappear from the display.
41
Page 42

Cleaning
Before cleaning
Turn off the appliance.
^
The display goes out and cooling is
turned off.
If this does not happen, then the
safety lock is still activated (see
"Selecting additional settings Deactivating the lock").
Unplug the appliance or trip the
^
circuit breaker.
Take any food out of the appliance
^
and store it in a cool place.
^ Remove the shelves:
Lift them up at the front slightly and
then pull them forwards and out.
The telescopic runners on the
shelves are not dishwasher safe.
To remove the telescopic runners:
^ 1. Press the catch up.
^ 2. Push the telescopic runner to the
side and then 3. backwards.
42
^
After cleaning, reattach the
telescopic runners to the shelf.
To do this, hook the telescopic runner
onto the shelf and then click the
catch into position.
Page 43

Cleaning
Interior and accessories
Clean the appliance at least once a
month.
Remove any soiling immediately so
that it does not dry up.
Clean the interior and any
^
accessories with warm water and
liquid dish soap applied with a soft
sponge. After cleaning, wipe with a
clean, damp cloth and then dry with
a soft cloth.
The ice cube tray is dishwasher safe.
The maximum temperature of the
dishwashing program selected must
not exceed 130°F (55°C). Contact
with natural dyes from carrots,
tomatoes and ketchup may discolor
the plastic parts in the dishwasher.
This discoloring does not affect the
stability of the parts.
The following parts cannot be cleaned
in a dishwasher:
the ice cube drawer
–
the freezer drawers
–
the shelves
–
the telescopic runners on the shelves
–
the cool packs
–
Wipe the telescopic runners with a
^
damp cloth to clean them.
Be careful not to wash out the
special lubricant in the telescopic
runners during cleaning.
^ Clean all other parts and accessories
by hand.
^ Leave the door open to air the
appliance for a short while.
43
Page 44

Cleaning
Ventilation slits
The ventilation slits should be
^
cleaned on a regular basis with a
brush or vacuum cleaner. A build-up
of dust will increase the energy
consumption of the appliance.
Door seal
Do not use any grease or oil on the
door seal as these will cause the
seal to deteriorate and become
porous over time.
^ The door seal should be cleaned
regularly with clean water and then
wiped thoroughly dry with a soft
cloth.
After cleaning
Slide all shelves back into the
^
appliance.
Close the appliance door.
^
Connect the appliance again and
^
turn it on.
Turn on the SuperCool function in the
^
freezer to cool it down quickly.
Place the freezer drawers with the
^
frozen food back in the freezer.
As soon as the freezer section
^
reaches a constant temperature of at
least 0°F (-18°C), press the
SuperCool button to turn off the
function.
44
Page 45

Frequently asked questions
With the aid of the following guide minor problems can be corrected without a ser
vice call.
If, having followed the suggestions below, you still cannot resolve the problem,
please contact Miele Technical Service.
To prevent cold from escaping, open the appliance doors as little as possible until
the malfunction has been corrected.
Repairs should only be carried out by a qualified and trained person in strict
accordance with local and national safety regulations. Unauthorized repairs
could cause personal injury or machine damage and may void the warranty.
Problem Possible cause Solution
The appliance does
not get cold and the
display is not lit up.
The appliance is not turned
on and the power supply
symbol t is lit up in the
display.
The plug is not properly
plugged into the electrical
outlet.
^ Touch the On/Off button.
^ Insert the plug correctly
into the socket. The power
supply symbol t appears
in the display when the
appliance is turned off.
-
The appliance does
not get cold,
although the
controls and the
interior lighting are
working.
Check whether the fuse
has tripped. There could
be a fault with the
appliance, the household
electrical wiring or another
electrical appliance.
Demo mode is turned on
and the r symbol lights up
in the display. This allows
the appliance to be
presented in the showroom
without the cooling system
being turned on. Do not
activate this setting for
domestic use.
^
Contact a qualified
electrician or Miele
Technical Service for
assistance.
^
Turn off Demo mode (see
"Information for dealers Demo mode").
45
Page 46

Frequently asked questions
The compressor runs more and more often and for longer periods of time,
and the temperature in the appliance drops.
Problem Possible cause Solution
Correct the temperature
The temperature in
the appliance is too
low.
The temperature setting is
too low.
The door is not properly
closed.
A large amount of food is
being frozen at once.
^
setting.
Check why the appliance
^
door is not closing
properly.
See "Freezing and storing
^
food".
The compressor
runs continuously.
The SuperCool function for
the freezer is still turned on.
It will turn itself off
automatically after approx.
65 hours.
To save energy, the
compressor runs at a lower
speed, but for longer, when
less cooling is required. In
this way, the running time of
the compressor is
extended.
You can turn off the
SuperCool function earlier to
save energy.
^ Press the SuperCool
button.
None
46
Page 47

Frequently asked questions
The compressor runs more and more often and for longer periods of time,
and the temperature in the appliance drops.
Problem Possible cause Solution
Do not block the
The compressor is
turning on more
frequently and for
longer periods.
The ventilation slits in the
housing unit have been
covered or become too
dusty.
The door has been opened
too frequently, or a large
amount of food has been
put in at once.
^
ventilation slits.
Clean the ventilation slits
^
on a regular basis.
Only open the door when
^
necessary and for as short
a time as possible.
After a while the temperature
will return to normal by itself.
The door is not properly
closed.
A thick layer of ice may
have developed in the
freezer section.
The room is too warm. The
higher the room
temperature, the longer the
compressor has to run.
The appliance was not
properly installed in the
niche.
^ Close the door.
After a while the temperature
will return to normal by itself.
If a thick layer of ice has
formed, it will decrease the
cooling capacity and
increase the energy
consumption.
^
Defrost the freezer section
and clean it.
^
See "Installation location".
^
See "Installation" and
"Installing the appliance".
47
Page 48

Frequently asked questions
The compressor comes on less and less often and for shorter periods of
time, the temperature in the appliance rises.
Problem Possible cause Solution
Correct the temperature
The temperature in
the appliance is too
high.
The food begins to
thaw.
This is not a fault.
The room temperature is
too low for this appliance.
If the room temperature is
too low, the compressor will
run less frequently. This
may cause the freezer to
become too warm.
^
setting.
Check the temperature
^
again after 24 hours.
See "Installation location".
^
Increase the room
^
temperature.
48
Page 49

Frequently asked questions
Indication in the display
Problem Possible cause Solution
Contact Miele Technical
"F0 to F9" appears in
the display.
"FE*" appears in the
display.
The ® symbol
flashes and the
indicator light on the
ice cube maker
flashes when the ice
cube maker is
turned on.
There is a fault.
There is a fault.
The water supply line is not
open.
^
Service.
Contact Miele Technical
^
Service.
Open the water intake.
^
The ® and ;
symbols flash. The
indicator light on the
ice cube maker also
flashes.
The alarm symbol ;
lights up in the
display together with
a refrigerator section
button, and an
acoustic alarm can
be heard.
The is a fault with the ice
cube maker.
The door alarm has been
activated.
^ Contact Miele Technical
Service.
^ Close the appliance door.
The alarm symbol ; will
go out and the acoustic
alarm will stop.
49
Page 50

Frequently asked questions
Indication in the display
Problem Possible cause Solution
Remedy the alarm. The
The alarm symbol
; flashes in the
display.
The temperature in the
freezer has risen higher or
fallen lower than the
temperature which has
been set. This could be due
to:
the door being opened
–
too frequently.
a large quantity of fresh
–
food has been placed in
the freezer at once
without turning on the
SuperCool function.
– there has been a lengthy
interruption of the power
supply.
^
alarm symbol ; will
disappear and the
audible tone will stop.
Depending on the
temperature, check
whether the food has
defrosted or started to
defrost. If this is the case,
cook the food before
freezing again.
The acoustic alarm
sounds and the
power failure symbol
t appears in the
display.
The temperature
display also shows
the warmest
temperature
recorded in the
freezer during the
loss of power or
interruption of the
electricity supply.
50
The temperature in the
appliance rose too much
over the past days or hours
because of a power outage
or interruption of the
electrical supply.
The appliance will go back
to the last temperature
setting when the power is
back on.
^ Touch the Alarm Off
button.
The warmest temperature
display will go out. The
display will then revert to
showing the current
temperature in the freezer
section.
^
Depending on the
temperature displayed,
you should check the
condition of food in the
freezer. If it has defrosted
or started to defrost,
check that it is still safe to
use and, if so, use it as
soon as possible.
Defrosted food may only
be re-frozen after it has
been cooked.
Page 51

Frequently asked questions
Interior lighting
Problem Possible cause Solution
Close the appliance door.
The LED lighting is
not working.
To avoid overheating, the
lighting turns itself off
automatically after approx.
15 minutes if the door is left
open.
If this is not the case, then
there is a fault.
^
When the door is opened
again, the interior lighting
will come on.
Contact Miele Technical
^
Service.
The LED lighting may only
be repaired or replaced by
Miele Technical Service.
There are live electrical
components under the
lighting cover. Danger of
injury and damage to the
appliance.
Do not remove the cover.
If the cover is damaged
or needs to be removed
due to damage, use
caution. There are lasers
in the lighting (laser
beam class 1M) which
you should avoid looking
at directly. Do not use
optical instruments
(magnifying glass or
similar) to look at the
lighting either.
51
Page 52

Frequently asked questions
Problems with the ice cube maker
Problem Possible cause Solution
Connect the appliance
You cannot turn
the ice cube maker
on.
The ice cube maker
does not produce
any ice cubes.
The appliance is not
connected to the power
supply or is not turned on.
The appliance or the ice
cube maker is not turned
on.
The water supply line is not
open.
The drawer of the ice cube
maker is not closed
properly.
^
and turn it on.
Turn the appliance and
^
the ice cube maker on.
Open the water intake.
^
Push the drawer all the
^
way in.
The ® symbol
flashes and the
indicator light on
the ice cube maker
flashes when the
ice cube maker is
turned on.
The ® and ;
symbols flash. The
indicator light on
the ice cube maker
also flashes.
The ice cube tray is not
positioned correctly.
The temperature in the
freezer section is too high.
The water supply line is not
open.
The is a fault with the ice
cube maker.
^ Correct the position of the
ice cube tray.
^ Select a lower
temperature.
^ Open the water intake.
^
Contact Miele Technical
Service.
52
Page 53

Frequently asked questions
Other problems
Problem Possible cause Solution
Use a blunt instrument
Food has frozen
together or to the
wall.
The food packaging was
not dry when loaded in the
freezer.
^
(such as a spoon handle)
to carefully pry them
apart.
There is no acoustic
alarm although the
door has been open
for a long time.
The appliance
cannot be turned
off.
The external walls
of the appliance feel
warm.
This is not a fault. The alarm
tone has been turned off in
settings mode (see
"Selecting additional
settings - Acoustic signals").
The safety lock is activated.
The 0 symbol is lit up in the
display.
This is not a fault. The
warmth created by the
evaporator is used to
prevent condensation.
None
Turn off the safety lock
^
(see "Selecting settings deactivating the safety
lock").
None
53
Page 54

Noises
Normal noises What causes them
Brrrrr... This noise may get louder for brief periods when the motor
kicks on.
Blub, blub.... A gurgling noise can be heard when the refrigerant circulates
through the pipes.
Click.... Clicking sounds occur whenever the thermostat turns the
motor on or off.
Sssrrrrr.... In multi-section and frost-free appliances, the movement of
air circulating through the appliance can sometimes just
barely be heard.
In appliances with a water tank, a humming noise can be
heard when the water pump is running.
Crack... A cracking noise can be heard when the appliance materials
expand.
Keep in mind that a certain amount of noise is unavoidable (from the compressor
and the refrigerant circulating through the system).
Noises that you
can easily
eliminate
Rattling, clinking The appliance is not level. Realign the appliance using a
54
Possible cause Solution
level, by raising or lowering
the screw feet underneath the
appliance.
The appliance is touching
another appliance or piece of
furniture.
Drawers, baskets or shelves
are jiggling or are stuck.
Bottles or containers are
touching.
The transport cord clips are
still hanging on the back of the
appliance.
Move it away.
Check all removable items
and refit them correctly.
Separate them.
Remove the cord clips.
Page 55

Lead free certificate
This product is tested and certified by WQA against ORD0902 for California
"lead free" compliance.
Miele & Cie. KG
Carl-Miele-Straße29
D-33332 Gütersloh
55
Page 56

Service / Warranty
In the event of a fault which you cannot
correct yourself, please contact
your Miele dealer
–
or
Miele Technical Service.
–
See back cover of the this manual
contact details.
When contacting Miele Technical Ser
vice, please quote the model and serial
number of your appliance. This
information is given on the data plate
inside your appliance.
-
Warranty
For additional information, please refer
to your warranty booklet.
See the end of these operating and
installation instructions for this
telephone number.
56
Page 57

Information for dealers/showrooms
Demo mode r
This appliance can be presented in
retails stores and in showrooms with the
help of the "Demo mode." The controls
and lighting will still work, but the
compressor will not operate.
Switching on the Demo mode
Switch the appliance off by tapping
^
the On/Off button.
If this does not work, the safety lock
is still activated.
Place your finger on the X button and
^
hold it there.
At the same time, briefly tap the
^
On/Off button (without letting go of
the X button).
The temperature will go out and the
mains connection symbol t will
appear.
^ Keep your finger on the X button until
the r symbol appears in the display.
^ Then, take your finger off the X
button.
Demo mode is switched on and the r
symbol is illuminated in the display.
57
Page 58

Information for dealers/showrooms
Switching off Demo mode
The r is illuminated in the display.
Tap the X or Y button so that 0
^
appears in the display (Demo mode
is inactive).
Tap the settings button.
^
All symbols available for selection will
appear in the display and the 0 symbol
flashes.
Tap the OK button to confirm your
^
selection.
The selected setting will be adopted
and the s symbol will flash.
^ Tap the buttons for setting the
temperature (X or Y) repeatedly until
the ) symbol flashes in the display.
^ Tap the settings button to leave the
settings mode.
Otherwise the appliance exits the
^ Tap the OK button to confirm your
selection.
settings mode automatically after
approximately one minute.
1 flashes in the display (Demo mode is
active) and the r symbol is illuminated.
58
The Demo mode is switched off and the
r symbol disappears.
Page 59

59
Page 60

Installation Instructions
Information is subject to change. Please refer to our website to obtain the most
current product specification, technical & warranty information.
To prevent accidents
and machine damage
read these instructions
before
installation or use.
60
Page 61

Caring for the environment
Disposing of the packaging
materials
The packaging is designed to protect
the appliance from damage during
transportation. The packaging materials
used are selected from materials which
are environmentally friendly for disposal
and should be recycled.
Ensure that any plastic wrappings,
bags, etc. are disposed of safely and
kept out of the reach of children. Return
the packaging to your dealer.
Disposal of your old appliance
Old appliances may contain materials
that can be recycled. Please contact
your local recycling authority about the
possibility of recycling these materials.
Please take care not to damage the
pipework while the appliance is being
stored for transport to a waste disposal
facility.
By protecting the pipework, you help
keep the coolants and compressor oil
from contaminating the environment.
Before discarding an old appliance
disconnect it from the electrical supply
and cut off the power cord to prevent it
from becoming a hazard.
61
Page 62

Plumbing
Information regarding the
water connection
All plumbing work should be carried
out by a suitable qualified person, in
accordance with local and national
regulations.
Disconnect the appliance from the
power supply before connecting it to
the water supply.
Before connecting the water hose
for the ice cube maker, ensure the
water supply is completely turned
off.
The water being used should meet
the drinking water standards of the
country where the machine is used.
All devices used for connecting the
appliance to the water supply must
comply with the current national and
local safety regulations in the
country in which the appliance is
being installed.
All units and systems used to supply
water to the appliance must also
comply with the applicable
requirements of the respective
country.
The appliance must be connected to
a cold water line that:
is directly connected to the fresh
–
water supply in order to ensure a
circulation of the water in the cold
water line.
Avoid using a water line in which the
water is allowed to pool.
This can affect the taste of water
and ice cubes.
withstands the operating pressure.
–
fulfills the hygiene regulations.
–
The water pressure must be between
22 and 87 psi (1.5 and 6 bar).
A shut-off valve must be provided
between the water line and the water
supply of the building to ensure that the
water supply can be cut off if
necessary.
The water supply should be easily
accessible after the machine has
been built in.
Before commissioning, the water
line needs to be vented by a
qualified technician:
62
Page 63

The water connection can be found at
the back of the appliance. The solenoid
valve b has a 3/4" connection thread.
The connection parts included with the
appliance permit the connection of
various water lines (a water line is not
included in delivery).
Plumbing
In the following, please note:
,
inserting the water filter incorrectly
can cause damage!
Place the water filter e on top of the
^
adapter e as shown in the picture.
Do not over-tighten the union
,
nut, damage can result!
Connect the union nut d to the
^
solenoid valve b and tighten it.
If you want to divert the water line by
^
90°, screw on the elbow f.
In case of a water line with a 1/4"
thread:
^ Connect the water line g (e.g.,
copper) using the clamping ring h
and the nut i on the adapter c or
elbow f.
^
Remove the cap a from the solenoid
valve b.
^
Insert the adapter c into the union
nut d.
In case of a water line with a 7/16"
24-UNS thread:
^
Connect the water line g directly to
the adapter c or elbow f (a
clamping ring h and nut i are not
required).
63
Page 64

Plumbing
^ Secure the water line g using the
retaining clip j.
Caution! Risk of damage to the ice
cube maker! During the operation of
the ice cube maker, do not interrupt
the water supply.
^ Slowly open the water shut-off valve
and check for leaks.
^
The appliance can now be
connected to the power supply (see
"Electrical connection").
^
Slide the appliance into the desired
position.
When doing so, make sure that the
water does not get kinked or damaged.
After a maximum of 24 hours, the
first ice cubes will drop out of the ice
cube maker and collect in the
drawer.
64
Page 65

Electrical connection
Failure to follow these
,
instructions can result in death, fire,
or electrical shock.
Improper connection of the
equipment grounding conductor
may result in electric shock.
If you are in any doubt as to whether
the appliance has been properly
grounded, have the appliance
checked by a qualified electrician or
service technician.
Installation, repairs and other work
by unqualified persons could be
dangerous. The manufacturer will
not be held responsible for damage
or injury arising from unauthorized
work.
Before installing the appliance,
verify that the voltage, load and
circuit rating information found on
the data plate match the household
electrical supply.
This appliance is equipped with
,
a three-prong grounding plug to
prevent shock hazards. It should be
plugged directly into a properly
grounded outlet. Do not cut or
remove the grounding prong from
the plug. If the plug does not fit the
outlet, have the proper outlet
installed by a licensed electrician.
Do not use extension cords or
ungrounded (two prong) adapters.
Connect this appliance to a 110 –
120 VAC, 60 Hz and 15 amp (20 amp
for side-by-side) circuit with a circuit
breaker or fuse.
This appliance must be grounded
according to local or national codes.
,
To guarantee the electrical
safety of this appliance, continuity
must exist between the appliance
and an effective grounding system.
It is imperative that this basic safety
requirement be met. If there is any
doubt, have the electrical system of
the house checked by a qualified
electrician.
65
Page 66

Electrical connection
The appliance must be connected to an
electrical outlet that is properly
grounded. The electrical installation
must comply with the applicable
electrical code.
The plug must be easily accessible and
not concealed behind the appliance so
that the appliance can quickly be
disconnected from the electricity
supply in an emergency. In addition, no
other appliances should be plugged
into a socket located directly behind
this appliance.
The power cord must not come into
contact with the back of the appliance,
as they could be damaged by
vibrations from the appliance. This may
result in a short circuit.
Do not use an extension cord to
connect the appliance to the power
supply. Extension cords do not
guarantee the required safety of the
appliance (e.g. they pose a danger of
overheating).
Do not connect the appliance to
stand-alone inverters, such as those
used with an autonomous energy
source, e.g. solar power systems.
Otherwise, when the appliance is
switched on, peak loads in the system
can cause the safety shutdown
mechanism to be triggered. This can
damage electronic units.
In addition, the appliance must not be
used with energy-saving devices,
which reduce the amount of energy
supplied to the appliance and cause it
to overheat.
If the power cord needs to be replaced,
this work must only be performed by a
qualified electrician.
66
Page 67

To avoid tipping over, the appliance
must be properly installed and
secured.
WARNING!
Danger of tilting! To avoid a hazard
due to instability of the appliance, it
must be secured in accordance with
the instructions.
Side-by-side
The FNS 37492 iE refrigerator/freezer
has two side-wall heaters encased in
foam and can be built into separate
cabinet units arranged side-by-side
with all appliances.
Please contact your dealer for
specific information about which
combinations will work with your
appliance.
Location
This appliance should not be installed
where it is exposed to direct sunlight or
directly adjacent to a heat-producing
appliance such as an oven or a
radiator. The higher the ambient
temperature of the room, the longer the
compressor runs, and the more energy
the appliance requires to operate. The
appliance should be installed in a dry,
well ventilated room.
The following should also be taken into
consideration:
–
The electrical socket must be easily
accessible in an emergency, not
concealed behind the appliance.
Installation information
The plug and cord must not touch
–
the rear of the appliance as they
could be damaged by vibrations
from the appliance.
Do not plug in other devices behind
–
this appliance.
Important! In environments with
high humidity condensation can
build up on the appliance exterior
and ultimately cause corrosion on the
outer walls.
To prevent this from happening, we
recommend installing the appliance
in a dry and/or an air-conditioned
room with sufficient ventilation.
Once you have completed the
installation, please make sure that the
appliance door closes properly, that
the ventilation openings are not
covered and that the appliance has
been installed as described.
Climate class
The appliance is designed for use
within a certain climate range (ambient
temperatures) and should not be used
outside this range. The climate range of
the appliance is stated on the data
plate inside the appliance.
Climate
class
SN
N
ST
T
Operating in a room which is too cold
will cause the compressor to turn off for
too long, causing the internal
temperature in the appliance to rise
resulting in damage.
Room temperature
+50°F to +90°F (+10°C to +32°C)
+60°F to +90°F (+16°C to +32°C)
+60°F to +100°F (+16°C to +38°C)
+100°F to 110°F (+16°C to +43°C)
67
Page 68

Installation information
Ventilation
WARNING! Danger of damage from
overheating. May restrict operation.
Keep ventilation openings, in the
appliance enclosure or in the built-in
structure, clear of obstruction.
The ventilation gaps given must be
observed, otherwise the compressor
will run more frequently and for
longer periods. This will result in
increased energy consumption and
a higher operating temperature for
the compressor. This may, in turn,
cause the compressor to be
damaged.
Air at the back of the appliance gets
warm. The appliance housing unit must
therefore be constructed to allow
sufficient space for ventilation (see
"Installation dimensions"):
– Air intake a occurs via the plinth at
the bottom of the appliance and the
air escapes at the top b at the rear
of the housing unit.
– A ventilation gap of at least 1 5/8"
(40 mm) depth must be provided
behind the appliance for air to
circulate.
68
–
The ventilation cross-sections in the
plinth, housing unit and above the
appliance must amount to at least
78 3/4"
circulate without obstruction.
–
Important. The appliance uses less
energy, the larger the ventilation
cross-section.
The ventilation cross-sections must
not be blocked or covered in any
way.
They also need to be
dusted/cleaned on a regular basis.
2
to ensure that air can
Page 69

Installation information
Top ventilation cross-section
The ventilation cross section at the top
of the appliance can be constructed in
different ways:
a directly above the appliance with a
ventilation grille (free airflow of at
least 78 3/4"
b in between the housing unit and the
ceiling.
c through a suspended ceiling.
2
).
Ventilation slits
If you would like to use the ventilation
slits, proceed as follows:
^ Cut an opening in the plinth b as
shown in the figure.
^ Place the ventilation slits a into the
opening.
^ Push the snap connector c into the
ventilation slits from the rear until the
hooks are touching the plinth.
^ Reinstall the plinth with the ventilation
slits.
69
Page 70

Installation information
Before installation
Before installation, remove the
^
accessories bag containing
installation components and
accessories from the appliance, and
remove the sealing strip from the
appliance door.
Do not remove the following from the
^
back of the appliance:
^ Remove the red transport safety
device a and close the created hole
with the included stopper b.
– The spacers (depending on model).
These ensure the gap required
between the back of the appliance
and the wall is maintained.
– Depending on model, the pouches
located in the metal grille (heat
exchanger).
They are required for the correct
functioning of the appliance. The
contents are not poisonous or
dangerous.
^
Remove any cable clips from the
back of the appliance.
^
Check that all parts at the back of the
appliance are unhindered. Carefully
remove any hindrance.
Wall spacer on the rear side
At a furniture depth below 21 3/4''
(553 mm), you can remove the wall
spacer from the rear side of the
appliance so that you can push the
appliance completely into the nice.
The removal of the wall spacer can lead
to a higher energy consumption since
the ventilation cross-section is reduced.
^
Loosen the screw and remove the
wall spacer.
70
Page 71

Installation dimensions
Before installation, ensure the building-in niche is the correct size. The specified
ventilation cross-sections must be adhered to in order to ensure the correct
functioning of the appliance.
Niche height
A
FNS 37492 iE 69 3/4" - 70 3/8"
(1772 - 1788 mm)
71
Page 72

Adjusting the door hinge
The door hinges are factory set so that
the door can be opened wide.
However if the opening angle of the
door needs to be limited for any reason,
the hinge can be adjusted to
accommodate this.
If, for instance, when it is opened the
appliance door would hit an adjacent
wall, you should limit the opening angle
of the appliance door to 90°:
^ Insert the limit pins provided into the
hinges from above.
This will limit the opening angle of the
appliance door to 90°.
72
Page 73

Always change the door hinge with
the assistance of another person.
The appliance is supplied right-hand
hinged. If left-hand hinging is required,
the hinges must be changed:
You will need the following tools for
changing the door hinging:
^ Open the appliance door.
^ Remove the shelves/bottle shelf from
the appliance door (depending on
model).
Changing the door hinging
^ Slightly loosen the screws d and e
on the hinges.
^
Pull off the covers a, b, c.
^ Push door f outwards and take it off
its hinges.
73
Page 74

Changing the door hinging
^ Remove the screws d completely.
^ Place the mounting bracket g on the
opposite side and loosely screw in
the screws d.
^ Remove screws e completely and
loosely screw them in on the opposite
side.
Unscrew the door closing dampers
Attention! When removed from the
unit, the soft-close mechanism
snaps shut. Risk of injury!
Place the door with the outer side
^
downwards on a stable surface.
^ Remove the soft-close mechanism h
from the ball joint.
^ Unscrew the mount i and pull the
soft-close mechanism h towards you
to remove it.
^
If you had inserted pins into the
hinges to limit the door's opening
angle: remove the pins upwards out
of the hinges.
74
^
Using a screwdriver, remove the ball
joint j and screw it into the adjacent
hole.
Page 75

Changing the door hinging
Now turn over the appliance door so
^
that outer side faces upwards
(hinges remain open).
Do not close the hinges. Danger of
injury.
^ Remove the screws k.
^ Place each hinge in the corner
diagonally opposite from its original
position l.
Fastening the soft-close mechanism
Now turn over the appliance door so
^
that the outer side faces downwards.
^ Screw the mount i onto the hinge
and firmly tighten.
^ Pull the soft-close mechanism so that
it extends h and hook it onto the ball
joint.
75
Page 76

Changing the door hinging
^ Hang the appliance door f onto the
pre-fitted screws d and
tighten the screws d and
^ Replace the covers a, b, and c.
e, and then
e.
^
Refit the locking pins into the top of
the hinges to prevent the doors
opening too far.
76
Page 77

Two people are required to install the
appliance.
Install the appliance in a stable, solid
^
housing unit, positioned on an even
and level floor.
Secure the housing unit against
^
tipping.
Installing the appliance
To install the appliance you will need
the following tools:
^ Use a level to align the housing unit.
The corners of the housing unit must
be at a 90° angle to each other,
otherwise the cabinet door will not
align correctly with all 4 corners of
the housing unit.
^
The required ventilation
cross-sections must be ensured (see
"Installation - Ventilation" and
"Installation dimensions").
77
Page 78

Installing the appliance
8
4
4
4
Parts required for installation
All installation parts are number coded.
This coding is also used in the
installation instructions.
Required for installing the
–
appliance in its housing unit:
Required for fitting the cabinet
–
door:
** Number depending on niche height.
Also contains additional installation
parts for fitting large or divided furniture
doors.
All installation instructions given are
for a right-hand hinged appliance. If
you have converted the appliance to
left-hand hinging, you will need to
adapt these instructions accordingly.
Preparing the appliance
* These parts are only supplied with
appliances with a niche height of 55''
(140 cm) or more.
** Number depending on niche height.
Also contains additional installation
parts for fitting large or divided furniture
doors.
78
^ Position the appliance in front of the
housing unit.
Page 79

^ Fit the straps of the compensation
strip a into the strut seats from the
front.
Installing the appliance
Push the appliance two-thirds of the
^
way into the installation space.
Ensure that the power cord does not
get caught.
Tip to help you push it into position:
Tie a piece of string around the plug to
"increase" the length of the power cord.
Then pull the cord by the end of the
string through the housing unit. It will
then be easier to connect once the
appliance is in the unit.
Only in the case of 5/8" (16 mm) thick
unit walls:
^
Screw fixing bracket d using hex
screw e to the pre-drilled holes in
the appliance door. Using the
pre-drilled holes in the appliance
door, secure a second pair of fixing
brackets d in the handle area of the
door.
^
Clip the spacers b and c on the
right-hand side of the hinges.
^
Open the appliance door.
79
Page 80

Installing the appliance
Screw in adjustable feet l
^
completely.
^ Remove the cover f.
^ Secure the fastening part g using
screws h loosely into the top
left-hand side of the appliance. Do
not tighten the screws so that you
can adjust the position of this part.
^
Fit the cover i onto the fixing
bracket j.
^
Then screw fixing bracket j using
screws k loosely into the bottom of
the appliance. Do not tighten the
screws so that you can adjust the
position of this part.
80
Page 81

^ Carefully remove the protective foil
from sealing strip m.
^ Secure the sealing strip m flush with
the front of the appliance on the door
opening side.
1. Position the sealing strip flush with
the lower edge of the top fixing.
2. Stick it down along its entire
length.
Installing the appliance
Installing the appliance
Push the appliance into the niche
^
until all of the brackets are in line with
the front edge of the furniture side
wall.
–
n With 5/8" 16 mm thick walls:
The spacers should touch the front
edge at the top and bottom of the
side walls of the housing unit.
–
o With 3/4" (19 mm) thick walls:
The front edges of the top and
bottom hinges should be flush with
the front edge of the housing side
walls.
81
Page 82

Installing the appliance
Check the position of the fixing
^
bracket at the top and bottom front
edge of the cabinet side wall again.
This will help maintain a 1 5/8"
(42 mm) distance all the way around
from the front edges of the cabinet
side walls.
On cabinetry with door fittings (e.g.
stubs, seals etc.) the dimension of
these must be taken into account when
making sure there is a gap all round of
1 5/8" (42 mm).
Pull the appliance forward the
^
appropriate amount to suit the
installed dimensions.
The hinges and covers will now be
positioned to suit the dimensions.
Tip: Remove the door fittings. This will
ensure that the door is flush with the
surrounding kitchen unit cabinet doors.
If the all round gap of 1 5/8" (42 mm)
is not maintained between the
appliance housing and the front
edge of the housing unit side wall,
the door may not shut properly.
This can cause ice to build up,
condensate to accumulate and lead
to faults in the appliance. These can
all lead to increased energy
consumption.
Securing the appliance in the
niche
^ p Align the appliance on both sides
by altering the adjustable feet using
the wrench supplied.
82
^
Push the hinged side of the
appliance to the cabinet wall.
^
Screw the particleboard screws s
through the hinge plates at the top,
bottom and then in the middle to
secure the appliance to the housing
unit.
Page 83

^ Push the loose bracket against the
cabinet wall.
Installing the appliance
Snap off any protruding ends from
^
the mounting bracket. They are no
longer required.
^ Replace covers f and u on the
mounting brackets.
^ Secure mounting bracket j to the
housing unit side wall with screw s.
Drill holes in the housing unit side
walls if necessary.
^
Secure bracket g to the housing unit
side walls using screws t. Drill holes
in the housing unit side walls if
necessary.
Attention! Push the protruding
bracket using your thumb towards
the housing unit wall while tightening
the screws. The appliance must not
pull back into the unit.
^
Retighten screws h and k.
83
Page 84

Installing the appliance
Only for an appliance with a niche
height greater than 55'' (140 cm)
For additional stability of the appliance
in the unit, push the rods supplied in
underneath the appliance between it
and the floor of the housing unit:
^ Then secure handle v to one of the
rods w.
^
Use the handle to push the rod into
the guide as far as it will go.
Remove the handle and fit it to the
other rod and push this into its guide
as far as it will go.
Important! Keep the handle
somewhere safe in case you ever
need to fit the appliance into a new
housing unit.
^
Close the appliance door.
84
Page 85

Installing the custom door
front
The cabinet door must be at least of
5/8" (16 mm) thick and not exceed 3/4"
(19 mm) thick.
The following gap dimensions must be
maintained:
The gap between the cabinet door
–
and the unit door above must be at
least 1/8" (3 mm).
The vertical gap between cabinet
–
doors should also be about 1/8"
(3 mm). The exact dimension will
vary depending on the radius of the
cabinet door edges.
If fitted in a run of units make sure that
the top edge of the cabinet door is at
the same height as neighboring unit
doors.
The door panel must be installed
correctly and not under tension.
Installing the appliance
Installing a door front which is
heavier than the maximum permitted
could damage the hinges. This can
cause damage.
Before installing door fronts ensure that
the weight of the door does not exceed
the maximum permitted:
Appliance Maximum weight
of furniture door
in Ib (kg)
FNS 37492 iE 50.7 (23)
When fitting large or divided cabinet
doors an extra fitting kit or set of
fixing brackets should be used.
These are available to order from
Miele.
85
Page 86

Installing the appliance
^ A gap of 5/16" (8 mm) is set ex works
between the appliance door and the
fixing bracket. Double check this gap
and reset it if necessary.
^ Push the installation aids b up to the
height of the cabinet door: the lower
edge X of the installation aids must
be at the same height as the upper
edge of the cabinet door being fitted
(see - on the diagram).
Tip: Push installation aids b together
with the cabinet front up to the height of
the adjoining unit cabinet doors.
^ Remove the nuts c and take the
mounting bracket d off together with
installation aids b.
86
Page 87

Place the door panel with the outer
^
side downwards on a stable surface.
^ Using a pencil, lightly mark a line
down the center of the inside of the
panel e.
^ Hang the fixing bracket d with the
fitting aids onto the inside of the
cabinet door. Align the bracket
centrally.
Installing the appliance
Secure the side cover q to the
^
bracket on the opposite side of the
hinge.
^ Turn the door over and attach the
handle (if required).
^
Attach the mounting bracket securely
using at least 6 short particle board
screws f. Drill holes in the cabinet
door if necessary.
^
Pull the installation aids upwards to
remove them g. Turn them around
and fit them into the middle slots on
the bracket for safe keeping.
87
Page 88

Installing the appliance
Open the appliance door.
^
^ Hang the door panel on the threaded
bolts h.
^ Screw the nuts c loosely onto bolts.
^ Close the door and check the
distance between the door and
neighboring cabinet doors. The gaps
should be even.
Adjusting the position of the door
– Side adjustments (X)
^ Adjust the door panel.
– Height adjustment (Y)
^ Tighten the nuts with a wrench h.
A gap of 3/8" (8 mm) is factory set
between the appliance door and the
bracket. This must only be adjusted
within its permitted range.
88
Page 89

Installing the appliance
^ While counterholding adjusting bolts
h with a screwdriver, tighten nuts c
on the appliance door with ring
spanner j.
^ Cover strip k must be completely
hidden in the niche, and must not
protrude.
^ Drill holes l in the door panel and fit
screws m. Make sure the two metal
edges are aligned (Symbol II).
^ Close the appliance door and the
cabinet door.
Adjusting the position of the door
–
Depth adjustment (Z)
^
Loosen screws i at the top of the
appliance door, and screw n on the
mounting bracket at the bottom. By
moving the cabinet door, create a
gap of 1/16" (2 mm) between the
cabinet door and the housing unit.
89
Page 90

Installing the appliance
Tighten all the screws again.
^
^ Replace top cover o, and click it into
place.
The following confirms that the
appliance is correctly installed:
The door must close properly.
–
The door must not touch the furniture
–
body.
The seal at the upper corner of the
–
side with the handle contacts tightly.
^
Replace side covers p, making sure
you hear them click into place.
90
Page 91

91
Page 92

FNS 37492 iE
M.-Nr. 10 117 220 / 00en-US
 Loading...