

Page 1
Producing a raw scan usin g Standard Control Panel Interface
b
b
p
p
the zoom scale
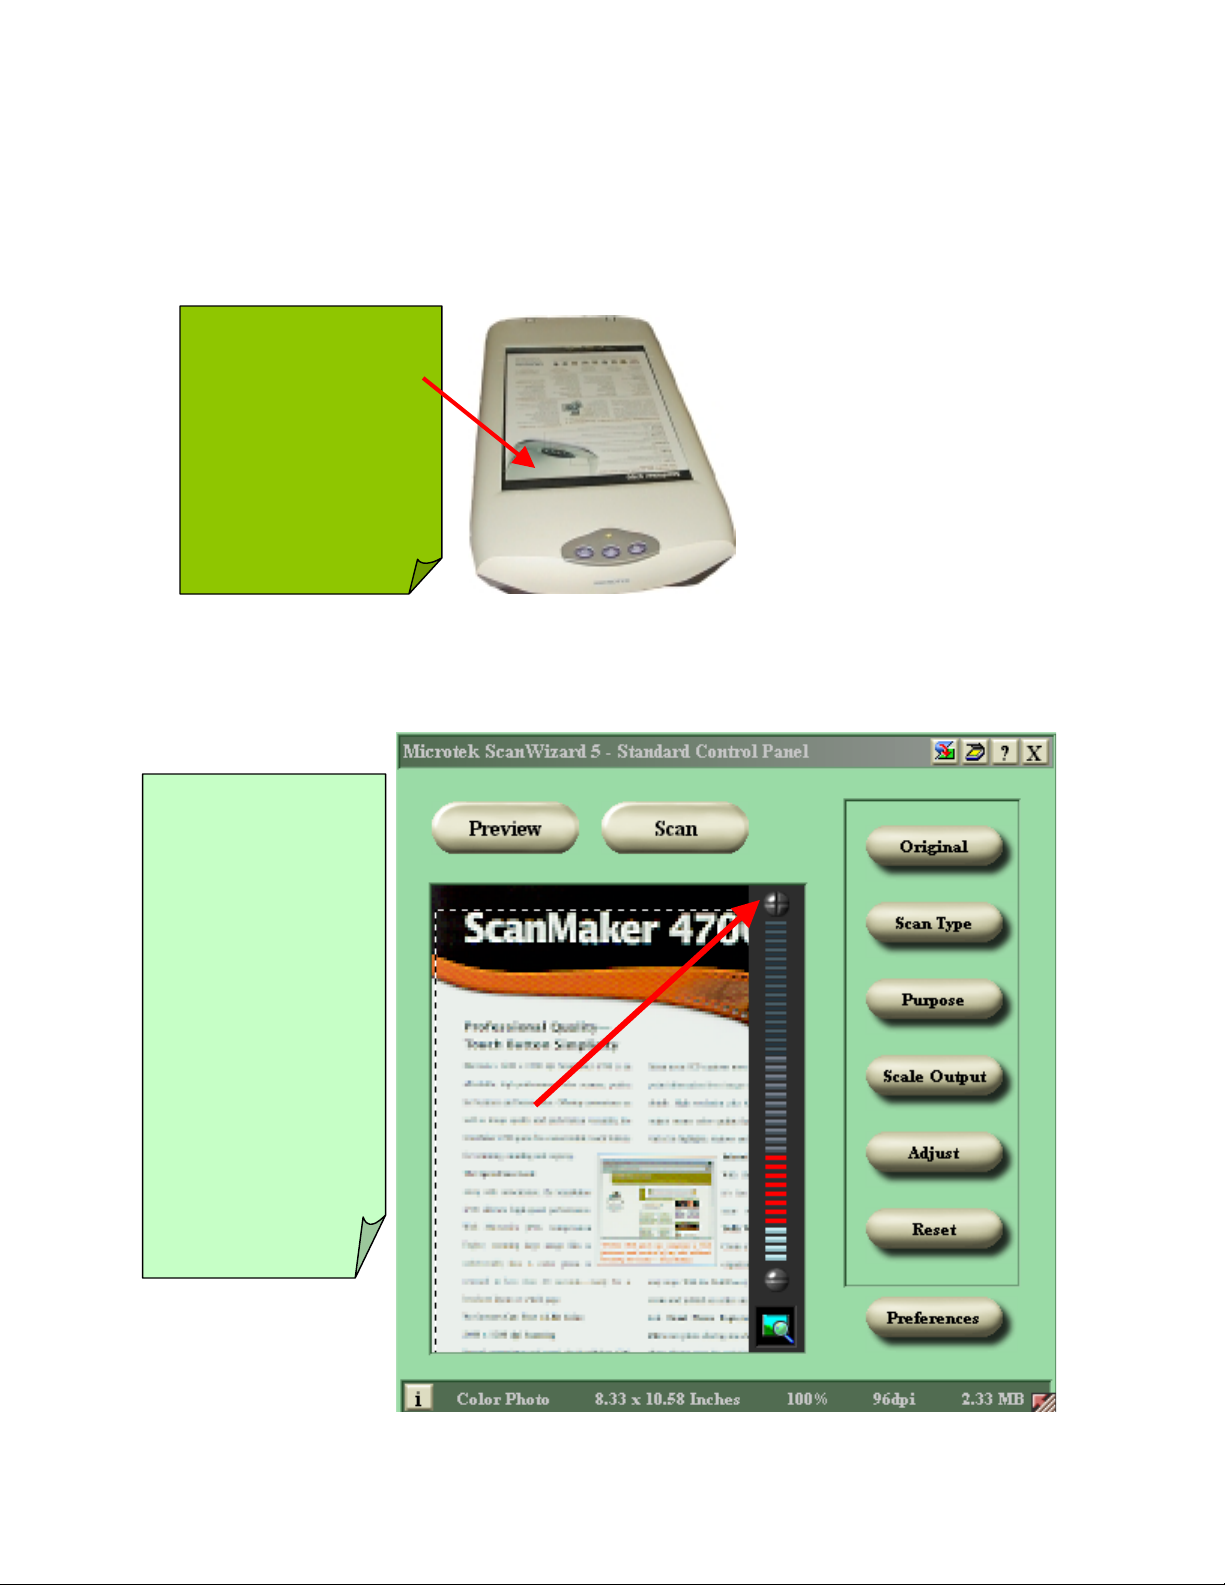
Previewing your original Image.
Placing the reflective,
positive and negative
materials on the
scanner’s glass bed.
Notice how the scan
material can easily be
aligned along the edges
of the scanner’s glass
ed.
Magnifying Your Preview Image.
ScanWizard 5
allows as much as
four times the size
of your original
preview image.
The Zoom Scale
ar (located at the
right side of your
review image) is
rovided to easily
accomplish
zooming of your
preview image.
To zoom in,
simply click on
Page 2
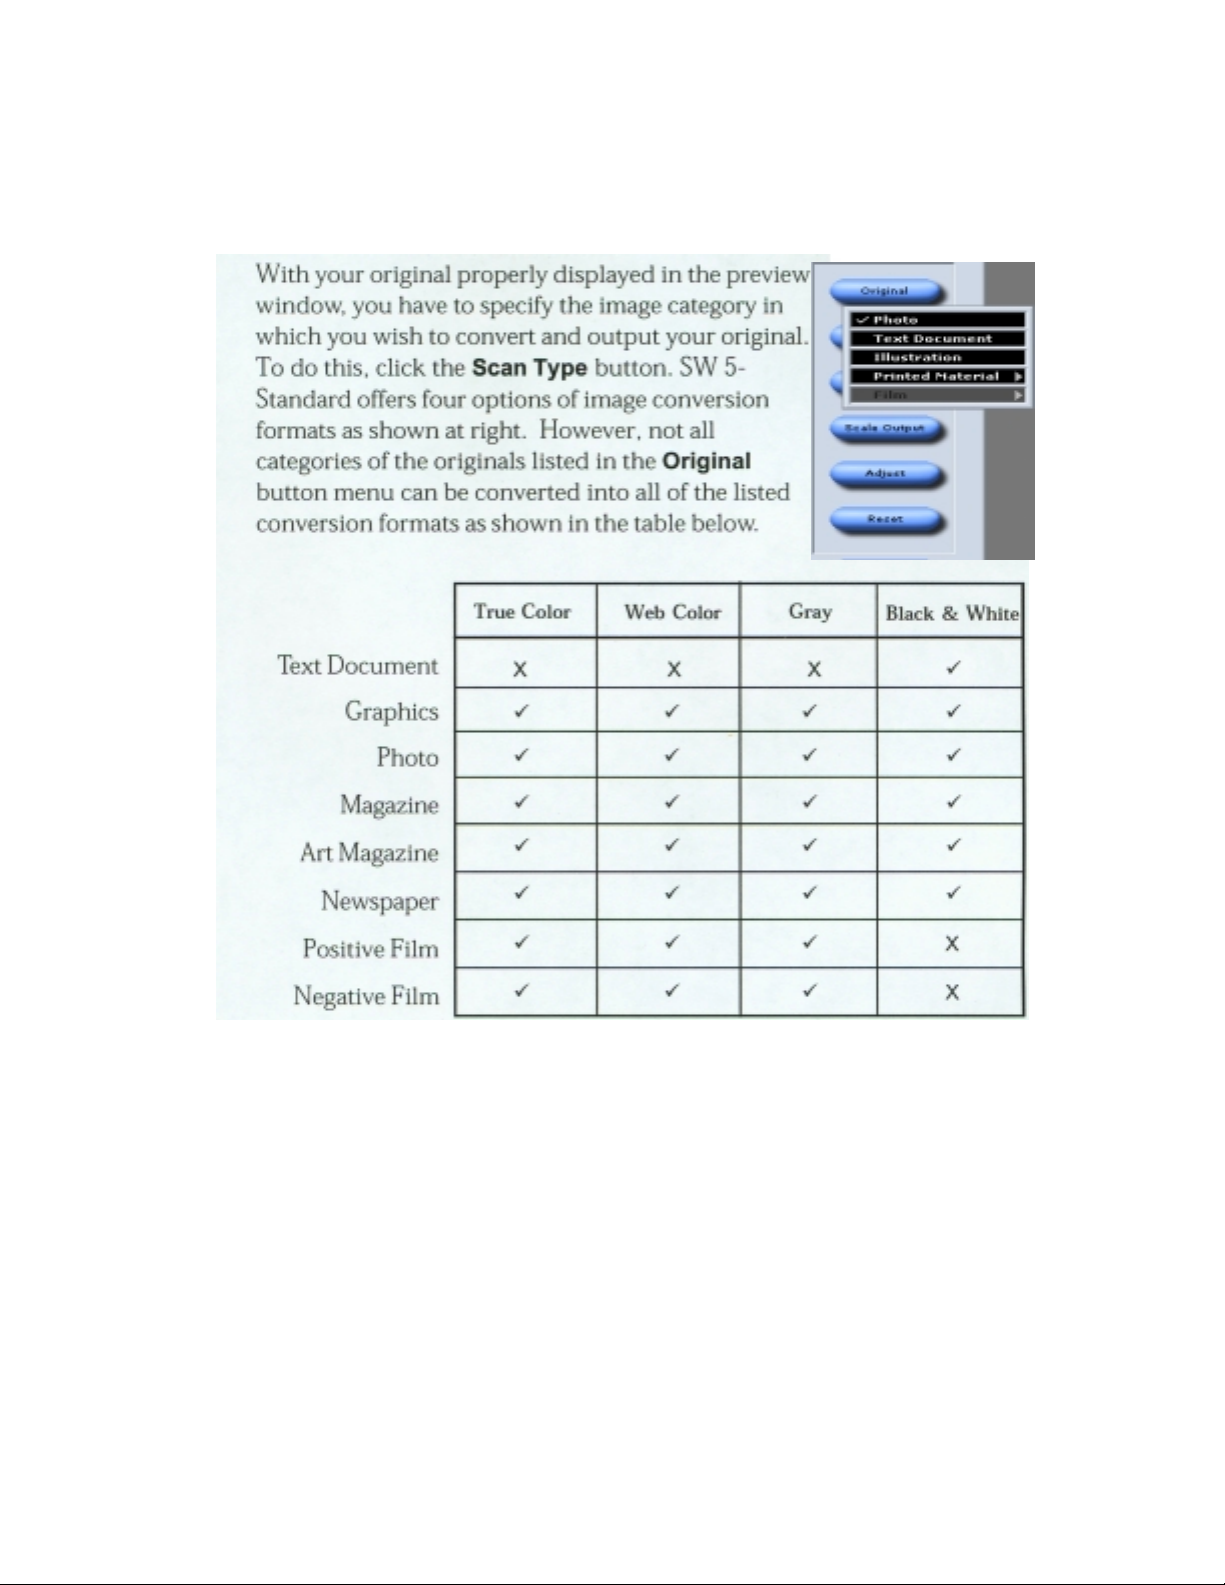
Define Type of Output Image
Page 3

Resolution of Output Image
Page 4

Intended Size of Output Image
By Default, ScanWizard 5-Standard scans your original
into an actual size (100%) output image. To change the
output image dimension, click on the Scale Output
button. From the resulting menu, select the predefined
scaled size that best matches your intended image output
dimension.
Improving Image Before Final Scan
When you scan your original image without
making any adjustments of your own.
ScanWizard 5-Standard will auto process to
enhance the quality of your digitized image by
using its default image editing settings. If you are
not satisfied with what ScanWizard 5-Standard
has done for you (as reflected in the preview
image), you may modify the default artwork and
apply your own image manipulation before final
scanning by using the image correction tools
panel under the Adjust button.
Click the Adjust button. When the image
correction panel displays, adjust the preview
image by dragging the pellet button of each tool
along its groove. Observe a live update taking
place with your preview image as you manipulate
each of the image correction tools. To reset a
correction tools. To reset a correction tool back to
its original position, click on the reset icon right
end of each tool (see figure at right).
Note that the new settings are automatically saved and will remain in effect for the
subsequent scanning sessions (after a reboot) unle ss otherwise r edefined or if they are reset
to default settings (as explained in the following section).
Page 5

Output Image Setting Information
As you perform adjustments and define various settings for the output of your original
image (as reflected in preview image), scanWizard 5- Standard monitors and makes
records of them. Part of the defined settings are displayed in the Status Bar (at the bottom
of ScanWizard 5 window) as soon as changes are made, while a separate and more
comprehensive record of the changes are kept at the same time. To view a complete record
of your settings, click on the information icon [ I ] at the left end of Status Bar. The
Image Information window then appears, listing all the current settings for your output
image. If you have not made any adjustment, the default settings will display.
Status bar showing summary
settings for output image
Click icon to display
detailed info box (right)
Drag this corner to
resize preview
window
Reset and Revert to Default Settings
Page 6

If you want to abandon the adjustments you have just made, you can easily revert to
ScanWizard 5-Standard default settings and start all over again. Click on the Reset
button. All changes you have made in the menus and control panels under Original,
Scan Type, Purpose, Scale Output, and Advance buttons are then reset back to
ScanWizard 5- Standard defaults
 Loading...