

Page 1
Published: December 2014
Surface Pro 3
Deployment and Administration Guide
Version 1.0
© 2014 Microsoft Page 1
Page 2

© 2014 Microsoft. All rights reserved.
Surface is a trademark of Microsoft Corporation.
Computrace is a trademark of Absolute Software Corporation
Reader is a trademark of Adobe Systems Incorporated
Java is a trademark of Oracle Corporation
This document is provided “as-is.” Information in this document, including URL and other Internet website references, may change without notice.
© 2014 Microsoft Page 2
Page 3

Contents
PART I – DEPLOYMENT OVERVIEW
Chapter 1 – Overview ................................................................................................................................................ 9
Purpose of This Guide ............................................................................................................................................ 9
Audience ................................................................................................................................................................ 9
How This Guide is Organized ............................................................................................................................... 10
Document Conventions ....................................................................................................................................... 11
What’s Not in This Guide ..................................................................................................................................... 11
Chapter 2 – Deployment Introduction .................................................................................................................... 12
Deployment Concepts .......................................................................................................................................... 12
Deployment and Imaging ................................................................................................................................ 12
Sysprep and Generalization ............................................................................................................................. 13
Image Servicing ................................................................................................................................................ 14
Licensing .......................................................................................................................................................... 15
Deployment Types ........................................................................................................................................... 16
Deployment Tools ................................................................................................................................................ 17
Factors and Considerations ............................................................................................................................. 17
Third Party Tools .............................................................................................................................................. 18
Microsoft Tools ................................................................................................................................................ 18
Microsoft Deployment Toolkit ............................................................................................................................. 22
The Deployment Workbench .......................................................................................................................... 22
Deployment Shares ......................................................................................................................................... 23
Windows Deployment Wizard ......................................................................................................................... 25
Driver Management ........................................................................................................................................ 26
Application Management ................................................................................................................................ 26
Package Management ..................................................................................................................................... 27
Task Sequences ................................................................................................................................................ 28
Considerations for Images ................................................................................................................................... 29
The Single Image Goal ..................................................................................................................................... 29
Using a Virtual Machine as a Reference System ............................................................................................. 30
Selecting Applications for the Base Image ...................................................................................................... 30
© 2014 Microsoft Page 3
Page 4

Planning for Deployment ..................................................................................................................................... 31
Laboratory Testing ........................................................................................................................................... 31
Pilot Deployments ........................................................................................................................................... 32
Staggered Deployments .................................................................................................................................. 33
“White Glove” Delivery ................................................................................................................................... 33
PART II – DEPLOYMENT STEP-BY-STEP
Chapter 3 – Manual Deployment with MDT............................................................................................................ 36
Installing Deployment Tools................................................................................................................................. 37
Windows Assessment and Deployment Kit ..................................................................................................... 37
Microsoft Deployment Toolkit ........................................................................................................................ 39
Windows Deployment Services ....................................................................................................................... 41
Creating a Deployment Share .............................................................................................................................. 45
Importing an Operating System ...................................................................................................................... 48
Importing Drivers ............................................................................................................................................. 50
Creating the Task Sequence ............................................................................................................................ 58
Preparing Boot Media .......................................................................................................................................... 61
Generating Boot Media ................................................................................................................................... 61
Importing Boot Media into WDS ..................................................................................................................... 62
Deploying the Basic Scenario ............................................................................................................................... 63
Booting from the Network .............................................................................................................................. 63
Windows Deployment Wizard ......................................................................................................................... 65
Chapter 4 – Reference Deployment with MDT ....................................................................................................... 68
Configuring Deployment Share Rules .................................................................................................................. 70
Configuring Windows Deployment Wizard Rules ........................................................................................... 71
Configuring Boot Media Rules ......................................................................................................................... 74
Creating a Reference Deployment Task Sequence .............................................................................................. 75
Enabling Windows Updates ............................................................................................................................. 76
Deploying to the Reference System ..................................................................................................................... 77
Customizations to the Reference Image .............................................................................................................. 80
Customizing the Wallpaper ............................................................................................................................. 80
Customizing the Default User Account Picture ............................................................................................... 81
Customizing Windows Store Apps ................................................................................................................... 83
© 2014 Microsoft Page 4
Page 5

Customizing the Start Screen .......................................................................................................................... 86
Creating a Capture Task Sequence....................................................................................................................... 88
Creating an Image from the Reference System ................................................................................................... 90
Testing the Image ................................................................................................................................................. 92
Importing the Captured Image ........................................................................................................................ 92
Creating the Test Deployment Task Sequence ................................................................................................ 92
Deploying the Captured Image ........................................................................................................................ 95
Chapter 5 – Automated Deployment with MDT...................................................................................................... 96
Disabling WDS PXE Boot ...................................................................................................................................... 97
Creating the Production Deployment Share ........................................................................................................ 98
Customizing Rules for Automation .................................................................................................................. 98
Customizing Task Sequence Selection by Model........................................................................................... 100
Importing the Custom Image ............................................................................................................................. 103
Importing Drivers ............................................................................................................................................... 104
Importing Applications ....................................................................................................................................... 104
Importing Adobe Reader ............................................................................................................................... 105
Importing Oracle Java .................................................................................................................................... 106
Importing Microsoft Office ............................................................................................................................ 107
Creating the Production Deployment Task Sequence ....................................................................................... 112
Testing the Production Deployment .................................................................................................................. 114
Creating the Offline Deployment Share ............................................................................................................. 115
Linking the Deployment Shares ..................................................................................................................... 116
Preparing a USB Stick for Boot ...................................................................................................................... 119
Generating Offline Media Files ...................................................................................................................... 120
Configuring Offline Media Rules .................................................................................................................... 121
Finalizing the Offline Media ........................................................................................................................... 123
Deploying from Offline Media ........................................................................................................................... 124
Chapter 6 – Automated Deployment with SCCM .................................................................................................. 126
Integrating MDT with SCCM............................................................................................................................... 128
Importing Surface Pro 3 Drivers ......................................................................................................................... 129
Importing the Drivers for the Boot Image ..................................................................................................... 129
Importing the Drivers for Windows 8.1 ......................................................................................................... 133
© 2014 Microsoft Page 5
Page 6

Importing the Operating System Image ............................................................................................................. 135
Creating the Deployment Task Sequence .......................................................................................................... 136
Specifying Drivers to Use in the Deployment Task Sequence ....................................................................... 140
Specifying the CopyProfile setting in the Answer Profile .............................................................................. 141
Deploying the Operating System Task Sequence to the Client .......................................................................... 143
Updating Distribution Point Components ..................................................................................................... 143
Deploying to Existing SCCM Clients ............................................................................................................... 143
Deploying to New or Unknown Computers .................................................................................................. 148
PART III – ADMINISTRATION
Chapter 7 – Administration Overview ................................................................................................................... 153
Management Tools ............................................................................................................................................ 153
System Center Configuration Manager ......................................................................................................... 153
Windows Intune ............................................................................................................................................ 154
Group Policy .................................................................................................................................................. 154
Features ............................................................................................................................................................. 154
Firmware ........................................................................................................................................................ 154
Asset Tagging ................................................................................................................................................. 154
BitLocker Encryption ...................................................................................................................................... 155
Computrace Persistence ................................................................................................................................ 155
Miracast Wireless Display .............................................................................................................................. 155
Accessories ......................................................................................................................................................... 155
Surface Pen .................................................................................................................................................... 155
Surface Ethernet Adapter .............................................................................................................................. 155
Surface Pro 3 Docking Station ....................................................................................................................... 156
Surface Pro Type Cover ................................................................................................................................. 156
User Serviceability ......................................................................................................................................... 156
Business Support Channels ............................................................................................................................ 156
Chapter 8 – Administration Scenarios ................................................................................................................... 157
Asset Tagging ..................................................................................................................................................... 157
BitLocker Encryption .......................................................................................................................................... 157
Enabling PIN Authentication on Surface Pro 3 .............................................................................................. 158
Encrypting During MDT Deployment ............................................................................................................ 158
© 2014 Microsoft Page 6
Page 7

Pen Pairing ......................................................................................................................................................... 159
Migrating User Data ........................................................................................................................................... 160
Migrating Data in Replace Scenarios ............................................................................................................. 160
Migrating Data in Refresh Scenarios ............................................................................................................. 162
System Tracking ................................................................................................................................................. 163
Deploying Computrace with MDT ................................................................................................................. 163
PART IV – APPENDIX
References ............................................................................................................................................................ 165
© 2014 Microsoft Page 7
Page 8

PART I
DEPLOYMENT
OVERVIEW
© 2014 Microsoft Page 8
Page 9

Chapter 1 – Overview
Purpose of This Guide
This guide was constructed to show you best practices for deploying Windows to Surface Pro 3 devices. This may sound
like a simple enough statement, but due to the vast number of scenarios and concepts, deployment can be quite
complex. This guide is organized in a way that minimizes the learning curve for you to understand how to deploy
Windows to the Surface Pro 3 devices to your organization. It presents step-by-step procedures that provide essential
building blocks for successive chapters. Therefore, it is a good idea to read the chapters in order.
The deployment concepts discussed in this guide are valid for all Windows computers, but specifically targets scenarios
for Surface Pro 3 devices.
You’ll see many screenshots in this document, but in an effort to keep the document as short as possible, some images
for basic options are described, but not shown.
Audience
This guide is intended for IT Professionals (IT Pros) that are responsible for managing and conducting rollouts of
Windows devices within an organization. This guide is written specifically to account for scenarios that are typically
experienced by organizations of all sizes, since many of the deployment concepts are not specific to organization size.
However, there are some scenarios, tips, and other guidance that is likely to be experienced specifically by a small or
medium business (SMB), or by a large business (enterprise). When the guidance differs by organization size, this is
specifically called out in this guide. This guide does not assume specific software is available only to a specific size
organization. For example, it does not assume only a large enterprise uses System Center.
If you have deployed Windows using a 3rd-party tool (a.k.a non-Microsoft tool), this guide provides a comprehensive
introduction into best practices for deploying Windows to Microsoft Surface Pro 3 devices. As you’ll learn, the best
practice for deployments of all sizes is to use the free Microsoft Deployment Toolkit (MDT). New users and experience
deployment professionals alike will gain insights from reading this guide. The Microsoft Deployment Toolkit is explored
in more detail in the Microsoft Deployment Toolkit section of Chapter 2 and is featured throughout the step-by-step
guidance in Part II of this guide.
Although the Microsoft Deployment Toolkit is the primary technology used throughout this guide, it is used in
conjunction with other Microsoft technologies as part of the overall solution. For example, in Chapter 6: Automated
Deployment with SCCM, the Microsoft Deployment Toolkit is integrated with Microsoft System Center Configuration
Management to leverage the functionality of both tools.
For administrators who are experienced with Windows deployment and the Microsoft Deployment Toolkit, specific
information is provided that addresses many of the key tasks for Surface Pro 3 and Windows deployment. To help
identify the locations where these concepts are discussed, a brief list has been provided here:
Application Deployment – Chapter 5
Windows Updates – Chapter 4, Chapter 5, and Chapter 6
Surface Pro 3 Firmware – Chapter 5, Chapter 6, and Chapter 7
© 2014 Microsoft Page 9
Page 10

BitLocker Encryption – Chapter 8
Asset Tagging – Chapter 8
Network Boot – Chapter 3, Chapter 4, Chapter 5, Chapter 6, and Chapter 8
Deployment Planning – Chapter 2
Offline Deployment – Chapter 5
System Tracking – Chapter 8
Surface Pro 3 Features – Chapter 7
Windows Store Apps – Chapter 4
Surface Pro 3 Administration – Chapter 7 and Chapter 8
How This Guide is Organized
This guide is organized in a series of parts and chapters that present increasingly complex concepts that build upon each
other. Therefore, it is recommended to read this document in sequential order. Even if you are familiar with
deployment concepts, there are some important tips you’ll learn along the way.
This guide is organized as follows:
PART I: DEPLOYMENT OVERVIEW
o Chapter 1: Overview – This chapter.
o Chapter 2: Deployment Introduction – Outlines basic concepts and terms needed as a prerequisite for
performing the step-by-step walkthroughs shown in Part II. Experienced deployment professionals may
be able to skip this chapter, but novice deployment professionals should read this chapter.
PART II: DEPLOYMENT STEP-BY-STEP
o Chapter 3: Manual Deployment with MDT - Provides a walkthrough of a basic, standalone deployment
of the operating system. This is a manual deployment because it provides no automation, thereby
forcing the user to enter required setup data throughout the process. The resulting operating system
contains no applications or configuration, so these will need to be installed or configured on each
computer.
o Chapter 4: Reference Deployment with MDT – Builds upon the manual deployment scenario, but starts
to introduce some automation. User interaction required during deployment is less than the manual
deployment, but more than a fully automated deployment. This scenario is used to prepare a reference
system and create an image for use in Chapter 5 and Chapter 6. Deployment of the image to a test
computer is also covered, but this test computer contains no drivers or applications.
o Chapter 5: Automated Deployment with MDT– Builds upon the reference deployment scenario with
additional automation, requiring minimal user interaction during deployment. This scenario uses the
image created in Chapter 4 and also deploys applications and drivers. The resulting operating system is
ready for use when the deployment completes. This scenario also addresses both online deployment for
network joined systems and offline deployment for systems without network connectivity.
o Chapter 6: Automated Deployment with SCCM – Adds System Center Configuration Manager and
support for zero-touch installation (ZTI) to produce an automated deployment requiring no interaction
from the user. This scenario uses the image created in Chapter 4 and includes applications and drivers
that are managed by System Center Configuration Manager. The resulting operating system is complete
© 2014 Microsoft Page 10
Page 11

with applications and drivers, is configured for central management through SCCM, and is ready for use
by the end user.
PART III: ADMINISTRATION
o Chapter 7: Administration Overview – Describes Surface Pro 3 administration and concepts.
o Chapter 8: Surface Pro 3 Administration Scenarios – Outlines Surface Pro 3 administration by showing
how to manage these settings and features:
Asset Tagging
BitLocker Encryption
Pen Pairing
User Data Migration
System Tracking
PART IV: APPENDIX
Document Conventions
The conventions used in this document are as follows:
Bold text – Indicates a literal name of an object on a screen, such as a button, link, option, or menu.
Italicized text – Indicates the first time a term is used.
Monospace text – Indicates code or script that can be copied/pasted and used in your environment.
Ctrl+F – Indicates the Ctrl and F keys are pressed simultaneously.
FileSave – Indicates a series of menu clicks.
Note – Indicates some additional information or considerations for a concept, option, or configuration.
Caution – Indicates special warning or tip to consider that may adversely affect your computer.
What’s Not in This Guide
This guide focuses on a variety of scenarios for Windows deployments. However, this guide assumes you already have
knowledge of these specific areas of administration and IT:
Windows Networking
Windows Server
Windows Firewall
Hyper-V
System Center Configuration Manager
© 2014 Microsoft Page 11
Page 12

Chapter 2 – Deployment Introduction
Deployment Concepts
This section discusses the concepts you’ll need to gain an overall understanding of the deployment process for the
Windows operating system and the tools available to your organization. Please read this section before continuing with
the rest of this deployment guide.
Deployment and Imaging
The simplest way to transfer an operating system onto a single computer is known as installation. Installation simply
refers to running a setup application supplied with the original media and following the prompts on the screen. For one
computer (or a small number of computers), this can be an ideal way to upgrade a computer’s operating system, or for
single bare metal machines. The setup application prompts for basic information to be manually entered and once the
default environment is prepared, the system can be manually customized with applications, drivers, and settings.
As the number of computers in your organization increases, it becomes less efficient (or even impossible) to install an
operating system on all computers by using a setup application. It becomes essential to employ methods of installation
that not only reduce the time and effort, but standardize the resulting systems. For more than one computer, you need
an efficient process to distribute the operating system and configuration to each, a process known as deployment.
The simplest method of deploying to multiple computers is cloning, whereby the process of installation and
configuration is performed on a single computer and the disk drive is mirrored to the other computers. This produces
multiple identical computers. One key problem with this approach is that you need to physically remove the storage
media, such as the hard drive(s), connect them to the system you are cloning, clone the drive, then reinstall the devices.
Another is that the hardware configuration of the computers must be identical. Even minor variations in hardware can
result in a computer that will not boot or function as intended.
These limitations are addressed by the process of imaging. Imaging works similar to cloning in that the target computer
contains the source computer’s files, but rather than directly transferring all files to the destination disk, the
configuration of the source disk is stored as a data file. Because this file represents an exact copy of the source, it is
known as an image. The image file can be transferred, or distributed, through a variety of means including removable
media (USB hard drive), optical disks (DVD, BluRay, etc.), or over standard network connectivity.
The first step in an image-based deployment is configuring the computer that is used as the source environment for
generating an image to be deployed. This source environment is often referred to as the reference system. Once the
reference system is configured, it is stored as an image file through a process known as capturing an image. The process
of capturing an image cannot be performed while files are in use, so before capturing can begin, you must boot the
reference computer to an alternative operating system. The device that contains the alternative operating system is
known as the boot media.
Note: The image created from the reference system is commonly known as the reference image or base image. This
image serves as the core configuration on which the environment for every deployed computer is built.
Boot media can reside on removable storage (such as a USB stick or optical media), but can also be located on your
network. If you use your network as boot media (also known as PXE boot), your computer’s network card must support
© 2014 Microsoft Page 12
Page 13

the Preboot Execution Environment (PXE) standard. The Surface Pro 3 supports PXE boot through the docking station or
Surface Ethernet Adapter. Your reference computer is likely to boot to the hard disk first, so you often need to change
the boot order in the system firmware to boot to the boot media containing the alternative operating system. Most
computers, including Surface Pro 3, provide a boot menu that enables a device to be selected at startup. Details of how
you select your boot media on Surface Pro 3 are shown in Chapter 3.
Once an image file is created, it is stored on local or network storage so that it can later be transferred, or deployed, to
the destination computers. This step also involves the alternative operating system provided by boot media, but is
effectively the reverse of a capture step, whereby the data in the image file is read and then written to the disk on the
new computer.
Sysprep and Generalization
The result of both the imaging and cloning procedures is a set of virtually identical computers. While in many ways you
want the destination computers to be identical to the reference computer, you don’t want everything to be identical.
For example, you don’t want the same computer identification and possibly the license/product keys (depending on the
type of license) on multiple computers.
The Windows operating system maintains an identifier which enables each Windows computer to appear as a unique
and individual computer when connected to the network. This Security Identifier, or SID, if identical between two
systems can produce conflicts with networking software. This is similar to the way you cannot have two computers with
the same IP address on the same network. A notable example of software that conflicts with an environment with
identical SIDs is Windows Server Update Services (WSUS).
Another scenario where a destination computer and reference computer differ is where there is a variation or change in
the hardware configuration. This variation can be a small change, such as using a discrete graphics card rather than the
onboard graphics card, or it can be two completely different models of computer where almost every device differs.
Drivers from the reference computer could cause conflicts in the destination computer or even result in the computer
being unable to boot.
Since a captured image will be identical to the reference system (including SID and licensing data), this data must be
removed before it can be deployed. The solution is to use the System Preparation Tool (Sysprep), which is a utility
designed to assist with deployment and creation of images. Sysprep works in conjunction with Windows Setup to reset
an existing Windows environment to a state in which this information can be regenerated for each new system to which
the environment is deployed. This process is known as Generalization. When Sysprep runs, it removes the undesired
configuration and information from the system, then reboots to a phase of Windows Setup known as Windows
Welcome or the Out of Box Experience (OOBE).
Note: If you don’t run Sysprep, the system is not considered unique, and therefore is not compliant with Microsoft
support policy.
The purpose of the OOBE is to present the user with the same welcome screen and prompts as he/she would experience
during a typical Windows installation/setup. As expected, the OOBE experience prompts for basic information like
computer name, workgroup or domain, and product key.
In some cases you want your users to experience OOBE. An example is those cases where the domain or workgroup of
the deployed computers may vary, or where the product key will change for each computer and will require it to be
© 2014 Microsoft Page 13
Page 14

entered manually. Another example is the pairing wizard for the Surface Pen for Surface Pro 3, which is covered in more
Sector-Based Images
File-Based Images
Not Serviceable
By drive
Destructive
Not Flexible
Serviceable
By partition
Non-Destructive
Flexible
detail in the Pen Pairing section of Chapter 8.
In other cases, many of the answers to question prompts are known in advance and are therefore predetermined. In
these cases Windows Setup can be configured to supply these predetermined answers to avoid prompting the user.
Answers to the setup questions are stored in an Answer File. In addition to supplying answers for the prompts which are
presented by the OOBE experience, a wide variety of additional settings are available which instruct Windows Setup to
perform additional tasks or to alter its behavior. A complete reference of the available settings for an answer file and
Windows Setup is linked in the References section of the Appendix.
Image Servicing
Some 3rd-party imaging tools capture images by reading each sector of the storage media and creating an exact
duplicate of the storage media. This type of image is referred to as a sector-based image. Sector-based images have two
disadvantages: lack of granularity and poor serviceability.
When a sector-based image is applied to a system, it overwrites the configuration of the storage media that includes
partitioning, file systems, etc. As such, it is impossible to apply only part of the image or to apply the image in a way that
is non-destructive to the files that reside on the storage media.
As sector-based images lack the ability to distinguish between individual files within the image, they are also difficult to
modify, or service, after creation. To explore the files within a sector-based image, a mounting solution is required that
emulates a hardware device and presents the data to the operating system sector-by-sector. Due to this level of
complexity required for sector-based images to access the files within an image, making modifications or alterations to
the files within an image is often less efficient than deploying that image to a system, modifying it, then recapturing.
On the other hand, file-based images, such as those created in the Windows Imaging format (WIM), are not subject to
the limitations of sector-based images. File-based images are captured at the file system level and thus are aware of the
individual files within them. They can be thought of as a large ZIP or archive file in which all of the files for the
environment are stored. They can be deployed to an existing file system without destruction of the data in that file
system, which is beneficial for migration scenarios where preservation of user data is required.
File-based images can also be edited directly using tools for servicing the image. For example, an existing file-based
image that is configured for a specific make and model of computer can have the drivers and files required for another
computer injected or inserted into the image so that it can be deployed to a platform for which it was not originally
intended. Another example is where Windows Updates can be applied to a Windows image to ensure that the deployed
computer is fully up-to-date.
Table 2.1 outlines the benefits of the different types of image technologies.
Table 2.1: Benefits of Imaging Technologies.
© 2014 Microsoft Page 14
Page 15

Licensing
An important consideration when deploying the Windows operating system is how licensing will be managed for the
deployed devices. There are four standard solutions for the management of licenses and each has implications for the
deployment process. These four solutions, described in the following sections, are:
Single license key
Multiple Activation Key (MAK)
Key Management Service (KMS)
Active Directory-Based Activation (ADBA)
Single License Key
Single license keys are available in several varieties, including Original Equipment Manufacturer (OEM), retail or Fully
Packaged Product (FPP), and retail upgrade. In a deployment scenario where the devices are licensed through OEM or
FPP channels, the license key will need to be manually entered on each computer individually to properly facilitate
activation. Some computers can have operating system product keys embedded into the system firmware through OEM
Activation 3.0 (OA 3.0). This includes the product key supplied with the Windows 8.1 Professional installation included
with the Surface Pro 3. The order of precedence for product key activation is:
1. Answer file
2. OA 3.0 product key in the system firmware
3. Product key prompt
As such, in order to ensure the OA 3.0 key is used in a deployment to the Surface Pro 3, no answer key should be
specified in an answer file or included in the image.
Multiple Activation Key (MAK)
For organizations with Volume Licensing agreements, there are three methods managing licenses. The first is Multiple
Activation Key (MAK), which is a license key that can be used on more than one computer, though it must be activated
on each. To deploy Windows with a MAK, include the key in the deployment task sequence or specify they key with the
answer file. For more information about task sequences, see the Task Sequences section in this chapter.
Key Management Services (KMS)
Another method of managing volume licenses is Key Management Services (KMS). With KMS, an organization maintains
a server that manages activation of the clients and communicates the activation data back to Microsoft. To deploy
Windows using KMS, no key is required during deployment. Volume License versions of the Windows Client are preconfigured as KMS clients and will attempt to discover a KMS host if no other qualifying license is discovered.
© 2014 Microsoft Page 15
Page 16

Note: The deployment of images in organizations with Volume Licensing agreements for Windows 8.1 Professional is
governed by the Reimaging Rights conferred with that Volume Licensing agreement. This agreement enables reimaging
from volume license media to devices with preinstalled versions of the same product. For example, an organization with
a pre-existing Windows 8.1 Professional image created from volume license media can deploy that image to the Surface
Pro 3 licensed for Windows 8.1 Professional using the license for Windows 8.1 Professional (OEM) included with the
system. These rights apply only to the same edition and version of Windows. For example, a Windows 8.1 Enterprise
image cannot be used with a Windows 8.1 Professional license. It is recommended to use Volume License Media for
deployment to Surface Pro 3.
Active Directory-Based Activation (ADBA)
Beginning with Windows 8, a new activation method was introduced that allows activation through an Active Directory
domain. This method enables central activation and management of licensing without requiring the infrastructure
necessary for KMS. Active Directory-Based Activation is managed through the Volume License Activation and
Management Tool (VAMT), a component of the Windows Assessment and Deployment Kit (Windows ADK) covered in
the Microsoft Tools section later in this chapter.
Deployment Types
A deployment can be categorized by the amount of interaction required of a user during the deployment process. The
three types of deployment are:
High-Touch Installation
Lite-Touch Installation
Zero-Touch Installation
It is possible to deploy using more than one deployment type. For example, to deploy to a new computer which is not
configured for a management solution or internal network, some level of interaction is required to cause the system to
initiate the deployment process, though the process of deployment could be entirely automated as a zero-touch
deployment. Each deployment type is discussed in the following sections.
High-Touch Installation
High-touch deployments are characterized by a large degree of user interaction during deployment. A typical high-touch
deployment requires the user to perform each separate task manually, often from the command-line. Usually drivers,
applications, and customization are all performed manually by the user as well, often on each deployed system. Hightouch deployments are rarely used in scenarios with multiple computers due to the inefficiency and time involved.
Note: A sub-category of high-touch deployment is full-touch installation, a term that is usually used to describe
installation from the original installation media and manual installation of applications and drivers.
Lite-Touch Installation
Lite-touch installation (LTI) is a deployment strategy that requires a user to manage and monitor the deployment
process, but eliminates many of the repetitive steps and processes, which increases the efficiency of the deployment.
The user is often required to boot to the deployment media and to answer basic questions such as the name of the
computer and to join a workgroup or domain, but the environment is pre-configured with applications and drivers
© 2014 Microsoft Page 16
Page 17

which eliminates the need for separate installation or configuration. The deployment can be fully automated but still
have to be manually initiated. The Microsoft Deployment Toolkit (MDT) is the recommended tool for LTI deployments.
The scenarios covered in Chapter 3, Chapter 4, and Chapter 5 are all lite-touch deployments.
Zero-Touch Installation
In a zero-touch installation (ZTI) deployment there is no human interaction on the client computer. The deployment is
performed entirely from the deployment server. Zero-touch deployments usually require a refresh or migration
scenario, where the target computers can be instructed to initiate the deployment and utilizes a management solution
like System Center Configuration Manager. Zero-touch deployment is covered in Chapter 6.
Deployment Tools
There are many factors to consider when selecting the deployment tools you will use in your organization. This section
outlines those tools and helps you understand the factors and considerations to make the appropriate decision for your
deployments.
Factors and Considerations
When selecting deployment tools and technologies for application in your organization and environment, there are
several factors which bear consideration:
Ease of use
Serviceability
Scalability
Automation
Compatibility
Price
Ease of use
Ease of use must be seen from two perspectives: the experience of the user or team setting up the infrastructure and
the individual or team doing the deployment.
Investing in some automation may initially take some time and require specialized skills, but will make device
deployment easier, faster and more consistent in the long run for those actually doing the deployment.
Serviceability
Serviceability was briefly covered earlier in this chapter. Using a file-based imaging technology makes it possible to
service the image, whereas sector-based technologies does not. Serviceability ensures the ability to modify an image to
keep software updates current, as well as the ability to modify components such as drivers and applications to address
new platforms and scenarios. Sector-based imaging by contrast often requires that an image be deployed to a reference
machine, manually updated or modified, and then re-captured whenever updates or changes are required.
Scalability
Scalability refers to the ability to use your selected technologies for deployment as your organization grows or you
rollout to larger parts of your company. A solution which supports network deployment is a must for scalability.
© 2014 Microsoft Page 17
Page 18

For larger deployments, there are additional scalability considerations, such as:
Selecting technologies that maximize performance by minimizing network traffic
Do the technologies cover multiple scenarios, such as:
o Deployment to field or disconnected workers
o Distribution across sites or subnets
o Bring Your Own Device (BYOD) scenarios
o Virtual Desktop Infrastructure (VDI) scenarios
Automation
Automation refers to the ability of a deployment task to be performed without human interaction. Some key
considerations in determining the level of automation provided by a deployment tool are:
Minimizing time and effort required to configure and deploy to your organization.
Ability to reduce repetitive tasks, such as application installation, user data migration, etc.
Ability to configure using graphical, on-screen wizards, instead of complex command-lines. The more complex
and manual a process is, the more the possibility exists that errors will be introduced.
Compatibility
A key requirement of any deployment technology is the compatibility of the solution with the hardware and operating
systems in your environment. For example, some deployment tools lack the ability to deploy to latest generation
hardware due to changes in the way that storage and firmware are managed. For example, Surface Pro 3 is a UEFI 2.3.1
class 3 device, so many older technologies may not be compatible.
Price
The cost of a deployment solution is an important consideration. You may have some deployment solutions already
implemented or licensed in your environment. For example, Windows Deployment Services is a feature included with
Windows Server or you may have System Center Configuration Manager already implemented as a management
solution. Some of the technologies discussed in this guide, such as Microsoft Deployment Toolkit and Windows
Automated Deployment Kit are available at no charge.
Third Party Tools
This guide is written to highlight Microsoft technologies, but it is possible to use some third-party tools and technologies
to deploy Surface Pro 3 devices. While this guide is unable to address specific third-party tools, there are two factors to
consider:
1. Many third-party tools use sector-based imaging, which makes servicing and automation difficult or impossible.
2. Some third-party tools simply serve as a wrapper around Microsoft tools and technologies. These third-party
tools may leverage boot media provided by Microsoft tools, or employ a mounting solution for servicing sectorbased images, but use Microsoft technologies to do so.
Microsoft Tools
There are many deployment tools and technologies provided by Microsoft for Windows deployment. These tools
provide a variety of solutions that range in complexity and functionality. Some tools are very specific utilities designed
© 2014 Microsoft Page 18
Page 19

to perform only a single task, others are complete solutions that can perform every step of a deployment. Most of the
Tool/Technology
Purpose
Windows System Image Manager (Windows SIM)
Creates and verifies answer files
Deployment Image and Servicing and Management (DISM)
Services and modifies images and
environments
tools can be integrated into a complete solution accessed through a single interface, providing a combination of
functionality and ease of administration. More details about these tools and solutions are provided in the following
sections.
Windows Deployment Services
Included with Windows Server, Windows Deployment Services (WDS) is a solution for the network distribution of images
and boot media. WDS provides support for PXE booting which helps to eliminate the need for physical boot media when
performing lite-touch deployments. It also natively supports the deployment of images in the file-based Windows
Imaging Format (WIM), which is common to all modern Microsoft deployment solutions.
WDS supports management of drivers and the creation of images and can serve as a powerful deployment solution by
itself, but works best when combined with the Microsoft Deployment Toolkit covered later in this chapter to provide
additional capacity for automation and customization during the deployment process. The version of WDS included with
Windows Server 2012 or newer is required for support of UEFI 2.3.1 devices like Surface Pro 3.
Note: For smaller environments without access to Windows Server, the cost of implementing Windows Server to use
WDS may be prohibitive. However, Microsoft Deployment Toolkit (MDT) is available at no cost and will operate on a
client computer. Even if you are using Windows Server, installing MDT on a client computer can reduce workload by
enabling the deployment storage location to be hosted by a Windows client while still supporting the network boot
capability of WDS. MDT is described in more detail later in this section.
Windows Assessment and Deployment Kit
The Windows Assessment and Deployment Kit (Windows ADK) is a collection of several tools and utilities that perform
specific tasks required during different parts of a deployment. If you are familiar with the Windows Automated
Installation Kit (Windows AIK), the Windows ADK is the replacement toolset for Windows 8 and newer operating
systems. When downloading the Windows ADK, it is important to ensure that you are downloading the latest update
because prior versions of the Windows ADK may not work on later operating systems. Most of this tools are command
line only, and are used behind the scenes by other tools such as the Microsoft Deployment Toolkit (MDT).
Inside the Windows ADK there are several components, each described in subsequent sections:
Windows System Image Manager (Windows SIM)
Deployment Image and Servicing and Management (DISM)
Windows Preinstallation Environment (WinPE)
User State Migration Tool (USMT)
Volume Activation Management Tool (VAMT)
Table 2.2 summarizes the purpose of each Windows ADK tool.
© 2014 Microsoft Page 19
Page 20
Windows Preinstallation Environment (WinPE)
Alternate boot operating system used
to perform deployments and imaging
User State Migration Tool (USMT)
Migrates user data from one
environment to another
Volume Activation Management Tool (VAMT)
Centrally manages Microsoft licenses
and activation
Application Compatibility Toolkit (ACT)
Mitigates application incompatibilities
Table 2.2: Windows ADK Tools.
Note: The Application Compatibility Toolkit is a powerful tool used to provide compatibility fixes, or shims, to resolve
application compatibility issues. Although it is included in the Windows ADK, it is not covered in this guide.
The Windows Assessment and Deployment Kit can be downloaded from the Microsoft Download Center by following
this link:
http://go.microsoft.com/fwlink/?LinkId=293840
Windows System Image Manager
The Windows System Image Manager (Windows SIM) is the utility that creates and manages the answer files used with
Sysprep and Windows Setup. Answer files are stored in an XML format, so it is possible to manually edit these files.
However, using WISM to manage answer files ensures the resulting file is built from settings confirmed to be valid for
the target operating system. Using the Windows SIM helps to ward against human error when performing a deployment
with configurations set by the answer file.
Deployment Image Servicing and Management
The Deployment Image Servicing and Management tool (DISM) is one of the most important tools included with the
Windows ADK. It is used to mount and service Windows images and replaces the previous imaging solution called
ImageX. ImageX was used by the Windows AIK in Windows 7 and Windows Vista. DISM is a command-line utility that
supports file and package management in images and can be used to apply updates, drivers, apps, and other
configurations to an image. DISM has the ability to service an operating system environment while it is currently running
on a computer, or an offline image.
Even with third party tools where servicing is supported, management of a Windows image is typically performed with
DISM. DISM is also commonly used in system maintenance and repair. In Windows 8 and later versions of Windows, the
DISM utility replaces the deprecated System File Checker (SFC) to verify and repair Windows core operating system files.
DISM is also commonly used to add or remove Windows features.
Windows Preinstallation Environment
The Windows Preinstallation Environment (WinPE) is the alternative operating system executed on the boot media used
by Windows Deployment Services, the Microsoft Deployment Toolkit, System Center Configuration Manager, and
several third party deployment solutions. As a minimalistic environment based on the kernel of the Windows operating
system, WinPE supports the same drivers and many of the same commands as the operating system being deployed.
This ensures compatibility with the destination computers and provides a highly configurable environment which is able
© 2014 Microsoft Page 20
Page 21

to meet a wide variety of tasks. Windows PE is runs exclusively from RAM to make sure no files are locked in the disk to
which we are deploying a new Operating System.
User State Migration Tool
The User State Migration Tool (USMT) is a command line utility that is used to back up and restore user-specific data and
settings. USMT includes two processes, ScanState and LoadState. ScanState is used to backup user settings, either to
the network, an external device, or locally on the system in a way that will be preserved through a file-based image
deployment using Microsoft tools. LoadState is then used in the deployed operating system to restore the user data and
settings for a seamless transition to the new computer.
Volume Activation Management Tool
The Volume Activation Management Tool (VAMT) collects activation data for large deployments by serving as a central
relay for communication with the Windows activation servers. It also provides a secure central management solution for
product keys and inventory and monitoring services for licensing and activation. VAMT also facilitates management of
licensing through Active Directory-Based Activation (ADBA).
System Center Configuration Manager
One of the most feature-rich solutions for the deployment and management of computers within an organization is
Microsoft System Center Configuration Manager, also known as SCCM. This enterprise tool serves not only as a utility
for facilitating operating system deployment, but also for managing active systems across an enterprise. SCCM enables
the deployment of applications, management of updates, and complex reporting of the environment. SCCM is capable
of managing not only Windows computers, but also those running non-Microsoft operating systems and mobile devices.
SCCM enables package and update management, so not only can a new environment be pushed to client computers
such as Surface Pro 3, but also driver and firmware updates. See Chapter 6 for more information about driver and
firmware deployment for Surface Pro 3 scenarios.
SCCM also supports a fully-automated, zero-touch deployment scenario. As a management solution, it is able to
seamlessly initiate deployment in a refresh scenario and perform the distribution of the environment without any user
interaction. SCCM integrates with the Microsoft Deployment Toolkit integration (see next section for more information),
to enable even more functionality, such as support for User Driven Installation (UDI). UDI is a framework that enables an
IT department to create a custom deployment wizard to guide users through a specific installation or customization
task.
Microsoft Deployment Toolkit
Each of the tools and technologies discussed thus far enable some deployment functionality, but the Microsoft
Deployment Toolkit (MDT) pulls all those technologies together, acting as a wrapper to consolidate the configuration
and unify the deployment experience.
Note: Early versions of the Microsoft Deployment Toolkit were known as Business Desktop Deployment, or BDD.
The Microsoft Deployment Toolkit is a highly scalable deployment solution. It can be used in deployments for small and
medium sized businesses (SMB), or large enterprises alike. MDT can handle small deployments where no servers are
available and the deployment files are hosted on a user’s workstation. Likewise, MDT can be used for distributed
deployments to multiple sites and thousands of computers across data centers, networks, and domains.
© 2014 Microsoft Page 21
Page 22

MDT is also highly automated, with an extensive set of preconfigured scripts and a process for scripting each step of a
Tool/Technology
Serviceability
Scalability
Automation
Compatibility
Price
WDS
Included with Windows
Server
Windows ADK
No cost
SCCM
May have additional
cost
MDT
No cost
Explanation
SCCM and
MDT offer the
greatest
serviceability
SCCM and
MDT offer
the greatest
scalability
SCCM and
MDT offer
the greatest
automation
SCCM and MDT
offer the
greatest
compatibility
MDT and Windows
ADK are available at no
cost.
deployment through task sequences. Task sequences are series of steps, where each step is performed by a command
or script that advances the deployment process. It even lends this automation to the serviceability of the images it
manages. It automates the management of drivers, applications, and packages to regulate updates and changes to the
image for the easiest maintenance of images and the greatest adaptability to new requirements and situations.
Note: Regardless of your business size or scenario, MDT is the recommended solution for Windows deployment. If your
organization uses SCCM or WDS, MDT can be easily integrated without interfering with existing configurations to
provide the additional functionality and automation. For organizations already using SCCM as a management and
deployment solution, MDT extends the deployment functionality by providing wizards, scripts, templates, and a
customizable User Driven Installation (UDI) solution. For environments with WDS, MDT adds the ability to automate
image creation and servicing, management of applications during deployment, and greatly reduces the amount of
manual labor required to perform simple and regular imaging tasks.
Table 2.3 represents the factors for each of the Microsoft deployment solutions and the ranking within each on a scale
of 1 to 5.
Table 2.3: Comparison of Microsoft Deployment Solutions.
Microsoft Deployment Toolkit
As you learned in the Deployment Tools section earlier in this chapter, the recommended solution for Windows
deployment for any size organization is the Microsoft Deployment Toolkit (MDT). With its capacity for scalability, MDT is
the right tool for the job because it enables you to manage a single image for multiple configurations of hardware and
software. Therefore, it is capable of meeting the requirements of any type of deployment. This section gives an
overview of the components in MDT and the concepts you’ll need to understand before taking a hands-on tour of MDT
in Chapter 3.
The Deployment Workbench
The main user interface in MDT is known as the Deployment Workbench. The Deployment Workbench is presented as a
snap-in for Microsoft Management Console (MMC). MMC is a familiar interface that IT Pros are likely to be familiar with,
as it is used for other often used tools, such as Disk Management, Services, Event Viewer, and more.
© 2014 Microsoft Page 22
Page 23

Caution: The first item under the Deployment Workbench is the Information Center, where you will find the
documentation for MDT, a getting started guide, and a list of components. It is not recommended to update MDT from
the list of components because the incorrect version of the components may be installed. To ensure the latest tools are
available to MDT, ensure that the latest version of the Windows ADK is installed.
Deployment Shares
A deployment share is a collection of the major components of MDT which are configured together as a collective unit. It
can contain images, applications, drivers, task sequences, boot media, configuration files, and any other deployment
component required. A deployment share is essentially a network share in which these components are located. It is
hosted as a standard network share and secured through the same permissions and settings as any other folder shared
on the network.
After having installed MDT and opening the Deployment Workbench, the Deployment Shares section will be empty, so
you’ll need to connect to an existing deployment share or create a new deployment share. When creating a deployment
share there are several considerations, as follows:
Isolation
Scope
Performance
Security
Note: It is important to remember that it is possible to have more than one deployment share, and in many cases it is
ideal to have at least two for the reasons outlined in this section. The number of deployment shares that are used in any
given environment can vary, but it is common to have more than one.
Isolation
One of the most important reasons to have more than one deployment share is isolation. There are two primary reasons
to isolate one deployment share from another:
The two deployment shares utilize different, incompatible configurations.
Scenarios where deployment shares require different security and permissions.
One common scenario that reflects the need for multiple deployment shares is when one deployment share is
configured for a laboratory or testing environment. This deployment share is configured with permissions that permit
full access to IT pros and does not contain organizational information such as instructions for the joining of the domain.
It is used to prepare base images, test deployment configurations, settings, and applications, and to develop solutions
which can be deployed to production deployment shares. Production shares are used to deploy images that are
configured to join the domain, permissions are much more restricted, and the deployment solutions may be more
automated.
Scope
An important question to ask when considering the number and purpose of separate deployment shares is what those
shares are intended to address. In some cases, the scope of a deployment project may be all-encompassing, so the
© 2014 Microsoft Page 23
Page 24

deployment share must be capable of deploying to an entire organization. In other cases, deployment shares may be
only a limited deployment desired for a handful of users or a new set of hardware.
Consider the scenario where a fully developed and implemented solution is available for deploying notebooks and
desktops in the organization, but where a handful of Surface Pro 3 devices are being purchased for select users. With
these new devices comes the need to ensure that as they reach end users they are configured with select settings
required in the organization, but which reflect the new device capabilities, such as touch and Windows 8.1. In this case,
you may need to develop a deployment share specific to this new task and initiative.
If you create a new deployment share, you don’t necessarily need to create new images and configure the deployment
from scratch. If you already have images, applications, driver packs, and packages configured, a new deployment share
can use those by either copying or linking. This prevents needing to recreate the wheel for your deployments.
It would also be possible to copy the all-encompassing corporate share to a separate server and configured as a new
deployment share in which the images, applications, and any other components can be edited, modified, or even
removed without disturbing the production share. In this way, an existing corporate image can be quickly modified to
apply to new systems without affecting a critical production share.
Performance
In large enterprises, the performance of deployment is a crucial consideration. A deployment share improperly located
or configured can result in extended downtime which can translate to work stoppage or loss of productivity. As
deployment shares operate over the network, the same performance factors which affect standard file sharing and
network communication also apply to deployments through MDT. The same solutions also apply.
For example, in a data center environment for Virtual Desktop Infrastructure (VDI), high performance network
connectivity is common to meet the highly demanding nature of the systems in the environment. It would make logical
sense in this scenario to ensure that the Deployment Share for those virtual environments was located in the data
center for optimum performance. However, even if you have a data center deployment share, it may be better to create
a separate deployment share for computers that are in another building or location. The bottom line is that you need to
consider the performance of your network in relation to the location of the deployment shares.
Note: Some VDI solutions, such as System Center Virtual Machine Manager, include the ability to manage the creation
or replacement of virtual machines.
There may also be scenarios in which offline media is the ideal solution, as MDT is fully capable of generating USB or
optical media for physical distribution. Workers who operate remotely from home or contract workers who travel from
site-to-site are two examples of where this might apply. Deployment with offline media is covered in the step-by-step
process in Chapter 5.
Security
As mentioned before when discussing isolation, security is another important facet in determining how deployment
shares should be configured. Beyond the simple concept of a fully open deployment share for system administrators
working on the deployment project and another for production users with fully configured security, there are also
scenarios where multiple shares can be utilized to provide granular security for targeted deployments.
For example, an organization could operate a deployment share which is available full time to one select set of users
who might have the need to refresh their systems at will, but only a limited configuration for deployment is available.
© 2014 Microsoft Page 24
Page 25
Another deployment share could be used to provide a full-featured deployment across the organization, but is secured
so that it is only available to the IT department. Even a third share could be configured with another select deployment
configuration and made available only to select groups or users to help facilitate a staggered deployment.
Windows Deployment Wizard
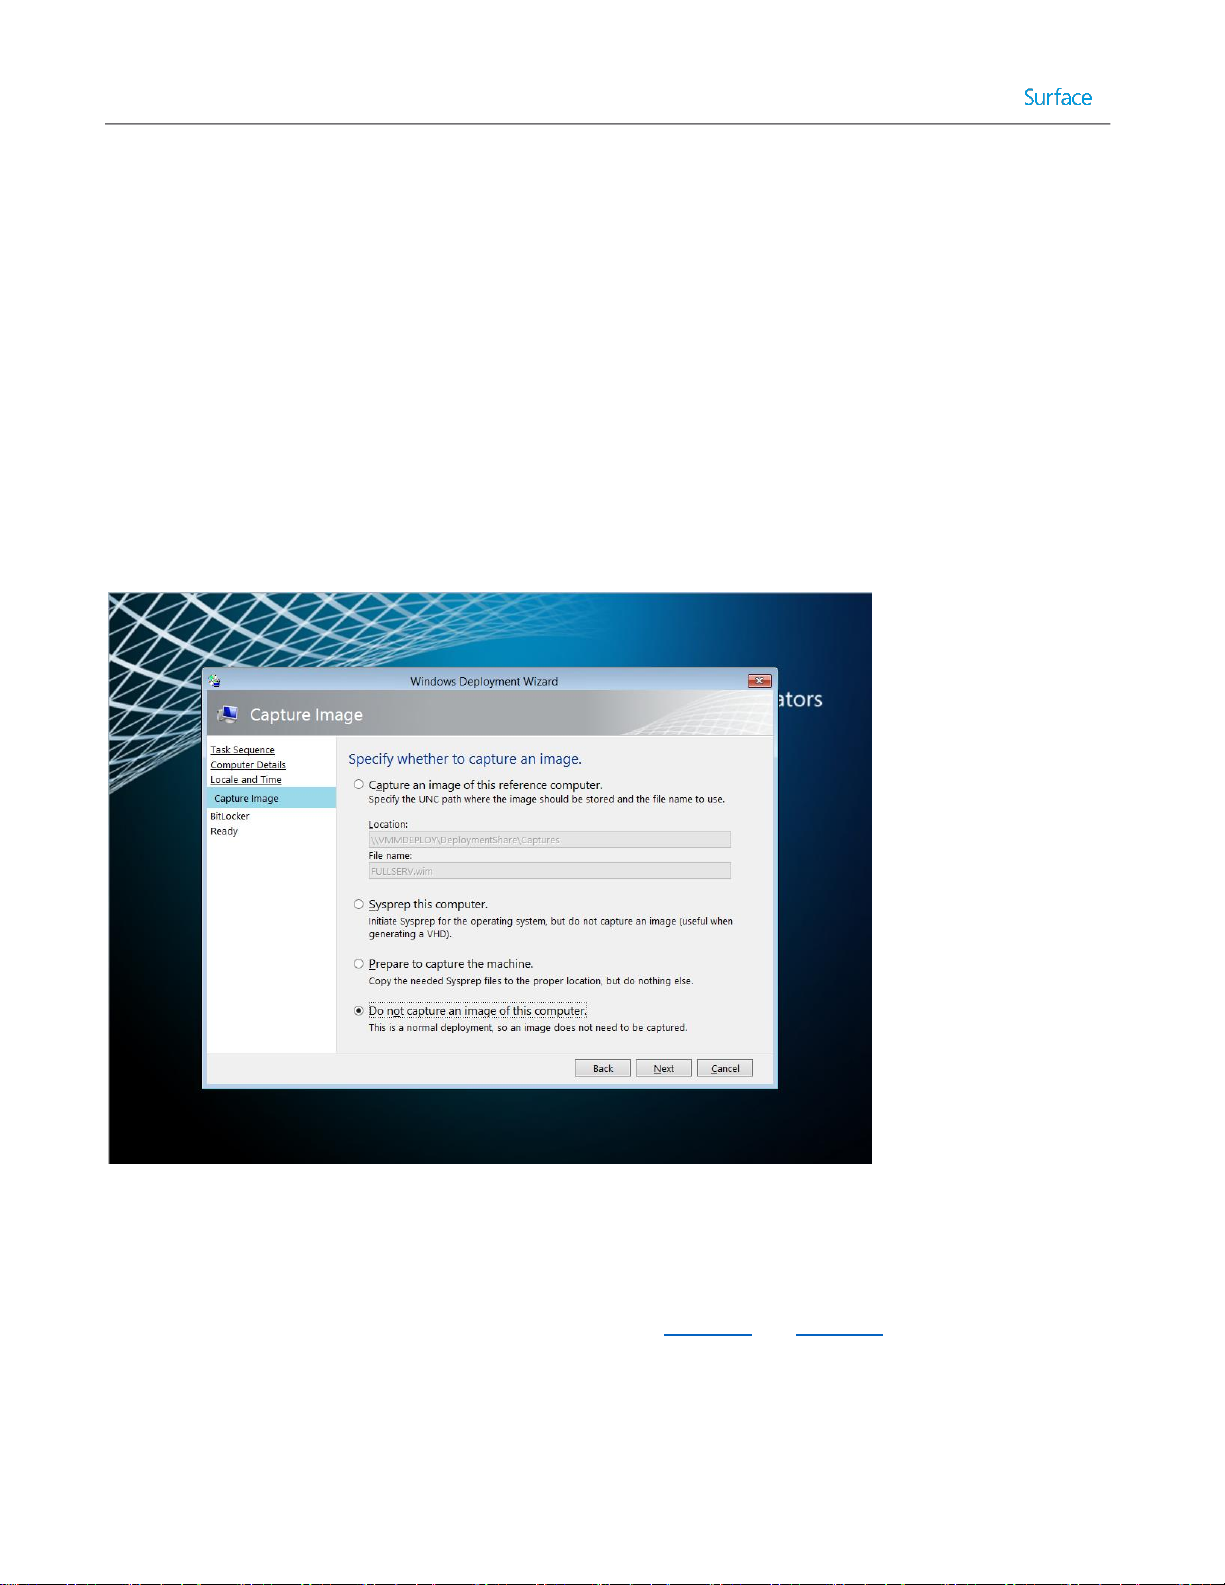
The Windows Deployment Wizard, also known as simply the deployment wizard, is the user interface through which
MDT is presented on client or target systems. It can be launched directly through network access to the deployment
share or it is the interface presented when launching MDT boot media. The deployment wizard is used to select
between task sequences to run on the client system and to provide any user interaction that wasn’t automated to
complete the deployment process. For example, the deployment wizard can request a computer name or to select
between time zones. It can also prompt whether to generate a backup of the computer before deploying the new
operating system and whether to encrypt the environment during deployment. An example of a deployment wizard
prompt is shown in Figure 2.1.
Figure 2.1. Windows Deployment Wizard Showing Prompt.
The experience provided by the deployment wizard is controlled by a selected task sequence and a configuration file,
named customsettings.ini. Customsettings.ini contains settings for technician prompts and supplied answers. For
example, automating the process of joining to a domain during deployment can be configured in customsettings.ini.
Editing and configuring the customsettings.ini file is shown in Chapter 4 and Chapter 5.
Connectivity to the deployment share is secured by Windows credentials to the network share. When the deployment
wizard launches, it will prompt the technician for user credentials each time it is run. However, it is possible to prevent
being prompted each time by storing credentials in a configuration file, named bootstrap.ini.
© 2014 Microsoft Page 25
Page 26

Driver Management
As the Microsoft Deployment Toolkit is able to manage drivers independently of the operating system image, there is a
separate section for Drivers in each deployment share. In some scenarios, like a share designed only to deploy to one
make and model of computer, you can simply place the available drivers in this section and MDT will automatically
select the most up to date applicable drivers for use at the time of deployment.
Note: It is not recommended to leave the drivers section of the deployment share unorganized. Even for a single make
and model of computer, different drivers may be required for different environments, such as Windows PE and
Windows 8.1. It is always recommended to organize drivers by make/model and operating system.
A deployment share might be used to deploy to many makes and models of computers, or the drivers for a make and
model might have incompatibilities with the boot environment. It is recommended to organize your drivers into folders,
based on make/model of computer, then by operating system. Within the Drivers section of the deployment workbench
folders can be created in which to organize the available drivers and Selection Profiles can be created that target these
folders under certain conditions, such as the use of a specific Task Sequence or when certain variables are met.
Selection Profiles are governed by simple configuration files in which a set of components can be selected and
identified. Through them the process of selecting application sets, driver sets, and packages can be greatly simplified
and automated.
For more details about downloading and configuring Surface Pro 3 drivers and firmware, see Chapter 3 and Chapter 6.
Application Management
Similar to the way drivers are managed, MDT can manage the deployment of applications separate from the operating
system image. In order to allow MDT to manage an application, the installation files must first be brought into the
deployment share by selecting New Application and specifying the installation files and the commands which apply to
the installer. It is also possible to deploy files which are located outside the deployment share, such as if an application
installer repository already exists on the network. This is covered in more detail in the Importing Applications section of
Chapter 5.
As outlined in the Considerations for Images section later in this chapter, it is highly recommended to allow MDT to
manage as many applications as possible. The reference image should contain only the applications that will never
change because they cannot be easily altered after the image is created. For example, you would not build an image
with the latest version of Adobe Flash or Oracle Java required for browsing an internal site, because when deploying to
another set of computers in the future, you may discover newer versions of those frameworks have become available.
When the applications are managed by MDT, you can simply add the updated applications and remove the outdated
ones to ensure the latest versions are deployed.
MDT also supports post-deployment only task sequences that facilitate application deployment and operating system
configuration. Through these task sequences, the operating system is not re-deployed, but applications can be installed
on systems which did not originally receive them. MDT is not a full-fledged application deployment solution as it does
not provide management of the deployed systems or applications. For that you would need to implement System
Center Configuration Manager. With that said, MDT does support applications to be installed in a base image. Whether
this type of configuration is in the best interest of your environment is dependent on the applications in your
organization.
© 2014 Microsoft Page 26
Page 27

Note: MDT provides full support for the management and sideloading of Windows Store apps (APPX). Sideloading is the
process of installing modern apps without downloading from the Windows Store. Chapter 4 shows how to manage
Windows Store apps with your Windows deployments.
Package Management
Note: The MDT deployment share package management section is, perhaps surprisingly, not provided for management
of application packages. Application management is performed by the applications section of the deployment share.
The package management section of a deployment share is provided for management of files provided in the Windows
Update Standalone Installer format, .MSU. This can include Windows Updates, language packs, and features such as
Remote Server Administration Tools (RSAT) or Internet Explorer. For management of Windows Updates, there are four
potential solutions:
1. Windows Update
2. Windows Server Update Service (WSUS)
3. MDT package management
4. Up-to-date images
The least complex method for update management is to allow updates to be provided directly through Windows Update
to each computer. This ensures that each environment will receive the full set of applicable updates and management
of the process is not required. Though the management effort is reduced when using Windows Update directly on the
client computer, the update traffic for each computer is separate and can tax internet connectivity. Downloading
updates at the end of the deployment will also increase the deployment time and may require several reboots.
Windows Server Update Services (WSUS) is a feature of Windows Server that provides central management for updates
in your organization. This method is recommended in most environments as it provides benefit not only for computers
during deployment, but ongoing maintenance. The default deployment process through MDT includes steps that will
ensure that updates are applied. Although WSUS aggregates Windows Update traffic on the local network, each
computer will still seek to individually communicate with the WSUS server, which does increase demand on the
network.
An alternative is to use the package management functionality supplied by MDT to inject the updates into the reference
image at the time of deployment. This includes the update packages in the image when it is transferred to the target
computer(s) and therefore reduces network traffic. Upon booting of the image the offline injected packages are
processed and installed.
The enhance performance, you may want to avoid the installation of offline packages. Instead, the updates can be
installed and incorporated into the image by allowing the update process to run and then capturing the image along
with updates. This avoids the installation process for each update package, eliminating the time required to run each
installation, and reduces network traffic by eliminating duplicate files.
© 2014 Microsoft Page 27
Page 28

MDT can also be used to manage packages that contain features or packs. Through the selection profile functionality
available in MDT, these packages can be targeted to specific computers. An example usage would be to deploy Remote
Server Administration Tools (RSAT) for system administrators.
Task Sequences
One of the key mechanisms by which actions are performed by MDT are task sequences. Task sequences are a series of
steps that together comprise the actions performed in a deployment and the conditions that control which steps are
performed. MDT provides nine out-of-the-box task sequence templates to get you started with task sequences. They
are:
Sysprep and Capture – Task sequences created by this template begins with a reference system, prepares it for
deployment, captures an image, and writes it to the deployment share.
Standard Client Task Sequence – This template creates a task sequence that includes the default steps for
deploying a Windows client operating system to a new computer or system.
Standard Client Replace Task Sequence – Task sequences generated from this template are for preparing an
existing operating system for replacement.
Custom Task Sequence – This template is used to generate a blank task sequence that can be customized.
Litetouch OEM Task Sequence – This template is used by system manufacturers to place an operating system on
a computer for distribution to customers.
Standard Server Task Sequence – This template is used to create a task sequence for deploying Windows
Server.
Post OS Installation Task Sequence – Task sequences created from this template can be used to performing any
required task after the operating system is installed. For example, task sequences created from this template
can be used to install applications from the deployment share to an already existing Windows environment.
Deploy to VHD Client Task Sequence – Task sequences created from this template can be used to deploy a
Windows client to a computer using boot to VHD.
Deploy to VHD Server Task Sequence – Task sequences created from this template can be used to deploy a
Windows Server to a computer using boot to VHD.
Task sequences provide pre-configured processes for deployment tasks that can be controlled or run from the
deployment wizard. They can be configured to be manual (allowing the technician to control the process through the
supplied prompts and choices), or automated (where the answers to prompts or choices are pre-selected in the task
sequence). Task sequences enable the deployment wizard to be configured to prompt the technician for only the
essential information, thereby minimizing effort.
Task sequences are often configured to address specific goals or scenarios required during deployment. Here are some
examples that show how separate task sequences can be created for each department to address the requirements of
that department specifically. The examples below illustrate how it is possible to control the deployment wizard through
task sequences to present only preselected options during deployment. Task sequences are shown in more detail in
Chapter 3, Chapter 4, and Chapter 5.
Financial Department Task Sequence
o Image: Windows 7 Enterprise, required for compatibility with a custom developed application
© 2014 Microsoft Page 28
Page 29

o Applications: A pre-selected set of applications including Office, accounting software, and the custom
developed application
o Drivers: Drivers are provided for multiple makes/models
o BitLocker: Encryption enabled during deployment and enforced by group policy
Design Department Task Sequence
o Image: Windows 8.1 Update Enterprise
o Applications: A choice of available applications including Office and various options for graphics
software
o Drivers: Drivers are provided for multiple makes/models
o BitLocker: Encryption is optional during this task sequence
Sales Department Task Sequence (Surface Pro 3)
o Image: Windows 8.1 Update Enterprise
o Applications: A pre-selected set of applications including Office
o Drives: A selection profile in which only Surface Pro 3 drivers are available to avoid conflict
o BitLocker: Encryption enabled during deployment
Considerations for Images
Creation of the images for use in your deployment environment is one of the most critical tasks for a successful
deployment. The configuration of the base image will apply to every machine on which it is deployed. This section
discusses best practices for image creation.
The Single Image Goal
In the traditional industry-standard approach for imaging technologies was to create one image for each combination of
hardware and software. Even for a single computer make/model in an organization, this can result in a dozen or more
images for each possible combination of software. For a dozen computer makes/models, the number of images can
climb to well over one hundred. As the number of images increases, so too does the demand on the administrators who
manage those images and the infrastructure on which the images reside.
In response to these increasing demands, a solution to increase the efficiency of image management and to help reduce
the duplication of tasks was needed. The solution was file-based imaging. Through file-based imaging, a single image can
be produced that can be modified to fit multiple scenarios or requirements. For example, for a single computer
make/model, a single image can be used with offline servicing and automated application installation to eliminate the
need for separate images for each combination of software.
With a deployment solution also supporting automated management of drivers, the need for multiple images can be
reduced even further. In an ideal scenario, the use of automated management for applications and drivers can allow an
entire organization with varied hardware makes/models and installed applications to be served by a single image. This
ideal scenario is commonly known as the single image goal.
Note: This automated management of applications and drivers is provided by the Microsoft Deployment Toolkit (MDT).
To accomplish the single image goal, the image must be configured to be as basic as possible. Only components which
are used in all computers and configurations in the organization should be included. The ideal, universal single image is
© 2014 Microsoft Page 29
Page 30

actually included on the original installation media (either OEM or volume license media) for the operating system. This
image file name is install.wim, and is sometimes referred to as the vanilla image.
Although the vanilla install.wim image is the ideal single image, there are a variety of reasons why an organization might
elect to create a customized image, such as:
Customizations only available through Sysprep and image creation
For example: Customization of the local default user profile can only be performed by using Sysprep and an
answer file configured with the CopyProfile setting. This instructs Windows Setup to copy the configuration of
the Administrator profile to the default user profile before resetting the Administrator profile.
Deployments of limited scope
For example: If tasked with deploying only to Surface Pro 3 devices with an identical set of applications as
quickly as possible, creating a fully-customized image complete with drivers and applications may be quicker
than automating application installation.
Incompatibility with automated installation
For example: Applications that feature only an installation wizard but do not support installation via the
command line cannot be deployed outside an image.
Policy requirements
For example: If an organization’s policy is in place that requires all systems be protected and secured by a third
party product, it may be required that this product be included in a custom image to ensure those requirements
are met.
Using a Virtual Machine as a Reference System
Though the process of creating a system image includes running Sysprep with the Generalize option (which is designed
to remove system specific information and configuration from the image to facilitate deployment to disparate
hardware), there are often components which are not compatible with the Generalize process which ultimately
interfere with deployment to different hardware. One of the most notable examples are graphics drivers and their
associated controlling software. The basic .inf drivers that are stored in the Windows folder are removed by the
Generalize step, but components like the NVIDIA Control Panel and AMD Catalyst Control Center are not always reliably
removed as they are installed not as drivers, but applications.
To avoid such issues, the best practice is to create images from a reference system which is virtual. Virtual environments
are greatly simplified when contrasted against physical systems and do not require any complex drivers which have
application style components. There are many virtualization solutions available, and any will work as a platform for
image creation. The solution included with Windows Server 2008 and newer is Hyper-V, which is also included with
Windows 8 Professional or Enterprise and newer Windows clients.
Note: Images are not compatible across architectures or firmware types. For example, an image of a 64 bit (x86-64)
environment cannot be deployed to a 32 bit (x86) environment.
Selecting Applications for the Base Image
Another consideration when planning images is which applications to include in the base image. As described with the
single image goal, the ideal configuration for an environment to be captured is as few applications and drivers as
possible. With that said, there are certainly times when an application does need to be installed in the base image. For
© 2014 Microsoft Page 30
Page 31

example, some applications cannot be configured through installation or scripts and require that they be configured in
the base image, or as mentioned before there are times when it is simply easier to create a fully configured image for a
project where deployment will only be to one type of device with one set of applications.
When selecting the applications to include in an image, there are some points which warrant consideration. Among the
most important is the interaction of an application with Sysprep. Some applications are aware of Sysprep, and will reset
configurations and activation information when Sysprep is run. An example of this is Microsoft Office. One class of
software noted for incompatibility with Sysprep is security software. Modern security software is often designed to
protect itself and the core system files from unauthorized access, but those same security measures can also conflict
with Sysprep in a way which produces an image which has been prepared but will not boot and which cannot be revered
to a pre-Sysprep state.
Also worth consideration are application deployment solutions that can distribute applications to a live operating
system. Some notable solutions include Windows Intune, System Center Configuration Manager, and a Post Deployment
MDT Task Sequence. In the case of the latter, it may be beneficial to include any application that is not explicitly
required in the base image as an application deployed by MDT. This allows for both deployment of the application with
a new operating system and a separate deployment of the application to systems that only need the application.
Planning for Deployment
When preparing for a deployment, there are several best practices which should be considered. These best practices
have been shown to increase efficiency and to reduce the impact of issues that might be encountered during the
deployment process. The more complex your environment or the larger the organization, the more likely it is that you’ll
encounter unforeseen issues. This section outlines some best practices to consider to minimize this impact.
Laboratory Testing
To help ensure that conflicts and incompatibilities are not encountered when performing a deployment, the first best
practice is to test your deployments in a laboratory environment before piloting and deploying into production. By
testing each task and process before it is implemented in a way that can impact users, issues which would otherwise
impact uptime and the ability to perform business are often found and resolved before users encounter them. This is
shown in Figure 2.2.
© 2014 Microsoft Page 31
Page 32

Develop Deployment
Process
Start
NO
Deployment
Successful?
Import Deployment
Into Production
YES
NO
End
YES
Test Deployment
Deployment
Successful?
Pilot Deployment
(Limited Scope)
Production
Deployment
Figure 2.2: Process for Testing and Piloting a Deployment.
Pilot Deployments
Once you have tested your deployments in a lab or VM, it is a good idea to deploy into production on a limited basis.
Though lab testing can uncover many of the issues that would be faced by users, there may be unforeseen
circumstances that exist in your production environment. Some important considerations for sizing a pilot deployment
include:
Support staff
Pilot scope
© 2014 Microsoft Page 32
Whether it be to explain how the user interface has changed or a system crash caused by an unforeseen
incompatibility, the users of a new piloted operating system are likely to encounter issues requiring attention.
This increased need for support should be considered before deploying to users who might overwhelm support
staff.
When selecting users for a pilot, it is important to consider which users would represent a reasonable facsimile
Page 33

of the production environment. For example, if you are deploying organization wide, but you pilot the
deployment only to the financial department, the pilot does not provide a reasonable indication that the
deployment will likewise be successful in the graphics department where hardware and software configurations
may be different.
Pilot duration
The more complex an environment, the more time you should give to pilot a deployment. It is important to
allow enough time for the computers and users involved in the pilot program to uncover any issues with
applications, configurations, drivers, etc.
Comparable usage
It is important that users involved in a pilot deployment use the computers in the same way as a production
system to ensure that potential issues or bugs are uncovered. For example, if users are allowed to work offsite
with a production Surface Pro 3 device, they should be allowed to do so in the pilot program as well. This will
ensure that any incompatibilities with devices in offsite environments are also uncovered.
Staggered Deployments
In a staggered deployment, the organization or production environment is divided into smaller sections with similar
requirements and deployment is performed to these smaller sections one at a time. For example, consider an
organization that has these functional areas:
Executive
Administrative
Design
IT
You likely want to deploy to each functional area/department at a time instead of all departments at once. You might
want to consider the “importance” of those functional areas. You want to ensure there are no deployment problems
before deploying to your executives. Alternatively, it is common to break up deployments by geographical location. In
an organization with offices in three separate buildings, the deployments may be performed by building.
Proper planning of a deployment can help to avoid the scenario where a deployment causes work stoppage or falls
behind schedule. With the highly granular and modular nature of the Microsoft Deployment Toolkit, the deployment
process can be divided or split without a loss of efficiency. The work done to deploy to one part of an organization can
easily translate to another part with the ability to copy or link deployment shares and to manage applications and
drivers separate from the system images.
“White Glove” Delivery
Receiving a new computer can be a radical change for some users. Not all users adjust to the changes of a new device at
the same pace and, in some cases, users can end up frustrated or dissatisfied with a device simply due to a lack of
familiarity that is otherwise a significant improvement. Some scenarios where this commonly occurs include:
Changing between operating system versions, such as moving from Windows 7 to Windows 8.1
Changing between form factors, such as replacing a desktop with a tablet
Introducing new technologies, such as touch capabilities
© 2014 Microsoft Page 33
Page 34

A recommended tactic to help the end user adjust to the new experience is a “white glove” delivery, in which IT or
support staff deliver the new device. When delivering the device, they review with the user the new features or
functionality, and assist the user in this adjustment process. When a user adjusts to a new Surface Pro 3 device, it may
encompass multiple scenarios at the same time (new form factor, touch, and new operating system). Therefore, as a
best practice, make sure you understand the needs of your users and try to understand their pain points so you can
address them proactively. It may be a good idea for your organization to construct a welcome guide or video to help
guide users through the process. For Surface Pro 3 readiness materials, see the References section in the Appendix.
© 2014 Microsoft Page 34
Page 35

PART II
DEPLOYMENT
STEP-BY-STEP
© 2014 Microsoft Page 35
Page 36
Chapter 3 – Manual Deployment with MDT
This chapter shows you how to perform a basic deployment, which includes no customization. It simply shows you how
to install and configure all required deployment tools, then deploy a preconfigured image, install.wim, to a Surface Pro
3 device from a deployment computer, known throughout this chapter as a manual deployment. In a manual
deployment, the user is prompted to input many fields, such as administrator password, domain, etc. However, because
the answers to the prompted questions are not preconfigured in this deployment scenario, it is the simplest type of
deployment. Subsequent chapters show increasing levels of automation, but also increase the complexity of configuring
the deployments.
The manual deployment scenario is not intended to be a best practice for a large enterprise, but may be appropriate for
a small business where customization will take place after installation or serve as a framework for additional
deployment configurations. In either case, if you have never performed a deployment, it is a good idea to follow the
procedures in this chapter to serve as an introduction to how the tools work.
Caution: Following the instructions in this chapter will overwrite the operating system and data on your Surface Pro 3
device.
The manual deployment scenario discussed in this chapter is comprised of two physical computers: A computer running
the deployment tools (referred to as the deployment server) and a Surface Pro 3 device, known as the deployment
target. The computer running the deployment tools in this scenario requires Windows Deployment Services (WDS), so it
must run any supported version of Windows Server.
Note: The deployment server can be either physical or virtual, but must have connectivity to the same network as the
Surface Pro 3.
The environment for the manual deployment scenario, as shown in Figure 3.1, is configured as follows:
Deployment Server – Windows Server with deployment tools installed
Target Computer – Surface Pro 3 device
Note: Windows Server 2012 or newer is recommended to ensure compatibility between the included Windows
Deployment Services and the UEFI platform used by Surface Pro 3.
© 2014 Microsoft Page 36
Page 37
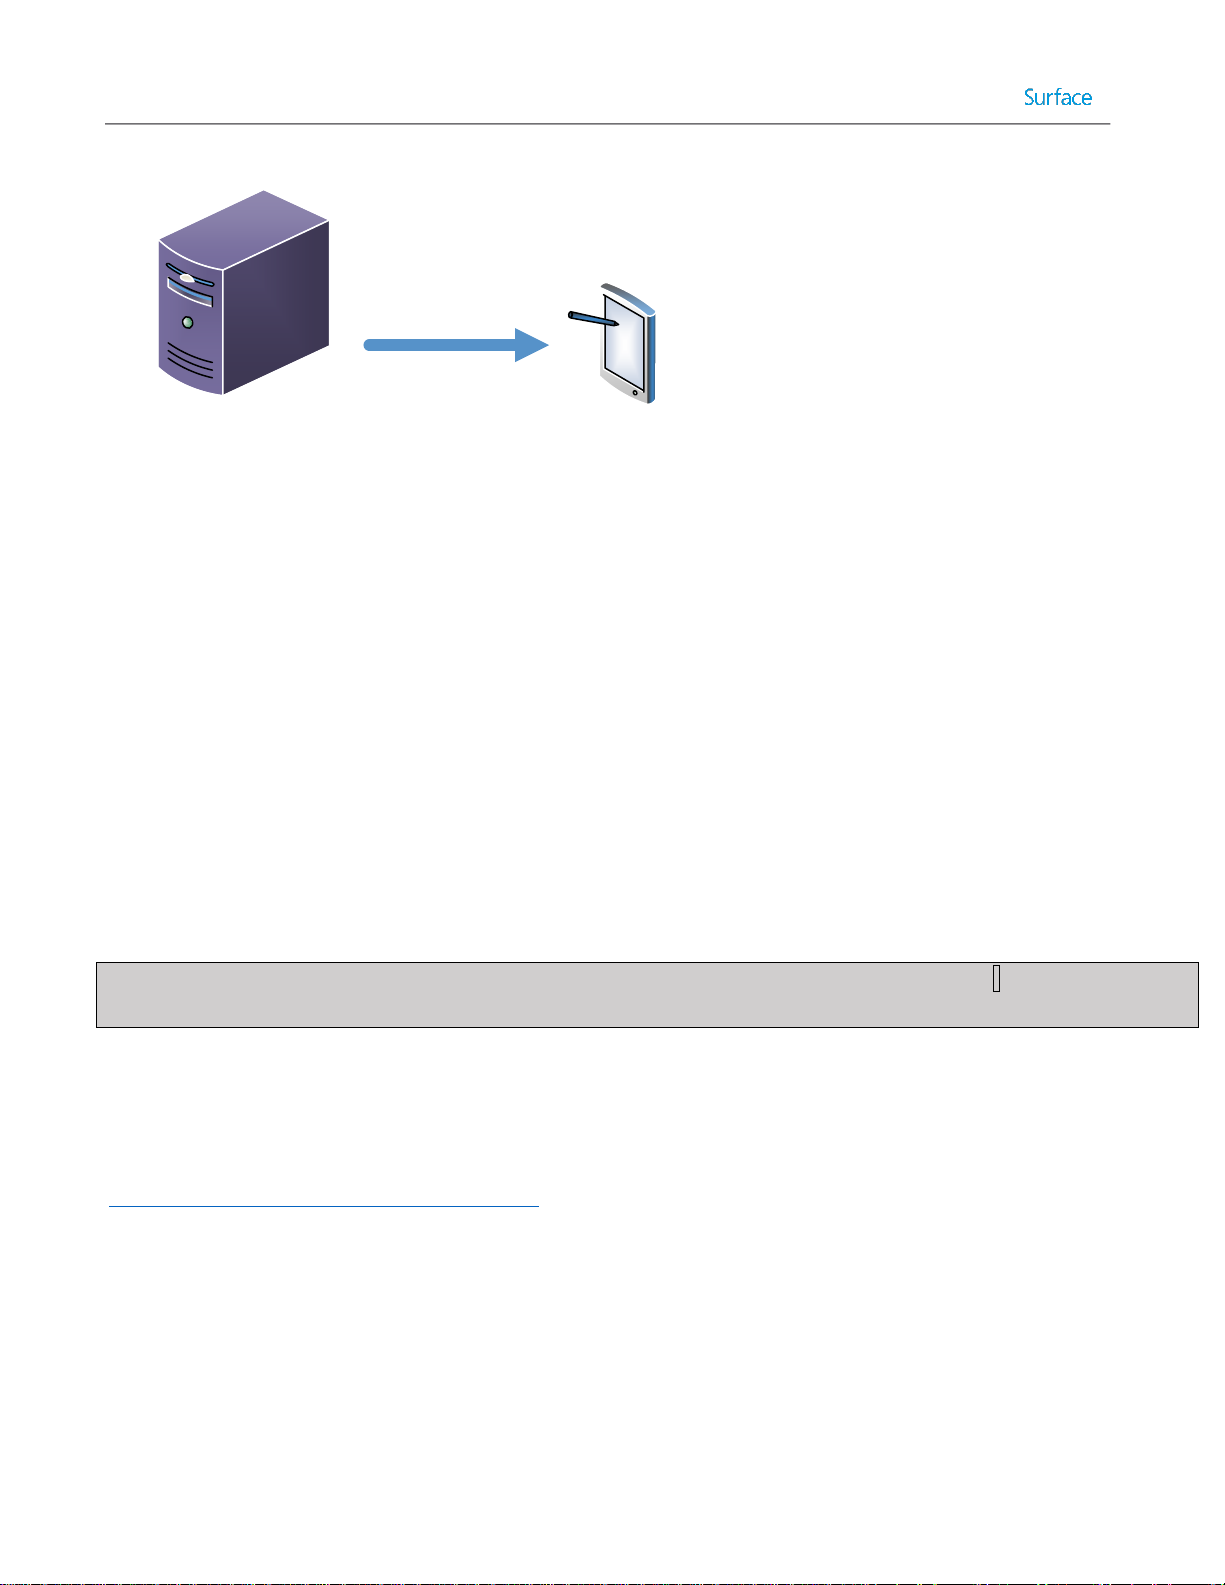
Surface Pro 3 Device
Deployment Server
Figure 3.1: Overview of Lab Environment.
The overall process is that deployment server running the deployment tools is responsible for deploying install.wim as a
base image to the Surface Pro 3 device. Any desired customizations will need to be performed directly on the device(s)
after deployment, or you can customize your deployments by incorporating elements of more complex scenario
examples in later chapters of this guide.
Installing Deployment Tools
The first step in any deployment is to ensure you have the deployment tools installed on the deployment server, which
must be installed in the following order:
Windows Assessment and Deployment Toolkit (or Windows ADK) – contains the foundation needed by MDT.
Microsoft Deployment Toolkit (MDT)
Windows Deployment Services (WDS)
Note: There is no charge to download and install Windows ADK or MDT. There is also no charge for WDS, as long as you
already have a licensed installation of Windows Server
Windows Assessment and Deployment Kit
The installation files for the Windows ADK are found online at the Microsoft Download Center. When downloading
these files, it is important to select the most recent version that is compatible with your operating system, which at the
time of this writing is the Windows ADK for Windows 8.1 Update. The link is
http://go.microsoft.com/fwlink/?LinkId=293840, which brings you to the download page, shown in Figure 3.2.
© 2014 Microsoft Page 37
Page 38

Figure 3.2: Downloading Windows ADK.
To permit downloads in Internet Explorer (IE) on Windows Server 2012 R2, you’ll need to disable Internet Explorer
Enhanced Security Configuration (IE ESC), which is shown in Figure 3.3. This can be done in Windows Server 2012 R2 in
the Local Server tab of Server Manager.
Figure 3.3: Disabling Enhanced Security Configuration.
© 2014 Microsoft Page 38
Page 39

The Windows ADK download includes a small setup file that is used to select and download only the desired
components. It presents you with a screen where you select the desired products you would like to install, as shown in
Figure 3.4. The bare minimum required for MDT are the Deployment Tools and Windows Preinstallation Environment
(WinPE) options.
Figure 3.4. Windows ADK Installation Options.
Microsoft Deployment Toolkit
After the Windows ADK is installed, you need to download and install the Microsoft Deployment Toolkit (MDT), which is
the primary tool you’ll use for your deployments. The link to the main MDT page is http://technet.microsoft.com/en-
US/windows/dn475741. From there you can select the latest MDT download that is applicable for your operating
system. At the time of this writing, MDT 2013 was the latest version, as shown in Figure 3.5.
© 2014 Microsoft Page 39
Page 40

Figure 3.5: Downloading Microsoft Deployment Toolkit (MDT) 2013.
When downloading MDT, the only required component is the installer for the processor architecture on which MDT will
be installed. The installers are the MSI files designated as x64 for 64-bit and x86 for 32-bit architectures respectively.
Also available is an extensive set of documentation including the standard deployment guides for Windows. These
options are shown in Figure 3.6.
Figure 3.6: MDT 2013 Download Options.
© 2014 Microsoft Page 40
Page 41

After you download and run the applicable MSI setup application, follow the prompts and accept all of the defaults.
Windows Deployment Services
After Windows ADK and MDT are installed, you need to install and configure Windows Deployment Services (WDS) to
allow network boot in the environment. Each is described in the following sections.
Installing WDS
Because WDS is a role within Windows Server rather than a separate application, it does not need to be downloaded.
Instead you install WDS using Server Manager in Windows Server by following these steps:
1. Open Server Manager.
2. Click the Manage Add Roles and Features menu as shown in Figure 3.7.
Figure 3.7: Windows Server 2012 R2 Server Manager.
3. Clicking Add Roles and Features brings up the Add Roles and Features Wizard shown in Figure 3.8.
© 2014 Microsoft Page 41
Page 42

Figure 3.8: Add Roles and Features Wizard.
4. The Add Roles and Features Wizard presents a series of steps, as follows:
Before You Begin – Presents an introductory page. Click Next.
Installation Type – Select from one of these installation types:
o Role-based or feature-based installation. Ensure this option is selected and click Next.
o Remote Desktop Services installation. This option is used in a Virtual Desktop Infrastructure (VDI)
environment, but is out of scope for this guide.
Server Selection – Ensure the correct server is selected and click Next.
Server Roles – Select Windows Deployment Services. Immediately after clicking this option, you are
prompted to add additional required features, as shown in Figure 3.9.
© 2014 Microsoft Page 42
Page 43

Figure 3.9: Add Roles and Feature Wizard Additional Features Prompt.
Click Add Features to accept the new features and return to the Add Roles and Features Wizard main page.
Click Next.
Features – Click Next to accept the newly selected required features.
WDS – Description page for WDS. Read this page and click Next.
Role Services – Ensure both Deployment Server and Transport Server are selected.
Confirmation – Displays a summary of the options selected.
Configuring WDS
After installing WDS in the prior section of this chapter, WDS needs to be configured to enable network boot. Network
boot enables network adapters capable of PXE boot to access boot media created in the Preparing Boot Media section
later in this chapter.
To configure WDS, follow these steps:
1. Launch the Windows Deployment Services console from the Start Screen under Administrative Tools on your
deployment server.
2. Right-click the name of the deployment server in the Servers tree and click Configure Server. This launches the
Windows Deployment Services Configuration Wizard, as shown in Figure 3.10.
© 2014 Microsoft Page 43
Page 44

Figure 3.10: Windows Deployment Services Configuration Wizard.
3. The Windows Deployment Services Configuration Wizard presents a series of steps, as follows:
Before You Begin – Shows a description of WDS and the prerequisites. Click Next.
Install Options – Select the Standalone server option to install WDS without active directory. Click Next.
Remote Installation Folder Location – Enter or select the path where you would like to store the WDS
components that will be accessed by the remote client and click Next. The selected folder must be located
on an NTFS volume and should not be located on the system volume.
PXE Server Initial Settings – Enables you to configure which clients will receive a response from WDS when
attempting to network boot, as shown in Figure 3.11. Select the applicable choice from the following, then
click Next:
o Do not respond to any client computers – Use this setting if you want to configure WDS without
enabling network boot, as in the case when you are staging and configuring a WDS server. This
scenario does not use this option.
o Respond only to known client computers – Use this setting if you want to configure which
computers WDS will respond to. This scenario does not use this option.
o Respond to all client computers (known and unknown) – Select this option, which ensures that
your Surface Pro 3 device can network boot without additional configuration. Additionally, the
Require administrator approval for unknown computers checkbox can be selected to require
approval through the WDS console for unknown machines. For this scenario, do not select this
option.
© 2014 Microsoft Page 44
Page 45

Figure 3.11. PXE Server Initial Settings.
Task Progress – Displays a progress bar during the configuration of WDS. Click Finish to close the Windows
Deployment Services Configuration Wizard.
Creating a Deployment Share
The main user interface in MDT is the Deployment Workbench, which is where you will create task sequences and lists
of actions that MDT will perform. Sequences provide the workflow for deployment. They define when and how to
perform the various tasks required to produce the desired Windows environment. When they are run they pass the
instructions to perform these tasks to the independent components and tools that perform the actions, such as the
MDT scripts or tools from the Windows ADK. More information on Task Sequences can be found in the Microsoft
Deployment Toolkit section in Chapter 2.
The MDT deployment workbench is comprised of two sections:
Information Center – Contains help documentation and lists installed and available components. This example
scenario does not use the information center.
Caution: The list of installed and available components may be shown for older operating systems, so use with
caution.
Deployment Shares – Contains a list of all the deployment shares and sub-folders. By default, there will be no
deployment shares listed. Right-click the Deployment Shares folder and click New Deployment Share. This
brings up the New Deployment Share Wizard, as shown in Figure 3.12.
© 2014 Microsoft Page 45
Page 46

Figure 3.12: New Deployment Share Wizard.
The New Deployment Share Wizard presents a series of sequential steps, as follows:
Path – Enter the path to your deployment share. It can reside anywhere you would locate a shared folder, but
for this scenario, you can accept the default path of C:\DeploymentShare. Click Next.
Share – Enter the name of the deployment share. The default inclusion of the dollar sign ($) character indicates
that an administrative share is created, causing the deployment share not to be visible when browsing the
network. You can accept the default value of DeploymentShare$. Click Next.
Note: The deployment share name cannot contain spaces. Some of the scripts included in MDT are not
compatible with deployment share names that contain spaces.
Descriptive Name – Give the deployment share a descriptive name. By default, this value is MDT Deployment
Share, which is acceptable for this scenario. This value is used to differentiate between deployment shares in
the MDT Deployment Workbench. Click Next.
Options – Enables the configurations of defaults for this deployment share, as shown in Figure 3.13. For this
scenario, ensure all of the following options are selected, then click Next:
o Ask if a computer backup should be performed – If selected, this option prompts the user to create an
image backup of the computer before performing the deployment.
o Ask for a product key – If selected, this option prompts the user for product key during the deployment
process. This option is not selected by default.
© 2014 Microsoft Page 46
Page 47

Note: Single license keys must be entered individually on each computer, so this option should be
checked in most scenarios. However, MAK volume license keys are specified in MDT task sequences, so
this option should not be checked in those scenarios. If you are using KMS volume license activation,
this option should be unselected because activation is an automatic process.
o Ask to set the local Administrator password – If selected, this option prompts the user for a password
for the local Administrator account. This option is not selected by default.
o Ask if an image should be captured – If selected, this option prompts the user if a system image of the
target computer should be created for deployment to other computers. This option is selected by
default.
o Ask if BitLocker should be enabled – If selected, this option prompts the user if the file system should
be encrypted with BitLocker during the deployment process. This option is selected by default.
Figure 3.13: New Deployment Share Options.
All deployment share options are discussed in more detail in Chapter 4.
Summary – Review the summary of your deployment share configuration and click Next.
Progress – Displays a progress bar during the creation of the deployment share.
Confirmation – Displays confirmation of success or errors generated during deployment share creation. Click
Finish to close the New Deployment Share Wizard.
© 2014 Microsoft Page 47
Page 48

After the deployment share is created, you’ll see many sub-folders under the name of the deployment share in the
Deployment Shares tree, as shown in Figure 3.14.
Figure 3.14: Folders Created For New Deployment Share.
Importing an Operating System
A newly created deployment share is empty and contains no operating system files, drivers, or any other configurations.
Therefore, the first step after creating a new deployment share is to import the files for the operating system intended
for deployment to the target computer(s).
For this scenario, you will import the standard install.wim image as the operating system, by following these steps:
1. Locate installation media that contains the install.wim file. This installation media is typically located on a
physical DVD, USB stick, ISO file, etc.
2. Insert or mount the installation media on the deployment server (where the deployment tools are installed).
3. In the MDT Deployment Workbench, expand the newly created deployment share.
4. Right-click Operating Systems and click Import Operating System. This launches the Import Operating System
Wizard, as shown in Figure 3.15.
© 2014 Microsoft Page 48
Page 49
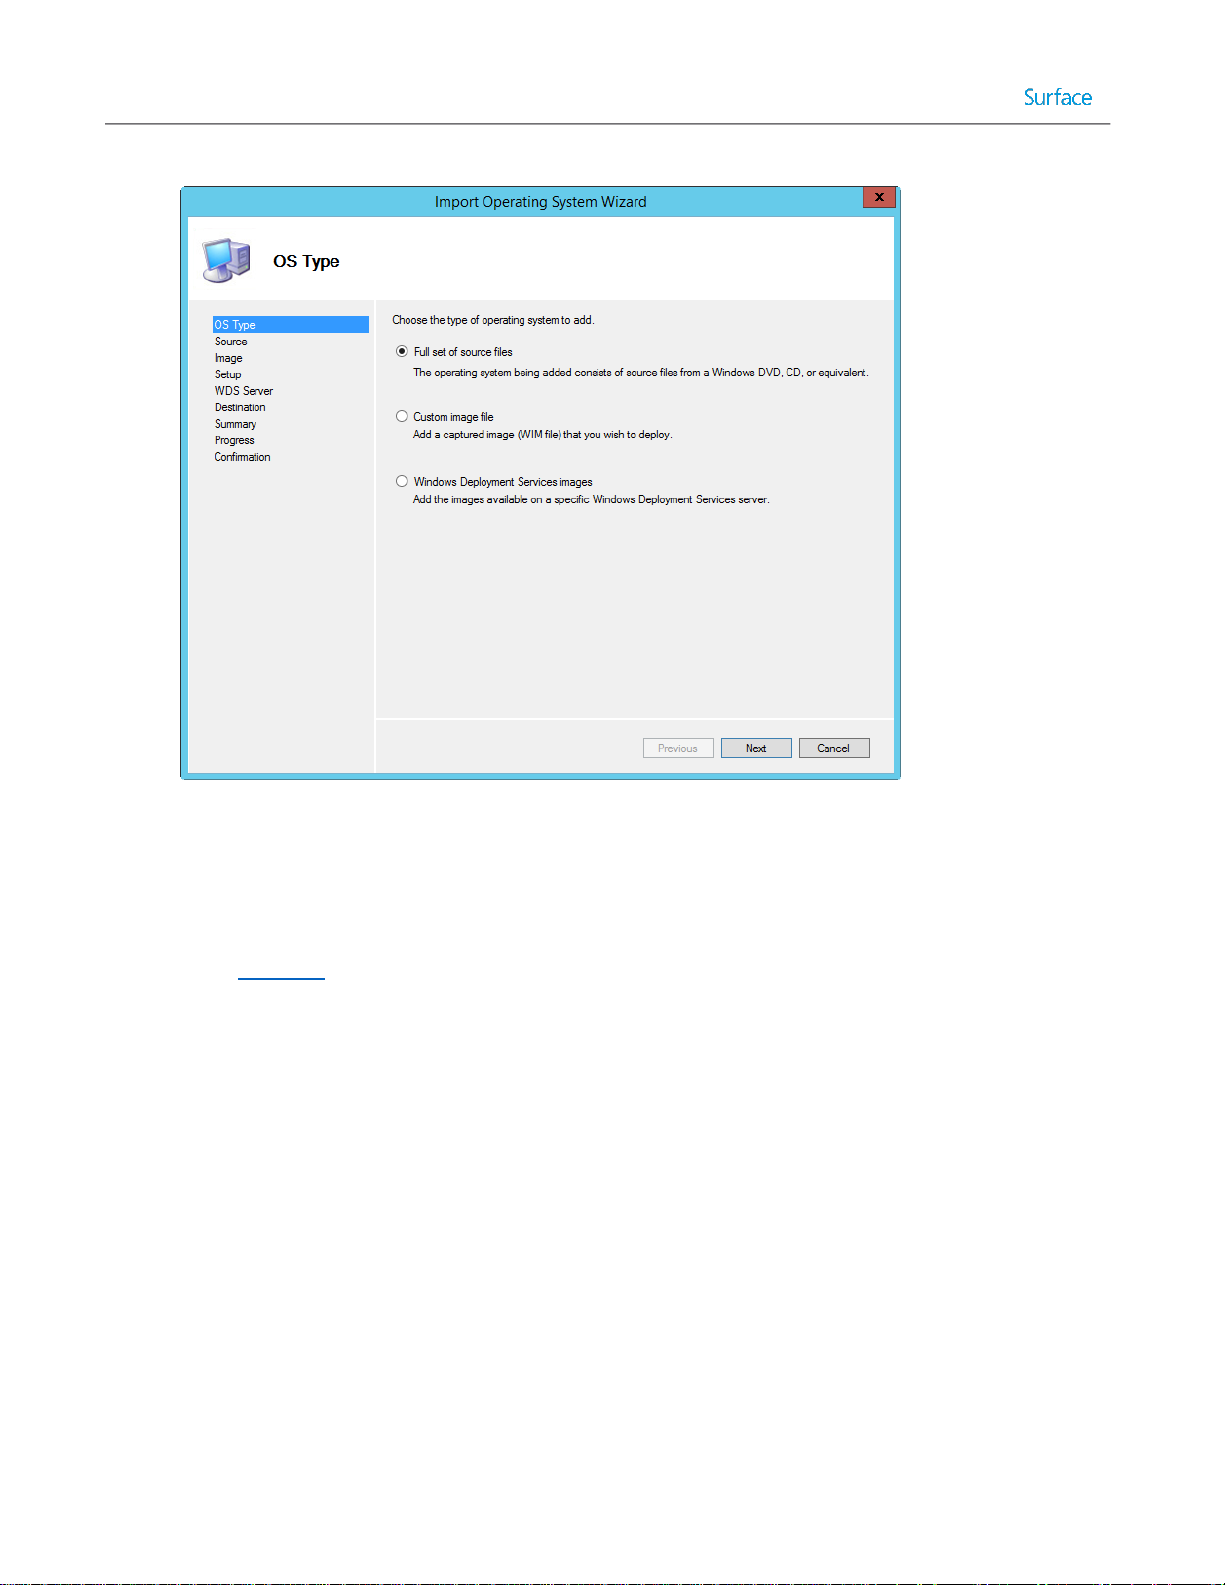
Figure 3.15: Import Operating System Wizard.
5. The Import Operating System Wizard presents a series of steps, as follows:
OS Type – Select the type of operating system to add. Select the Full set of source files option. A full set of
files is required for each operating system you will deploy. More details about the other options is discussed
in Chapter 4. Click Next.
Source – Enter or browse to the path containing the full set of source files. This will be the drive or mounted
ISO file you identified in Step 2. This step is not available if you select Custom image file or Windows
Deployment Services images in the prior step. Click Next.
Image – Enter or browse to the path of your custom WIM file. This step is not available if you select Full set
of source files or Windows Deployment Services images in the first step. Click Next.
Setup – Enter or browse to the set of full source files for the operating system in your custom WIM file. This
option is not available if you select Full set of sources files or Windows Deployment Services images in the
first step. Click Next.
WDS Server – Enter the name of the WDS server from which you will import all images. This option is not
available if you select Full set of sources files or Custom Image file in the first step. Click Next.
Destination – Enter the name of the folder where the operating system files will be stored. This folder is
created in the deployment share on the deployment server. For example, you could enter Windows 8.1 as
the destination. Click Next.
Summary – Review the summary of your operating system import configuration and click Next.
Progress – Displays a progress bar during the importing of the operating system files.
© 2014 Microsoft Page 49
Page 50

Confirmation – Displays confirmation of success or errors generated while importing the operating system
files. Click Finish to close the Import Operating System Wizard.
After you import the operating system files and close the Import Operating System Wizard, the MDT Deployment
Workbench will look similar to the one shown in Figure 3.16.
Figure 3.16: Deployment Workbench after Importing Operating System.
Note: The default name given to the operating system is specified in the operating system source files. You can rename
the operating system by right-clicking the imported operating system and clicking Rename.
Note: As Surface Pro 3 is a 64 bit device with UEFI, a 64 bit operating system is required.
Importing Drivers
While some computers such as virtual machines, can boot from the MDT boot media without additional drivers, the
Surface Ethernet Adapter requires additional drivers that must be added to the boot media. Additionally, the deployed
Surface Pro 3 devices require additional drivers to enable the deployed operating system to function as intended. In
order to include these drivers in a deployment, they must first be imported into the deployment share.
© 2014 Microsoft Page 50
Page 51
Downloading the Surface Pro 3 Firmware and Driver Pack
For Surface Pro 3, as well as Surface Pro and Surface Pro 2, drivers are made available through the Microsoft Download
Center, on the Surface Pro 3, Surface Pro 2, and Surface Pro firmware and driver packs page. This page can be accessed
at http://go.microsoft.com/fwlink/?LinkID=301483, and is shown in Figure 3.17.
Figure 3.17: Microsoft Download Center Page for Firmware and Driver Packs.
At the time of writing, the following resources are available for download:
Surface Ethernet Adapter.zip – Provides drivers for the Surface Ethernet Adapter accessory.
Surface Gigabit Ethernet Adapter.zip – Provides drivers for the Surface Gigabit Ethernet Adapter accessory.
Surface Pro - Enterprise Deployment Quick Start Guide-June2013.pdf – Instructions for enterprise deployment
for Surface Pro and Surface Pro 2, in English
Surface Pro - Enterprise Deployment Quick Start Guide-June2013_JP.PDF – Instructions for enterprise
deployment for Surface Pro and Surface Pro 2, in Japanese.
Surface Pro 1 - August 2014.zip – A collection of the drivers and firmware for Surface Pro.
Surface Pro 2 - July 2014.zip – A collection of the drivers for Surface Pro 2.
Surface Pro 3 - September 2014.zip – A collection of the drivers for Surface Pro 3.
SurfacePro3PenDriverOct62014.zip – An updated driver for Surface Pen.
Windows8.1-KB2969817-x64.msu – An update for the firmware update process.
For Surface Pro 3 deployment, the Quick Start guides and collections for Surface Pro and Surface Pro 2 are not required.
© 2014 Microsoft Page 51
Page 52

Importing Drivers for Windows PE
When configuring a deployment share for an organization that uses many computer models, each using different
drivers, it is advisable to create a separate selection profile for the WinPE boot media. This will help to prevent any
conflicts with drivers and functionality that is not provided in WinPE. The drivers most frequently required by WinPE are
network and storage drivers. To make drivers available to the selection profile, they must be imported into the
deployment share. To import the Surface Ethernet Adapter drivers for WinPE, follow these steps:
1. Open File Explorer and navigate to the download location for the Surface Pro 3 drivers.
2. Extract the Surface Ethernet Adapter and Surface Gigabit Ethernet Adapter ZIP archives to a folder on the
production deployment server.
3. Open the MDT Deployment Workbench.
4. Expand the deployment share tree and select the Out-of-Box Drivers folder.
5. Select the New Folder option from the Actions pane to launch the New Folder dialog box as shown in Figure
3.18.
Figure 3.18: New Folder Dialog Box.
6. The New Folder dialog box shows the following options:
General Settings – Specify the name WinPE and any desired comments and then click Next.
Summary – Confirm the specified options and click Next.
Progress – A progress bar will be displayed as the folder is created.
Confirmation – Confirmation of the successful creation of the folder will be displayed here. Click Finish.
7. Select the newly created WinPE folder in the Out-of-Box Drivers folder.
© 2014 Microsoft Page 52
Page 53
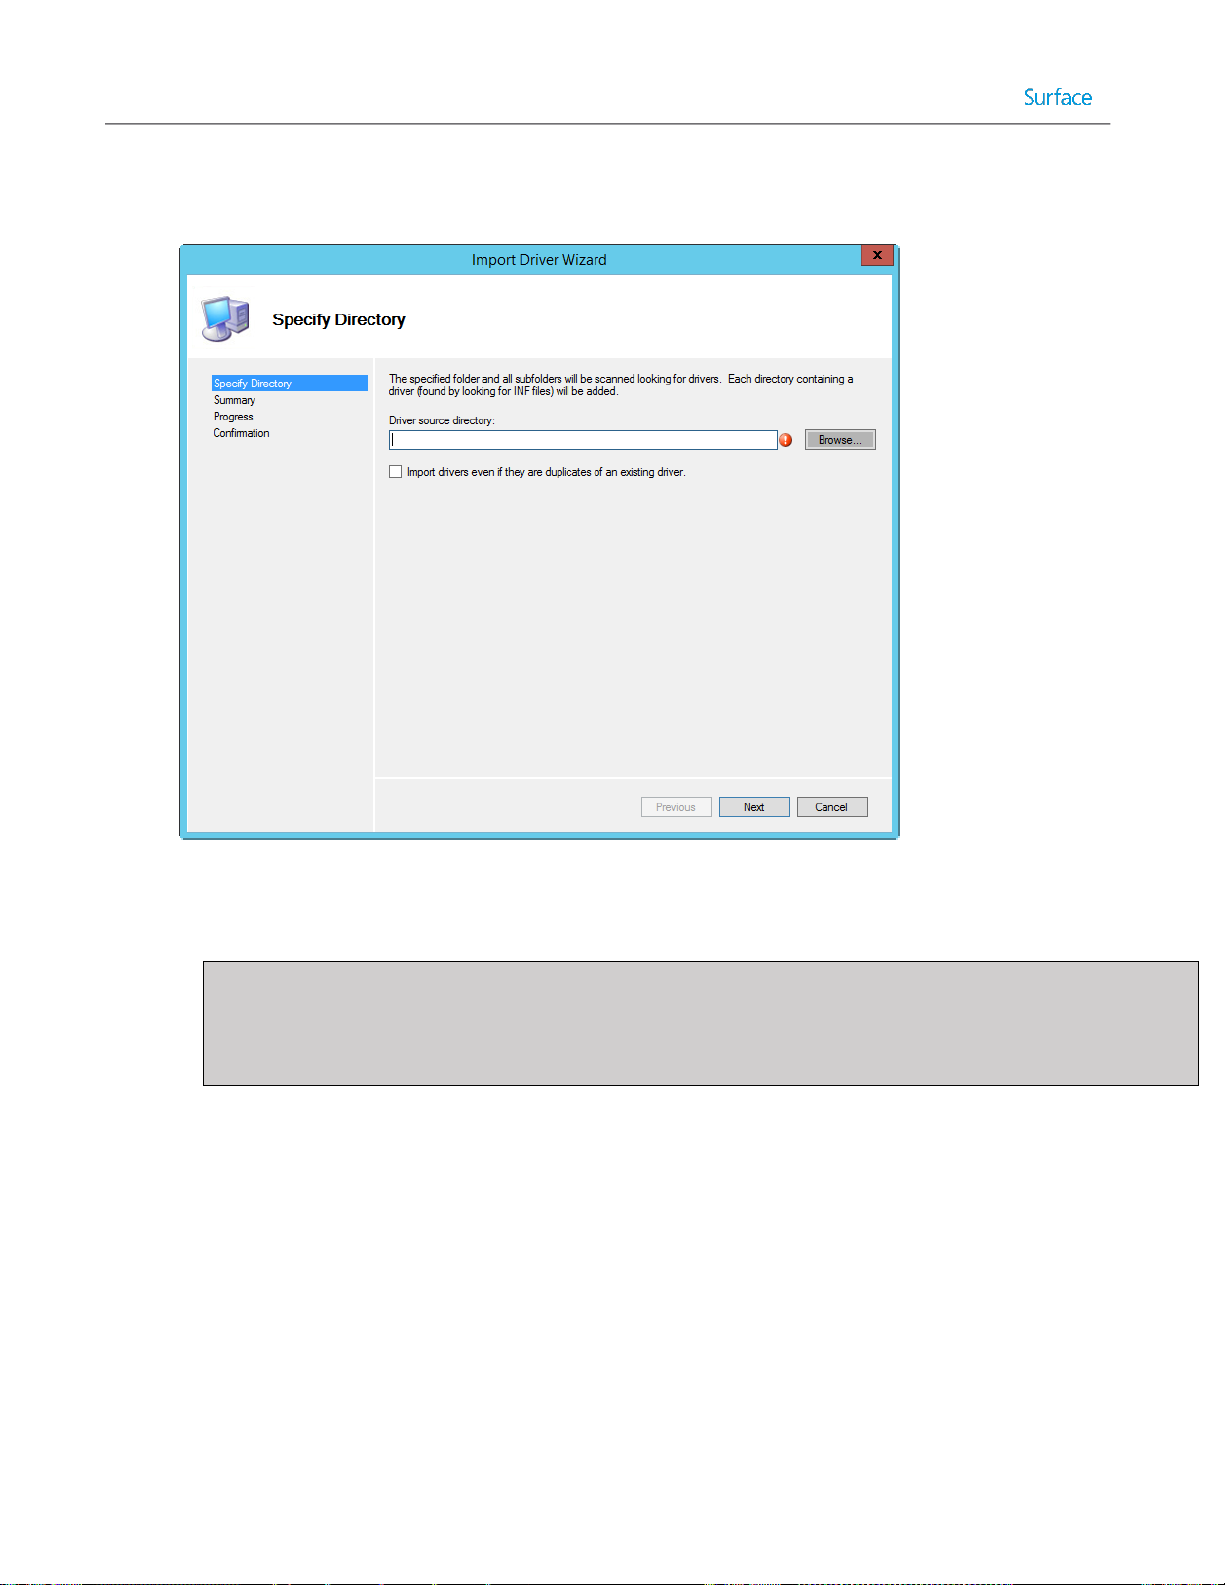
8. Select the Import Drivers option from the Actions pane to launch the Import Driver Wizard, as shown in Figure
3.19.
Figure 3.19: Import Driver Wizard.
9. The Import Driver Wizard presents a series of steps.
Specify Directory – Enter or browse to the folder in which the extracted drivers are located and click Next.
Note: Drivers are imported at the folder level. Therefore, when you import drivers and specify a folder, all
drivers in that folder are imported. WinPE should have only those drivers necessary to boot and connect to
the network. In this scenario, only the Surface Ethernet Adapter drivers are required, so it is a good idea to
locate all other drivers in a separate folder.
Summary – Confirm the specified options and click Next.
Progress – A progress bar will be displayed as the drivers are imported.
Confirmation – Confirmation of the successful import of the drivers will be displayed here. Click Finish.
10. Repeat steps 7-9 and the Import Driver Wizard if required for the second Ethernet adapter folder.
Creating the WinPE Selection Profile
After the drivers for WinPE are imported into the deployment share, the deployment share needs to be configured to
use these drivers when creating boot media by following this procedure:
1. Expand the Advanced Configuration folder of the production deployment share in the Deployment Workbench.
2. Select the Selection Profiles folder.
3. Select New Selection Profile from the Actions pane to launch the New Selection Profile Wizard.
4. The New Selection Profile Wizard presents the following options:
© 2014 Microsoft Page 53
Page 54

General Settings – Specify the name WinPE for the selection profile and any desired comments, then click
Next.
Folders – Expand the deployment share tree and the Out-of-Box Drivers folder and check the box next to
the WinPE folder as shown in Figure 3.20.
Figure 3.20: WinPE Folder Selected In Selection Profile.
Summary – Confirm the specified options and click Next.
Progress – A progress bar will be displayed as the selection profile is created.
Confirmation – Confirmation of the successful selection profile creation will be displayed here. Click Finish.
5. Right-click the deployment share and select Properties and perform these actions:
Select the Windows PE tab.
Select x64 from the Platform drop down menu, as shown in Figure 3.21.
Select the Drivers and Patches tab.
Select WinPE from the Selection profile drop down menu shown in Figure 3.21.
© 2014 Microsoft Page 54
Page 55

Figure 3.21: Windows PE Selection Profile.
Click OK to apply the changes and close the window.
Note: Repeat step 5 for the x86 platform if you are using boot media for 32 bit systems.
Importing Drivers for Windows 8.1
Now that the drivers are configured for the boot media to enable Surface Pro 3 devices to launch the deployment
process from network boot, the drivers for the operating system need to be supplied. As with WinPE, it is beneficial to
organize the drivers used for different operating systems and models. This helps to avoid conflict where different
models may use different versions of the same driver that are incompatible with one another. Selection profiles will be
used to specify the operating system and the model used.
To import the drivers for the operating system, follow these steps:
1. Open File Explorer and navigate to the download location for the Surface Pro 3 drivers.
2. Extract the Surface Pro 3 collection and Surface Pro 3 Pen ZIP archives to a folder on the production deployment
server.
3. Open the MDT Deployment Workbench.
4. Expand the deployment share tree and select the Out-of-Box Drivers folder.
5. Select the New Folder option from the Actions pane to launch the New Folder dialog box.
6. The New Folder dialog box presents the following options:
General Settings – Specify the name Windows 8.1 x64 and any desired comments and then click Next.
Summary – Confirm the specified options and click Next.
Progress – A progress bar will be displayed as the folder is created.
© 2014 Microsoft Page 55
Page 56

Confirmation – Confirmation of the successful creation of the folder will be displayed here. Click Finish.
7. Select the Windows 8.1 x64 folder.
8. Select the New Folder option from the Actions pane to launch the New Folder dialog box.
9. The New Folder dialog box presents the following options:
General Settings – Specify the name Surface Pro 3 and any desired comments and then click Next.
Summary – Confirm the specified options and click Next.
Progress – A progress bar will be displayed as the folder is created.
Confirmation – Confirmation of the successful creation of the folder will be displayed here. Click Finish.
10. Select the newly created Surface Pro 3 folder.
11. Select the Import Drivers option from the Actions pane to launch the Import Driver Wizard.
12. The Import Driver Wizard presents the following options:
Specify Directory – Enter or browse to the folder in which the extracted drivers, including the Surface
Ethernet adapters, the Surface Pro 3 collection, and the Surface Pro 3 Pen driver, are located, then click
Next.
Summary – Confirm the specified options and click Next.
Progress – A progress bar will be displayed as the drivers are imported.
Confirmation – Confirmation of the successful import of the drivers will be displayed here. Click Finish.
All of the drivers provided by the driver and firmware pack downloads should now appear inside the Surface Pro 3
folder. This includes the drivers that provide firmware updates to Surface Pro 3, as shown in Figure 3.22. These drivers
will be injected into the deployment image as part of the deployment task sequence and therefore will be preinstalled in
the image that is written to Surface Pro 3. When the firmware drivers are written to the Surface Pro 3 device for the first
time, as part of the image, the firmware updates will be applied when the computer is restarted. This restart occurs
automatically as a part of the deployment process.
© 2014 Microsoft Page 56
Page 57
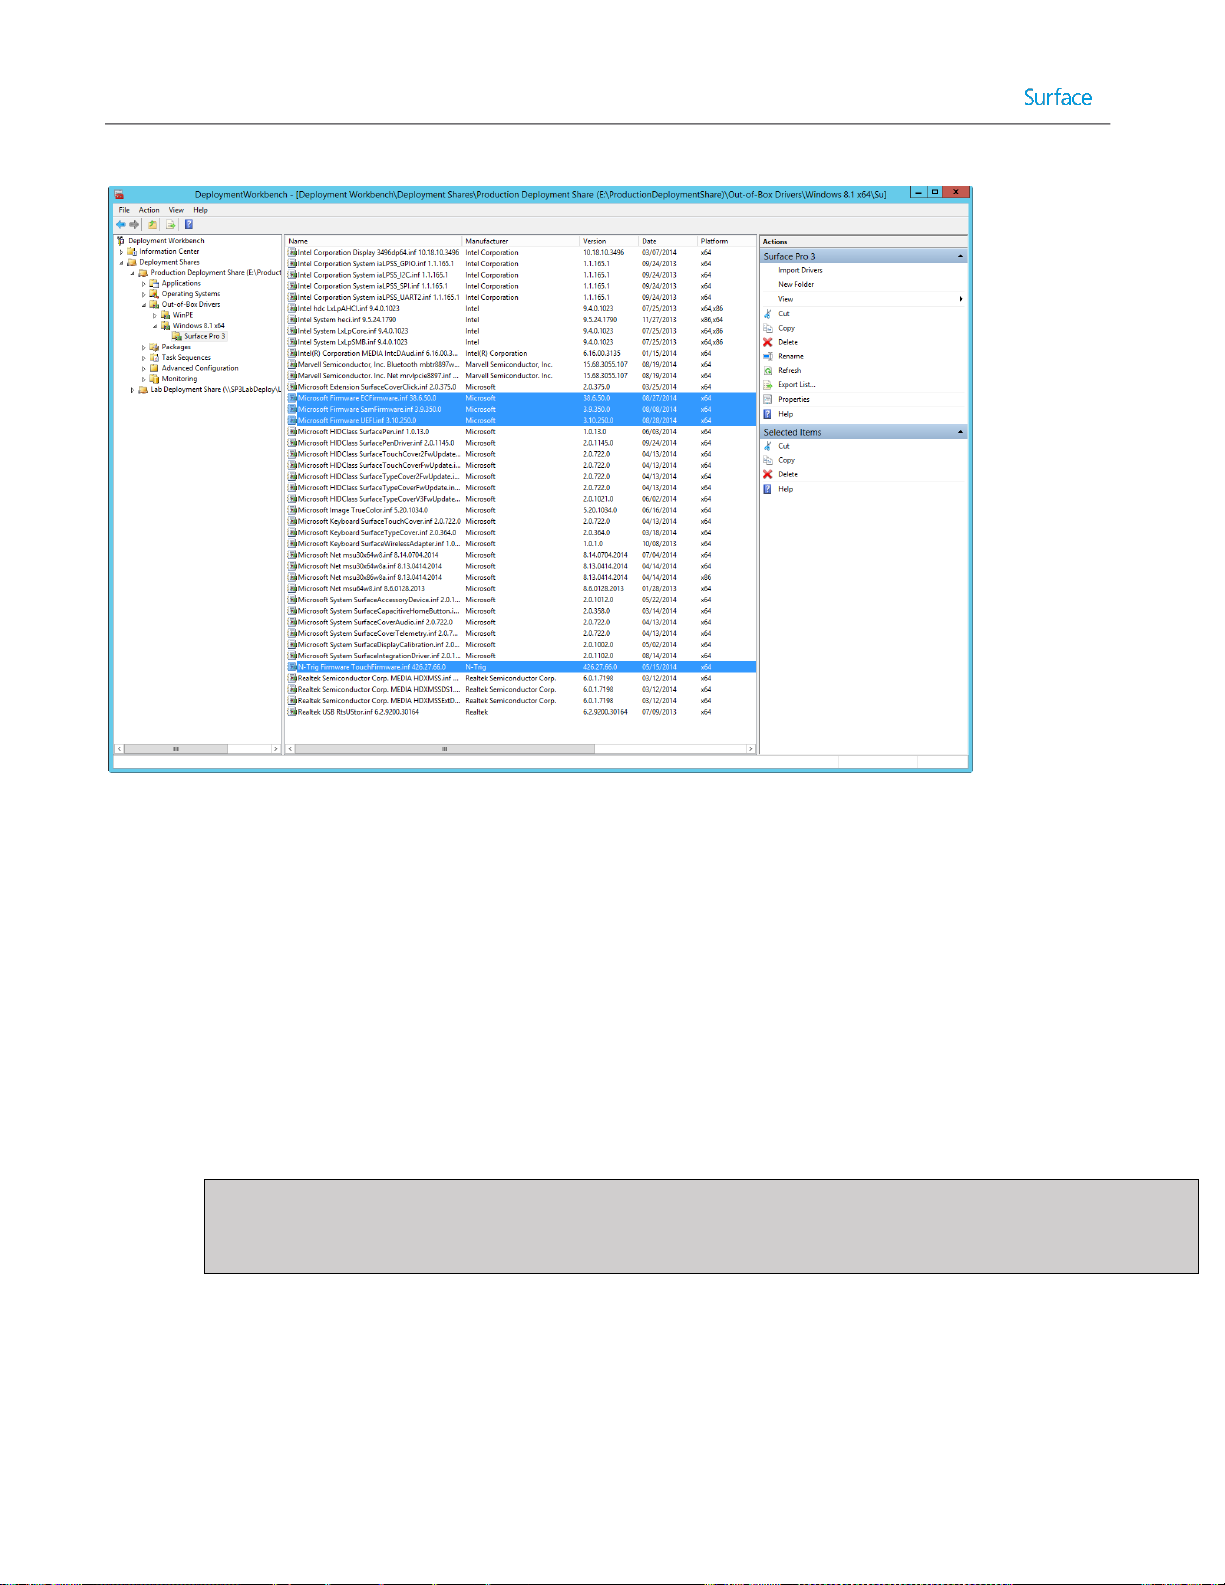
Figure 3.22: Deployment Share Showing Surface Pro 3 Firmware Drivers.
Creating the Surface Pro 3 Win 8.1 x64 Selection Profile
In a production deployment share with multiple makes and models of computers, there may incompatible drivers
available. You need to ensure that only Surface Pro 3 drivers are deployed to Surface Pro 3 devices. The mechanism to
specify which drivers are to be deployed to specific computers is to configure another selection profile, by following
these steps:
1. Expand the Advanced Configuration folder of the deployment share.
2. Select the Selection Profiles folder.
3. Select New Selection Profile from the Actions pane to launch the New Selection Profile Wizard.
4. The New Selection Profile Wizard shows the following options:
General Settings – Specify the name Surface Pro 3 Win 8.1 x64 for the selection profile and any desired
comments, then click Next.
Note: Though the Surface Pro 3 supports only Windows 8.1 Update 64 bit, it is recommended to include the
operating system and architecture in all model selection profile names to allow for separate selection
profiles for each model, operating system, and architecture.
Folders – Expand the deployment share tree, the Out-of-Box Drivers folder, and the Windows 8.1 x64
subfolder, and then check the box next to the Surface Pro 3 folder as shown in Figure 3.23.
© 2014 Microsoft Page 57
Page 58

Figure 3.23: Windows 8.1 x64 Folder Selected In Selection Profile.
Summary – Confirm the specified options and click Next.
Progress – A progress bar will be displayed as the selection profile is created.
Confirmation – Confirmation of the successful selection profile creation will be displayed here. Click Finish.
Creating the Task Sequence
You have now installed the deployment tools, created a deployment share, and imported operating system files and
drivers. All required components are configured and you are ready to begin configuring how the deployment will be
performed. The deployment process is controlled through task sequences. For more details about task sequences, refer
to the Task Sequences section of Chapter 2.
Creating the Deployment Task Sequence
Task sequences are configured in the MDT Deployment Workbench. For this scenario, you will create a basic task
sequence that deploys the imported operating system to the target Surface Pro 3 device. You create a task sequence by
following these steps:
1. In the MDT Deployment Workbench, expand the deployment share.
2. Right-click Task Sequences and click New Task Sequence. This launches the New Task Sequence Wizard, as
shown in Figure 3.24.
© 2014 Microsoft Page 58
Page 59

Figure 3.24: New Task Sequence Wizard.
3. The New Task Sequence Wizard presents a series of steps, as follows:
General Settings – Enter the Task sequence ID and Task sequence name. These fields are used to uniquely
differentiate this task sequence from others in the deployment share. For example, a task sequence to
deploy Windows 8.1 Update Enterprise, you can enter a Task sequence ID of DplyWin8.1Ent and a Task
sequence name of Deploy Windows 8.1 Update Enterprise. Click Next.
Note: The Task sequence ID field only allows for 16 characters with no spaces.
Select Template – Select Standard Client Task Sequence from the dropdown list of predefined templates.
For more information about the additional templates, refer to Chapter 2. Click Next.
Select OS – Select the imported operating system from the list. Click Next.
Specify Product Key – Ensure the Do not specific a product key at this time option is selected. For this
scenario, the product key will be entered at the time of deployment. Click Next.
OS Settings – Enables you to configure the following basic operating system settings, then click Next:
o Full Name – Enter full name you’ll use to register the operating system. This field is required.
o Organization – Enter the name of your organization you’ll use to register the operating system. This
field is required.
o Internet Explorer Home Page – Enter the URL of the home page that comes up when Internet
Explorer is launched. This field is required.
Admin Password – Enter a strong password for the local Administrator account. Click Next.
Summary – Review the summary of your new task sequence and click Next.
Progress – Displays a progress bar during the creation of the new task sequence.
© 2014 Microsoft Page 59
Page 60

Confirmation – Displays confirmation of success or errors generated while creating the task sequence. Click
Finish to close the New Task Sequence Wizard.
Configuring Driver Selection
To configure the task sequence to use the selection profile, follow these steps:
1. Right-click the production deployment task sequence and select Properties.
2. Select the Task Sequence tab.
3. Expand the Preinstall folder and select the Inject Drivers step as shown in Figure 3.25.
4. Select the selection profile that you created for Surface Pro 3 from the Chose a selection profile: drop down
menu as shown in Figure 3.25.
5. Change the option from Install only matching drivers from the selection profile to Install all drivers from the
selection profile as shown in Figure 3.25.
Note: This will force all drivers selected in the selection profile to be installed, even if the PnP signature is not
available on the system. This is important for Surface devices because some components are not visible until
drivers for other components are installed.
Figure 3.25: Inject Drivers Step with Selection Profile Configuration.
© 2014 Microsoft Page 60
Page 61

Note: Specifying the selection profile in the deployment task sequence will make the task sequence applicable
to Surface Pro 3 only. Selection profiles can also be specified with model specific deployment share rules. See
the Customizing Rules for Automation section of Chapter 5.
Preparing Boot Media
Preparing boot media is comprised of two separate steps, each of which is described in this chapter:
Generating boot media – creates the media that the target deployment computer boots from.
Configuring network boot – configures the environment that enables the boot media to read the deployment
share on the deployment server.
The concept of boot media is described in more detail in Chapter 2.
Generating Boot Media
After the task sequence is created, you need to generate the boot media to be used on the Surface Pro 3 device that will
connect to the deployment share (including access to the task sequence and source files). To generate boot media,
follow these steps:
1. In the MDT Deployment Workbench, expand the deployment share.
2. Right-click the name of your deployment share and click Update Deployment Share. This launches the Update
Deployment Share Wizard, as shown in Figure 3.26.
Figure 3.26: Update Deployment Share Wizard.
© 2014 Microsoft Page 61
Page 62

3. The Update Deployment Share Wizard presents a series of steps, as follows:
Options – Enables you to select the desired option for updating the boot media. For this scenario, you can
simply click Next because there is no boot image to update.
Summary – Review the summary of updating the deployment share and click Next.
Progress – Displays a progress bar of updating the deployment share.
Note: Both 32-bit and a 64-bit boot images are created. By default, these images are named
LiteTouchPE_x86.wim and LiteTouchPE_x64.wim respectively and are located in the Boot folder on the
deployment share.
Confirmation – Displays confirmation of success or errors generated while updating the deployment share.
Click Finish to close the Update Deployment Share Wizard.
Importing Boot Media into WDS
You have now installed and configured WDS for network (PXE) boot and created a basic deployment share to support
this scenario. Now you need to add the previously created boot image into WDS to make it available to the PXE boot
clients, such as a Surface Pro 3 device.
To import the boot image into WDS, follow these steps:
1. Launch the Windows Deployment Services console from the Start Screen under Administrative Tools on your
deployment server.
2. Expand the name of your server in the Servers tree and right-click the Boot Images folder. Click Add Boot
Image. This launches the Add Image Wizard.
3. The Add Image Wizard presents a series of steps, as follows:
Image File – Select the LiteTouchPE_x64.wim boot media image file you created earlier in this chapter. Click
Next.
Image Metadata – Prompts you for the image name and description. For this scenario, accept the default
values. Click Next.
Summary – Review the summary of the image to be imported and click Next.
Task Progress – Displays a progress bar during the importing of the boot image. Click Finish to close the Add
Image Wizard.
After the boot image is imported, you’ll see it listed in the Boot Images folder in WDS console, as shown in Figure 3.27.
© 2014 Microsoft Page 62
Page 63

Figure 3.27: WDS Console Showing Imported Boot Image.
Deploying the Basic Scenario
After creating the deployment share in MDT and configuring WDS, you are ready to deploy to the target Surface Pro 3
device. The deployment method is specific to the manual deployment scenario because it requires several prompts to
be addressed on the target computer during the deployment process.
Booting from the Network
To deploy the prepared image to your Surface Pro 3 device, you will need to boot the device from the network. For
Surface Pro 3 devices this can be done with a simple combination of buttons. To boot your Surface Pro 3 from the
network, follow this procedure:
Note: Network booting with a Surface Pro 3 device requires either the Surface Ethernet Adapter or the Surface Pro 3
Docking Station. Other third party external network adapters are not supported for network boot.
1. Connect the Surface Ethernet Adapter to the USB port or insert your Surface Pro 3 into the Surface Pro 3
Docking Station.
2. Power off the Surface Pro 3 device.
3. Press and hold the volume down button.
4. Press and release the power button.
5. Continue to hold the volume down button until the text Checking Media Presence… appears on the screen, as
shown in Figure 3.28, indicating that network boot has begun. Once this text appears, the volume down button
can be released.
© 2014 Microsoft Page 63
Page 64

Figure 3.28: Surface Pro 3 Device Booting from the Network.
6. The network adapter will receive an IP address from a DHCP server and after the WDS PXE service is detected,
will prompt the user to press ENTER to begin the network boot process as shown in Figure 3.29.
Figure 3.29: Confirmation of Successful Connection to WDS Server.
Note: In order to press the Enter key, the Surface Type Cover or a USB keyboard should be connected.
After the network boot process has been initiated, the boot image generated for the MDT deployment share
(LiteTouchPE_x64.wim) will load. A progress bar appears along with the name of the loading image, as shown in Figure
3.30.
Figure 3.30: Network Boot Progress Bar.
© 2014 Microsoft Page 64
Page 65
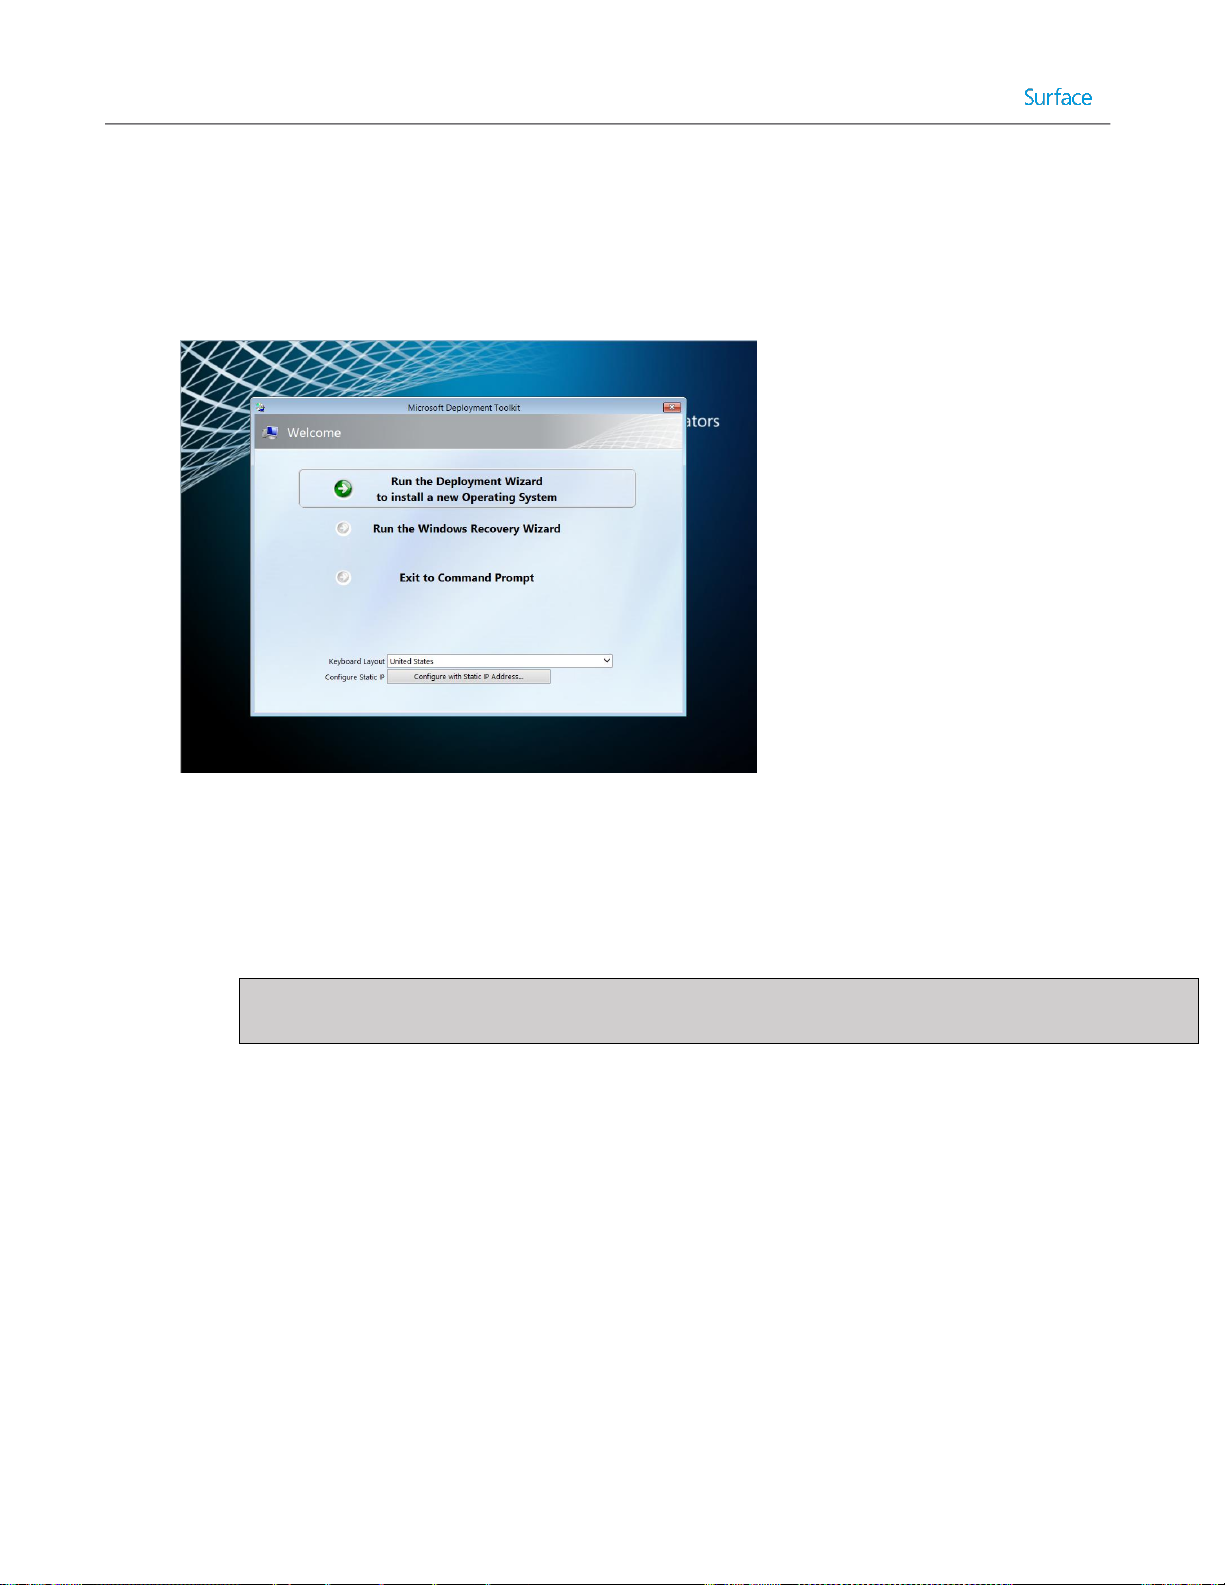
Windows Deployment Wizard
After the boot image is loaded onto the target Surface Pro 3 device, the Microsoft Deployment Toolkit Welcome Page
launches. You can start the Windows Deployment Wizard by following these steps:
1. Select the Run the Deployment Wizard to install a new Operating System option, as shown in Figure 3.31.
Figure 3.31: Microsoft Deployment Toolkit Welcome Page.
2. Enter credentials in these fields for access to the deployment share and click OK:
User Name – Enter the user name for an account that has a minimum permission level of Read. This
field is required.
Password – Enter the password for the account. This field is required.
Domain – Enter the domain where the user account belongs. This field is required.
Note: When using a standalone deployment server that is not connected to a domain, the name of the
deployment server should be used to indicate that a local account is being used.
3. If the specified credentials are valid, the Windows Deployment Wizard launches. The Windows Deployment
Wizard is used to initiate and control the deployment process on the target Surface Pro 3 devices by following a
series of steps presented sequentially:
Task Sequence – Select the desired deployment task sequence that was created earlier in this chapter, then
click Next.
Computer Details – Enter the desired name for the deployed computer and specify either a domain or
workgroup to be joined. If selecting a domain, enter the credentials with permissions to join the domain.
Click Next.
Move Data and Settings – Select the option to control how data and settings are managed, then click Next:
o Do not move user data and settings – Indicates that user data and settings are overwritten. If you
don’t need any existing user data or settings while testing deployment with this scenario, click this
option.
© 2014 Microsoft Page 65
Page 66

o Keep existing partitions – Indicates that any existing partitions should be preserved and not
formatted or partitioned.
o Move user data and settings – Indicates user data and settings should be preserved.
User Data (Restore) – Select the option to control whether user data should be restored with the following
options, then click Next:
o Do not restore user data and settings – No user data is restored from a network location or USMT
backup. For testing a manual deployment, select this option.
o Specify a location – Restores user data from a specified backup location.
Product Key – Select the desired product key option, then click Next:
o No product key is required – Select this option if your deployed operating system will use a KMS
server for activation, or you are using evaluation software. This scenario uses evaluation software,
so select this option.
Note: If you are using a Windows 8.1 Professional image to be licensed using the embedded product
key included with a Surface Pro 3 device (OA 3.0), no product key is required. More details about OA
3.0 are described in Chapter 2.
o Activate the machine with a multiple activation key (MAK) – Select this option if your organization
uses MAK keys, which are used for volume licensed operating systems.
o Use a specific product key – Select this option if you have a single product key, such as one
obtained from a retail box or from a preinstalled operating system.
Locale and Time – Select the desired language and time zone settings from the following options, then click
Next:
o Language to install – Select your desired operating system language.
o Time and currency format – Select your desired time and currency format.
o Keyboard layout – Select your desired keyboard locale.
o Time zone – Select your desired time zone.
Administrator Password – Enter and confirm a strong password for the local Administrator account in the
target Surface Pro 3 device, then click Next.
Capture Image – Select the desired image capture settings from the following options, then click Next:
o Capture an image of this reference computer – Captures an image when using a reference
computer. This option is discussed further in Chapter 4.
o Sysprep this computer – Generalizes the computer but does not capture an image.
o Prepare to capture the machine – Only copies required Sysprep files.
o Do not capture an image of this computer – Does not create any images from the target Surface
Pro 3 device after deployment. Ensure this option is selected for testing the deployment of this
scenario.
Ready – A detailed summary of the selected options is provided under the Details button. Click Begin to
initiate the deployment.
As shown in Figure 3.32, a progress bar is displayed to show the installation progress. The process runs without any
further user interaction until the operating system is fully deployed.
© 2014 Microsoft Page 66
Page 67

Figure 3.32: Installation Progress Bar.
At the completion of a successful deployment, a Deployment Summary page is displayed, as shown in Figure 3.33. After
review, the Deployment Summary page can be closed and the computer and operating system are ready for use or
further customization.
Figure 3.33: Deployment Summary Page.
Note: The system is logged in using the local Administrator account specified in the Windows Deployment Wizard.
© 2014 Microsoft Page 67
Page 68

Chapter 4 – Reference Deployment with MDT
One of the most common deployment tasks required by an organization is the creation of custom images. Sector-based
imaging tools, such as many third-party tools, have no mechanism to customize an image during the deployment
process. On the other hand, file-based imaging tools, such as MDT, can provide customization at the time of
deployment. However, some scenarios still may require a custom image, such as:
Deployment Performance – Capturing an image from a reference system that already includes the latest
updates or applications can consume less bandwidth and fewer system resources than having MDT manage
those updates and applications at the time of deployment. For example, deploying an image with Windows
Updates already installed can be much faster than having those updates injected as packages or having updates
applied during the task sequence.
Customization – Some customizations do not support automated deployment, such as apps that require user
interaction in a GUI. Other customizations are performed only during image creation, such as the examples
shown in the Customizations to the Reference Image section later in this chapter.
Deployment Scope – Capturing an image from a reference system that already includes updates, applications,
and drivers) can take far less time than having MDT manage updates, applications, and drivers at the time of
deployment. For example, to include .NET framework in an image for deployment of limited scope it could be
faster to download and install .NET framework on the reference computer before capturing an image than to
download the files for installation, research the commands for silent installation, and import the application into
MDT.
The reference deployment scenario in this chapter builds upon the manual deployment scenario discussed in Chapter 3.
The reference deployment scenario increases the level of automation over the manual deployment scenario by
introducing some customization.
The reference deployment scenario outlined in this chapter is applicable to organizations or businesses of any size and is
often the next step towards more the more complex deployments described in Chapter 5 and Chapter 6.
The lab scenario used in this chapter is comprised of only one physical system: A Windows Server 2012 R2 environment
configured with Hyper-V. The VMs hosted by the physical server are designated as the virtual lab for testing, planning,
creation, and deployment of images. Hyper-V is configured with a virtual switch to allow connectivity between virtual
machines and the local network and internet access.
The environment, as shown in Figure 4.1, is configured as follows:
Virtualization Host:
o Hyper-V (either server or client) to host two virtual machines
o Virtual Switch (configured to provide network and internet access to virtual machines)
Note: Machines connected to the virtual switch must be able to receive IP addresses from DHCP, a
prerequisite for PXE network boot.
Virtual Machine (VM) 1: Deployment Server
o Windows Server 2012 R2
o Windows Assessment and Deployment Kit (Windows ADK)
o Microsoft Deployment Toolkit (MDT)
o Windows Deployment Services (WDS)
© 2014 Microsoft Page 68
Page 69

Instructions for installation of the deployment tools are provided in Chapter 3.
Virtualization
Host
VM2
(Reference System)
Hyper-V Virtual Machines
VM1
(Deployment Server)
VM3
(Test System)
Virtual Machine (VM) 2: Reference System
o Generation 1 Virtual Machine
o Legacy network Adapter
o No operating system installed
Virtual Machine (VM) 3: Test System
o Generation 1 Virtual Machine
o Legacy network Adapter
o No operating system installed
The conceptual process of capturing and deploying images is described in Chapter 2. For the reference deployment
scenario outlined in this chapter, VM1 is responsible for deploying install.wim as a base image to VM2. You then
customize the base image according to your needs. After customization, you capture the image from VM2 to VM1 and
deploy it to VM3.
Figure 4.1: Overview of Lab Environment.
© 2014 Microsoft Page 69
Page 70

Note: It is recommended to use generation 1 virtual machines for image creation because the resulting images are
compatible with a wider range of potential clients. To support PXE boot, generation 1 virtual machines must use a legacy
network adapter.
Configuring Deployment Share Rules
In Chapter 3, you learned how to create a new deployment share on the deployment server. If necessary, refer to
Chapter 3 to learn how to navigate to and create the deployment share. During creation, a several options can be
specified to control the behavior of the deployment process. These options result in the enabling and disabling of
specific prompts presented to the user/technician by the Windows Deployment Wizard. In the reference deployment
scenario, described herein, you’ll learn how to configure the options to suppress some of the prompts, thereby reducing
the amount of user interaction required from Chapter 3.
To suppress Windows Deployment Wizard prompts, follow this procedure:
1. Create a new deployment share by following the procedure you learned in the Creating a Deployment Share
section of Chapter 3, but stop at the Options page.
2. In Chapter 3, you selected all options, which resulted in every possible prompt during deployment. In the
reference deployment, some of those prompts are suppressed by unselecting these options, as shown in Figure
4.2:
Ask if a computer backup should be performed – This option can be unselected because no users or data
(except for tests accounts) will exist.
Ask for a product key – This option can be unselected because the product key will be specified in the
deployment task sequence.
Ask to set the local Administrator password – This option can be unselected because the password for the
local Administrator account will be supplied in the task sequence.
Ask if BitLocker should be enabled – This option can be unselected because encryption is not required in a
lab environment where no user data will exist on deployed systems.
© 2014 Microsoft Page 70
Page 71
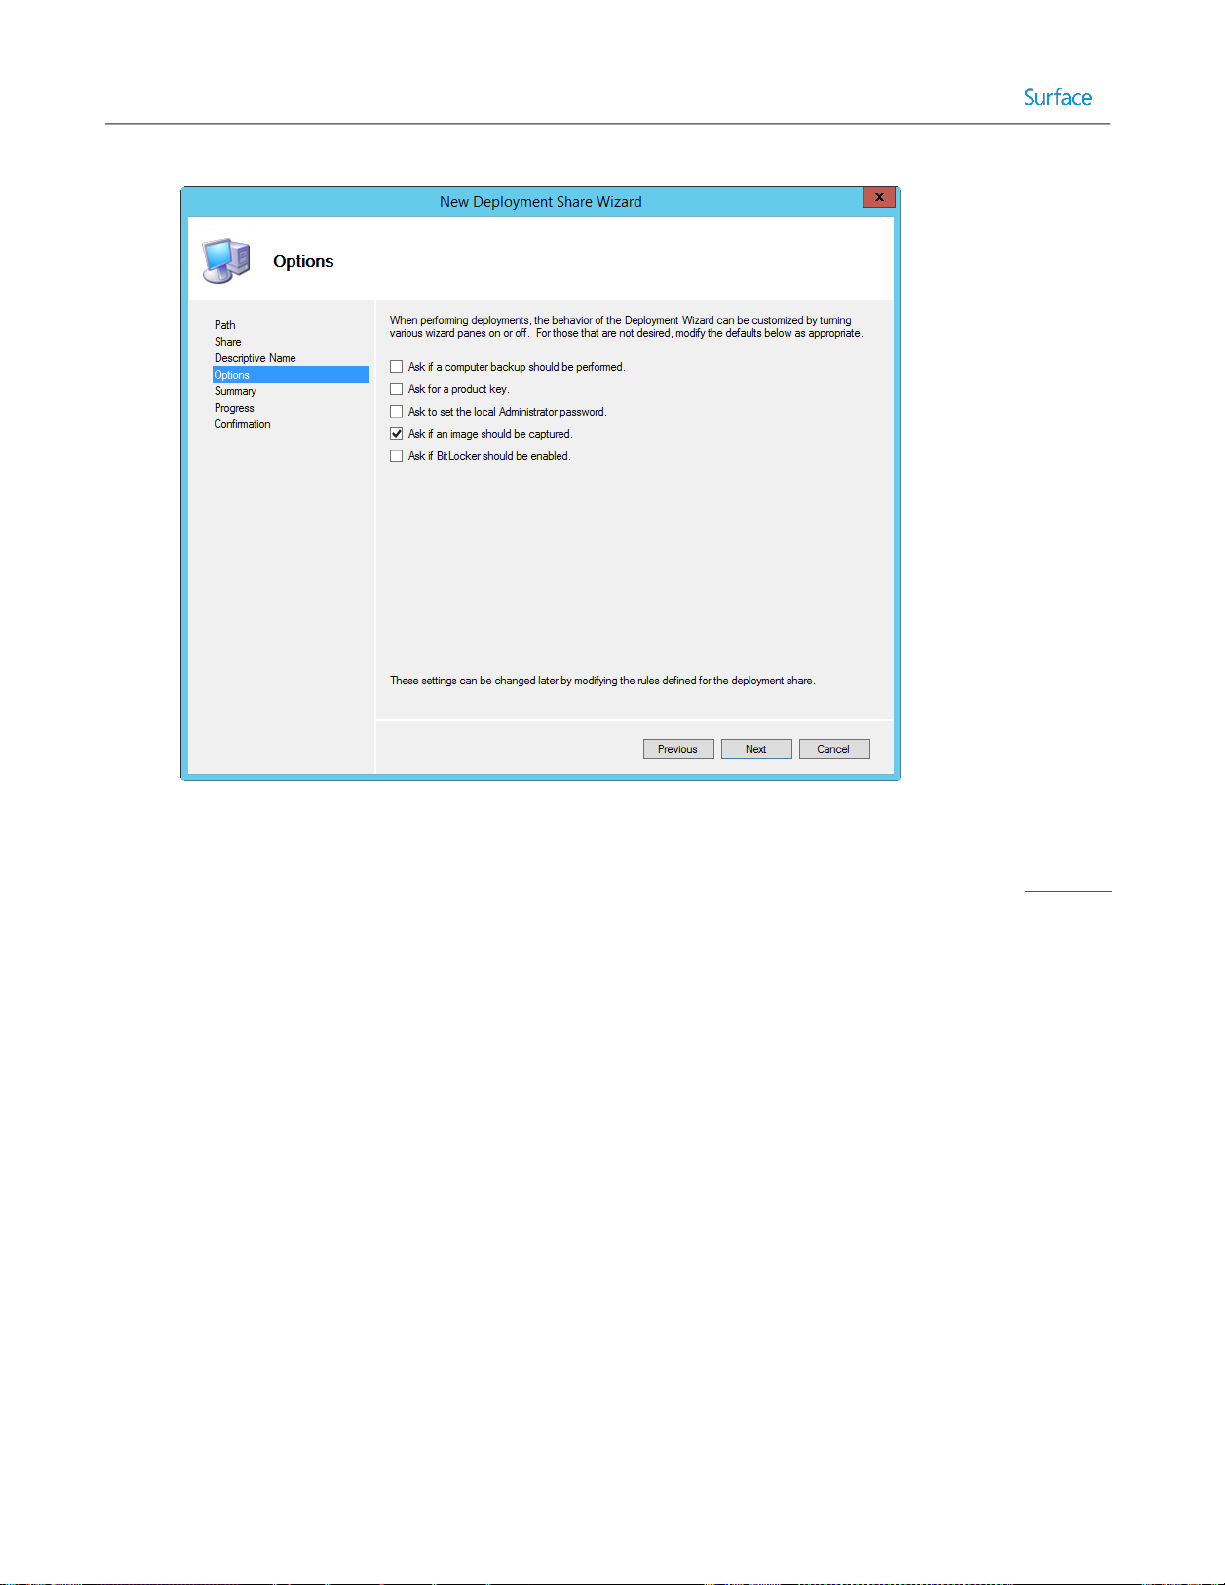
Figure 4.2: New Deployment Share Options.
3. Continue clicking Next to complete and close the New Deployment Share Wizard as you did in Chapter 3.
Configuring Windows Deployment Wizard Rules
The values for the options on the deployment share Options page, shown in Figure 4.2, are specified as settings, known
as rules. These rules are stored in a file named customsettings.ini. Each deployment share contains this file, so each can
be configured differently. The five options on the page shown in Figure 4.2 are not the only options that can be
configured, but additional options can only be configured by editing the customsettings.ini file.
To edit the customsettings.ini file, follow these steps:
1. Expand the Deployment Share tree in the Deployment Workbench and right-click the deployment share, and
then click Properties.
2. Click the Rules tab. This brings up the screen shown in Figure 4.3.
© 2014 Microsoft Page 71
Page 72
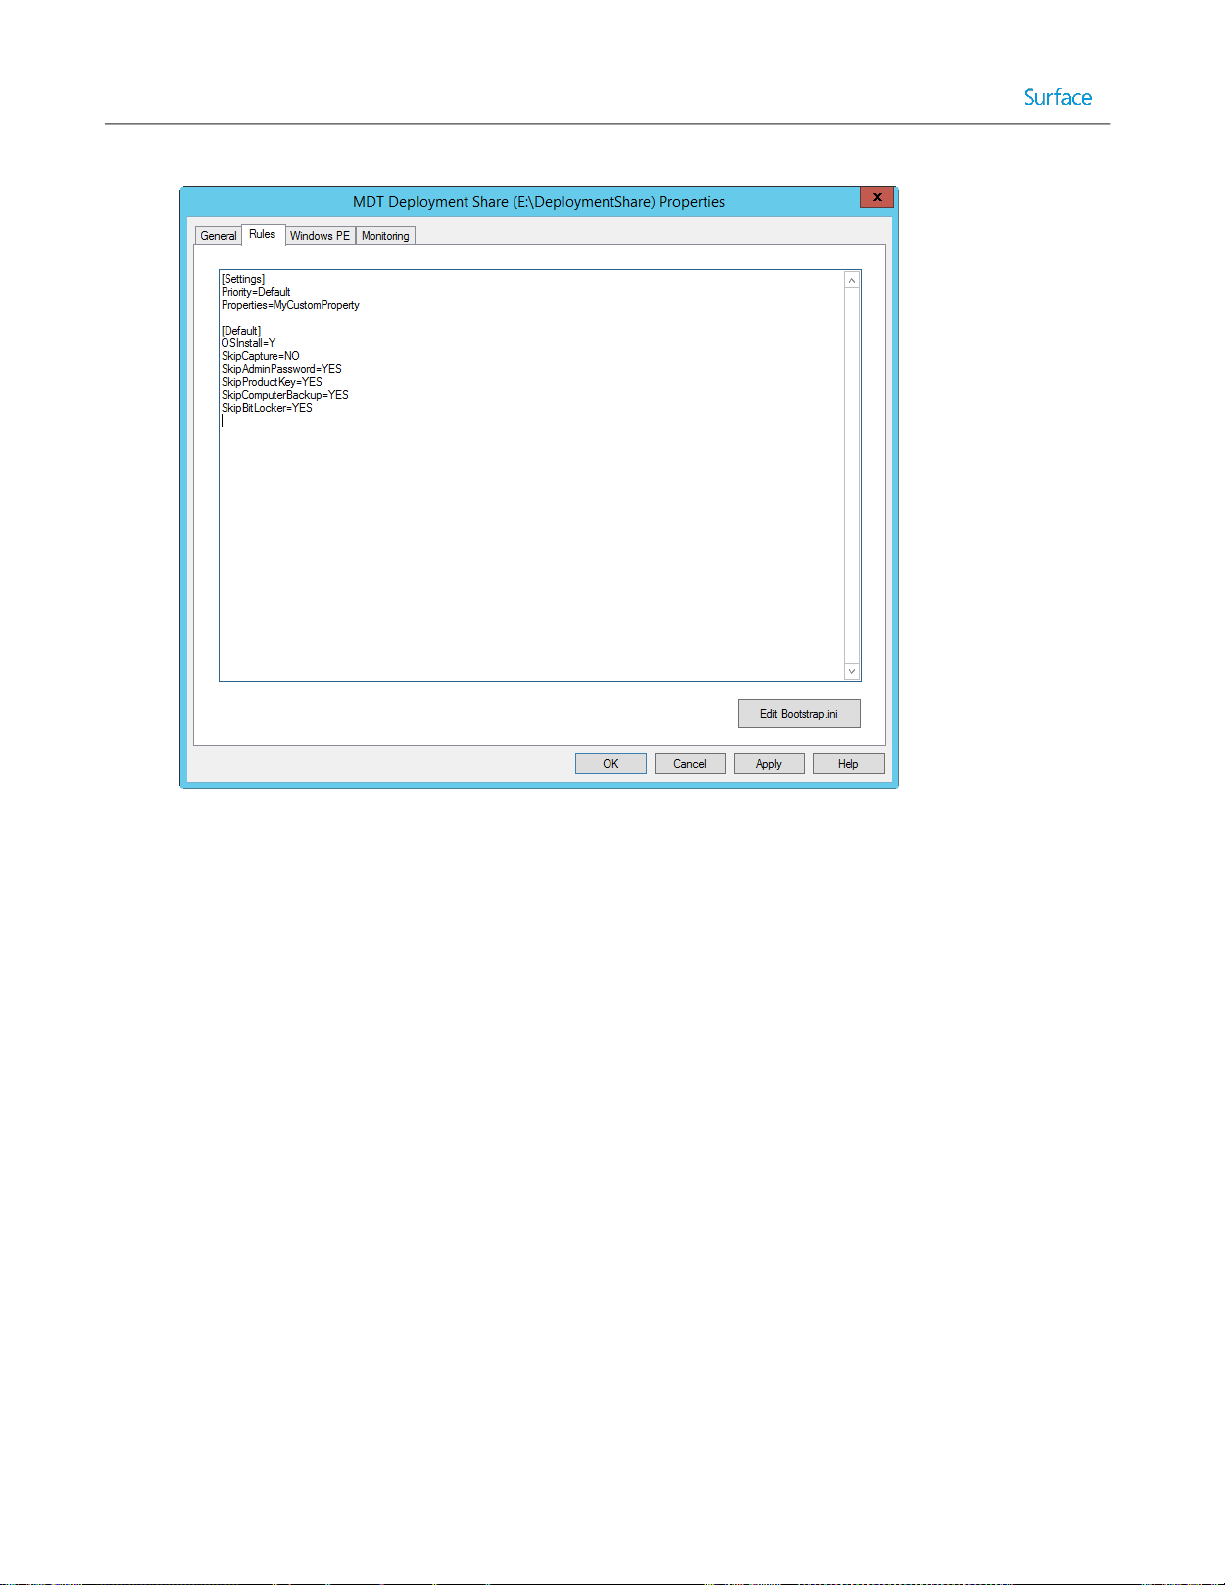
Figure 4.3: Original Deployment Share Rules.
Notice that the options in the [Default] section correspond to the options selected in the GUI screen in Figure
4.2.
3. Specify additional customizations by replacing the text shown in Figure 4.3 with the text shown in Listing 4.1.
[Settings]
Priority=Default
Properties=MyCustomProperty
[Default]
OSInstall=Y
SkipCapture=NO
SkipAdminPassword=YES
SkipProductKey=YES
SkipComputerBackup=YES
SkipBitLocker=YES
SkipBDDWelcome=YES
SkipUserData=YES
UserDataLocation=NONE
SkipDomainMembership=YES
JoinWorkgroup=WORKGROUP
SkipLocaleSelection=YES
KeyboardLocale=en-US
UserLocale=en-US
UILanguage=en-US
© 2014 Microsoft Page 72
Page 73

SkipTimeZone=YES
TimeZoneName=Pacific Standard Time
UserDomain=SP3DEPLOY
UserID=MDT
UserPassword=P@ssw0rd
SkipFinalSummary=YES
Listing 4.1: Specifying Additional Customizations in the customsettings.ini File.
Note: This guide does not outline every possible customization option in the customsettings.ini file. For more details
about what can be customized and the values that can be specified, refer to the MDT Toolkit Reference, available in the
MDT documentation. For more information about downloading MDT documentation, refer to the Installing Deployment
Tools section of Chapter 3.
The additional settings specified in Listing 4.1 are:
SkipBDDWelcome – Setting this value to YES bypasses the MDT Welcome Page when the Windows Deployment
Wizard is launched.
SkipUserData – Setting this value to YES bypasses the prompts to back up or restore user data.
UserDataLocation – Setting this value to NONE instructs MDT that user data should not be backed up. For more
information on backing up user data with this setting, see the Migrating User Data section of Chapter 8. This
setting is required when specifying YES for the SkipUserData rule.
SkipDomainMembership – This setting controls the prompts for domain or workgroup on the Computer Details
page of the Windows Deployment Wizard. When set to YES, the setting JoinWorkgroup or JoinDomain must
also be set to supply the information otherwise provided at the prompt.
SkipLocaleSelection – This setting controls the localization and language prompts on the Locale and Time page
of the Windows Deployment Wizard. When set to YES, the following settings must be configured to specify the
information otherwise provided at the prompt:
o KeyboardLocale
o UserLocale
o UILanguage
SkipTimeZone – This setting controls the prompt for time zone. When both the SkipTimeZone and
SkipLocaleSelection settings are set to YES, the Locale and Time page will be skipped. When set to YES, the
desired time zone must be specified with the setting TimeZoneName.
These settings are used to specify the credentials used by the Windows Deployment Wizard during
deployment:
o UserDomain
o UserID
o UserPassword
SkipFinalSummary – This setting determines whether a final summary will be displayed upon deployment
completion.
Note: The reference system, the computer that will be prepared with a base configuration before being captured to an
image for deployment to other computers, should not be joined to a domain to ensure that no group policies are
applied to the base environment. To ensure that systems deployed in the lab environment are not joined to the domain,
the JoinWorkgroup setting must be specified in the deployment share rules.
© 2014 Microsoft Page 73
Page 74

Configuring Boot Media Rules
In the same way that rules defined in customsettings.ini control the behavior of the Windows Deployment Wizard,
rules defined in the file bootstrap.ini control the way the boot media for a deployment share behaves. The default
behavior when booting to the MDT boot media is:
1. Before the Windows Deployment Wizard is launched, the MDT Welcome Screen is displayed and shows a Run
the Deployment Wizard to install a new Operating System button.
2. Clicking the Run the Deployment Wizard to install a new Operating System button prompts the user to specify
credentials for connectivity to the deployment share.
Configuring bootstrap.ini to instruct the Windows Deployment Wizard to launch without displaying the Welcome
Screen and to bypass the prompts for credentials can performed with this procedure:
1. Expand the Deployment Share tree in the Deployment Workbench and right-click the deployment share, and
then click Properties.
2. Click the Rules tab. This brings up the screen shown in Figure 4.3.
3. Select the Edit Bootstrap.ini button. This opens the bootstrap.ini file in Notepad as shown in Figure 4.4.
Figure 4.4: Original Bootstrap.ini File Configuration.
4. Specify additional customizations by replacing the text shown in Figure 4.4 with the text shown in Listing 4.2.
[Settings]
Priority=Default
© 2014 Microsoft Page 74
Page 75

[Default]
DeployRoot=\\SP3DEPLOY\LabDeploymentShare
UserDomain=SP3DEPLOY
UserID=MDT
UserPassword=P@ssw0rd
SkipBDDWelcome=YES
Listing 4.2: Additional Rules in Bootstrap.ini.
The additional settings specified in Listing 4.2 are:
SkipBDDWelcome – Setting this value to YES bypasses the MDT Welcome Page when the boot media is
launched.
These settings are used to specify the credentials used by the boot media to connect to the deployment share.
o UserDomain
o UserID
o UserPassword
Note: Credentials specified in the bootstrap.ini and customsettings.ini files are stored in plaintext on the MDT
boot media. It is recommended to use a local user account dedicated to deployment processes that has readonly permissions to the deployment share.
After the deployment share is created and configured with the desired rules for automation, you then supply the
installation files for the operating system. Import the source files for the operating system to be deployed to the
reference system, which is detailed in the Importing an Operating System section in Chapter 3.
Creating a Reference Deployment Task Sequence
You have now configured the deployment share for automation and supplied source files for the operating system to be
deployed to the reference system. Contrary to the manual deployment scenario discussed in Chapter 3, for the
reference deployment scenario, the task sequence includes additional steps to automate the deployment and
installation of Windows Updates. To create the reference deployment task sequence, begin by following the procedure
shown in the Creating the Deployment Task Sequence section of Chapter 3, but then customize according to the
instructions in this section.
Note: Because the SkipAdminPassword rule is set to a value of YES, the user is not prompted for a password at the time
of deployment, so it must be specified in the task sequence.
After the reference deployment task sequence is created, additional behaviors or customizations can be specified. To
open the task sequence, expand the Task Sequences section of the deployment share and double-click the task
sequence. The properties of a task sequence include these three tabs:
General – Contains the name, comments, and target platforms of the task sequence. The task sequence can also
be enabled or disabled from this tab.
Task Sequence – Contains the steps to be performed by the task sequence.
© 2014 Microsoft Page 75
Page 76

OS Info – Contains information regarding the operating system used by the task sequence and a button to edit
the answer file that is used by the task sequence.
Enabling Windows Updates
To instruct the deployment process to run Windows Updates, follow this procedure:
1. Expand the lab deployment share in the Deployment Share tree in the Deployment Workbench and click the
Task Sequences folder.
2. Right-click the reference deployment task sequence created earlier in this chapter.
3. Click Properties.
4. Select the Task Sequence tab.
5. Expand the State Restore folder.
6. Select the Windows Update (Pre-Application Installation) step.
7. Select the Options tab for the selected step as shown in Figure 4.5.
Figure 4.5: Windows Update Step Enabled.
8. Uncheck the Disable this step checkbox.
9. Select the Windows Update (Post-Application Installation) step.
10. Select the Options tab for the selected step.
11. Uncheck the Disable this step check box.
12. Click OK to save and close the task sequence properties.
© 2014 Microsoft Page 76
Page 77

Note: Enabling Windows Update during deployment will significantly increase the time required to perform the
deployment task sequence. The increase in time is dependent on how many updates must be installed.
The task sequence is now configured to install Windows Updates on the reference system.
Deploying to the Reference System
Network boot is required to deploy to the reference system. See Chapter 3 for a complete walkthrough of configuring
WDS for network boot, generating boot media, and importing boot media for use with WDS. These steps are required
before proceeding.
To deploy an image to the reference system, follow these steps:
1. Verify the boot order is configured to boot from the network as the first priority in the settings of the Hyper-V
virtual machine as shown in Figure 4.6:
Figure 4.6: Boot Priority in Hyper-V Virtual Machine Settings.
2. In Hyper-V, start VM2, which is a blank virtual machine. The adapter will receive an IP address from the DHCP
server and then contact the PXE server.
3. After the PXE server is found, the PXE boot screen is displayed, as shown in Figure 4.7.
© 2014 Microsoft Page 77
Page 78

Figure 4.7: WDS PXE Boot Screen.
4. Press Enter to boot from the network. This launches the MDT boot media and processes the bootstrap.ini and
customsettings.ini configuration files. You’ll notice a progress bar on the screen.
5. The Task Sequence page is displayed. Select the reference deployment task sequence created earlier in this
chapter, as shown in Figure 4.8. Click Next.
Figure 4.8: Selecting the Task Sequence.
© 2014 Microsoft Page 78
Page 79

6. Enter the desired computer name on the Computer Details page as shown in Figure 4.9 and click Next.
Figure 4.9: Entering the Computer Name.
The Installation Progress window appears to show the progress of the deployment. The deployment process will write
the image to the reference computer and automatically manage the installation of Windows Updates, as shown in
Figure 4.10.
Figure 4.10: Progress of Windows Updates Installation.
© 2014 Microsoft Page 79
Page 80

When complete, the Windows Deployment Wizard will close automatically and the system will be logged in as the
Administrator account with the password supplied during task sequence creation. The reference system is now ready
for application installation, customization, and tweaking before it is captured back to the deployment share as an image.
Customizations to the Reference Image
Before an image of the reference system is captured for deployment to other computers, it can be customized in a
number of ways. Any changes or settings made to the reference system will be captured in the resulting image and
therefore will be included on any deployed computers using that image. Examples of changes to a reference system
include installed applications, changed settings, or any data placed on the system.
Customizing the experience for all new users on a computer that uses a deployed image follows this overall procedure,
which is described in more detail throughout the rest of this chapter:
1. Make desired changes to the reference system while being logged in as the Administrator account.
2. Capture the image.
3. Deploy the image, specifying the CopyProfile setting, which copies the customized changes made to the
Administrator profile to the default profile. The default profile is used as a baseline for users logging into a
computer for the first time.
Note: The CopyProfile setting must be configured in the deployment task sequence, not the capture task
sequence. The CopyProfile setting is processed in the Specialize pass, during deployment.
4. During deployment, the Administrator account is automatically deleted.
This section shows how to customize the reference system to include:
Customization of the wallpaper
Customization of the default user account picture
Removal of Windows Store apps
Customization of the Start Screen
Note: As any changes to the system are recorded in the image, it is highly recommended to clean up any
temporary files, application installers, and empty the recycle bin before capturing.
Customizing the Wallpaper
To customize the wallpaper of the reference system, follow these steps:
1. Place the desired wallpaper image in the C:\Windows\Web\Wallpaper folder on the reference system. This will
make the wallpaper available in the Windows Desktop Backgrounds picture location. This example uses the
Microsoft Surface wallpaper, as shown in Figure 4.11, which is located in the
C:\Windows\Web\Wallpaper\Surface folder in the unaltered Surface Pro 3 installation of Windows 8.1
Professional.
2. Right-click the desktop and select Personalize to launch the Personalization control panel applet.
3. Click Desktop Background, then select the desired wallpaper(s) and click Save Changes.
4. Select the Save Theme option under My Themes and assign the desired name for the theme.
5. Close the Personalization control panel applet.
© 2014 Microsoft Page 80
Page 81

Figure 4.11: Configured Microsoft Surface Wallpaper.
Customizing the Default User Account Picture
The default user account picture is used as the default picture for each new account created on a computer, unless the
user changes it. The default user account picture is not configured as a component of the user profile, but as a separate
set of images stored in the C:\ProgramData\Microsoft\User Account Pictures folder. To customize the default user
account picture, follow these steps:
1. Open File Explorer.
2. Enter C:\ProgramData\Microsoft\User Account Pictures in the address bar. The full path must be entered
because the ProgramData folder is hidden by default and cannot be selected or browsed without enabling
display of hidden files and folders. This shows the default screen in Figure 4.12 before image replacement.
© 2014 Microsoft Page 81
Page 82
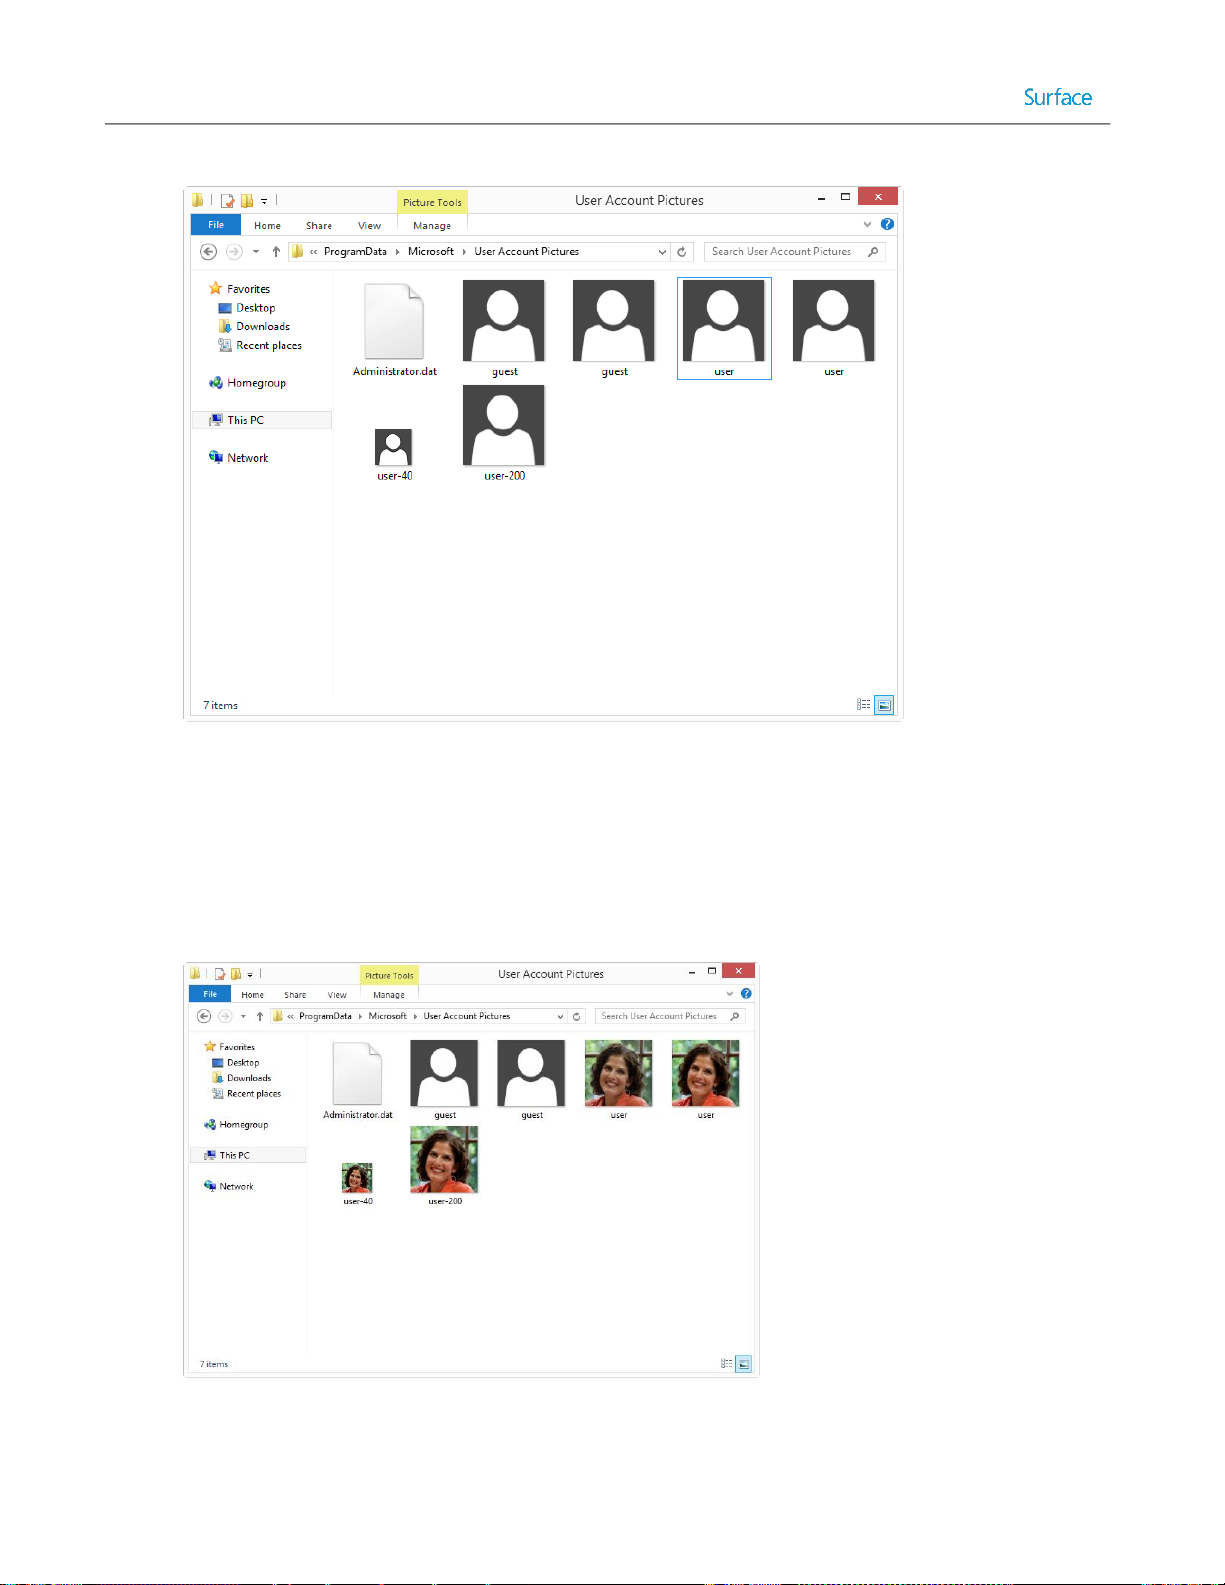
Figure 4.12: User Account Picture Before Replacement.
3. For the default user account, these four images must be provided in the specified format and size:
user.bmp (448x448 pixels)
user.png (448x448 pixels)
user-40.png (40x40 pixels)
user-200.png (200x200 pixels)
4. Replace all four image files with your desired customized image, as shown in Figure 4.13.
Figure 4.13: User Account Picture After Replacement.
© 2014 Microsoft Page 82
Page 83

5. When prompted to Replace or Skip Files, select Replace the files in the destination.
6. When the Destination Folder Access Denied dialog box appears, check the Do this for all current items
checkbox to provide administrator permission to copy files to the folder and click Continue.
7. Close File Explorer. After customization, the default user account picture is shown in Figure 4.14.
Figure 4.14: Customized User Account Picture.
Customizing Windows Store Apps
It is important to understand the relationship between the provisioned apps and installed apps. A provisioned app is
staged in the image and will be installed at the first logon for each user. An app is installed for a specific user. When a
user updates an app or installs an app from the Windows Store, it becomes installed only for that user. Therefore, there
becomes a mismatch between the user’s installed app and the staged provisioned app.
For example, when an app is uninstalled for a user, it will still be installed for any new users on that computer. This is
because the app is still provisioned. If an app is unprovisioned it will not be installed for new users on the computer, but
it will remain installed for any users who had already installed the app. When an app is installed from the Windows
Store, it is installed only for that individual user but not provisioned for new users.
Windows Store apps cannot be updated during the customization of a reference system. Updating these apps including
the built in apps such as Mail, Calendar, or News will cause Sysprep to fail. This is because when apps are updated, the
updated version is installed only for the user. This breaks the association with the provisioned app, which is available for
all users of the computer.
To completely remove a Windows Store app from the image, it must be removed for both the user (uninstalled) and the
computer (un-provisioned). This is because Windows Store apps can exist in a state where they are available for all users
of a computer even when they are not installed for a specific user, or they can exist for a specific user, but not all users
of the computer.
To begin, refer to Figure 4.15 to see what the Start Screen looks like before customization.
© 2014 Microsoft Page 83
Page 84
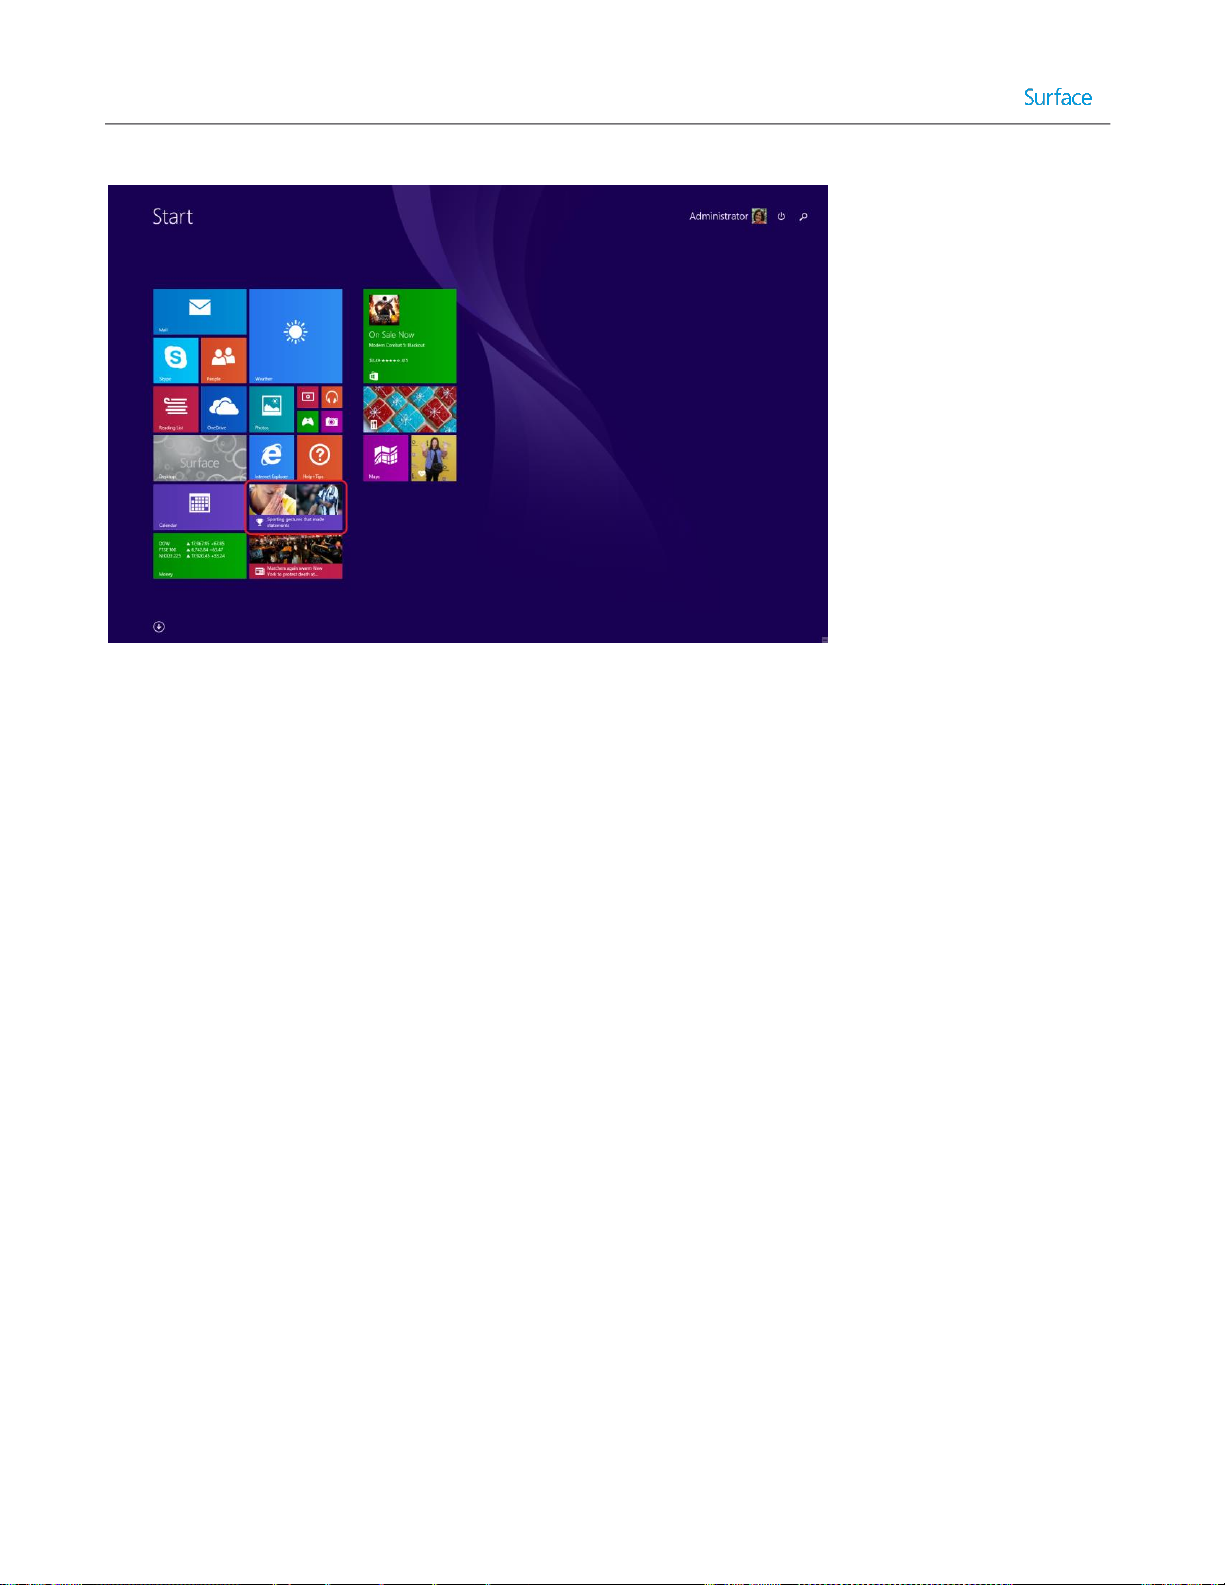
Figure 4.15: Start Screen Before Customization.
As an example, this procedure shows you to uninstall and un-provision the Sports app, but the same procedure works
for any other Windows Store app as well:
1. Open an Administrative PowerShell session.
2. Get a list of packages that are installed for specific users on the computer by executing the get-appxpackage
cmdlet with this statement:
get-appxpackage –alluser | format-list -property packagefullname
You will see a list of all apps that are currently installed, as shown in Figure 4.16.
© 2014 Microsoft Page 84
Page 85
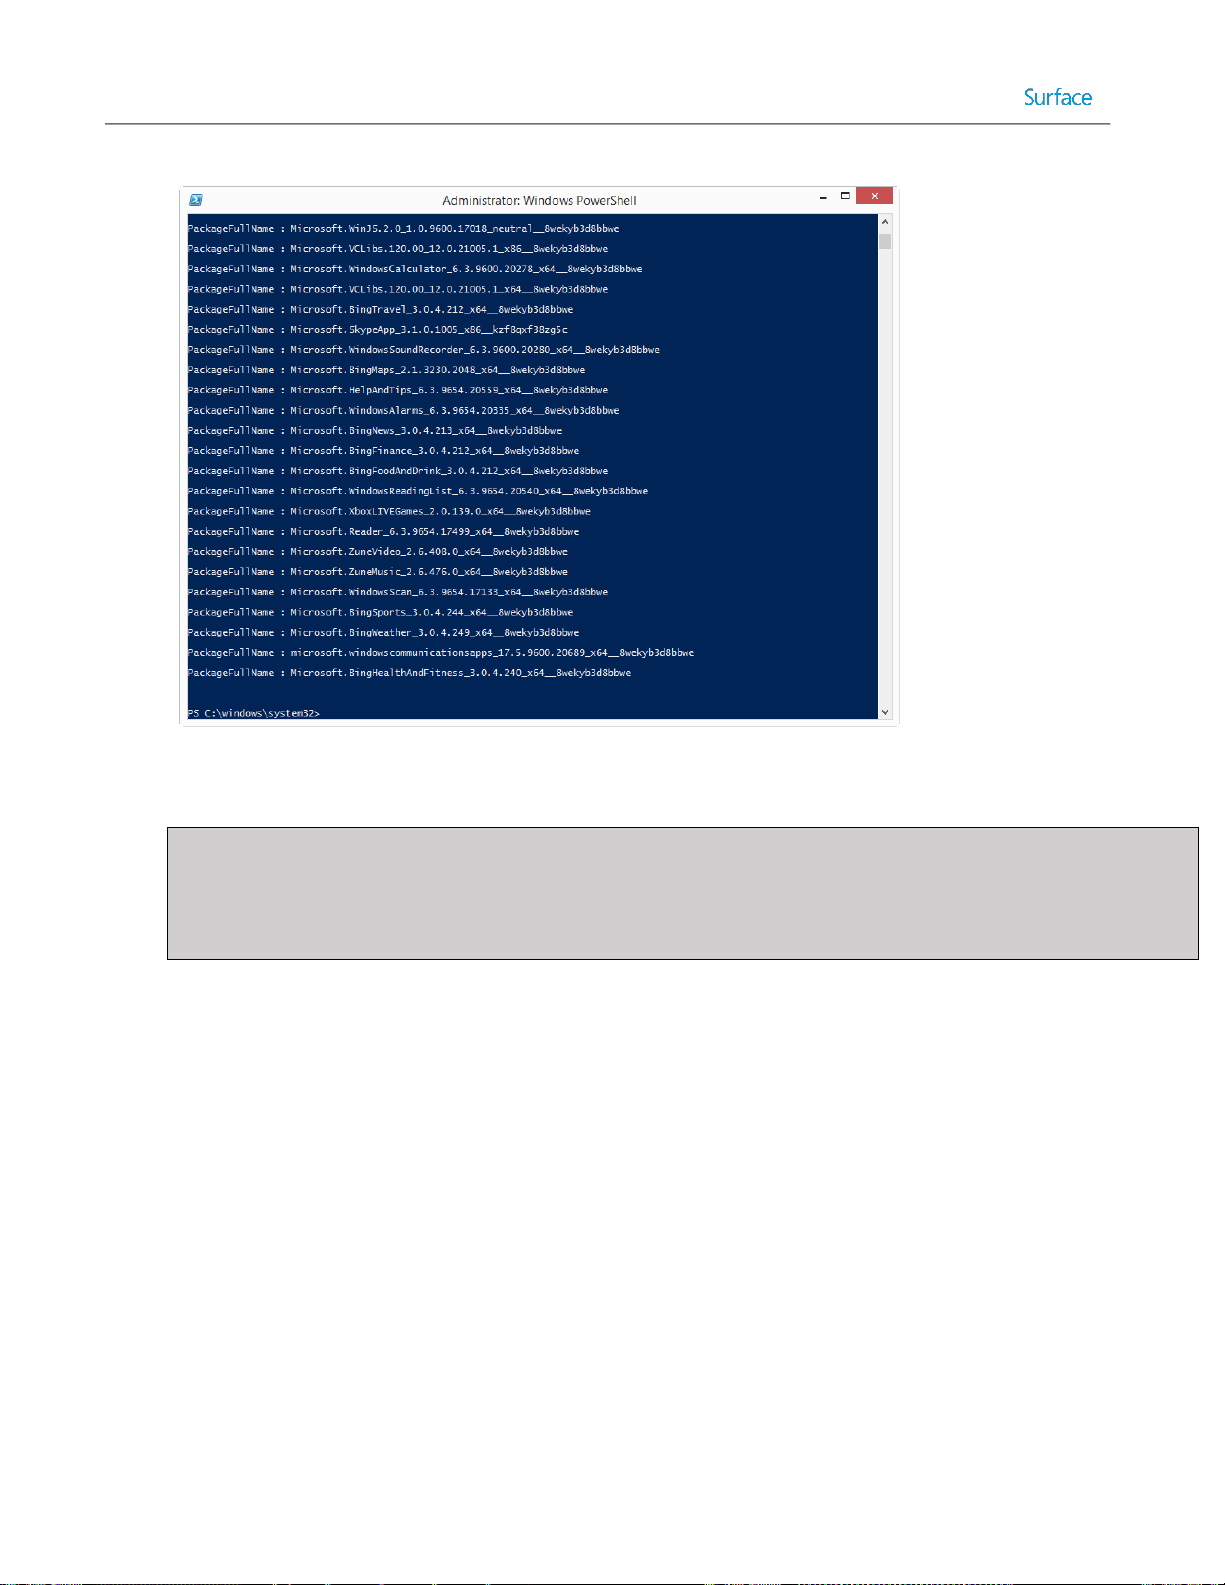
Figure 4.16: Get-AppxPackage Output.
Note: The output from this statement can be written to a text file to make it easier to reference, search, or copy
from. This is done by adding > c:\report.txt to the end of the statement. For example:
get-appxpackage –alluser | format-list -property packagefullname >
c:\users\administrator\desktop\installedappx.txt
3. If you scroll through the list of returned apps, you’ll see
Microsoft.BingSports_3.0.4.212_x64__8wekyb3d8bbwe in the list. You’ll need this exact name to supply as an
argument to the PowerShell cmdlet to remove the app in the next step.
4. Uninstall the undesired apps by executing the remove-appxpackage cmdlet with this statement:
remove-appxpackage Microsoft.BingSports_3.0.4.212_x64__8wekyb3d8bbwe
5. Get a list of packages that are provisioned in on the computer by executing the get-appxprovisionedpackage
cmdlet with this statement:
get-appxprovisionedpackage -online | format-list -property packagename
You will see a list of all apps that are currently provisioned.
6. If you scroll through the list of returned apps, you’ll see
Microsoft.BingSports_2014.926.258.4003_neutral_~_8wekyb3d8bbwe in the list. You’ll need this exact name
to supply as an argument to the PowerShell cmdlet to remove the app in the next step.
7. Un-provision the undesired apps by executing the remove-appxprovisionedpackage cmdlet with this statement:
remove-appxprovisionedpackage -online -packagename
Microsoft.BingSports_2014.926.258.4003_neutral_~_8wekyb3d8bbwe
© 2014 Microsoft Page 85
Page 86

Figure 4.17 shows the same Start Screen as in Figure 4.15, but with the Sports app removed.
Figure 4.17: Start Screen After Sports App Removed.
Customizing the Start Screen
Customizing the Start Screen involves the arrangement of the tiles on the screen and grouping them into logical sections
and alternatively naming those sections. You do this by simply dragging the tiles into the desired location on the screen,
resizing them, or any other action that configures the screen any way you like. These customizations are stored in the
local Administrator profile and will be captured as-is during the deployment process, which is described in the Testing
the Image section later in this chapter.
It is a best practice, as discussed in the Considerations for Images section in Chapter 2, to not install apps on the
reference system. The guidance is to install apps during deployment, which is covered in Chapter 5. However, you can
still customize Start Screen tiles for apps that are not yet installed.
This is done by copying the layout of the Start Screen from a computer that does have the apps installed using a
template. A template stores the layout of the tiles, but does not install the apps. Figure 4.18 shows the Start Screen
before customization.
© 2014 Microsoft Page 86
Page 87
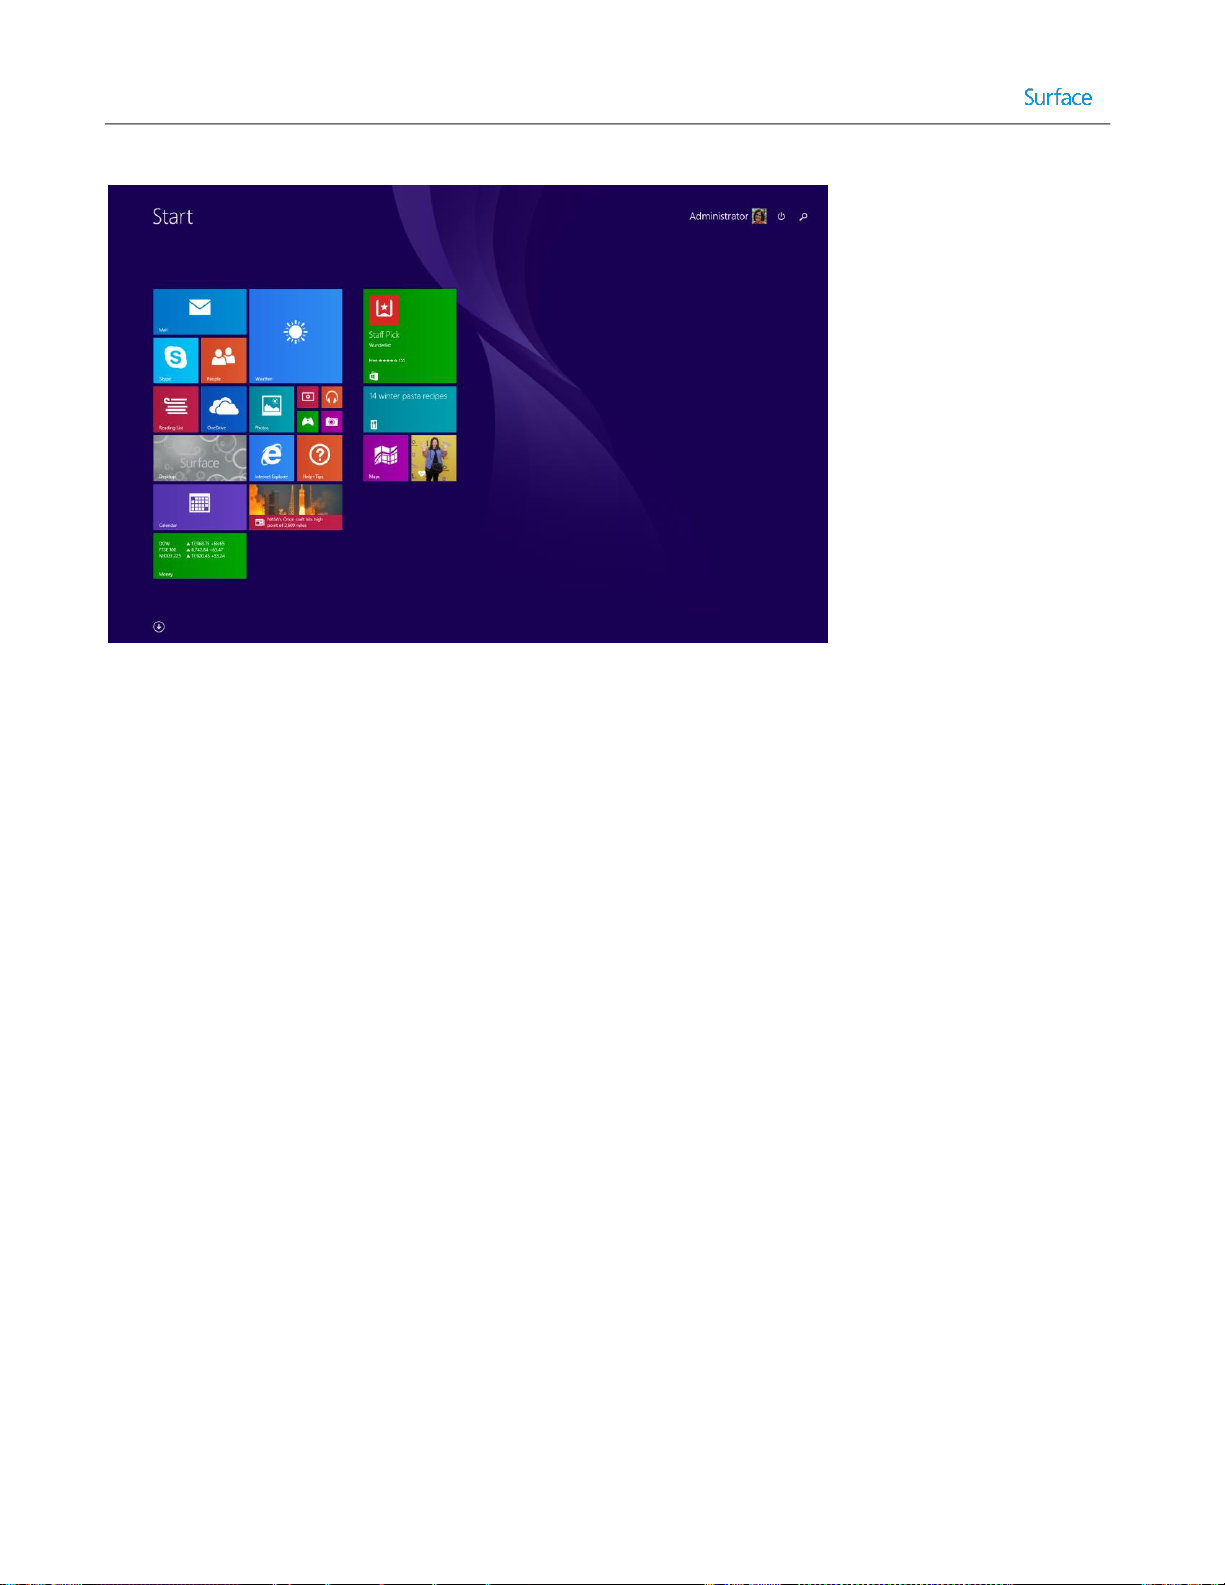
Figure 4.18: Start Screen Before Customization.
To export and import a Start Screen layout template, follow these steps:
1. On the computer with the app(s) installed, open an Administrative PowerShell session.
2. To generate the template, run the Export-StartLayout cmdlet with the following statement:
export-startlayout –path c:\startscreenlayout.bin -as bin
3. Close the PowerShell session window.
4. Copy the generated c:\startscreenlayout.bin file from the computer with the app(s) installed to the C:\ drive on
the reference system.
5. On the reference system open an Administative PowerShell session.
6. To apply the template, run the Import-StartLayout cmdlet with the following statement:
Import-startlayout -path c:\startscreenlayout.bin –mountpath c:\
7. Close the PowerShell session window.
After the layout is imported into the reference system, all customizations are visible. Figure 4.19 shows the Start Screen
after customization. Notice in Figure 4.19 the desktop tile is in the top left position, the Start Screen background is
changed, the Weather tile size is wide, and the Reading List tile is removed.
© 2014 Microsoft Page 87
Page 88
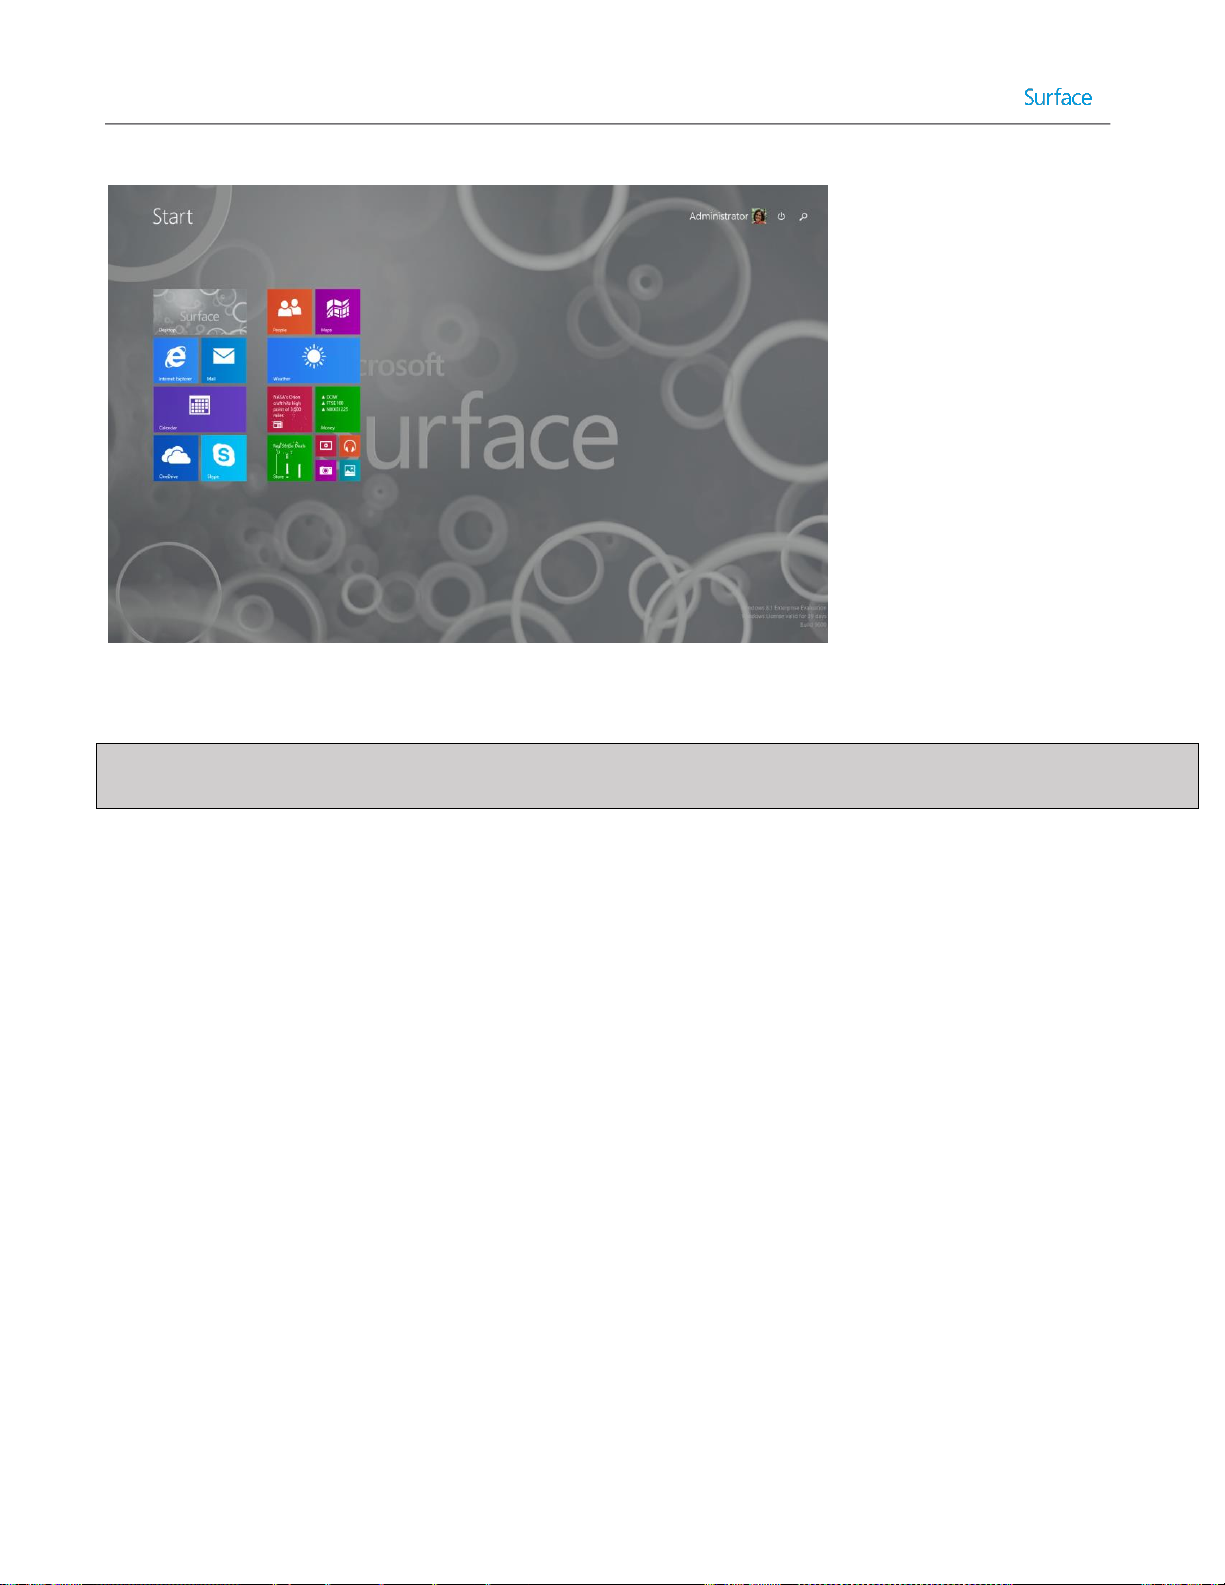
Figure 4.19: Start Screen After Customization.
Note: The same PowerShell cmdlets can also be used to generate an XML export of a Start Screen layout for use with
the Start Screen Layout group policy setting.
Creating a Capture Task Sequence
After the reference system is customized the system must be prepared for deployment and captured into an image file.
Capturing an image is controlled by using a task sequence. To create a task sequence to capture an image of the
reference system, follow these steps:
1. Expand the Task Sequences folder in the Deployment Share tree in the Deployment Workbench.
2. Right-click the Task Sequences folder and select New Task Sequence. This launches the New Task Sequence
Wizard.
3. The New Task Sequence Wizard presents a series of steps, as follows:
General Settings – Supply a name and ID for this new task sequence, as shown in Figure 4.20, and then click
Next.
© 2014 Microsoft Page 88
Page 89

Figure 4.20: Capture Task Sequence.
Select Template – Select the Sysprep and Capture template and click Next.
Select OS – Select the operating system that was originally deployed to the reference system and click Next.
Specify Product Key – When capturing an image, you do not specify a product key. Click Next.
OS Settings – Enter the desired registration information and home page and click Next.
Admin Password – Enter the desired strong password for the local Administrator account and click Next.
Summary – Confirm the selected options and click Next.
Progress – Shows a progress bar during task sequence creation.
Confirmation – Click Finish to complete the New Task Sequence Wizard.
The newly created capture task sequence appears in the Task Sequences folder of the deployment share as shown in
Figure 4.21.
© 2014 Microsoft Page 89
Page 90

Figure 4.21: Capture and Reference Deployment Task Sequences.
Note: It is possible to perform the deployment and capture steps in the same task sequence. To accomplish this, the
task sequence must automate customization to the reference image. However, automation is not possible for some
tasks. Therefore, the task sequence will need to be paused to enable user interaction. MDT includes a script named
LTISuspend.wsf, which pauses a task sequence for this purpose. Refer to the MDT documentation for more information
on this script.
Profile customizations made to the reference system are stored in the local Administrator profile. Examples of some of
these customizations include configuration of the Start Screen and wallpaper. To make these customizations available to
all new users who log onto the deployed computer, the deployment answer file needs to have the CopyProfile setting
configured. The CopyProfile setting is configured in the specialize pass, which is run during the deployment process
rather than the generalize process. See the Testing the Image section in this chapter for details on including the
CopyProfile setting in a deployment task sequence.
Unlike deploying an image, which needs read-only permissions to the deployment share, capturing an image needs to
write to the Captures folder in the deployment share. Ensure the account specified in the customsettings.ini file has
write permissions to the Captures folder.
Creating an Image from the Reference System
You have now made customizations to the reference system and prepared the capture task sequence to create an image
of the reference system. Now the capture task sequence must be run on the reference system to create that image.
© 2014 Microsoft Page 90
Page 91

Note: Another advantage in using a virtual machine as a reference system is the ability to use checkpoints or snapshots.
Checkpoints store the exact state of a virtual machine at the specified point of time. A virtual machine can be easily
reverted to this state, if necessary. For example, the Sysprep process makes irreversible changes to the reference
system, so creating a checkpoint gives you the ability to restore to a specific point in time.
Launch the Windows Deployment Wizard via the litetouch.wsf script using the following steps:
1. Open an Administrative PowerShell session.
2. Enter the following command to map a network drive to the deployment share and press Enter:
net use * \\sp3deploy.contoso.com\labdeploymentshare /user:sp3deploy\mdt
This is done to specify the user account which will be used to connect to the share. In this command
sp3deploy.contoso.com is the name of the deployment server, labdeploymentshare is the name of the
deployment share, and mdt is the name of the user account for MDT deployments. These values should be
replaced with the values used in your environment.
3. Enter the following command to launch the Windows Deployment Wizard and press Enter:
cscript \\sp3deploy.contoso.com\labdeploymentshare\Scripts\LiteTouch.WSF
4. The Windows Deployment Wizard presents a series of prompts:
Task Sequence – Select the capture task sequence that was created in the Creating a Capture Task Sequence
section of this chapter and click Next.
Capture Image – Specify the desired location for the captured image to be placed, along with the name of
the image to be created, as shown in Figure 4.22. The default location is the Captures folder of the
deployment share, where the required write permissions were added earlier in this chapter. Click Next.
Figure 4.22: Settings for Image Capture.
© 2014 Microsoft Page 91
Page 92

Testing the Image
After the image has been captured, it is ready to be used to deploy to other computers. To verify the successful
application of the customizations in the resulting image, a test deployment to a second virtual machine in the lab is
recommended. To perform this test deployment, follow these steps:
1. Import the captured image in the deployment share
2. Create a new test deployment task sequence
3. Run the new test deployment task sequence on a second virtual machine (VM3), as shown in Figure 4.1.
Each of these steps is covered in the next three sections.
Importing the Captured Image
To import the captured image in the deployment share, follow these steps:
1. Expand the deployment share in the Deployment Workbench.
2. Right-click Operating Systems, and then select Import Operating System. This launches the Import Operating
System Wizard.
3. The Import Operating System Wizard presents the following steps:
OS Type – Select the type of operating system to add. Select the Custom Image option. Click Next.
Image – Enter or browse to the Custom folder in the deployment share and select the image captured in the
previous section of this chapter. Check the Move the files to the deployment share instead of copying
them check box if you’d like to reduce the storage space required by the MDT deployment share, but it isn’t
necessary for the imported image in this scenario. Click Next.
Setup – Select the Copy Windows 7, Windows Server 2008 R2, or later setup files from the specified path
option. Enter or browse to the Operating Systems folder of the deployment share and select the folder that
contains the original operating system installation media for the reference system. Click Next.
Destination – Enter the name of the folder where the operating system files will be stored. This folder is
created in the deployment share on the deployment server. For example, you could enter Windows 8.1
Custom as the destination. Click Next.
Summary – Review the summary of your operating system import configuration and click Next.
Progress – Displays a progress bar during the importing of the operating system files.
Confirmation – Displays confirmation of success or errors generated while importing the operating system
files. Click Finish to close the Import Operating System Wizard.
More details about the options presented by the Import Operating System Wizard are available in Chapter 2.
Creating the Test Deployment Task Sequence
To create the test deployment task sequence, follow these steps:
1. Expand the deployment share in the Deployment Workbench.
2. Right-click the Task Sequences folder, then select New Task Sequence.
3. The New Task Sequence Wizard presents a number of steps, as follows:
© 2014 Microsoft Page 92
Page 93

General Settings – Enter the desired task sequence ID, name, and comments. Click Next.
Select Template – Select the Standard Client Task Sequence and click Next.
Select OS – Select the operating system you imported from your custom image. Click Next.
Specify Product Key – Select Do not specify a product key at this time and click Next.
OS Settings – Enter the desired registration information and home page and click Next.
Admin Password – Specify a strong password for the local Administrator account on the deployed
computer. Click Next.
Summary – Review the summary of your new task sequence and click Next.
Progress – Displays a progress bar during the creation of the new task sequence.
Confirmation – Displays confirmation of success or errors generated while creating the task sequence. Click
Finish to close the New Task Sequence Wizard.
For more information about what the CopyProfile setting does and how it relates to the local Administrator account,
refer to the Creating a Capture Task Sequence section earlier in this chapter.
To set the CopyProfile setting in the answer file, follow these steps:
1. Open the Task Sequences folder of the deployment share in the Deployment Workbench.
2. Right-click the test deployment task sequence and select Properties.
3. In the task sequence properties, select the OS Info tab.
4. Edit the answer file by clicking the Edit Unattend.xml button, as shown in Figure 4.23. This launches the
Windows System Image Manager (Windows SIM).
Figure 4.23: OS Info Tab Showing Edit Unattend.xml Button.
Note: When the answer file for a specific operating system is opened for editing for the first time, a catalog of
available settings is generated. This may take several minutes.
© 2014 Microsoft Page 93
Page 94

5. Select the EditFind menu or press Ctrl+F to launch the Find dialog box.
Note: With a large number of available components, it is typically quicker to find a specific setting by searching
rather than expanding the components tree under the Windows Image pane.
6. Enter the term copyprofile and click Find Now to locate the Microsoft-Windows-Shell-Setup component.
7. Double-click the amd64 version of the component to locate the setting in the Windows Image pane that
matches the architecture of the image being deployed.
8. Right-click the Microsoft-Windows-Shell-Setup component and select Add Setting to Pass 4 specialize.
9. Select the setting from the Answer File pane in the center of Windows SIM. After this setting is selected, the
available setting options will appear in the right pane which is labeled with the setting name, Microsoft-
Windows-Shell-Setup.
10. Set the property value for the CopyProfile setting to True as shown in Figure 4.24.
Figure 4.24: Configuring CopyProfile Settings.
11. Select the FileSave Answer File menu or press Ctrl+S to save the answer file.
Note: Windows SIM will automatically validate the answer file when selecting save. Any settings that are
configured improperly will result in a warning message on the screen.
12. Close Windows SIM.
© 2014 Microsoft Page 94
Page 95

When the image is applied to the target system, the specialize pass will run, which copies the Administrator profile to
the local Default User profile, enabling new users to receive the customizations made to the Administrator profile in the
reference system.
Deploying the Captured Image
To deploy to the test system (VM3), follow the procedure for deploying as outlined in the Deploying to the Reference
System section in this chapter, but in step #5, where you select the task sequence, select the test deployment task
sequence created in the Testing the Image section in this chapter. All other parts of the procedure remain the same.
The deployed system (VM3) will contain the customizations configured in the reference system (VM2). Before rolling out
the image to production, as detailed in Chapter 5, verify that all customizations are present in VM3.
© 2014 Microsoft Page 95
Page 96

Chapter 5 – Automated Deployment with MDT
The automated deployment scenario in this chapter builds upon the reference deployment scenario discussed in
Chapter 4. The automated deployment scenario decreases the level of interaction required by the user/technician and
also includes apps and drivers. The automated deployment produces a computer that is production-ready.
While this chapter shows how to deploy to computers in two specific scenarios (connected and offline), the procedures
outlined in this chapter can be used to address the demands of an entire organization, including the need for different
apps, computer models, and customizations.
The deployment process described in each scenario can be used to deploy any number of computers, but this step-bystep focuses on three specific computers, as shown in Figure 5.1:
Production Deployment Server
o Windows Server 2012 R2
o Windows Assessment and Deployment Kit (Windows ADK)
o Microsoft Deployment Toolkit (MDT)
o Windows Deployment Services (WDS)
PC1: Connected Device
o A Surface Pro 3 device
o Connected to the corporate network
PC2: Offline
o A Surface Pro 3 device
o Not connected to the corporate network
© 2014 Microsoft Page 96
Page 97
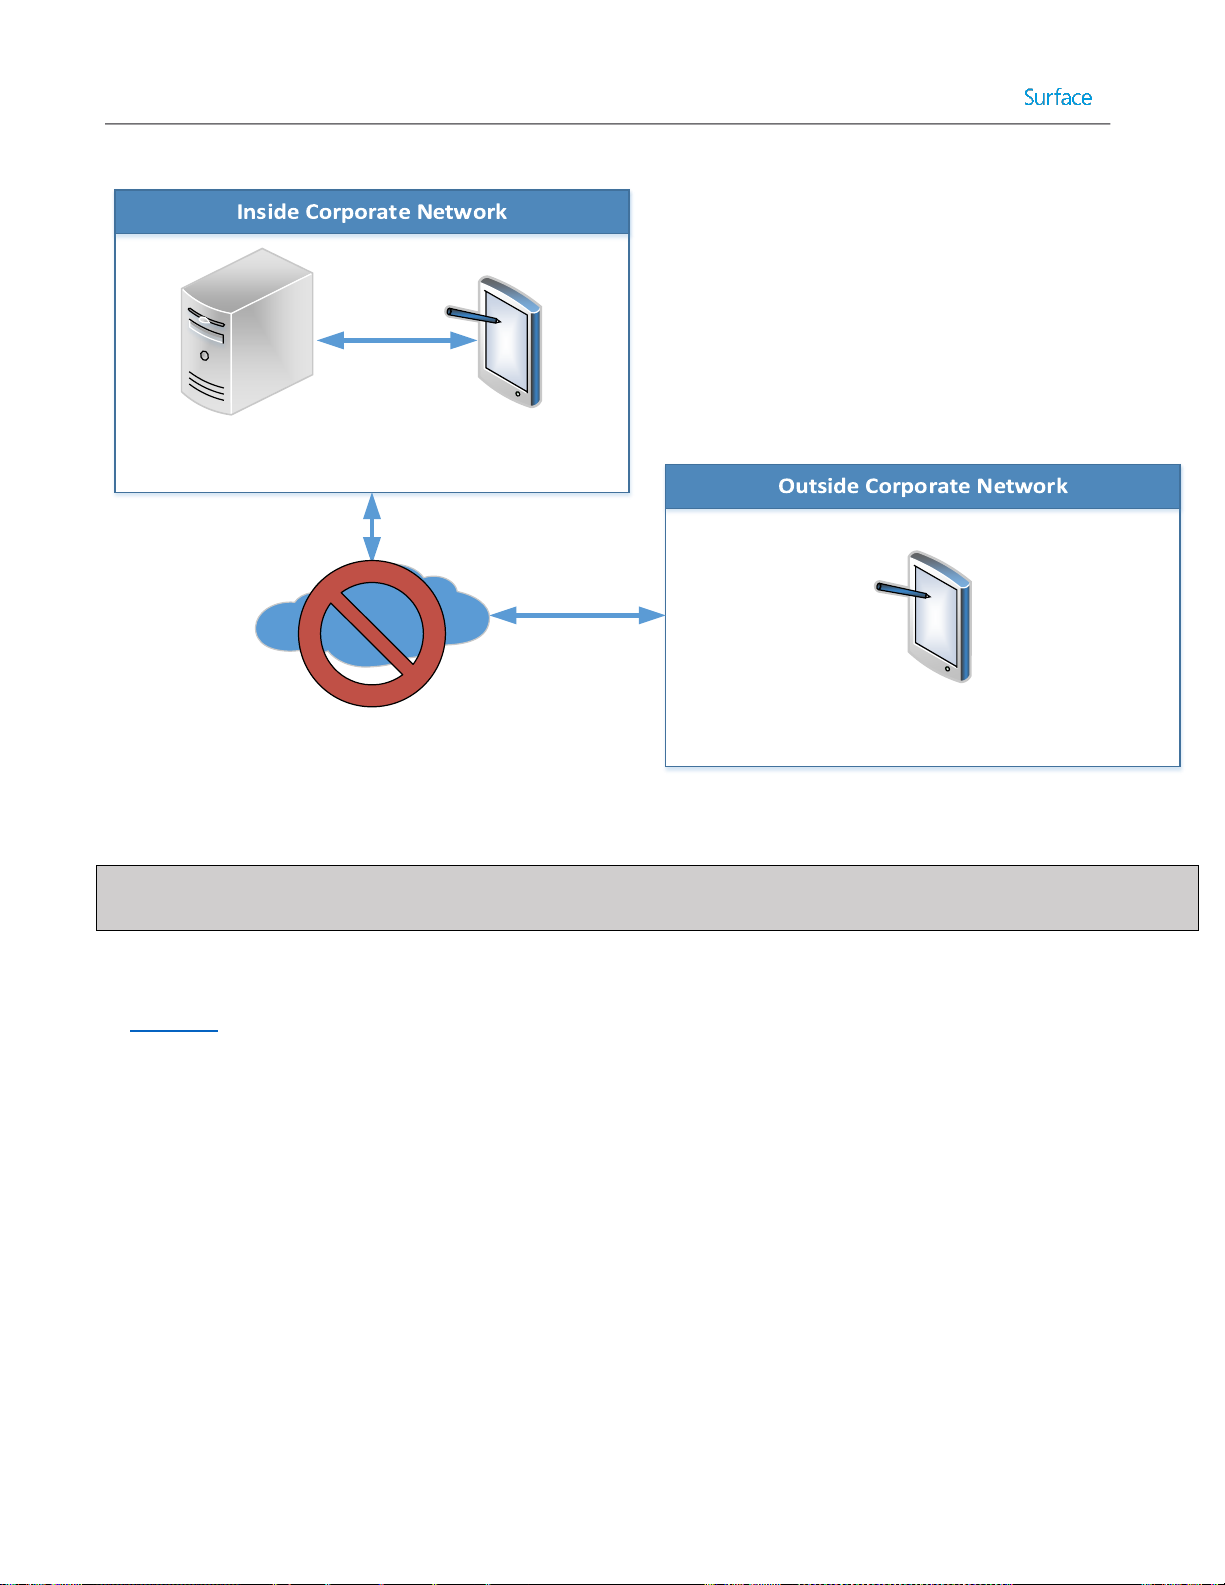
PC1
(Connected Device)
PC2
(Offline Device)
Production
Deployment Server
Figure 5.1: Offline Deployment Scenario Computers.
Note: A USB stick with at least 10GB of storage is required for the offline deployment outlined in this chapter. The USB
drive must be reported as a fixed drive to support multiple partitions. A Windows To Go certified drive is recommended.
Disabling WDS PXE Boot
In Chapter 4, the lab deployment server was configured for PXE boot. Therefore, if your lab deployment server is on the
same network as the production deployment server shown in Figure 5.1, PXE boot on the lab deployment server will
need to be disabled to prevent conflicting responses. To disable network boot, follow these steps:
1. Launch Windows Deployment Services on the lab deployment server.
2. Expand the Servers tree and right-click the lab deployment server, then select Properties.
3. Select the PXE Response tab.
4. Select the Do not respond to any client computers option as shown in Figure 5.2 and click OK to save and exit
the server WDS properties.
© 2014 Microsoft Page 97
Page 98

Figure 5.2: Disabling PXE Response to Clients.
5. Close Windows Deployment Services.
Creating the Production Deployment Share
The production deployment share will contain the applications, drivers, and custom images for deployment across the
organization and will share these components with the offline deployment share. The deployment production share and
offline deployment share will use the same apps, drivers, and images, so instead of duplicating effort, deployment
shares can be linked. To create the production deployment share follow the Creating a Deployment Share section
outlined in Chapter 3.
Customizing Rules for Automation
As with the reference deployment scenario outlined in Chapter 4, the deployment share will be customized by
configuring rules to bypass the prompts that are displayed by the Windows Deployment Wizard. As you may recall,
these rules are stored in the configuration files customsettings.ini and bootstrap.ini, which control the Windows
Deployment Wizard and boot media respectively.
To configure deployment share rules to automate the Windows Deployment Wizard, follow these steps:
1. Expand the Deployment Shares tree in Deployment Workbench.
2. Right-click the production deployment share and select Properties.
3. Select the Rules tab.
4. Replace the text displayed on the Rules tab with the text provided in Listing 5.1:
[Settings]
© 2014 Microsoft Page 98
Page 99

Priority=Default
Properties=MyCustomProperty
[Default]
OSInstall=Y
SkipCapture=YES
SkipAdminPassword=YES
SkipProductKey=YES
SkipComputerBackup=YES
SkipBitLocker=YES
SkipBDDWelcome=YES
SkipUserData=YES
UserDataLocation=AUTO
SkipApplications=YES
SkipPackageDisplay=YES
SkipComputerName=YES
SkipDomainMembership=YES
JoinDomain=contoso.com
DomainAdmin=MDT
DomainAdminDomain=contoso
DomainAdminPassword=P@ssw0rd
SkipLocaleSelection=YES
KeyboardLocale=en-US
UserLocale=en-US
UILanguage=en-US
SkipTimeZone=YES
TimeZoneName=Pacific Standard Time
UserID=MDT
UserDomain=SP3ProdDeploy
UserPassword=P@ssw0rd
SkipSummary=YES
SkipFinalSummary=YES
Listing 5.1: Deployment Share Rules for Added Automation
Listing 5.1 differs from the similar listing 4.1 in Chapter 4 in the following ways:
SkipCapture – This setting has been changed to YES to prevent the Capture Image page of the Windows
Deployment Wizard from appearing. Custom images for this production deployment share will be produced in
the lab environment and thus image capturing will not be performed from the production deployment share.
SkipApplications – By configuring this setting to NO, the Applications page of the Windows Deployment Wizard
will not be displayed, even if there are applications available in the deployment share and the install
applications step is present in the task sequence. To install applications while keeping this page hidden, an
application installation step must be created to explicitly define an application for installation. See the Importing
Applications section later in this chapter for more information.
SkipPackageDisplay – By configuring this setting to NO, the Packages page will be hidden, even if language
packs, updates, or firmware packs are available in the deployment share. Packages will need to be specified by a
© 2014 Microsoft Page 99
Page 100

selection profile in the task sequence. Selection profiles are covered in the Importing Drivers section in this
chapter.
SkipDomainMembership – This setting is still configured as YES to prevent the display of the domain or
workgroup join fields on the Computer Details page, but rather than specifying a workgroup to join, the
following settings specify a domain to be joined along with the required credentials:
o JoinDomain – This setting is used to specify the domain for the deployed computer to join.
o DomainAdmin – This setting is used to specify the user name with rights to join a computer to the
domain.
o DomainAdminDomain – This setting is used to specify the domain membership of the user being used
to join the computer to the domain.
o DomainAdminPassword – This setting is used to specify the password for the user being used to join
the computer to the domain.
Note: The user name and password information is stored in the deployment share rules in plaintext. As
such it is recommended to use an account that is designated to the required task only. In this case the
user account MDT in the contoso.com domain will be configured with delegation rights to join
computers to the domain and will be enabled only during active deployments.
Follow the procedure for configuring the bootstrap.ini file in the Configuring Boot Media Rules section of Chapter 4.
Customizing Task Sequence Selection by Model
The SkipTaskSequence setting is not specified in the [Default] section of the deployment share rules, but is required for
full automation of the deployment. It was omitted to enable a technician to select between task sequences during
deployment. If it was specific in the rules, the same task sequence would be applied to every computer. To automate
the selection process for a specific computer model, you need to determine the value for the built-in Model variable
and specify it in the customsettings.ini file.
To find the value for the Model variable for a specific computer or device, launch a PowerShell session on the desired
computer and run the following command, as shown in Figure 5.3:
wmic csproduct get name
© 2014 Microsoft Page 100
 Loading...