

Page 1
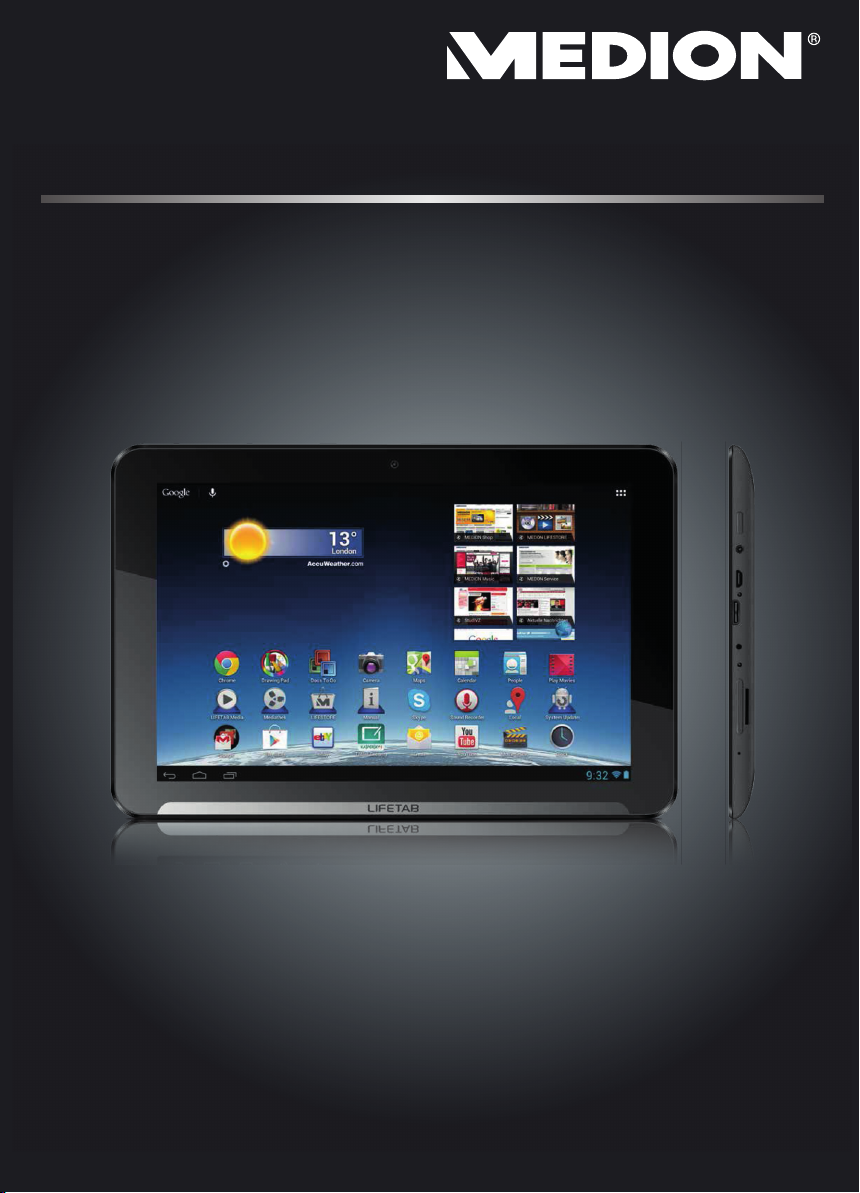
25.7 cm / 10.1“ Tablet-PC
MEDION® LIFETAB
®
E10310 (MD 98382)
Instruction Manual
Page 2

Table of Contents
1. About these Instructions ............................................................................. 3
1.1. Symbols and Key words used in these Instructions ................................... 3
1.2. Proper Use .................................................................................................................4
1.3. Declaration of Conformity ................................................................................... 4
2. Safety Instructions ....................................................................................... 5
2.1. Dangers for children and people with reduced ability to
operate electronics ................................................................................................5
2.2. Operational Safety .................................................................................................. 5
2.3. Notes on lithium-ion batteries ........................................................................... 6
2.4. Never Carry out Repairs Yourself ....................................................................... 7
2.5. Ambient Temperature .......................................................................................... 7
2.6. Connecting................................................................................................................ 8
2.7. Cabling........................................................................................................................8
3. Included with Your Tablet ............................................................................ 9
4. Views ........................................................................................................... 10
4.1. Front Side .................................................................................................................10
4.2. Rear Side ..................................................................................................................10
4.3. Side view ..................................................................................................................11
5. Getting Started .......................................................................................... 13
5.1. First Steps .................................................................................................................13
5.2. Configuring Your Google™ Account ..............................................................13
5.3. Short Description of the Home Screen .........................................................14
5.4. Status Icons .............................................................................................................16
6. Power Supply ............................................................................................. 16
6.1. Power Adapter .......................................................................................................16
6.2. Battery Operation ................................................................................................17
7. Power Button ............................................................................................. 17
7.1. Powering On Your Tablet ....................................................................................17
7.2. Powering Off your Tablet ...................................................................................17
7.3. Setting the Tablet into Standby Mode ..........................................................18
7.4. Waking up from Standby Mode ......................................................................18
8. Operating the Tablet ................................................................................. 19
8.1. Customising the Home Screen ........................................................................19
9. Making/Checking Settings ........................................................................ 20
9.1. Software updates ..................................................................................................22
9.2. Google Play .............................................................................................................22
9.3. Using Non-Market Applications ......................................................................22
10. Widgets – Little helpers on the Desktop .................................................. 23
11. Setting Wallpapers .................................................................................... 23
12. Connecting to the Internet ....................................................................... 24
DeutschEnglishNederlandsFrançais
Italiano
1 of 37
Page 3

12.1. Main Settings..........................................................................................................24
12.2. Airplane Mode .......................................................................................................24
12.3. Wi-Fi ...........................................................................................................................25
12.4. Bluetooth ................................................................................................................26
13. Connecting the Tablet PC to a Computer ................................................. 26
14. External Storage Media ............................................................................ 27
14.1. Inserting microSD Cards .....................................................................................27
14.2. Removing microSD Cards ..................................................................................28
14.3. Connecting USB Stick ..........................................................................................28
14.4. Removing the USB Memory ..............................................................................29
15. Communication ......................................................................................... 29
15.1. Browser ....................................................................................................................29
16. LIFETAB Media – Entertainment ............................................................... 29
16.1. Camera ......................................................................................................................30
16.2. Video ........................................................................................................................30
16.3. Music ........................................................................................................................30
17. External Keyboard ..................................................................................... 31
18. FAQ .............................................................................................................. 32
19. Customer Service ....................................................................................... 32
19.1. Additional Support...............................................................................................32
19.2. Maintenance ...........................................................................................................33
19.3. Measures for Protecting the Display ..............................................................33
20. Recycling and Disposal.............................................................................. 34
21. European Norm EN 9241-307 Class II ...................................................... 34
21.1. FCC Compliance Statement ..............................................................................35
22. Technical Data ............................................................................................ 36
23. Index ........................................................................................................... 37
Copyright © 2013
®
All rights reserved. This manual is protected by copyright. MEDION
is the owner of
the copyright.
Trademarks: Google, Android, Google Play and other Google marks are trademarks
of Google Inc.
®
, the HDMI logo and the name High-Definition Multimedia Interface
are registered trademarks of HDMI Licensing LLC.
Other trademarks are the property of their respective owners.
Subject to technical and optical changes as well as printing errors.
2 of 37
Page 4
1. About these Instructions
Before using the device for the first time, please read these operating instructions carefully, paying special attention to the safety notices.
This device should only be used as designated and as described in these
instructions.
Please keep these instructions in a safe place for future reference. Always include these instructions if passing the device on.
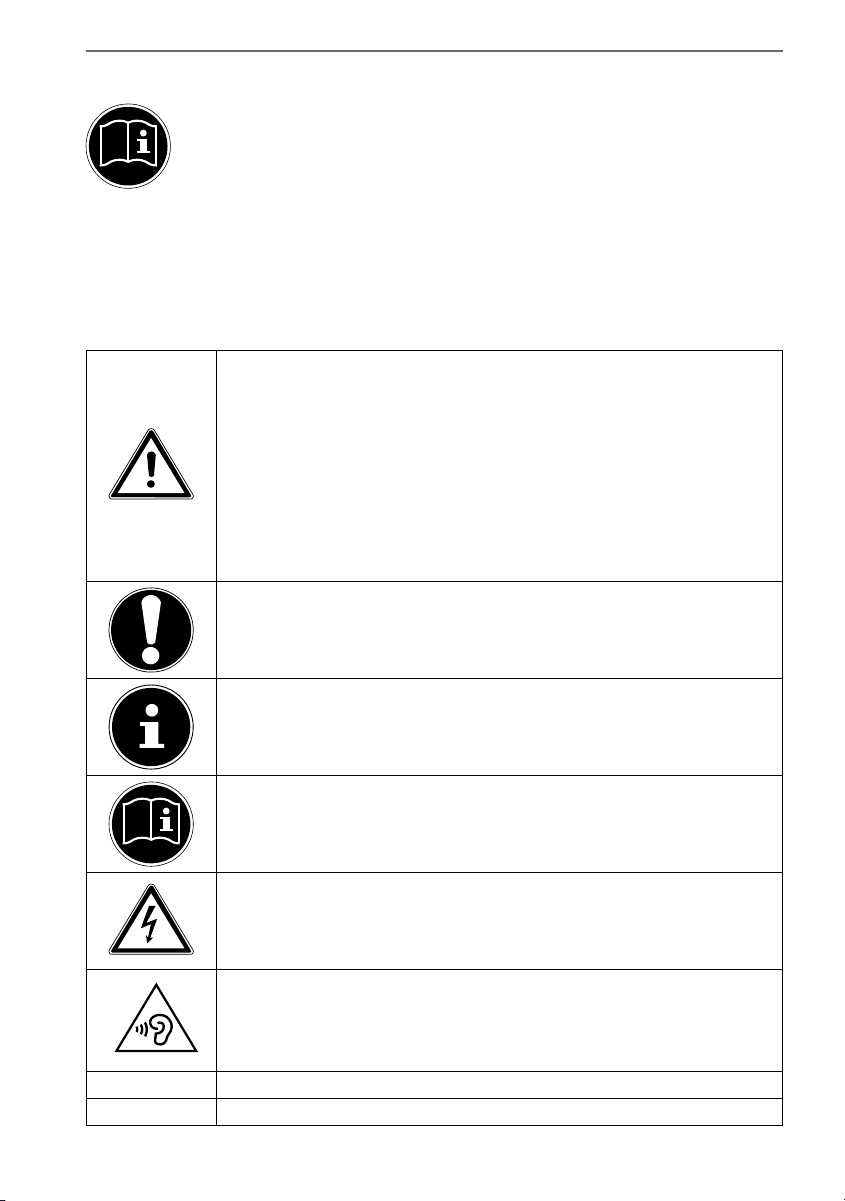
1.1. Symbols and Key words used in these
Instructions
DANGER!
Warning of immediate risk of fatal injury!
WARNING!
Warning: possible mortal danger and/or serious irre-
versible injuries!
CAUTION!
Warning: possible light or moderate injuries!
CAUTION!
Please follow the guidelines to avoid injuries and/or property damage.
DeutschEnglishNederlandsFrançais
PLEASE NOTE!
Additional information on using the device
PLEASE NOTE!
Please follow the guidelines in the operating instructions.
WARNING!
Warning: danger of electric shock!
WARNING!
Warning: danger due to excessive volume!
• Bullet point/information on operating steps and results
Tasks to be performed
Italiano
3 of 37
Page 5
1.2. Proper Use
0682
You can use your tablet PC in various ways. For example, you can surf the internet
whenever and wherever you want, read books and news articles, play games, watch
films and communicate with the whole world.
An internet connection is required to access the internet and this service may be
subject to a charge.
The device is intended for private use only and not for industrial/commercial use.
Please note that we shall not be liable in cases of improper use:
• Do not modify the device without our consent and do not use any auxiliary
equipment which we have not approved or supplied.
• Use only spare parts and accessories which we have supplied or approved.
• Follow all the instructions in this instruction manual, especially the safety information. Any other use is deemed improper and can cause personal injury or
damage to the product.
• Do not use the device in extreme environmental conditions.
1.3. Declaration of Conformity
This device is supplied with the following wireless features:
• Wireless LAN
• Bluetooth
Medion AG hereby declares that this device conforms to the fundamental requirements and the remaining relevant regulations of the 1999/5/EC R&TTE Directive.
This product satisfies the basic requirements and relevant regulations of the Ecodesign Directive 2009/125/EC. Full declarations of conformity are available at
http://www.medion.com/conformity.
4 of 37
Page 6

2. Safety Instructions
2.1. Dangers for children and people with reduced
ability to operate electronics
• This device is not intended for use by people (including children)
with reduced physical, sensory or mental abilities or for those without experience and/or knowledge, unless they are supervised by a
person responsible for their safety or they have been instructed in
its use.
• Children should be supervised to ensure that they do not play with
the device. Children should not be allowed to use this device without supervision.
• Keep the device and its accessories out of the reach of children
DANGER!
Keep plastic packaging out of the reach of children. There
is a risk of suffocation.
.
2.2. Operational Safety
Please follow the instructions in this section for the safe operation of
your tablet.
• Do not open the case of the tablet, or the power adapter. When the
case is open there is a danger of severe electric shock.
• Do not insert foreign objects through the slots and openings of the
tablet. This may lead to electric shock, electrical short-circuit or fire
that will damage your tablet.
• Operation under extreme environmental conditions can result in
damage to your tablet.
• Do not operate the tablet during a thunderstorm, in order to avoid
damage through a lightning strike.
• Never place objects on top of the tablet that would exert any pres-
sure on the LCD display.
• In order to avoid damage to the LCD display, do not touch it with
sharp objects.
DeutschEnglishNederlandsFrançais
Italiano
5 of 37
Page 7

• Do not expose the tablet PC to heat for any extended period. This
applies in particular to leaving it in your car, as excessive heat could
deform the various components.
• Update the software regularly to make sure the tablet PC is always
compatible and stable.
• Switch off your tablet immediately or do not switch it on at all and
contact the contact customer service if:
− The power supply or the connectors attached to it are burnt or
damaged. Replace the defective power supply with an original
power supply. Under no circumstances may a defective power
supply be repaired.
− ... the housing of the tablet is damaged or fluids have leaked
into it. Have the tablet checked by customer service first as
the tablet may not be safely operated and there may be a
life-threatening risk of electrocution!
If the tablet PC gets wet:
• Do not switch it on.
• Disconnect the power cable and switch off the tablet PC.
• Do not switch it back on until it has dried off completely.
2.3. Notes on lithium-ion batteries
This device contains a lithium-ion battery. Please note the following
when using lithium-ion batteries:
• Charge the battery regularly and as fully as possible. Do not leave
the battery discharged for long periods.
• Keep the battery away from heat sources such as radiators or open
flames, e.g. candles. There is a risk of explosion!
• If the device cannot be switched on although it is connected to a
power source, please contact your service centre.
• Do not use chargers or batteries that are in damaged any way.
• Do not dismantle or deform the batteries. You could injure your
hands or fingers, and battery fluid could come into contact with
your eyes or skin. If this happens, rinse the affected areas immediately with plenty of clean water and contact your doctor immediately.
6 of 37
Page 8
2.4. Never Carry out Repairs Yourself
WARNING!
Never try to open or repair the device yourself. There is
a risk of electrical shock!
• If there is a fault, contact the Service Centre or other suitable spe-
cialist workshop.
2.5. Ambient Temperature
• The tablet is most reliably operated at an ambient temperature
between 5°C and 30°C and at a relative humidity between 20% and
80% (without condensation).
• When powered off, the tablet can be stored at temperatures bet-
ween 0°C and 60°.
• Wait until the tablet has reached ambient (room) temperature be-
fore turning it on or connecting it to the power adapter. Drastic
variations in temperature and humidity can create condensation
within the tablet and may cause it to short-circuit.
• Make sure you do not expose the tablet to high temperatures and
direct sunlight in the car.
• Keep the original packaging in the event the device needs to be
sent.
• Your tablet PC is not suitable for use with workstations in ac-
cordance with the workstation regulation.
DeutschEnglishNederlandsFrançais
7 of 37
Italiano
Page 9
2.6. Connecting
Pay attention to the following information in order to connect your
tablet correctly.
2.6.1. Power Adapter
• Do not open the power adapter housing. When the housing is
open there is a danger of severe electric shock. It contains no user-serviceable parts.
• The electric outlet must be in the vicinity of the tablet and within
reach of the power adapter cords.
• To disconnect your tablet from the power source, or set the tablet to battery operation, remove the power cord from the tablet’s
power socket.
• Only use the tablet with a power adapter operating at AC 100-
~
240V
50/60 Hz. For details on power consumption, please refer to
the rating plate on the rear of your tablet. If you are unsure of the
type of power supply available at the point of use, ask your local
power company.
• Use only the supplied power adapter.
• To detach the power adapter from the mains power supply remove
the plug from the power source first and then remove the connector from the tablet. A reverse sequence could damage the power
adapter or the tablet. Always hold the connector firmly when removing it. Never pull on the power cord.
CAUTION!
Use only the supplied mains adapter to charge your
tablet PC
.
2.7. Cabling
• Arrange cables so that no one can walk on or trip over them.
• Do not place objects on any of the cables.
8 of 37
Page 10
3. Included with Your Tablet
Please check that the contents are complete and notify us within 14 days of purchase if any of the following components are missing:
• Tablet-PC
• microUSB cable (optional)
• microUSB Host cable (optional)
• AC Adapter with Power Cord
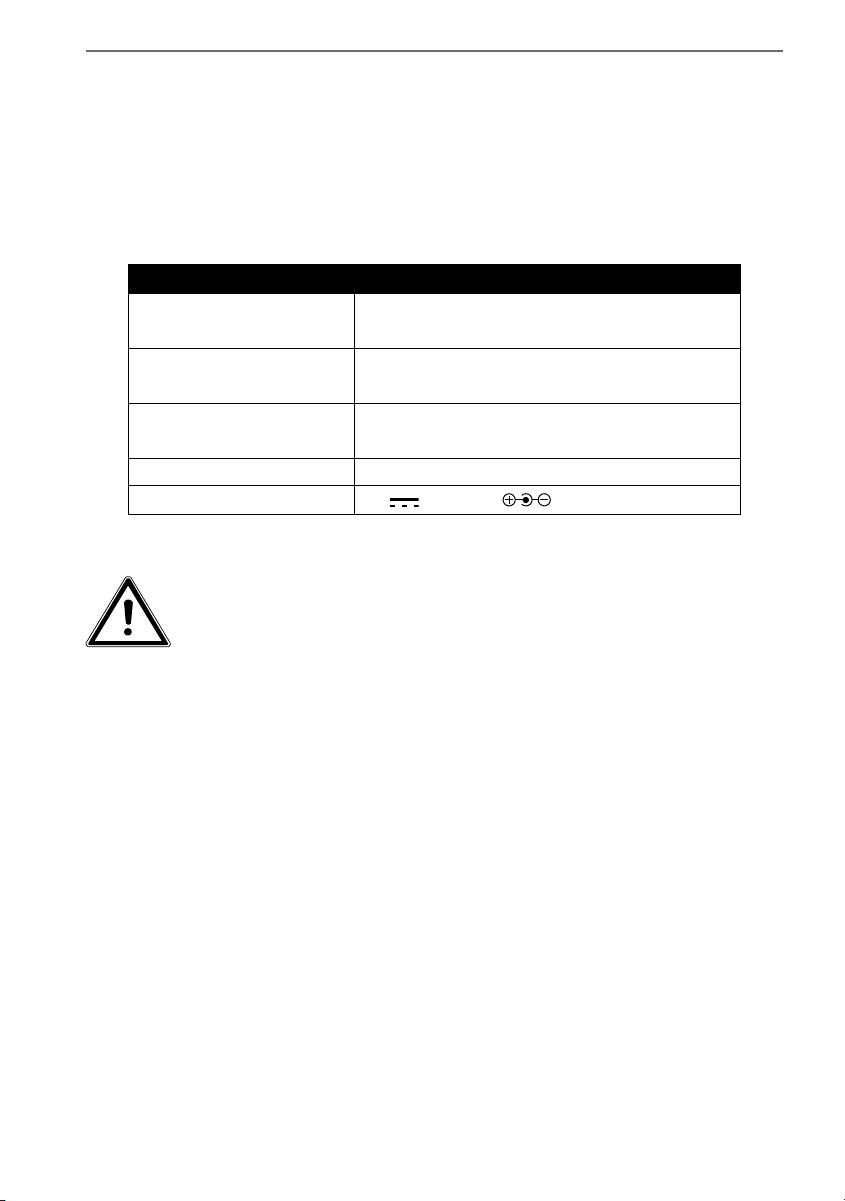
AC Adapter
Manufacturer Shenzhen Bestgk Technology Co. Ltd., China
Model K-C70503000E
Required mains voltage 100 - 240 V (50-60 Hz)
AC Input 100 - 240V~ 0,75A max. 50 - 60 Hz
DC Output
• Documentation
DANGER!
Keep plastic packaging out of reach of children. There is a
risk of suffocation.
5 V
3000 mA
DeutschEnglishNederlandsFrançais
9 of 37
Italiano
Page 11
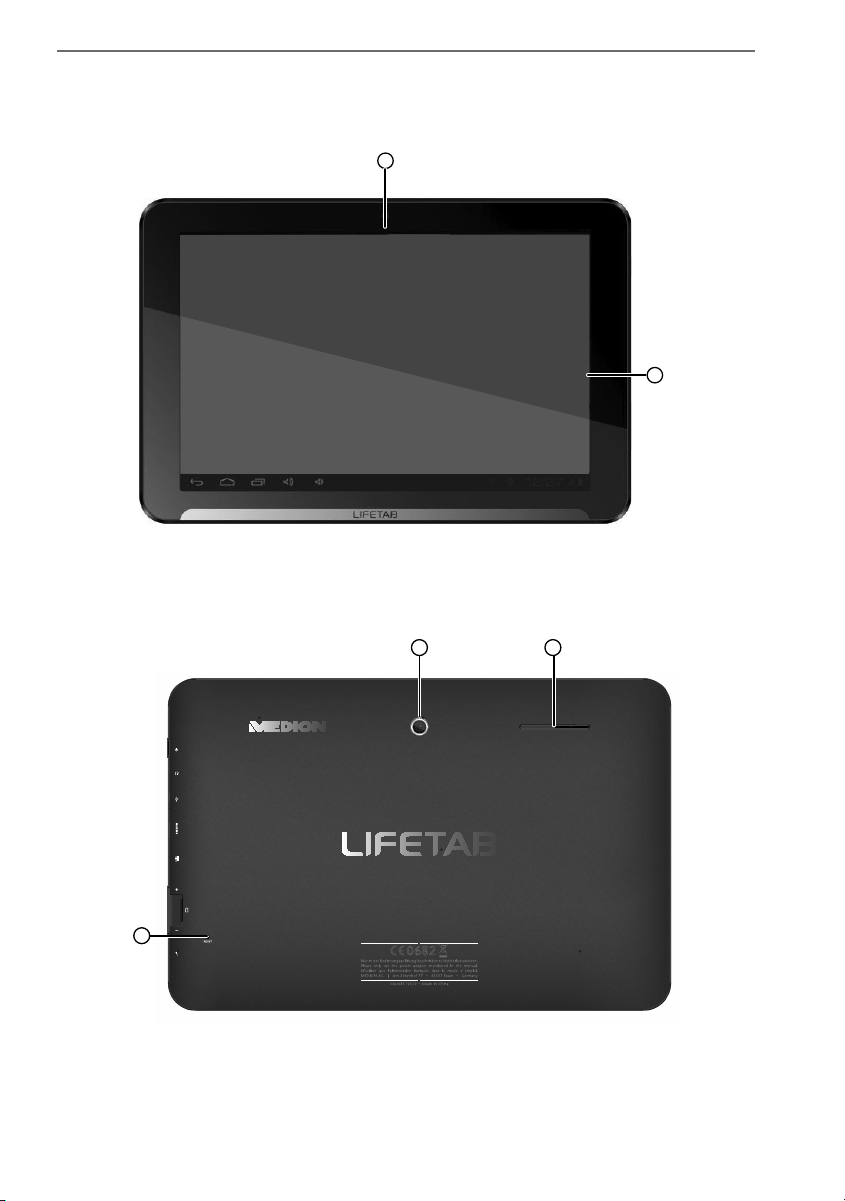
4. Views
4.1. Front Side
1) Camera
2) Display
4.2. Rear Side
1
2
3
1
2
3
1) Camera
2) Speaker
3) Reset button
10 of 37
Page 12
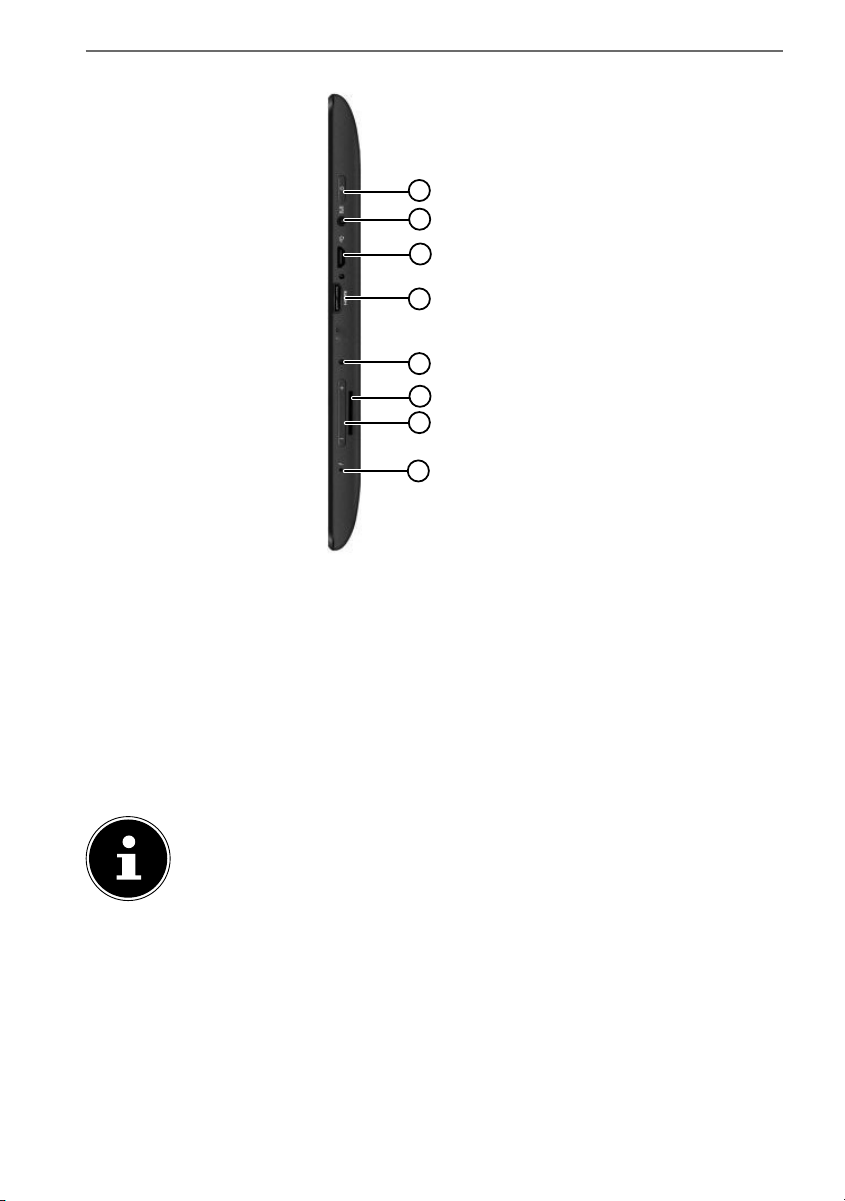
4.3. Side view
1) On/Off Switch
2) Stereo headphone socket
3) USB connection
4) miniHDMI connection
5) Port for power adapter
6) microSD card slot
7) Volume control +/-
8) Microphone
1
2
3
4
5
6
7
8
DeutschEnglishNederlandsFrançais
PLEASE NOTE!
Please only use stereo earphones / headphones with this tablet PC. The
use of a headset (earphones + microphone) may affect the playback of
media files.
11 of 37
Italiano
Page 13

WARNING!
The use of headphones/earphones with a high volume can
lead to lasting damage to your hearing. Set the volume to
the lowest level before reproducing any sound. Start the
sound reproduction and increase the volume to the level
that is comfortable for you. Changing the basic settings of
the equaliser can also cause damage to the hearing of the
listener.
It can cause damage to the hearing ability of the listener if
a device is operated through earphones with an increased
volume for a long period.
CAUTION!
The microSD card must be inserted in the correct direction.
Make sure that the contacts on the microSD card are pointing
towards the screen. Do not apply force when inserting cards
otherwise they may be damaged.
12 of 37
Page 14

5. Getting Started
Before you get started using your tablet, first take a few moments to read the important section on safety.
5.1. First Steps
Connect the end of the power cable to the connector on your tablet PC. Connect
the power adapter to a free AC power outlet.
Switch the tablet on by operating the ON/OFF switch. Hold the ON/OFF switch
for approx. 3 sec. The tablet starts and goes through a number of phases.
After the welcome screen has appeared, select your language and tap Start.
PLEASE NOTE!
The initial setup may take some time to complete.
During the initial configuration phase, you can return to the previous
screen by selecting.
Follow the steps on the screen.
5.2. Confi guring Your Google™ Account
Your tablet provides you with access to a variety of applications from Google™. You
need a Google™ account to use these applications. This account allows you to use a
large number of different services, e.g. Google Mail™.
You can now create a Google™ account (tap on Create account).
If you already have a Google™ account, enter your access details and tap Sign in.
PLEASE NOTE!
An Internet connection is required in order to create a Google™ account
or to sign in. You can connect to the Internet using a WLAN connection.
Google Play can automatically install all available application updates if
required.
DeutschEnglishNederlandsFrançais
13 of 37
Italiano
Page 15

5.3. Short Description of the Home Screen
The home screen is displayed when your tablet has finished booting and there are
no other applications in the foreground. It is divided into several pages that you
can access by swiping your finger to the left or right. The home screen serves to display the shortcuts and mini views (widgets) and already includes some of these elements.
Tap on the corresponding element to start the respective application or to re-
ceive further information.
You can also customise this content as you like and set your own background
image (see below)
In the title bar of the home screen located at the top edge you will find the following icons:
Icon Description
This icon starts a Google search. The search includes the content of
your tablet PC (e.g. your contacts and installed applications) as well
as the Internet. The input field provides suggestions for completion
while you type.
This icon starts a voice search in the Internet. Say your text into the
microphone.
14 of 37
Page 16

Icon Description
This icon displays a list of all applications on your tablet PC. Tap on
an application to start it. Keep your finger on an application to create a shortcut to the application on the home screen (drag the application to the corresponding page) or to uninstall it (drag the application to the waste basket).
In the status bar of the home screen located at the bottom edge you will find the
following icons:
Icon Description
This icon will return you directly to the previous screen. Imagine the
different screens of an application as a stack. Only the top screen of
this stack is visible. The bottom screen is always the home screen.
The button removes the top element from the stack. It thus behaves like the Back button that you are familiar with from your Web
browser.
This icon will return you to the home screen. Please note that the
application you were using has not closed, but is only paused and
shifted to the background. It therefore continues to use memory and possibly also processor performance. However, you can also
bring an application back to the foreground.
This icon displays a list of recently used applications. You can use
this list to restart an application, or to retrieve it from the background and bring it back to the foreground. Simply tap on the relevant thumbnail. To remove an item from the list, drag it off to the
side with your finger.
DeutschEnglishNederlandsFrançais
You will usually find the title and status bars in a slightly modified form in most
applications. Some applications offer a dynamic menu with further commands. This
is accessed by a corresponding icon either in the title bar (at the right edge) or the
status bar (next to the recently used applications).
15 of 37
Italiano
Page 17

5.4. Status Icons
The bottom right of the display shows the active status icons which indicate the following:
• SD card is inserted
• Current time
• Connected via WLAN
• Battery charge indicator
• etc.
Tap on a status icon to obtain further details (e.g. to read the content of a mes-
sage) or to quickly access the settings (e.g. time or network).
6. Power Supply
Connect the tablet PC to the mains adapter when first switching on or after the tablet has been powered off for a long period. The tablet is provided with a rechargeable integrated high-performance lithium battery which you can charge using the
mains adapter supplied.
6.1. Power Adapter
Your tablet is supplied with a universal AC power adapter, which automatically adjusts to the available power source. The following levels are supported:
AC 100-240V~/ 50 - 60 Hz. Please follow the power supply safety instructions.
The power adapter must be connected to a power outlet. The adapter provides the
tablet with power and also charges the battery. The battery is also being charged
when you are working on your tablet with the power adapter connected. The power adapter is still receiving power even when your tablet is not connected to it. You
should therefore unplug the power adapter from the outlet if it is not connected to
the tablet.
16 of 37
CAUTION!
Only use the power adapter supplied with your tablet
.
Page 18

6.2. Battery Operation
Batteries store electrical energy in their cells and then deliver it when needed.
The useful life and performance of your battery will depend on careful handling.
The battery should be completely discharged before a charging process and com-
pletely charged again in order to optimise its useful life and its performance.
6.2.1. Charging the Battery
The battery is charged via the power adapter or the supplied USB cable.
If the power adapter is connected, it charges the battery automatically, no matter if
the tablet is turned on or off. If the tablet is switched on, the charging process takes
a significantly longer time.
PLEASE NOTE!
The charging process will be interrupted if the temperature or the voltage of the battery is too high.
7. Power Button
7.1. Powering On Your Tablet
Press and hold the power button for about 3 sec. on the left side of the tablet.
The tablet PC boots up.
7.2. Powering Off your Tablet
Press and hold the power button until the following message appears on the
screen:
DeutschEnglishNederlandsFrançais
Tap Power Off to power off your tablet.
Italiano
17 of 37
Page 19

7.3. Setting the Tablet into Standby Mode
To optimise the battery operating time, the tablet switches to energy saving mode
whenever it isn’t being used.
In sleep mode, your device will be placed into a low-energy standby mode with the
display turned off in order to save battery power. If there is no operation within a
preset time, the screen backlight will automatically turn off, and the device will be
locked.
If your tablet is powered on and you do not use it temporarily, you can press the
power button quickly to dim the display. The device will then enter the standby
mode and become locked.
You can adjust the preset time under Settings > Display > Sleep.
7.4. Waking up from Standby Mode
While the screen display is off, press the power button quickly to re-illuminate
the screen.
To do this, drag the lock icon onto the sign, to return the main page.
18 of 37
Page 20

7.4.1. Adjusting Screen Lock Pattern Settings
You can adjust the screen lock pattern settings under Settings > Security > Screen
lock.
8. Operating the Tablet
You operate your tablet with your fingertips. Do not use any pointed or sharpedged objects.
Tap on the display to selects apps or to open applications.
Tapping and holding your finger on an input field will cause any available ad-
vanced input options to be displayed.
Drag your finger over the display to move it up, down, right or left.
To move an app on the display, tap and hold on it for a few seconds, then drag it
to the desired position.
Drag two fingers apart on the screen at the same time or tap twice on the dis-
play in order to increase/reduce the size of a website.
PLEASE NOTE!
You can view the display in portrait or landscape format. Simply hold
the tablet upright and turn it to the desired orientation to do this.
8.1. Customising the Home Screen
Your tablet has several workspaces.
You can move the screen with your fingers, adjust the display or move icons be-
tween the workspaces.
DeutschEnglishNederlandsFrançais
19 of 37
Italiano
Page 21

9. Making/Checking Settings
To change or display your tablet settings, tap on Apps > Settings.
All available settings appear on the left. Touching the display allows you to select
the menu items for the settings.
9.1.1. WIRELESS & NETWORK
Icon Menu Name Description
Wi-Fi
Configure and administer your wireless connections (Wi-Fi)
Bluetooth
Data usage
More... Here you can select the Airplane Mode.
Configure and administer your wireless connections (Bluetooth)
Displays the data volume of the installed applications
9.1.2. DEVICE
Icon Menu Name Description
Sound
Display
Storage
Battery
Apps
Configure the sound settings, e.g. ring tones
and notifications.
Configure display settings, e.g. brightness.
Check the available memory on an inserted
microSD card and the internal device
memory.
Displays the charging status and the remaining battery life.
Manage your applications and install new
applications.
20 of 37
Page 22

9.1.3. USER
Icon Menu Name Description
Location services
Here you can set the sources that are to be
used to determine your location.
Create your unlock pattern, define the mem-
Security
Language & input
Backup & reset
ory management for the registration information on your mobile device.
Set the operating system language and region, as well as the text input option
Configure the data protection settings, e.g.
backup, restoration and personal data.
9.1.4. SYSTEM
Icon Menu Name Description
Date & time
Accessibility
Developer options
About tablet
Example
• Choose the desired item on the left side. This will open a submenu at the same
time on the right of the screen.
• To return to the previous menu or other available menus, select the title of the
list on the left.
Set the date, time, time zone and date/time
format
After installing the applications for input
support, you can set various options here.
Display the mobile network status, battery
level and legal information. You can also
search for system updates
DeutschEnglishNederlandsFrançais
21 of 37
Italiano
Page 23

9.1. Software updates
When a software update is available, you can download this update from the Internet.
To check the availability of new updates, go to Settings > About tablet >
System update.
9.2. Google Play
As your tablet is based on the Android platform, you can expand its functions by installing additional applications. Play Store
other mobile applications.
offers a simple way to get games and
PLEASE NOTE!
In order to be able to access the Android™ marketplace, you will need an
internet connection and a Google™ account.
9.3. Using Non-Market Applications
If you would like to install applications from sources other than the official market
place (e.g. via the Web browser or the memory card), then tap on Security in the
Settings and place a checkmark next to Unknown sources . By default this option is
not ticked.
22 of 37
Page 24

10. Widgets – Little helpers on the Desktop
Widgets – mini programs that are executed on the desktop – are used to display
and manage many things. How to run widgets:
Tap on
To add a widget, tap on the desired widget and drag it to the preferred screen.
You can also download widgets from the Play Store. These widgets then also
appear in the list of all available widgets.
To remove a widget, tap on the widget and drag it up on the screen to the X. The
widget will be deleted.
> Widgets. All available widgets will be shown:
11. Setting Wallpapers
Browse through the many available wallpapers and give your tablet PC a
fresh design.
Continue tapping on the home screen until the following message appears:
DeutschEnglishNederlandsFrançais
Browse wallpapers and background images.
Tap on the desired picture and select Set wallpaper.
Italiano
23 of 37
Page 25

12. Connecting to the Internet
12.1. Main Settings
You can connect to the internet with the standard connection settings using a
WLAN connection.
12.2. Airplane Mode
The airplane mode allows you to deactivate all wireless connections (e.g. WLAN,
Bluetooth).
Tap on the right bottom corner of the task bar and then on Settings.
Tap on Airplane mode and then ON or OFF to activate or deactivate the wire-
less links.
24 of 37
Page 26

12.3. Wi-Fi
12.3.1. Activating Wi-Fi
CAUTION!
Make sure the Wireless LAN option is switched OFF in any environment where it might interfere with critical and sensitive devices, e.g. on aircraft, in hospitals and other medical centres,
etc.
Tap on Apps > Settings.
Tap on Wireless & Networks.
Tap on WLAN > ON to enable/disable this function.
If you would like to be notified when an open network is available, make sure that
the Network notification function is activated:
Tap on Apps > Settings > Wi-Fi.
Tap at the top right on > Advanced.
Set a checkmark next to Network notification. In the default settings this box
is not checked.
You can also manually add a WLAN network using the Add Network option by entering the network SSID with the respective security types.
DeutschEnglishNederlandsFrançais
12.3.2. Connecting to a WLAN Network
Tap on Apps > Settings and then on Wireless & Networks > Wi-Fi > ON. The
descriptions for the WLAN network and the relevant security settings (open or
secure) that have been detected by your tablet are displayed under Wi-Fi networkst.
Tap on the network to which you want to connect.
PLEASE NOTE!
If you attempt to make a connection to a secure network, you will be required to enter a password to gain access.
25 of 37
Italiano
Page 27

12.4. Bluetooth
Bluetooth enables you to exchange files between local and connected devices.
12.4.1. Activating Bluetooth
CAUTION!
Make sure the Wireless LAN option is switched OFF in any environment where it might interfere with critical and sensitive devices, e.g. on aircraft, in hospitals and other medical centres,
etc.
Tap on Apps > Settings and then on Wireless & Networks.
Tap on Bluetooth > ON to enable/disable this function.
Tap on Search for devices (note: the Bluetooth function must be activated on
the relevant devices).
PLEASE NOTE!
Before this procedure, pick up your Bluetooth device and make sure that
the target device is within the reception range of approx. 10 m.
12.4.2. Pairing Devices
Tap on Bluetooth > ON.
On the right in the window, tap on LIFETAB, thus activating the option Visible to
all Bluetooth devices nearby.
Tap at the top right on Search for devices and search the network for accessible
devices. Select the required device and wait for the detection.
Confirm by tapping on Touch to pair.
The devices are now paired and can connect automatically whenever they are in
range of each other.
13. Connecting the Tablet PC to a Computer
The micro USB connection lets you connect the tablet PC to a computer via the USB
cable supplied. The computer recognises the tablet as a USB device.
26 of 37
Page 28

14. External Storage Media
Your tablet PC permits the use of external storage media. These allow you to increase the memory capacity of the device and exchange data with your desktop
computer or other devices/people. You can use the following types of storage media:
− microSD cards
These are inserted into the corresponding card slot.
− USB memory, e.g. USB sticks or USB hard disks;
these require the USB host adapter.
PLEASE NOTE!
The form and capacity of a memory card can vary depending on the manufacturer. Your tablet supports the microSD format.
14.1. Inserting microSD Cards
PLEASE NOTE!
Memory cards can only be installed in one direction.
Incorrect insertion of a card can cause damage to the card reader and/
or the card.
Open the cover of the card slot for the microSD card.
Insert the memory card carefully into the card bay, ensuring that the contacts
go in first and point towards the screen. The card must lock easily.
After the microSD card has been inserted, the message SD card connected appears
at the bottom right of the task bar.
DeutschEnglishNederlandsFrançais
CAUTION!
Never remove the SD card without disconnecting it beforehand. This can result in data loss!
14.1.1. Accessing the microSD Card Contents
To access the SD card you either can use the application the ES file explorer or another application of your choice (i.e. LIFETAB Media) to play music or watch photos
from the SD card.
14.1.2. Accessing the microSD via the ES File Explorer
Open the ES file explorer.
The SD card is detected automatically.
27 of 37
Italiano
Page 29

14.1.3. Accessing the microSD via LIFETAB Media
Start LIFETAB Media.
Select Music, Video, Photo or Camera.
The data from the corresponding category can now be played back.
14.2. Removing microSD Cards
Tap on Settings > Storage.
Tap on Remove SD card.
Now press lightly on the microSD card. The microSD card disengages and pops
out of the card slot slightly.
Remove the memory card by carefully pulling it out.
14.3. Connecting USB Stick
Connect the USB host cable supplied to the tablet PC.
Connect the USB stick to the USB host cable.
After the USB memory has been connected, the message USB Storage connected
appears at the bottom right in the task bar.
CAUTION!
Never remove the USB memory without disconnecting it beforehand. This can result in data loss!
14.3.1. Accessing the USB Memory
With ES File explorer or another application of your choice (e.g. LIFETAB MEDIA)
you can access the content of the USB memory and play back music or display photos.
14.3.2. Accessing the USB Memory using the ES File Explorer
Open the ES file explorer.
The USB memory is detected automatically.
28 of 37
Page 30

14.3.3. Accessing the USB Memory using LIFETAB Media
Start LIFETAB Media.
Select Music, Video, Photo or Camera.
The data from the corresponding category can now be played back.
14.4. Removing the USB Memory
Tap on Settings > Storage.
Tap on Remove USB storage.
Remove the USB memory by carefully pulling out the USB host cable.
15. Communication
15.1. Browser
After you have established a network connection, tap on the Browser icon to
surf the Net.
16. LIFETAB Media – Entertainment
Using the LIFETAB Media application you can watch videos, listen to music,
view photos or use the integrated camera.
DeutschEnglishNederlandsFrançais
29 of 37
Italiano
Page 31

16.1. Camera
With this application you can use the integrated camera to shoot photos
and/or to record films.
Tap on
camera.
Move the control in the + direction in order to zoom in.
Move the control in the - direction in order to zoom out.
Press to operate the shutter release.
At the bottom left you will see a thumbnail view of the taken photo or the recorded
film. By simply clicking the thumbnail, the user can play back the video or view the
picture just taken.
to switch between the front camera and the camera at the rear
.
16.2. Video
From here you can call up videos that are available in the internal memory or on the
external memory card. Select the desired film to play it back.
PLEASE NOTE!
If you play back videos stored on the tablet on a television, you can only
adjust the volume on the television.
16.3. Music
With this application you can visualise and play back music albums. The multimedia
content is sorted by artists, albums, tracks and playlists.
30 of 37
Page 32

17. External Keyboard
If you use your tablet to write long e-mails or texts, it may be helpful to use an external keyboard. You can connect keyboards via USB (with the USB host adapter) or
Bluetooth. The first time an unknown keyboard is connected, it will only offer the
US layout, i.e. some keys will have unusual characters. With the help of the External
Keyboard app you will be able to set a different layout for the currently connected
keyboard.
Follow the instructions of the app.
PLEASE NOTE!
If you use a PC keyboard with function keys (F1 to F12), the function
keys are assigned with special Android™ functions. The layout is displayed in the app.
DeutschEnglishNederlandsFrançais
31 of 37
Italiano
Page 33

18. FAQ
How do I switch off the tablet when the system is blocked?
Press the On/Off switch for several seconds. The device switches off and can
then be restarted.
How can I reset the tablet PC to the factory settings?
Tap on Settings > Backup & reset > Factory data reset in the main menu to re-
set the system to the factory settings.
Caution: This will delete any data you have stored!
How can I increase the operating life of the battery?
Reduce the brightness of the display to a suitable brightness level.
Deactivate WLAN and Bluetooth.
Reduce the Sleep value of the display.
What do I do if the image/photo is not clear?
Make sure you have removed the protective foil from the lens.
Check whether the lens is clean (after having taken a photo or saving a video)
and clean it, if necessary, with a soft, lint-free cloth.
What can I do if a microSD card cannot be read?
Insert the microSD card again into the designated card slot and start the tablet.
Why are Bluetooth and WiFi deactivated?
Check whether the Airplane mode is active. In this case, the Bluetooth and
WLAN functions cannot be activated. Deactivate the airplane mode.
19. Customer Service
19.1. Additional Support
Please contact the customer service and we will attempt to help you solve the problem. Before you call, however, please have your proof of purchase at hand and the
following information available
• What messages, if any, appear on your screen?
• What steps have you already undertaken to solve the problem?
• If you have been given a customer number previously, please have this available.
32 of 37
Page 34

19.2. Maintenance
CAUTION!
There are no user-serviceable or user-cleanable parts inside the
tablet housing. Never open the tablet housings
Following these measures can extend the lifetime of your tablet. Before cleaning
the tablet and its accessories, proceed as follows:
Switch off the tablet.
Before cleaning, always remove the power adapter plug and all connecting ca-
bles.
Do not use any solvents, corrosive or gaseous cleaning agents.
.
19.3. Measures for Protecting the Display
• The display is the most sensitive component part of the tablet as it consists of
thin glass. It can break if stressed too strongly. Do not scratch the cover of the
tablet, because it will not be possible to remove any scratches.
• Prevent contact between the display and hard objects
(e.g. buttons, wristwatch).
• Do not place any objects on the display.
• Do not allow any objects to drop onto the display.
• Do not pour any fluids into the tablet, as this could damage it.
• Do not scratch the display with your fingernails or hard objects.
• Do not clean the display with chemical cleaning products.
• Clean the display with a soft, dry and lint-free cloth.
DeutschEnglishNederlandsFrançais
33 of 37
Italiano
Page 35

20. Recycling and Disposal
Should you have any questions concerning the disposal please contact your dealer
or our customer service.
Packaging
To avoid damage during transport, the tablet is stored in packaging.
Packaging is produced mostly from materials which can be disposed of
in an environmentally friendly manner and be professionally recycled.
Device
At the end of its life, the appliance should not be disposed of in household rubbish. Enquire about the options for environmentally friendly
disposal.
21. European Norm EN 9241-307 Class II
There have been several attempts in the past to define the acceptable number of
defective pixels. But this can be difficult and varies widely between different manufacturers.
We, therefore, adhere to the clear and strict requirements of EN 9241-307,
class II, for the warranty handling of all LCD display products. These requirements
are summarised below.
Within standard EN 9241-307the general requirements regarding pixel defects are
defined. Pixel defects are classified into three failure types and four failure classes. Each individual pixel is made up of three sub-pixels in the primary colours (red,
green, blue).
Pixel structure
34 of 37
5 Pixel
5 Pixel
Page 36

Types of Pixel Failures:
• Type 1:
A constantly lit pixel (a bright, white spot), even though it is not addressed. A
white pixel is caused when all three sub-pixels are lit.
• Type 2:
A pixel that does not light up (dark, black spot), although it is addressed
• Type 3:
Abnormal or defective red, green or blue sub-pixels. (E.g. constantly lit with half
the brightness, one colour is not shining, blinking or flickering, but not
belonging to Type 1 or 2 Pixel Failures).
In addition: A cluster of type 3 (= 2 or more defective sub-pixels in an array of 5 x 5
pixel). A cluster is an array of 5 x 5 pixel (15 x 5 sub-pixel).
EN 9241-307, Class II
Cluster
Resolution Type 1 Type 2 Type 3
1024 x 768 2 2 4 0 2
1280 x 800 3 3 6 0 3
1280 x 854 3 3 6 0 3
1280 x 1024 3 3 7 0 3
1366 x 768 3 3 7 0 3
1400 x 1050 3 3 8 0 3
Type 1, Type
2
Cluster
Type 3
DeutschEnglishNederlandsFrançais
21.1. FCC Compliance Statement
This equipment has been tested and found to comply with the limits for a Class B
digital device, pursuant to Part 15 of FCC Rules. These limits are designed to provide reasonable protection against harmful interference in a residential installation.
This equipment generates, uses, and can radiate radio frequency energy and, if not
installed and used in accordance with the instructions, may cause harmful interference to radio communications. However, there is no guarantee that interference
will not occur in a particular installation. If this equipment does cause harmful interference to radio or television reception, which can be determined by turning the
equipment off and on, the user is encouraged to try to correct the interference by
one or more of the following measures:
• Reorient or relocate the receiving antenna.
• Increase the separation between the equipment and receiver.
• Connect the equipment into an outlet on a circuit different from that to which
the receiver is connected.
• Consult the dealer or an experienced technician for help.
Changes or modifications not expressly approved by the party responsible for compliance could void the user’s authority to operate the equipment. Shielded interface
cables, if any, must be used in order to comply with the emission limits.
35 of 37
Italiano
Page 37

22. Technical Data
Description
Dimensions (w x h x d) approx. 260,7 x 172 x 12,1 mm
Weight approx. 594 g
Shenzhen Bestgk Technology Co.Ltd., China
Model: K-C70503000E UK
AC adapter with power cord
CPU ARM Cortex A9 (1,6GHz) dual-core processor
Storage
Display
Battery
Wireless properties
Cameras Front camera 0.3 MP / rear camera 2.0 MP
Speaker 8Ω/1W *1
Microphone integrated
Operating system
Input: 100-240V ~ 0,75A max. /
max. 50 - 60 Hz
Output: 5V 3000 mA
1 GB DDR3 memory / 16 GB internal memory
(memory can be expanded to 64 GB with microSD/SDHC/SDXC cards - not included in the
delivery)
25,7 cm/10,1“ Touch Screen
Resolution: 1280 x 800 pixel
Rechargeable 6000 mAh lithium polymer bat-
tery - operating time of up to 6 hours*
WLAN: IEEE 802.11n
Bluetooth 2.1
Android™ 4.1 (Jelly Bean)
* Depending on the device settings and usage.
36 of 37
Page 38

23. Index
A
Airplane Mode ............................................. 23
B
Battery Operation ....................................... 16
Bluetooth ....................................................... 25
Browser .......................................................... 28
C
Charging the Battery ................................. 16
Connecting to the Internet ..................... 23
Customer Service ....................................... 31
D
Declaration of Conformity .........................4
Disposal.......................................................... 33
E
External Keyboard ...................................... 30
External Storage Media ............................ 26
F
FAQ .................................................................. 31
FCC Compliance Statement .................... 34
G
Google Play ................................................... 21
Google™ Account ....................................... 12
H
Home Screen ......................................... 13, 18
L
LIFETAB Media ............................................. 28
M
Maintenance ................................................ 32
Making/Checking Settings ..................... 19
microSD Cards ............................................. 26
N
Non-Market Applications ........................21
O
Operating the Tablet ................................. 18
Operational Safety ........................................5
P
Powering Off ................................................ 16
Powering On ................................................ 16
Power Supply ............................................... 15
Power Adapter ........................................ 15
Proper Use ........................................................ 4
S
Safety Instructions
Ambient Temperature .............................7
Cabling .........................................................8
Connecting ................................................. 7
Operational Safety ...................................5
Power Adaptor ...........................................7
Selecting/checking the settings ........... 19
Software updates ....................................... 21
Standby Mode ............................................. 17
Status Icons................................................... 15
T
Technical Data ............................................. 35
V
Views
Front Side ....................................................9
Rear Side ......................................................9
Side view ................................................... 10
W
Wallpapers .................................................... 22
Widgets .......................................................... 22
Wi-Fi ................................................................. 24
DeutschEnglishNederlandsFrançais
Italiano
37 of 37
Page 39

120 Faraday Park, Faraday Road, Dorcan
Medion Electronics Ltd.
Swindon SN3 5JF, Wiltshire
United Kingdom
Hotline: 0871 37 61 020
(Costs 7p/min from a BT landline,
mobile costs may be higher)
Fax: 01793 71 57 16
To contact us by email please visit the „Service and
Support“ section of our website at www.medion.co.uk.
www.medion.co.uk
06/13
MSN 4004 5637
 Loading...