

Mc Leod Piston Seal Replacement User Manual
Hydraulic Bearing Piston and Seal Replacement Instruction
The McLeod hydraulic throw out bearing assembly is adjustable by easily changing the piston in the
assembly. The seals can easily be replaced and serviced by the installer as well. This instruction is
intended to make this process easy to understand and reassemble the hydraulic throw out bearing
correctly.
Step 1 Remove the bearing assembly from the transmission. Place caps over the end of the AN-4 hose to
keep from dripping oil onto the floor and work surface.
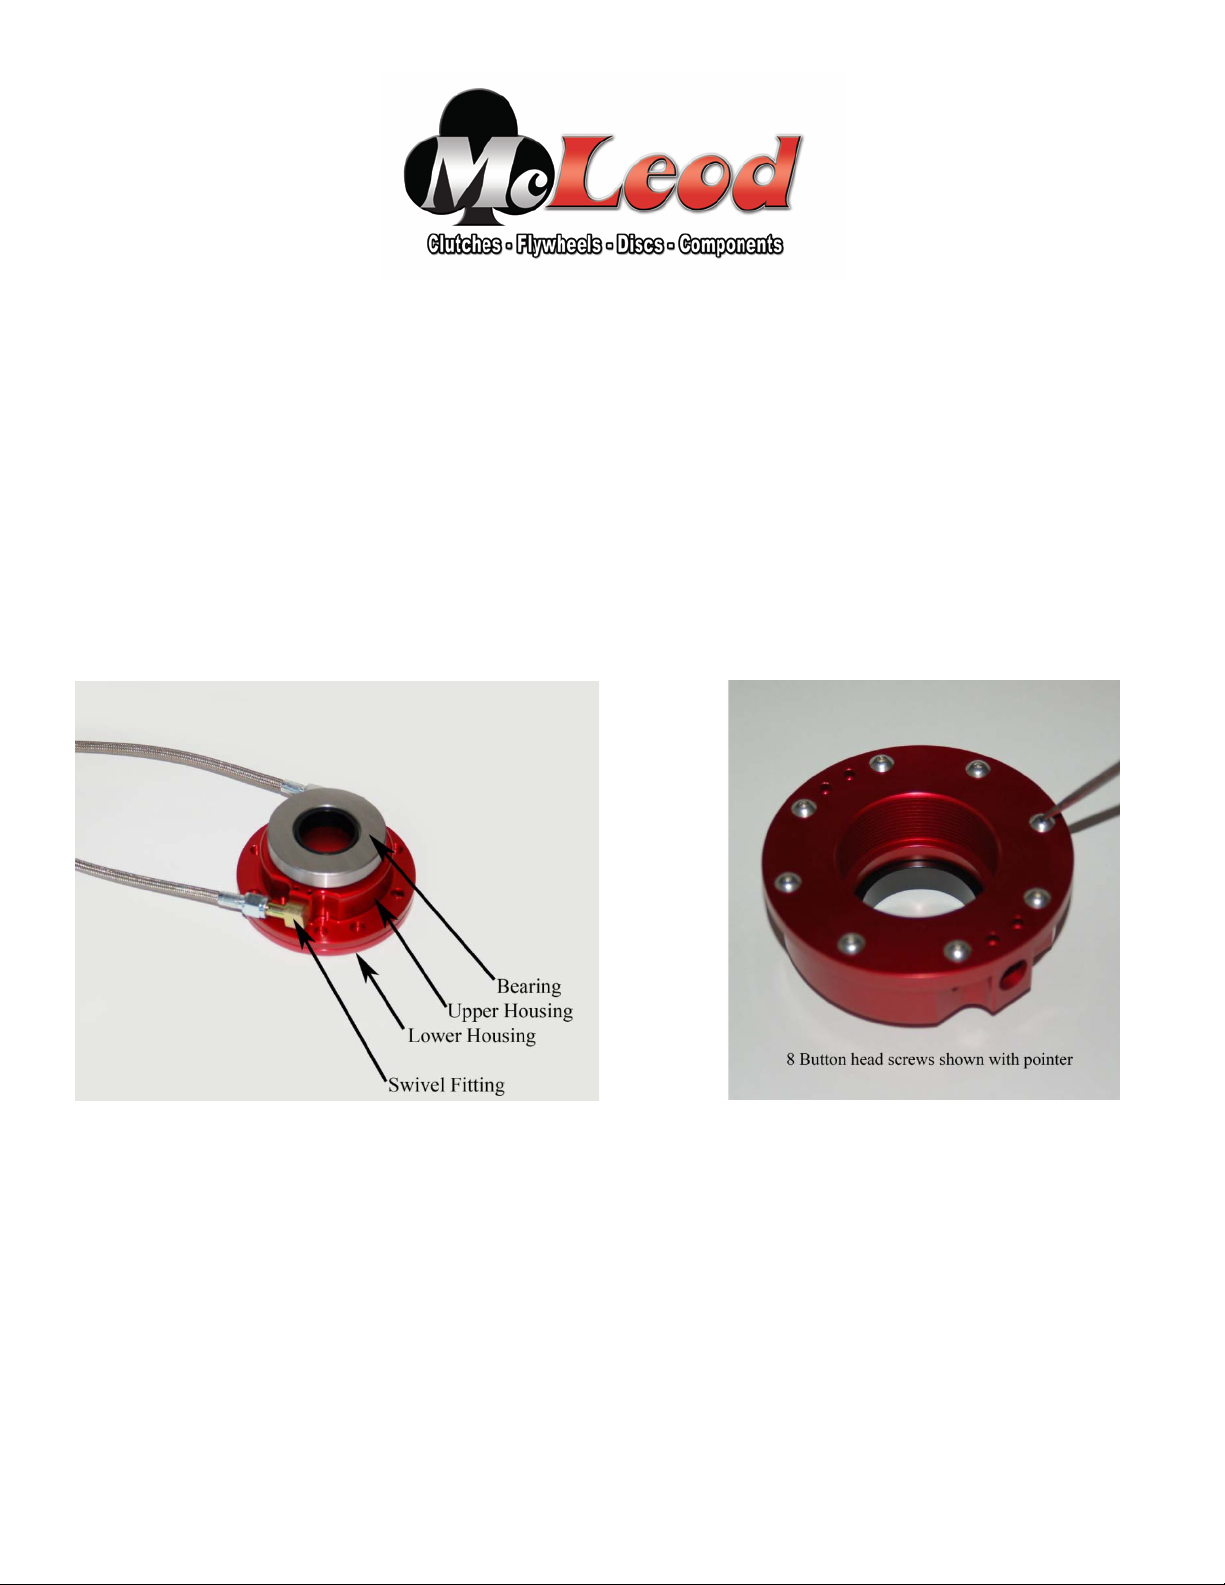
Step 2 Grab the bearing and firmly pull to remove the bearing from the hydraulic assembly. It is only
held in position with an O-Ring. Set the bearing aside. See Figure 1
Figure 1 Bolt on Bearing Assembly Shown Slip-On Style Bearing Shown Figure 2
Step 3 If you are disassembling a Slip-On style bearing you will need to remove the 8 screws from the
bottom of the bearing assembly to disassemble the unit. See Fig 2
To separate the Upper and Lower Housings turn bearing assembly over with the lower housing facing up.
Hold a hose in each hand. Drop bearing assembly so piston makes contact with a 2 x 4 piece of wood.
This may require two attempts. This should separate the upper and lower housing. Do not attempt to
wedge the Upper and Lower housings with a screw driver or similar metal tool! See Figure 3.
Pull the two pieces apart exposing the black piston. Remove the piston from the housing.
If only changing Pistons skip to step 10.
Step 4 Remove the O-Ring from the Piston Groove. Install new O-Ring from kit.
Step 5 Remove the Quad Ring from the ID of the Upper Housing. A small pick can be used to expose a
small cross section of the seal to grab with your fingers. Do not cut or pierce the quad ring. Do not gouge
the seal groove or housing. Remove the large O-Ring from the bottom of the Upper Housing.
Figure 3 Bolt-On Style Shown Figure 4
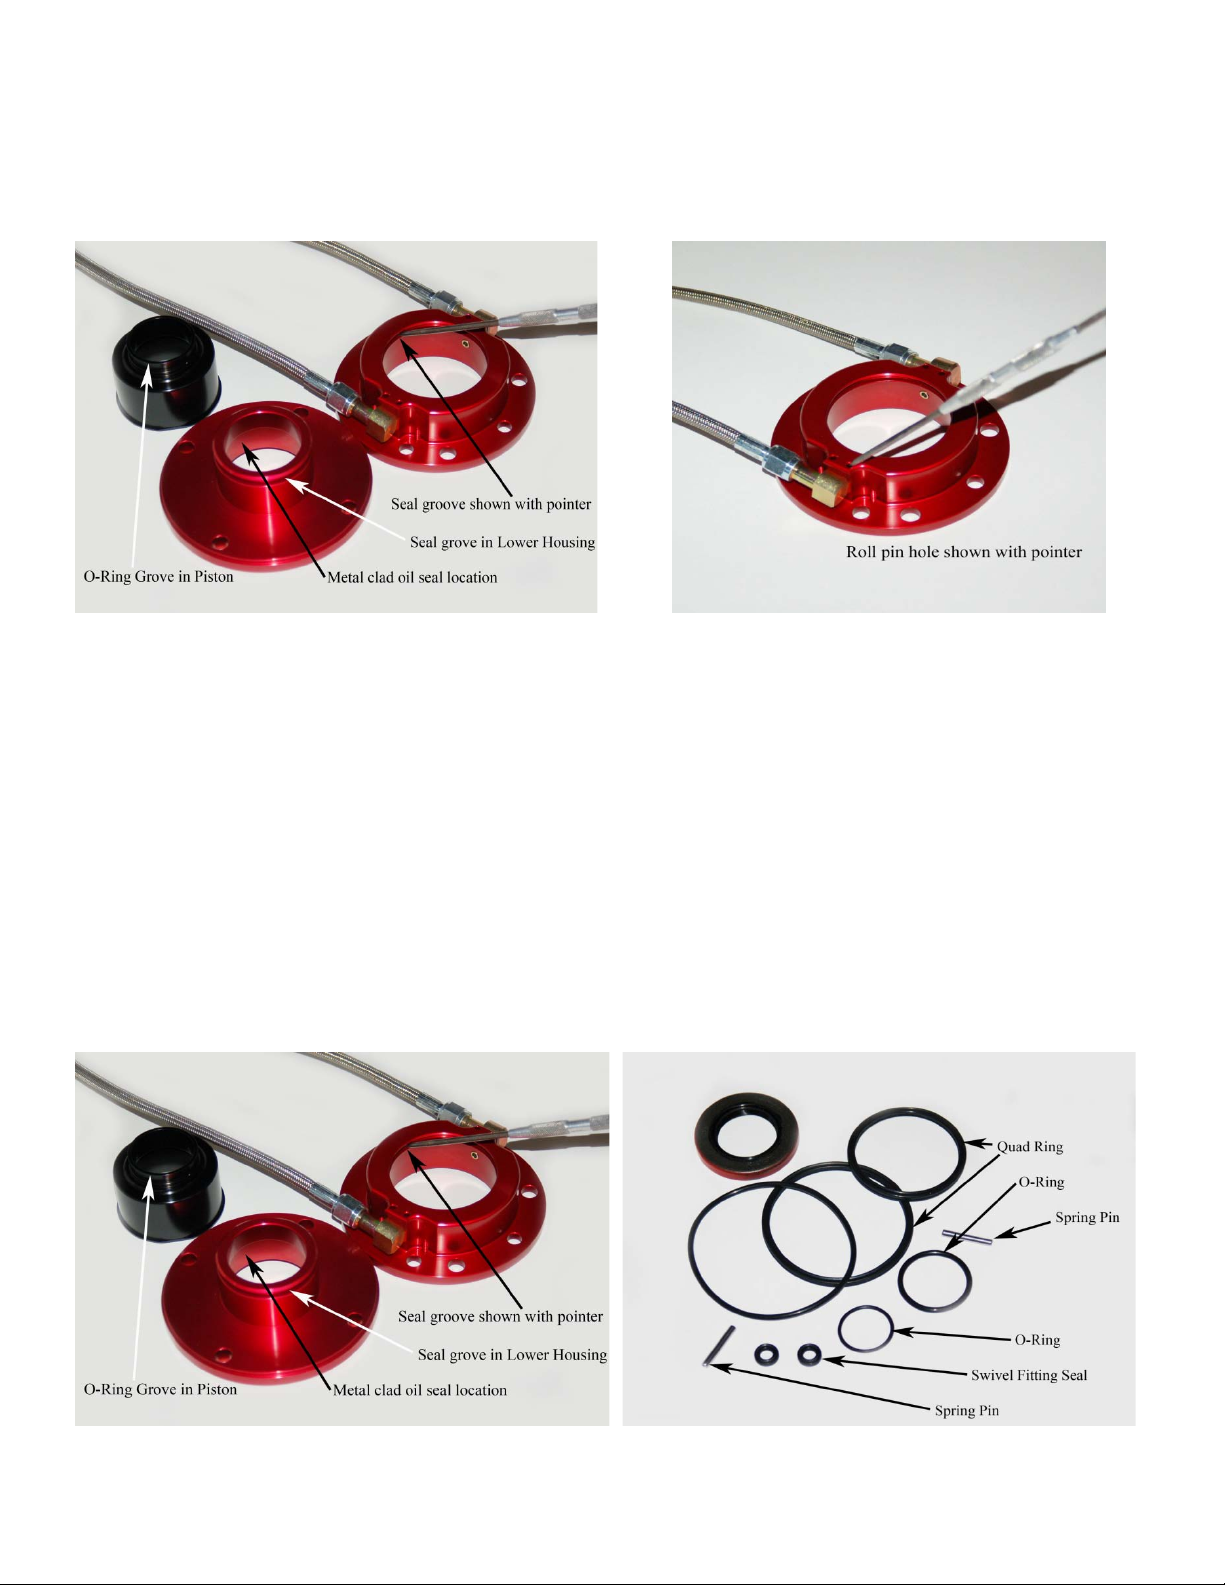
Step 6 Place the Upper Housing and hose assembly up-side down on a piece of 1”x 2” wood block or
similar material. Using a small diameter ‘drift’ or punch (1/8” or smaller), drive the Spring Pins through
the Upper Housing from the bottom. See Figure 4. The swivel fittings and hose will pull out of the Upper
Housing. A small pick can be used to remove the small quad ring fitting seal from the housing. Repeat for
second hose/fitting assembly.
Step 7 Remove metal clad oil seal from center of Lower Housing. Note location of seal depth, some are
all the way down to the step in the housing, some are 1/16”down and some flush with the top of the bore.
Make a note for you to reference when reinstalling the seal. You can use a socket with a 1-3/4” OD to
drive the seal out of the housing from the upper side. Gently tap the seal out. Remove Quad seal from OD
of Lower Housing.
Figure 5 Bolt-On Bearing Shown Seal Guide Figure 6
 Loading...