

Mc Leod 1964-66 Mustang Hydraulic Conversion Instructions
1964 – 1966 Ford Mustang Hydraulic Clutch Conversion Kit
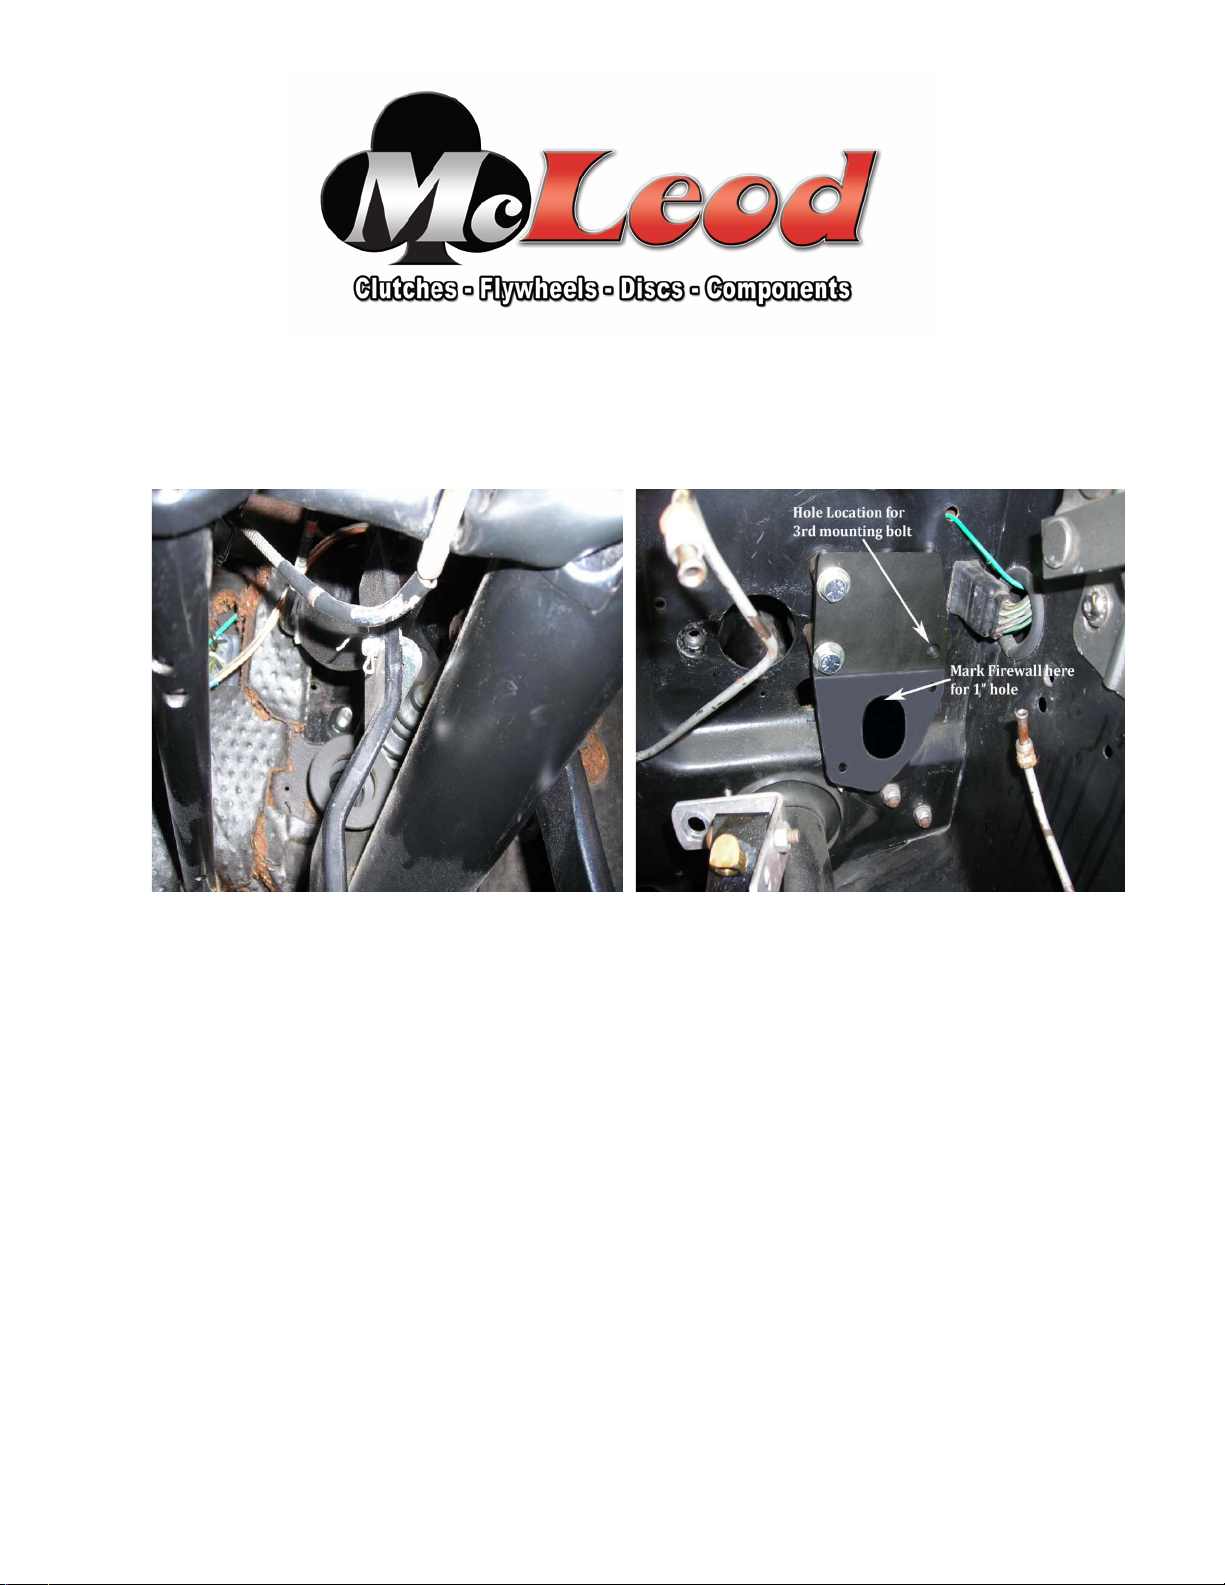
1) Remove all of the existing factory mechanical clutch linkage components. (Clutch rod, bell crank or
Z bar). See Figure 1.
Figure 1 Figure 2
2) For ease of installation it is recommended you remove the brake master cylinder and booster
assembly (if equipped). Carefully remove the brake lines from the master cylinder and mark them
to be certain they are reinstalled into the correct ports. Brake lines may need to be rerouted if
interference occurs. Only use proper steel brake lines when rerouting the brake lines.
3) If the vehicle has power brakes, you will need to use the two long spacers between the McLeod
Master Cylinder mounting plate and the power brake bracket. If you do not have power brakes
(no power brake booster), you will need to use one long and one short spacer between the
McLeod master cylinder mounting plate and the brake master cylinder. This will space the master
cylinder mounting plate even with the firewall on the driver side. Using the two supplied 3/8-16 x
2” bolts pass the bolts through the large upper holes in the mounting plate, spacers and brake
master cylinder (or bracket) into the firewall. See Figure 2. Tighten these bolts snug at this time.
4) The hole located on the right side of the bracket just above the bend is the third mounting hole for
this bracket. The bracket can serve as a drill guide to drill a 3/8” hole through the firewall for this
third mounting fastener.
5) Mark the firewall at the top center of the large oval hole in the mounting bracket. See Figure 2.
Remove the mounting plate to gain access, using a hole saw drill a 1” diameter hole in the firewall
to allow the push rod for the McLeod master cylinder to pass through the firewall. See Figure 3.
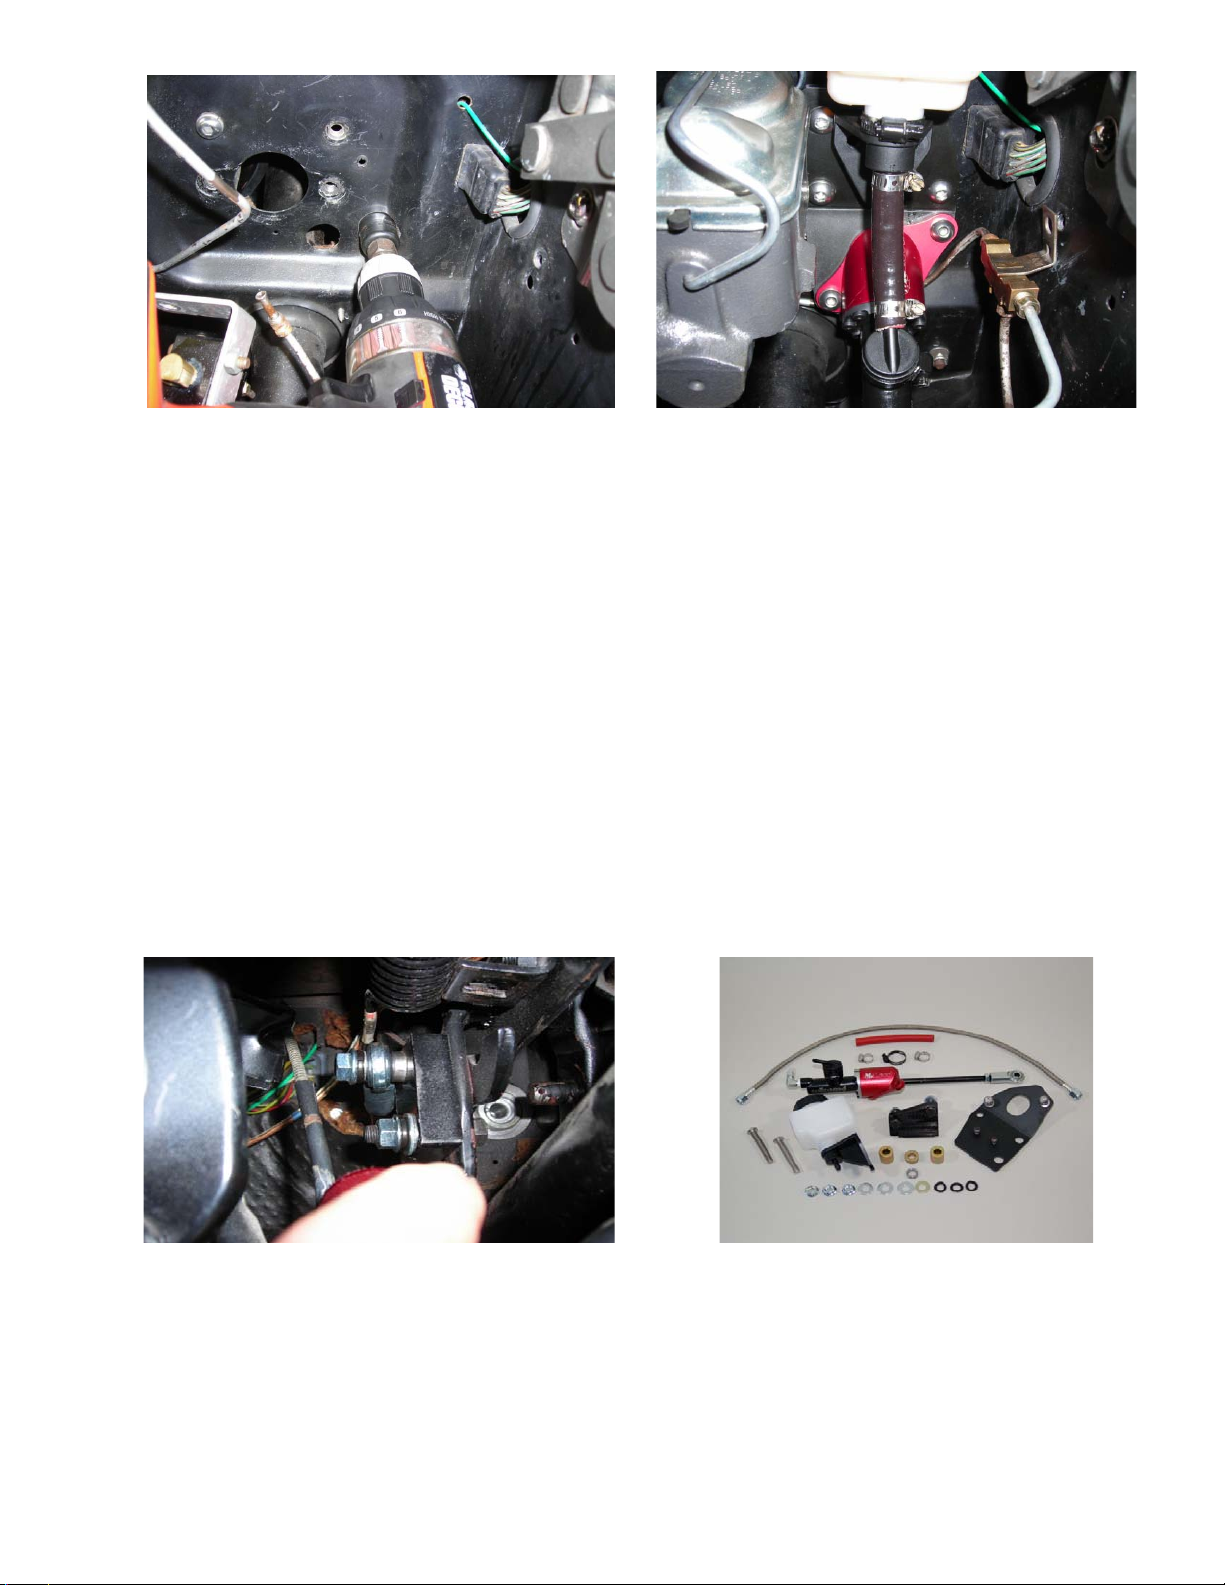
Figure 3 Figure 4
6) Assemble the McLeod master cylinder to the mounting plate with supplied button head silver
screws and lock washers. Tighten screws securely. Re-install the factory brake master cylinder to
the firewall. Install the mounting plate/McLeod master cylinder assembly, passing the pushrod
through the firewall. Attach the mounting plate with appropriate spacers and fasteners to the
firewall. The third mounting location uses a 3/8-16 x 1” bolt, lock washer and nut. Tighten all
three fasteners securely.
7) Install the pedal bracket, with the stud at the top, to the pedal under the dash. Install the .200”
spacer onto the stud; place the rod end on the end of the push rod over the stud with the lock
washer and nut. Remove the heavy pedal return spring from the pedal if present. Swing the pedal
through its range of motion to be certain there is no interference with any component including
wires and or hoses. See Figure 5.
8) Mount the master cylinder reservoir to the mounting plate with the supplied black button head
screws. Connect the reservoir to the master cylinder with the red hose. Secure the reservoir and
hose with supplied clamps (3). See Figure 4
Figure 5 Figure 6
9) Connect the McLeod master cylinder to the slave cylinder with the supplied AN4 line. Fill the
master cylinder with Dot 3 or 4 brake fluid (Do not use synthetic brake fluid!) and bleed system
completely.
10) Adjustments to the pedal height can be made at the rod end attached to the bracket on the brake
pedal. Be certain to tighten the rod end jam nut when adjustment is complete.
11) Re-install the brake lines to the brake master cylinder and bleed the brakes. I0011
 Loading...