

Mc Leod 1963-1972 Chevelle Hydraulic Conversion Instructions
1963 - 72 Chevrolet Chevelle Hydraulic Clutch Conversion Kit
1) Remove all of the existing factory mechanical clutch linkage components. (Clutch rod, bell crank or
Z bar) from under the dash and at the bell housing area.
Figure 1 Figure 2
2) Remove the brake master cylinder and booster assembly (if equipped). Carefully remove the
brake lines from the master cylinder and mark them to be certain they are reinstalled into the
correct ports. Brake lines may need to be rerouted if interference occurs. Only use proper steel
brake lines when rerouting the brake lines.
3) Disassemble the pedals from the pedal box. Note order of all parts (spacers, washers, nylon
washers etc) during disassembly. The pivot rod at the top of the box is secured with a spring clip.
Remove the clip and slide the pivot rod out of the box. Install the supplied McLeod pedal, then the
brake pedal along with the above mentioned spacers and washers. Reinstall the spring clip. Both
pedals should now be securely mounted and travel through their complete arc. Be sure to install
the rubber pedal covers at this time. See Fig 3
4) Assemble the McLeod master cylinder to the mounting plate with supplied screws and lock
washers. Tighten screws securely. Install the mounting plate/McLeod master cylinder assembly,
passing the pushrod through the firewall. Re-install the factory brake master cylinder onto the
mounting bracket. Install washers and nuts. Tighten all four fasteners securely.
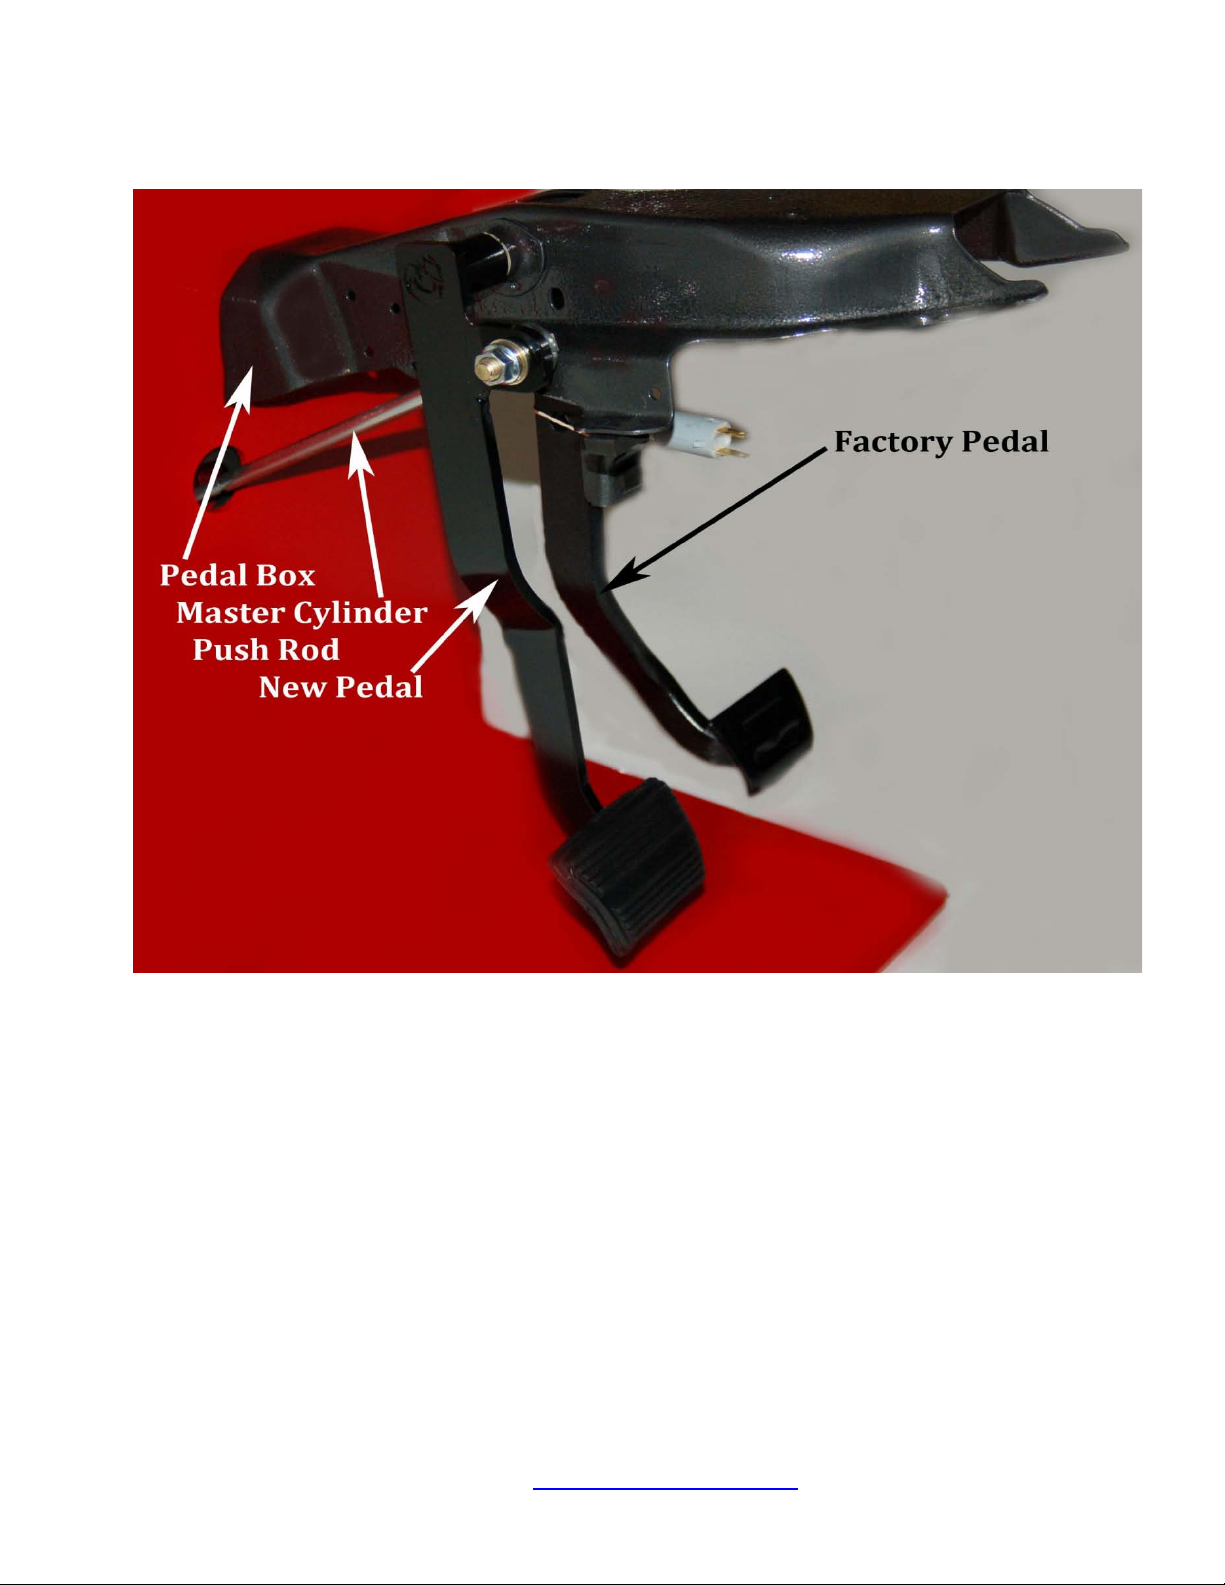
5) Assemble the rod end attached to the push rod to the new pedal with the supplied hardware in
this order……bolt, flat washer, rod end on the end of the push rod, pedal, flat washer, lock washer
and nut. Tighten nut securely. Remove the heavy pedal return spring from the pedal if present.
Swing the pedal through its range of motion to be certain there is no interference with any
component including wires and or hoses. See Figure 3.
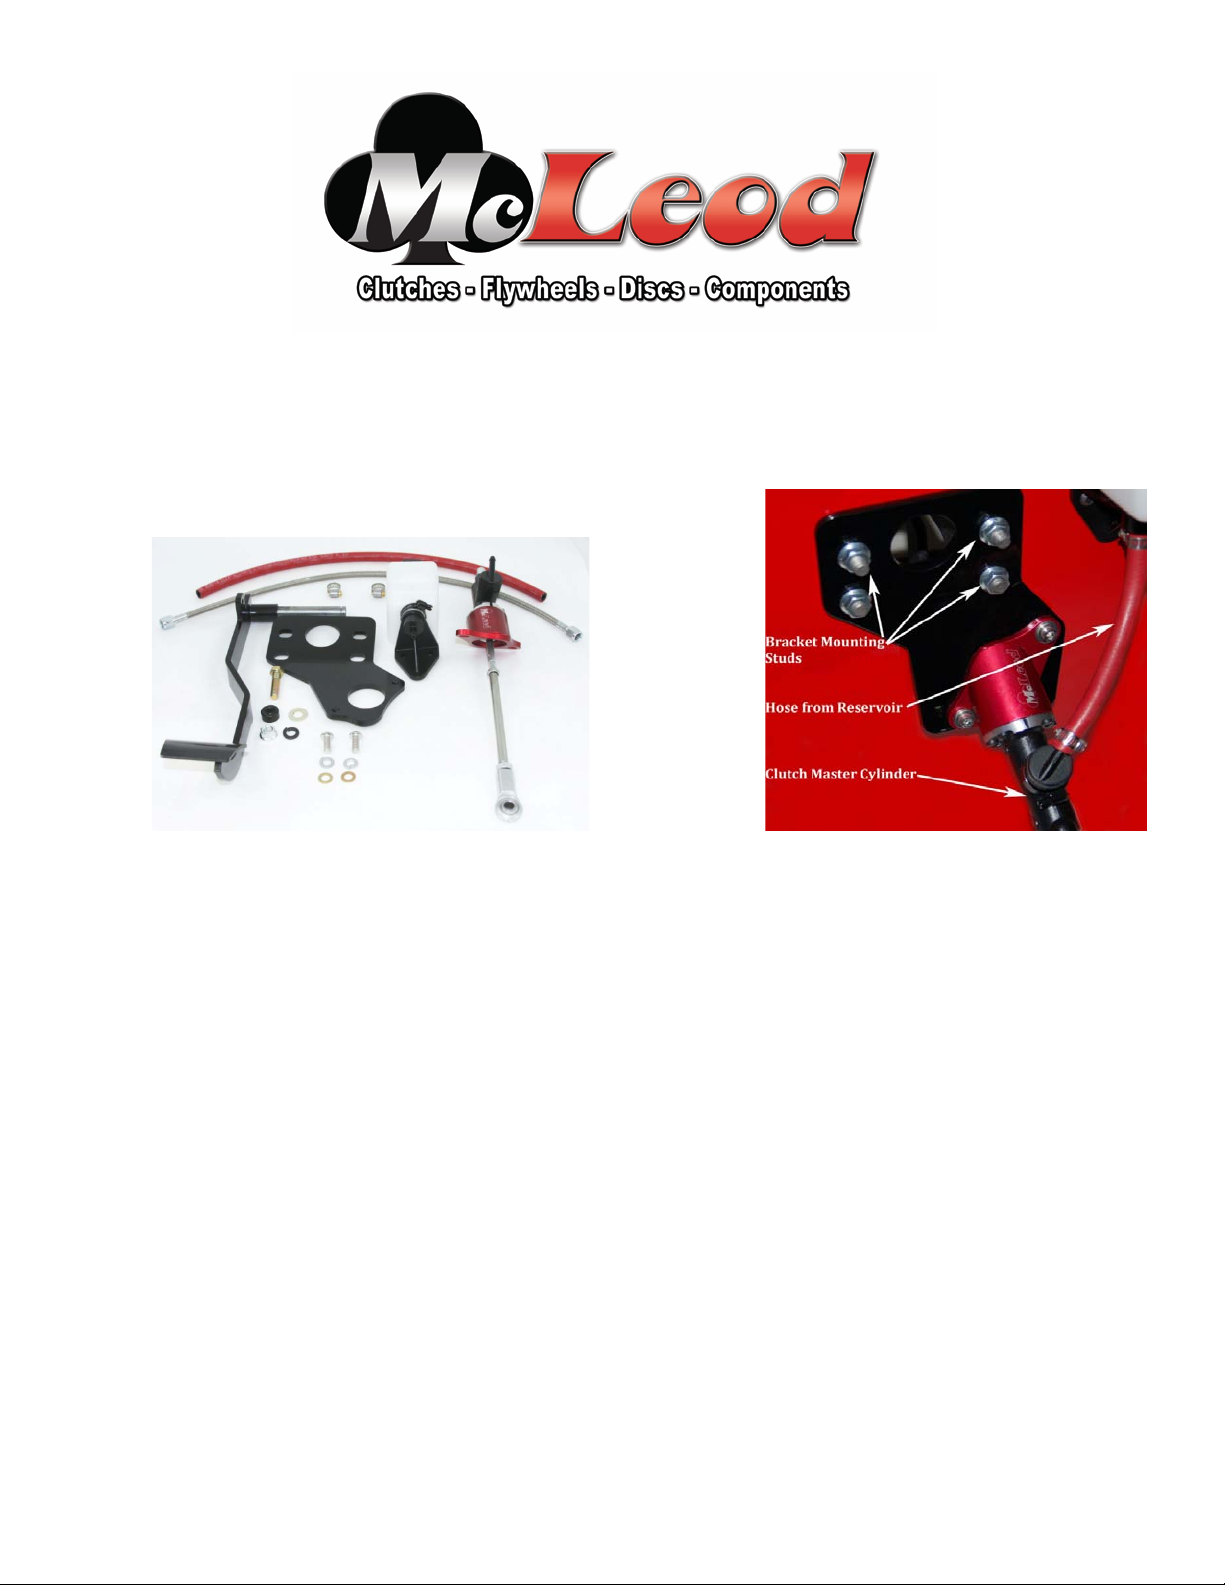
6) Mount the master cylinder reservoir in a convenient location above the master cylinder using the
supplied screws. Connect the reservoir to the master cylinder with the red hose. Secure the
reservoir and hose with supplied clamps (3). See Figure 2
Figure 3
7) Fill the master cylinder reservoir with Dot 3 or 4 brake fluid (Do not use synthetic brake fluid!).
Before connecting the bottom of the AN4 line to the slave cylinder stroke the pedal a few times to
bleed the upper system. Connect the McLeod master cylinder to the slave cylinder with the
supplied AN4 line and bleed system completely.
8) Adjustments to the pedal height can be made at the rod end attached to the bracket on the brake
pedal. The pedal must travel the full range of motion to allow full clutch release before the pedal
contacts the floor. The push rod must not bottom out into the clutch master cylinder. Be certain
to tighten the rod end jam nut when adjustment is complete.
9) Re-install the brake lines to the brake master cylinder and bleed the brakes.
McLeod Racing, LLC 1600 Sierra Madre Circle Placentia, CA 92870 714.630.3668 Tech Line
See us at www.mcleodracing.com I0033.1
 Loading...