

MB OfficeCenter 316, OfficeCenter 320 Online Manual
MB OfficeCenter 316/320
Online Manual
Downloaded From ManualsPrinter.com Manuals
C lick t
Start
his
"S tart" but
ton.
Introduction
This manual describes the printer functions of the MB OfficeCenter 316/320 digital multifunctional system.
●
Note
Trademark Acknowledgments
●
Microsoft® Windows® operating system is a trademark or copyright of Microsoft Corporation in the U.S.A. and other countries.
●
Windows® 95, Windows® 98, Windows® Me, Windows NT® 4.0, Windows® 2000, and Windows® XP are trademarks or copyrights
of Microsoft Corporation in the U.S.A. and other countries.
●
Acrobat® Reader Copyright© 1987- 2002 Adobe Systems Incorporated. All rights reserved. Adobe, the Adobe logo, Acrobat, and
the Acrobat logo are trademarks of Adobe Systems Incorporated.
●
All other trademarks and copyrights are the property of their respective owners.
For information on the following topics, please refer to the Operation Manual for the digital multifunctional system.
• Basic machine procedures (adding paper, replacing the toner cartridge, using peripheral devices)
• Copier functions
• Resolving printer problems
• Specifications
●
Where "MB OfficeCenter XXX" appears in this manual, please substitute the name of your model for "XXX". For the name of
your model, see "DIFFERENCES BETWEEN MODELS" in the Operation Manual.
●
The screen images and procedures that appear in this manual are mainly for Windows XP. With other versions of Windows, some
screen images may be different from those in this manual.
●
For information on using your operating system, refer to your operating system's manual or online Help.
The display screens, messages, and key names shown in the manual may differ from those on the actual machine due to product
improvements and modifications.
CONTENTS INDEX
Downloaded From ManualsPrinter.com Manuals
2
How to Use the Online Manual
Contents
This section explains how to view the online manual. Please read this section before using the online manual.
Introduction 2
For information on using Acrobat Reader, see Acrobat Reader Help.
How to Use the Online Manual 3
How to Control the Online Manual
PRINT
In this manual, the following buttons are displayed at the
bottom of each page. Click these buttons to move quickly to
Basic Printing 5
pages that you wish to view.
Opening the Printer Driver From the "Start" Button 7
Printer Driver Settings 8
Printing Multiple Pages on One Page 9
CONTENTS
Fitting the Printed Image to the Paper 10
Displays the Contents of this manual. Click on a topic in the
Rotating the Print Image 180 Degrees 11
Contents to jump directly to that section.
Printing a Watermark 12
PRINTER SHARING
Sharing the Printer Using Windows Networking 14
Following Links
Shared Printer Settings 15
Client Settings 16
This manual uses a link function that allows you to jump to a
related page. If you click green, underlined text, the related
page will be displayed. (In the Contents and Index sections, the
INDEX
linked areas are not underlined.)
Example:
To return to the previous page, click the button on the menu
bar of Acrobat Reader.
☞
Contents
Using Bookmarks
Outline of the Print Status Window 13
INDEX
Displays the Index of this manual. Click on a topic in the Index
to jump directly to that section.
Takes you forward page by page.
Takes you back page by page.
CONTENTS INDEX
CONTENTS INDEX
Downloaded From ManualsPrinter.com Manuals
Downloaded From ManualsPrinter.com Manuals
Bookmarks have been created on the left side of this manual.
You can click on a bookmark to jump directly to that section.
How to Print Out This Manual
To print this manual, select "Print" from the "File" menu of
Acrobat Reader. Select the desired printer settings in the "Print"
dialog box, and then click the "OK" button.
3
4
How to Use the Online Manual
Contents
This section explains how to view the online manual. Please read this section before using the online manual.
Introduction 2
For information on using Acrobat Reader, see Acrobat Reader Help.
How to Use the Online Manual 3
How to Control the Online Manual
1 PRINT
In this manual, the following buttons are displayed at the
bottom of each page. Click these buttons to move quickly to
Basic Printing 5
pages that you wish to view.
Opening the Printer Driver From the "Start" Button 7
Printer Driver Settings 8
Printing Multiple Pages on One Page 9
CONTENTS
Fitting the Printed Image to the Paper 10
Displays the Contents of this manual. Click on a topic in the
Rotating the Print Image 180 Degrees 11
Contents to jump directly to that section.
Printing a Watermark 12
2 PRINTER SHARING
Sharing the Printer Using Windows Networking 14
Following Links
Shared Printer Settings 15
Client Settings 16
This manual uses a link function that allows you to jump to a
related page. If you click green, underlined text, the related
page will be displayed. (In the Contents and Index sections, the
3 INDEX
linked areas are not underlined.)
Example:
To return to the previous page, click the button on the menu
bar of Acrobat Reader.
Contents
Using Bookmarks
Outline of the Print Status Window 13
INDEX
Displays the Index of this manual. Click on a topic in the Index
to jump directly to that section.
Takes you forward page by page.
Takes you back page by page.
CONTENTS INDEX
CONTENTS INDEX
Downloaded From ManualsPrinter.com Manuals
Downloaded From ManualsPrinter.com Manuals
Bookmarks have been created on the left side of this manual.
You can click on a bookmark to jump directly to that section.
How to Print Out This Manual
To print this manual, select "Print" from the "File" menu of
Acrobat Reader. Select the desired printer settings in the "Print"
dialog box, and then click the "OK" button.
3
4
PRINT
1
The following example explains how to print a document from WordPad.
Before printing, make sure that the correct size of paper for your document has been loaded in the machine.
1
2
3
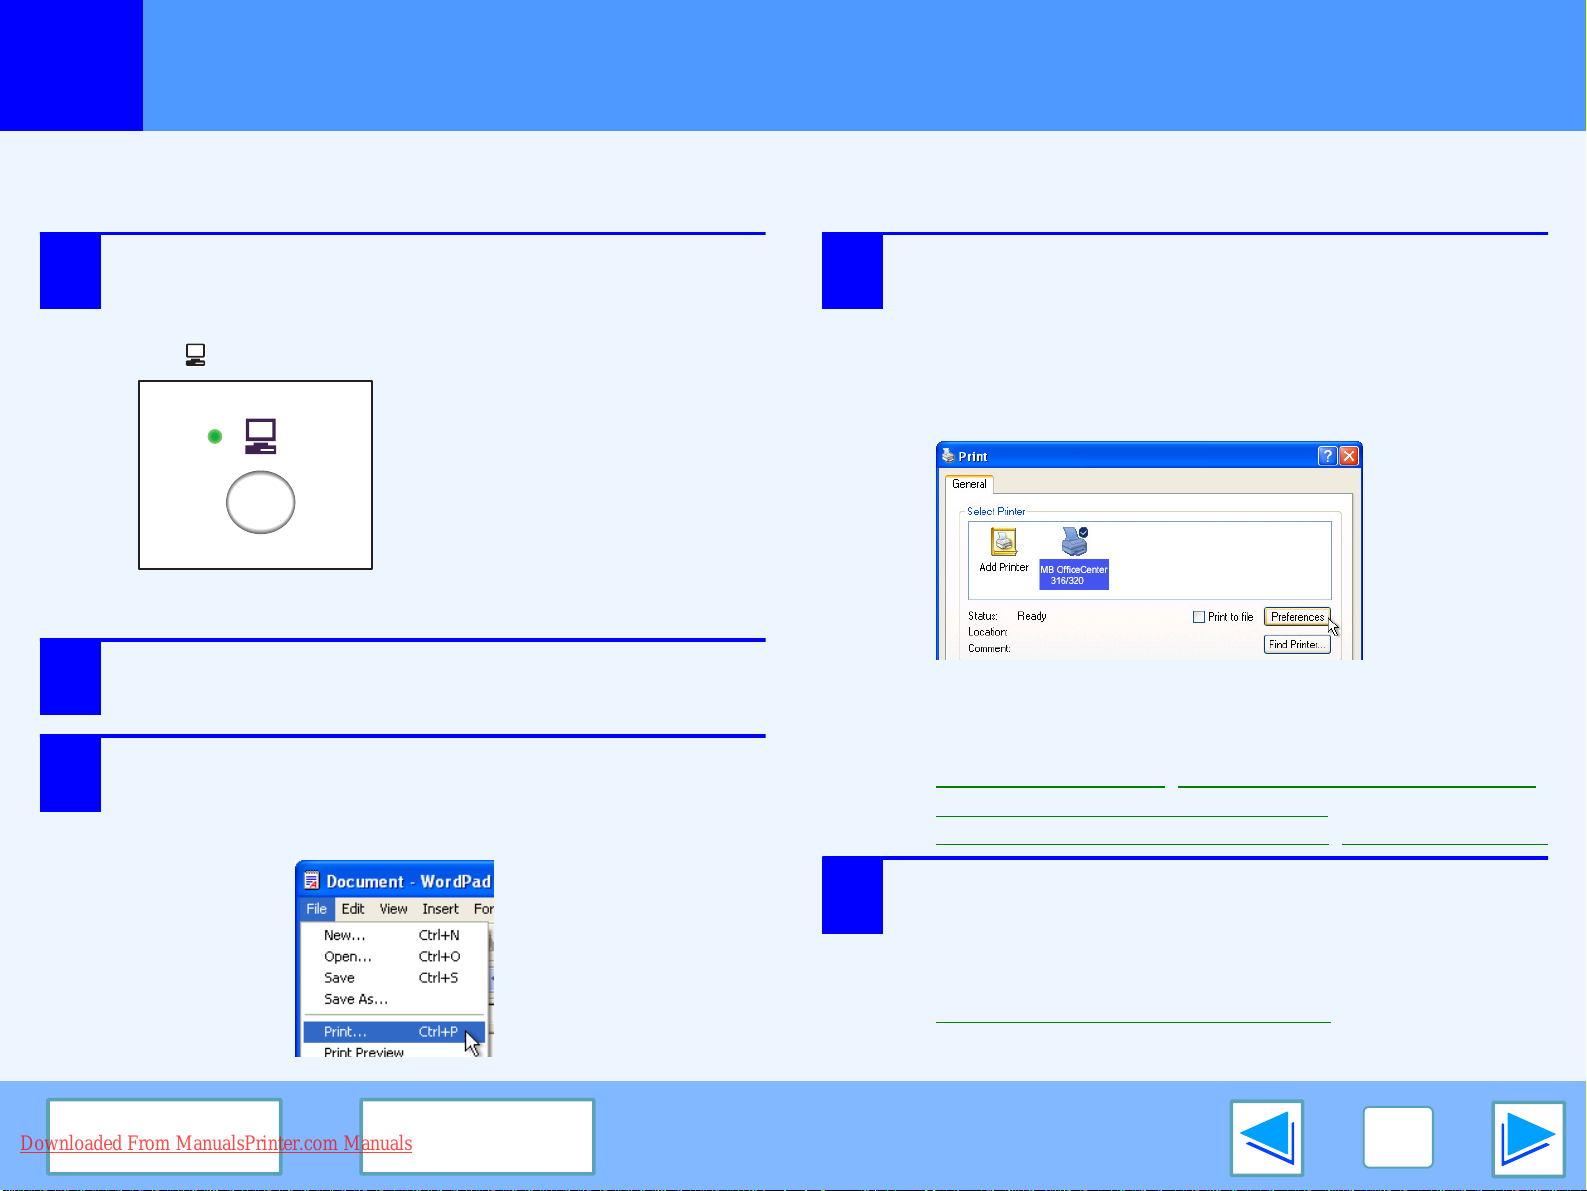
Basic Printing
Make sure that the ON LINE indicator on the
operation panel is lit.
If the ON LINE indicator is not lit, press the [ON LINE]
key ( ).
When the indicator is:
●
Lit, the machine is online and
ready to print, or is printing.
●
Blinking, the machine is
processing print data in memory
or printing has been paused.
●
Off, the machine is off-line
and cannot print.
Start WordPad and open the document that you
wish to print.
Select "Print" from the application's "File"
menu.
The "Print" dialog box will appear.
4
Make sure that "MB OfficeCenter XXX" is selected
as the printer. If you need to change any print
settings, click the "Preferences" button
("Properties" button in Windows 95/98/Me/NT 4.0)
to open the printer driver setup screen.
The printer driver setup screen will appear.
Windows 2000 does not have the "Preferences" button
in this dialog box. Select settings as needed on each of
the tabs in the setup screen.
☞
Printer Driver Settings,
Fitting the Printed Image to the Paper
Rotating the Print Image 180 Degrees
Printing Multiple Pages on One Page
(part 1)
,
,
Printing a Watermark
,
CONTENTS INDEX
Downloaded From ManualsPrinter.com Manuals
5
Click the "Print" button ("OK" button in
Windows 95/98/Me/NT 4.0).
Printing begins. When printing begins, the Print Status
Window automatically opens.
☞
Outline of the Print Status Window
5
PRINT
1
Basic Printing
If the tray runs out of paper during printing
Add paper to the tray or press the [TRAY SELECT] key ( ) to
select a different tray, and then press the [ON LINE] key ( ) to
resume printing.
Note that if "Auto tray switching" (in the user programs) is
enabled on a 2-tray model and "Auto Select" is selected in
"Paper Source" in the printer driver, the machine will
automatically switch to the other tray and continue printing.
Pausing a print job
To pause a print job during printing, press the [ON LINE] key
( ) on the operation panel to switch the machine off-line.
Printing will be paused and the ON LINE indicator will blink.
●
To cancel a print job, press the [CLEAR] key ( ) or the
[CLEAR ALL] key
●
To resume printing, press the [ON LINE] key ( ) to switch the
machine online.
()
.
(part 2)
When "Paper Source" is set to "Auto Select"
If "Paper Source" is set to "Auto Select" in the "Paper" tab of the
printer driver setup screen and the correct size of paper for a
print job is not loaded in the machine, the printing procedure will
vary depending on the "Use Close Paper Size" setting in the user
programs (see "USER PROGRAMS" in the Operation Manual).
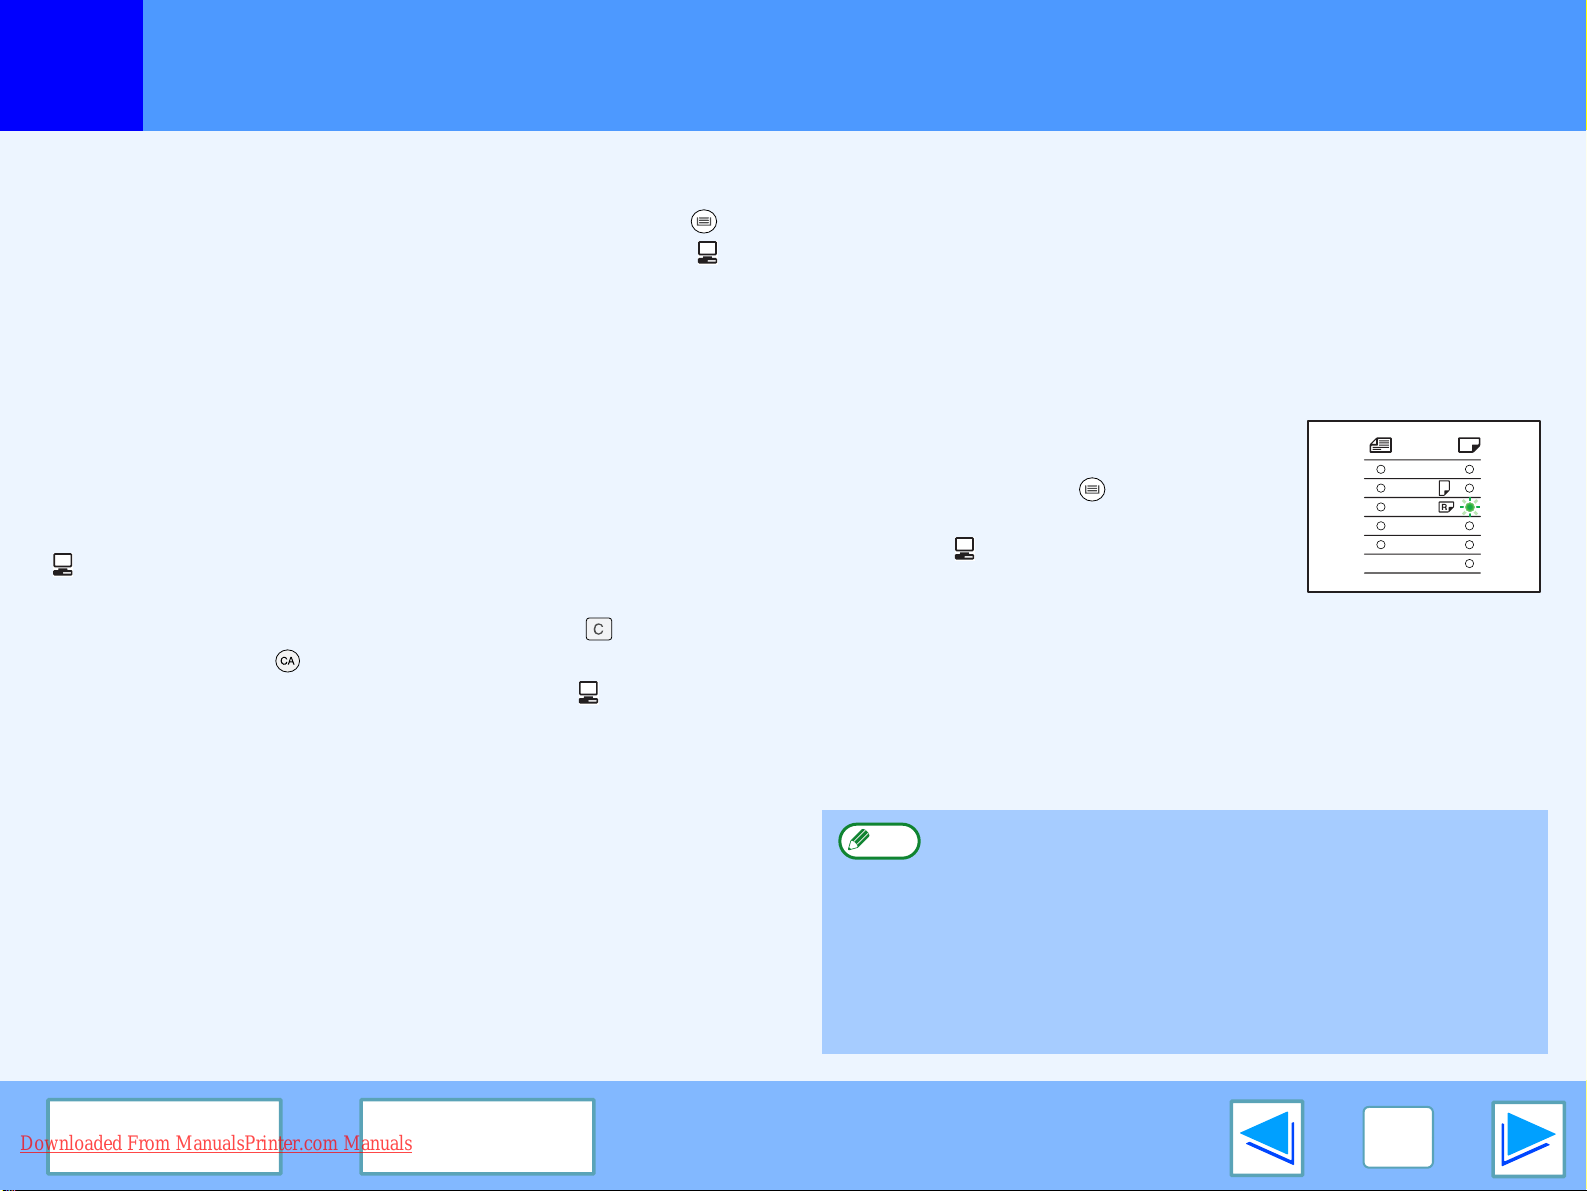
When "Use close paper size" is disabled
The PAPER SIZE indicator on the
operation panel will blink. Press the
[TRAY SELECT] key ( ) to manually
select the tray and then press the [ON
LINE] key ( ).
* The paper sizes that appear in the operation panel will vary by
country and region.
When "Use close paper size" is enabled
Printing will take place using a size of paper that is close to the
size of the print image.
A3
A4
A4
A5
B4
EXTRA
CONTENTS INDEX
Downloaded From ManualsPrinter.com Manuals
Note
Before printing make sure that the paper size set in "Set
Tray Status" of the printer driver is the same as the size
of paper loaded in the tray. (See "CONFIGURING THE
PRINTER DRIVER" in the Software Setup Guide.) When
printing, if you select the paper tray with the correct size
of paper for the document to be printed, printing will take
place correctly (select the paper tray in "Paper source" in
the "Paper" tab of the printer driver setup screen).
6
 Loading...