

Page 1
Checking the contents
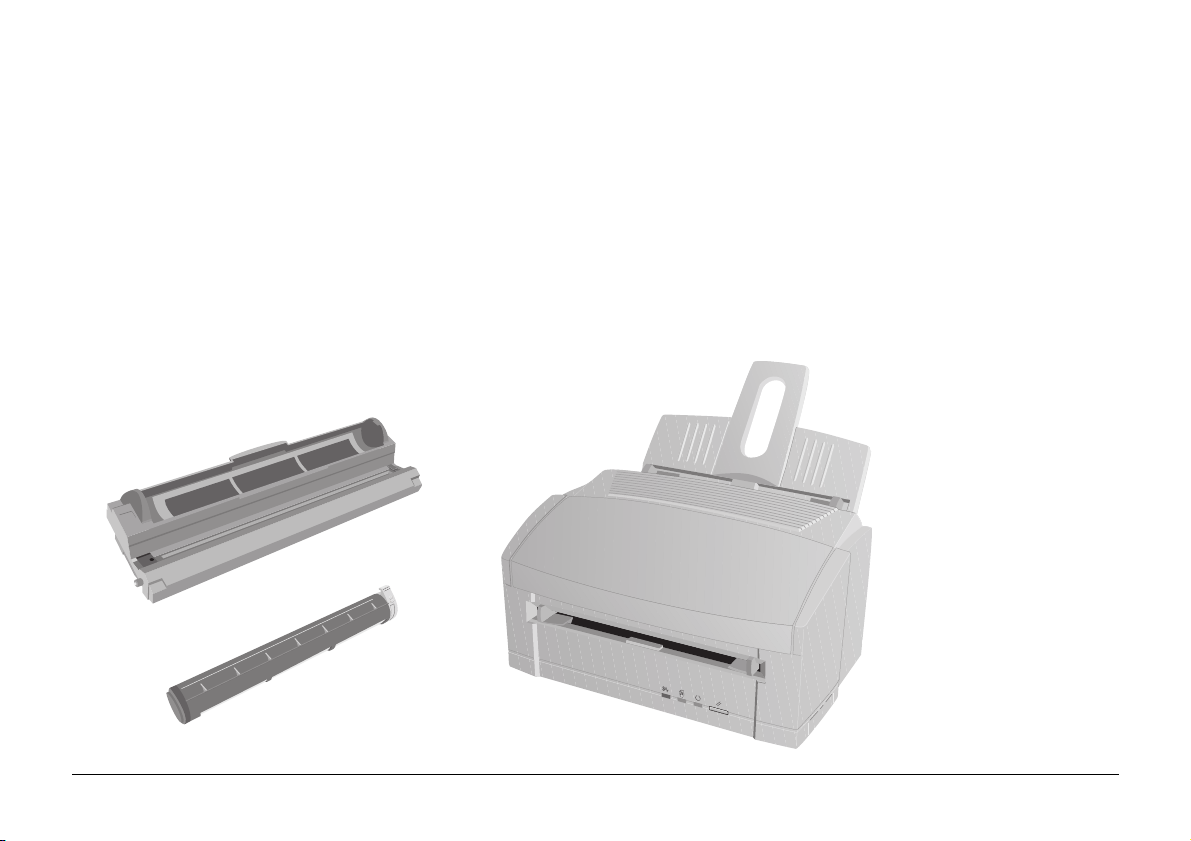
Carefully remove all the contents from the box and unpack
your printer. In addition to the printer manual(s) you should
have the following items:
• Printer
• Toner cartridge
• Paper input tray
• Image drum cartridge
(shipped inside printer but not ready for use)
Other items in the box:
• driver disk(s)
• power cable
• lightproof plastic bag
Check the contents carefully…
if anything appears to be missing or damaged, contact MB
as soon as possible.
English
Setup Guide 7
Page 2
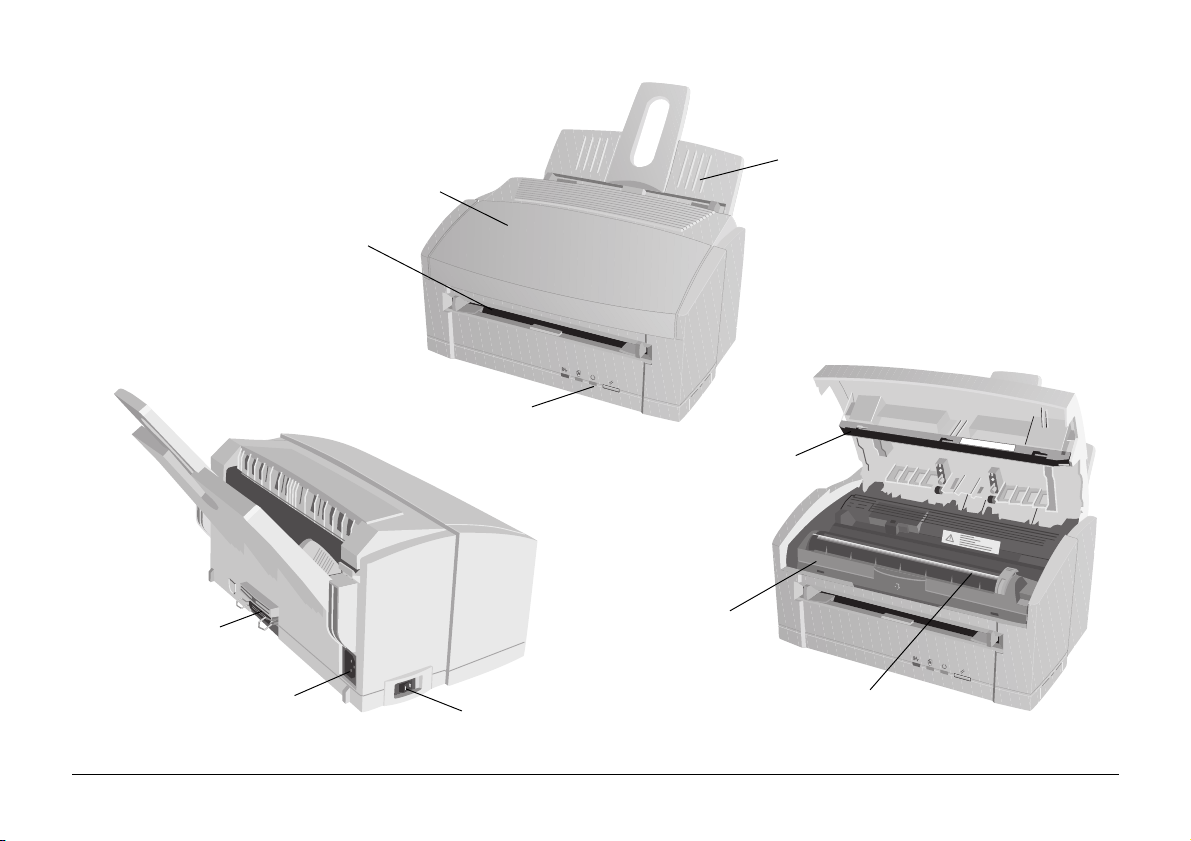
Printer ComponentsPrinter Components
Manual feed slot
Paper feed/exit tray
Printer cover
Control panel (MB 508)
LED array
Parallel interface
connector
Power cable receptacle
8
Power switch
Image drum cartridge
Toner cartridge
MB 508/508e
Page 3
Setting up your printer
Attaching the paper input tray
Choose a location that is clean, dry, well ventilated and out
of direct sunlight. The area should be free of electromagnetic
interference and not suffer from extremes or drastic changes
in temperature or humidity. The printer should be placed on
a surface which is not be subject to shock or vibration.
Before you continue, you should already have:
• Checked that all contents as listed have been supplied.
• Familiarised yourself with printer components.
• Identified a suitable location for your printer.
The following sections will guide you through:
• Attaching the paper input tray.
• Removing the image drum protection sheet.
• Installing toner.
• Loading paper.
• Connecting your printer.
• Installing a printer driver.
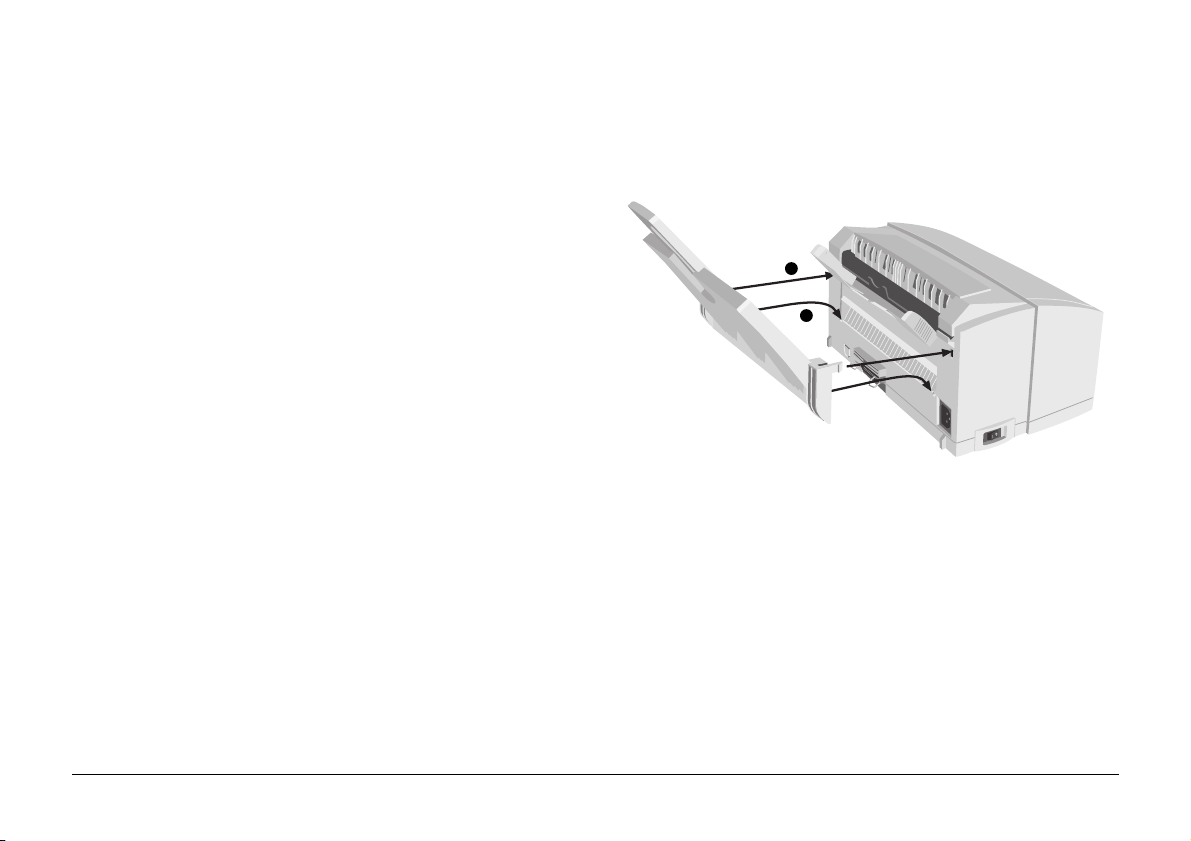
1 Insert the paper tray so that the hooks on the lower edge
latch with the printer.
2
1
2 Push the paper tray forwards until it latches and is secure
on both sides.
English
Setup Guide 9
Page 4

Removing the image drum protection sheet
1 Open the cover.
2 Remove the image drum cartridge.
3 Remove the protective sheet.
Keep the image drum as level as possible to avoid toner
spillage. (Some toner is added during the test phase.)
4 Replace the image drum.
Do not expose the image drum to strong light.
Do not touch the image drum’s green surface.
10
MB 508/508e
Page 5

Installing toner
1 Remove the tape and shipping insert from the image drum
cartridge.
2 Shake the toner cartridge to evenly distribute toner.
3 Unwrap the toner cartridge.
4 Remove the tape.
5 Insert the toner cartridge.
6 Push the lock lever forward.
English
7 Close the printer cover.
Setup Guide 11
Page 6

Loading paper
For best results, use standard laser or copier paper with a Sheffield
rating of 100–250 such as MB 80g/m² paper. The paper input
tray can stack up to 100 sheets of standard paper.
1 Set the left paper guide to the marker for the required
paper size and move the right guide to a position slightly
wider than your paper width.
2 Insert the paper so that it is up against and flush with the
left paper guide.
3 Adjust the right paper guide to fit against the edge of the
paper.
Adjust the guides for a snug, but not tight, fit.
For use of envelopes, transparencies, other print media and
the manual feed slot, refer to the User’s Guide.
12
MB 508/508e
Page 7

Connecting the data cable
Connecting power to your printer
The printer comes with a standard high speed bidirectional
IBM Centronics compatible parallel data interface as standard.
This requires a IEEE1284 compliant parallel printer cable, not
more than 1.8m in length.
1 Connect one end of the parallel data cable (36-pin
Centronics) to the printer’s data interface (1).
1
2 Connect the end containing the standard DB25 connector
to the host PCs parallel data port (usually designated as
LPT1).
A suitable AC power cable is supplied with your printer,
terminated with the appropriate plug for connection to a
standard AC wall outlet.
1 Ensure the printer on/off switch (1) is off.
2
1
2 Connect the cable to the power socket (2) on the rear of the
printer.
3 Connect the other end of the power cable to a suitable
nearby AC power socket outlet.
English
Setup Guide 13
 Loading...