

Mayser WLS Instruction Manual
Polymer Electric
20041202 v0.1 Mounting Instructions
Page 1/3 WLS
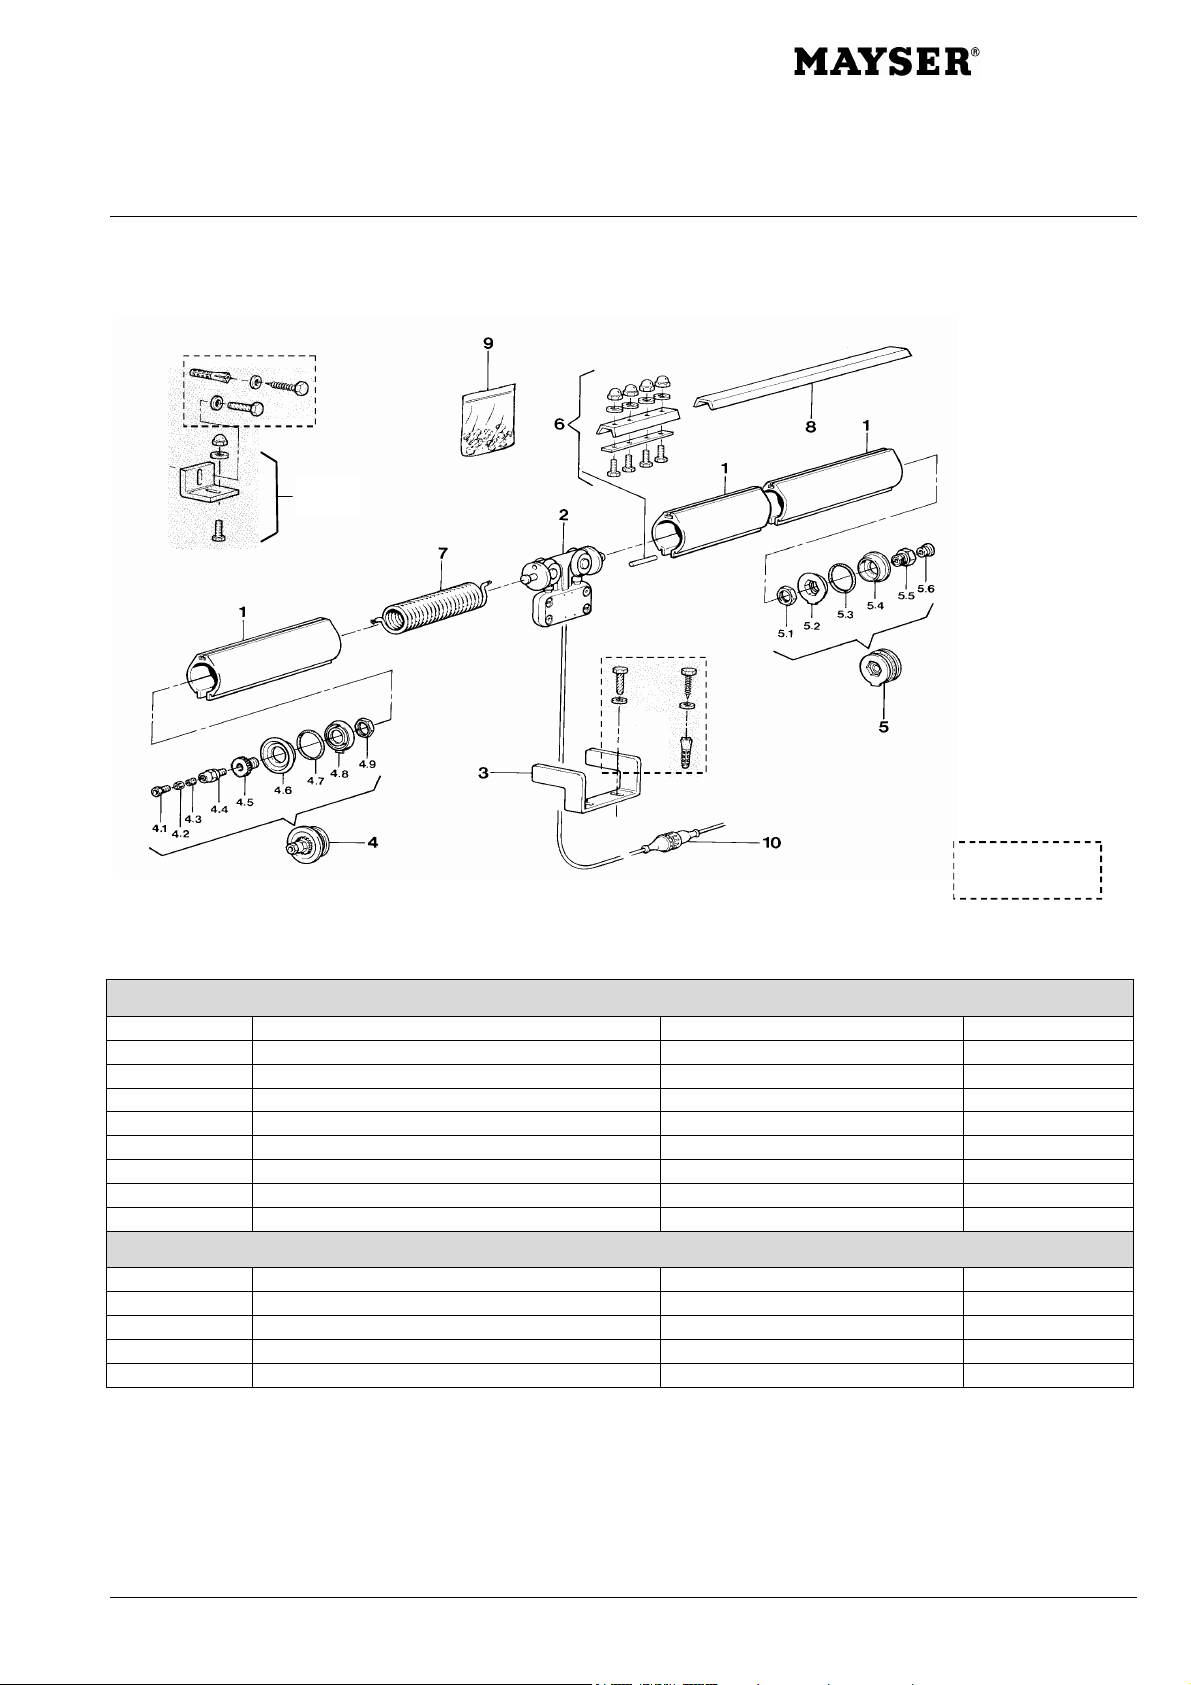
Overview / Exploded view
11
Not included
in delivery
Components
Standard material
Position Designation Comment Part No.
1 Profile tube, natural aluminium, anodised Available lengths: 2, 3, 4 & 6 m 10038-06 ... -09
2 Carriage –
3 Carrying fork for WLS 1003771
4 WLS sealing cap PG7 1003791
5 WLS sealing cap, closed 1003792
6 Tube connector for WLS, galvanised 1003802
7 Spiral cable 4x 0.14 mm² –
7 + 2 Spiral cable with carriage 4x 0.14 mm² 75015-13 ... -24
Zubehör
Position Designation Comment Part No.
8 WLS- cover strip, nat. aluminium anodised Available length: 3 m 1003823
9 Set of screws for WLS cover strip 1003805
10 Connector IP65 –
11 Fastening parts for WLS incl. nuts and screws 1003804
Mayser Polymer Electric Postfach 30 48 89020 Ulm Germany Tel. +49 731 2061-0 Fax +49 731 2061-222

ca.
Polymer Electric
20041202 v0.1 Mounting Instructions
Page 2/3 WLS
Installation on door leaf (moving) For stationary installation
Preparation
ca.
Determine WLS mounting position and mark
and drill bore holes at intervals of c. 1 m.
Determine WLS position and mark and drill
bore holes at intervals of c. 1 m.
Mounting angle
Fix the mounting angle. Fix the mounting angle.
Insert mounting
components
Insert nuts and screw on angle. Insert nuts and screw on angle.
Adjusting the
profile tube
Adjust and fix the profile tube. Adjust and fix the profile tube.
Mayser Polymer Electric Postfach 30 48 89020 Ulm Germany Tel. +49 731 2061-0 Fax +49 731 2061-222
 Loading...