

Page 1

Table of Contents
Introduction . . . . . . . . . . . . . . . . . . . . . . . . . . . . . . . . . . . . . . . . . . . . . . . . . . . . . .2
Revolution 7.1 Features . . . . . . . . . . . . . . . . . . . . . . . . . . . . . . . . . . . . . . . . . . . . .2
System Requirements . . . . . . . . . . . . . . . . . . . . . . . . . . . . . . . . . . . . . . . . . . . . . .3
Package Contents . . . . . . . . . . . . . . . . . . . . . . . . . . . . . . . . . . . . . . . . . . . . . . . . .4
Hardware Installation . . . . . . . . . . . . . . . . . . . . . . . . . . . . . . . . . . . . . . . . . . . . . .4
Software Installation . . . . . . . . . . . . . . . . . . . . . . . . . . . . . . . . . . . . . . . . . . . . . . .5
Windows XP Setup . . . . . . . . . . . . . . . . . . . . . . . . . . . . . . . . . . . . . . . . . . . . .5
Windows 2000 Setup . . . . . . . . . . . . . . . . . . . . . . . . . . . . . . . . . . . . . . . . . . .7
Windows ME Setup . . . . . . . . . . . . . . . . . . . . . . . . . . . . . . . . . . . . . . . . . . . .9
Revolution 7.1 and the Windows Sound System . . . . . . . . . . . . . . . . . . . . .10
Mac OS 9 Setup . . . . . . . . . . . . . . . . . . . . . . . . . . . . . . . . . . . . . . . . . . . . . . .11
Mac OS X Setup . . . . . . . . . . . . . . . . . . . . . . . . . . . . . . . . . . . . . . . . . . . . . . .11
Physical Connections . . . . . . . . . . . . . . . . . . . . . . . . . . . . . . . . . . . . . . . . . . . . . .12
Speaker Connections . . . . . . . . . . . . . . . . . . . . . . . . . . . . . . . . . . . . . . . . . .13
Line and Mic In . . . . . . . . . . . . . . . . . . . . . . . . . . . . . . . . . . . . . . . . . . . . . . .14
Explanation of Surround Formats . . . . . . . . . . . . . . . . . . . . . . . . . . . . . . . . . . . .14
Revolution 7.1 Control Panel . . . . . . . . . . . . . . . . . . . . . . . . . . . . . . . . . . . . . . . . .16
QuickSwitch Settings . . . . . . . . . . . . . . . . . . . . . . . . . . . . . . . . . . . . . . . . . . .18
“Save As” Button . . . . . . . . . . . . . . . . . . . . . . . . . . . . . . . . . . . . . . . . . . . . . .18
Speaker Setup Tab . . . . . . . . . . . . . . . . . . . . . . . . . . . . . . . . . . . . . . . . . . . . . . . .18
Output Mixer Tab . . . . . . . . . . . . . . . . . . . . . . . . . . . . . . . . . . . . . . . . . . . . .20
Surround Sound Tab . . . . . . . . . . . . . . . . . . . . . . . . . . . . . . . . . . . . . . . . . . .21
Input/Other Tab . . . . . . . . . . . . . . . . . . . . . . . . . . . . . . . . . . . . . . . . . . . . . .22
About Tab . . . . . . . . . . . . . . . . . . . . . . . . . . . . . . . . . . . . . . . . . . . . . . . . . . .23
Revolution 7.1 Applications . . . . . . . . . . . . . . . . . . . . . . . . . . . . . . . . . . . . . . . . .24
DVD Playback . . . . . . . . . . . . . . . . . . . . . . . . . . . . . . . . . . . . . . . . . . . . . . . .24
Music Playback . . . . . . . . . . . . . . . . . . . . . . . . . . . . . . . . . . . . . . . . . . . . . .25
Windows Media Player Setup . . . . . . . . . . . . . . . . . . . . . . . . . . . . . . . . . . .25
Gaming . . . . . . . . . . . . . . . . . . . . . . . . . . . . . . . . . . . . . . . . . . . . . . . . . . . . .25
Recording . . . . . . . . . . . . . . . . . . . . . . . . . . . . . . . . . . . . . . . . . . . . . . . . . . .25
Troubleshooting & Technical Support . . . . . . . . . . . . . . . . . . . . . . . . . . . . . . . . .26
Contact information . . . . . . . . . . . . . . . . . . . . . . . . . . . . . . . . . . . . . . . . . . . . . . .27
Warranty Information . . . . . . . . . . . . . . . . . . . . . . . . . . . . . . . . . . . . . . . . . . . . . .27
Appendix A: Technical Specifications . . . . . . . . . . . . . . . . . . . . . . . . . . . . . . . . .28
Appendix B: WinDVD v5 Installation . . . . . . . . . . . . . . . . . . . . . . . . . . . . . . . . . .29
Page 2

Introduction
Thank you for purchasing the Revolution 7.1 by M-Audio. The Revolution 7.1 is an
audio upgrade for any PC or Macintosh computer,* bringing the ultimate in
surround performance to your computer system. The Revolution 7.1 brings you up
to 24-bit, 192kHz audio and the highest-quality stereo, virtual surround, and multichannel surround sound available today.
Please take the time to read this User Guide. It will tell you how to install the
Revolution 7.1 on your particular computer and instruct you on how to get the most
from your Revolution 7.1 audio interface.
* Must meet minimum system requirements
Revolution 7.1 Features
• Audiophile quality 24-bit/192kHz audio playback, 24-bit/96kHz recording
Analog connectors for powered speakers or stereo receiver
• Supports Dolby Digital 5.1 (AC3)®, DTS®, and other encoded multichannel formats
• Advanced Circle Surround II® technology creates true multi-channel surround
sound from your stereo, MP3s, CDs, and other audio sources
• SRS TruSurround XT® technology delivers virtual surround sound over stereo
speakers, deep bass enhancement, and Dialog enhancement
• S/PDIF Coaxial (RCA Jack) Output
• Revolution 7.1 supports the following digital output formats: 24-bit Linear PCM;
16-bit Linear PCM; 16-bit AC-3, Dolby Pro Logic, or DTS over coaxial connector
• Revolution 7.1 supports the following sampling frequencies (Hz): 32000,
44100, 48000, 88200, 96000, 176400, 192000; with MME drivers all rates up
to 192kHz using internal sample rate conversion with Windows XP SP1
• Pro Audio Performance: Dynamic Range: 106 dB (a-weighted); Signal-toNoise Ratio: 107 dB (a-weighted); THD+N: <0 .00235% (-92.6 db)
• One-year warranty
2
Page 3

System Requirements
Windows® PC:
• Requires available PCI card slot
Minimum Required - for stereo operation:
• Intel Celeron 350MHz or AMD K6II 500MHz
• 128MB RAM
• CD-ROM Drive
• Windows Me, 2000 (SP4) or XP (SP1)
• DirectX 9.0b (included)
Recommended:
• Intel Pentium III 800MHz or AMD 800MHz
• 256MB RAM
• DVD-ROM drive and decoding player application (included)
• Windows XP (SP1)
• DirectX 9.0b (included)
Apple Macintosh®:
• Requires available PCI card slot
Minimum Required (for stereo operation):
• Apple Macintosh® G4*
• CD-ROM Drive
• Mac OS 9.2.2 or later; Mac OS X version 10.2.6 or later
• 256 MB RAM
Minimum Required - for multi-channel operation:
• Apple Macintosh® G4* 733MHz (QuickSilver)
• CD-ROM Drive
• Mac OS 9.2.2 or later; Mac OS X version 10.2.6 or later
• 256 MB RAM
Recommended:
• Apple Macintosh® G4* 800MHz (QuickSilver) or better
DVD-ROM Drive
•
• Mac OS X version 10.3 or later (Apple DVD Player required or AC-3 or DTS)
• 512 MB RAM
*CPU Accelerator cards are not supported
3
Page 4

Package Contents
Your Revolution 7.1 was carefully packed at the factory, and the shipping carton
was designed to protect the unit during shipping. Please retain this container in
the unlikely event that you need to return your Revolution 7.1 for service.
The following items are included with your Revolution:
• Revolution 7.1 PCI audio card
• M-Audio driver CD (includes driver installation software)
• Additional software installation CDs
• This Product Manual (PDF)
• Quick Start Guide
Hardware Installation
Installing the PCI Card
The Revolution 7.1 is a PCI card that must be installed in one of your computer’s
PCI expansion slots. Every computer model is slightly different, but here are some
general installation instructions:
Note: Revolution 7.1 audio cards have been designed to be PCI 2.2-compliant
with support for both 3.3-volt and 5-volt PCI signaling environments. This
guarantees compatibility with PCI-X, 64-bit, and standard 32-bit PCI-based
systems, including the Apple G5.
1. Shut down your computer, and then unplug the power cable.
2. Open the case to expose the PCI slots.
3. Touch the metal cage surrounding the power supply. This grounds you to
prevent any static electricity from accidentally damaging the computer.
4. Unscrew the metal cover adjacent to the empty PCI slot you will install the
Revolution 7.1 into.If you are replacing another PCI card with the
Revolution 7.1, remove this card instead.
On Windows systems, for optimal IRQ and data throughput reasons, we
recommend that you start by choosing one of the middle (inside) PCI slots since the
end PCI slots are often summed in pairs, which limits bandwidth. For example, if
your machine has five PCI slots, place the Revolution 7.1 card in slot 2 or 3 if
available, rather than 1, 4 or 5.
5. Press the Revolution 7.1 card into the PCI card slot. When it is properly
installed in the slot, you should be able to see only a small edge of the
metal connectors showing above the slot.
6. Put the case back together
Note: Your computer may have come with more specific instructions on how to
install a PCI card into your type of computer
installation to avoid possible damage to your computer.
, plug in the power
4
, and star
. Review those instructions before
t up the computer
.
Page 5
After the PCI installation, you will need to follow the driver software installation
instructions described below.
Software Installation
Your Revolution 7.1 comes with driver software that allows it to communicate with
your computer’s operating system, Windows or Mac OS. Please skip to your
computer’s operating system in this section and follow those instructions.
Revolution’s driver software, which includes SRS Circle Surround II and
TruSurround XT, will load during this installation. You will also want to install the
DVD playback software provided on the additional included CDs.
DirectX Note: If installing under Windows, the driver for this PCI Card requires
that your system is running under at least DirectX 9.0b.
least version 9.0b, then you can install the included DirectX 9.0b file, which is
included on the installer CD-ROM. When you first run the Revolution 7.1 driver, you
will be prompted to install the included DirectX 9.0b if your system does not yet
meet this requirement.
Windows XP Setup
1. Place the Revolution 7.1 Software CD in your CD-ROM Drive.
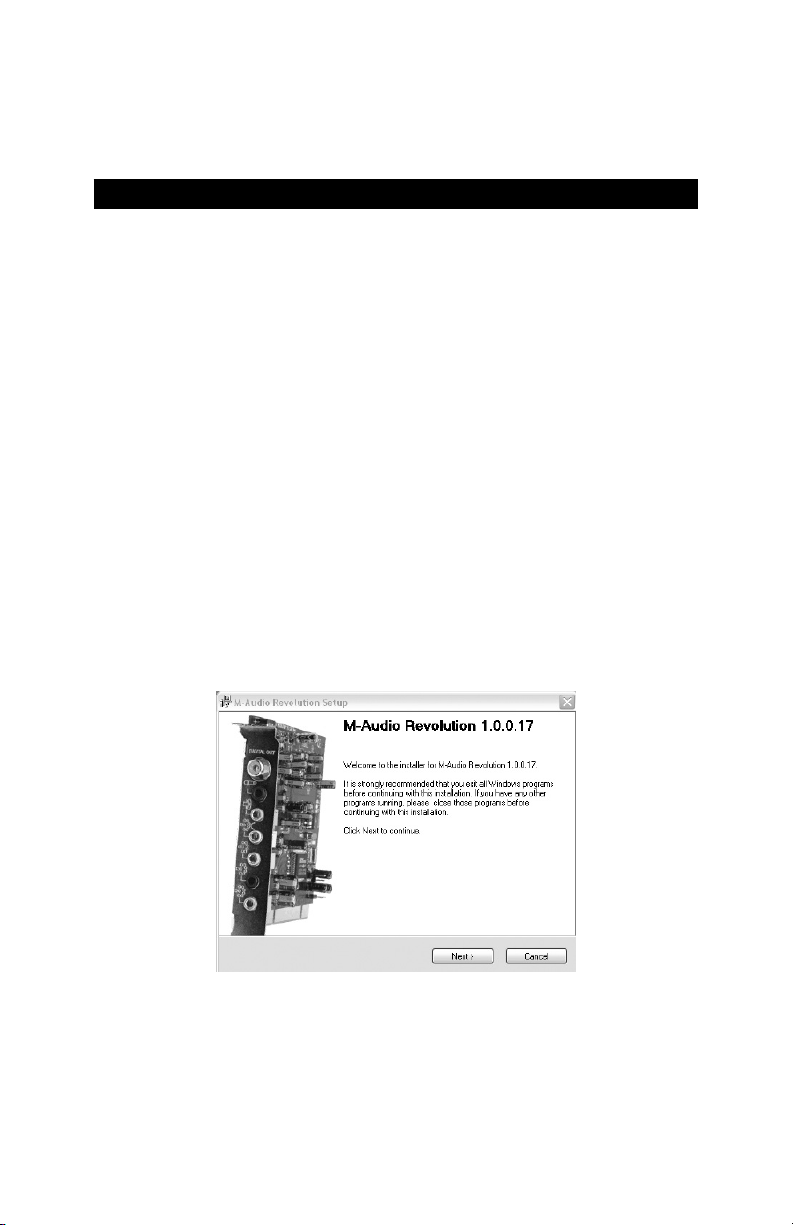
2. Launch the Revolution 7.1 Installer.exe installation program.
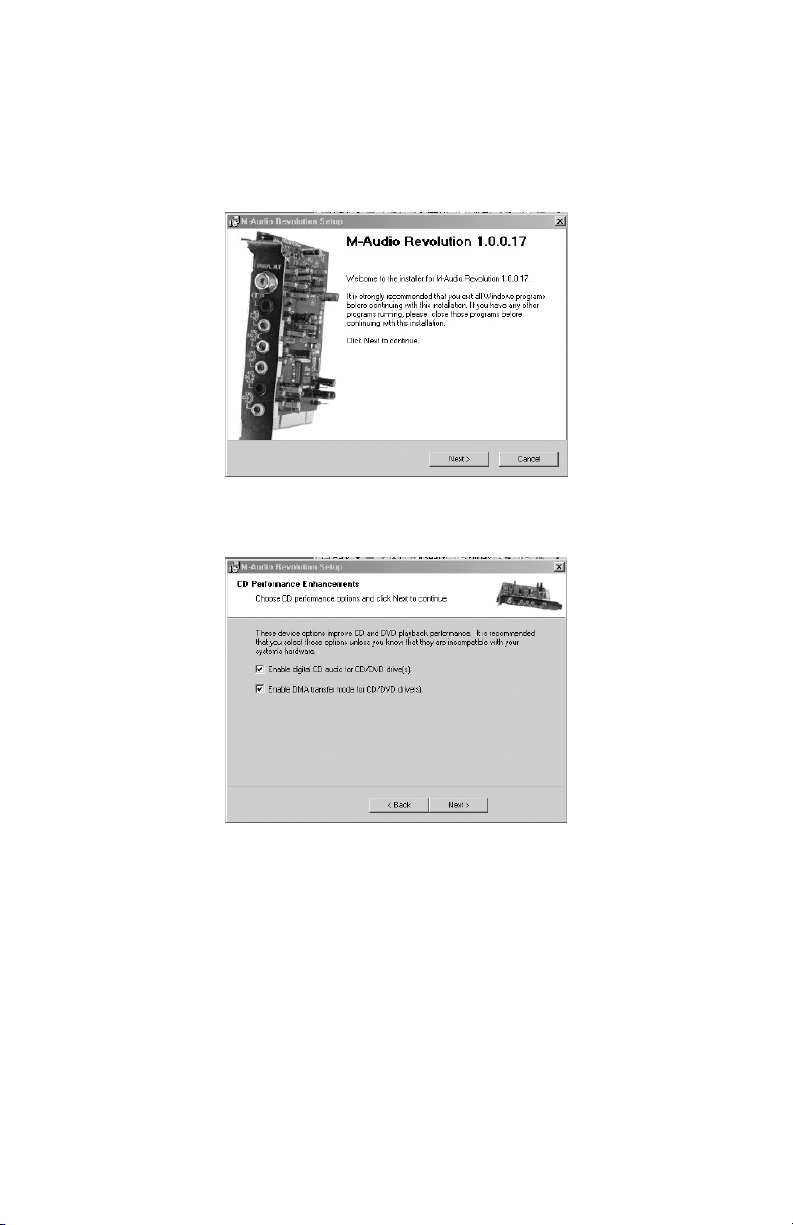
3. The Revolution 7.1 install screen will appear. Click “Next” to continue.
If you do not have at
5
Page 6
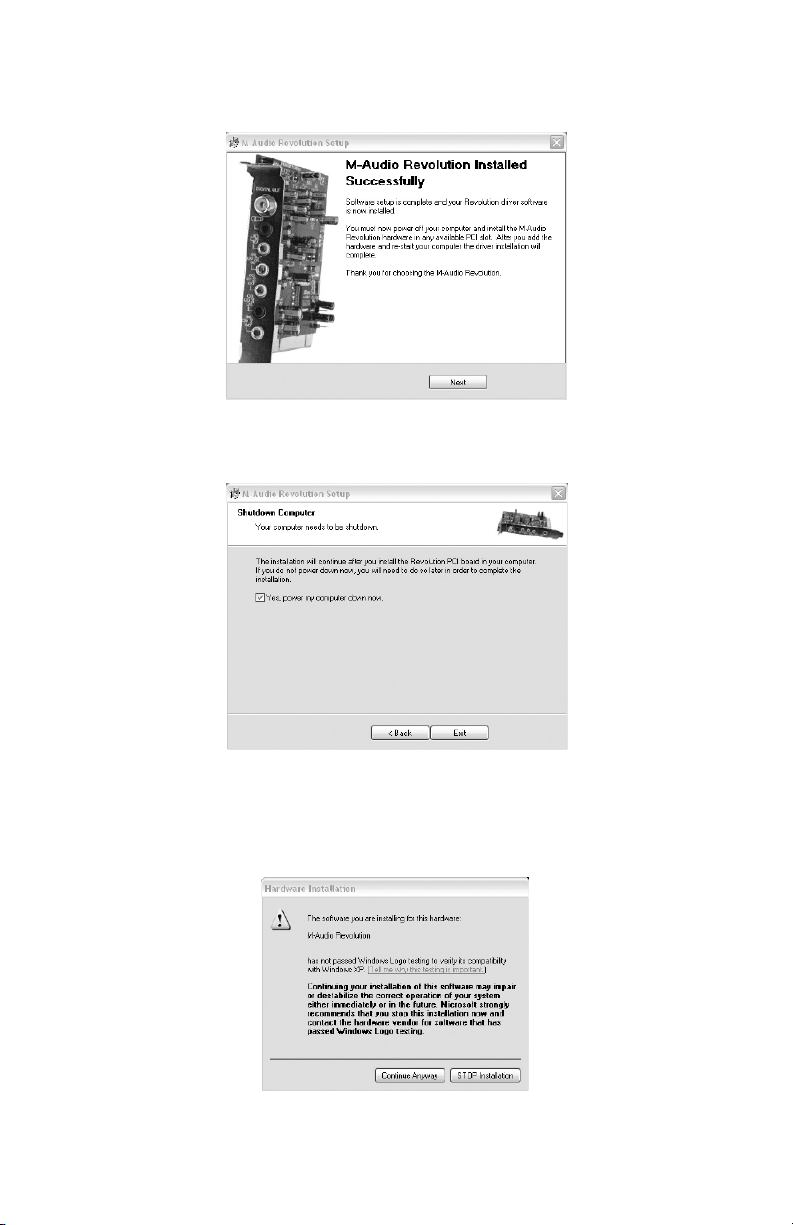
4. Click “Continue Anyway,” then Click “Next.”
5. The installation program will now shut down your computer to allow you
to install your Revolution 7.1 card. Click “Exit” to continue.
6. Please refer to Hardware Installation Guide preceding this section for
steps on installing the Revolution 7.1 card into your computer.
7. After the Revolution 7.1 card is installed, restart your computer.
8. Click “Next” and then “Continue Anyway” to continue.
6
Page 7
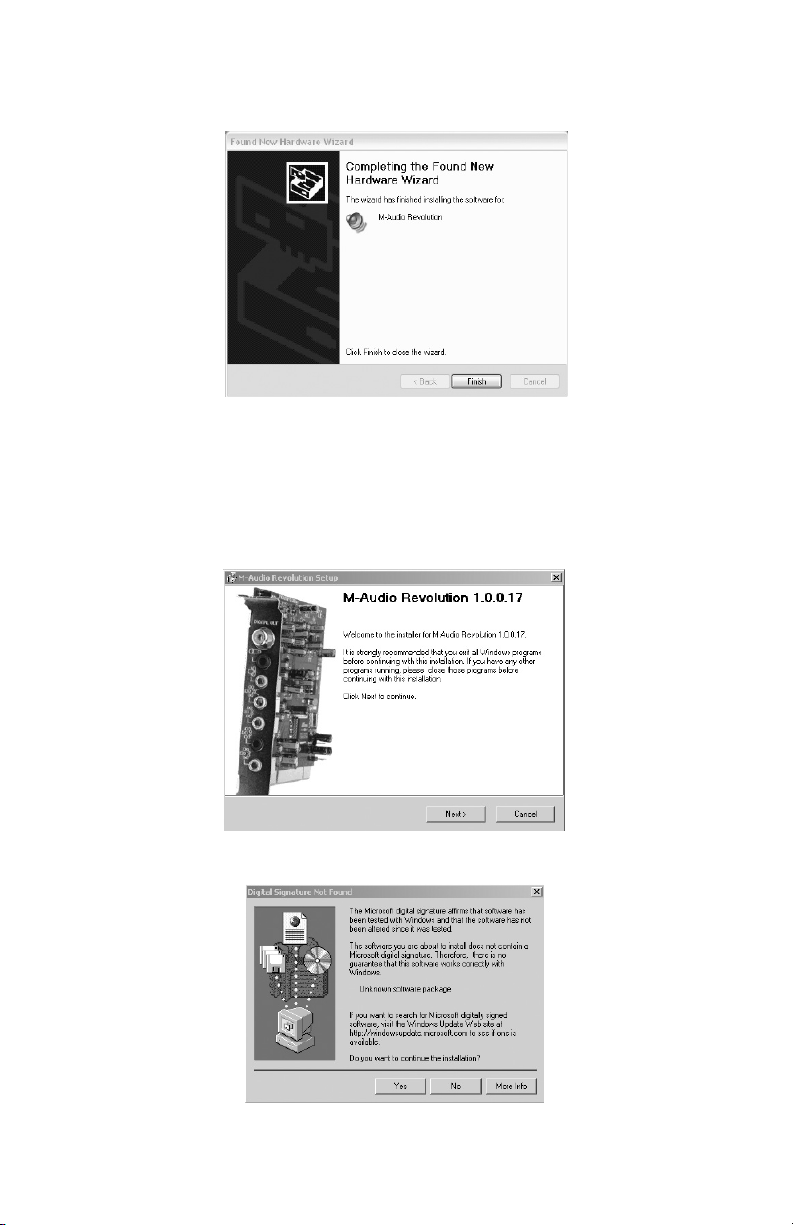
9. Click “Finish” to complete the installation.
Windows 2000 Setup
1. Place the Revolution 7.1 Software CD in your CD-ROM Drive.
2. Launch the Revolution 7.1 Installer.exe program.
3. The Revolution 7.1 install screen will appear. Click “Next” to continue.
4. Click “Yes” to continue.
7
Page 8
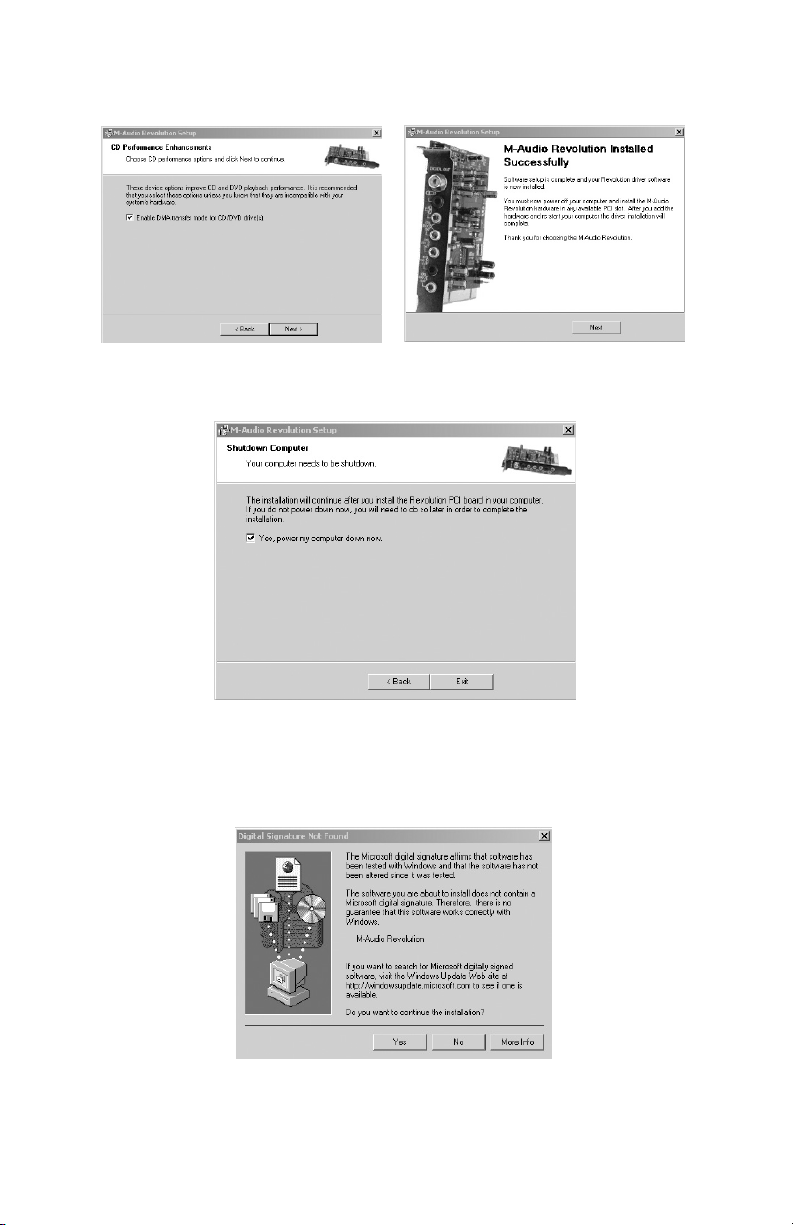
5. Click “Next” twice.
6. The installation program will now shut down your computer to allow you
to install your Revolution 7.1 card. Click “Exit” to continue.
7. Please refer to Hardware Installation Guide preceding this section for
steps on installing the Revolution 7.1 card into your computer.
8. When the computer restarts, you will be prompted with note about Digital
Signature not found. Click “Yes” to continue.
9. The card is now installed in your operating system.
8
Page 9
Windows ME Setup
1. Place the Revolution 7.1 Software CD in your CD-ROM Drive.
2. Launch the Revolution 7.1 Installer.exe program.
3. The Revolution 7.1 install screen will appear. Click “Next” to continue.
4. A screen appears that displays DMA and Digital Music Playback
functions checked. Click “Next” to continue.
9
Page 10

5. The computer will now need to be shut down to install the Revolution 7.1
card. Click “Yes” and then “Exit” to continue shutting your machine down.
Note: If you uncheck “Yes, power my computer down now”, you will be prompted
with another screen to shut your machine down because the DMA mode has
been enabled.
6. Please refer to Hardware Installation Guide preceding this section for
steps on installing the Revolution 7.1 card into your computer.
7. Restart the computer.
8. Revolution 7.1 card is now correctly installed.
Revolution 7.1 and the Windows Sound System
The Revolution’s Windows Multimedia drivers will allow you to use the Revolution 7.1
as your Windows system sound device. If the Revolution 7.1 is the only audio
device installed in your computer, Windows will “select” it automatically.
Otherwise, you may need to tell Windows to use the Revolution. To check your
Windows Audio settings and select the M-Audio Revolution:
1. Go to the Start menu, and then choose Control Panel.
2. Open “Sounds and Audio Devices” (or “Sounds and Multimedia”), then
click the “Audio” tab.
3. Under “Sound playback,” the default device should say “Revolution.” If it does
not say “Revolution,” then drop down the list of devices and select “Revolution.”
4. Click “Apply,” then click “OK.” Close your Control Panel--you’re done!
10
Page 11

Mac OS 9 Setup
1. After installing the Revolution 7.1 PCI card, start your computer and place
the Revolution 7.1 Drivers CD ROM into your computer’s CD ROM tray.
2. Click the Install M-Audio Revolution 7.1 Icon.
3. The Stuff it Installer Maker page is prompted. Click continue.
4. The “Virtual memory must be disabled” page is prompted. Click yes to
install anyway.
5. A warning to restart will be prompted. Click yes.
6. Click quit to finish the installation.
7. Once the computer has restarted, select "Sound" in "Control Panels," then
select the "Output" tab. Click on "M-Audio Revolution" to choose the
Revolution 7.1 as your default output device. You will also see a Control
Panel named “M-Audio Revolution 7.1” that you can use to configure the
Revolution 7.1 card.
Mac OS 9.2.2 Installation is now complete. Refer to the section titled “Control
Panel Setup” for more information.
Mac OS X Setup
1. After installing the Revolution 7.1 PCI card, start your computer and place
the Revolution 7.1 Drivers CD ROM into your computer’s CD ROM tray.
2. Double-click on Mac OS X
3. Double-click on M-Audio Revolution.dmg
4. Double-click on M-Audio Revolution 7.1 software.mpkg
5. Enter your computer’s Administrator password, if prompted.
6. The “Welcome to the M-Audio Revolution 7.1 Software” page will appear.
Click continue.
7. The “Important Information” page will appear. Click continue.
8. The “Select Destination” page will appear. Click continue.
9. The “Installation type” page will appear. Click Install.
10. Click Continue.
11. Click Restart.
12. Go to "System Preferences" in the Apple Menu, select the "Sound"
preference panel, and click the "Output" tab. Select "M-Audio Revolution"
to choose the Revolution 7.1 as your default output device.
13. In your Applications folder you will find an application called “M-Audio
Revolution 7.1”. Use this to configure your Revolution 7.1 card.
Refer to the section titled “Control Panel Setup” for more information.
11
Page 12

Physical Connections
The rear panel of the Revolution 7.1 has the following jacks:
1. Digital Out - The Digital Output jack is a S/PDIF Coaxial output. You can
use an RCA cable (sold separately) to connect this to a digital recorder,
mixer or surround receiver. A 75 Ohm digital coaxial cable is required for
this type of connection.
2. Mic In (pink) - The mic input allows you to connect a mono microphone
for recording, videophone or voice recognition applications. The jack is a
3-conductor TRS-type jack for condenser (2-conductor) and electret (3conductor) type microphones
3. Line In (blue) - This is a stereo line-level input that can be used to record
into an audio recording program.
4. Front L/R, Phones (green) - This jack should connect to the powered Left
and Right speakers, located to the left and right of your computer monitor.
If you have just a two-speaker stereo setup, this is the jack to use. You
can also plug a pair of stereo headphones into this jack.
5. Center/Subwoofer (orange) - This line-level output connects to powered
Center and Subwoofer speakers. The Center channel speaker should be
directly above or below your monitor and the subwoofer can go just
about anywhere it will fit in your room.
6. L/R Surround (black) - This line-level output should be connected to
powered Surround Left and Right speakers. These speakers should be
located to your left and right sides, just behind your head.
7. L/R Center Surr
Left and Right Center Surround channel speakers. These speakers should
be located directly behind you as you are looking at your computer monitor.
ound (silver)
- This line-level output connects to power
ed
12
Page 13

Speaker Connections
Right Front
Subwoofer
Left Front
Center Front
Left Surround Right Surround
Right Center SurroundLeft Center Surround
1/8" Stereo Mini Jack
(2) Female RCA Jacks
White = Left
Red = Right
The rear panel of your Revolution 7.1 has four 1/8” stereo output jacks that connect
to powered speakers or the inputs on a surround sound receiver. These jacks are
designed to pack two speaker outputs into one jack, saving space and simplifying
installation.
For example, the Center/Subwoofer output is actually two speaker outputs, one
for the Center channel and another for the Subwoofer channel. Most multimedia
speakers have this type of input. If your speakers or receiver uses RCA jacks
instead, you can purchase an adapter like the one pictured below at an
electronics store such as Radio Shack.
The white RCA jack connects to the first channel listed, and the red jack connects
to the second. For example, on the Front L/R jack, the white jack connects to the
Left speaker and the red jack connects to the Right speaker.
Note that the outputs of the Revolution 7.1 are line level. You can connect these
outputs directly to the inputs of powered speakers. However, if your speakers are
not self-powered, you will need to connect the Revolution’s outputs to the inputs
of a power amplifier or surround receiver. You can then connect the power amp’s
outputs to the speakers.
Use the diagram below as a guide for placing the speakers around your
computer. Make the following speaker connections:
• Connect the L/R Center Surround jack to the two Center Surround speakers.
• Connect the Center/Subwoofer jack to the Center and Subwoofer (LFE) speakers.
• Connect the L/R Surround jack to the Left and Right Surround speakers.
• Connect the Front L/R to the Left and Right speakers.
13
Page 14

Make sure that the speakers that you use near a CRT computer monitor are
shielded speakers. If your monitor begins to become discolored in one of the
corners, or if the image appears warped, this could be due to unshielded
speakers and you should move the speaker further away to avoid damage to
your monitor.
Line and Mic In
The Revolution 7.1 has a stereo line input. This input allows you to record CDs,
audio from videos, instruments, or virtually anything else with audiophile-quality,
24-bit/96kHz sampling. It also has a microphone input. This input is mono (one
channel) and has a gain and impedance designed to accommodate the output
of a microphone. It can accept a small mono condenser microphone and it also
provides power for common electret multimedia microphones. You can connect
a small microphone for recording sound effects, voice-recognition, and video
conference applications.
You can set the Input level of the Line and Mic inputs on the Input/Other tab of the
Revolution 7.1 control panel. See the Control Panel section for more details.
Explanation of Surround Formats
You will run into a variety of surround formats when playing DVDs, some of which
include 2.0, 4.1, 5.1, 6.1 and 7.1. This section is meant to provide a quick
explanation of some of these formats.
2.0 - This is a stereo soundtrack. This soundtrack can be expanded up to 7.1
channel playback with a Dolby Pro Logic® or SRS Circle Surround II® decoder. It
will play out of the left and right speakers without decoding. Headphones are
generally stereo or 2.0 devices.
2.1 - This is a stereo soundtrack with a separate LFE(Low Frequency Effect, or the
low-end frequencies designed only for subwoofers). Sometimes this soundtrack
can be expanded to surround playback with a Dolby Pro Logic® or Circle
14
Page 15

Surround® decoder. It will play out of the left, right and subwoofer speakers.
4.0 - This signal is the same as 4.1, only without the LFE channel.
4.1 - This is how most feature films from 1970-1980 were mixed. It will play back
from the left, center and right speakers with a mono signal going to all of the
surrounds. An additional “point one” signal gets sent to the subwoofer in all of
the following formats, called .1 because it only uses up 1/10th of the data of the
other channels.
5.0 - is signal is the same as 5.1, only without the LFE channel
5.1 - This is how most current DVDs are released. Dolby Digital® and DTS®
soundtracks usually have 5.1 channels. This signal plays back from the left,
center, and right speakers, plus two surrounds, left and right, and LFE channel.
6.1 - This signal sends three channels to the front: left, center and right. There
are also three surround channels: left surround, center surround and right
15
Page 16

surround. This is the format used by Dolby Digital EX® and DTS ES®.
7.1 - This is a further refinement of the 6.1 system described above, where the center
surround channel is played back on two center surround speakers in order to provide
better diffusion of the center surround audio. Some technologies, such as Microsoft’s
Windows Media 9, also provide the possibility of playing back content encoded with
7.1 discrete channels of audio.
You need specialized software to play back surround audio formats using more
than two channels. Much of this software is included in the drivers or the software
bundle for Revolution. See the installation CD that came with your Revolution 7.1
for more information, or check the M-Audio website.
Revolution 7.1 Control Panel
Once setup is complete, you can control most aspects of the Revolution 7.1 via its
control panel. To launch the control panel:
Windows - Following the driver software installation in Windows ME, 2000, and XP,
you will find an M-Audio logo “M” installed on the right side of your Windows
taskbar. Double click on this logo to launch the M-Audio Revolution 7.1 Control Panel.
Mac OS 9 - Following the driver software installation in Mac OS 9 and restarting,
the Revolution 7.1 Contr
Open your Control Panel folder and select “M-Audio Revolution 7.1 Settings.” This
will launch the M-Audio Revolution 7.1 Contr
Mac OS X - Follow the driver software installation for Mac OS X and restart. Open
your Applications folder and double-click “M-Audio Revolution” to launch the
M-Audio Revolution 7.1 Preference Panel.
ol Panel will be placed in your Apple Contr
ol Panel.
16
ol Panels folder
.
Page 17

When you launch the control panel, you will see the QuickSwitch Settings buttons,
Current Set speaker pull-down and five tabs.
The QuickSwitch Settings buttons allow you to quickly switch between five default
setups. You can use different QuickSwitch settings for watching DVDs and playing
games for example, or for using different sets of speakers.
The Current Set pull-down menu includes presets for many popular speaker
models. For recommended settings for your speakers, click and hold on the
menu to see if your speaker model is included in the list.
The Current Set pull-down menu also allows you to set the number of output
channels, such as stereo, 5.1, 6.1 or 7.1 (similar to the “QuickSwitch Set” buttons at
the top of the panel). Speaker sets can be manually added or deleted using the
“Add to QuickSwitch Sets” feature from the pull-down menu. It is important for this
control to reflect the actual number of speakers you are using, so that the drivers
aren’t sending audio to non-existent speakers. For example, if you set this to 5.1
when you only have two speakers connected, you won’t hear any of the dialog
when you play a DVD movie.
The Master Volume slider at the bottom of the panel controls the overall volume
of the Revolution’s outputs. The Mute button mutes all of the outputs, handy for
answering the phone or pretending you’re hard at work!
The tabs near the top of the control panel allow you to change the size, volume
and surround settings of the Revolution’s output. From left to right, the tabs are:
Speaker Setup, Output Mixer, Surround Sound, Input/Other and About. Use the
Speaker Setup tab to set the size and distance of your speakers. Use Output
Mixer to balance the volumes of each speaker output. The Surround Sound tab
controls aspects of SRS Circle Surround II or TruSurround XT, depending on
whether you have a stereo or multi-channel speaker set. Input/Other controls the
input and sample rate settings. Finally, the About tab gives you information about
the software version of your Revolution 7.1 drivers.
The next section will explains the settings on each of these tabs in greater detail.
17
Page 18

QuickSwitch Settings
At the top of the Revolution 7.1 Control Panel are five buttons that allow you to
quickly change the output settings of your Revolution. After installation, these
QuickSwitch buttons default to Headphone, Stereo, 5.1 Surround Sound, 6.1
Surround Sound, and 7.1 Surround Sound. You can change these buttons to
reflect any presets you want to save. For example, you might have one setting
that’s optimized for DVD playback, and another for game playing. You can have
up to five QuickSwitch buttons in the Revolution 7.1 Control Panel.
To delete a QuickSwitch button:
1. Right-click on the button you want to delete.
2. Select “Remove QuickSwitch button…”
3. Click “Yes” at the prompt.
To add a QuickSwitch button:
1. Set the controls as you would like them saved, using the instructions in
the following sections.
2. Make sure there are four or less QuickSwitch buttons at the top of the
screen. If there are five already there, you’ll need to delete one of the
QuickSwitch buttons using the instructions in the previous paragraph.
3. Click and hold on the blue “Current Set” icon and drag it up into the
QuickSwitch settings area.
“Save As” Button
Additionally, to the right of the “Current Set “ field, there is a “Save As” button which
has the same functionality as the “Add to QuickSwitch Sets” feature from the
Current Set drop-down menu. Use this to save speaker configurations with their
own name, for which you can also choose a Speaker Set icon. Just click “Save As”,
enter a name in the new window, find & click the appropriate Speaker Set icon, and
then click “OK” to save your new settings.
Speaker Setup Tab
This tab sets the size and volume of the speakers. First, check the Speaker Set
menu to see if your speakers are included in the manufacturer’s presets. If not, the
settings in this tab will ensur
On the left side of this window is a thr
setup. By default, the front left and right speakers are highlighted. To change the
settings of any other speaker, just click on that speaker in the diagram. Each
speaker has it’s own settings, so if you have large Front Left and Right speakers
with a small Center speaker
e the best performance from your speaker system.
ee dimensional pictur
, you can set your system up accor
18
e of your speaker
.
dingly
Page 19

Speaker Bass Management - This function enables Bass Management for the
Revolution 7.1 control panel. The Revolution 7.1 control panel uses Bass
Management to get the best sonic performance from your speakers. What this
means is that if you have large speakers, it will send the full-range signal to those
speakers. If you have small cube speakers, they probably can’t reproduce the
strong bass found in many DVD soundtracks, so the Revolution 7.1 control panel
automatically routes the bass from those speakers to the subwoofer.
Bass Management serves two purposes: 1. To allow a small-speaker surround
sound system to reproduce the full-frequency spectrum by re-routing bass from
the main channels to a subwoofer, which can handle frequencies that small
speakers can not. 2. As a precautionary safeguard to make sure the subwoofer is
not overdriven when it simultaneously receives both LFE & Crossover Bass. Enable
Bass Management by using your mouse to place a checkmark in the box, and use
the Crossover control to select how much main-channel bass is sent to the
subwoofer.
Speaker Size - This setting tells the driver software what size your speakers are.
Select the speaker size that best describes your selected speakers: Large, (5” or
larger woofer), Medium (3”-5” woofer), or small (woofer smaller than 3”). There
are also settings for Cube or Flat Panel speakers. Click on the speakers in the
diagram on the left side of the window in order to set the sizes for each of your
speakers.
Crossover - The Crossover control selects how much bass goes from the Main
speakers to the subwoofer and how much bass is retained by the main speakers.
When Bass Management is enabled, any sound above the Crossover threshold
is routed to the main channels (Front Left, Center, etc.). Any sound below this
frequency (or Crossover threshold) gets sent to the subwoofer. This is done so that
low bass frequencies don’t distort smaller speakers, and can improve the
acoustics of smaller rooms.
Your choices of crossover frequencies are 40Hz, 60Hx, 80Hz, 90Hz, 100Hz, and
120Hz. Check the documentation that came with your speakers to help you with
this setting. If you find a specification like, “Frequency Response: ±2dB 80Hz 20kHz”, for example, set the crossover to 80Hz or higher. The Bass Management
box must be checked to use the crossover feature.
Link Stereo Output Levels - This links the front left and right output level controls,
so that if you change one, the other follows.
Levels - These contr
independent of the other speakers. Move it to the right, towar
volume or down towar
ols change the volumes of the selected speaker outputs
ds 0dB, for mor
ds -60dB for less volume. This is the same contr
ol found in
the Output Mixer, described in the next section.
Distance - These contr
independent of the other speakers. Move it to the right, towar
ols change the volumes of the selected speaker outputs
ds 0dB, for mor
volume or down towards -60dB for less volume. This is the same control found in
19
e
e
Page 20

the Output Mixer, described in the next section.
Solo - By pressing this button, you will only send sound to the selected channel.
The Solo function is useful if you think the left and right speakers are reversed, for
example. You can solo more than one channel at a time, if you wish.
Mute - Use this button to stop audio from going to this speaker.
Test - Use this button to stop audio from going to this speaker.
The subwoofer screen, displayed after clicking on the subwoofer icon, has the
following additional controls:
Bass Boost -
level of the Crossover bass signal to the subwoofer. This fader attenuates the
bass below the crossover frequency sent to the subwoofer using Bass
Management mode.
LFE Boost - This controls the level of the “.1” LFE signal going to the subwoofer. The
subwoofer gets its signal from two places: from the LFE (“.1”) signal on a DVD, and
through bass management sending bass frequencies below a crossover
frequencies to the subwoofer. These two faders give you individual control over
these two signals. You can also adjust the overall subwoofer level using the Level
control at the top of the window.
Phase + 180 - This control switches the phase of the signal going to the
subwoofer. Compare the volume of your subwoofer when this feature is enabled
or disabled. Of the two settings, the one that produces the louder volume is the
one you want to use. For example, if subwoofer volume is louder when Phase +
180 is enabled, then always leave this setting enabled. The best place for your
subwoofer is usually near a wall or in a corner.
When Bass Management is turned on, this control increases the
Output Mixer Tab
This tab provides level controls for each of the speaker outputs on the Revolution.
Use these controls to change the balance between speakers in your system.
20
Page 21

Level - Move the level fader up or down to change the volume of any of the eight
speaker outputs. For proper DVD playback, each of the surround speakers should
play back at the same perceived volume, but you may need to adjust them for
distance or to taste. Each level control has a level meter next to it, so you can see
how much signal is going to each of the outputs.
Solo - By pressing this button, you will only send sound to the selected channel. The
Solo function is useful if you think the left and right speakers are reversed, for
example. You can solo more than one channel at a time, if you wish.
Mute - By pressing this button, you will only send sound to the selected channel.
The Solo function is useful if you think the left and right speakers are reversed, for
example. You can solo more than one channel at a time, if you wish.
Surround Sound Tab
This tab controls the surround sound features of the Revolution. There are three
surround modes in the Revolution 7.1 control panel: TruSurround XT/Circle Surround II,
Sensaura, and Off (no surround processing). Click one of these radio buttons to select
the surround mode you wish to use with the Revolution.
Sensaura/Game Mode - This mode is for use with EAX compatible games. This
technology, available on many Windows-compatible computer games, allows
2.0, 4.0, or 5.1 surround playback of the game’s soundtrack (with Sensaura mode
enabled). Only EAX-compatible games can be used with Sensaura surround
playback. If you have a non-EAX game that you would like to play in surround,
you can use Circle Surround II for a similar effect. See the “Gaming” section in the
next chapter for more on Sensaura technology.
TruSurround XT/Circle Surround - The two SRS Labs technologies included with the
control panel are TruSurround XT and Circle Surround II. TruSurround XT takes a multichannel source and plays it through two speakers in a way that makes it sound like
you’re playing it back through multiple speakers. Circle Surround II takes a stereo
source and processes it so that it plays through multiple speakers.
Here’s a suggested guide to playing surround sources through your Revolution:
• If you’re playing a 5.1 DVD with WinDVD 4 (Windows only), and you have
multiple speakers attached, Circle Surround II should be unchecked.
• If you’re playing a 5.1 DVD and you only have two speakers connected,
turn on TruSurround XT.
• If you’re playing a stereo MP3, CD, or DVD and want to hear it through
multiple surr
The TruSurround XT settings only appear if your Cur
Stereo with Subwoofer
Speaker Set is set to thr
SRS TruSurround XT Enable - This control turns on the TruSurround XT feature.
This control turns on the T
ound speakers, turn on Circle Surround II.
ent Speaker Set is Stereo or
r
round II settings only appear if your Current
. The Cir
cle Sur
ee or mor
round XT feature.
uSur
r
e channels.
21
Page 22

SRS Circle Surround II Enable - This control turns on the Circle Surround II
feature. Circle Surround II is a patented SRS technology that solves the problem
of generating 5.1 multi-channel content from a two channel source. It delivers a
compelling surround sound experience through any multi-channel playback
system. It is fully compatible with all multi-channel formats up to 6.1 channels.
Use this feature to turn stereo sources, such as CDs, MP3s or Dolby Pro Logic
encoded DVDs, into 6.1 multi-channel surround. You’ll want to turn this feature off
if you’re listening to a source that’s already playing back in 5.1 or 6.1, such as
Windows Media or a DVD movie.
Note: Circle Surround II has an output frequency of 48000H.z the frequency
selection on the control panel for higher frequencies will be grayed out. (See next
section, “Input/Other.”)
SRS TruSurround XT/Circle Surround II Mode - There are three modes to the
Circle Surround II and TruSurround XT feature. Use Cinema when watching films
or television programs. Select Music to listen to stereo music sources in surround.
Choose Mono to spread out a mono source, such as an old movie or some
internet radio stations.
SRS Dialog Enhancement - There are three modes to the Circle Surround II and
TruSurround XT feature. Use Cinema when watching films or television programs.
Select Music to listen to stereo music sources in surround. Choose Mono to
spread out a mono source, such as an old movie or some internet radio stations.
SRS TruBass - This feature takes the low bass from big-theater soundtracks and
turns it into frequencies that home speakers can reproduce. When you use this
feature, you don’t need to worry about missing out on the big bass rumbles of
submarine missile launches or spacecraft flybys just because you’re using small
computer speakers. Click the Enable checkbox to turn on the TruBass feature, and
use the Level slider to add more bass.
and are trademarks of SRS Labs, Inc. Cirle Surround II and
TruSurround XT are incorporated under license from SRS Labs, Inc.
You can also enable or disable the “Sensaura” or “SRS Circle Surround II/SRS
TruSurround XT” features by using your mouse to right-click the Revolution 7.1 Icon,
located in the system tray(next to your computer’s clock). Once the Icon Menu is
open, left-click “Sensaura” or “SRS Circle Surround II/SRS TruSurround XT”.
Input/Other Tab
The Input/Other tab controls the input levels and sampling frequency of the
y about the settings on this page unless you’r
Revolution. You don’
recording audio with the Revolution.
Link Stereo Input Levels - The Input/Other tab controls the input levels and
sampling frequency of the Revolution. You don’t need to worry about the settings
on this page unless you’r
t need to wor
r
ding audio with the Revolution.
ecor
e r
22
e
Page 23

Left/Right Input Level - The Input/Other tab controls the input levels and
sampling frequency of the Revolution. You don’t need to worry about the settings
on this page unless you’re recording audio with the Revolution.
The Input/Other tab controls the input levels and sampling frequency of the
Revolution. You don’t need to worry about the settings on this page unless you’re
recording audio with the Revolution.
Sample Rate - This control selects the sample rate of the audio to be recorded.
This is a bit like the “SP/EP” control on a VCR. A higher sample rate will sound
better, but will take up more memory. 44100 Hz is the standard CD sampling rate
and is usually your best choice. Higher sampling rates such as 96000 Hz will
cause certain features to be disabled, such as Circle Surround.
ASIO Buffer Size - This control selects the sample rate of the audio to be
recorded. This is a bit like the “SP/EP” control on a VCR. A higher sample rate will
sound better, but will take up more memory. 44100 Hz is the standard CD
sampling rate and is usually your best choice. Higher sampling rates such as
96000 Hz will cause certain features to be disabled, such as Circle Surround.
Enable Monitoring - (also known as “Direct” or “Hardware” Monitoring) When
this box is checked, the input signal is sent directly to the front left and right
outputs. If both a mic and a line signal are plugged in, these will be mixed
together and sent to the outputs. This setting defeats normal sound playback.
When you want to playback audio from your PC again, uncheck this box. Note:
Use of this feature requires heavy CPU usage, and should be disabled when not
in use. One example for when you may need to use this feature is in the case of
watching video with audio from a ‘TV Tuner’ card. Simply connect a ‘loop-back’
cable from the audio output of your TV Tuner card to the Revolution’s Line-Input.
Then you can use your mouse to place a checkmark in the Enable Monitoring box
to use this feature. Since this feature uses ASIO, there is virtually no delay
(depending on the speed of your system).
You can also enable or disable the “Enable Monitoring” feature by using your
mouse to right-click the Revolution 7.1 Icon, located in the system tray (next to
your computer’s clock). Once the Icon Menu is open, left-click “Direct Monitoring”.
ASIO Note: If this ASIO based feature is in use, then you cannot additionally use
ASIO in ASIO-supported software. If you previously have and want to use ASIOsupported recording software, then first disable the ‘Enable Monitoring’ feature to
use software monitoring in your ASIO-supported software.
About Tab
This tab provides infor
driver software. This information can be useful to customer support personnel
when troubleshooting problems with your Revolution.
mation about the softwar
e version of the contr
23
ol panel and
Page 24

Revolution 7.1 Applications
Now that we’ve finished connecting speakers and setting levels, you’re probably
interested in playing with the Revolution 7.1 now. This chapter should help you
through some typical uses of the Revolution.
DVD Playback
The Revolution 7.1 ships with a copy of WinDVD 4, which plays back decoded Dolby
Digital signals. Use this supplied version of WinDVD to fully take advantage of the
surround sound features of your Revolution 7.1 and the Windows operating system.
Apple DVD player software supports Dolby Digital or DTS playback on Mac OS X
10.3 & higher.
WinDVD 4 is can be found on the Applications CD that came with your Revolution.
You may double click on the application to install it in your Windows system. For
instructions on how to install WinDVD, please refer to Appendix A in this manual.
In Win DVD 4 for Windows, click on the “Subpanel” button, which looks like an arrow
pointing right. Choose “Audio Mode” and then click on the “Setup” button, which
looks like a wrench. Click on the “Audio” tab, and select the desired output format
(6-channel, etc.). For more information, also see Appendix A.
The Revolution 7.1 will work with any software DVD player. What type of audio signal
your DVD player sends to the Revolution 7.1 depends on the setting in your DVD
player software. Generally, DVD player software provides a series of audio setup
options or preferences. The exact location of these audio options may vary, so
check your DVD player’s documentation for more information. It is from these setup
options that you will be able to change or direct the audio output of the DVD player.
Stereo - When the Revolution 7.1 is chosen as your computer’s audio device (see
the previous chapter, “Software Setup”), this setting will send a stereo signal to the
Revolution’s outputs. You may want to turn on the Circle Surround feature when
playing a stereo movie (see the previous section for details).
Digital Out - When the Revolution 7.1 is chosen as your computer’s audio device
(see the previous chapter, “Software Setup”), this setting will send a stereo signal
to the Revolution’s outputs. You may want to turn on the Circle Surround feature
when playing a stereo movie (see the previous section for details).
Note for Macintosh Users: There is currently no DVD player for Mac OS 9 or X
(below 10.3) that suppor
Revolution’s CircleSurround II technology does a remarkable job of generating a
real surround soundtrack from the Apple DVD Player application.
5.1 oder 6.1 - If your DVD player is capable of decoding a sur
such as Dolby Digital (EX) and DTS (ES), select this option. If you have only ster
speakers connected, you may want to tur
ts softwar
e decode of Dolby Digital or DTS, but
round sound signal,
eo
n on T
24
uSur
r
r
ound XT to pr
ovide the best
Page 25

surround sound simulation from stereo speakers. If you have multi-channel
speakers connected, make sure to turn off Circle Surround.
Music Playback
The Revolution 7.1 can expand stereo music CD and MP3 playback into a
surround sound room-filling experience.
For surround playback for your stereo music, open the Revolution 7.1 control
panel, select the Surround Sound tab, and turn on SRS Circle Surround II. Select
the Music mode for best music playback. For more information, check the
previous section. The Revolution 7.1 is even capable of playing back DVD-Audio
discs with the proper playback software.
Windows Media Player Setup
Microsoft’s Windows Media Player 9 and later allows you to play 5.1 or 7.1 music
and movies through the Revolution. As long as the Revolution 7.1 is selected as
your default audio device, Media Player will play surround recordings through
the Revolution’s outputs.
Gaming
The Revolution 7.1 brings gameplay to life through Sensaura surround sound
playback. Sensaura uses an exclusive suite of algorithms, based on the physics
of spatial hearing, to mimic the acoustic processes that are involved in
replicating a 3D sound space in computer software. The result is a realistic
simulation of the effect of hearing any particular sound at a chosen position in
three-dimensional space around the listener.
If you have an EAX-compatible game, which supports Sensaura technology
(Windows Only), open the Revolution 7.1 Control Panel, select the Surround
Sound tab and check the “Sensaura/Game Mode” box. This mode disables
Circle Surround, and the sampling rate is automatically changed to 48000Hz.
Sensaura provides support for EAX 1.0, EAX 2.0, DirectSound3D, DirectSound,
I3DL2, and A3D. It also features Sensaura MultiDrive, MacroFX, EnvironmentalFX,
and ZoomFX technologies for increased audio realism in game play. Sensaura
works in stereo (or headphones) or multi-channel modes.
If you find that your game slows down when Sensaura is turned on, you may
want to turn off some of the graphic details or r
speed things up.
educe the scr
een resolution to
Recording
The Revolution 7.1 includes a pair of audio inputs for recording. You can set the
input level of the inputs by launching the Revolution 7.1 control panel, selecting
25
Page 26

the Input/Other tab, and changing the level on that screen. If your recording
application doesn’t see audio from the Revolution’s inputs, check that program’s
audio preferences, check your cable connections, or review the Software Setup
chapter for potential problems. Go to the Windows Control panel and open
Sounds and Multimedia icon. The Revolution 7.1 features both Line and Mic
inputs for the best performance with your input source. The Revolution 7.1
records at sampling rates up to and including 96kHz.
The Revolution 7.1 ships with M-Audio’s ASIO drivers for stereo recording and
multi-track playback with recording applications that are ASIO-compliant. The
buffer for ASIO can be adjusted in the DMA buffer drop down selection in the
Input/Other tab of the Revolution 7.1 control. Some applications allow the access
of this feature through its own audio setup menu.
Troubleshooting & Technical Support
The M-Audio.com website (www.m-audio.com) contains the latest
troubleshooting information. This should be your first stop for up-to-date
information on the latest drivers, FAQ’s, and extensive how-to guides.
Here are some quick troubleshooting tricks to try, if you’re having problems with
your Revolution 7.1:
• When things don’t seem to be working properly, try restarting the computer.
This solves the majority of computer problems.
• If you haven’t been able to get the unit to work at all, or if it stopped working
altogether, uninstall and reinstall the driver software.
• When launching an ASIO application, make sure that game mode is
disabled in the Input/Other tab of the Revolution 7.1 control panel.
• If the unit stopped working when you installed a new program or a system
software update, check the M-Audio website for new drivers. If there is a
major new system software update that has just been released, you may
need to search for beta software drivers that support the new system.
• Some features don’t work when 192000Hz or 96000Hz sampling rate is
selected. Try opening the control panel, selecting Input/Other and setting the
sampling rate to 48000Hz if a feature isn’t working properly.
If you need additional assistance after trying the suggestions above and visiting
our website, you may contact M-Audio’s Technical Support department by phone
(626-633-9066, 9-5 PST M-F), by fax (626-633-9060) or by e-mail
(techsupt@m-audio.com).
26
Page 27

Contact information
If you have any questions, comments or suggestions about this or any M-Audio
product, we invite you to contact us at:
M-AUDIO U.S.
5795 Martin Road, Irwindale, CA 91706-6211, U.S.A.
Sales Information: 626-633-9050
Sales Information (email): info@m-audio.com
Tech Support: 626-633-9055
T
ech Support (email): techsupt@m-audio.com
Fax: 626-633-9060
Internet Home Page: http://www.m-audio.com
M-AUDIO Deutschland (Ger
Kuhallmand 34, D-74613 Ohringen, Germany
Sales Infor
mation: 49 7941 98 7000
Sales Information (email): info@m-audio.de
Technical Support: 49 7941 98 70030
Technical Support (email): support@m-audio.de
Fax: 07941 98 70070
Internet Home Page: http://www.m-audio.de
many)
M-AUDIO U.K.
Unit 5, Saracen Industrial Estate, Mark Road,
Hemel Hempstead, Herts HP2 7BJ, England
Sales Information (phone): 44 (0) 1442 416590
Sales Information (fax): 44 (0) 1442 246832
Sales Information (email): info@maudio.co.uk
Technical Support (PC): 44 (0) 1309 671301
Technical Support (Mac): 44 (0) 1765 650072
Technical Support (email): richard@maudio.freeserve.co.uk
Internet Home Page: http://www.maudio.co.uk
M-AUDIO France
Unit 5, Saracen Industrial Estate, Mark Road
Hemel Hempstead, Herts HP2 7BJ, England
Sales Information: 0810 001 105
Sales Information (email): info@m-audio-france.com
Technical Support: 0820 00 731
Technical Support (email): support@m-audio-france.com
Fax: 44 (0) 144 224 6832
Internet Home Page: http://www.maudio.co.uk
M-AUDIO Canada
1400 St-Jean Baptiste Ave. #150
Quebec City, QC G2E 5B7, Canada
Tel: 418-872-0444
Fax: 418-872-0034
Email: midimancanada@m-audio.com
Internet Home Page: http://www.m-audio.ca
M-AUDIO Japan
Annex Buliding 6F, 2-18-10 Marunouchi
Naka-Ku, Nagoya 460-0002, Japan
Tel: 81 52 218 3375
Fax: 81 52 218 0875
Technical Support: 0820 00 731
Email: info@m-audio.co.jp
Internet Home Page: http://www.m-audio.co.jp
Warranty Information
Warranty Terms
M-Audio warrants products to be free from defects in materials and
workmanship, under normal use and provided that the product is owned by the
original, registered user. Visit www.m-audio.com/warranty for terms and
limitations applying to your specific product.
Warranty Registration
Thank you for registering your new M-Audio product. Doing so immediately both
entitles you to full warranty coverage and helps M-Audio develop and
manufacture the finest quality pr
oducts available. Register online at
www.m-audio.com/register to receive FREE product updates and for the chance
to win FREE M-Audio gear.
27
Page 28

Appendix A: Technical Specifications
Hardware Features
• 8 Channel Analog Line Outputs (on 4 stereo 1/8" Mini jacks)
• S/PDIF Digital Coaxial (RCA) Output
• S/PDIF Out can transmit either Linear PCM or AC-3
• Stereo 1/8" Mini Analog Line Input
• Mono 1/8" Mini Analog Microphone Input with electret mic power
Audio Performance Specifications
Line Outs:
Dynamic Range 106dB (A-weighted)
Signal-to-Noise Ratio 107dB (typical, A-weighted)
THD 0.00235% (-92.6dB)
Maximum Line Output Level +2.1dBV (1.276 Vrms)
Frequency Response +/-0.6dB; 22Hz-20kH
@48kHz Samplefrequenz
+/-3.0dB; 22Hz-80kHz
Crosstalk: -118.9dB
Mic In:
Dynamic Range 98dB (A-weighted)
Signal-to-Noise Ratio 96.8dB (A-weighted)
THD+N 0.00360% (-88,9dB)
Maximum Input Level 6.1dBu (+0.384 Vrms)
Line In:
Dynamic Range 99.5dB (A-weighted)
Signal-to-Noise Ratio 98.9dB (A-weighted)
THD+N <0.00297% (-90,5db)
Frequency Response +/-0.75 dB; 22Hz - 22kHz
@ 48kHz sample rate
Sampling Frequencies (kHz):
No sample rate conversion 32, 44.1, 48, 88.2, 96, 172.4, 192
With MM E rate conve rsion All sample rates up to 200kHz
Driver Features
Audio playback using the following input/output formats:
• 24-bit Linear PCM
• 16-bit Linear PCM
• 16-bit AC-3 output over S/PDIF (not available in Mac OS 9)
SRS Circle Surround II processing
SRS TruSurround XT processing
Sensaura (for 3D gaming) (PC-only)
28
Page 29

Appendix B: WinDVD v5 Installation
The enclosed WinDVD Version5 gives you the multi-channel support needed to play
encoded surround sound material such as Dolby Digital 5.1. With the proper settings,
WinDVD will decode that material and send it to the multi-channel outputs of your
Revolution 7.1.
To use WinDVD, you must have DirectX 8.1 installed in your System. If you have an older
version of DirectX, WinDVD will inform you that, “The setup program has detected that
you have an older version of Microsoft’s DirectX.” Click “Yes” to install DirectX 8.1. If your
System prompts you to restart your computer after installing DirectX, then do so.
Otherwise, proceed with the WinDVD installation.
To install WinDVD v5:
1. Insert the “Applications” CD into your CD drive and locate the “WinDVD”
folder. Run the setup application by double-clicking the “Setup” icon.
2. The “Welcome to WinDVD Setup” window will pop up. Click the “Next”
button.
3. A “License Agreement” box will pop up. Assuming that you agree with the
terms, click the “Yes” button on the bottom right hand corner.
4. WinDVD will ask you for User Information such as Name, Company
(optional) and Serial Number. Your serial number is located on the
Applications CD sleeve. After entering this information, click the “Next”
button.
5. The “Choose Destination Location” dialog box will pop up, asking you to
choose where you want to install WinDVD. Usually the default locations
are a good choice (if you want to choose another location, then “Browse”
to the desired location). Click “Next.”
6. The “Select Program Folder” box appears. WinDVD will create a folder for
you named “InterVideo WinDVD 5.” Click “Next.”
7. The “Setup Status” box informs you that it is installing the program to your hard drive.
8. The “File Types Association” window will pop up. If you want DVD video to
autoplay, or movie files such as mpegs (files with the .mpg extension) to
be played on WinDVD, then leave these boxes checked and click “Next.”
9. The “Third Party Application Setup” window will pop up. If you want
WinDVD to use Microsoft HTML Help, check the box and then click “Next.”
10. Now the Setup is complete. Select, “Yes, I want to restart my computer
now,” remove the Applications CD from the drive, and hit the “Finish”
button.
Setting Up the Revolution 7.1 in WinDVD:
1. Double-click the “Intervideo WinDVD 5” icon that is now located on the
Desktop.
2. Look at the transport bar, then click on the SubPanel “arrow” found just to
the right of the InterVideo logo. Select “Audio Mode” from the list.
3. Click on the tool button (it looks like a little wrench), located in the lower right
hand corner. The “Audio” page of the Setup box will then pop up next to
29
Page 30

the transport.
4. Select the Audio Output. If you are listening to speakers attached to the
Revolution 7.1’s line outputs, then select “Analog.” If you have the digital
output connected to a home theater digital input, then select “S/PDIF.”
5. Set the Audio Speaker Configuration according to how many speakers you
are connecting to the Revolution 7.1’s outputs. Click “OK.”
6. Now the setup is complete. Place a DVD video in your DVD drive and hit “Play.
REVO71-MNL-062904
30
 Loading...