


Marantz DV8400 user guide

Model DV8400 User Guide
Super Audio CD/DVD Player
R
CLASS 1 LASER PRODUCT
LUOKAN 1 LASERLAITE
KLASS 1 LASERAPPARAT

CONGRATULATIONS ON YOUR PURCHASE OF THIS
FINE MARANTZ PRODUCT.
MARANTZ is on the leading edge of Super Audio CD, DVD
research for consumer products and this unit incorporates the
latest technological developments.
We are sure you will be fully satisfied with the Super Audio
CD, DVD player.
Thank you for your support.
WARNING:
TO REDUCE THE RISK OF FIRE OR ELECTRIC SHOCK,
DO NOT EXPOSE THIS APPLIANCE TO RAIN OR
MOISTURE.
Do not remove the cover from the equipment.
Do not insert anything into the equipment through the ventila-
tion holes.
Do not handle the mains lead with wet hands.
Make a space of about 0.1 meter around the unit.
IMPORTANT NOTICE
[For U.S. model]
The serial number for this equipment is located on the rear
panel. Please write this serial number on your enclosed
warranty card and keep it in a secure area. This is for your
security.
CAUTION
• Use of controls or adjustments or performance of
procedures other than those specified herein may result
in hazardous radiation exposure.
• The use of optical instruments with this product will
increase eye hazard.
[For Canadian model]
This Class B digital apparatus complies with Canadian
ICES-003.
[Pour le modèle Canadien]
Cet appareil numérique de la Classe B est conforme à la
norme NMB-003 du Canada.
[For Canadian model]
CAUTION: TO PREVENT ELECTRIC SHOCK, MATCH WIDE
BLADE OF PLUG TO WIDE SLOT, FULLY INSERT.
ATTENTION: POUR ÉVITER LES CHOCS ÉLECTRIQUES,
INTRODUIRE LA LAME LA PLUS LARGE DE LA FICHE
DANS LA BORNE CORRESPON-DANTE DE LA PRISE ET
POUSSER JUSQU’AU FOND.
CAUTION: This product satisfies FCC regulations when
shielded cables and connectors are used to connect the
unit to other equipment. To prevent electromagnetic
interference with electric appliances such as radios and
televisions, use shielded cables and connectors for
connections.
NOTE: This equipment has been tested and found to
comply with the limits for a Class B digital device, pursuant
to Part 15 of the FCC Rules. These limits are designed to
provide reasonable protection against harmful interference
in a residential installation. This equipment generates,
uses, and can radiate radio frequency energy and, if not
installed and used in accordance with the instructions, may
cause harmful interference to radio communications.
However, there is no guarantee that interference will not
occur in a particular installation. If this equipment does
cause harmful interference to radio or television reception,
which can be determined by turning the equipment off and
on, the user is encouraged to try to correct the interference
by one or more of the following measures:
– Reorient or relocate the receiving antenna.
– Increase the separation between the equipment and
receiver.
– Connect the equipment into an outlet on a circuit different
from that to which the receiver is connected.
– Consult the dealer or an experienced radio/TV technician
for help.
Information to User
Alteration or modifications carried out without appropriate
authorization may invalidate the user's right to operate the
equipment.
This product incorporates copyright protection technology
that is protected by method claims of certain U.S. patents
and other intellectual property rights owned by
Macrovision Corporation and other rights owners. Use of
this copyright protection technology must be authorized by
Macrovision Corporation, and is intended for home and
other limited viewing uses only unless otherwise
authorized by Macrovision Corporation. Reverse
engineering or disassembly is prohibited.
CAUTION:
LASER SAFETY: This unit employs a LASER. Only
a qualified person should remove the cover or
attempt to service this device, due to possible eye
injury.
“CAUTION-USE OF CONTROLS OR
ADJUSTMENTS OR PERFORMANCE OF
PROCEDURE OTHER THAN THOSE SPECIFIED
HEREIN MAY RESULT IN HAZARDOUS
RADIATION EXPOSURE.”
Notification
Concerning HDCP compatible DVI-D
output
This product is equipped with an HDCP compatible DVI-D output terminal, but its output format
is not formally authorized at this time for copyright protection reasons.
Therefore, when it is shipped, this output is not
possible. When the format has been formally
authorized, an upgrade will provide compatibility
necessary to perform this output.
2
Please read through these operating instructions so you will know how to operate your model properly. After you have finished
reading the instructions, put them away in a safe place for future reference.
• This player is not suitable for commercial use.
The lightning flash with arrowhead symbol, within an
CAUTION
RISK OF ELECTRIC SHOCK
DO NOT OPEN
CAUTION: TO REDUCE THE RISK OF ELECTRIC SHOCK,
DO NOT REMOVE COVER (OR BACK)
NO USER-SERVICEABLE PARTS INSIDE
equilateral triangle, is intended to alert the user to the
presence of uninsulated “dangerous voltage” within the
product’s enclosure that may be of suffi-cient magnitude
to constitute a risk of electric shock to persons.
The exclamation point within an equilateral triangle is
intended to alert the user to the presence of important
operating and maintenance (servicing) instructions in the
literature accompanying the appliance.
REFER SERVICING TO QUALIFIED SERVICE PERSONNEL
IMPORTANT SAFETY INSTRUCTIONS
READ INSTRUCTIONS — All the safety and operating
instructions should be read before the product is
operated.
RETAIN INSTRUCTIONS — The safety and operating
instructions should be retained for future reference.
HEED WARNINGS — All warnings on the product
and in the operating instructions should be adhered
to.
FOLLOW INSTRUCTIONS — All operating and use
instructions should be followed.
CLEANING — Unplug this product from the wall
outlet before cleaning. The product should be
cleaned only with a polishing cloth or a soft dry
cloth. Never clean with furniture wax, benzine,
insecticides or other volatile liquids since they may
corrode the cabinet.
ATTACHMENTS — Do not use attachments not
recommended by the product manufacturer as
they may cause hazards.
WATER AND MOISTURE — Do not use this product
near water — for example, near a bathtub, wash
bowl, kitchen sink, or laundry tub; in a wet
basement; or near a swimming pool; and the like.
ACCESSORIES — Do not place this product on an
unstable cart, stand, tripod, bracket, or table. The
product may fall, causing serious injury to a child or
adult, and serious damage to the product. Use only
with a cart, stand, tripod, bracket, or table
recommended by the manufacturer, or sold with
the product. Any mounting of the product should
follow the manufacturer’s instructions, and should
use a mounting accessory recommended by the
manufacturer.
CART — A product and cart combination should be
moved with care. Quick stops, excessive force,
and uneven surfaces may cause the product and
cart combination to overturn.
VENTILATION — Slots and openings in the cabinet
are provided for ventilation and to ensure reliable
operation of the product and to protect it from
overheating, and these openings must not be
blocked or covered. The openings should never be
blocked by placing the product on a bed, sofa, rug,
or other similar surface. This product should not be
placed in a built-in installation such as a bookcase
or rack unless proper ventilation is provided or the
manufacturer’s instructions have been adhered
to.
POWER SOURCES — This product should be operated
only from the type of power source indicated on
the marking label. If you are not sure of the type of
power supply to your home, consult your product
dealer or local power company.
LOCATION – The appliance should be installed in a
stable location.
NONUSE PERIODS – The power cord of the appliance
should be unplugged from the outlet when left
unused for a long period of time.
GROUNDING OR POLARIZATION
• If this product is equipped with a polarized alternating
current line plug (a plug having one blade wider
than the other), it will fit into the outlet only one
way. This is a safety feature. If you are unable to
insert the plug fully into the outlet, try reversing the
plug. If the plug should still fail to fit, contact your
electrician to replace your obsolete outlet. Do not
defeat the safety purpose of the polarized plug.
• If this product is equipped with a three-wire
grounding type plug, a plug having a third (grounding)
pin, it will only fit into a grounding type power
outlet. This is a safety feature. If you are unable to
insert the plug into the outlet, contact your electrician
to replace your obsolete outlet. Do not defeat the
safety purpose of the grounding type plug.
POWER-CORD PROTECTION — Power-supply cords
should be routed so that they are not likely to be
walked on or pinched by items placed upon or
against them, paying particular attention to cords at
plugs, convenience receptacles, and the point
where they exit from the product.
OUTDOOR ANTENNA GROUNDING — If an outside
antenna or cable system is connected to the product,
be sure the antenna or cable system is grounded so
as to provide some protection against voltage
surges and built-up static charges. Article 810 of
the National Electrical Code, ANSI/NFPA 70,
provides information with regard to proper
grounding of the mast and supporting structure,
grounding of the lead-in wire to an antenna discharge
unit, size of grounding conductors, location of
antenna-discharge unit, connection to grounding
electrodes, and requirements for the grounding
electrode. See Figure A.
LIGHTNING — For added protection for this product
during a lightning storm, or when it is left unattended
and unused for long periods of time, unplug it from
the wall outlet and disconnect the antenna or cable
system. This will prevent damage to the product
due to lightning and power-line surges.
POWER LINES — An outside antenna system should
not be located in the vicinity of overhead power
lines or other electric light or power circuits, or
where it can fall into such power lines or circuits.
When installing an outside antenna system,
extreme care should be taken to keep from touching
such power lines or circuits as contact with them
might be fatal.
OVERLOADING — Do not overload wall outlets,
extension cords, or integral convenience
receptacles as this can result in a risk of fire or
electric shock.
ELECTRIC
SERVICE
EQUIPMENT
OBJECT AND LIQUID ENTRY — Never push objects
of any kind into this product through openings as
they may touch dangerous voltage points or shortout parts that could result in a fire or electric shock.
Never spill liquid of any kind on the product.
SERVICING — Do not attempt to service this product
yourself as opening or removing covers may expose
you to dangerous voltage or other hazards. Refer
all servicing to qualified service personnel.
DAMAGE REQUIRING SERVICE — Unplug this
product from the wall outlet and refer servicing to
qualified service personnel under the following
conditions:
• When the power-supply cord or plug is damaged.
• If liquid has been spilled, or objects have fallen into
the product.
• If the product has been exposed to rain or water.
• If the product does not operate normally by
following the operating instructions. Adjust only
those controls that are covered by the operating
instructions as an improper adjustment of other
controls may result in damage and will often require
extensive work by a qualified technician to restore
the product to its normal operation.
• If the product has been dropped or damaged in any
way.
• When the product exhibits a distinct change in
performance — this indicates a need for service.
REPLACEMENT PARTS — When replacement parts
are required, be sure the service technician has
used replacement parts specified by the
manufacturer or have the same characteristics as
the original part. Unauthorized substitutions may
result in fire, electric shock, or other hazards.
SAFETY CHECK — Upon completion of any service
or repairs to this product, ask the service technician
to perform safety checks to determine that the
product is in proper operating condition.
WALL OR CEILING MOUNTING — The product
should not be mounted to a wall or ceiling.
HEAT — The product should be situated away from
heat sources such as radiators, heat registers,
stoves, or other products (including amplifiers)
that produce heat.
ANTENNA
LEAD IN WIRE
GROUND
CLAMP
Fig. A
ANTENNA
DISCHARGE UNIT
(NEC SECTION 810-20)
GROUNDING CONDUCTORS
(NEC SECTION 810-21)
GROUND CLAMPS
POWER SERVICE GROUNDING
ELECTRODE SYSTEM
(NEC ART 250, PART H)
English
NEC — NATIONAL ELECTRICAL CODE
3
WARNING: Slot and openings in the cabinet are provided
for ventilation and to ensure reliable operation of the product and to protect it from overheating, to prevent fire hazard, the openings should never be blocked and covered with
items, such as newspapers, table-cloths, curtains, etc. Also
do not put the apparatus on the thick carpet, bed, sofa, or
fabric having a thick pile.
Operating Environment
Operating environment temperature and humidity:
+5°C to +35°C (+41°F to +95°F); less than 85%RH (cooling
vents not blocked)
Do not install in the following locations
÷ Location exposed to direct sunlight or strong artificial
light
÷ Location exposed to high humidity, or poorly ventilated
location
THX
With their experience in movie making and DVD mastering,
Lucasfilm engineers researched the capabilities of the DVD
format. They have identified many key areas of importance
within the DVD player system that are necessary to ensure
the highest quality possible for video and audio playback.
The THX select DVD specification was created to realize
the full potential of the format.
The THX DVD program is a number of technical and
performance specifications developed to make certain that
the audio and video quality of every DVD recording is
reproduced as accurately as possible.
Thus exploiting the medium’s maximum potential.
Lucasfilm and THX are trademarks of Lucasfilm Ltd.
We Want You Listening For A Lifetime
Selecting fine audio equipment such as the unit you’ve just
purchased is only the start of your musical enjoyment. Now it’s
time to consider how you can maximize the fun and excitement
your equipment offers. This manufacturer and the Electronic
Industries Association’s Consumer Electronics Group want you
to get the most out of your equipment by playing it at a safe level.
One that lets the sound come through loud and clear without
annoying blaring or distortion-and, most importantly, without
affecting your sensitive hearing.
Sound can be deceiving. Over time your hearing “comfort
level” adapts to higher volumes of sound. So what sounds
“normal” can actually be loud and harmful to your hearing. Guard
against this by setting your equipment at a safe level BEFORE
your hearing adapts.
To establish a safe level:
• Start your volume control at a low setting.
• Slowly increase the sound until you can hear it comfortably and
clearly, and without distortion.
Once you have established a comfortable sound level:
• Set the dial and leave it there.
Taking a minute to do this now will help to prevent hearing
damage or loss in the future. After all, we want you listening for
a lifetime.
4
Used wisely, your new sound equipment will provide a lifetime
of fun and enjoyment. Since hearing damage from loud noise is
often undetectable until it is too late, this manufacturer and the
Electronic Industries Association’s Consumer Electronics Group
recommend you avoid prolonged exposure to excessive noise.
This list of sound levels is included for your protection.
Decibel
Level Example
30 Quiet library, soft whispers
40 Living room, refrigerator, bedroom away from traffic
50 Light traffic, normal conversation, quiet office
60 Air conditioner at 20 feet, sewing machine
70 Vacuum cleaner, hair dryer, noisy restaurant
80 Average city traffic, garbage disposals, alarm clock
at two feet.
THE FOLLOWING NOISES CAN BE DANGEROUS
UNDER CONSTANT EXPOSURE
90 Subway, motorcycle, truck traffic, lawn mower
100 Garbage truck, chain saw, pneumatic drill
120 Rock band concert in front of speakers, thunderclap
140 Gunshot blast, jet plane
180 Rocket launching pad
Information courtesy of the Deafness Research Foundation.

Table Of Contents
English
1 Before You Start
Features.................................................................................... 6
What’s in the box ................................................................... 7
Putting the batteries in the remote control .................... 7
Using the remote control .................................................... 7
Discs compatible with this player ..................................... 8
DVD Video regions ................................................................ 9
MP3 compatibility information .......................................... 9
2 Connecting Up
Easy Setup ............................................................................ 10
Home theater video connections ..................................... 11
Home theater audio connections.................................... 12
3 Controls & Displays
Display .................................................................................... 13
Remote control .................................................................... 14
Front panel ............................................................................ 15
4 Getting Started
Using the FL menu ............................................................... 16
Using the Setup Navigator ................................................ 17
Playing discs ......................................................................... 20
Navigating DVD disc menus .............................................. 22
Navigating Video CD PBC menus .................................... 22
Navigating DVD-RW discs menus .................................... 22
5 Playing Discs
Introduction .......................................................................... 23
Finding what you want on a disc ..................................... 23
Still Frame/Slow Play/Frame advance playback ........... 24
Switching camera angles .................................................... 25
Switching subtitles .............................................................. 25
Switching audio language .................................................. 26
Switching audio channel (DVD-Audio) .......................... 26
Switching audio channel
(DVD-RW/Video CD/CD/MP3) ...................................... 26
Making a program list ......................................................... 27
Programming tips................................................................. 28
Using random play .............................................................. 29
Using repeat play ................................................................ 30
Bookmarking a place in a disc
(LAST MEMORY) ................................................................. 31
Memorizing disc settings
(CONDITION MEMORY) .................................................. 32
Using setup menu shortcuts
(FUNCTION MEMORY)..................................................... 33
Displaying disc information .............................................. 34
6 Playing MP3s
Playing MP3s ........................................................................ 35
Searching for folders and tracks ...................................... 36
Using random play .............................................................. 36
Using repeat play ................................................................ 36
Displaying MP3 information ............................................. 36
Using the MP3 Navigator.................................................. 37
Making a program list of MP3 tracks .............................. 38
7 DVD Setup Menu
Using the Setup menu ........................................................ 39
Setup Menu Mode............................................................... 39
OSD Settings ........................................................................ 40
Audio settings....................................................................... 40
Video settings ....................................................................... 47
Language settings ................................................................ 52
General settings ................................................................... 55
8 Additional Information
Handling discs ...................................................................... 58
Storing discs ......................................................................... 58
Discs to avoid ....................................................................... 58
Cleaning the pickup lens ................................................... 58
Problems with condensation ............................................ 58
Hints on installation ........................................................... 59
Moving the player................................................................ 59
Glossary .................................................................................60
Troubleshooting ................................................................... 62
Resetting the Player ............................................................65
Country Code List............................................................... 66
Language code list .............................................................. 66
Specifications ....................................................................... 69
5

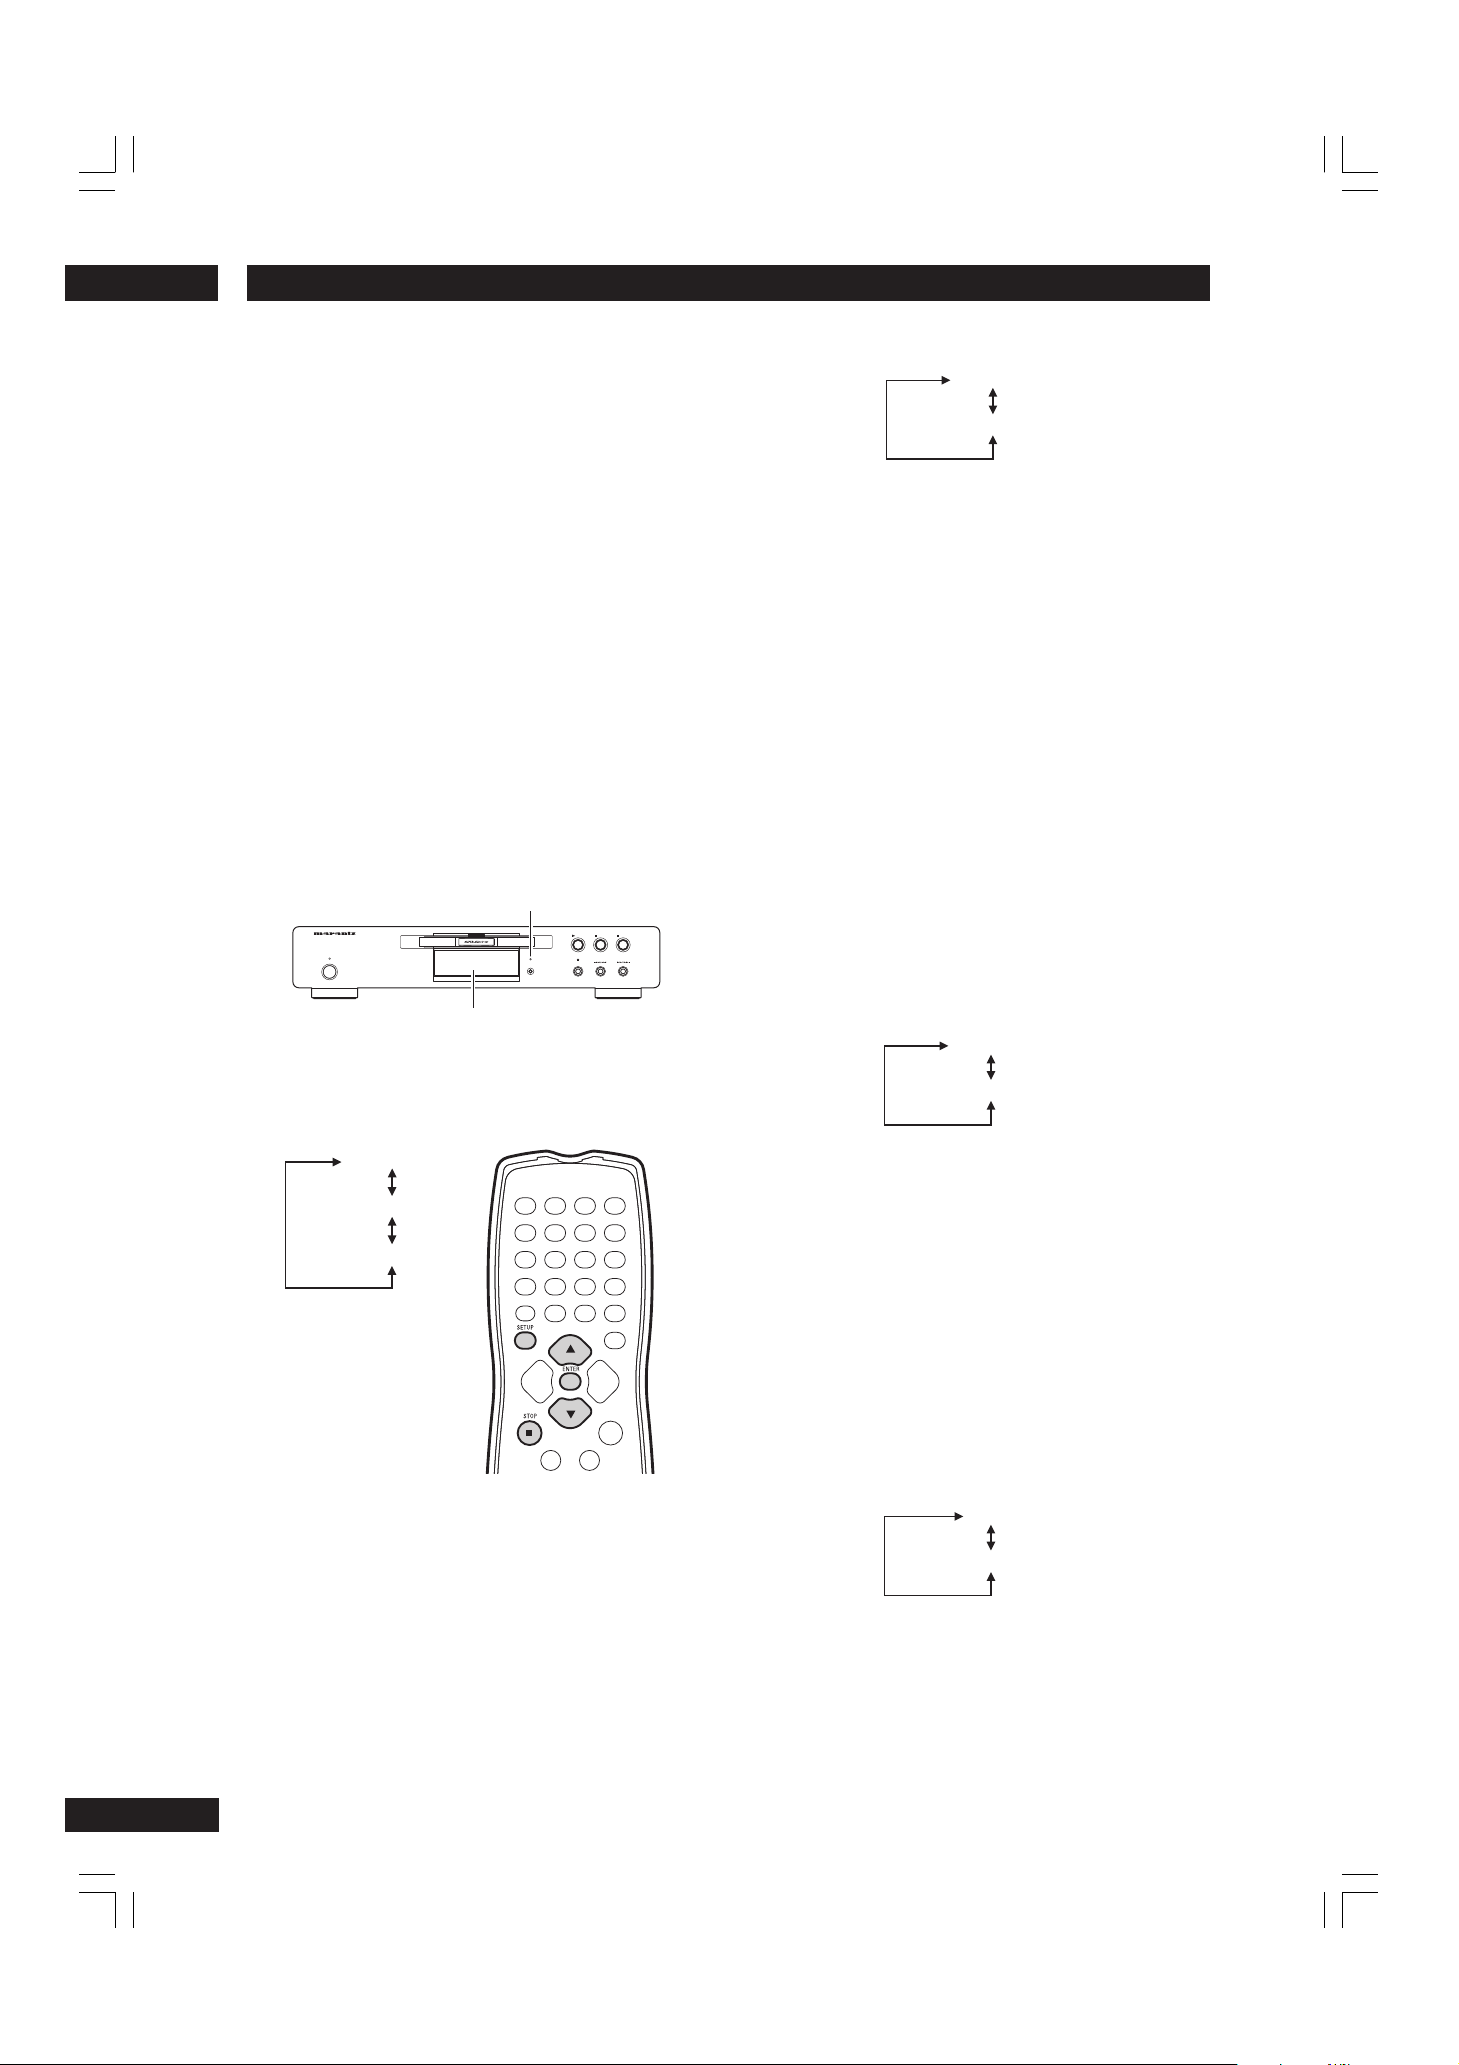
1
Before You Start
Features
An HDCP-compatible DVI-D (digital
RGB) terminal is provided for the
realization of the very highest picture
quality by fully digital transmission
This unit is equipped with an HDCP-compatible
digital image output terminal (DVI-D) to realize
copyright protection.
Direct digital transmission without analog
conversion of DVD image data makes it possible
to enjoy real-life images without any image
deterioration resulting from AD/DA conversion.
525 line digital progressive-scan
component video output
Compared to standard interlaced video, progressive scan effectively doubles the amount of video
information fed to your TV or monitor. The result
is a stable, flicker-free image. (Check your TV/
monitor for compatibility with this feature.)
For the very highest picture quality, try watching
a movie on DVD-Video on a progressive-scan
compatible TV.
Video Adjust
This new type of DNR (Digital Noise Reduction) for encoding video enables you to
adjust the video settings on a more detailed
and exact level. There are three possible
settings to choose from. These include: TV
(CRT), PDP, and Professional. This technology can remember which setting you've
chosen and employ it at the proper time.
(see page 49).
High quality 24-bit/192kHz DAC
The high specification 24-bit/192kHz DAC
delivers dynamic, smooth and expansive analog
sound from CDs and DVDs.
Graphical Setup Navigator
Setting up your DVD player is easy using the
graphical Setup Navigator. Answer the questions
that appear on-screen and the Setup Navigator
makes the necessary audio, video and language
settings for you (see page 17).
Superlative audio performance with
DVD-Audio, Dolby*1 Digital and DTS
software
R
Logos: 1
The DV8400 delivers breathtaking sound quality
with Dolby Digital and DTS discs.
TruSurround
Logo:
When used with stereo sources, TruSurround
creates a realistic surround-sound effect using
just two speakers (see page 42).
*3
MP3 compatibility
This player is compatible with CD-R, CD-RW and
CD-ROM discs that contain MP3 audio tracks
(see pages 8, 35).
*2
Energy conservation design
This unit is designed to reduce electrical power
consumption by automatically switching to
standby mode after 30 minutes of non-use.
*1Manufactured under license from Dolby
Laboratories. “Dolby” and the double-D symbol
are trademarks of Dolby Laboratories. Confidential unpublished works. © 1992-1997 Dolby
Laboratories. All rights reserved.
*2“DTS” and “DTS Digital Surround” are regis-
tered trademarks of Digital Theater Systems,
Inc.
*3TruSurround, SRS and
trademarks of SRS Labs, Inc. TruSurround
technology is incorporated under license from
SRS Labs, Inc.
®
symbol are
6
Before You Start
1
What’s in the box
Thank you for buying this MARANTZ product. Please confirm that the following
accessories are in the box when you open it.
• Remote control
• AA/R6P dry cell batteries x2
• Audio/Video cable (yellow/red/white)
• System control cable
• Power cable
• Operating instruction (this manual)
• Warranty card
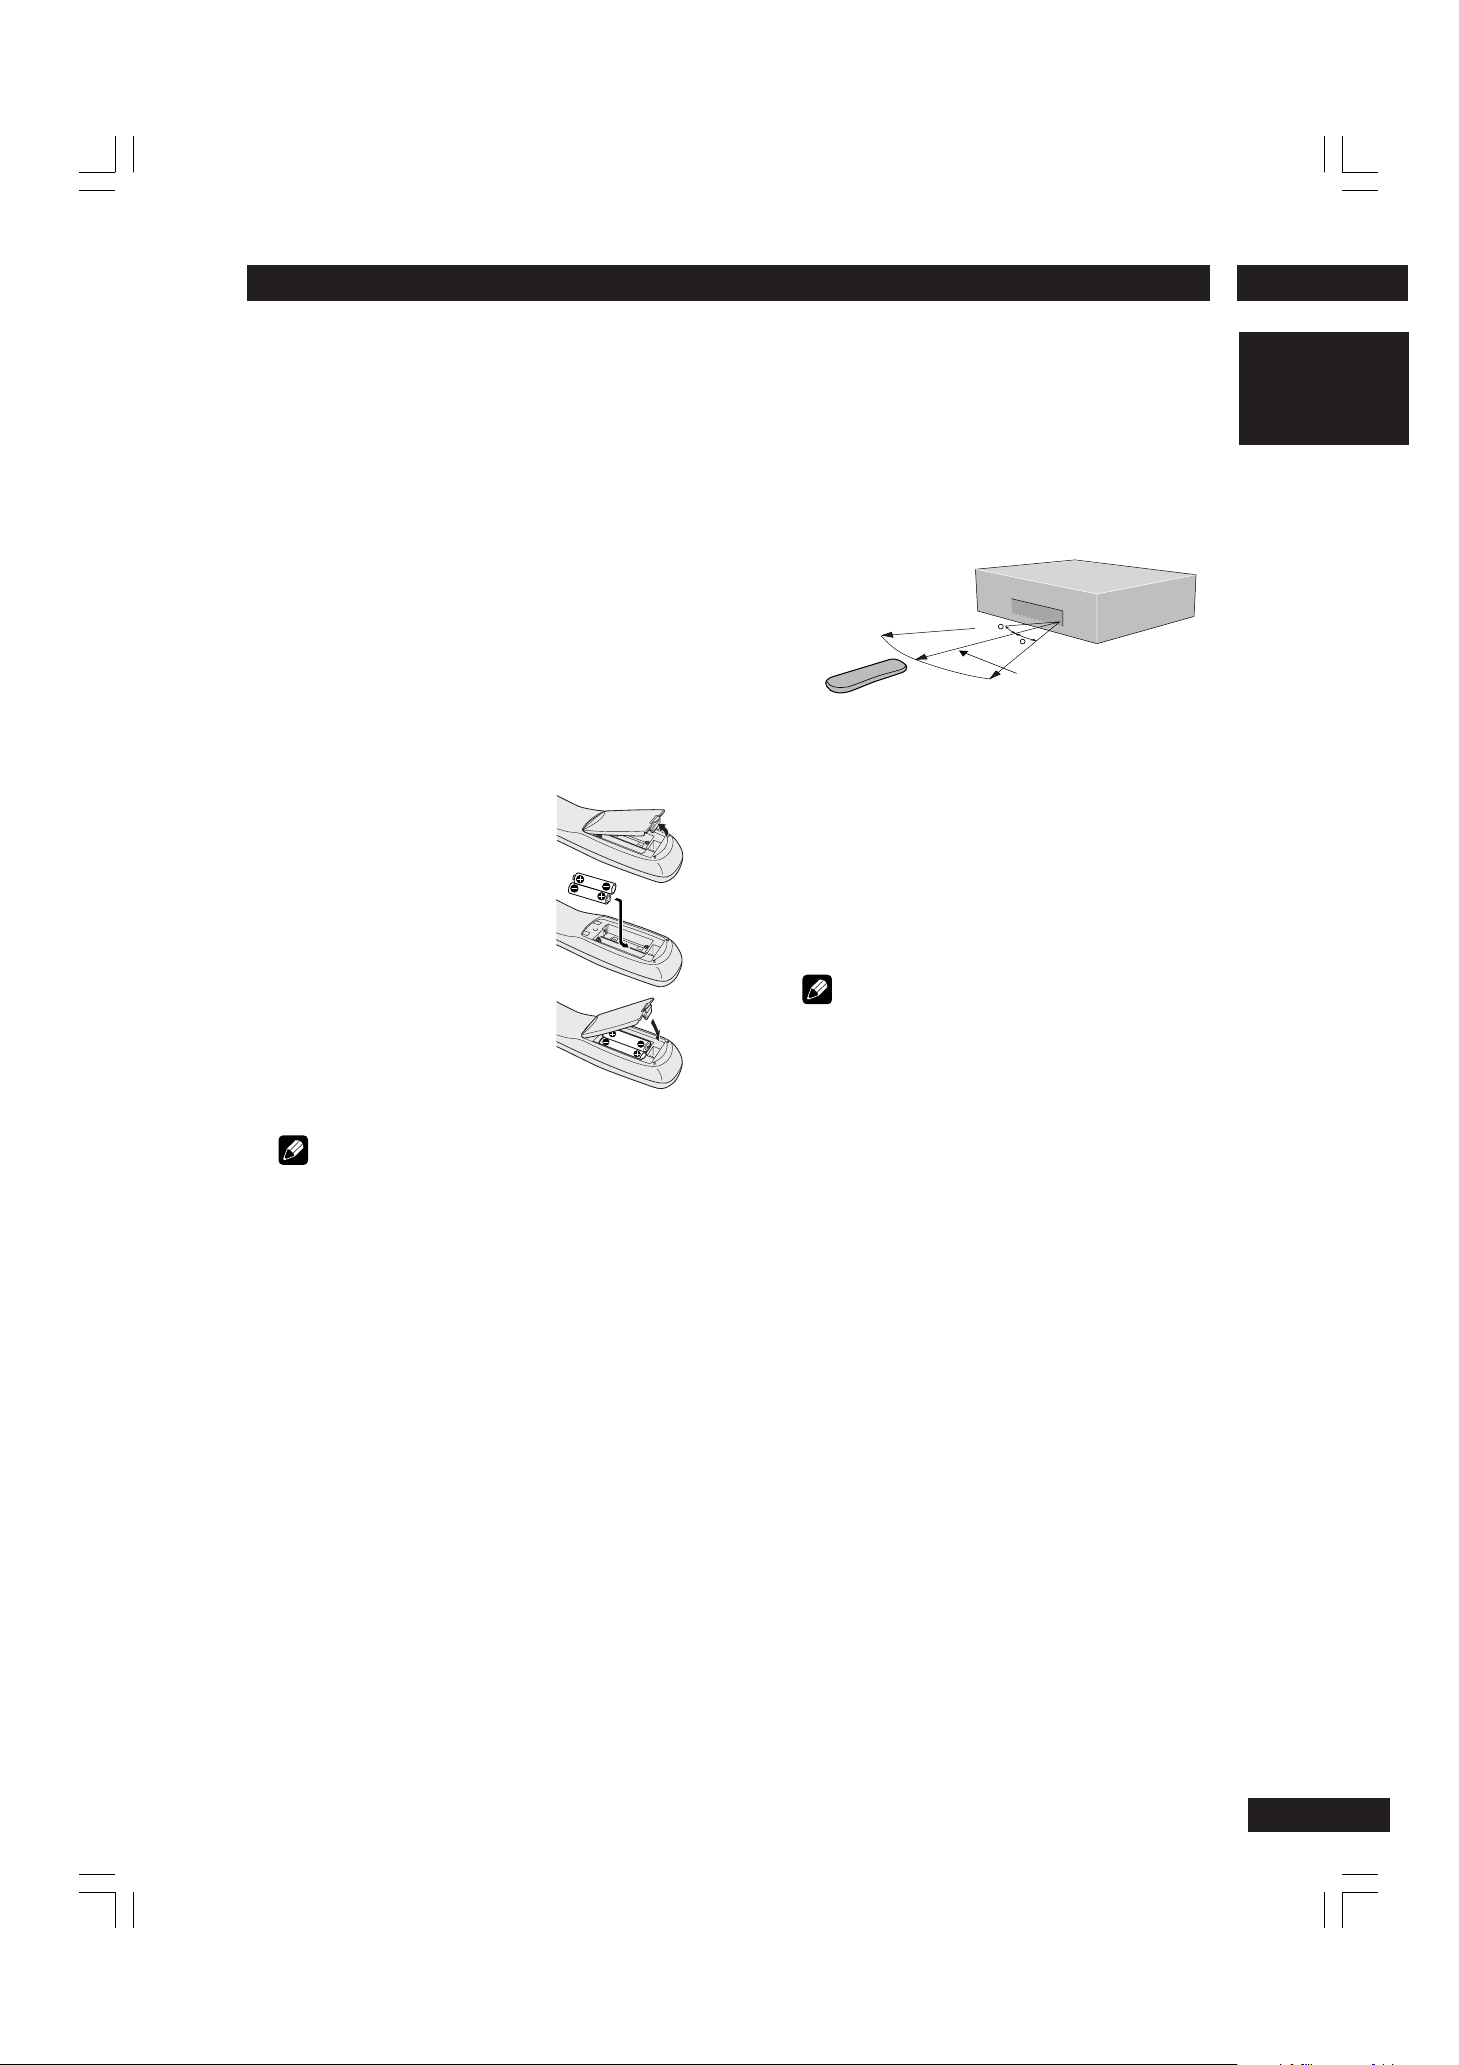
Putting the batteries in the
remote control
1 Open the battery com-
partment cover on the
back of the remote
control.
2 Insert two AA/R6P
batteries into the battery
compartment following
the indications (ª, ·)
inside the compartment.
3 Close the cover.
Using the remote control
Keep in mind the following when using the
remote control:
• Make sure that there are no obstacles between
the remote and the remote sensor on the unit.
• Use within the operating range and angle, as
shown.
30
30
5m (17 feet)
• Remote operation may become unreliable if
strong sunlight or fluorescent light is shining on
the unit’s remote sensor.
• Remote controllers for different devices can
interfere with each other. Avoid using remotes
for other equipment located close to this unit.
• Replace the batteries when you notice a fall off
in the operating range of the remote.
Note
When using this player independently, set a
REMOTE CONTROL switch on the rear panel to
INTERNAL. (page 10)
English
Note
Incorrect use of batteries can result in hazards such
as leakage and bursting. Please observe the
following:
• Don’t mix new and old batteries together.
• Don’t use different kinds of battery together—
although they may look similar, different
batteries may have different voltages.
• Make sure that the plus and minus ends of each
battery match the indications in the battery
compartment.
• Remove batteries from equipment that isn’t
going to be used for a month or more.
When disposing of used batteries, please comply
with governmental regulations or environmental
public instruction’s rules that apply in your
country or area.
7

1
Before You Start
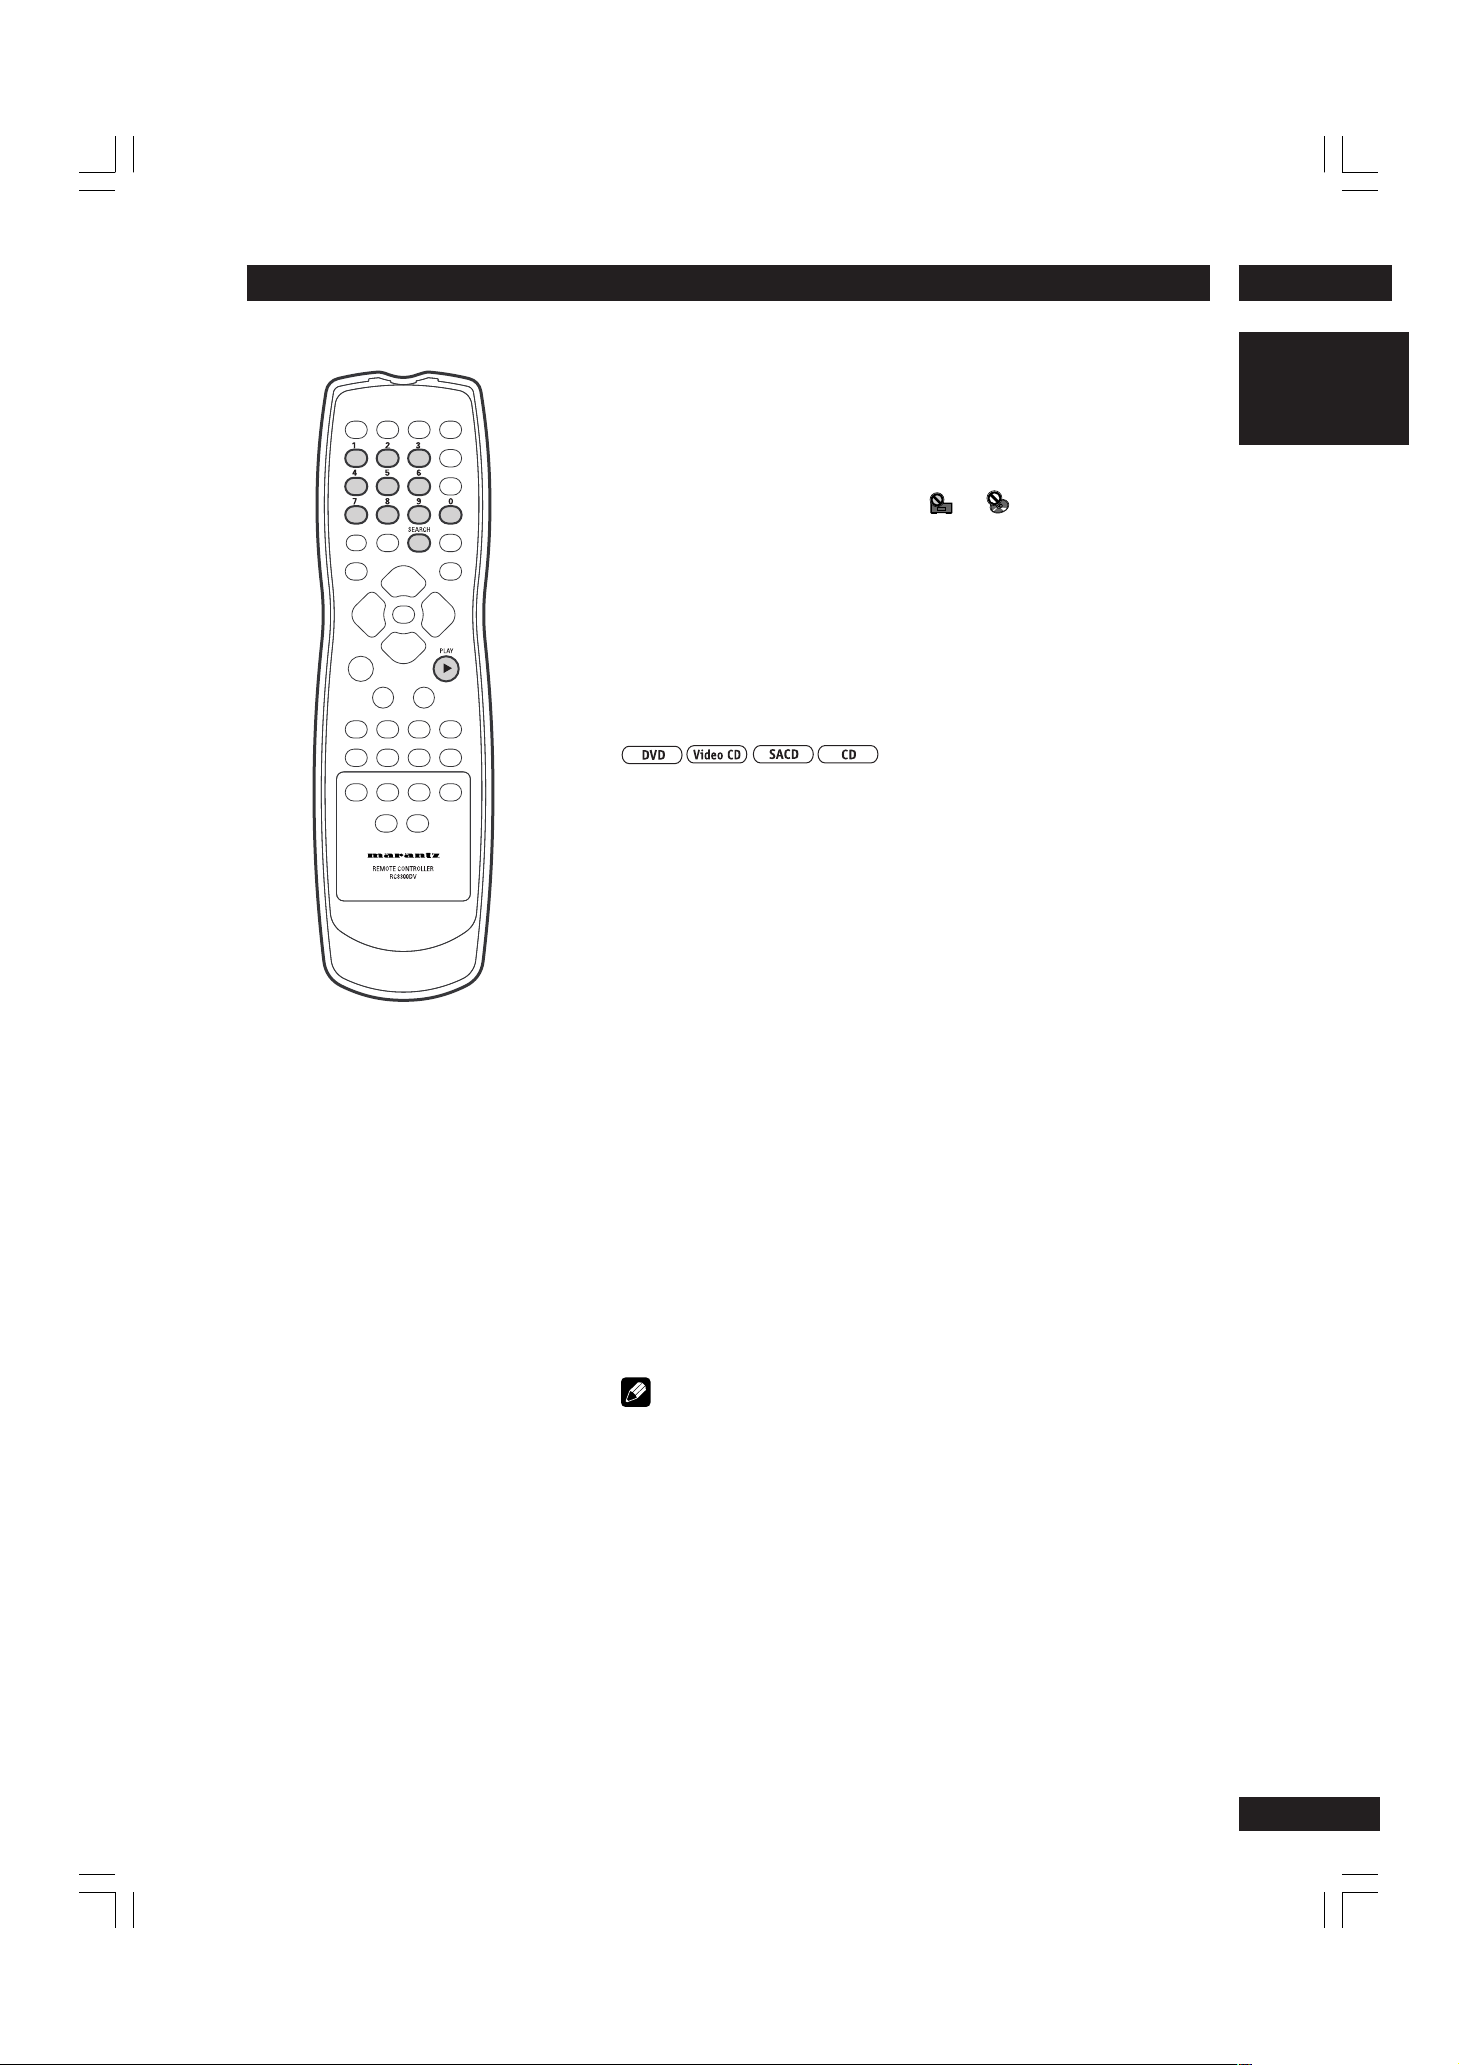
Discs compatible with this player
Any disc that displays one of the following
logos should play in this player. Other
formats, including DVD-RAM, DVD-ROM,
CD-ROM (except those that contain MP3
files) and Photo CD will not play.
DVD Video compatibility:
• Logos:
• Single-sided or double-sided discs
• Single layer or dual layer discs
• Dolby Digital, DTS, MPEG or Linear PCM digital
audio
• MPEG-2 digital video
Discs are generally divided into one or more titles.
Titles may be further subdivided into chapters.
DVD Audio compatibility:
• Logos:
• Single sided discs
• Single layer or dual layer discs
• Linear or packed PCM digital audio
• Some discs may contain MPEG-2 video, and
Dolby Digital, DTS or MPEG digital audio
Discs are generally divided into one or more
groups. Groups may be further subdivided into
tracks.
DVD-R compatibility:
This unit can play DVD-R discs. Please note the
following points when using these discs:
• Logo:
• This unit can play DVD-R discs recorded as
DVD video format.
• When playing a DVD-RW disc that was edited
on a DVD recorder, you may see scenes from
just before the edited point.
• Up to 20 characters of a title name can be
displayed.
Audio CD compatibility:
• Logos:
• 12cm (5in.) or 8cm (3in.) discs
• Linear PCM digital audio
• CD-Audio, CD-R* and CD-RW* formats
CDs are divided into tracks.
*This unit can play CD-R and CD-RW discs
recorded in CD Audio or Video CD format, or with
MP3 audio files.
*Some copy-controlled CDs may not conform to
official CD standards. They are special discs and
may not play on the DV8400.
Video CD compatibility:
• Logo:
• 12cm (5in.) or 8cm (3in.) discs
• MPEG-1 digital audio
• MPEG-1 digital video
Video CDs are divided into tracks.
Super Audio CD compatibility:
• Logo:
• Single layer, dual layer or Hyblid layer
• 12cm (5in.) or 8cm (3in.) discs
• Digital audio (DSD)
Super Audio CDs are divided into tracks.
DVD-RW compatibility:
This unit can play DVD-RW discs. Please note the
following points when using these discs:
• Logo:
• This unit can play DVD-RW discs recorded as
DVD video format or DVD video recording
format.
• DVD-RW discs that were recorded with copyonce only permission cannot be played. The
message, ‘COPY PROTECT PROGRAM,
UNPLAYABLE’ appears in the display during
these parts of the disc.
• When playing a DVD-RW disc that was edited
on a DVD recorder, the screen may go momentarily black at the edited point.
8

Before You Start
1
DVD Video regions
All DVD Video discs carry a region mark on
the case somewhere that indicates which
region(s) of the world the disc is compatible with. Your DVD player also has a region
mark, which you can find on the rear panel.
Discs from incompatible regions will not
play in this player. Discs marked ALL will
play in any player.
MP3 compatibility information
• The CD-ROM must be ISO 9660 compatible.
• Files should be MPEG1 Audio Layer 3 format, 44.1
or 48kHz. Incompatible files will not play and
“UNPLAYABLE MP3 FORMAT” will be displayed.
• Not compatible with some variable bit-rate (VBR)
files.
• VBR files may not show play times correctly.
• This player only plays tracks that are named with
the file extension “.mp3” or “.MP3”.
• This player is not compatible with multi-session
discs. If you try and play a multi-session disc, only
the first session will be played.
• Use CD-R or CD-RW media for recording your MP3
files. The disc must be finalized in order to play.
• Audio encoded at 128Kbps should sound close to
regular audio CD quality. Although this player will
play lower bit-rate MP3 tracks, the sound quality
becomes noticeably worse at lower bit-rates.
• Only the first 8 characters of folder and track names
(excluding the “.mp3” extension) are displayed.
• This player can recognize a maximum of 250 folders
and 250 tracks. Discs containing more than 250
folders or tracks will play, but only the first 250
folders/tracks.
Caution!
• DVD-R/RW and CD-R/RW discs recorded using a
personal computer or a DVD or CD recorder may
not play if the disc is damaged or dirty, or if there
is dirt or condensation on the player’s lens.
• If you record a disc using a personal computer,
even if it is recorded in a compatible format, there
are cases in which it may not play because of the
settings of the application software used to create
the disc. (Check with the software publisher for
more detailed information.)
• Unfinalized DVD-R/RW discs cannot be played.
• Unfinalized CD-R/RW discs can be played, but not
all time information (playing time, etc.) will be
displayed.
• For more information on using DVD-R/RW and
CD-R/RW discs, see Handling discs starting on
page 58.
English
9
Connecting Up2
Easy Setup
This easy setup is the minimum set of connections you need to start watching DVD video
discs. Both sound and picture are fed directly to
your TV using the supplied Audio/Video cables.
For other possible connections, see pages 11
and 12.
Important
Before making or changing any rear panel connections,
make sure that all components are switched off and
unplugged from the wall outlet.
Connect to a composite video input
1
on your TV using the supplied Audio/
Video cable.
Y
C
/P
BB
C
/P
RR
COMPONENT
DVI-D OUT
(HDCP)
VIDEO
VIDEO OUTPUT
DVI V.LEVEL
NORMAL EXPAND
1
RS232C
INTERNAL
EXTERNAL
OUT
IN
S1/S2
2
REMOTE CONTROL
2
Connect to a pair of stereo audio
OPTICAL
DIGITAL
OUTPUT
inputs on your TV using the
INTERNALEXTERNAL
supplied Audio/Video cable.
Connecting audio/video cables
Be sure to insert each
plug fully for the best
connection. The plugs
and jacks are colourcoded to make connection easier.
Connecting system control cables
By connecting this DVD player to another
Marantz audio component using a supplied
System Control cable, you can remotely
operate the components as a single system.
• When connecting to component with a remote
sensor (such as the SR8300, SR7300), be sure
to connect the REMOTE CONTROL IN jack of
this DVD player to the REMOTE CONTROL
OUT jack of the component with the remote
sensor.
• When connecting to component which is not
equipped with a remote sensor, be sure to
connect the component to the REMOTE
CONTROL OUT jack of this DVD player.
RS232C terminal
Control terminal for use
by custom installers.
L
L
R
R
1
COAXIAL
FRONT
2
AUDIO OUTPUT
SURR.
Synchronized power on and off
• Connect with the remote control output jack of
a component (such as the SR8300, SR7300)
which is compatible with Marantz remote
control system. The remote control allows to
switch the power of this DVD player to “POWER
ON and Standby mode”.
Note
Be sure to leave power switch on the Front
panel in the power mode.
Remote switch
• When using this DVD player independently, set
this switch to INTERNAL. When using this DVD
player in a system with a Marantz receiver
equipped with a remote sensor, set the switch
to EXTERNAL.
CENTER
SUB W.
3
Plug into a standard AC
wall outlet.
10
2Connecting Up
Home theater video connections
This player outputs video in a number of different
ways. Choose the one most suitable for your
system using the guide below.
If your TV has a component
1
video input, we recommend
using it to connect directly to
the COMPONENT VIDEO
OUT of this player. Use the
standard 3-jack component
video ouput.
Y
C
/P
BB
C
/P
RR
COMPONENT
DVI-D OUT
(HDCP)
VIDEO
VIDEO OUTPUT
DVI V.LEVEL
NORMAL EXPAND
1
S1/S2
2
If your TV and projector have a
DVI-D terminal for Video Input,
we recommend using it to
connect directly to the DVI-D
out of this player.
RS232C
EXTERNAL
OUT
IN
REMOTE CONTROL
INTERNAL
OPTICAL
DIGITAL
OUTPUT
COAXIAL
1
FRONT
2
L
R
AUDIO OUTPUT
Important
Before making or changing any rear panel connections,
make sure that all components are switched off and
unplugged from the wall outlet.
DVI V.LEVEL Switch
When connecting the DVI unit, black may rise to the
surface depending on the display. If that happens,
set the switch to Expand.
The DVI V.LEVEL switch switches between the
following output image data ranges
Normal: 16 (black) – 235 (white)
Expand: 0 (black) – 246 (white)
CENTER
L
R
SUB W.
SURR.
English
2
If a component input is not available to you, connect this
player to your TV or AV receiver using either the VIDEO or S-
VIDEO jacks.
Connecting S-Video cables
S-Video cables will only plug in one way, so make
sure the plug is correctly lined up with the jack
before inserting. Be sure to fully insert for a good
connection.
S-Video or composite video?
S-Video should give a better picture, so if you
have an S-Video input, use it. S-Video cables are
available from any good audio/visual dealer.
DVI output format (for NTSC replay)
System : 480/60p
Resolution : 720 x 480
Vertical frequency : 60 Hz
Horizontal frequency : 31.5 kHz
P : Indicates Progressive (progressive scan)
NTSC : A broadcast format using primarily in
Japan, the U.S., Canada, Taiwan and
Korea.
3
Plug into a standard AC
wall outlet.
Note
• The DVI output of this unit is HDCP compatible.
When watching DVI output images with this unit,
it is necessary to use a TV or display with HDCP
compatible DVI input.
• There may be no Image output if connected to a
TV or display that is not compatible with the
above format.
• Refer to the instruction manual of the TV or
display to be connected to this unit for detailed
information regarding the DVI-D terminal.
Notification
Concerning HDCP compatible DVI-D
output
This product is equipped with an HDCP
compatible DVI-D output terminal, but its
output format is not formally authorized at
this time for copyright protection reasons.
Therefore, when it is shipped, this output is
not possible. When the format has been
formally authorized, an upgrade will provide
compatibility necessary to perform this
output.
11

Connecting Up2
Home theater audio connections
This player outputs multi-channel audio in both
analog and digital form. Check the manual for
your amplifier/receiver to see what equipment it
is compatible with (especially which digital
formats—Dolby Digital, DTS, etc.—it can
decode).
Important
Before making or changing any rear panel connections,
make sure that all components are switched off and
unplugged from the wall outlet.
If your amplifier has
1
stereo inputs only,
connect them here.
If your amplifier has 5.1 channel
2
analog inputs, connect them here.
Connect to the FRONT L (left)/R
(right), SURROUND L/R, CENTER
and SUBWOOFER inputs of your
amplifier.
Y
C
/P
BB
C
/P
RR
COMPONENT
Connect to the coaxial or optical input of your
34
DVI-D OUT
(HDCP)
VIDEO
VIDEO OUTPUT
DVI V.LEVEL
NORMAL EXPAND
1
RS232C
1
INTERNAL
2
REMOTE CONTROL
EXTERNAL
OUT
IN
S1/S2
OPTICAL
DIGITAL
OUTPUT
COAXIAL
FRONT
2
L
R
AUDIO OUTPUT
L
CENTER
R
SUB W.
SURR.
Plug into a standard AC wall outlet.
amplifier, if it has digital inputs.
Connecting analog audio cables
Be sure to fully insert each plug for the best
connection. The plugs and jacks are colourcoded to make connection easier.
Connecting optical cables
Optical interconnects only
plug in one way, so make
sure the plug is correctly
lined up with the jack
before inserting. When
inserting the plug, the
protective shutter will
open and you should hear it click into position
when fully inserted.
Be careful that you do not
force the plug, because this could result in
damage to the
protective shutter, the cable, or the unit
itself.
OPTICAL
Connecting coaxial cables
Use an interconnect with a pin-type (also
called RCA or phono)
plug on each end to
connect up digital
coaxial-type jacks. Make
sure that the plug is
pushed fully home.
Note
If you listen to multichannel DVD-Audio
through one of the digital outputs, it will be
downmixed to stereo. Also, high sampling rate
DVD-Audio (192kHz or 176.4kHz) will be
downsampled to 96kHz, 88.2kHz, 48kHz or
44.1kHz, depending on the disc. Multi channel
and high sampling rate DVD-Audio is only
available through the analog outputs.
All DVD-Audio and all Super Audio CD audio
is output only through the analog outputs.
COAX
12
Controls & Displays
3
Display
1 2 3
V-PART
GRP
TITLE
&^ ¡
*
4 5 7 8 0 = ! #
V OFF
1 3 – Lights when a disc is playing
2 V-PART – Lights during playback of the video
part of DVD discs
3
– Lights during a multi-angle section of a
DVD-Video disc
4 V OFF – Indicates that video output is turned
off
5 Lights during repeat play
6 VCD – Lights when a Video CD is loaded
CD – Lights when a Audio CD is loaded
7 192kHz/96kHz – Indicates a DVD disc
containing high-sampling rate (192kHz/
96kHz) audio is playing
8 DVD – Lights when a DVD is loaded
9 DVD-AUDIO – Lights when a DVD-Audio disc
is playing
10
– Lights when a Super Audio CD is
loaded
11 LAST – Lights when the disc has a bookmark
memory (see page 31)
12 PROGRESSIVE – Lights when unit is
outputing 525 line progressive scan (noninterlaced) video.
13 COND – Lights when the disc has had
preferences set (see page 32)
14 SURROUND – Lights when playing a disc
with TruSurround switched on
15 DOLBY D – Lights when a disc with Dolby
Digital audio is playing
16
– Lights when Remote Control Signal is
received
6 9
192kHz
VCD
TRKD OFF
( ) _ ™ £
96kHz
CHP
-
PROGRESSIVE
LAST
TOTAL
+
~ @ $ %
SURROUND
COND
REMAIN
DOLBY D
DOWN MIX
L
LS
5.1CH
C
LFE
S
¢
R
RS
17 5.1CH – Lights when the audio ouput is set
to 5.1 channel
18 DOWNMIX – Lights when multi-channel
DVD-Audio, Dolby Digital, DTS or MPEG
audio is downmixed, for example to two
channel stereo
19 8 – Lights wheh a disc is paused
20 GRP – Indicates that the number below in the
character display is a DVD-Audio group
number
21 TITLE – Indicates that the number below in
the character display is a DVD-Video title
number
22 D OFF – Lights wheh unit is set to Digital Out
off
23 TRK – Indicates that the number below in the
character display is a DVD-Audio, CD, Video
CD or MP3 track number
24 CHP – Indicates that the number below in the
character display is a DVD-Video chapter
number
25 Character display
26 TOTAL – Indicates that the time shown in the
character display is the total playing time of
the disc
27 REMAIN – Indicates that the time shown in
the character display is the remaining playing
time of the disc
28
– Lights when a disc with DTS audio is
playing
29 L, C, R, LS, S, RS, LFE – show which channels
are recorded on the disc playing
English
13
Controls & Displays3
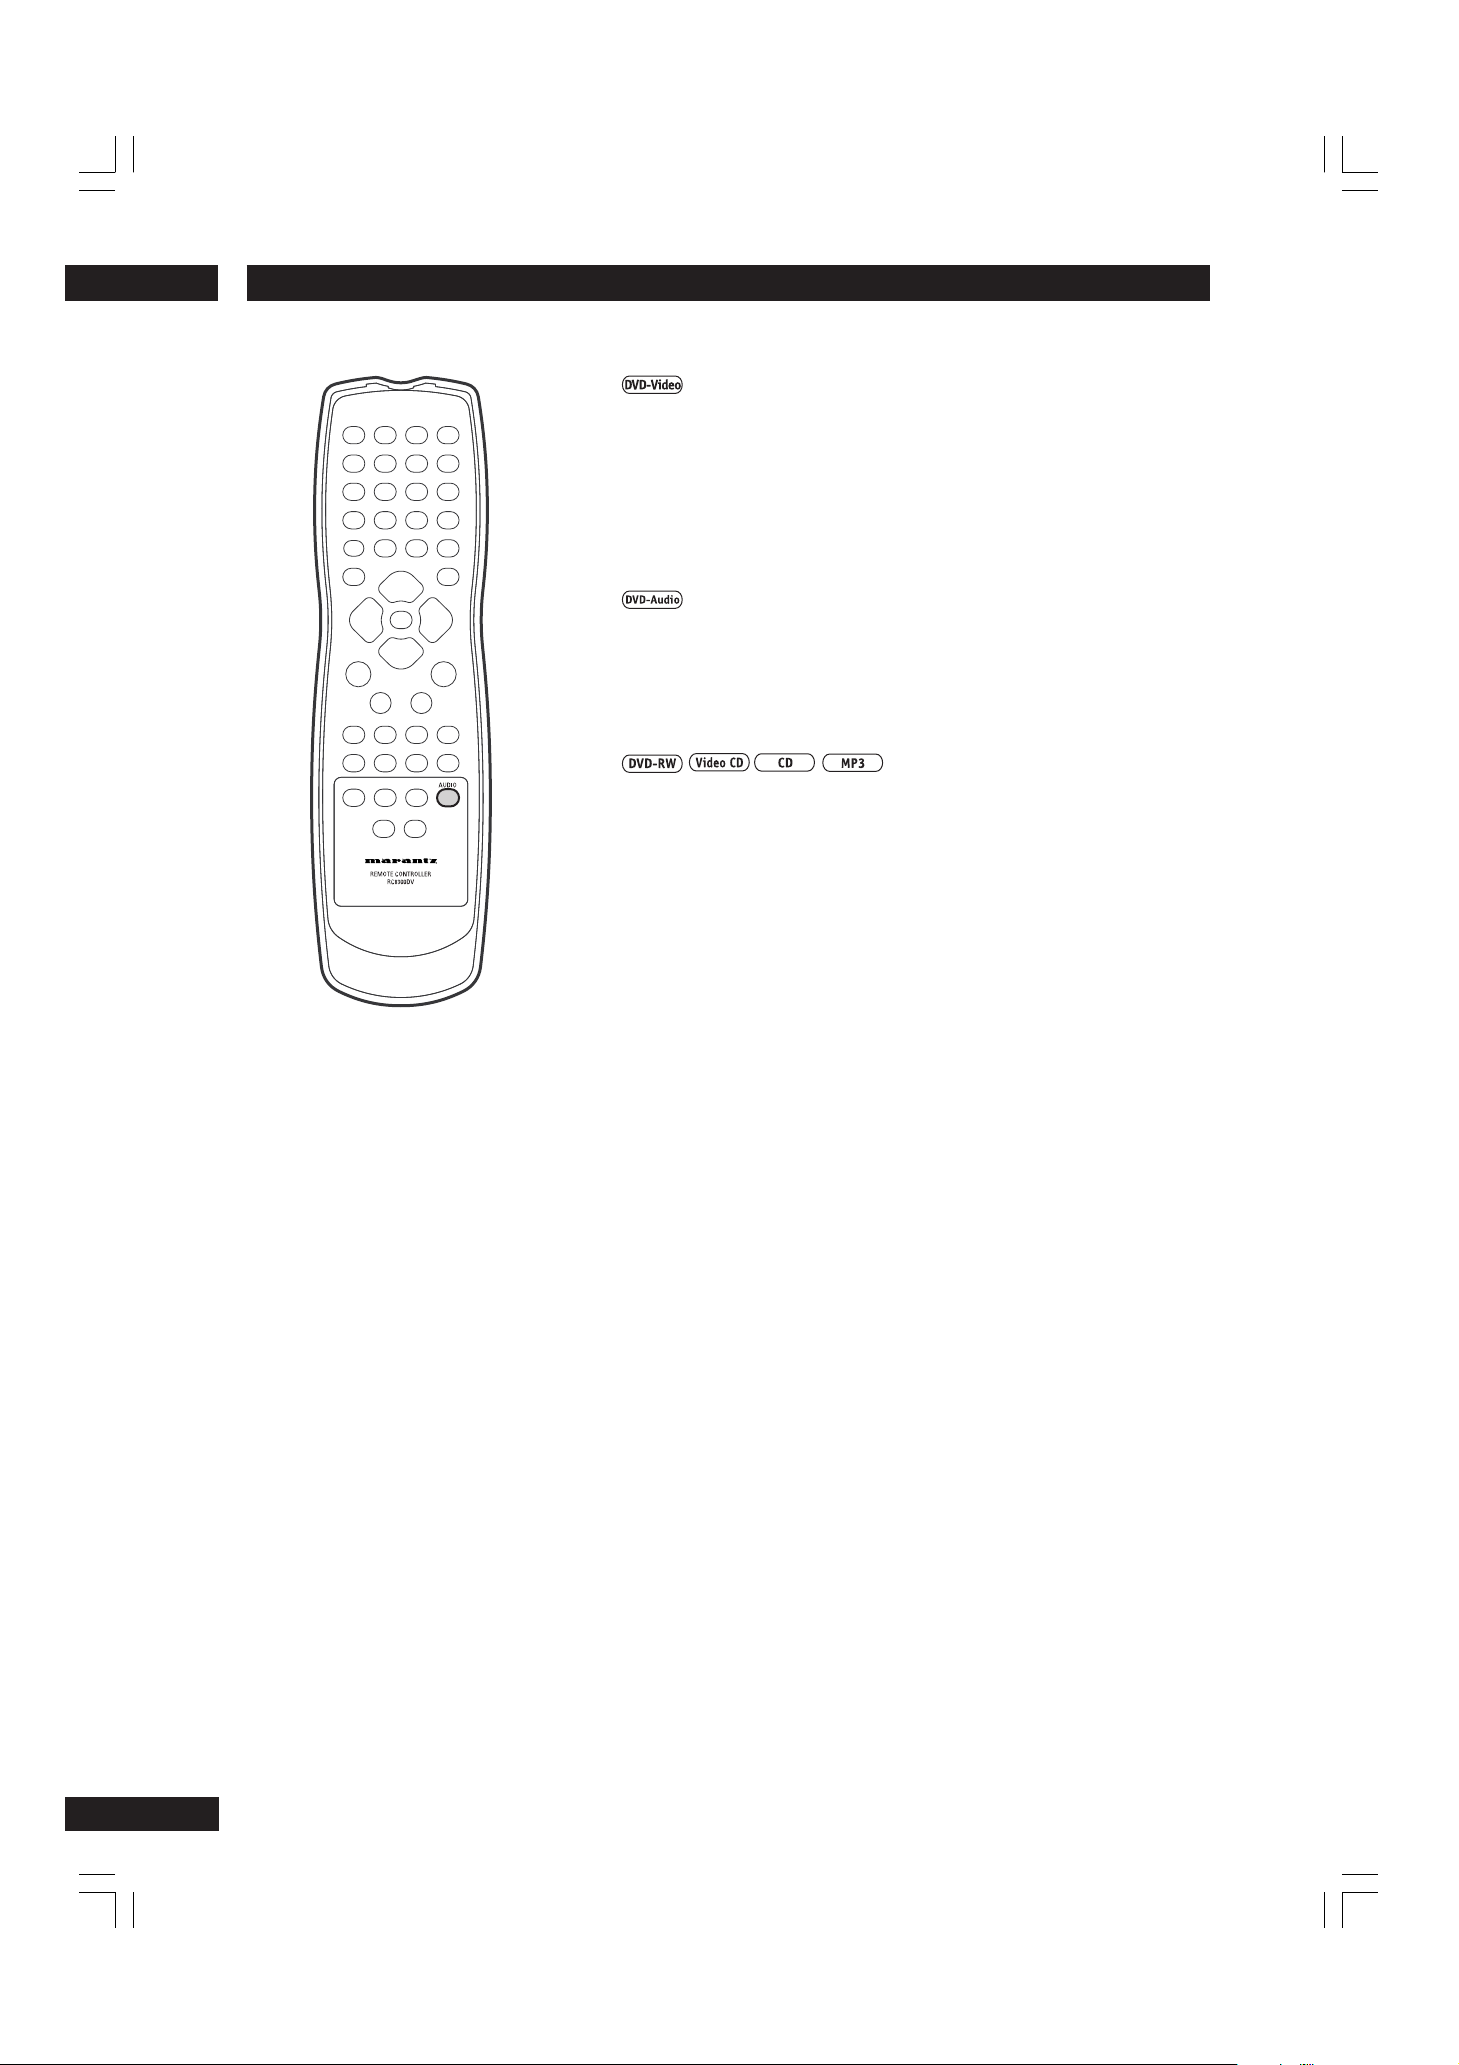
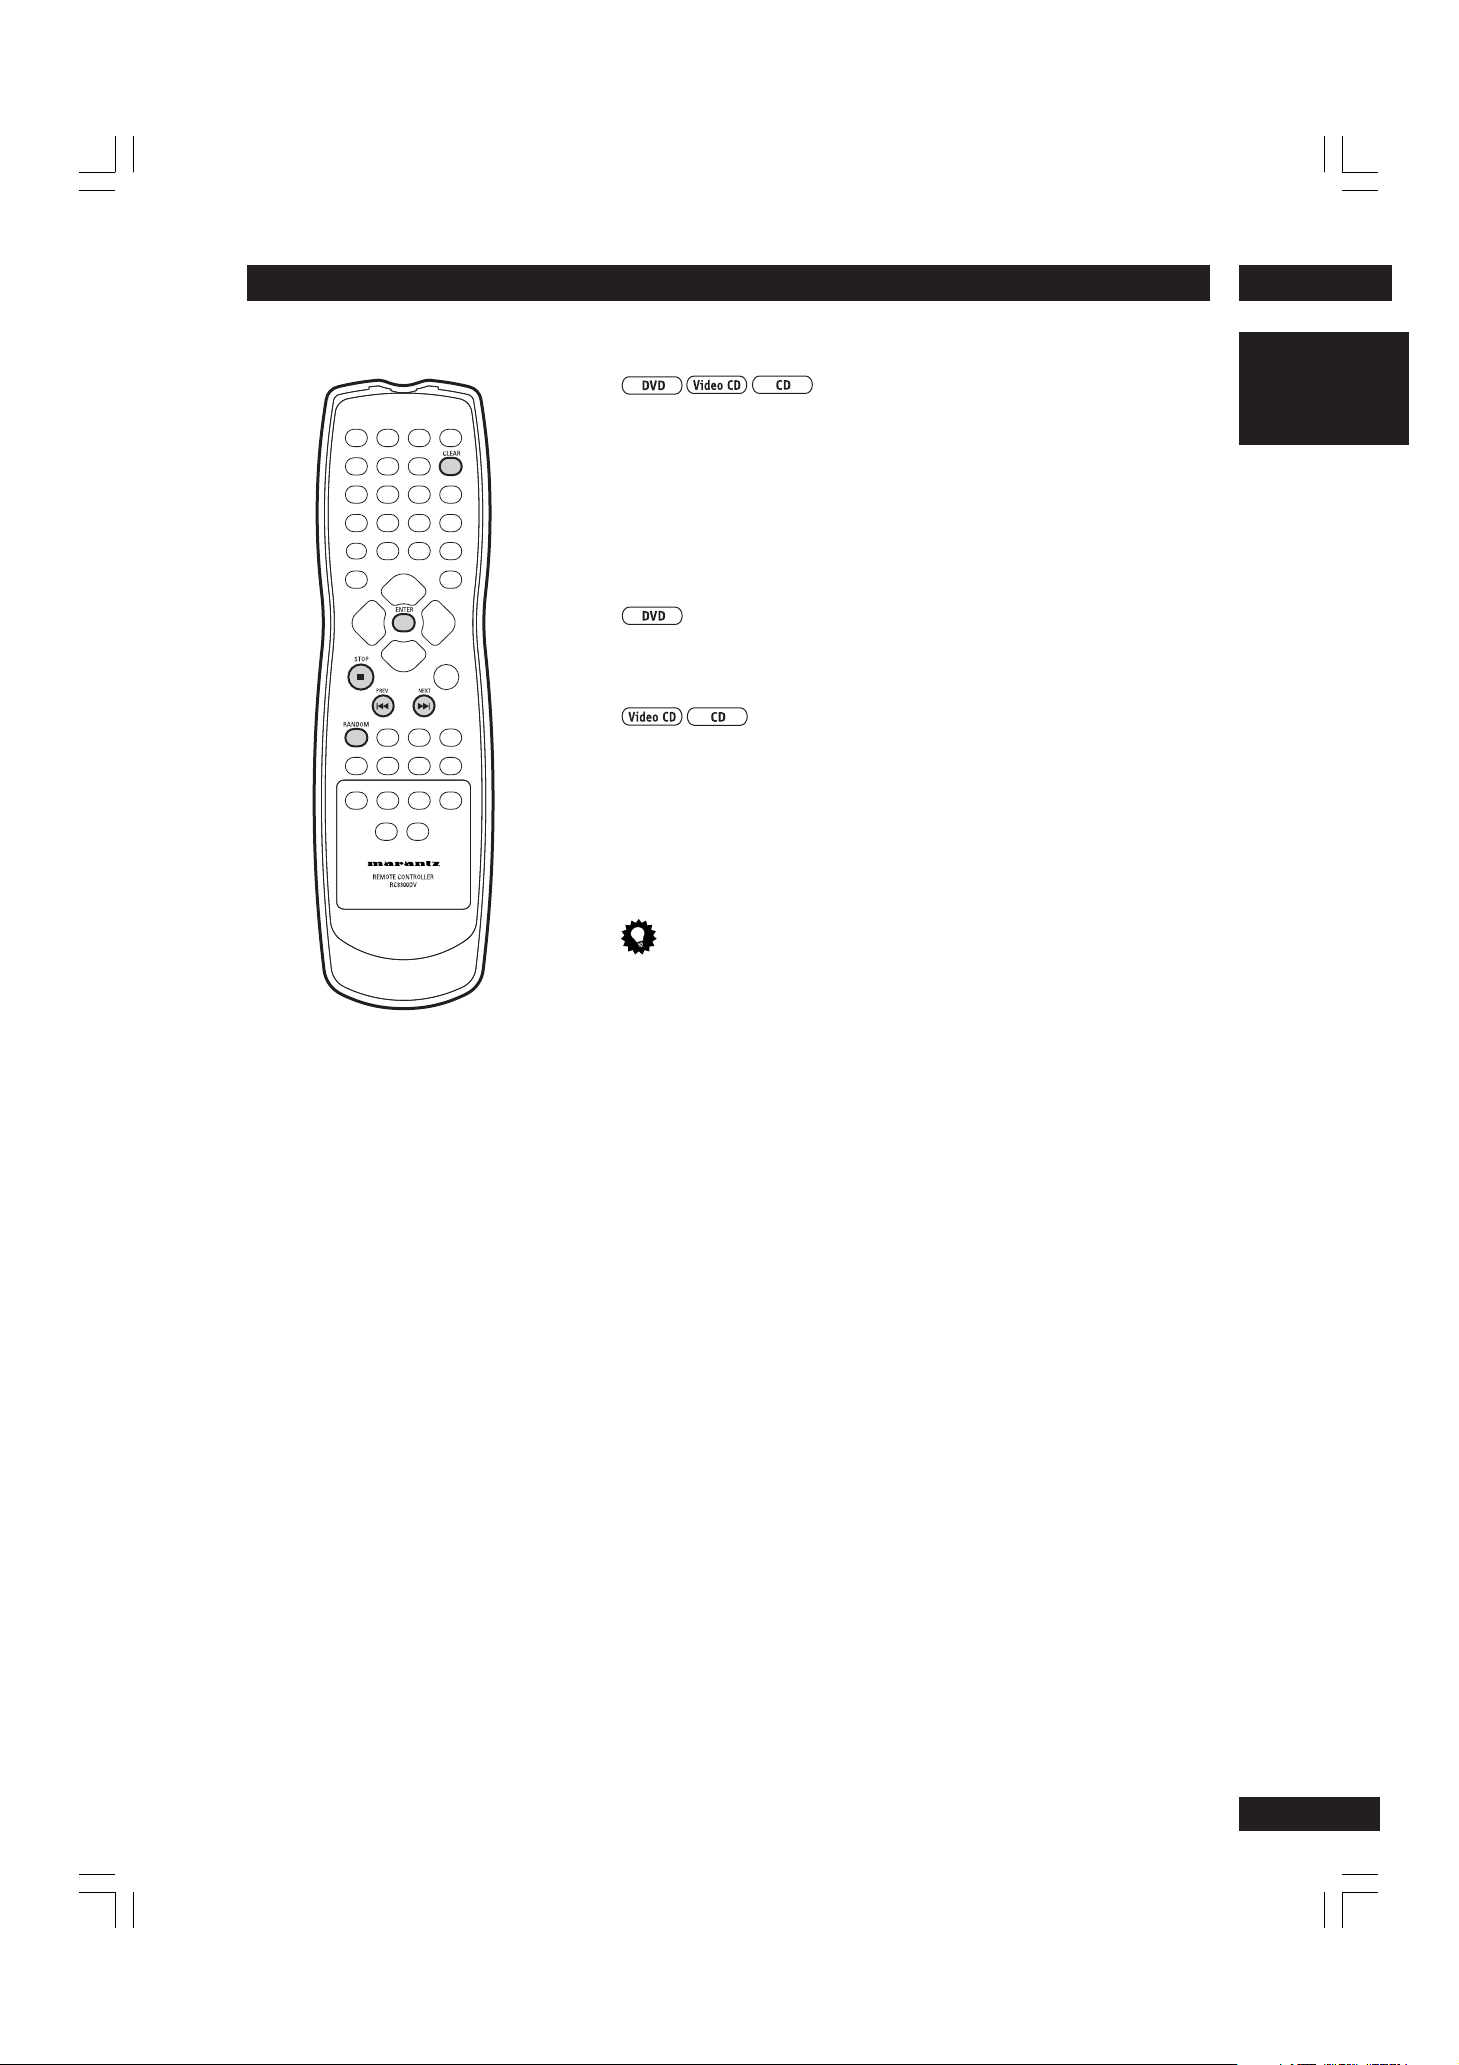
Remote control
1
2
3
4
5
6
7
8
9
0
=
~
!
@
#
$
%
^
&
*
(
)
_
+
¡
™
£
1 VIDEO ON/OFF – press to turn video
output off and on (page 51)
2 OPEN/CLOSE – Disc tray open/close
3 Number buttons – pages 21, 22
4 RETURN (
) – Return
5 PROGRAM – pages 27, 38
6 SETUP – pages 17, 39
7 Cursor (2/3/5/∞) / ENTER button –
page 22
8 7 – Stop
9 4¢ – Skip
10 8 – Pause
11 RANDOM – pages 29, 36
12 F.MEMO – Function memory (page 33)
13 VIDEO ADJ. – Video adjust (page 49)
14 DISPLAY – pages 34, 36
15 ANGLE – page 25
16 LAST MEMO – page 31
17 DIMMER – Press to change the display
brightness
18 POWER – switches player on or into
standby.
19 CLEAR – Clear
20 TOP MENU – page 22
21 SEARCH – page 23
22 MENU – page 22
23 3 – Play
24 1¡ – Scan
25 REPEAT — A-B – page 30
26 AUDIO – page 26
27 SUBTITLE – page 25
28 CONDITION MEMO – page 32
14
• This remote control supports two remote control codes: DVD1 and DVD2.
• When the unit is shipped from the factory, the remote control is set to DVD1.
• To set the remote control to DVD2, hold down both the “7 (Stop)” button and the “2” number button
on the remote control for at least five seconds. (If the batteries in the remote control are replaced
while the remote control is set to DVD2, the setting will revert to DVD1.)
• To set the remote control back to DVD1, hold down both the “7 (Stop)” button and the “1” number
button on the remote control for at least five seconds.
• To check which remote control code is set at any time, hold down both the Stop and Pause buttons; the
current setting (either “DVD1” or “DVD2”) will be displayed in the display window on the main unit.
• Also set the REMOT CODE on the FL menu to the same setting as the remote control. (This setting is
set to DVD1 when the unit is shipped from the factory.) (page 16)
Controls & Displays
3
Front panel
1
STANDBY
ON/OFF
POWER
1 POWER ON/OFF
2 Disc tray
3 3 – Play
4 7 – Stop
5 8 – Pause
6 Display – page 13
SACD/DVD PLAYER
English
2
V-PART
192kHz
VCD
GRP
96kHz
V OFF
TRKD OFF
TITLE
CHP
PROGRESSIVE
LAST
TOTAL
SURROUND
DOLBY D
COND
5.1CH
REMAIN
DOWN MIX
FL OFF
L
R
C
LFE
S
LS
RS
6
7 FL OFF – Lights when the display is switched
off using the FL OFF button and DIMMER
button on the remote unit.
8 0 – Disc tray open/close
9 4 /1 – Reverse scan/skip
10 ¡ /¢ – Forward scan/skip
345
STOP
OPEN/CLOSE
87 9 0
PAUSEPLAY
15
Getting Started4
Using the FL menu
The FL menu has been designed to set
“DISP MODE”, “AUTO P OFF” and
“REMOT CODE”.
The FL menu can not be used if a disc is
playing.
It is recommended to set the FL menu
before loading a DVD.
If a DVD has been loaded, be sure to press
STOP 7 twice before proceeding.
(If “RESUME” is displayed in the FL display,
press STOP 7.)
Selecting the FL menu
Press SETUP for longer than 1 sec.
The FL OFF indicator on the player turn on and
off.
FL menu is displayed in the FL display.
FL OFF
SACD/DVD PLAYER
STANDBY
ON/OFF
POWER
DISP MODE
FL menu
FL OFF
Use the cursor buttons (5/∞) to select the FL
menu you want as follows.
(Example)
DISP MODE
AUTO P OFF
REMOT CODE
STOP
PAUSEPLAY
OPEN/CLOSE
(Example)
DISP OFF
DISP ON
*
* Factory setting
Press ENTER you want to set.
The menu select is set.
• If you play a CD, MP3 or Super Audio CD while
DISP ON is selected, FL display and video
output shut off automatically. FL display is on
and video output is off during Stop. And if you
push the DIMMER button on the remote
control or FL OFF button on the front panel
during DISP ON, for three seconds, only FL
display is displayed.
• Depending on the disc, it may not operate
normally. When this happens, use it after
turning off DISP MODE.
AUTO P OFF setting
Select AUTO P OFF, then press ENTER.
Use the cursor buttons (5/∞) to select the type
of AUTO P OFF you want to set as follows.
(Example)
ON 30 MIN
OFF
Press ENTER you want to set.
The menu select is set.
• The standby mode is automatically selected to
save power if the player is left in the stop mode
for about 30 minutes.
*
* Factory setting
16
To exit the FL menu
When you have compleated setting up the FL
menu or if you want exit the FL menu. Press
SETUP to close the FL menu.
DISP MODE setting
Select DISP MODE, then press ENTER.
Use the cursor buttons (5/∞) to select the type
of DISP MODE you want to set as follows.
REMOT CODE setting
Select REMOT CODE, then press ENTER.
Use the cursor buttons (5/∞) down to select
the type of REMOT CODE you want to set as
follows.
(Example)
*
DVD 1
DVD 2
* Factory setting
Press ENTER you want to set.
The menu select is set.
• The DVD player support two remote control
codes: DVD 1 and DVD 2.
• Set the remote control code of the Remote
Control to the same setting.
• See page 14 for more information.
4Getting Started
Using the Setup Navigator
Before playing any discs, we strongly recommend using the
Setup Navigator. This makes all the basic DVD player settings for
you.
1 Press POWER button on the front panel to switch on.
Also turn on your TV and make sure that it is set to the correct video
input.
• The POWER button on the remote switches the player between
standby and on.
• If a disc that’s already loaded starts to play, press 7 to stop it.
Note
When it is required to remote control the power mode of this DVD
player, be sure to leave this switch in the power on mode.
2 Press SETUP.
The Setup Navigator on-screen display (OSD) appears:
Audio1
Setup Navigator
Setup using the Setup Navigator
V2
Video1
A2
Setup Navigator
Move
Language
Start
Auto Start Off
Select
General
SETUPENTER
Exit
English
Navigate all of the following OSDs using these controls:
Cursor (5/∞) – cursor up/down
ENTER – select the highlighted menu option
Cursor (2) – go back to the previous question.
The control possibilities for the current OSD are shown at the bottom
of each screen.
3 Select ‘Start’.
Audio1
Setup Navigator
Setup using the Setup Navigator
Press ENTER to select an option.
• If you decide you don’t want to use the Setup Navigator, select Auto
Start Off here instead.
V2
Language
Video1
A2
Setup Navigator
Move
Remember
General
Start
Auto Start Off
SETUPENTER
Select
Exit
17
Getting Started4
4 Choose an OSD menu language.
Audio1
Setup Navigator
Language
Select the On Screen Language
V2
Video1
A2
OSD Language
Move
Language
English
français
Deutsch
Italiano
Español
Select
General
SETUPENTER
Exit
5 Select the type of TV you have.
Audio1
Setup Navigator
TV Connection
Widescreen TV
16:9 aspect ratio
• See Aspect ratio in the Glossary on page 60 if
you’re unsure of the difference between
widescreen and standard TVs.
A2
Video1
TV Type
Move
V2
Language
Widescreen(16:9)
Standard(4:3)
Select
General
SETUPENTER
Exit
6 Select the type of analog audio connec-
tions you made to your amplifier/receiver.
7 If you selected 5.1 Channel audio connec-
tions in step 6, confirm which speakers are
connected to your amplifier.
Audio1
Setup Navigator
Amp Connection
Center speaker is connected
to an amplifier
Audio1
Setup Navigator
Amp Connection
Surround speakers are connected
to an amplifier
Audio1
Setup Navigator
Amp Connection
Sub–woofer is connected
to an amplifier
V2
Language
Video1
A2
Center Speaker
Move
V2
Language
Video1
A2
Surround Speakers
Move
V2
Language
Video1
A2
Sub–woofer
Move
General
PresentDolby Digital/DTS
Not Present
SETUPENTER
General
SETUPENTER
General
SETUPENTER
Exit
Exit
Exit
Select
PresentDolby Digital/DTS
Not Present
Select
PresentDolby Digital/DTS
Not Present
Select
Audio1
Setup Navigator
Amp Connection
2channel jacks for L/R
Video1
A2
Analog Jacks
Move
V2
Language
General
2 ChannelDolby Digital/DTS
5.1Channel
Not Connected
SETUPENTER
Select
Exit
• If you connected the audio output directly to
your TV following the Easy setup on page 10,
choose 2 Channel.
8 Confirm the digital audio formats your
amplifier is compatible with (if you made a
digital connection).
A2
Video1
Move
V2
Digital Jack
Language
General
Dolby Digital
Dolby Digital/DTS
Dolby Digital/MPEG
Dolby D/DTS/MPEG
PCM
Not Connected
SETUPENTER
Select
Exit
Audio1
Setup Navigator
Amp Connection
Compatible with Dolby Digital
• All options (except Not Connected) assume
PCM compatibility. The PCM option means only
compatible with PCM.
• More information on these audio formats is
available in the Glossary on page 60.
• Consult the manual that came with your
amplifier if you’re unsure about compatibility
with any of these formats.
18

4Getting Started
9 Confirm whether your amplifier is compat-
ible with 96kHz audio.
Audio1
Setup Navigator
Amp Connection
Digital jack not compatible with 96kHz
• You won’t see this screen if you selected Not
Connected in step 8.
• Selecting Don’t Know has the same effect as
selecting No: any 96kHz audio will be
downsampled to 48kHz. This is a more compatible sampling frequency. See Sampling frequency
in the Glossary on page 61 for more on this.
V2
Language
Video1
A2
96kHz PCM Audio
Move
General
No
Yes
Don't Know
Select
SETUPENTER
Exit
10 Select ‘Save Changes’ to make the settings.
A2
Video1
Move
V2
Language
Save Changes
Delete Changes
Start Again
Select
General
SETUPENTER
Exit
Audio1
Setup Navigator
Exit Setup Navigator
Changes are saved
English
11 Press SETUP to exit.
• You may not need to do this step, depending
on when you use the Setup Navigator.
Congratulations, set up is complete!
If you want to use the Setup Navigator again at
any time, it is available from the General menu.
Also, each individual setting can be changed
using the appropriate menu option—chapter 7
explains all menu options in detail.
19

Getting Started4
Playing discs
The basic playback controls for playing discs are covered here.
Further functions are detailed in the next chapter.
Note
Throughout this manual, the term ‘DVD’ means DVD-Video, DVDAudio and DVD-R/RW. If a function is specific to a particular kind of
DVD disc, it is specified.
1 Switch the player on.
If you’re playing a DVD or Video CD, also turn on your TV and make
sure that it is set to the correct video input.
2 Press OPEN/CLOSE to open the disc tray.
3 Load a disc.
Load a disc with the label side facing up, using the disc tray guide to
align the disc (if you’re loading a double-sided DVD disc, load it with
the side you want to play face down).
4 Press 3 to start playback.
If you’re playing a DVD or Video CD, a menu may appear. See page 22
for how to navigate these.
20

4Getting Started
Basic playback controls
Button What it does
3 Starts playback.
DVD and Video CD: if the display shows
RESUME, playback starts from the
resume point.
8 Pauses a disc that’s playing, or restarts a
paused disc.
7 Stops playback.
DVD and Video CD: Display shows
RESUME. Press 7 again to cancel the
resume function.
1 1. Press & hold for fast reverse scanning.
Release to resume normal playback.
2. Press once to start reverse scannning.
Press again to increase the scan speed.
(Super Audio CD, CD and Video CD have
two scan speeds; DVD has three.) Press
3 to resume normal playback.
¡ 1. Press & hold for fast forward scanning.
Release to resume normal playback.
2. Press once to start forward scannning.
Press again to increase the scan speed.
(Super Audio CD, CD and Video CD have
two scan speeds; DVD has three.) Press
3 to resume normal playback.
English
Important
While using the DVD playback controls, you may
see the or mark displayed on-screen.
• means that the operation is not allowed by
the player.
• means that the operation is not allowed by the
disc.
4 Skips to the start of the current track or
chapter, then to previous tracks/chapters.
¢ Skips to the next track or chapter.
Numbers 1. If the disc is stopped, playback starts
from the selected title/group (DVD) or
track number (Super Audio CD/CD/
Video CD).
2. If the disc is playing, playback jumps
to the start of the selected chapter or
track (within the current group for DVDAudio).
+10 Selects titles/groups/chapters/tracks 10
and over. (For example, for 24, press +10,
+10, 4.)
21

Getting Started4
Navigating DVD disc menus
Many DVD discs contain menus. Sometimes these
are displayed automatically when you start
playback; others only appear when you press
MENU or TOP MENU. For DVD Audio discs, use
TOP MENU.
Note
Some DVD-Audio discs feature a ‘bonus group’. To
access this group you have to input a password, which
you can find on the disc’s packaging. See page 57 for
more information.
Button What it does
TOP MENU Displays the ‘top menu’ of a DVD disc—this
varies with the disc.
MENU Displays a DVD disc menu—this varies with
the disc and may be the same as the ‘top
menu’.
RETURN Returns to the previously displayed menu
screen.
On some DVD-Audio discs featuring
browsable pictures, press to display the
browser screen.
Coursor Moves the cursor around the screen.
(2/3/5/∞)
ENTER Selects the current menu option.
Numbers Selects a numbered menu option (some discs
only).
+10 Selects a numbered menu option 10 and over.
(For example, for 24, press +10, +10, 4.)
(Some discs only.)
Navigating Video CD PBC menus
Some Video CDs have menus from which you
can choose what you want to watch. These
are called PBC (Playback control) menus.
You can play a PBC Video CDs without
having to navigate the PBC menu by starting
playback using a number button to select a
track, rather than the 3 button.
Button What it does
RETURN Displays the PBC menu.
Numbers Selects a numbered menu option.
+10 Selects a numbered menu option 10 and
over. (For example, for 24, press +10,
+10, 4.)
4 Displays the previous menu page (if there
is one).
¢ Displays the next menu page (if there is
one).
Navigating DVD-RW discs menus
1 Press MENU.
2 Use the cursor buttons (2/3) to toggle
between Original and Play List.
The Original screen shows the contents of the
disc as recorded. The Play List screen shows the
contents in the order programmed by the person
who recorded the disc (not all DVD-RW discs
contain a Play List).
• You can’t switch between Original and
Play List while a disc is playing.
22
3 Use the cursor buttons (5/∞) to highlight
a menu item in the list, then press ENTER
to select it.
• Use the 4 and ¢ to see the previous/next
page.
• To preview the first frame of the highlighted
menu item, use the cursor button (3).
• To display this disc menu during playback, press
MENU.
5Playing Discs
Introduction
• Many of the functions covered in this chapter apply to DVD
discs, Video CDs, Super Audio CDs and CDs, although the
exact operation of some varies slightly with the kind of disc
loaded.
• When playing DVD discs, if the
screen when you try and use a particular function, either the
player or the disc doesn’t allow the use of that function.
• When playing Video CDs, some of the functions are not
available in PBC mode. If you want to use them, start the disc
playing using a number button to select a track.
or icon appears on-
Finding what you want on a disc
You can directly access any point on a disc using one of the
search modes. Use these search modes while a disc is playing, or
when it’s stopped. Playback jumps to the point specified.
1 Press SEARCH repeatedly to choose between:
• Title/Group search (DVD only)
• Chapter/Track search
• Page search (DVD-Audio discs with browsable pictures only)
• Time search (DVD-Video and Video CD only)
• Frame & Time search (DVD-Video only)
(The Frame Search option in the Video1 menu must be On to use
this) (page 47)
• Off
English
2 Enter the title/chapter/group/track number or time (minutes
& seconds).
For example, for title 4, press 4.
For chapter/track 12, press 1 , 2.
For 45 minutes into the disc, press 4, 5, 0, 0.
3 Press 3 to start/restart playback.
Note
The Frame Search option in the Video menu must be On to use this.
Press DISPLAY while a still picture is displayed to see the frame
number.
Depending on the disc, it may not be possible to search for a specific
frame. Also, when using frame advance, forward step or reverse step.
Each frame may not be appear in exact order when stepping through
them. The number assigned to a specific frame may be different when
stepping through the frames in forward or reverse mode.
23

Playing Discs5
Still Frame/Slow Play/Frame Advance Playback
The video images on DVD and Video CD can be viewed as a still frame,
played back at slow speeds and even advanced frame by frame.
Viewing a still frame
Press 8.
When viewing a DVD, if the paused picture shakes, select the [Field]
setting in the Setup screen Video menu [Still Picture] setting as
described on page 51.
To return to normal playback
When viewing a still frame playback, pressing 8 or 3 restores normal
playback operation.
Viewing slow playback
With this function, DVDs can be viewed in both forward and
reverse direction. Video CDs can only be moved in the forward
direction.
Press ¡ for longer than one second during Pause.
• Slow playback is engaged.
• During slow playback, the speed of playback can be adjusted from
1/16 normal playback speed to 1/2 normal
playback speed in four steps using ¡.
• During slow playback, the player return to pause when pressing 1.
1/16 – 1/8 – 1/4 – 1/2
Press 1 for longer than one second during Pause.
• Slow playback in the reverse direction is engaged.
• During slow playback, the speed of playback can be adjusted from
1/16 normal playback speed to 1/2 normal
playback speed in four steps using 1.
• During slow playback, the player return to pause when pressing ¡.
1/2 – 1/4 – 1/8 – 1/16
To return to normal playback
When viewing still frames or slow playback, pressing 3 restores normal
playback operation.
Frame by frame advance playback: Viewing one
frame at a time
With this function, DVDs can be viewed in both forward and reverse
directions. Video CDs can only be moved in the forward direction.
1 Press 8.
2 Press ¡ or 1 rapidly.
¡: The picture advances one frame each time the button is pressed.
1: The picture backs up a DVD a few frames each time the button is
pressed.
To return to normal playback
When viewing frame by frame playback, pressing 8 or 3 restores
normal playback operation.
24
Note
• There is no sound when viewing still frames or slow playback, or when
advancing one frame at a time.
• Still frame, slow play, or frame advance playback may not be possible
with certain titles. In this case, the mark is displayed.
• If a Browsable picture (page 60) is recorded on a DVD-Audio disc,
frame advance playback is possible.
• Depending on the disc, it may automatically return to normal replay at the
transition between chapters. And when this happens, it may not fast forward
or rewind even if you push the scan (1/¡) button. In this case, push the
PLAY button once more, then push the scan button (1/¡) again.

5Playing Discs
Switching camera angles
Some DVD Video discs feature scenes shot from two or more
angles—check the disc box for details: it should be marked with
a icon if it contains multi-angle scenes.
• To switch the camera angle, press ANGLE.
If the disc was paused, playback starts again with the new angle.
• To hide the TV angle indicator, choose Angle Indicator > Off from the
Video 2 menu (see page 51).
Switching subtitles
Many DVD Video discs have subtitles in one or more languages—the disc box will usually tell you which subtitle languages are available. You can switch subtitle language anytime
during playback.
• To display/switch the subtitle language, press SUBTITLE
repeatedly.
The current subtitle language is shown on-screen.
English
• To switch off subtitles, press SUBTITLE then CLEAR.
• To set subtitle preferences, see page 53.
25
Playing Discs5
Switching audio language
When playing a DVD Video disc recorded with dialog in two or more
languages, you can switch audio language anytime during playback.
• To display/switch the audio language, press AUDIO repeatedly.
The current audio language is shown on-screen.
• To set audio language preferences, see page 52.
Switching audio channel
Depending on the disc, you may be able to switch channels, when
playing DVD-Audio discs—see the disc box for details.
• To switch the audio channel, press AUDIO repeatedly.
Switching audio channel
On Video CDs, CDs and MP3s you can switch between stereo, just the
left channel or just the right channel.
On DVD-RW discs that have both L and R audio channel, you can
switch between the L, R, or a mix of both.
• To switch the audio channel, press AUDIO repeatedly.
The current playback channel(s) are indicated on-screen.
26
5Playing Discs
Making a program list
This feature lets you program the play order of titles/groups/chapters/tracks on a disc. You make a program list via an on-screen display,
using the cursor buttons to navigate and the number buttons to enter
titles/chapters/tracks.
Note that programmed playback is not available for DVD-RWs.
1 Press PROGRAM.
Program Chapter Program Title
7
Current:
Title
Title
1
Program Memory — Off
Move
Chapter
(Chapter 1~18)
PROGRAMENTER
Play
2 Use the cursor buttons (2/3) to select ‘Program Chapter’ or
‘Program Title’.
3 Use the cursor button (
If you selected Program Chapter, use the cursor button (5) and enter a title
number (all the programmed chapters will come from this title).
Program Chapter Program Title
1
Current:
Title
2(/20)
Program Memory — Off
Exit
∞
) to the program list window.
Move
Play
PROGRAMENTER
Exit
English
4 Enter the title/chapter numbers for your program list.
For titles/chapters 1–9, use the corresponding number buttons. For 10 and
over, use the +10 button (+10, +10, 4 for 24, etc.)
• You can program a pause instead of a title/chapter: press 8 instead of
entering a number in the program list. (A pause can't be the first or last step
in the list.)
• A program list can contain up to 24 steps.
5 If you want to save the program list, use the cursor button (∞) to
‘Program Memory’ and set it to ‘On’.
Program Chapter Program Title
1
Off
7
Chapter
(Chapter 1~18)
PROGRAMENTER
Select
Exit
Current:
Title
09 07 18
Title
1
Program Memory On
Move
If you do this, the program list is automatically recalled when you next load
the disc.
• You can save program lists for up to 24 discs.
• After setting to On, move the cursor back up to the program list window.
27
Playing Discs5
6 Press ENTER or 3 to start playback immedi-
ately, or PROGRAM to exit if you want to start
playback later.
During program play, you may occasionally see the
start of a chapter that was not programmed when the
chapter number changes. This is not a malfunction.
For Video CDs that feature PBC, make sure that
the disc is stopped before you start.
1 Press PROGRAM.
Program Track
Current:
Total Time
Move
Track
1(/10)
0.00
Play
PROGRAMENTER
Exit
2 Enter the track numbers for your program list.
For tracks 1–9, use the corresponding number
buttons. For 10 and over, use the +10 button (+10,
+10, 4 for 24, etc.)
• You can program a pause instead of a track/chapter:
press 8 instead of entering a number in the program
list. (A pause can't be the first or last step in the
list.)
• A program list can contain up to 24 steps.
Programming tips
• To view the program list press PROGRAM.
• To delete a step in the program list, position
the cursor on the title/group/chapter/track
and press CLEAR.
• To insert a step into the program list, position
the cursor where you want the new step to
appear, then enter the title/group/chapter/
track number.
All the following steps move up one.
• To add the currently playing title/group/
chapter/track to the program list, press and
hold PROGRAM for about a second.
If there is no current program list, a new one is
created (for DVD, if the last list created was a title
list then the a title program list is created, otherwise
a chapter program list is created).
• To delete the program list, stop playback
(press 7), then press CLEAR.
The program list is also erased when you remove the
disc from the player or turn the power off
(standby).
• To delete a memorized DVD program list, load
the DVD, press PROGRAM, then change the
Program Memory option to Off. Press ENTER
to confirm.
3 Press ENTER or 3 to start playback immedi-
ately, or PROGRAM to exit if you want to start
playback later.
• You can't start playback later with a PBC Video CD;
press ENTER or 3 to start.
Note
You can’t program track numbers over 100 on Super
Audio CDs.
28
5Playing Discs
Using random play
Use the random play function to play titles/chapters/groups/tracks
(DVD) or tracks (CD or Video CD) in a random order.
You can’t use random play with DVD-RW discs, Super Audio CD or
Video CD playing in PBC mode.
1 Press RANDOM repeatedly to select a random play mode.
The mode is displayed on-screen:
• Random Chapter/Track (from within the current title)
• Random Title/Group
• Random (random play starts immediately)
2 DVD only: Press ENTER or 3 to start random play.
• To stop the disc and cancel random playback, press 7.
• To cancel random playback without stopping playback, press CLEAR. The
rest of the disc plays out.
English
Tip
• During random play, the 4 and ¢ buttons function a little differently to
normal: 4 returns to the beginning of the current track/chapter/. You
can't go back further than this. ¢ selects another track/chapter at random
from those remaining.
• You can't use random play together with program or repeat play.
29

Playing Discs5
Using repeat play
You can set the player to repeat individual tracks on CDs or VideoCDs, chapters/tracks or titles/group on DVD discs, or the whole disc.
It's also possible to loop a section of a disc.
You can use the repeat together with the programming mode to repeat
the tracks/chapters in the program list (see page 27 for how to make a
program list).
You can’t use any repeat mode or looped play with a Video CD playing
in PBC mode.
Looped playback is not possible with Super Audio CD.
Note
• You can’t use repeat and random play at the same time.
• If you switch camera angle during repeat play, repeat play is cancelled.
1 Press REPEAT during playback to select a repeat mode.
Each press switches the repeat mode:
• Repeat Chapter/Track
• Repeat Title/Group
• Repeat Off
• Repeat Track
• Repeat All
• Repeat Off
2 To resume normal playback, press CLEAR.
Tip
You can use repeat play with program play. During program play, press
REPEAT.
Looping a section of a disc
1 Press (REPEAT) A-B once at the start of the section you want to
repeat, then again at the end.
Playback immediately jumps back to the start point and plays the loop round
and round.
• On a DVD disc, the start and end points of the loop must be in the same
title/group.
30
2 To resume normal playback, press CLEAR.
• You can also repeat a section of a disc just once by pressing 3 to mark the
end point (instead of A-B).