

Makita PM7650HG, PM7650H Instruction Manual
Instruction Manual
Manuel d’instructions
Manual de instrucciones
Manual de Instruções
PM7650H
PM7650HG
WARNING:
Read this instruction manual carefully before putting the petrol mist blower into operation and strictly observe the safety regulations!
Save instruction manual for future reference.
AVERTISSEMENT :
Veuillez lire attentivement ce mode d’emploi avant d’utiliser l’atomiseur, et observez strictement les consignes de sécurité !
Conservez ce mode d’emploi pour vous y reporter ultérieurement.
ADVERTENCIA:
Lea esta manual de instrucciones con atención antes de utilizar el pulverizador a gasolina y ¡observe estrictamente las regulaciones de
seguridad!
Guarde el manual de instrucciones para futuras referencias.
AVISO:
Leia com atenção este manual de instruções antes de colocar o atomizador em funcionamento e cumpra estritamente com os regulamentos
de segurança!
Guarde o manual de instruções para consulta futura.
2
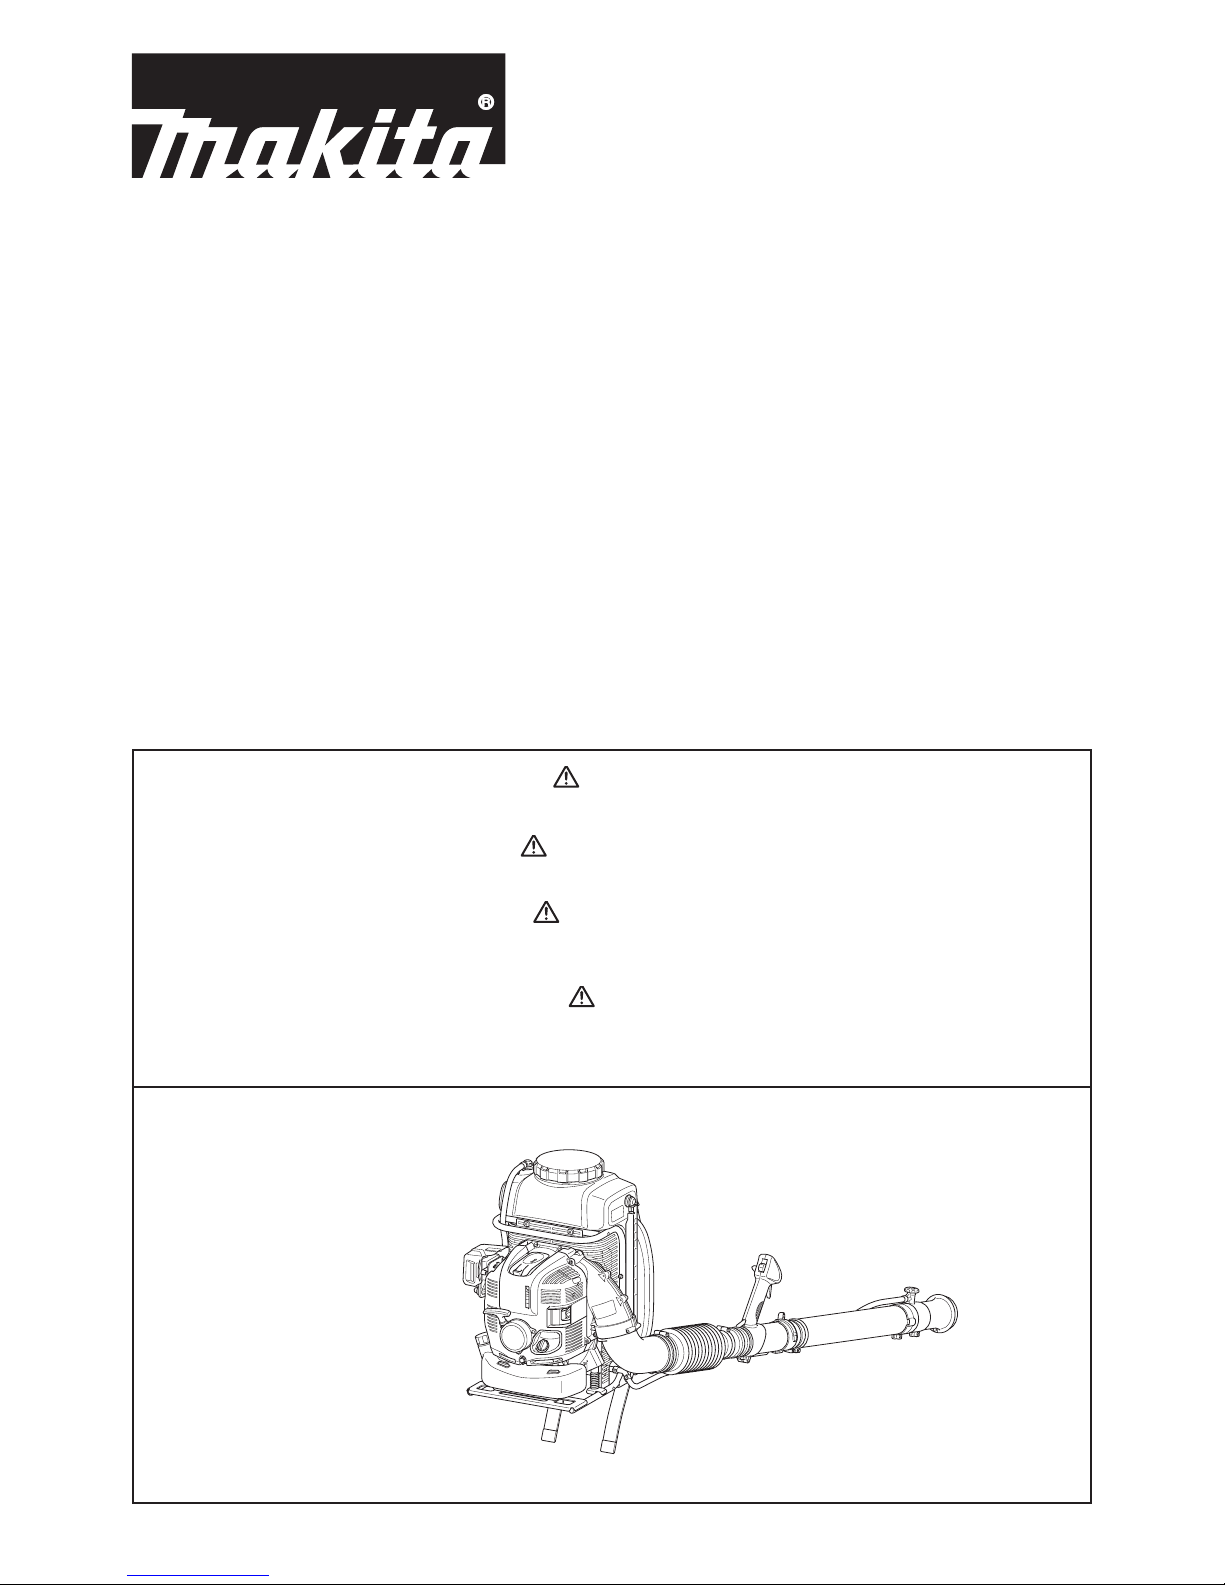
Thank you very much for selecting the MAKITA petrol mist blower. We are
pleased to be able to offer you the MAKITA petrol mist blower, which is the
result of a long development program and many years of knowledge and
experience.
The mist blower models PM7650H/PM7650HG combines the advantages of
state-of-the-art technology with ergonomic design. They are of handy, compact
and represent professional equipment for a great variety of applications.
Please read, understand and follow this booklet, which refers in detail to
the various points that will demonstrate its outstanding performance. This
will assist you to safety obtain the best possible results from your MAKITA
mist blower.
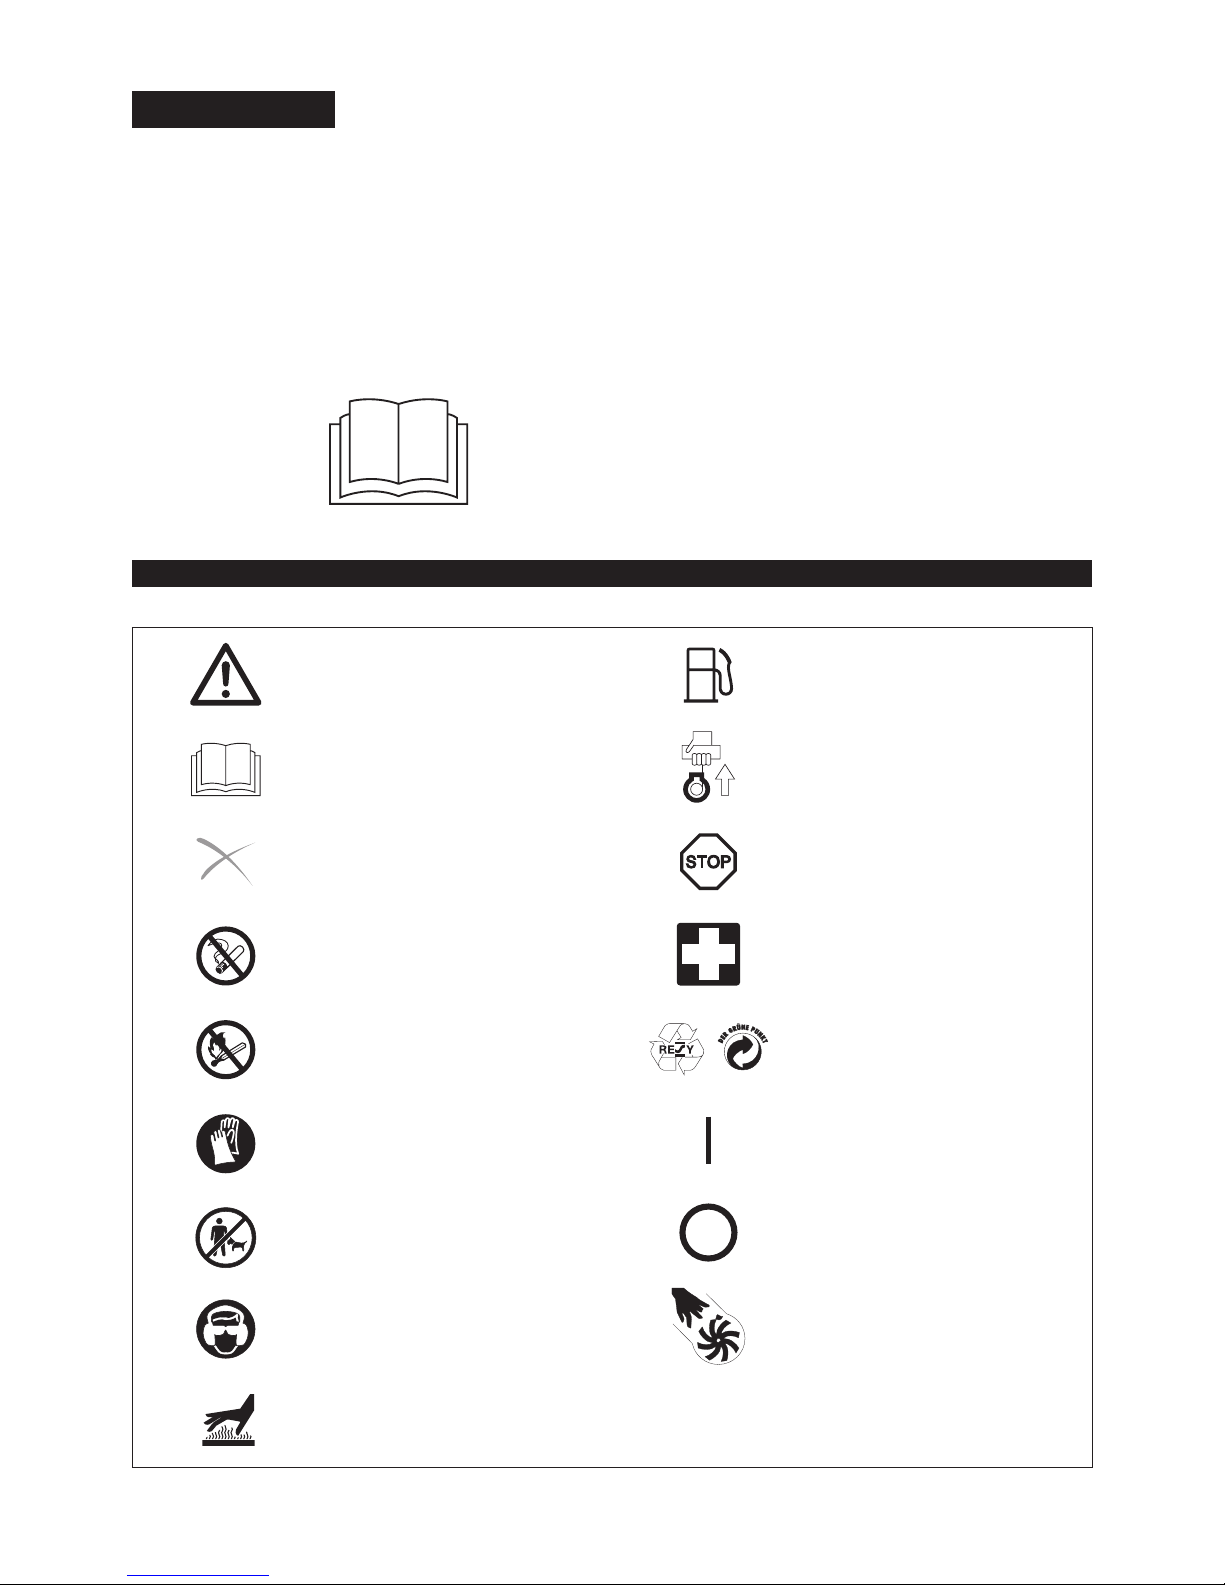
SYMBOLS
It is very important to understand the following symbols when reading this instructions manual.
English
WARNING/DANGER Fuel (Gasoline)
Read, understand and follow
instruction manual
Engine-manual start
Forbidden Emergency stop
No smoking First aid
No open ame Recycling
Protective gloves must be worn ON/START
Keep the area of operation clear of all
persons and pets
OFF/STOP
Wear eye and ear protection
Severing of ngers or hand, impeller
blade
Hot surfaces - Burns to ngers or hands
Table of Contents Page
Symbols .........................................................................2
Important safety instructions..........................................3
Technical data................................................................9
Designation of parts.....................................................10
Assembly instructions .................................................. 11
Before starting the engine ...........................................12
Operation .....................................................................14
Adjustment of idling .....................................................16
Operation method ........................................................17
Inspection and maintenance........................................23
Storage ........................................................................26
Troubleshooting ...........................................................28
3
WARNING: Read all safety warnings and all instructions. Failure to follow the
warnings and instructions may result in electric shock, re and/or serious injury.
Save all warnings and instructions for future reference.
General Instructions
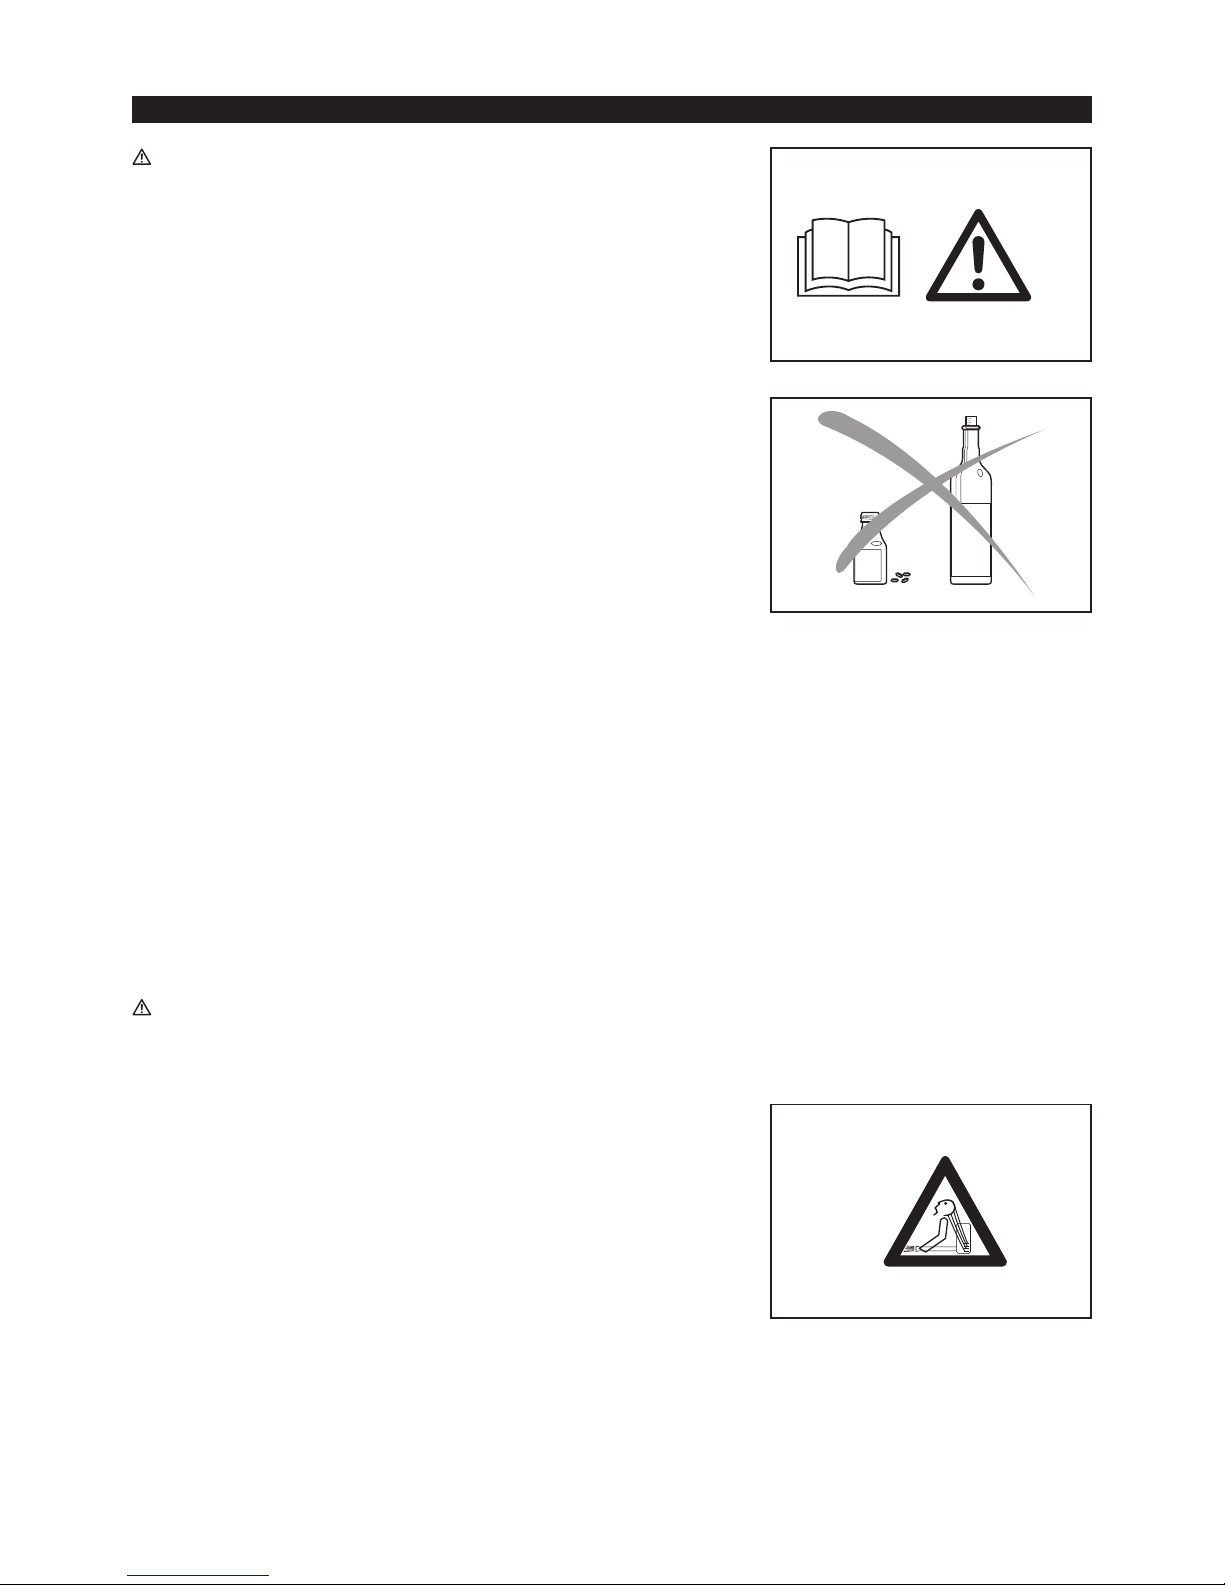
• To ensure correct and safe operation, the user must read, understand and follow
this instruction manual to assure familiarity with the handling of the mist blower
(1). Users insufciently informed will risk danger to themselves as well as others
due to improper handling.
• It is recommended only to loan the mist blower to people who have proven to be
experienced with mist blowers.
• Always hand over the instruction manual.
• First-time users should ask the dealer for basic instructions to familiarize oneself
with the handling of a mist blower.
• Children and young persons aged under 18 years must not be allowed to operate
the mist blower. Persons over the age of 16 years may however use the tool for
the purpose of being trained only while under the direct supervision of a qualied
trainer.
• Use mist blowers with the utmost care and attention.
• Operate the mist blower only if you are in good physical condition.
• Perform all work conscientiously and carefully. The user has to accept
responsibility for others.
• Never use the mist blower while under the inuence of alcohol or drugs (2).
• Do not use the unit when you are tired.
• Save these instructions for future referral.
Intended use of the tool
• Use right tool. The mist blower is only intended for spraying liquid chemicals and
other liquids to control pests and weeds in fruit, ower and vegetable gardens, on
trees and bushes and on other plants, such as coffee, tobacco and cotton. It is
also useful in the maintenance of young trees for, e.g., controlling the bark beetle
and other pests and plant diseases.
Never use for any other purpose.
• Only use plant protection products that are specically approved for use with mist
blowers by their manufacturer and that meet all applicable safety regulations,
standards and ordinances.
Get information from your dealer on how to operate your mist blower. Observe all
applicable local safety regulations, standards and ordinances.
All operating and servicing people should be trained and familiarized with the proper
handling procedures for the chemical products being used, as well as with rst aid/
emergency care, and liquid chemical disposal regulations.
WARNING:
Your mist blower is only for professional use. Do not lend or rent your mist blower
without the instruction manual. Make sure that anyone using it understands the
information contained in this instruction manual.
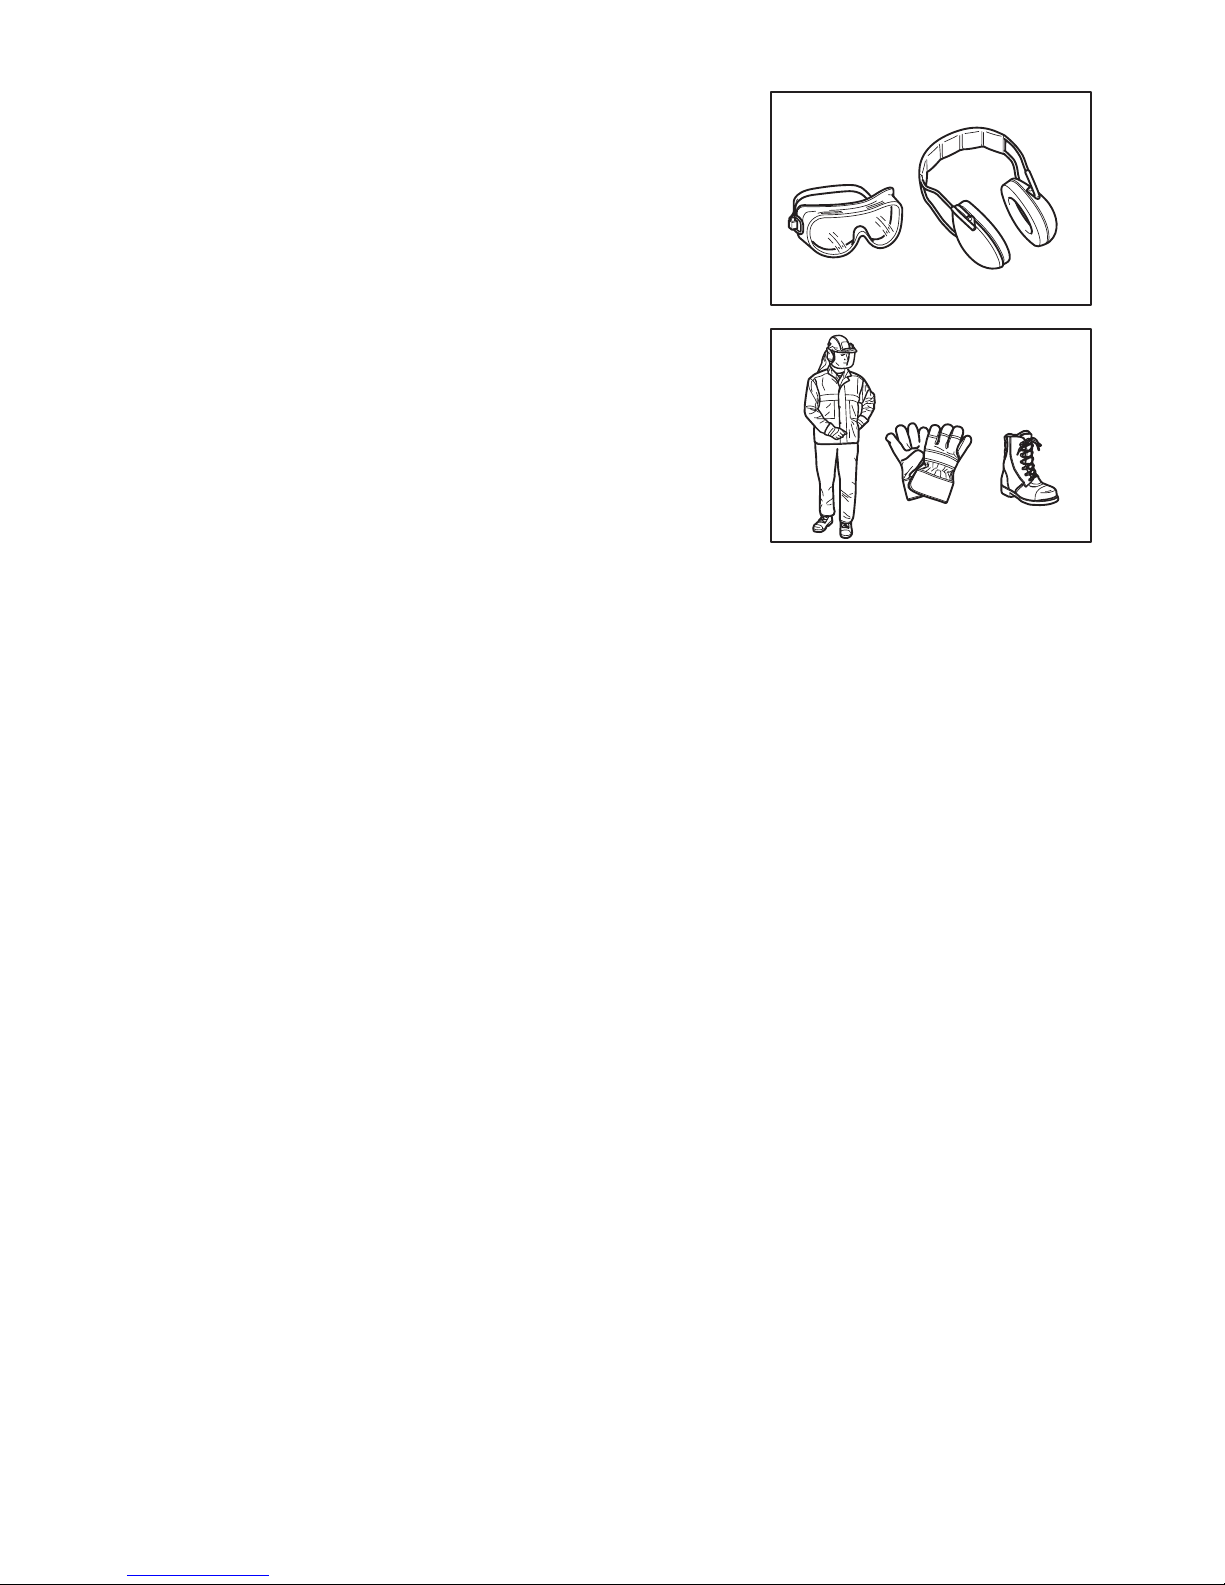
Personal Protective Equipment
• To reduce the risk of injury when using chemical products, wear proper protective
apparel when lling, using and cleaning the mist blower. Always follow all of
the chemical manufacturer’s instructions with respect to proper eye, skin and
respiratory protection. They may differ from and exceed the following precautions.
• When using toxic chemicals, the operator and any bystanders may need to wear
a properly tted respirator approved by NIOSH/MSHA for the chemical being
used. Refer to the chemical product label. Breathing toxic chemicals can cause
serious or fatal injury.
• The clothing worn should be functional and appropriate, i.e. it should be tight
tting but not cause a hindrance. Do not wear jewelry, clothing or long hair which
could be drawn into the air intake. (3)
• In order to avoid head-, eye-, hand- or foot injuries as well as to protect your
hearing the following protective equipment and protective clothing must be used
during operation of the mist blower.
(1)
(2)
IMPORTANT SAFETY INSTRUCTIONS
(3)
4
Pay particular attention to the following regulations
• Clothing must be sturdy and snug-tting, but allow complete freedom of
movement. Avoid loose-tting jackets, ared or cuffed pants, scarves, unconned
long hair or anything that could be drawn into the air intake.
Wear long pants to protect your legs.
Do not wear shorts. (5)
• Mist blower noise may damage your hearing. Wear sound barriers (ear plugs or
ear mufers) to protect your hearing. Continual and regular users should have
their hearing checked regularly. (4)
• Always use rubber/chemical-resistant gloves when working with the mist blower.
Good footing is most important. Wear rubber/chemical boot. (5)
• Proper eye protection is a must. Even though the discharge is directed away from
the operator, ricochets and bounce-backs can occur during mist blower operation.
(4)
• Never operate a mist blower unless wearing goggles or properly tted safety
glasses with adequate top and side protection which comply with ANSI Z 87.1 (or
your applicable national standard).
HANDLING OF CHEMICALS
• Some chemicals used with your mist blower may contain toxic and/or caustic
substances. Such chemicals can be dangerous and cause serious or fatal injury
to persons and animals and/or severe damage to plants and the environment.
Avoid direct contact with chemicals.
Follow the chemical manufacturer’s instructions with respect to any contact with
its product.
• Read the manufacturer’s label and instruction manual each time before mixing or
using the chemical and before storing or disposing of it.
Do not rely on your memory.
Careless or improper use may cause serious or fatal injury.
• Carefully read the labels on chemical containers before use.
Chemicals are classied into categories of toxicity.
Each category will have unique handling characteristics.
Familiarize yourself with the characteristics for the category of the chemical you
are using.
Chemicals may be used only by persons trained in their handling and the
appropriate rst-aid measures.
• Chemicals may be harmful to persons, animals and the environment if improperly
used. In addition, it is advisable not to use some chemicals that are caustic,
corrosive or poisonous in your mist blower.
• Mix only compatible pesticides. Wrong mixtures can produce toxic fumes.
When handling and spraying chemicals, make sure you are operating in
accordance with local, state, and federal environmental protection rules and
guidelines. Do not spray when it is windy. To help protect the environment, use
only the recommended dosage - do not overuse.
Pay special attention when using near watersheds, waterway, etc.
• Avoid opening mouth such as eating, drinking, or smoking while handling
chemicals or while you are spraying. Never blow through nozzles, tubes, pipes or
any other component by mouth. Always handle chemicals in a well-ventilated area
while wearing appropriate protective clothing and safety equipment.
Do not store or transport chemicals together with food, drink, or medicines, and
never reuse a chemical container for any other purpose.
Do not transfer liquid chemicals to other containers, especially food and/or drink
containers.
• In case of accidental contact or ingestion of chemicals or in case of contamination
of clothing, stop working and immediately consult the chemical manufacturer’s
instructions.
If doubtful about what to do, ask a poison control center or doctor for advice
without delay.
Keep the product’s label ready to read to or show the persons you consult.
Clean all chemical spills immediately.
Dispose of any residue observing state, federal or your nation’s laws and
regulations.
• Keep chemicals out of reach of children, other unauthorized people and animals.
When not in use, store chemicals in a safe and locked place. Follow the
manufacturer’s recommendations for proper storage.
(5)
(4)

5
Preparing chemicals
– Prepare chemical solutions of according to the chemical manufacturer’s
instructions.
– Prepare solution only enough for the job at hand so that no solution is left over.
– Mix chemicals only by following instructions - wrong mixtures can produce toxic
fumes or explosive mixtures.
– Never spray undiluted chemicals.
– Prepare solution and ll the container outdoors only in a well-ventilated place.
Storage
– Do not store spray solution in the container for more than one day.
– Always store and transport spray solution only in approved containers.
– Never store or transport the spray solution in containers intended for foods, drinks
or animal feed.
– Do not store or transport spray solution with foods, drinks or animal feed.
– Keep spray solution out of the reach of children, other unauthorized people and
animals.
– Store the spray solution in a locked place secured against unauthorized use.
Disposal
Never dispose of residual chemicals or contaminated rinsing solutions in waterways,
drains, sewers, street gutters, manholes or the like.
When disposing of contaminated rinse, observe all applicable laws, regulations and
ordinances.
Strictly observe the precautionary instructions of the chemical manufacturer.
Filling the Container
• Tighten all connections and check to be sure the pipes as well as a tube are
securely attached and in good condition. Keep the solution discharge button on
the control handle closed.
Before using the mist blower with chemicals, ll it with fresh water to assure that
you have assembled it properly and practice spraying. Also, check for any leaks at
this time. When thoroughly familiar with the mist blower operation, follow normal
operating procedures.
Fill your mist blower in well-ventilated areas, outdoors.
• Do not use:
– ammables in the mist blower, which may cause explosion resulting in serious
or fatal injury;
– caustic or corrosive materials in the mist blower, which could result in damage
to the unit;
– liquids with a temperature above 120 degrees F (50 degrees C) to reduce the
risk of scalding and damage to the unit.
To ll the solution tank, place the mist blower on a level surface. To reduce the risk
of contaminating the surrounding environment, be careful not to overll the solution
tank with chemical solution.
To reduce the risk of injury, do not ll the mist blower while wearing it on your back.
If you ll the solution container with a hose attached to a central water supply, be
sure the end of the hose is out of the solution to reduce the risk of backow, i.e. the
chemicals being sucked into the water supply in the case of a sudden vacuum.
Calculate the correct amount of chemical solution so that it is used up at one time,
with no extra solution left over in the tank.
After lling, t the solution tank cap and tighten it down rmly.
• Check for leakage while relling and during operation. A leak from the solution
tank or a loose tting could soak your clothing and come into contact with your
skin.
6
Starting up the mist blower
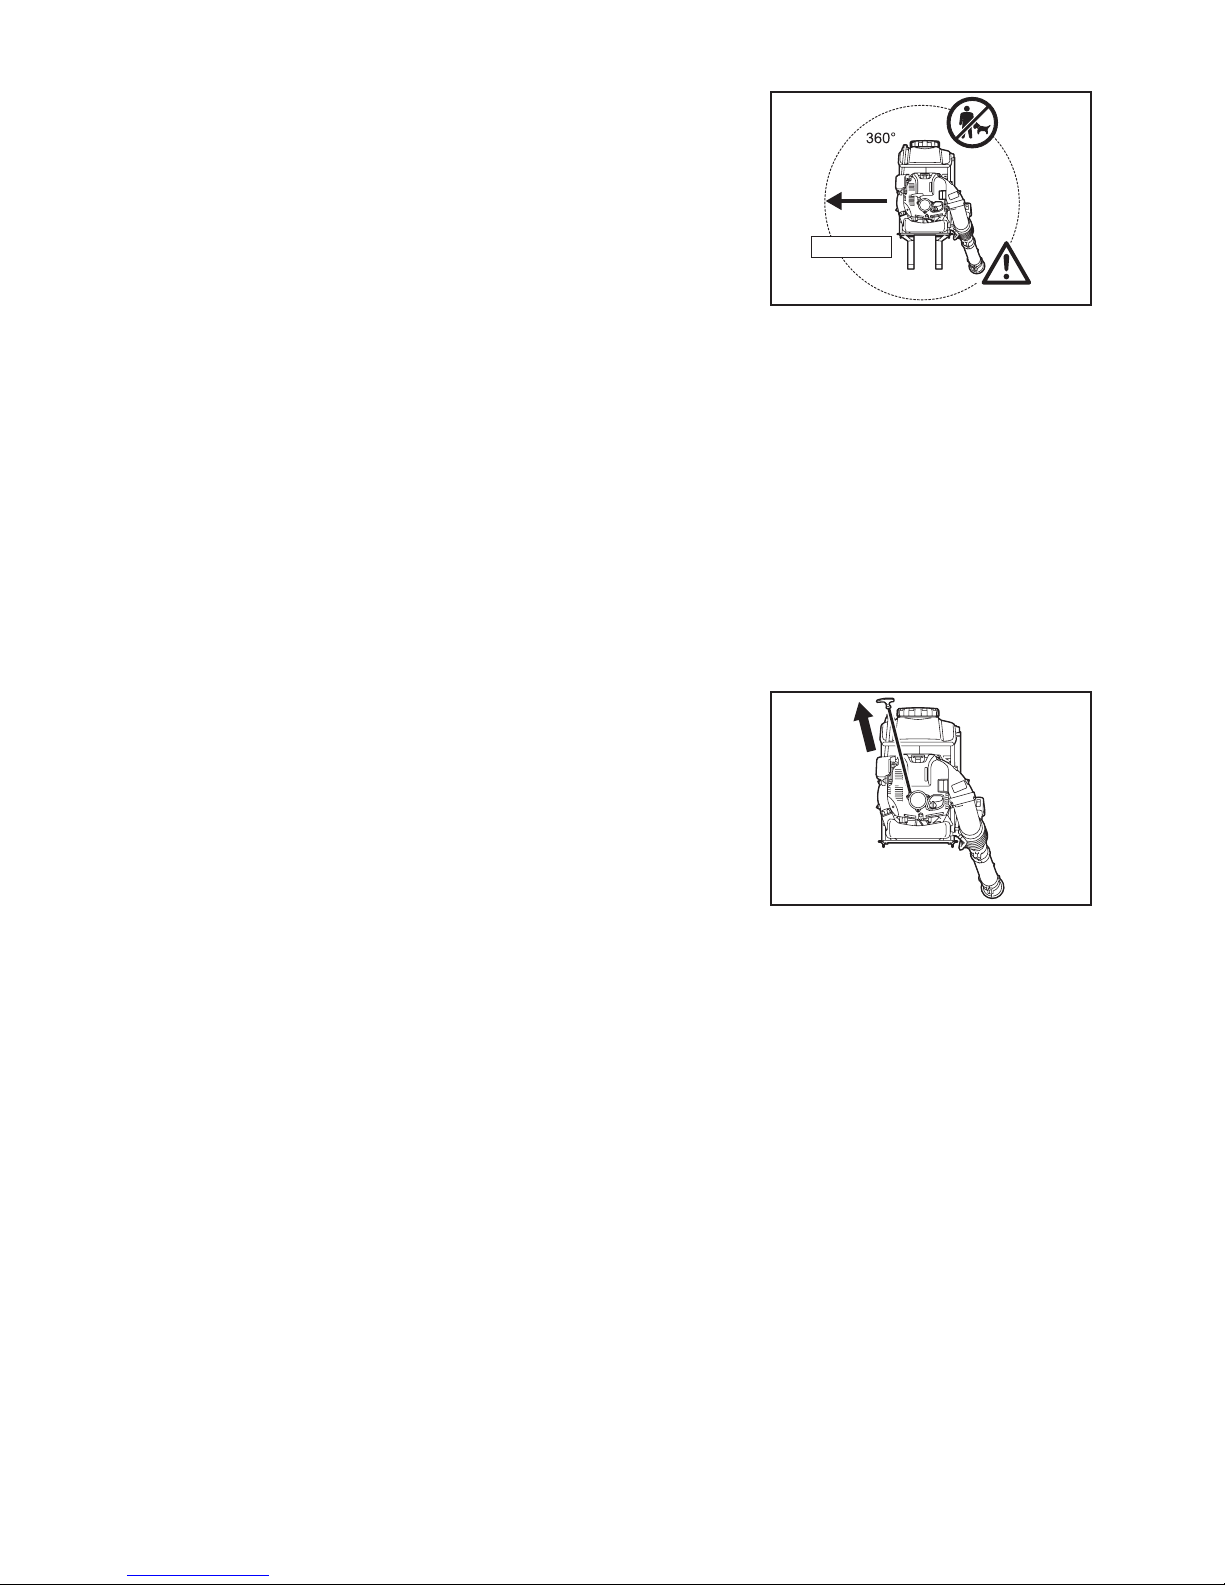
• Please make sure that there are no children or other people within a working
range of 20 meters (6), also pay attention to any animals in the working vicinity.
Never use the mist blower in urban areas.
• Before operating, always check that the mist blower is safe for operation:
Check the security of the throttle lever. The throttle lever should be checked for
smooth and easy action. Check for proper functioning of the throttle lever lock.
Check for clean and dry handles and test the function of the l-O switch. Keep
handles free of oil and fuel.
• To reduce the risk of leakage and skin contact with chemicals, check that the
container cap and all connections in the path of the spray are tight, and be sure
the hose is securely attached and in good condition. Keep the solution discharge
button closed.
• Check that the spark plug cap is securely mounted on the spark plug - a loose
plug cap may cause arcing that could ignite combustible fumes and cause a re.
• Check condition of harness straps and replace damaged or worn straps.
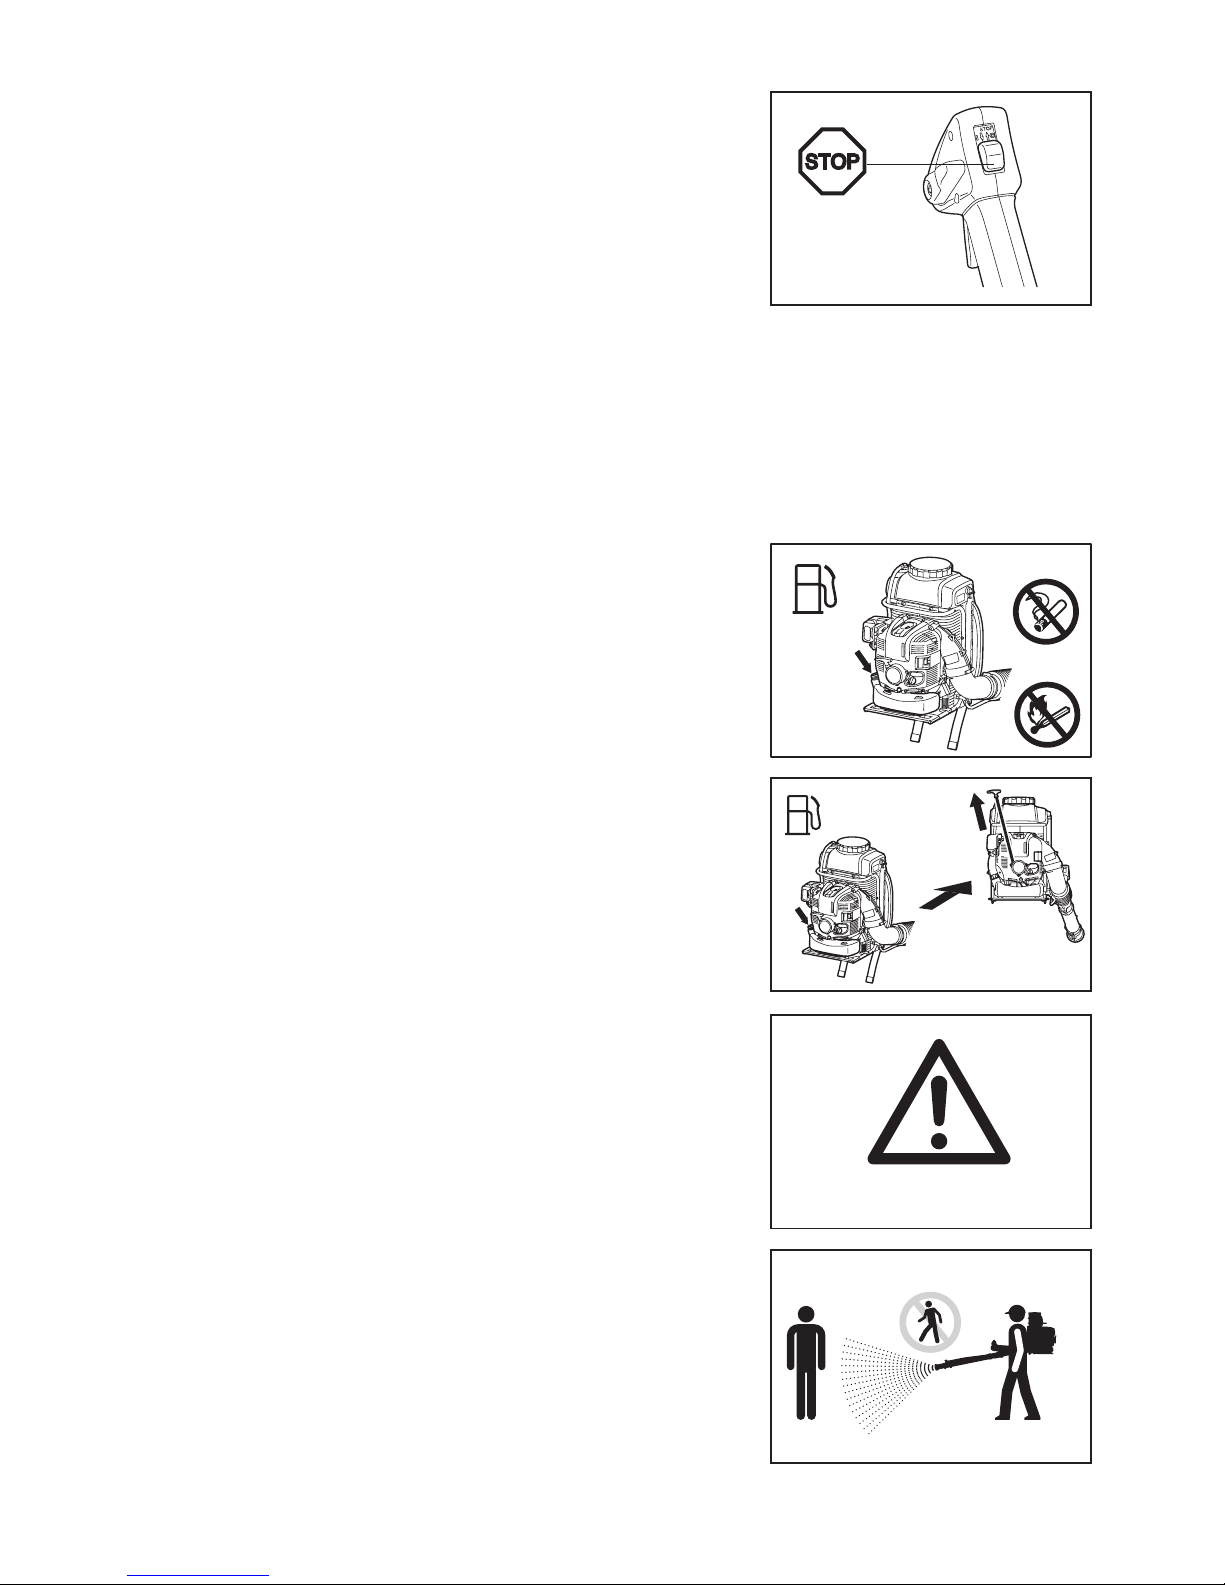
• Adjust shoulder strap to suit your size before starting work.
In an emergency, you may slip out of the shoulder strap and throw off the machine
quickly. Practice slipping out of the harness a number of times before using the
machine in order to become accustomed to it. Do not throw off the machine while
practicing as it could damage the machine.
• When you pull the starter handle, do not wrap the starter rope around your hand.
Do not let the starter handle snap back, but guide the starter rope to rewind it
properly.
Failure to follow this procedure may result in injury to your hand or ngers and
may damage the starter mechanism.
• The assistance of another person may be needed in placing the mist blower on
your back after starting. In order to reduce the risk of injury to the assistant from
thrown objects, chemical spray/liquid or from contact with hot exhaust fumes,
keep the engine at idle speed during this brief period, and do not let your assistant
stand in the area of the outlet nozzle or exhaust. Otherwise, the mist blower
should be started and operated without assistance.
• Start the mist blower only in accordance with the instructions.
• Do not use any other methods for starting the engine (7)!
• Use the mist blower and the tools supplied only for applications specied.
• Start the mist blower engine only after the entire tool has been assembled.
Operation of the tool is permitted only after all the appropriate accessories are
attached.
• The engine is to be switched off immediately if there are any engine problems.
• Use the mist blower for single-handed operation with the right hand on the control
handle. Carry as a backpack with the shoulder straps over both shoulders.
To reduce the risk of loss of control, never carry the mist blower with the strap(s)
over one shoulder.
• When working with the mist blower, always wrap your ngers tightly around the
handle, keeping the control handle cradled between your thumb and forenger.
Keep your hand in this position to have your machine under control at all times.
Make sure your control handle is in good condition and free of moisture, pitch, oil
or grease.
Always ensure a safe, well-balanced footing.
• In order to keep the solution tank upright and reduce the risk of spillage, do not
bend at the waist. Bend only at the knees and support yourself as required to
ensure proper balance.
Remember that a mist blower lled with liquid has a signicant amount of weight.
Use extra caution when bending, leaning or walking.
• Operate the mist blower in such a manner as to avoid inhalation of the exhaust
gases. Never run the engine in enclosed rooms (risk of suffocation and gas
poisoning). Carbon monoxide is an odorless gas.
Always ensure there is adequate ventilation.
• Your mist blower is not insulated against electric shock. To reduce the risk of
electrocution, never operate this mist blower in the vicinity of any wires or cables
(power, etc.) which may be carrying electric current. Do not spray on or near
electrical installations.
(7)
(6)
20 m (66 ft)
7
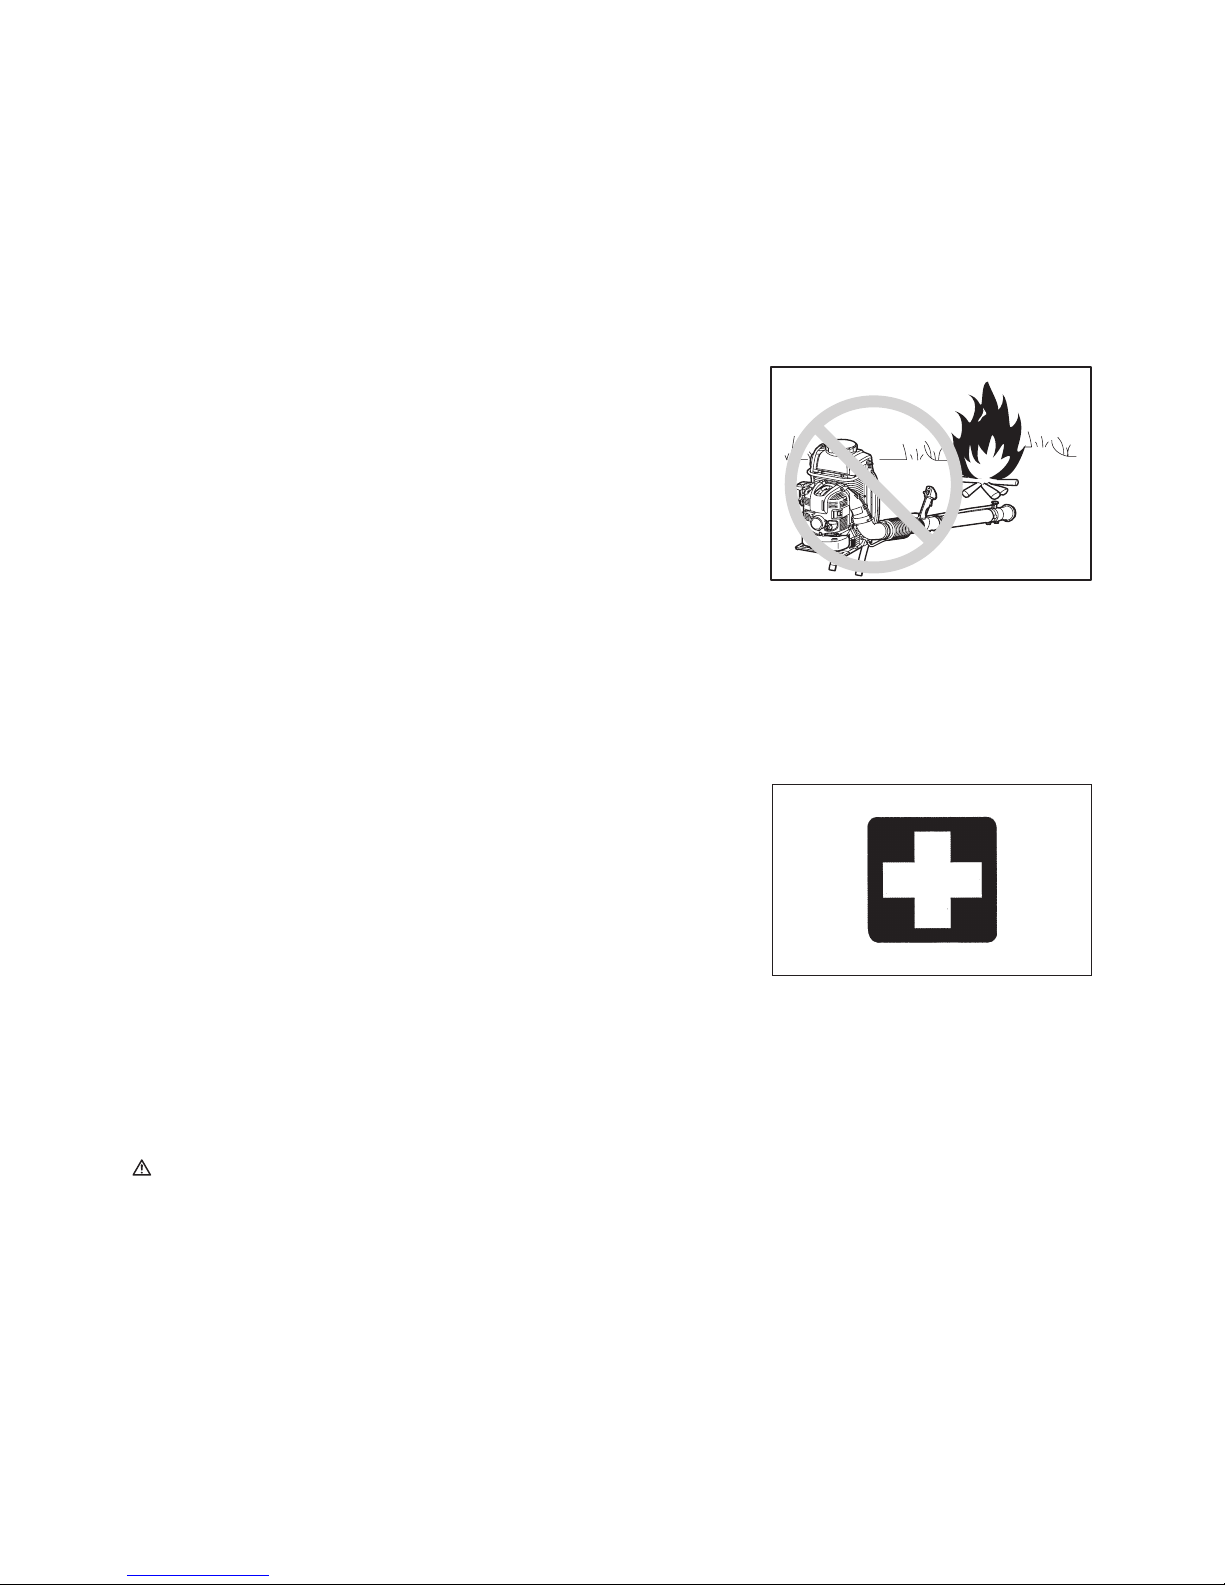
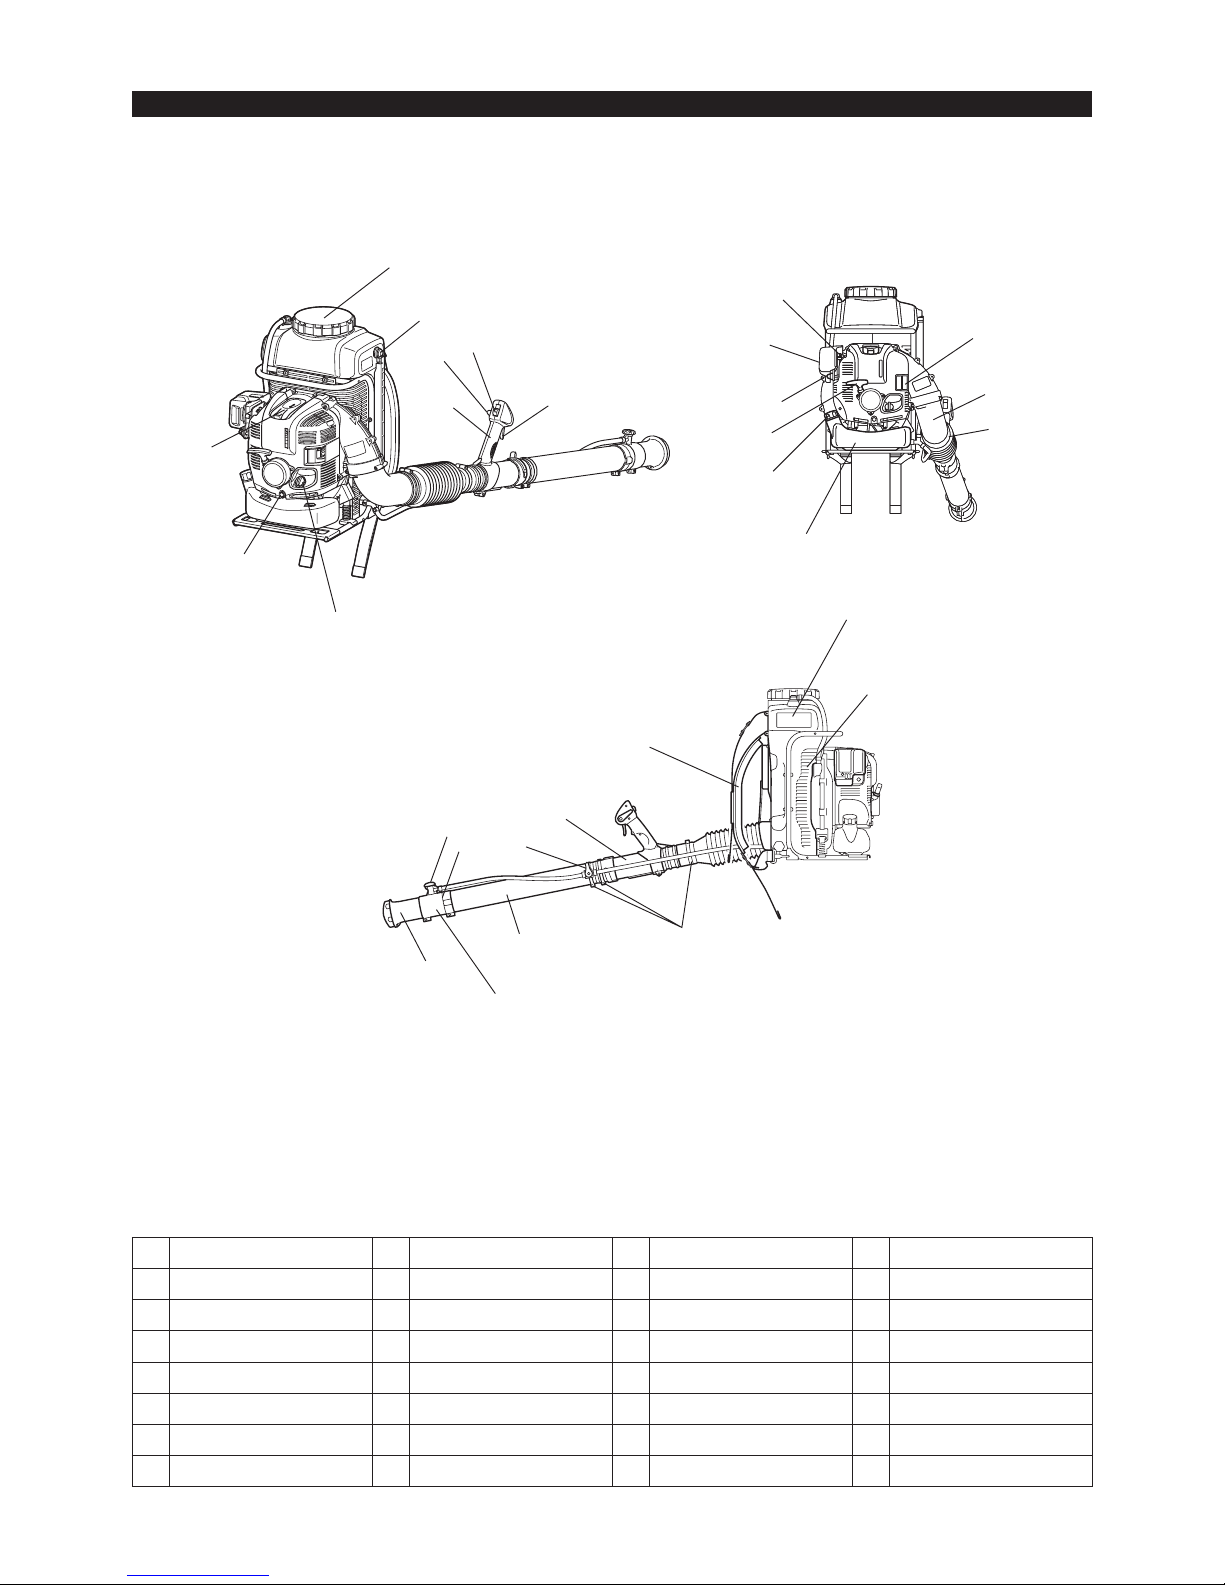
• Switch off the engine when resting and when leaving the mist blower unattended.
Place it in a safe location prevent danger to others, setting re to combustible
materials, or damage to the machine (8).
• Never lay the hot mist blower onto dry grass or onto any combustible materials.
• Do not place the mist blower on the ground when operating at high speed,
because small objects such as sand, grass, dust, etc. may be pulled into the air
intake and damage the fan wheel.
• During work breaks, do not leave the mist blower in the hot direct sunlight or near
any heat source.
• All protective parts and guards supplied with the machine must be used during
operation.
• Never operate the engine with a faulty exhaust mufer.
• Shut off the engine during transport (8).
• Position the mist blower safely during car or truck transportation to avoid fuel
leakage.
• When transporting the mist blower, ensure that the fuel tank and liquid/chemical
container is completely empty.
• Keep children, unconcerned people and pets away from areas that have just been
sprayed.
After the use of some chemicals, especially agricultural pesticides, a notice must
be posted on the treated area that a “Restricted Entry Interval” (REI) is in effect.
See the chemical product’s label and any applicable governmental regulations.
Refueling
• Shut off the engine (8) during refueling, keep well away from open ame (9) and
do not smoke.
• Avoid skin contact with petroleum products. Do not inhale fuel vapor.
Always wear protective gloves during refueling. Change and clean protective
clothing at regular intervals.
• Take care not to spill either fuel or oil in order to prevent soil contamination
(environmental protection). Clean the mist blower immediately after fuel has been
spilled. Allow wet cloths to dry before disposing in properly, covered container to
prevent spontaneous combustion.
• Avoid any fuel contact with your clothing. Change your clothing immediately if fuel
has been spilled on it (re hazard).
• Inspect the fuel cap at regular intervals making sure that it stays securely
fastened.
• Carefully tighten the locking screw of the fuel tank. Change locations to start the
engine (at least 3 meters away from the place of refueling) (10).
• Never refuel in closed rooms. Fuel vapors accumulate at ground level (risk of
explosions)
• Only transport and store fuel in approved containers. Make sure stored fuel is not
accessible to children.
• Do not attempt to refuel a hot or a running engine.
Method of operation
• Use the mist blower only in good light and visibility. During cold seasons beware
of slippery or wet areas, ice and snow (risk of slipping).
Always ensure a safe footing (11).
• Never work on unstable surfaces or steep terrain (11).
• If you are unfamiliar with the risks associated with the particular chemical you use,
review the product label and/or material safety data sheet for that substance and/
or consult the material manufacturer/supplier.
You may also ask your employer, governmental agencies such as the EPA, OSHA
and NIOSH and other sources for information on hazardous materials.
The state of California and some other authorities, for instance, have published
lists of substances known to cause cancer, reproductive toxicity, etc. (11).
• To reduce the risk of personal injury, do not direct air blast towards bystanders,
since the high pressure of the air ow could injure eyes and could blow small
objects at great speed (11).
• Never spray in the direction of humans, animals or property which might be
injured or damaged by spraying (12).
• Never insert any foreign object into the air intake of the machine or into the nozzle
of the mist blower. It will damage the fan wheel and may cause serious injury to
the operator or bystanders as a result of the object or broken parts being thrown
out at high speed.
• Pay attention to the direction of the wind, i.e., do not work against the wind.
• To reduce the risk of stumbling and loss of control, do not walk backward while
operating the machine.
• Always shut off the engine before cleaning or servicing the unit or replacing parts.
(8)
(9)
(11)
(12)
(10)
3 meters
8
After nishing work
• Always wash yourself thoroughly with soap and water after spraying or handling
chemicals. Shower immediately, and wash all protective clothing separately from
other items.
Follow any additional recommendations of the chemical manufacturer.
Always clean dust and dirt off the mist blower.
• Empty, rinse and clean solution tank and assembly after each use. This helps
to prevent the solution from crystallizing, which could later cause clogging
and chemical damage to the unit. In addition, residual chemicals may have
undesirable effects during subsequent spraying with a different type of chemical
(e.g., residual herbicide may damage or kill plants being sprayed with a pesticide).
Do not store the mist blower with spray solution in the solution tank.
Maintenance instructions
• Be kind to the environment. Operate the mist blower with as little noise and
pollution as possible. In particular check the correct adjustment of the carburetor.
• Clean the mist blower at regular intervals and check that all screws and nuts are
securely tightened.
• Never service or store the mist blower in the vicinity of open ames, sparks, etc.
(13).
• Always store the mist blower in a well-ventilated locked room and with an emptied
fuel tank and the emptied solution tank.
(13)
Observe and follow all relevant accident prevention instructions issued by the trade associations and by insurance companies.
Do not perform any modications to the mist blower as this will risk your safety.
The performance of maintenance or repair work by the user is limited to those activities as described in this instruction manual. All other work is
to be done by Authorized Service Agents.
Use only genuine spare parts and accessories supplied by MAKITA.
Use of non-approved accessories and tools means increased risk of accidents and injuries. MAKITA will not accept any liability for accidents or
damage caused by the use of any non-approved attachment or accessories.
First Aid
In case of accident make sure that a well-stocked rst-aid kit is available in the
vicinity of the operations. Immediately replace any item taken from the rst aid kit.
When asking for help, please give the following information:
• Place of accident
• What happened
• Number of injured persons
• Extent of injuries
• Your name
Packaging
The MAKITA mist blower is delivered in a protective cardboard box to prevent
shipping damage. Cardboard is a basic raw material and is therefore consequently
reusable or suitable for recycling (waste paper recycling).
SAVE THESE INSTRUCTIONS.
WARNING:
DO NOT let comfort or familiarity with product (gained from repeated use) replace
strict adherence to safety rules for the subject product. MISUSE or failure to follow
the safety rules stated in this instruction manual may cause serious personal injury.

9
TECHNICAL DATA
Model PM7650H/PM7650HG
Mass (kg) 13.8 (30.4 lbs)
Dimension (without blower pipe L x W x H) (mm) 420 × 440 × 595 (16-17/32 × 17-5/16 × 23-7/16 in)
Max. engine speed (min
-1
) 7,400
Idling speed (min
-1
) 2,800
Engine displacement (mL) 75.6 (4.61 cu.in)
Fuel Automobile gasoline
Fuel tank capacity (L) 1.8 (60 .oz)
Engine oil SAE 10W-30 oil of API Classication, Class SF or higher
(4-stroke engine for automobile)
Engine oil volume (L) 0.22 (7.4 .oz)
Carburetor (Diaphragm-carburetor) WALBRO WYK
Ignition system Solid state ignition
Spark plug NGK CMR6A
Electrode gap (mm) 0.7 – 0.8 (0.028 – 0.031 in)
Chemical tank capacity (L) 15.0 (507 .oz)
Spray range (Horizontal / Vertical) (m) 16 (53 ft) / 13 (43 ft)
Max air velocity (m/s) 85
Max air volume with nozzle (m
3
/h) 845
Note:
1. Use the oil and spark plug specied by MAKITA.
2. This specication is subject to change without prior notice.
3. Use the level line 10 l as a guide line for the gross weight 25 kg of the mist blower including the solution.
PM7650HG: This model has adapted for use with brazillian Gasoline (E25).
10
DESIGNATION OF PARTS
DESIGNATION OF PARTS DESIGNATION OF PARTS DESIGNATION OF PARTS DESIGNATION OF PARTS
1 Stop switch 8 Starter handle 15 Oil cap 22 Hose band diameter 76
2 Control handle 9 Fuel tank 16 Oil drain bolt 23 Liquid adjustment knob
3 Trigger lever 10 Fuel tank cap 17 Elbow 24 Solution tank
4 Cruise control lever 11 Mufer 18 Swivel pipe 25 Second nozzle
5 Primer pump 12 Shoulder strap 19 Straight pipe 26 Solution tank cap
6 Element cover 13 Air inlet net 20 Top nozzle 27 Tube for solution level check
7 Choke lever 14 Plug cover 21 Hose band diameter 100 28 Solution discharge lever
5
6
7
8
9
10
11
17
21
12
13
18
19
20
22
23
24
25
22
28
1
2
3
4
14
15
16
26
27
11
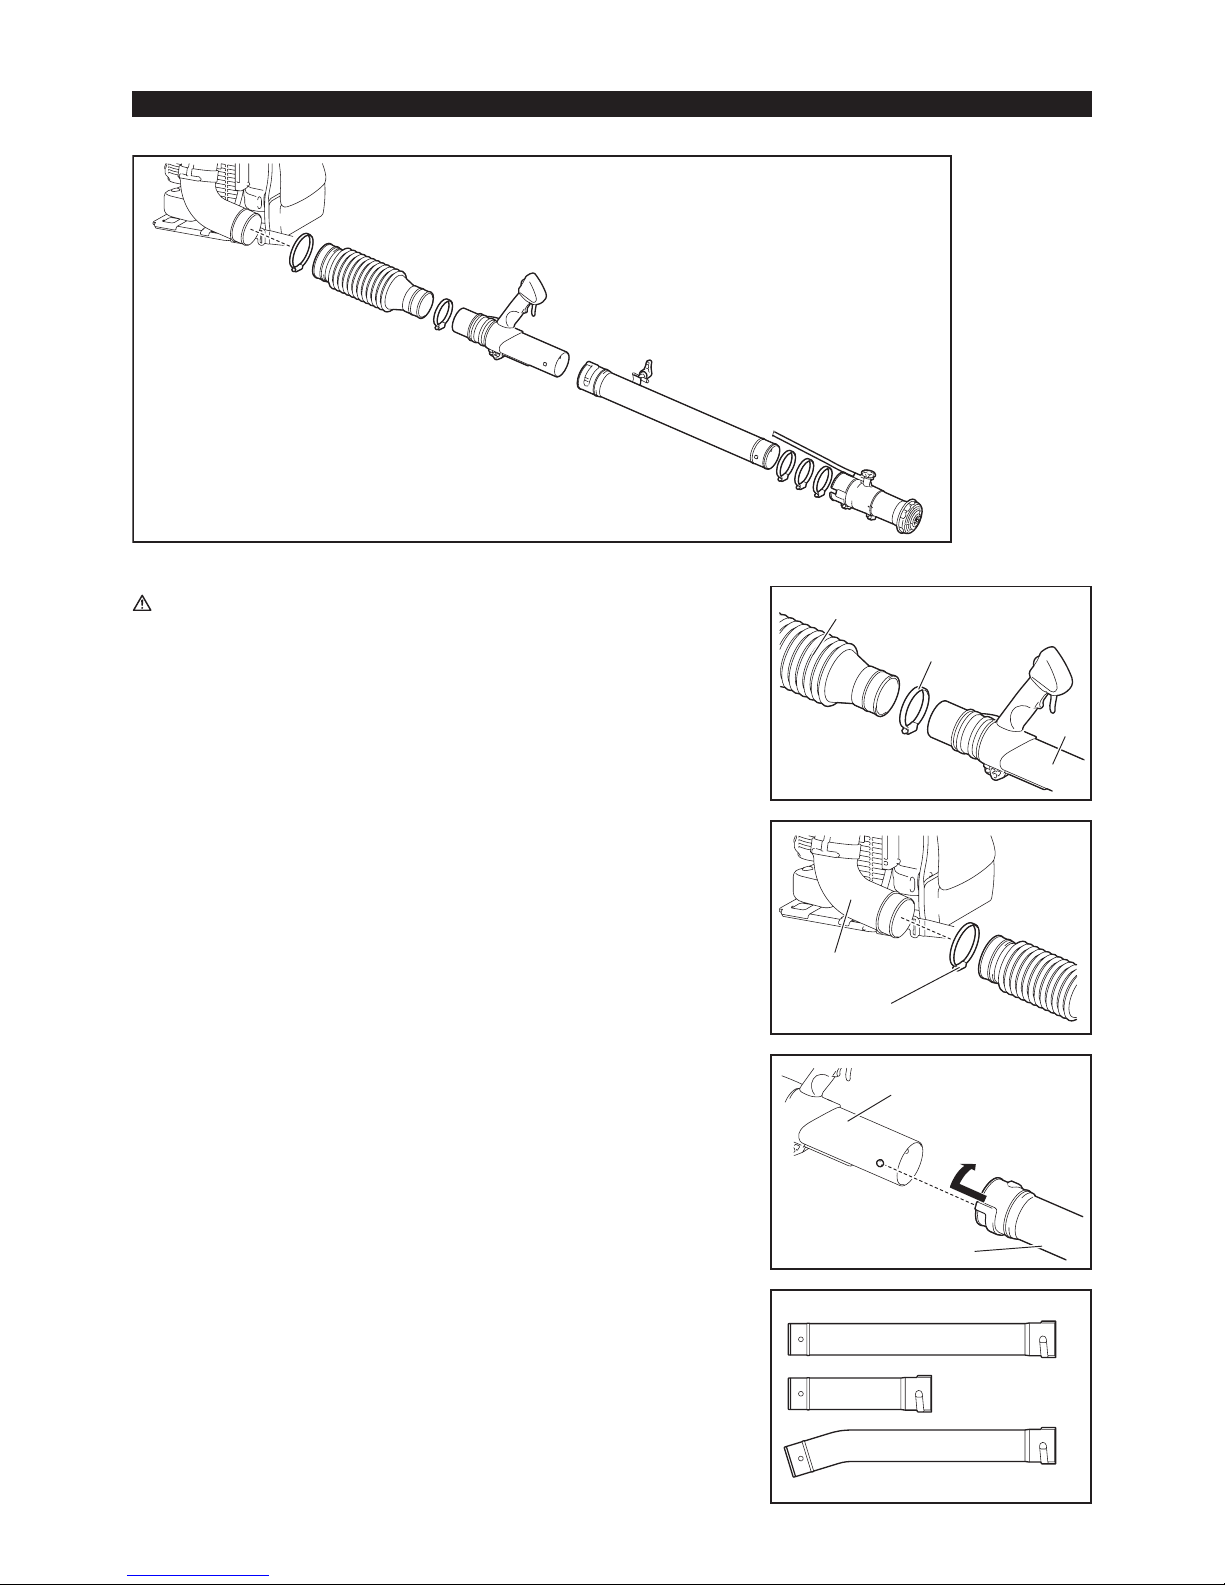
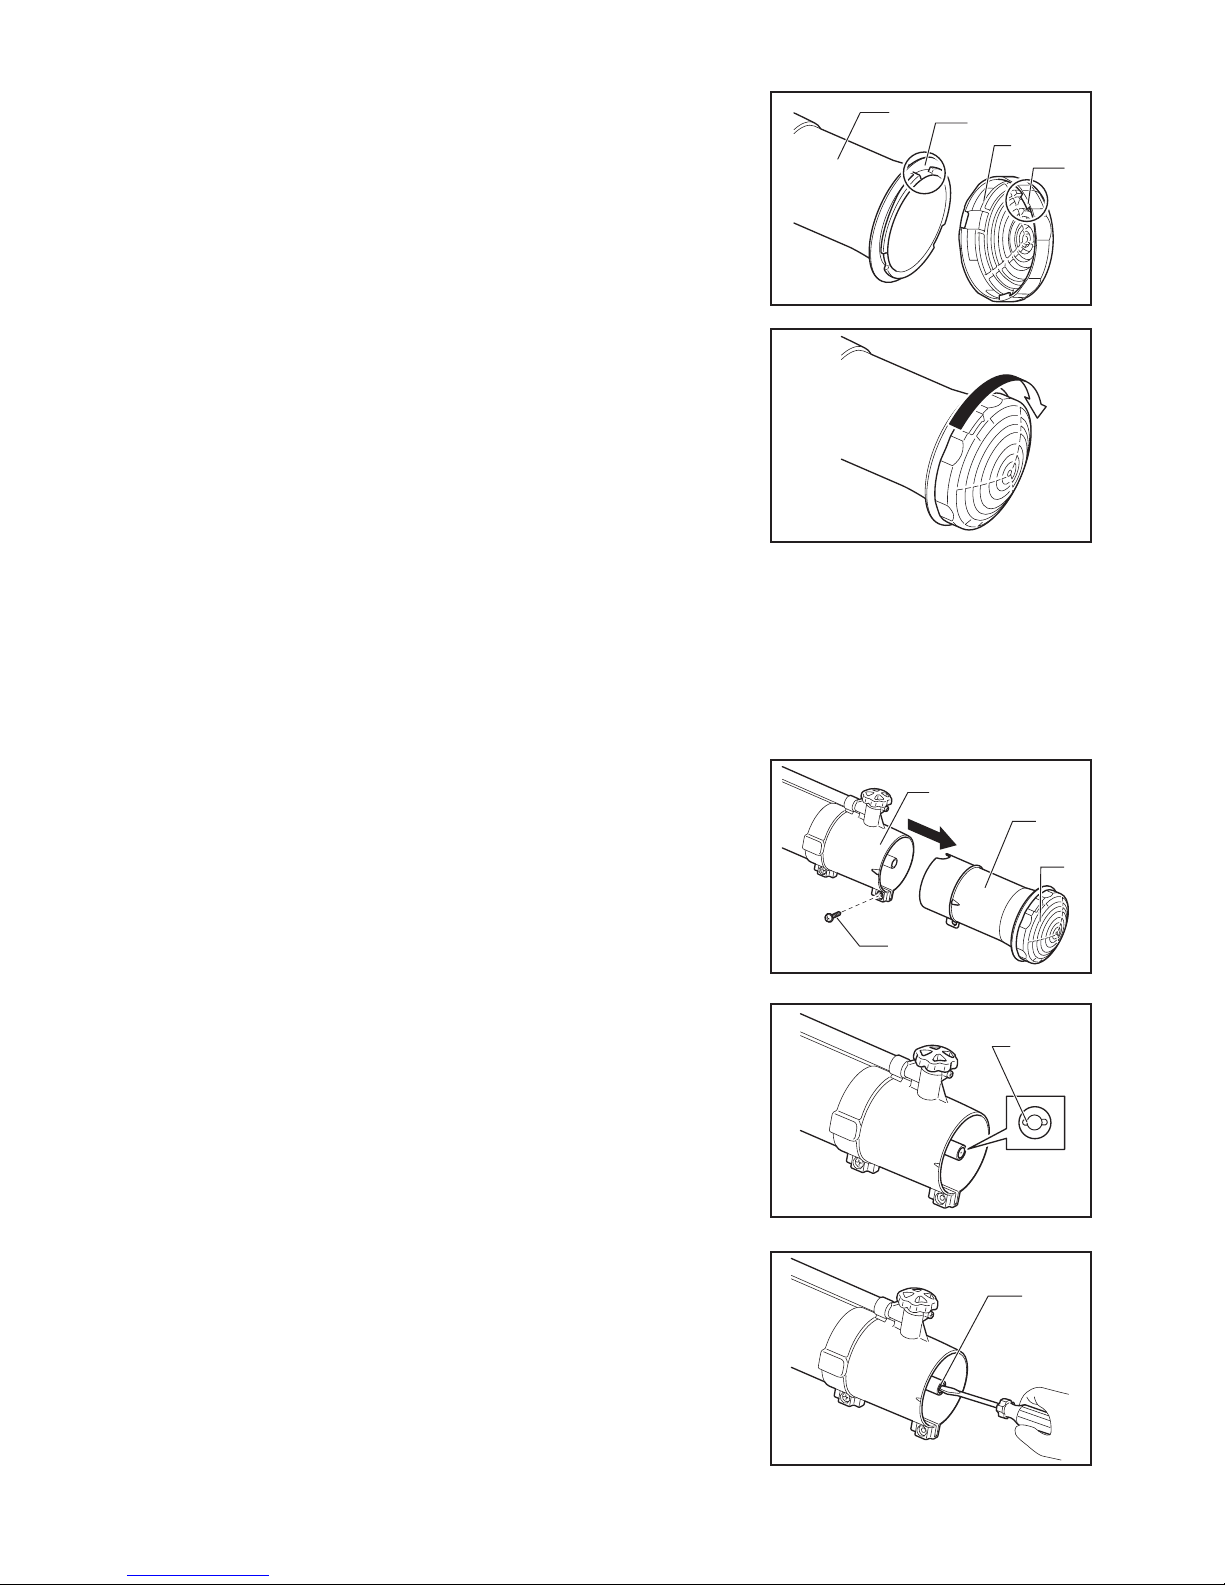
Assembling mist blower pipes
CAUTION:
• Before performing any work on the mist blower, always stop the engine and pull
the spark plug connectors off the spark plug.
• Always wear protective gloves!
• Start the mist blower only after having assembled it completely.
• Make sure that all the hose bands are tight after assembly.
NOTE:
• Make the band’s bolt heads come outer side when you tighten them as illustrated.
(2)
(3)
(1)
(4)
(5)
(6)
(1)
(6)
(7)
(8)
ASSEMBLY INSTRUCTIONS
2. Assemble the exible pipe with the elbow (4) of the mist blower.
Tighten them with the 100 mm diameter band (5).
NOTE:
• The straight pipe stated above means the following three pipes and can be
substituted depending on your work need.
– Straight pipe (long) (6)
– Straight pipe (short) (7)
– Bent top pipe (8)
Only one or combination of the above pipes is supplied as a standard equipment
with your mist blower, which may differ from country to country.
The remaining types of pipes may need to be obtained as optional accessories.
3. Assemble the straight pipe (6) with the swivel pipe (1).
Align the groove of the straight pipe with the projection on the swivel pipe, and
turn the straight pipe until it clicks.
1. Assemble the swivel pipe (1) with the exible pipe (2).
Tighten them with the 76 mm diameter band (3).
12
1. Checking and Relling Engine Oil
1) Follow the procedure below when the engine oil is cold i.e. the mist blower has
not been running.
• Inspection: Set the blower down on a level surface and remove the oil cap.
Verify that the oil level is within the upper and lower limit marks on
the oil level gauge. If the oil is not up to the 100 mL level, ll up with
new oil.
• Adding Oil: Set the mist blower down on a level surface and remove the oil cap.
Fill the oil up to the upper limit of the oil level gauge.
2) On average, engine oil normally needs to be added after every 20 hours of
operation. This interval for every change in oil corresponds to refueling the mist
blower approximately 10-15 times.
3) Please change the oil whenever it becomes dirty or signicantly changes color.
(Refer to P. 23 for the oil change procedure and frequency.)
Recommended oil: MAKITA genuine oil or SAE10W-30 oil of API type SF grade or
better (4 stroke motor oil for automobiles)
Oil capacity: Approximately 0.22 L (220 ml)
CAUTION:
• If the mist blower is not stored in an upright position, the oil may ow from the level gauge into the engine and give a false reading when
checking the oil level. This may result in inadvertently overlling whenever adding engine oil. Always store in an upright position.
• If the upper oil level limit is exceeded, this can result in the oil becoming dirty and white smoke from burning excess oil.
Check Point #1: Concerning the oil cap when adding oil
• Wipe off dirt and grime around the opening before removing the oil cap.
• Remove the oil cap and place it on a clean surface so that it does not accumulate any sand, dirt, or other foreign bodies. These may stick
to the cap and adulterate the engine oil if proper care is not taken. Dirty oil containing sand, dirt, or foreign bodies may cause excessive
wear on the engine due to improper lubrication and result in a breakdown.
BEFORE STARTING THE ENGINE
Oil
level
gauge
Remain
100 ml
Lower limit
Upper limit
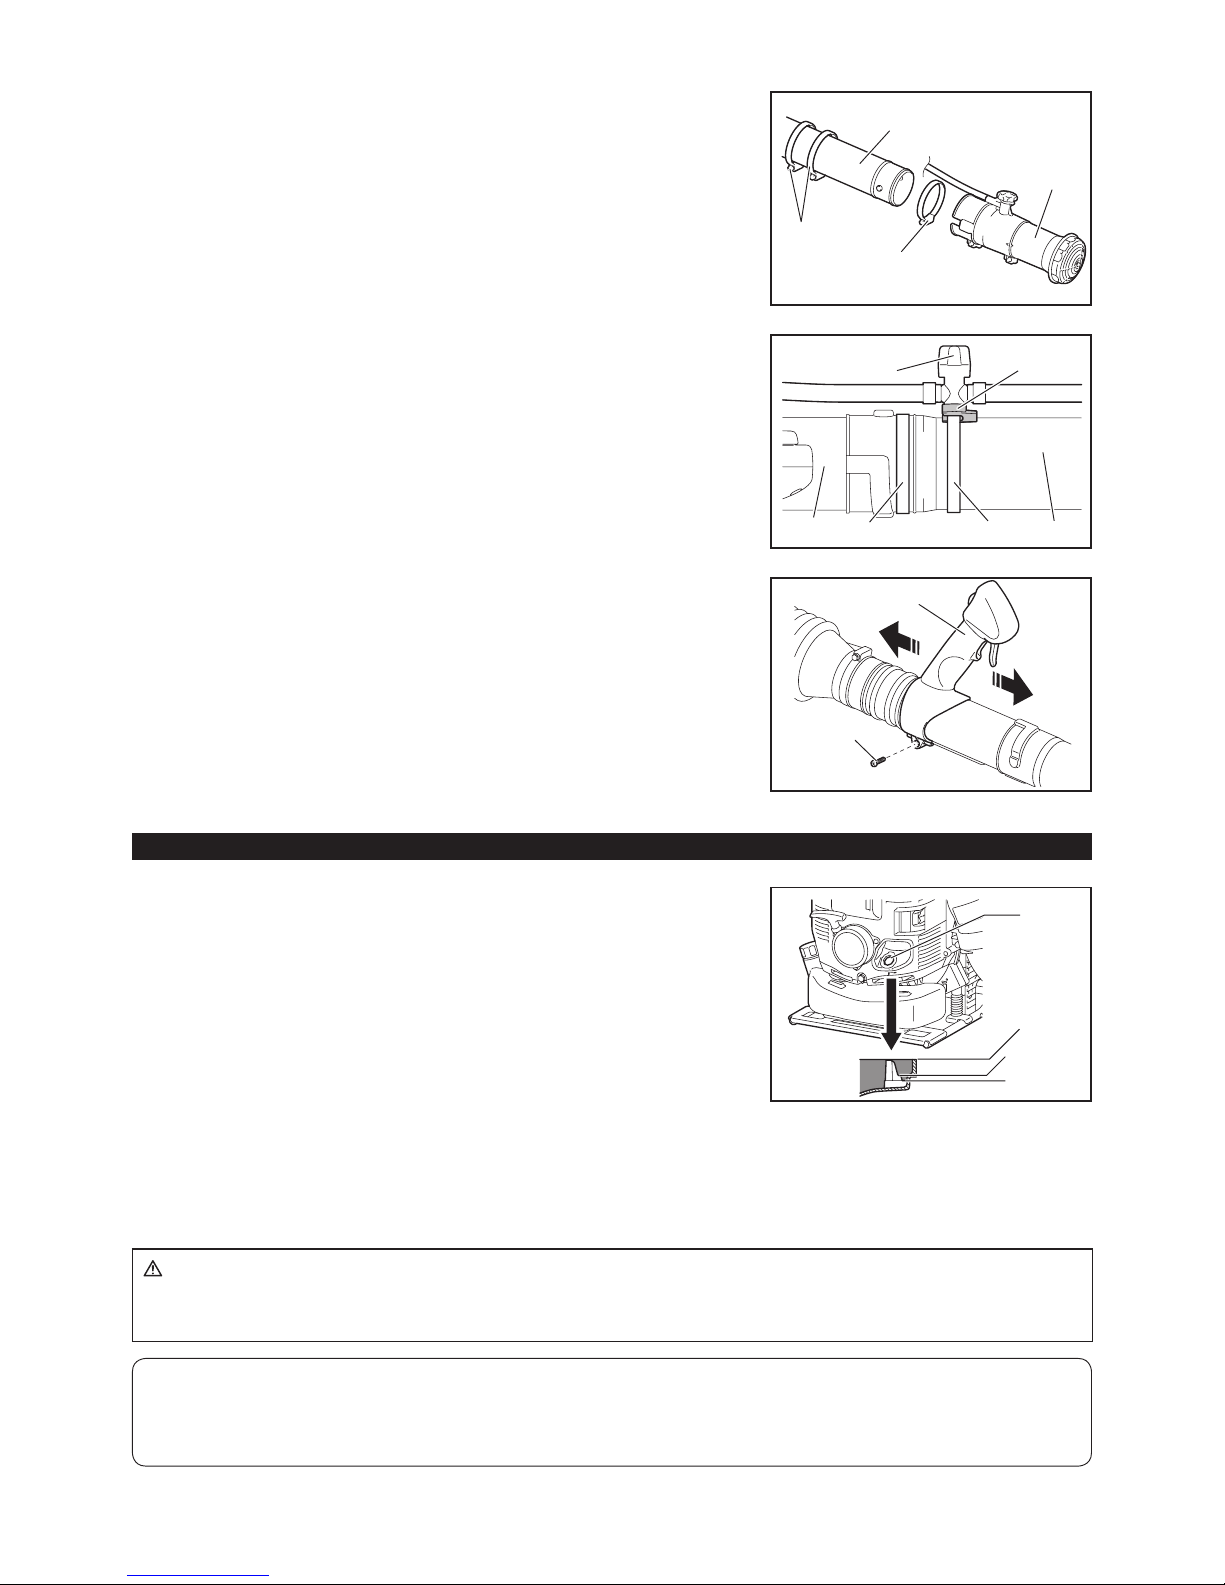
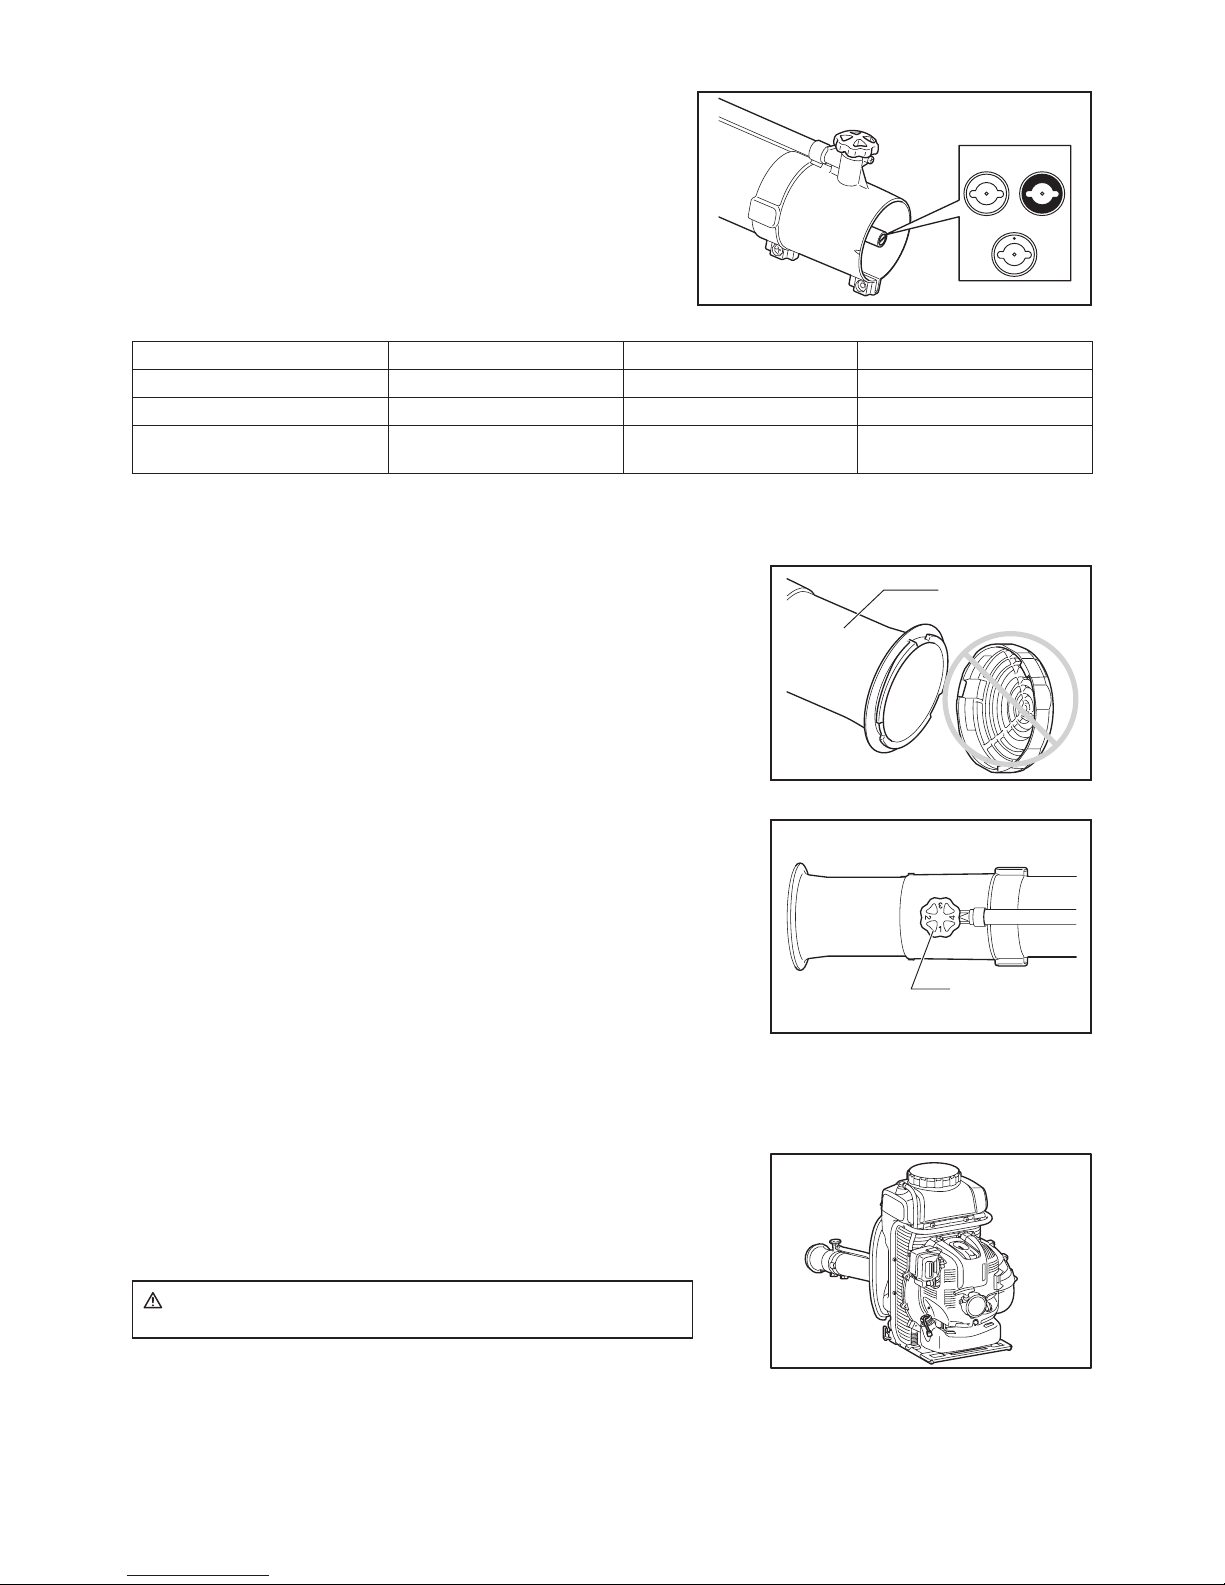
4. Set two 76 mm diameter bands (3) on the pipe loosely (those bands are used for
tightening the swivel pipe and straight pipe, and tightening the solution discharge
lever later).
Assemble the second nozzle (9) with straight pipe (6).
Tighten them with another 76 mm diameter band (3).
(1)
(2)
(10)
(11)
(3) (6)(3)
(1)
(3)
(6)
(3)
(9)
5. Put the solution discharge lever (10) onto the pipe.
Make sure that the open side of the lever’s base (11) faces the swivel pipe.
Tighten them with the 76 mm diameter band (3).
And then, tighten the swivel pipe (1) and straight pipe (6) with another the 76 mm
diameter band (3).
6. Make sure all clamps are tight.
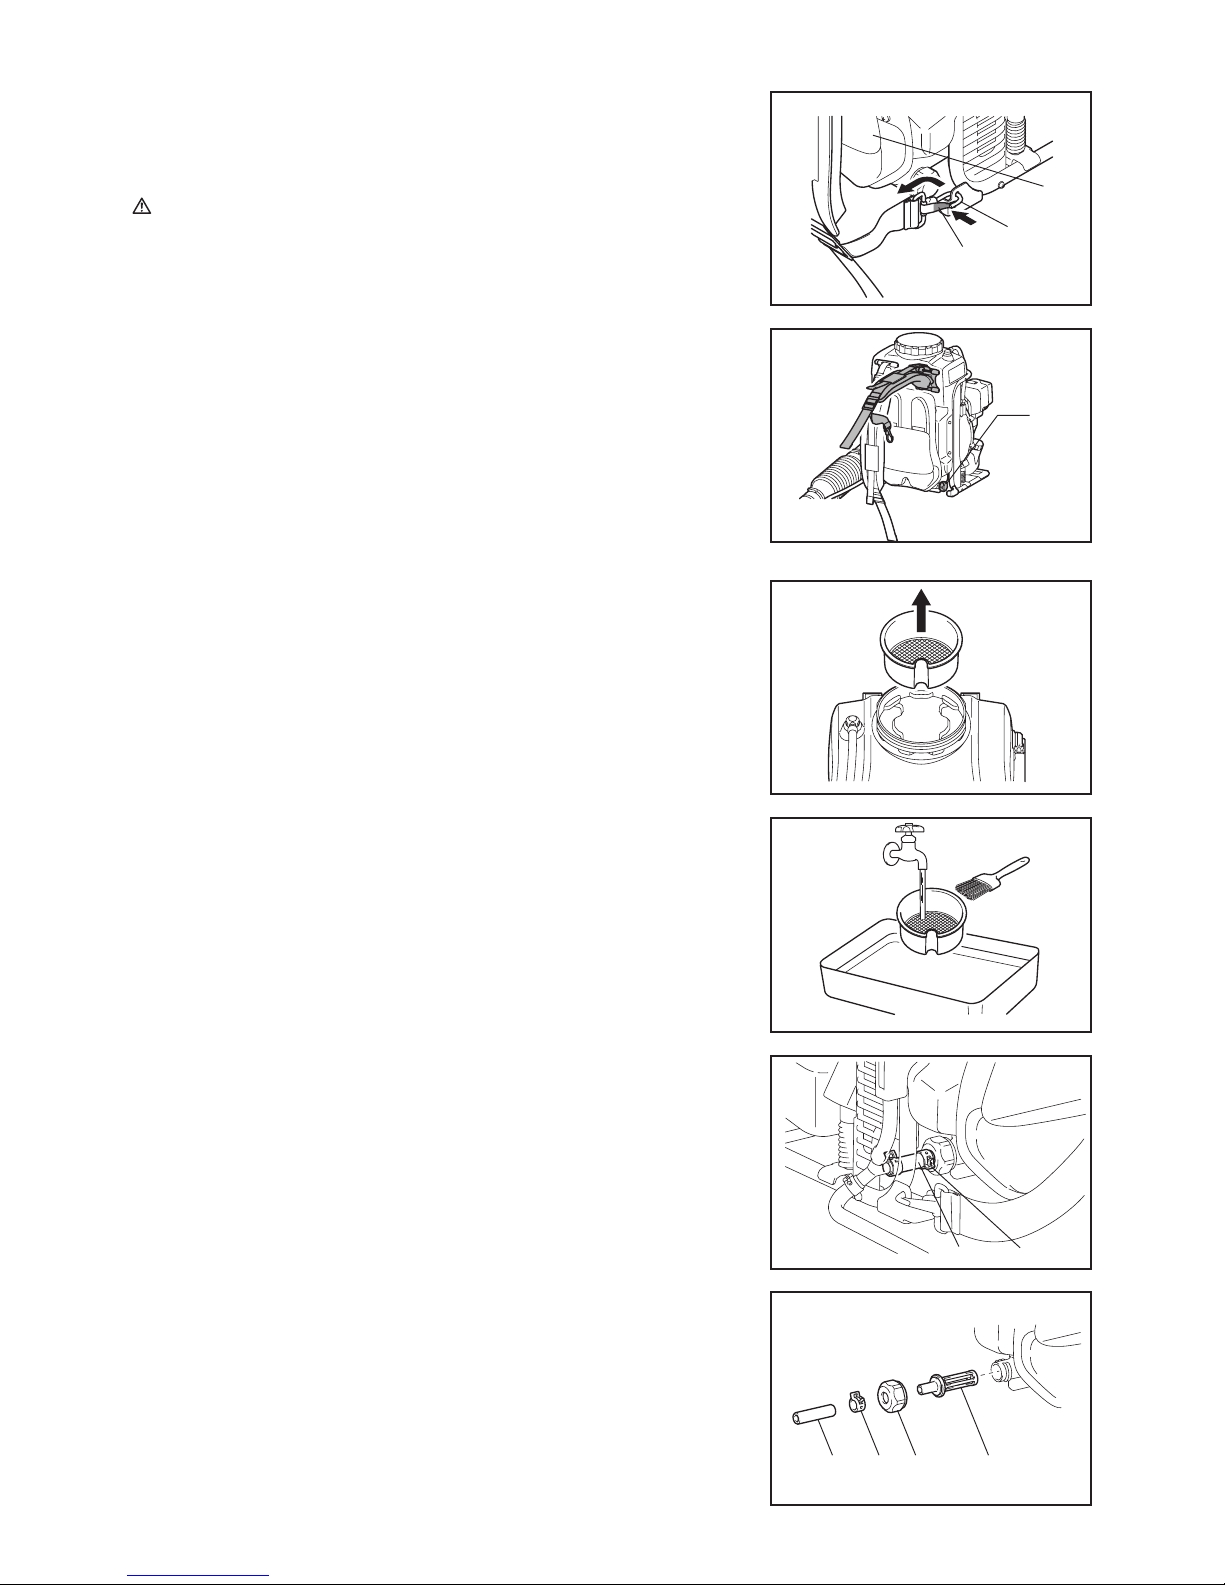
Adjusting and securing the control handle
1. Put the machine on your back and adjust the shoulder strap (see “Adjusting the
shoulder strap”).
2. Slide the control handle (1) along the tube to the most comfortable position.
3. Secure the control handle by turning the knob (2).

13
Check Point #2: If oil is spilled when adding oil
• Oil spillage on the outside on the mist blower may result in the engine oil becoming dirty or adulterated. Therefore, please wipe off any oil
spillage before starting the engine.
2. Fuel supply
WARNING:
• When supplying the fuel, be sure to observe the following instructions to prevent ignition or re:
– Fuel supply must be made in a place free of re. Never bring the re (smoking, etc.) near to the place of fuel supply.
– Stop the engine and allow the engine to cool down before fuel supply.
– Open the fuel tank cap full of fuel slowly. The fuel may sprout out under internal pressure.
– Take care not to spill the fuel. Any spilled fuel must be wiped clean.
– Carry out fuel supply in a well-ventilated place.
• Handle the fuel with care.
– Fuel sticking to the skin or entering an eye may cause allergies or irritation. When any physical abnormality is detected, consult the
medical specialist immediately.
STORAGE PERIOD OF FUEL
Fuel should be used up within a period of 4 weeks, even if it is kept in a special container in a well-ventilated shade.
If a special container is not used or if the container is not covered, fuel may deteriorate in one day.
Storage of machine and rell tank
• Keep the machine and tank at a cool place free from direct sunshine.
• Never keep the fuel in the cabin or trunk.
FUEL
The engine is a four-stroke engine. Be sure to use an automobile gasoline (regular gasoline or premium gasoline).
Points for Fuel
• Never use a gasoline mixture which contains engine oil. Otherwise, it will cause excessive carbon accumulation or mechanical troubles.
• Use of deteriorated oil will cause irregular startup.
When refueling the fuel, be sure to stop the engine and make sure that the engine cools down.
REFUELING METHOD
• Loosen the tank cap a little so that there will be no difference in atmospheric pressure.
• Detach the tank cap, and refuel, discharging air by tilting the fuel tank so that the refuel port will be oriented upward. (Never rell fuel full to the
oil rell port.)
• After refueling, securely tighten the tank cap.
• If there is any aw or damage on the tank cap, replace it.
• The tank cap will wear. Replace the tank cap every two to three years.
14
OPERATION
1. Starting
WARNING:
• Never attempt engine start in a place where the unit was refueled. When
starting the engine, keep a distance of at least 3 m (10 feet).
– Otherwise, it will may cause ignition or re.
• Exhaust gas from the engine is toxic. Do not operate the engine in a poorlyventilated place, such as in a tunnel, building, etc.
– Operating the engine in the poorly-ventilated place may cause poisoning by
exhaust gas.
• In case of detection of any abnormality in sound, odor, vibration after start,
stop the engine immediately and carry out inspection.
– If the engine is operated without attending such abnormality, an accident
may occur.
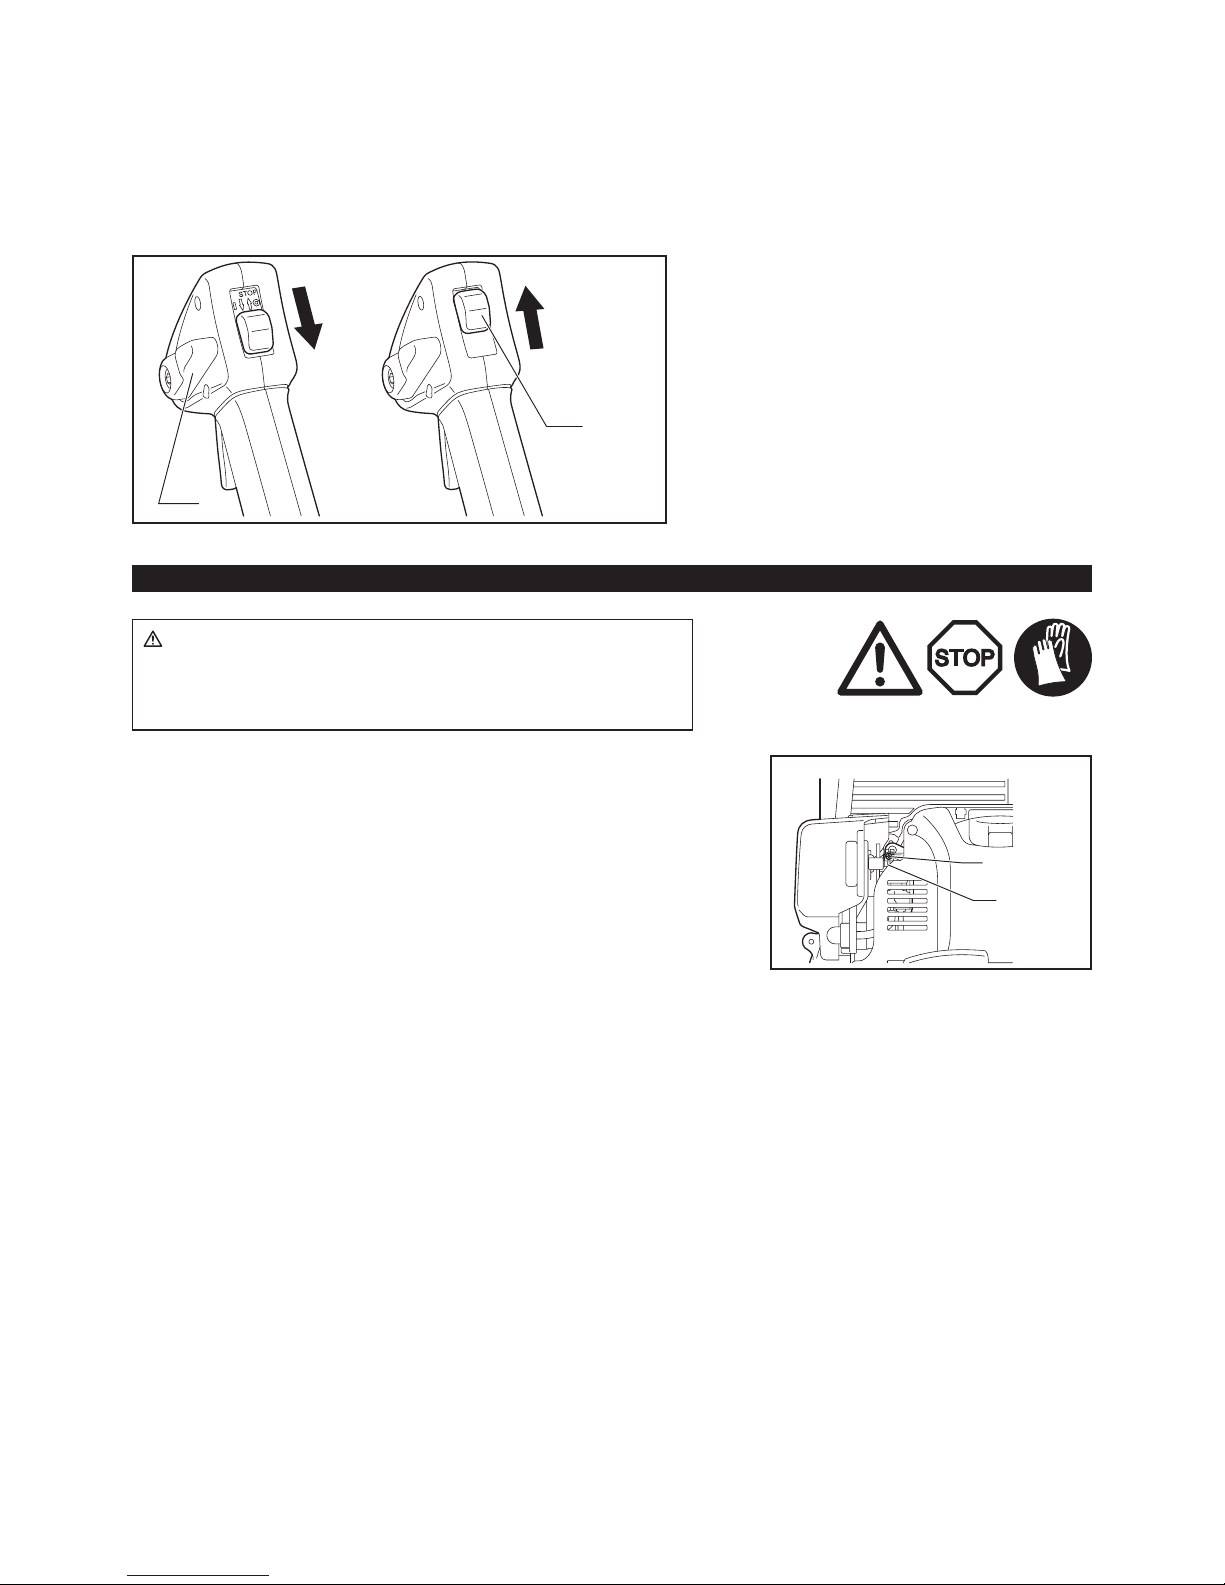
• Make sure that the engine stops when the stop switch is set to “O” position.
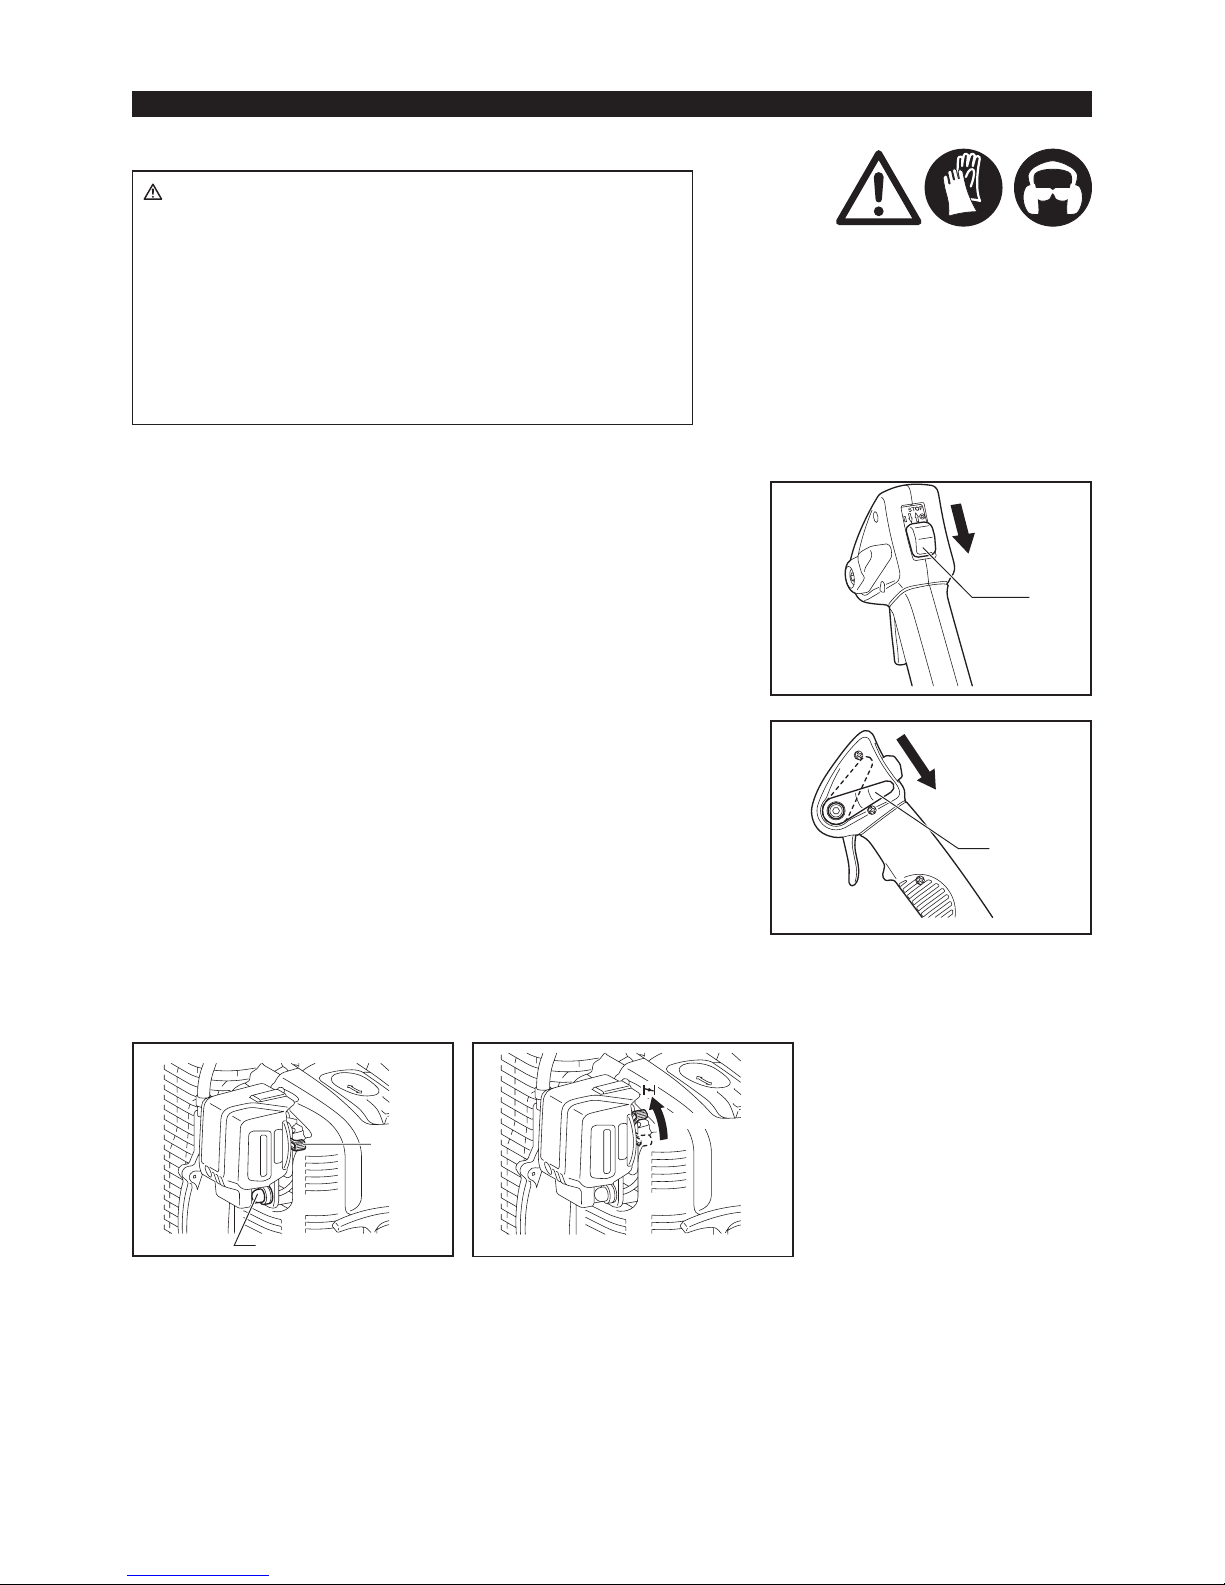
1) When the engine is cold, or when the fuel it refueled
(1) Set this machine on a at space.
(2) Set the stop switch to “ I ” position.
(3) Verify that the cruise control lever is in the low-speed position.
(4) Continue to push the primer pump until fuel enters into the primer pump.
– In general, fuel enters into the carburetor by 7 to 10 pushes.
– If the primer pump is pushed excessively, an excess of gasoline returns to
the fuel tank.
(4)
Choke
lever
Primer pump
Close
(2)
Stop
switch
(3)
High speed
Low speed
Cruise
control lever
15
(9) Continue warm-up operation for 2 to 3 minutes.
(10) Rotation of the engine speed stabilizes and when from low speed making at
high-speed rotation, if reaches the point where it accelerates smoothly, it is
completion of warming-up.
(8)
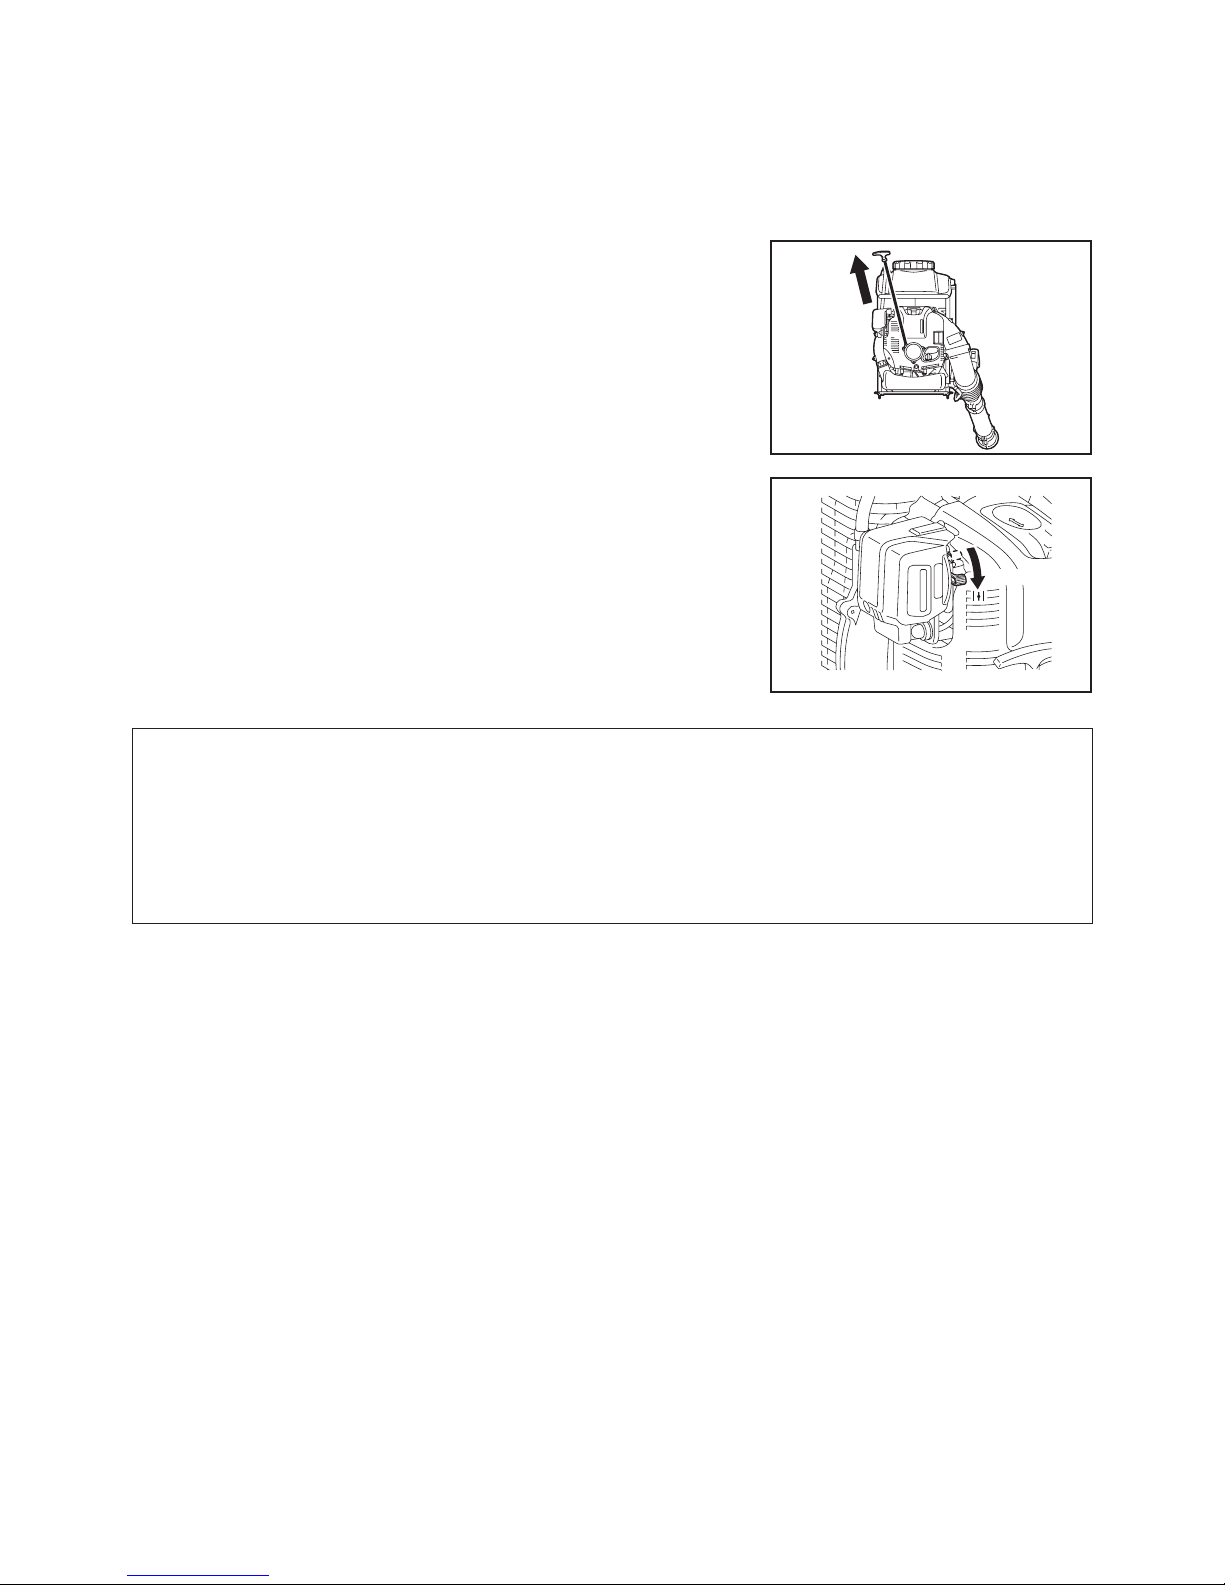
(5) Lifting the choke lever of the air cleaner right side, close the choke lever.
(6) Hold the element cover with a left hand to prevent the engine from moving,
settle down to take the stable position.
(7) Pull out slowly the starter handle till a certain resistance is felt. Return the
starter handle backward once from this position, then pull it out with force.
– Never pull the rope to the full.
– Once the starter handle is pulled, never release your hand immediately.
Hold the starter handle until it returns to its original point.
(8) When the engine starts, open the choke lever.
– Open the choke lever progressively while checking the engine operation. Be
sure to open the choke lever to the full in the end.
– In cold or when the engine is cooled down, never open the choke lever
suddenly. Otherwise, the engine may stop.
Note:
• The engine may be damaged if the choke lever is moved further beyond the “CLOSE” position.
• If the engine stops with an explosion sound or if the engine started, but stopped before operation of the choke lever, return this lever to the
“OPEN” position and pull the starter handle several times to start the engine again.
• If the operator keeps pulling the starter handle several times with the choke lever left in the “CLOSE” position, the engine may be difcult to
start because of over-suction of the fuel.
• In case of over-suction of the fuel, remove the spark plug and pull the handle several times rapidly to discharge any excess fuel. Dry the
spark plug electrode.
• When the throttle valve does not return to a position in contact with the idling adjusting screw even if the throttle lever is set to the low
speed, correct the control cable catching state to ensure proper return of the valve.
2) When the engine is warm
(1) Place the engine on a at ground.
(2) Press the primer pump several times.
(3) Make sure that the choke lever is open.
(4) Hold the element cover with a left hand to prevent the engine from moving, settle down to take the stable position.
(5) Pull out slowly the starter handle till a certain resistance is felt. Return the starter handle backward once from this position, then pull it out
with force.
(6) When the engine is difcult to start, open the throttle valve by about 1/3.
(9)
Open
16
2. Stopping
1) When the cruise control lever is a low-speed position.
Release the trigger lever to reduce the engine speed, and set the stop switch to
the “O” position.
2) When the cruise control lever (1) is except a low-speed position.
Set the cruise control lever to the low-speed position, reduce the engine speed,
and set the stop switch (2) to the “O” position.
(1)
(2)
High speed
Low speed
ADJUSTMENT OF IDLING
DANGER:
The carburetor is the adjustment being completed at the time of factory
shipment. Please do not adjust other than idling adjusting. When adjustment
becomes necessary, please consult your dealership or an authorized service
agent.
Checkup of low-speed rotation
Set the low-speed rotation to 2,800 min-1.
• If it is necessary to change the rotation speed, regulate the adjusting screw, with
Phillips screwdriver.
• Turn the adjusting screw to the right, and the engine rotation will increase. Turn
the adjusting screw to the left, and the engine rotation will drop.
Adjusting
screw
Carbureter
17
1. Installing the strainer
The mist blower is provided with the strainers at the solution tank opening and the
pipe inlet head.
Always make sure the strainer is installed in place.
To install the strainer, push it in place.
To remove the strainer, pry it out of place.
WARNING:
• Tighten the tank cap rmly. Failure to tighten the tank cap may cause solution
leakage, pressure reduction and the like.
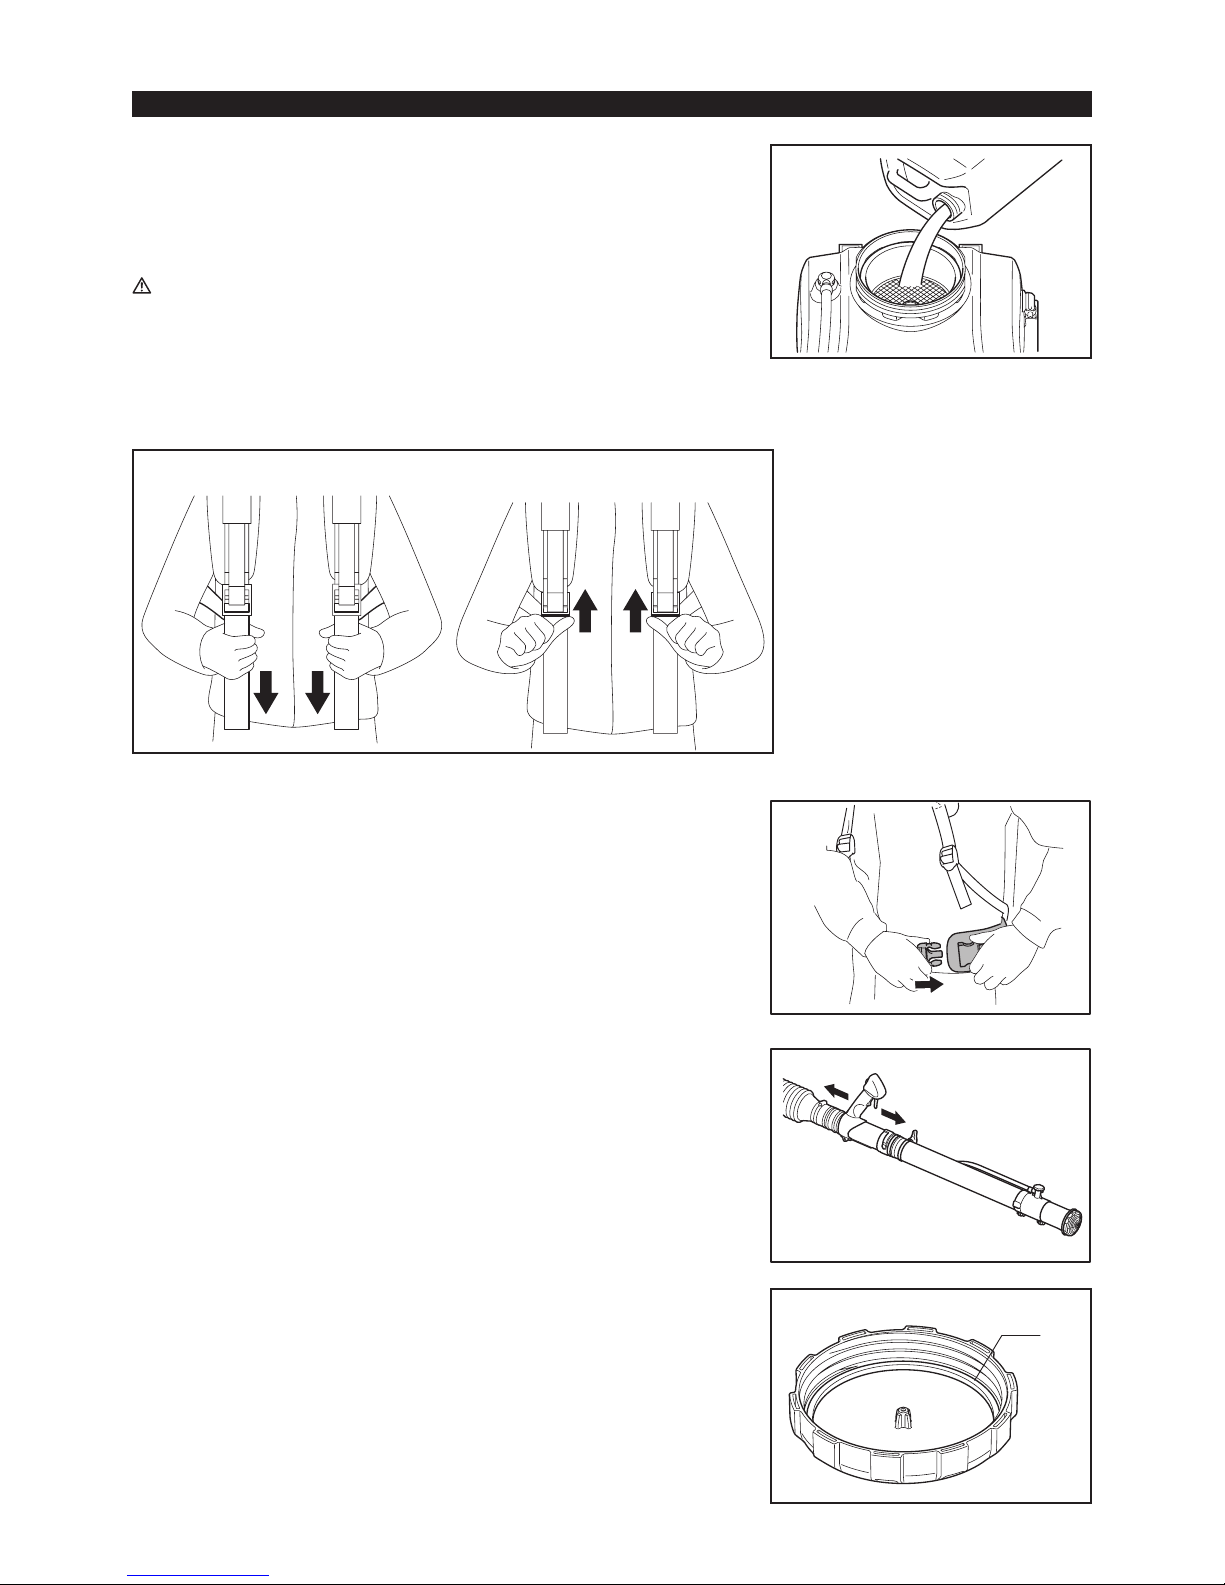
2. Adjusting the shoulder strap
Adjust the shoulder strap to a length that is comfortable to work while carrying the
mist blower.
Adjust as shown in the gure.
To tighten strap To loosen strap
Hip belt (optional accessory)
The hip belt (optional accessory) enables the operator to carry the appliance more
stably.
OPERATION METHOD
3. Adjusting the control handle
Move the control handle along the swivel pipe to the most comfortable position.
4. Filling the solution tank
1) Keep the gasket (1) in good condition and lubricated with grease and clean.
(1)
18
2) Put the mist blower on a at surface.
3) Before lling the solution tank, be sure to close the solution discharge lever (2).
4)-1 For Brazil:
The solution tank is capable of 15 liters of solution.
When the tank is full, the total weight including solution is nearly 30 kg. Adjust
the solution pouring volume so that the mist blower with solution in tank does
not overweigh and can be within an operator’s strength.
When the total product weight of 25 kg or less after lling is needed, use the
level line on the side of the solution tank at or below 10 l as a guideline.
4)-2 For countries other than Brazil:
The solution tank is capable of 15 liters of solution.
When the tank is full, the total weight including solution is nearly 30 kg.
Adjust the solution pouring volume so that the mist blower with solution in tank
is not overweighted and can be within an operator’s strength.
When 10 liters of solution is poured (that is, when the poured solution level
points 10 l marking on the side of the tank), the total product weight is nearly
25 kg.
4)-3 Use the solution level in the tube on the side of the mist blower as a guideline
to check the solution level in the solution tank.
5. Solution mixing function
The solution mixing device inside the solution tank allows solution to be mixed with
air bubbles coming out of it during spraying operation.
(2)
19
6. Mist blower operation
While operating the mist blower, adjust the throttle bar so that the wind force is
appropriate for the work location and conditions.
Low speed: 2,800/min
High speed: 7,400/min
The cruise control lever allows the operator to maintain a constant engine RPM
without operating the trigger lever.
Lifting the cruise control lever increases engine RPM.
Lowering the cruise control lever decreases RPM.
Adjusting engine RPM when the cruise control lever is being used:
When increasing RPM:
• Pull the trigger lever to increase engine RPM. Engine RPM returns to its
original setting when the trigger lever is released.
• Increasing the RPM in this manner also increases the cruise control setting.
The cruise control lever lifts simultaneously as the trigger lever is pulled, and
the new cruise control setting will be maintained at the higher RPM.
When reducing engine RPM:
• Lower the cruise control lever to the low-speed position
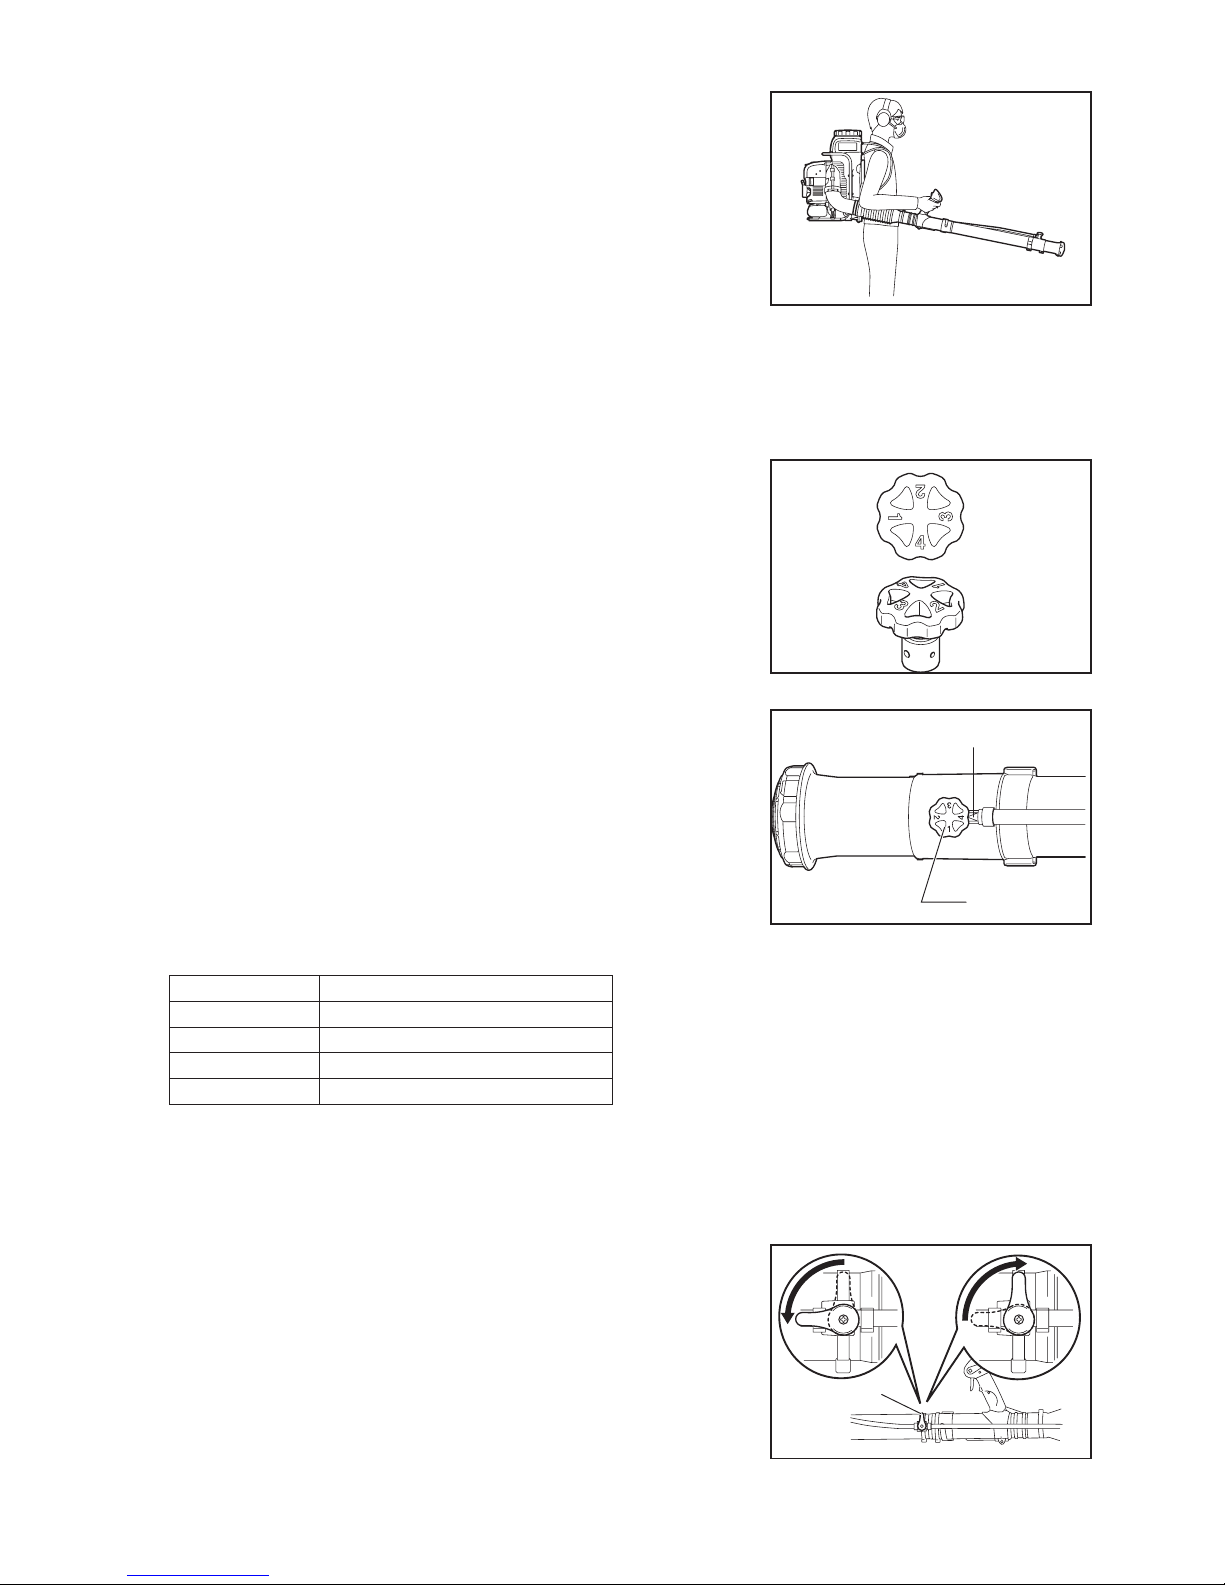
Liquid adjustment knobs
Liquid adjustment knobs allow a wide range of different discharge rates.
Adjusting the discharge rate
Turn the liquid adjustment knob (1) on the second nozzle to obtain the desired
discharge rate so that the number on the liquid adjustment knob is aligned with the
triangle marking (2).
Discharge rate
Spray holding the straight pipe with the angle of 0 degrees to - degrees to the horizontal.
Knob position Discharge rate (l/min) (mean value)
1 0.3
2 1.0
3 1.6
4 2.5
Note:
• Use the gures shown in the above table as a guide line for operation and these may be changed according to the density of chemical
solution used in the solution tank.
(A) (B)
(1)
(1)
(2)
Solution discharge lever
To start the solution feeding (A), turn the solution discharge lever (1) horizontally to
the pipe.
To stop the solution feeding (B), turn the solution discharge lever vertically to the
pipe.
20
(1)
(2)
(3)
(4)
(1)
(2)
(3)
(4)
(5)
(6)
Installing and removing the dispersion cover
To install the dispersion cover (1), mount the dispersion cover on the top nozzle (2)
so that its protrusion (3) is aligned with the notch (4) in the top nozzle.
Secure the dispersion cover by turning it fully clockwise.
To remove the dispersion cover, follow the above procedure in reverse.
Changing the nozzle to a small-amount-solution-discharge
nozzle (optional accessory)
When a small amount of solution needs to be sprayed, replace the nozzle cap with
another type of supplied nozzle cap with a small discharge hole.
To replace the nozzle, follow the procedure below.
1. Remove the screw (1) from the second nozzle (2) and then remove the top
nozzle (3) and dispersion cover (4).
2. Fit a slotted bit screwdriver to the slit (5) in the nozzle top and remove the nozzle
cap (6) by turning it fully counterclockwise.
21
3. Mount another supplied nozzle with a small discharge hole.
NOTE: Choose a right nozzle out of the following two according to the kind
(viscosity) of the chemical you use.
(7) (8)
(9)
(3)
(10)
Nozzle type Viscosity of chemical Example of chemical Discharge rate (L/min)*
1
Aluminum nozzle (silver color) (7) *2 High MALATHION (Mix the oil.) 0.14
Brass nozzle (gold color) (8) *
2
Low Aqua K-Othrine (Mix the water.) 0.075
Brass nozzle with punch marking
(gold color) (9) *
2
Low Cipermetrinato (Mix the water.) 0.060
Note 1: The discharge rate shown in the table is that in case of water only used for a guide line. This varies by chemicals being used.
Note 2: The type of the nozzle(s) provided with the mist blower changes from country to country.
4. Mount the top nozzle (3) and secure it with the screw (1).
Note: When using an above small-amount-solution-discharge nozzle, do not mount
the dispersion cover (4) and put it aside so that it is not lost.
5. Set the knob (10) to the position 4.
7. TRANSPORTING THE MIST BLOWER
Please keep the mist blower in an upright position whenever transporting or storing.
(Refer to the gure.)
Transporting or storing in a position that is not upright may cause oil to spill inside
the mist blower engine. This may result in oil leaks and white smoke from burning
oil, and the air cleaner may become dirty with oil.
DANGER:
When transporting and storing the mist blower, be sure to stop the engine.
22
(1)
(3)
(2)
(4)
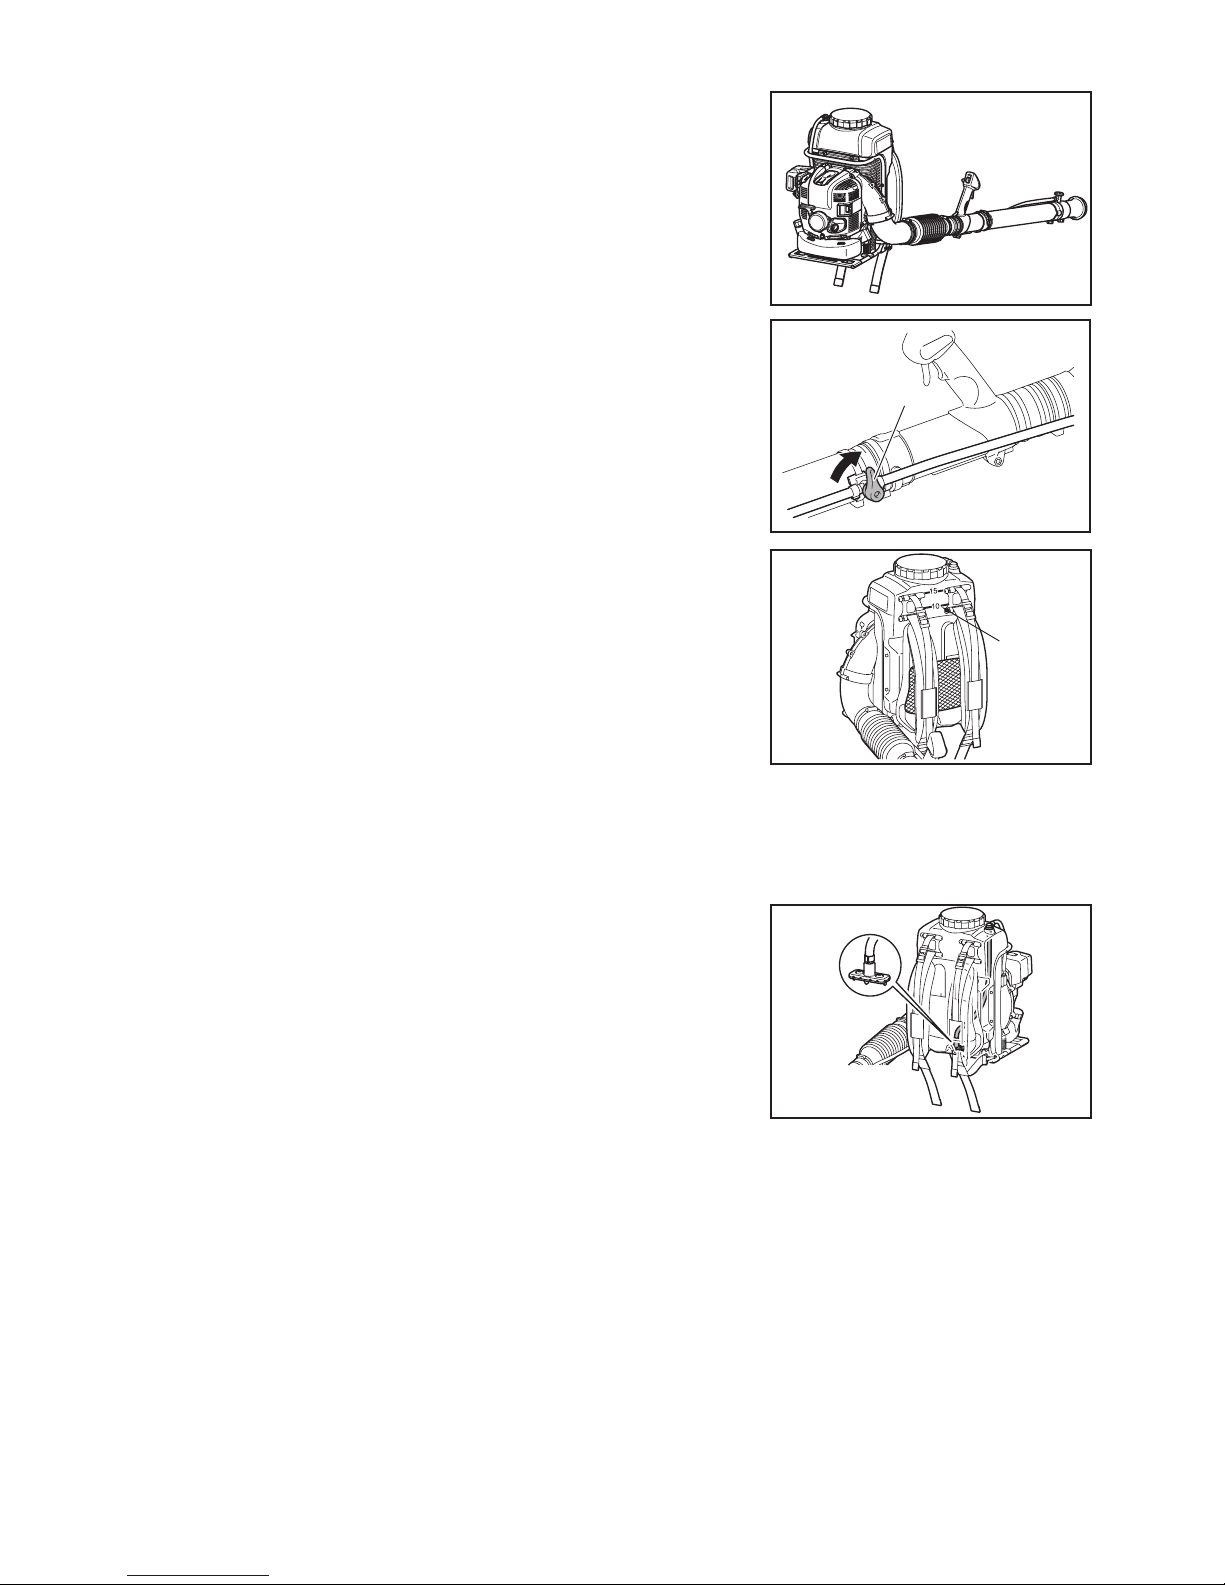
1) Draining the solution tank
To clean the solution tank (1), remove the shoulder strap (2) from the hook (3) by
pressing the bottom of the buckle to open it and then taking it off.
Clean the tank inside with water.
And then remove the draining cap (4) to drain the waste water after cleaning.
CAUTION:
• After draining, be sure to attach the strap to the hook.
(5)(6)
(5)(7) (8)(6)
2) Cleaning the strainer at the top of solution tank
Remove the tank cap, take out the strainer from inside the tank and then clean it
after use.
3)-1 Remove the hose band (5) and the tube (6).
3)-2 Loosen and remove the cap (7) that comes out with the strainer (8).
3)-3 Clear dust and particles with water away from strainer.
3)-4 Put the strainer (8) and the cap (7) back to the original position. Be sure to
tighten the cap rmly.
Push the tube (6) over the strainer (8) as far as the hose band can fully hold it
and then secure it with the hose band (5).
23
INSPECTION AND MAINTENANCE
DANGER:
• Before inspection and maintenance, stop the engine and allow it to cool. Remove also the spark
plug and plug cap.
– If inspection or maintenance is attempted immediately after engine stop or with the plug cap
left attached, the operator may suffer burn or an accident due to careless startup.
• After inspection and maintenance, make sure that all parts are assembled. Then, proceed to
operation.
NOTICE:
• Never use gasoline, benzine, thinner, alcohol or the like. Discoloration, deformation or cracks may result.
1. Replacement of engine oil
Deteriorated engine oil will shorten the life of the sliding and rotating parts to a great extent. Be sure to check the period and quantity of
replacement.
DANGER:
• In general, the engine main unit and engine oil still remain hot just after the engine is stopped. In replacement of oil, make sure that the
engine main unit and engine oil are sufciently cooled down. Otherwise, there may remain a risk of burn. In addition just after of the engine
stops all the oil may not return to crank case. Do not check the oil level right after engine stops.
• If the oil lled above the limit, it may be contaminated or may catch re with white smoke.
Interval of replacement: Initially, every 20 operating hours, and subsequently every 50 operating hours
Recommended oil: SAE10W-30 oil of API Classication SF Class or higher (4-stroke engine oil for automobile)
(1)
(4)
(3)
(2)
Points in replacement of engine oil
• Never discard replaced engine oil in garbage, earth or sewage ditch. Disposal of oil is regulated by law. In disposal, always follow the
relevant laws and regulations. For any points remaining unknown, contact Authorized Service Agent.
• Oil will deteriorate even when it is kept unused. Perform inspection and replacement at regular intervals (replace with new oil every
6 months).
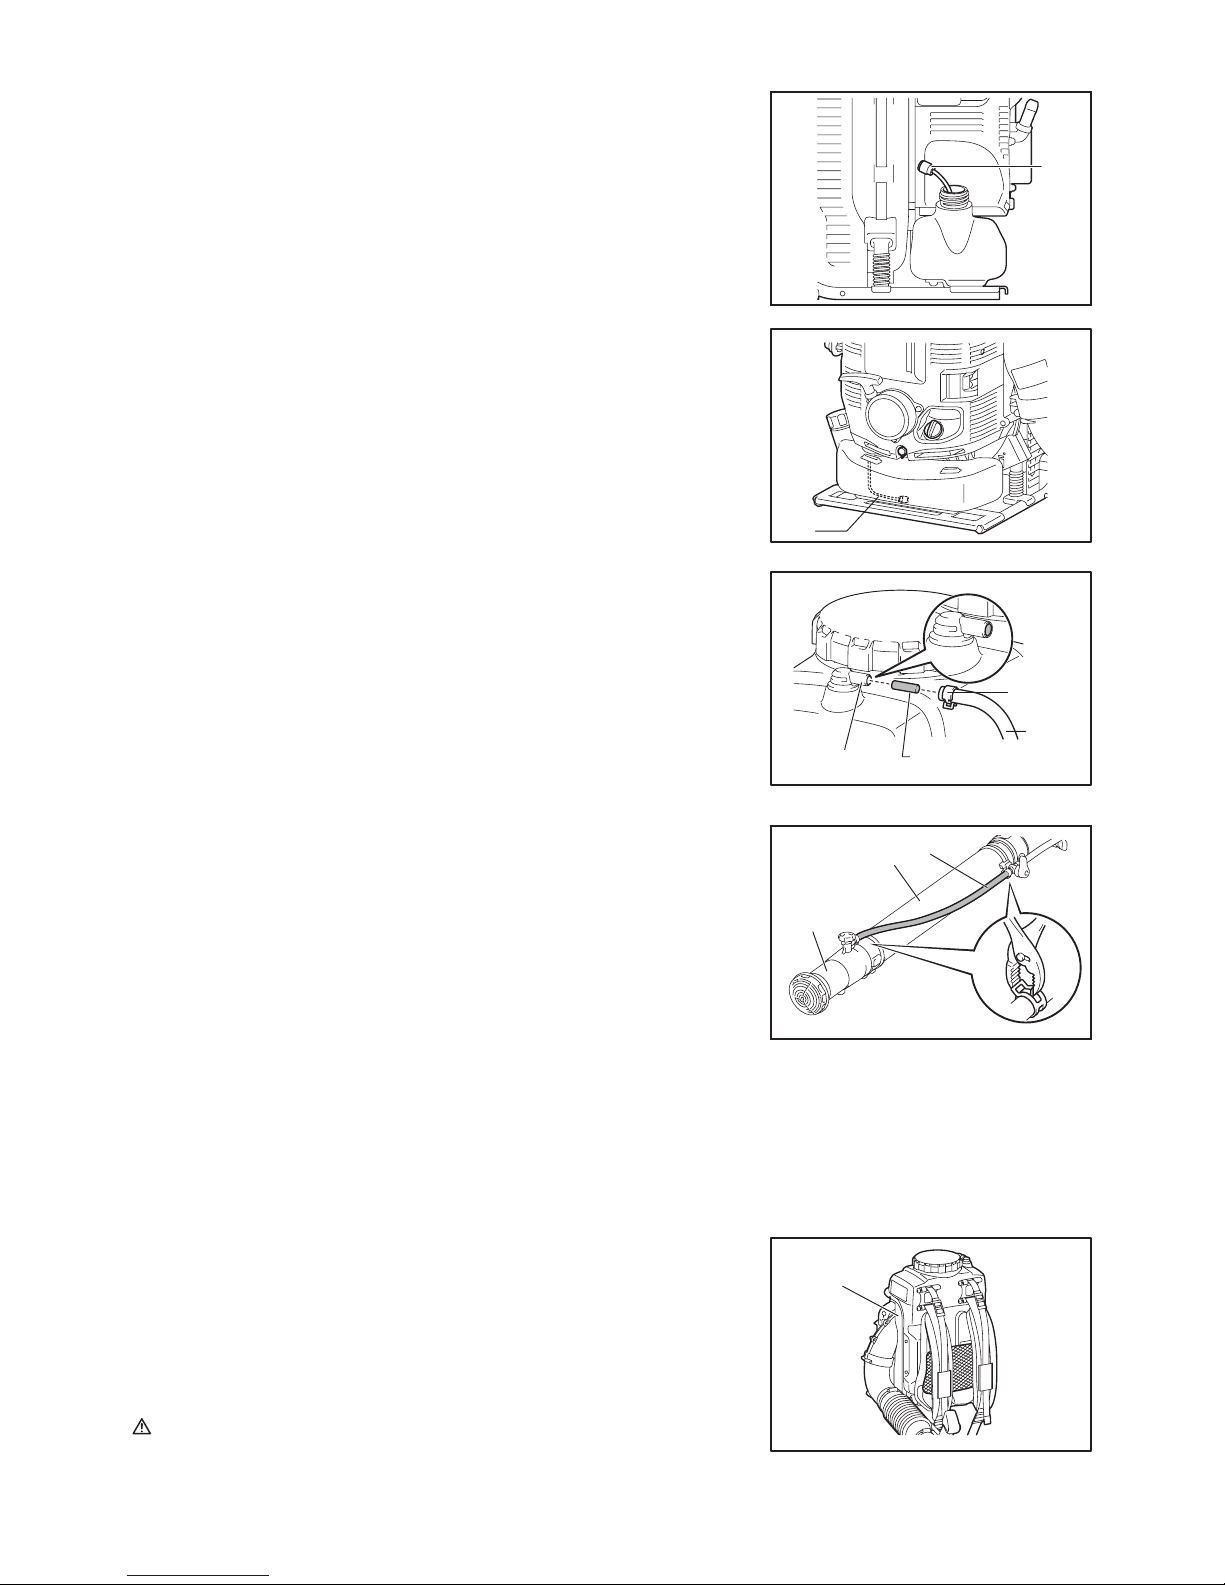
Oil Change Procedure
Please follow these steps when changing the oil:
(1) Set the mist blower down on a level surface.
(2) Place a waste oil container under the drainage hole (1) to catch the oil as it
drains out. The container should have a capacity of at least 220 ml to be able to
catch all of the oil.
(3) Loosen the oil drain bolt (2) to let the oil drain out. Be careful not to allow oil to
get on the fuel tank or other parts.
CAUTION: Be careful not to lose the gasket (aluminum washer) (3). Place
the oil drain bolt (2) in a location where it will not accumulate dirt.
(4) Remove the oil cap (4). (Removing the oil cap (4) allows the oil to drain easily.)
CAUTION: Be sure to set the oil cap (4) down in a location where it will not
accumulate dirt.
(5) As the level of the oil being drained decreases, tilt the mist blower over on to the
side with the drain so that the oil will completely drain out.
(6) After the oil has completely drained out, tighten the oil drain bolt (2) securely. If
the bolt is not tightly fastened, this may result in an oil leak.
CAUTION: Do not forget to put the gasket (aluminum washer) (3) back on
when reattaching the drain plug.
(7) Adding oil during the oil change procedure is performed in the same manner
as the separately explained procedure for adding oil whenever the level is
insufcient. Always add oil by lling from the opening under the oil cap.
(Specied oil level: Approximately 220 ml)
(8) After lling with oil, tighten the oil cap (4) securely to prevent oil leaks.
4) Retaining the straight pipe with a supplied hand strap
When storing the mist blower, retain the straight pipe with a supplied hand strap tied
to the frame.
Retaining the pipe in this position will be easy to transport the unit.
24
2. Cleaning of air cleaner
WARNING: INFLAMMABLES STRICTLY PROHIBITED
Interval of Cleaning and Inspection: Daily (every 10 operating hours)
(1) Loosen the knob bolt (1).
(2) Remove the air cleaner cover (2).
(3) Take out the element (3) and remove any dirt with the brush.
Note: The element is a dry type and should not get wet. Never wash with water.
(4) Replace the element with a new one if it is damaged or very dirty.
(5) Wipe off any oil that has come into contact with the breather with a rag or cloth.
(6) Install the element in the cleaner case (4).
(7) Attach the air cleaner cover and tighten the knob bolt.
DANGER:
• Clean the element several times a day, if excessive dust adheres to it.
• If operation continues with the element remaining not cleared of oil, oil in the air cleaner may fall outside, resulting in oil contamination.
3. Checking the spark plug
CAUTION:
• When removing the spark plug, clean the spark plug and cylinder head rst, so that no dirt, sand, etc will enter the cylinder.
• You must remove the spark plug after the engine has cooled down in order to avoid damaging the threaded hole in the cylinder.
• The spark plug must be installed properly into the threaded hole. If installed at an angle, the threaded hole in the cylinder will get damaged.
(1) Opening/closing the plug cover
To open the plug cover, pull up on the seam of the plug cover projection and
slide in the direction of the “OPEN” indication as shown in the gure at right.
When closing the cover, slide the cover in the “CLOSE” direction till the click
under the plug cover projection rides over the engine cover. Finally, push in the
projection.
(1)
(2)
(3)
(4)
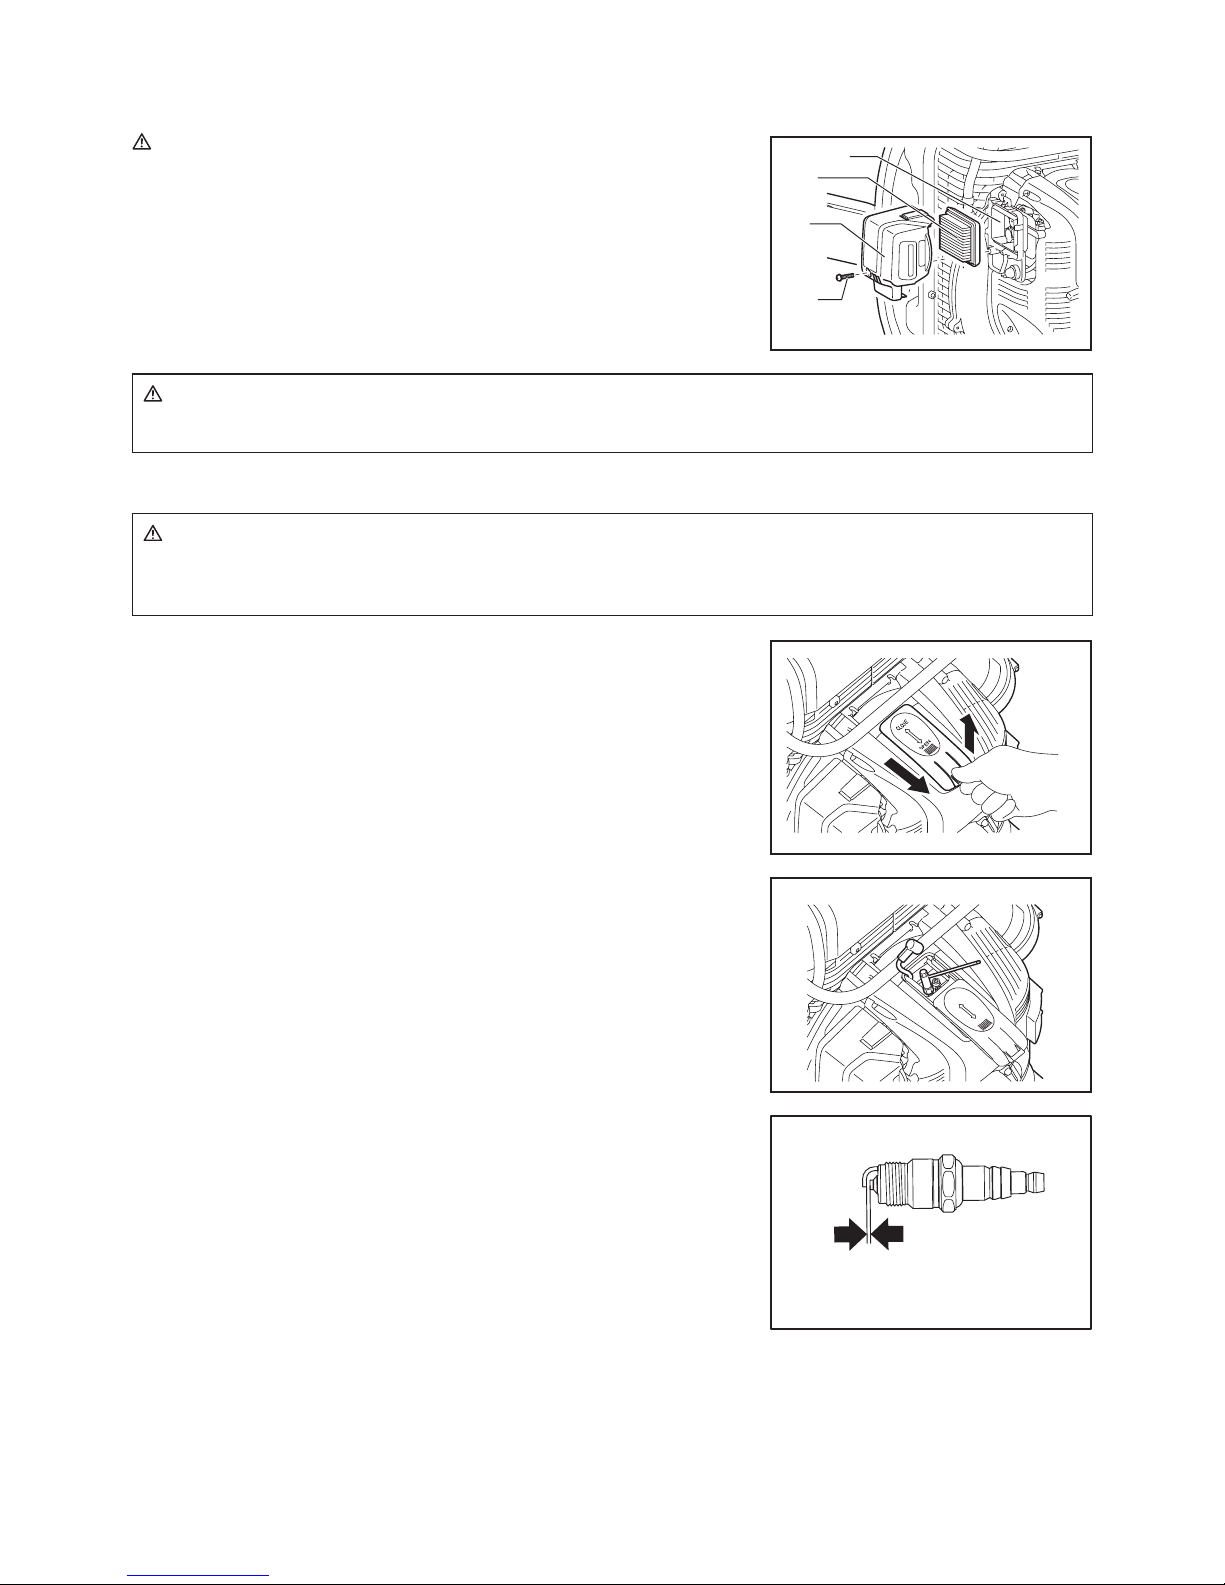
(2) Removing the spark plug
Use an attached box wrench to remove or install the spark plug.
(3) Checking the spark plug
The clearance between two electrodes of spark plug (see the gure) is 0.7 to
0.8 mm. Adjust to the correct clearance when it is too wide or too narrow.
Clean thoroughly or replace the spark plug if it has accumulated carbon or
contaminated.
(4) Replacing the spark plug
For replacement, use NGK-CMR6A.
0.7 - 0.8 mm
25
4. Cleaning the fuel lter
• Clogged fuel lter may cause difculty of start-up or failure of engine speed
increase.
• Check the fuel lter regularly as follows:
(1) Remove the fuel tank cap, drain the fuel to empty the tank. Check the tank inside
for any foreign materials. If any, wipe clean such materials.
(2) Pull out the fuel lter (1) with wire through the oil lling port.
(3) If the fuel lter surface is contaminated, clean it with gasoline. Foul gasoline
must be disposed of according to the method specied by each local authority.
Excessively foul lter must be replaced.
(4) Reset the fuel lter in the fuel tank and tighten rmly the fuel tank cap.
Note:
When resetting the fuel lter in the tank, return it to the position as shown in the
gure.
For replacement, contact your dealership or an authorized service agent.
8. Cleaning of parts
• Keep the engine always clean.
• Keep the cylinder ns free of dust or dirt. Dust or dirt adhering to the ns will
cause seizure.
• Blowing air is taken in from the air inlet net (3). When airow has dropped
down during operation, stop engine and inspect the air inlet net for blocking by
obstacles.
• Note that failure to remove any such obstacles may result in the engine becoming
overheated and damaged.
WARNING:
Never use the mist blower without the net of the mist blower. Before each use,
check that the net is attached in place and is free from any damage.
(1)
(1)
(3)
(3)
(2)
(1)
Joint pipe
Element
Hose band
Hose
5. Cleaning the joint pipe cleaner element
(1) Remove the hose band and the hose.
(2) Pull out the element and remove any dirt form it with a brush.
If it is difcult to pull out the element, use a slender stick to catch it out.
(3) Replace the element with a new one if it is damaged or very dirty.
(4) Press the element into the joint pipe until the element tail is ush with its port
end.
(5) Install the hose and secure it with a hose band.
6. Replacement of solution hose
• Check the solution hose (1) frequently. Damaged hose may result in leakage of
chemical solution. Replace the hose if necessary as follows.
1. Remove the nozzle (2) from the pipe (3).
2. Loosen the hose band, and then replace the old hose with new one.
7. Inspection of bolts, nuts and screws
• Retighten loose bolts, nuts, etc.
• Check for fuel and oil leakage.
• Replace damaged parts with new ones for safety operation.

26
STORAGE
1. Draining the fuel
WARNING:
• When draining the fuel, be sure to stop the engine and conrm that the engine cools down.
– Just after stopping the engine, it may still hot with possibility of burns, inammability and re.
DANGER:
• When the machine is kept out of operation for a long time, drain up all fuel from the fuel tank and carburetor, and keep it at a dry and clean
place.
Drain up fuel from the fuel tank and carburetor according to the following procedure:
(1) Remove the fuel tank cap, and drain fuel completely.
If there is any foreign matter remaining in the fuel tank, remove it completely.
(2) Pull out the fuel lter from the rell port using a wire.
(3) Push the primer pump until fuel is drained from there, and drain fuel coming into
the fuel tank.
(4) Reset the lter to the fuel tank, and securely tighten the fuel tank cap.
(5) Then, continue to operate the engine until it stops.
(6) Remove the spark plug, and drip several drops of engine oil through the spark
plug hole.
(7) Gently pull the starter handle so that engine oil will spread over the engine, and
attach the spark plug.
(8) During storage, please keep the machine upright.
(9) Keep the drained fuel in a special container in a well-ventilated shade.
2. Draining the solution tank
WARNING:
• When draining the solution tank, be sure to stop the engine and conrm that
the engine cools down.
– Just after stopping the engine, it may still hot with possibility of burns,
inammability and re.
Before storing the mist blower, drain the solution tank by referring to the section
titled “TRANSPORTING THE MIST BLOWER”.
3. Cleaning the strainer at the top of the solution tank
When storing the mist blower, always clean the strainer at the top of solution tank.
To clean the strainer, refer to the section titled “TRANSPORTING THE MIST
BLOWER”.
4. Cleaning the strainer at the solution tank-tube joint
When storing the mist blower, always clean the strainer at the solution-tank-tube
joint.
To clean the strainer, refer to the section titled “TRANSPORTING THE MIST
BLOWER”.
DANGER:
• When storing the mist blower, be sure to stop the engine.
9. Replacement of gaskets and packings
In reassembling after the engine is dismounted, be sure to replace the gaskets and
packings with new ones.
Any maintenance of adjustment work that is not included and described in this
manual is only to be performed by Authorized Service Agents.

27
Fault location
Fault System Observation Cause
Engine not starting or with
difculty
Ignition system Ignition spark O.K. Fault in fuel supply or compression system, mechanical
defect
No ignition spark STOP-switch operated, wiring fault or short circuit,
spark plug or connector defective, ignition module faulty
Fuel supply Fuel tank lled Incorrect choke position, carburetor defective, fuel
supply line bent or blocked, fuel dirty.
Compression No compression when pulled
over
Cylinder bottom gasket defective, crankshaft seals
damaged, cylinder or piston rings defective or improper
sealing of spark plug
Mechanical fault Starter not engaging Broken starter spring, broken parts inside of the engine
Warm start problems Tank lled ignition spark
existing
Carburetor contaminated, have it cleaned
Engine starts but dies Fuel supply Tank lled Incorrect idling adjustment, carburetor contaminated
Fuel tank vent defective, fuel supply line interrupted,
cable or STOP-switch faulty
Insufcient performance Several systems may
simultaneously be
affected
Engine idling poor Air lter contaminated, carburetor contaminated, mufer
clogged, exhaust duct in the cylinder clogged
Operating time
Item
Before
operation
After
lubrication
Daily
(10h)
30h 50h 200h Shutdown/
rest
Corresponding P
Engine oil Inspect
12
Replace
*1
23
Tightening parts
(bolt, nut)
Inspect
25
Fuel tank Clean/inspect
–
Drain fuel
*3
26
Throttle lever Check
function
–
Stop switch Check
function
14
Low-speed rotation Inspect/adjust
16
Air cleaner Clean
24
Ignition plug Inspect
24
Cooling air duct Clean/inspect
25
Fuel pipe Inspect
25
Replace
*2
–
Fuel lter Clean/replace
25
Clearance between
air intake valve and
air discharge valve
Adjust
*2
–
Oil tube Inspect
*2
–
Engine overhaul
*2
–
Carburetor Drain fuel
*3
26
*1 Perform initial replacement after 20h operation.
*2 For the 200 operating hour inspection, request Authorized Service Center or a machine shop.
*3 After emptying the fuel tank, continue to run the engine and drain fuel in the carburetor.

28
TROUBLESHOOTING
Before making a request for repairs, check a trouble for yourself. If any abnormality is found, control your machine according to the description
of this manual. Never tamper or dismount any part contrary to the description. For repairs, contact Authorized Service Agent or local dealership.
State of abnormality Probable cause (malfunction) Remedy
Engine does not start Failure to operate primer pump Push 7 to 10 times.
Low pulling speed of starter rope Pull strongly.
Lack of fuel Feed fuel.
Clogged fuel lter Clean
Bent fuel tube Straighten fuel tube
Deteriorated fuel Deteriorated fuel makes starting more difcult.
Replace with new one. (Recommended replacement: 1 month)
Excessive suction of fuel Set throttle lever from medium speed to high speed, and pull
starter handle until engine starts.
If engine will not start still, remove spark plug, make electrode
dry, and reassemble them as they originally are. Then, start as
specied.
Detached plug cap Attach securely
Contaminated spark plug Clean
Abnormal clearance of spark plug Adjust clearance
Other abnormality of spark plug Replace
Abnormal carburetor Make request for inspection and maintenance.
Starter rope cannot be pulled Make request for inspection and maintenance.
Abnormal drive system Make request for inspection and maintenance.
Engine stops soon
Engine speed does not increase
Insufcient warm-up Perform warm-up operation
Choke lever is set to “CLOSE” although
engine is warmed up
Set to “OPEN”
Clogged fuel lter Clean
Contaminated or clogged air cleaner Clean
Abnormal carburetor Make request for inspection and maintenance.
Abnormal drive system Make request for inspection and maintenance.
Detached throttle wire Attach securely
Engine does not stop
Run engine at idling, and set
choke lever to CLOSE.
Detached connector Attach securely
Abnormal electric system Make request for inspection and maintenance.
When the engine does not start after warm-up operation:
If there is no abnormality found for the check items, open the throttle by about 1/3 and start the engine.

29
Merci beaucoup d’avoir choisi l’atomiseur de MAKITA. Nous sommes ravis de
pouvoir vous proposer l’atomiseur de MAKITA, résultat d’un long programme de
développement et de nombreuses années d’expérience et de connaissances.
Le modèle d’atomiseur PM7650H/PM7650HG associe les avantages d’une
technologie de pointe à un design ergonomique. Il s’agit d’un appareil pratique,
compact et professionnel utilisé pour de nombreuses applications.
Veuillez lire, comprendre et suivre ce livret qui explique en détails les
nombreuses caractéristiques qui en font un outil d’une performance
exceptionnelle. Elles vous aideront à obtenir en toute sécurité les
meilleurs résultats possibles à partir de votre atomiseur MAKITA.
SYMBOLES
Il est très important de comprendre les symboles suivants lors de la lecture de ce mode d’emploi.
Français
AVERTISSEMENT/DANGER Carburant (Essence)
Lire, comprendre et suivre
le manuel d’instruction
Démarrage manuel du moteur
Interdit Arrêt d’urgence
Ne pas fumer Premiers secours
Pas de ammes nues Recyclage
Porter des gants de protection SOUS TENSION/DÉMARRAGE
Éloigner les personnes et les animaux du
lieu de travail
HORS TENSION/ARRÊT
Porter des lunettes de protection et des
protège-oreilles
Coupure des doigts ou de la main,
lame de la roue
Surfaces brûlantes - Brûlures aux doigts
ou aux mains
Table des matières Page
Symboles .....................................................................29
Consignes de sécurité importantes .............................30
Caractéristiques techniques ........................................36
Nomenclature des pièces ............................................37
Instructions de montage ..............................................38
Avant de démarrer le moteur .......................................39
Fonctionnement ...........................................................41
Réglage du ralenti .......................................................43
Méthode de fonctionnement ........................................44
Inspection et entretien .................................................50
Entreposage ................................................................53
Résolution de problèmes .............................................55
30
AVERTISSEMENT : Lisez toutes les consignes de sécurité et les instructions.
Le non-respect des mises en garde et instructions peut entraîner un choc
électrique, un incendie et/ou des blessures graves.
Conservez toutes les mises en garde et instructions
pour référence ultérieure.
Instructions générales
• Pour garantir un fonctionnement correct et en toute sécurité, lisez, comprenez
et suivez ce manuel d’instruction pour vous familiariser avec le maniement de
l’atomiseur (1). Sans ces informations, vous risquez de vous mettre en danger ou
de blesser d’autres personnes à cause d’une utilisation incorrecte.
• Il est préférable de ne prêter l’atomiseur qu’à des personnes expérimentées avec
les atomiseurs.
• Prêtez-leur systématiquement le mode d’emploi.
• Si vous utilisez l’appareil pour la première fois, demandez des instructions de
base auprès du vendeur, an de vous familiariser avec le fonctionnement d’un
atomiseur.
• Les enfants et les adolescents de moins de 18 ans ne doivent pas utiliser
l’atomiseur. Toutefois, les personnes de plus de 16 ans peuvent l’utiliser à des ns
de formation, mais uniquement sous la supervision directe d’un formateur agréé.
• Faites preuve d’une extrême vigilance et attention lors de l’utilisation de
l’atomiseur.
• Utilisez l’atomiseur uniquement si vous êtes en bonne condition physique.
• Effectuez tout le travail consciencieusement et prudemment. Vous êtes
responsable par rapport aux autres personnes.
• N’utilisez jamais l’atomiseur lorsque vous êtes sous l’inuence de l’alcool ou de
drogues (2).
• N’utilisez pas l’appareil lorsque vous êtes fatigué.
• Conservez ces instructions pour pouvoir vous y reporter ultérieurement.
Utilisation prévue de l’outil
• Utilisez le bon outil. L’atomiseur est destiné uniquement à la vaporisation de
produits chimiques liquides et d’autres liquides an d’éradiquer les organismes
nuisibles et les mauvaises herbes dans les vergers, jardins d’ornement et
potagers, sur les arbres et les arbustes ainsi que sur d’autres plantes, telles que
le café, le tabac et le coton. Il est également utile lors de l’entretien des jeunes
arbres, an notamment d’éliminer les scolytes, autres organismes nuisibles et
maladies des plantes.
Ne l’utilisez jamais à d’autres ns.
• Utilisez uniquement des produits destinés à protéger les plantes spéciquement
approuvés par leur fabricant pour être utilisés avec les atomiseurs et qui
répondent à toutes les réglementations, normes et règlements de sécurité en
vigueur.
Demandez des informations à votre revendeur sur la procédure d’utilisation de votre
atomiseur. Respectez les réglementations, normes et règlements de sécurité locaux
en vigueur.
Toutes les personnes utilisant et réalisant l’entretien de l’atomiseur doivent
être formées et familiarisées avec les procédures de maniement des produits
chimiques utilisés, avec les premiers soins et soins d’urgence ainsi qu’avec les
réglementations relatives à l’élimination des produits chimiques.
AVERTISSEMENT :
Votre atomiseur est destiné uniquement à une utilisation professionnelle. Ne prêtez
pas ou ne louez pas votre atomiseur sans le manuel d’instruction. Assurez-vous
que toutes les personnes qui l’utilisent comprennent les informations contenues
dans ce manuel d’instructions.
Équipement de protection individuelle
• Pour réduire les risques de blessure lors du maniement des produits chimiques,
portez des vêtements de protection appropriés au moment de remplir, utiliser
et nettoyer l’atomiseur. Suivez toujours l’ensemble des instructions du fabricant
des produits chimiques en ce qui concerne la protection des yeux, de la peau
et des voies respiratoires. Elles peuvent différer et aller au-delà des précautions
suivantes.
• Lors de l’utilisation de produits chimiques toxiques, l’opérateur et les spectateurs
peuvent être amenés à porter un appareil de protection respiratoire adapté
approuvé par NIOSH/MSHA pour les produits chimiques utilisés. Reportez-vous à
l’étiquette gurant sur le contenant de produits chimiques. L’inhalation de produits
chimiques toxiques peut entraîner des blessures graves ou mortelles.
• Les vêtements que vous portez doivent être fonctionnels et adaptés, c’est-à-dire
qu’ils doivent être près du corps, sans pour autant gêner vos mouvements. Ne
portez pas de bijoux, vêtements ou cheveux longs susceptibles d’être happés par
l’entrée d’air. (3)
• L’équipement de protection suivant ainsi que les vêtements de protection doivent
être utilisés an d’éviter des blessures au pied, à la main, aux yeux et à la tête
ainsi que pour protéger votre ouïe durant l’utilisation de l’atomiseur.
(1)
(2)
CONSIGNES DE SÉCURITÉ IMPORTANTES
(3)
 Loading...