

Page 1

Bedienungsanleitung
User Manual
Manuel d'utilisation
Manuale d'uso
Manual de empleo
Gebruiksaanwijzing
Manual de Operação
Brukerhåndbok
Käyttäjän käsikirja
Brugervejledning
Bruksanvisning
Kullanma Kılavuzu
Uživatelská příručka
Návod na použitie
Instrukcja obsługi
Manualul utilizatorului
Használati útmutató
Οδηγίες χρήσης
Руководство пользователя
Lietotāja rokasgrāmata
Kasutusjuhend
Bendrosios instrukcijos
사용자 설명서
用户手册
D
GB
F
I
E
NL
P
N
FIN
DK
S
TR
CZ
SK
PL
ROM
H
GR
RUS
LV
EST
LT
ROK
CN
Page 2

User Manual
English
Congratulations on the purchase of your
Makita LD060P.
The safety instructions and the user
manual should be read through
carefully before you use the
person responsible for the product must ensure that
all users understand these directions and adhere to
them.
Symbols used in this manual
The symbols used have the following meaning:
WARNING
Indicates a potentially hazardous situation or
an unintended use which, if not avoided, could result
in death or serious injury.
CAUTION:
Indicates a potentially hazardous situation or
an unintended use which, if not avoided, may result
in minor injury and/or in appreciable material, financial and environmental damage.
Important paragraphs which must be adhered
)
to in practice, as they enable the product to be used
in a technically correct and efficient manner.
Makita LD060P
product for the first time. The
Intended Use
Permitted uses
• Measuring distances
• Computing functions, e.g. areas and volumes
Adverse uses
• Using the instrument without instructions
• Using outside the stated limits
• Deactivation of safety systems and removal of
explanatory and hazard labels
• Opening of the equipment by using tools
(screwdrivers etc.)
• Carrying out modification or conversion of the
product
• Use of accessories from other manufacturers
without the express approval of Makita.
• Deliberate or irresponsible behaviour on scaffolding, when using ladders, when measuring near
machines which are running, or near parts of
machines or installations which are unprotected
• Aiming directly into the sun
• Deliberate dazzling of third parties; even in the
dark
• Inadequate safeguards at the surveying site (e.g
when measuring on roads, construction sites,
etc.)
1
Symbols used in this manual
D
GB
F
I
E
NL
P
N
FIN
DK
S
TR
CZ
SK
PL
SLO
HR
H
GR
RUS
LV
EST
LT
ROK
CN
Page 3

D
GB
F
I
E
NL
P
N
FIN
DK
S
TR
CZ
SK
PL
SLO
HR
H
GR
RUS
LV
EST
LT
ROK
CN
Limits of use
Also see section "Technical data".
)
The Makita LD060P is designed for use in areas
permanently habitable by humans, do not use the
product in explosion hazardous areas or in aggressive
environments.
Responsibilities
Responsibilities of the manufacturer of the
original equipment Makita Corporation Anjo,
Aichi 446-8502, Japan:
Makita is responsible for supplying the product, including the User Manual and original accessories, in a
completely safe condition.
Responsibilities of the manufacturer of nonMakita accessories:
The manufacturers of non-Makita accessories for the
Makita LD060P are responsible for developing, implementing and communicating safety concepts for their
products. They are also responsible for the effectiveness of these safety concepts in combination with
the Makita equipment.
Responsibilities of the person in charge of the
instrument:
WARNING
The person responsible for the instrument
must ensure that the equipment is used in accordance with the instructions. This person is also
accountable for the deployment of personnel and for
Overview
their training and for the safety of the equipment
when in use.The person in charge of the product has
the following duties:
• To understand the safety instructions on the
product and the instructions in the user manual.
• To be familiar with local safety regulations relating to accident prevention.
• To inform Makita immediately if the equipment
becomes unsafe.
Overview
Keyboard
See drawing {A}:
1 ON (ON/MEAS) - button
2 PLUS [+] - button
3 ILLUMINATION - button
4 MEASUREMENT - button
5 TIMER / UNIT - button
6 REFERENCE - button
7 CLEAR / OFF - button
8 HISTORICAL MEMORY - button
9 MINUS [-] - button
2
Makita LD060P
Page 4

Display
See drawing {B}
1Laser "ON"
2 Reference (front/rear/end piece)
3Pythagoras
4 Timer (self-triggering)
5 Historical memory
6Area/volume
7 Battery status
8 Units with exponents (
9 Intermediate line 2
10 Intermediate line 1
11 Main line
12 min / max display
13 Info symbol
2/3
)
Start up
Inserting / Replacing Batteries
1 Remove battery compartment lid.
See drawing {C}.
2 Insert batteries, observing correct polarity.
3 Close the battery compartment.
• Replace the batteries when the symbol flashes
permanently in the display.
Only use alkaline batteries.
)
If the instrument will not be used for a long
)
time, remove the batteries as a protection against
corrosion.
Makita LD060P
Operation
Measuring Conditions
Range
Range is limited to 60 m.
At night or dusk and if the target is in shadow the
measuring range without target plate is increased.
Use a target plate to increase the measurement
range during daylight, or if the target has poor reflection properties!
Target Surfaces
CAUTION:
Measuring errors can occur when measuring
toward colourless liquids (e.g. water) or dust free
glass, Styrofoam or similar semi-permeable surfaces.
Aiming at high gloss surfaces may deflect the laserbeam and lead to measurement errors.
Hazards of Use
CAUTION:
Watch out for erroneous distance measurements if the instrument is defective or if it has been
dropped or has been misused or modified.
Precautions:
Carry out periodic test measurements.
Particularly after the instrument has been subject to
3
Start up
D
GB
F
I
E
NL
P
N
FIN
DK
S
TR
CZ
SK
PL
SLO
HR
H
GR
RUS
LV
EST
LT
ROK
CN
Page 5
D
GB
F
I
E
NL
P
N
FIN
DK
S
TR
CZ
SK
PL
SLO
HR
H
GR
RUS
LV
EST
LT
ROK
CN
abnormal use, and before, during and after important
measurements.
Make sure the Makita LD060P optic is kept clean and
that there is no mechanical damage to the bumpers.
CAUTION:
In using the instrument for distance measurements or for positioning moving objects (e.g. cranes,
building equipment, platforms, etc.) unforeseen
events may cause erroneous measurements.
Precautions:
Only use this product as a measuring sensor, not as
a control device. Your system must be configured and
operated in such a way, that in case of an erroneous
measurement, malfunction of the device or power
failure due to installed safety measures (e.g. safety
limit switch), it is assured that no damage will occur.
Switching on/off
1x briefly: the instrument and the laser are switched on.
The display shows the battery symbol until
the next button is pressed.
Pressing this button for longer switches the
instrument off.
The instrument switches off automatically after
three minutes of inactivity.
Operation
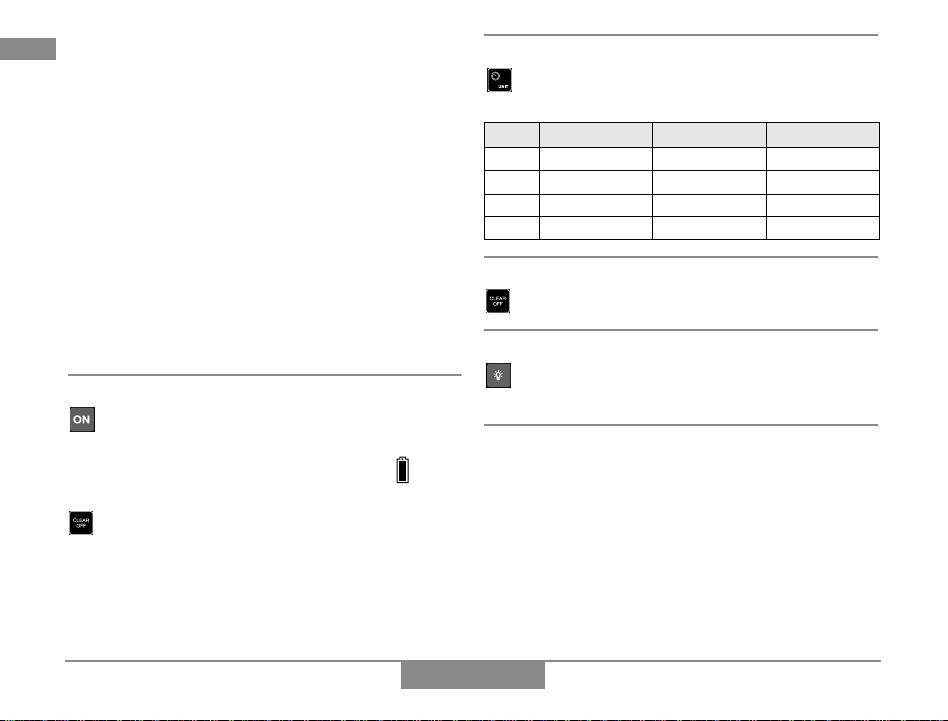
Setting the instrument
Press long until the desired unit is displayed.
Possible units:
Distance Area Volume
1. 0.000 m
2. 0'0''
3. 0 in
4. 0.00 ft
1
/
1
/
16
16
0.000 m² 0.000 m³
0.00 ft² 0.0 ft³
0.00 ft² 0.0 ft³
0.00 ft² 0.0 ft³
CLEAR-Key
1x briefly: the last action is cancelled.
Illumination
1x briefly: the display illumination is switched on
or off.
Reference Setting
Default reference setting is from the rear of the
instrument.
The instrument can be set for the following measurements:
• To measure from an edge (see drawing {D}), fold
out the stop bracket until it snaps in for the first
time. See drawing {E}.
• To measure out of a corner (see drawing {D}),
fold out the stop bracket until it snaps in, push
4
Makita LD060P
Page 6
the stop bracket with a little force to the right
side; the stop bracket can now be completely
unfolded. See drawing {E}.
CAUTION:
Make sure that when measuring from the
unfolded endpiece, the measuring reference is set to
"End piece"!
1x briefly: the next measurement is taken from
the front edge.
2x briefly: the measurement is taken from the
unfolded end piece.
After one measurement, the reference returns automatically to the default setting (rear reference).
1x long: the measurements are taken with the
front as reference until a new measuring reference is set
2x long: the measurements are taken from the
unfolded end piece until a new measuring reference is set.
See drawing {F}.
Measuring
Single Distance Measurement
1x briefly: the laser is activated.
1x briefly: a distance measurement is taken.
Makita LD060P
The result is displayed immediately.
Continuous measurement
Distances can be measured with this function
1x long: a "beep" is sounded.A continuous
measurement is started.
1x briefly: the continuous measurement is
stopped.
The last measured value is displayed in the summary
line.
Minimum-/Maximum-Measuring
This function enables determining the minimum or
maximum distance from a specific measuring point,
e.g. the determination of room diagonals (maximum
value) or horizontal distance (minimum value).
Switching on continuous measurement (see above).
The corresponding maximum and minimum values are
displayed.
Functions
Addition / Subtraction
Distance Measurement.
1x briefly: the next measurement is added to
the previous one.
5
Measuring
D
GB
F
I
E
NL
P
N
FIN
DK
S
TR
CZ
SK
PL
SLO
HR
H
GR
RUS
LV
EST
LT
ROK
CN
Page 7

D
GB
F
I
E
NL
P
N
FIN
DK
S
TR
CZ
SK
PL
SLO
HR
H
GR
RUS
LV
EST
LT
ROK
CN
1x briefly: the next measurement is subtracted
from the previous one.
Repeat this procedure for as many times as required.
The result is displayed in the summary row, the
previously measured value is displayed in intermediate line 2, the value to be added in intermediate line
1.
1x briefly: the last step is cancelled.
Area function
1x briefly: The symbol is displayed.
1x briefly: takes first distance measurement
(e.g. length)
1x briefly: takes second distance measurement
(e.g. width)
The result of the area measurement is displayed in
the summary row, the individually measured values
are displayed in intermediate lines 1 and 2.
Adding and subtracting areas
Calling up the area function and measuring areas.
Press or .
1x briefly: takes first distance measurement
(e.g. length)
1x briefly: takes second distance measurement
(e.g. width)
Functions
The result of the second area measurement, "+"
flashes.
1x briefly: confirms the addition; the added area
results are displayed in the summary row.
Volume function
2x briefly: the symbol is displayed.
1x briefly: takes first distance measurement
(e.g. length)
1x briefly: takes second distance measurement
(e.g. width)
The result of the area measurement from the values
already measured is displayed in the summary row.
1x briefly: takes the third distance measurement (e.g. height). The value is displayed in
intermediate line 1.
The result of the area measurement is displayed in
the summary row, the two previously measured
values in intermediate lines 1 and 2.
Indirect Measurement
The instrument can measure distances with the
Pythagorean method. This procedure facilitates in
measuring distances that are difficult to access.
Adhere to the prescribed sequence of measu-
)
rements:
6
Makita LD060P
Page 8

• All target points must be vertical or horizontal on
the surface of the wall.
• The best results are achieved when the intrument
is rotated around a fixed point (e.g. the stop
bracket is fully extended and the instrument is
placed against a wall).
• To take the measurement, the minimum/
maximum function can be called up. The minimum
value is used for measurements that must be at
right-angles to the target; the maximum distance
is used for all other measurements.
Make sure that the first measurement and the
)
distance to be measured are at right angles. Use the
minimum/maximum function.
Indirect measurement - determining a distance using 2 auxilliary measurements
See drawing {G}
3x briefly: the symbol is displayed.
The distance to be measured flashes in the symbol.
1x briefly: takes a measurement of the distance
The second distance to be measured flashes in the
symbol
1x briefly: takes a measurement of the horizontal distance
The result of the function is displayed in the summary
row.
If the button is pressed for along time while
Makita LD060P
measuring a distance, maximum or minimum continuous measuring is activated.
Indirect measurement - determining a distance using 3 auxilliary measurements
See drawing {H}
4x briefly: the symbol is displayed.
The distance to be measured flashes in the symbol.
1x briefly: takes a distance measuement
The second distance to be measured flashes in the
symbol
1x briefly: takes a horizontal measurement.
The third dist ance to be measured flashes in the
symbol
1x briefly: takes a measurement of the distance
The result of the function is displayed in the summary
row.
If the button is pressed for along time while
measuring a distance, maximum or minimum continuous measuring is activated.
Stake out function
This function is helpful when staking out equal
distances, e.g in the erection of wooden substructures. See drawing {I}
5x briefly: the symbol is displayed.
A value is displayed in the summary row (default
7
Functions
D
GB
F
I
E
NL
P
N
FIN
DK
S
TR
CZ
SK
PL
SLO
HR
H
GR
RUS
LV
EST
LT
ROK
CN
Page 9

D
GB
F
I
E
NL
P
N
FIN
DK
S
TR
CZ
SK
PL
SLO
HR
H
GR
RUS
LV
EST
LT
ROK
CN
value 1.000 m). This value can be adjusted to the
desired stake out distance.
The value is increased.
The value is reduced.
Holding the button down accelerates the speed at
which the value changes.
1x briefly: starts continuous measurement.
In intermediate line 1, the set distance or the next
appropriate multiple thereof is displayed.
In the summary row, the distance to the next appropriate stake out point is displayed.
When approaching a stakeout point (to less than
0,10 m), the instrument starts to beep. When the
point is reached, the beep sound changes and intermediate line 1 starts to flash.
1x briefly: distance measurement is interrupted
and the instrument switches back to individual
distance measuring mode.
Historical memory
1x briefly: the symbol and the last measured
value are displayed.
Use the "+" or "-" buttons to navigate through the
last 10 values. The values can also be used in
functions.
Functions
Using stored values in functions
Using added distances in area functions (e.g. wall
surfaces or painters):
Adding distances (see additions / subtractions)
Call up area function to e.g. measure the height
of a room.
1x briefly: calls up the historical memory and to
possibly search for the correct value.
1x briefly: the value is entered into the function
and the result of the function (e.g. area) is
displayed.
Timer (self-triggering)
1x briefly: The symbol is displayed.
The timer is preset to 5 seconds.
The value is increased.
The value is reduced.
Holding the buttons down increases the rate of
change of the values.
The countdown starts automatically (if the laser is
activated) and then triggers the measurement.
8
Makita LD060P
Page 10

Switching off the beep
Press and hold simultaneously for 5
seconds:
The beep is switched off.
To reactivate it, press and hold for 5 seconds.
Appendix
Display Notices
All display notices are either displayed with or
"Error". The following errors can be corrected.
Cause Correction
204
Calculation error Repeat procedure
252
Temperature too
high
253
Temperature too
low
255
Received signal too
weak, time for a
measurement too
long.
256
Received signal too
strong
257
Faulty measurement, too much
background light
Makita LD060P
Let device cool down.
Warm device up
Use a target plate
Use target plate (gray
side)
Use target plate (brown
side)
Cause Correction
258
Outside of the range
of measurement
Error Cause Correction
Error Hardware error Should this message
Select measurement
distance within the
range of measurement
remain active after
switching the instrument off and on several
times, please contact
the dealerhip.
Technical Specifications
Range 0.05 m to 60 m*
Measuring accuracy (2 σ)
Smallest unit displayed 1 mm
Laser class 2
Laser type 635 nm, < 1 mW
Protection against
splashes and dust
Autom. power off:
Laser
Instrument
Illumination
Folding out endpiece
Battery life,
Type 2 x AAA
Dimension 112 x 43 x 25 mm
Weight 100 g
9
typically ± 1.5 mm**
IP 54, dust-proof,
splash-proof
after 60 s
after 180 s
9
9
up to
5 000 measurements
Appendix
D
GB
F
I
E
NL
P
N
FIN
DK
S
TR
CZ
SK
PL
SLO
HR
H
GR
RUS
LV
EST
LT
ROK
CN
Page 11

D
GB
F
I
E
NL
P
N
FIN
DK
S
TR
CZ
SK
PL
SLO
HR
H
GR
RUS
LV
EST
LT
ROK
CN
Temperature range:
Storage
Operation
* Use a target plate to increase the measurement range
during daylight or if the target has poor reflection properties!
** in favourable conditions (good target surface properties,
room temperature) up to 10 m. In unfavourable conditions,
such as intense sunshine, poorly reflecting target surface or
high temperature variations, the deviation over distances
above 10 m can increase by ± 0.15 mm/m.
-25°C to +70°C
0°C to +40°C
Electromagnetic Compatibility (EMC)
The term "electromagnetic compatibility" is taken to
mean the capability of the product to function
smoothly in an environment where electromagnetic
radiation and electrostatic discharges are present,
and without causing electromagnetic interference to
other equipment.
WARNING
The Makita LD060P conforms to the most stringent requirements of the relevant standards and
regulations.
Yet. the possibility of the product causing interference in other equipment cannot be fully excluded.
Appendix
FCC statement (applic. in U.S.)
This equipment has been tested and found to comply
with the limits for a Class B digital device, pursuant to
part 15 of the FCC Rules. These limits are designed to
provide reasonable protection against harmful interference in a residential installation.
This equipment generates, uses and can radiate radio
frequency energy and, if not installed and used in
accordance with the instructions, may cause harmful
interference to radio communications.
However, there is no guarantee that interference will
not occur in a particular installation. If this equipment
does cause harmful interference to radio or television
reception, which can be determined by turning the
equipment off and on, the user is encouraged to try
to correct the interference by one or more of the
following measures:
• Reorient or relocate the receiving antenna.
• Increase the separation between the equipment
and receiver.
• Connect the equipment into an outlet on a circuit
different from that to which the receiver is
connected.
• Consult the dealer or an experienced radio/TV
technician for help
WARNING
Changes or modifications not expressly
approved by Makita for compliance could void the
user’s authority to operate the equipment.
10
Makita LD060P
Page 12

Laser classification
Laser Radiation
Do not stare into the beam
Laser class 2
acc. IEC 60825-1:2007
Maximum radiant power *: <1mW
Emitted wavelength: 620-690nm
Beam divergence 0.16 x 0.6 mrad
Impulse duration 1 x 10
-9
s
The Makita LD060P produces a visible laser beam
which emerges from the front of the instrument.
See drawing {K}.
The product is a Class 2 Laser Product in accordance
with:
• IEC60825-1 : 2007 "Radiation safety of laser
products"
Class 2 Laser Products:
Do not stare into the beam or direct it unnecessarily
at other persons. Eye protection is normally afforded
by aversion responses including the blink reflex.
WARNING
Looking directly into the laser beam with
optical aids (e.g. binoculars, telescopes) can be
hazardous.
Precautions:
Do not look directly into the beam with optical aids.
CAUTION:
Looking into the laser beam may be hazardous
to the eyes.
Precautions:
Do not stare into beam. Do not look into the laser
beam. Make sure the laser is aimed above or below
eye level (particularly with fixed installations, in
machines, etc.).
Makita LD060P
Labelling
For the position of the type plate see drawing {J}.
Care
Wipe off dirt with a damp, soft cloth. Do not immerse
the instrument in water. Do not use aggressive
cleaning agents or solutions.
11
Appendix
D
GB
F
I
E
NL
P
N
FIN
DK
S
TR
CZ
SK
PL
SLO
HR
H
GR
RUS
LV
EST
LT
ROK
CN
Page 13

D
GB
F
I
E
NL
P
N
FIN
DK
S
TR
CZ
SK
PL
SLO
HR
H
GR
RUS
LV
EST
LT
ROK
CN
Disposal
CAUTION:
Flat batteries must not be disposed of with
household waste. Care for the environment and take
them to the collection points provided in accordance
with national or local regulations.
The product must not be disposed with
household waste.
Dispose of the product appropriately in
accordance with the national regulations in
force in your country.
Adhere to the national and country specific regulations.
All right reserved for changes (drawings, descriptions
and technical specifications).
Appendix
EC Declaration of Conformity
12
Makita LD060P
Page 14

Gebruiksaanwijzing
Nederlands
Gefeliciteerd met de aanschaf van uw Makita LD060P.
De veiligheidsinstructies en de
handleiding dienen zorgvuldig te
worden gelezen alvorens het instru-
nemen. De beheerder moet er op toezien, dat alle
gebruikers deze aanwijzingen begrijpen en opvolgen.
Gebruikte symbolen
De gebruikte symbolen hebben de volgende betekenis:
WAARSCHUWING
Gevaar bij gebruik of onjuist gebruik, dat kan
leiden tot ernstig lichamelijk letsel of de dood.
VOORZICHTIG
Gebruiksgevaar of gebruik in strijd met de
bepalingen, dat slechts geringe schade voor
personen met zich meebrengt, maar aanzienlijke
schade aan materiaal, bezittingen of milieu kan
veroorzaken.
Belangrijke alinea's waaraan men zich in de
)
praktijk dient te houden, omdat hierdoor het product
op een technisch juiste en efficiënte wijze wordt
gebruikt.
Makita LD060P
ment de eerste keer in gebruik te
Gebruiksdoel
Toegestaan gebruik
• Meten van afstanden
• Rekenfuncties, zoals oppervlakte en inhoud
Ongeoorloofd gebruik
• Gebruik van het instrument zonder instructies
• Gebruik buiten de toepassingsgrenzen
• Uitschakelen van veiligheidsinrichtingen en
verwijderen van aanwijzings- en waarschuwingsetiketten
• Openen van de apparatuur met behulp van
gereedschap (schroevendraaiers, etc.)
• Het verrichten van modificaties of aanpassingen
aan het product
• Gebruik van toebehoren van andere fabrikanten,
die niet nadrukkelijk zijn goedgekeurd door
Makita.
• Opzettelijk of onverantwoord gedrag op steigers,
bij het beklimmen van ladders, bij het meten in de
buurt van draaiende machines of open machineelementen of installaties
• Direct richten in de zon
• Het met opzet verblinden van derden; zelfs in het
donker
• Onvoldoende beveiliging van de meetlocatie
(bijv.: bij het verrichten van metingen op straat,
constructielocaties, etc.)
1
Gebruikte symbolen
D
GB
F
I
E
NL
P
N
FIN
DK
S
TR
CZ
SK
PL
SLO
HR
H
GR
RUS
LV
EST
LT
ROK
CN
Page 15

D
GB
F
I
E
NL
P
N
FIN
DK
S
TR
CZ
SK
PL
SLO
HR
H
GR
RUS
LV
EST
LT
ROK
CN
Toepassingsgrenzen
Zie ook hoofdstuk "Technische gegevens".
)
De Makita LD060P is ontworpen voor toepassing in
gebieden, die geschikt zijn voor permanente menselijke bewoning, gebruik het product niet gebieden
met explosiegevaar of in agressieve omgevingen.
Verantwoordelijkheden
Verantwoordelijkheden van de fabrikant van de
oorspronkelijke apparatuur
Anjo, Aichi 446-8502, Japan
Makita is verantwoordelijke voor de veiligheidstechnische onberispelijke levering van het product inclusief
gebruiksaanwijzing en originele toebehoren.
Verantwoordelijkheidsgebied van de fabrikanten
van secundaire toebehoren:
De fabrikanten van niet-Makita accessoires voor de
Makita LD060P zijn verantwoordelijk voor het ontwikkelen, invoeren en communiceren van de veiligheidsmaatregelen voor hun producten. Zij zijn tevens
verantwoordelijk voor de effectiviteit van hun maatregelen in combinatie met de Makita apparatuur.
Verantwoordelijkheden van de exploitant
WAARSCHUWING
De exploitant dient ervoor te zorgen, dat de
apparatuur in overeenstemming met de instructies
wordt gebruikt. Hij is tevens verantwoordelijk voor de
inzet van personeel en hun training en voor de veilig-
Overzicht
Makita Corporation
(afgekort Makita):
heid van de apparatuur tijdens gebruik. Voor de
exploitant gelden de volgende verplichtingen:
• Hij begrijpt de veiligheidsinformatie op het instrument en de instructies in de gebruiksaanwijzing;
• Hij kent de plaatselijke, industriële voorschriften
ter voorkoming van ongevallen en leeft deze na.
• Hij stelt Makita op de hoogte, zodra aan de apparatuur veiligheidsgebreken optreden.
Overzicht
Toetsenbord
Zie illustratie {A}:
1 AAN (AAN/METEN) - toets
2 PLUS [+] - toets
3 VERLICHTING - toets
4 METING - toets
5 ZELFONTSPANNER / EENHEDEN - toets
6 REFERENTIE - toets
7 WIS/UIT - toets
8 GEHEUGEN - toets
9 MINUS [-] - toets
2
Makita LD060P
Page 16

Display
Zie illustratie {B}
1 Laser "AAN"
2 Referentie (voorzijde/achterzijde/eindstuk)
3Pythagoras
4 Zelfontspanner (timer)
5Geheugen
6 Oppervlakte/ Inhoud
7 Batterijstatus
8 Eenheden met exponenten (
9 Tussenresultaat 2
10 Tussenresultaat 1
11 Meetresultaat
12 min / max display
13 Info pictogram
2/3
)
Opstarten
Inzetten / Vervangen batterijen
1 Verwijder het deksel van het batterijcomparti-
ment.
Zie illustratie {C}.
2 Zet nieuwe batterijen in, let op de polariteit.
3 Sluit het batterijcompartiment.
• Vervang de batterijen als het pictogram
continu knippert in het display.
Gebruik uitsluitend alkaline batterijen.
)
Makita LD060P
Neem de batterijen uit het apparaat als dit
)
langere tijd niet zal worden gebruikt om lekken te
voorkomen.
Werking
Meetomstandigheden
Bereik
Het bereik is beperkt tot 60 m.
In de nacht en bij schemering of als het richtmerk in
de schaduw ligt, dan is het meetbereik zonder richtplaat groter. Gebruik een richtplaat om het meetbereik te vergroten bij daglicht of als het richtpunt
slecht reflecteert!
Richtoppervlakken
VOORZICHTIG:
Meetfouten kunnen optreden bij metingen op
kleurloze vloeistoffen (bijv. water) of schoon glas,
styrofoam of dergelijke halfdoorzichtige oppervlakken. Richten op glanzende oppervlakken kan de
laserstraal afbuigen en tot meetfouten leiden.
3
Opstarten
D
GB
F
I
E
NL
P
N
FIN
DK
S
TR
CZ
SK
PL
SLO
HR
H
GR
RUS
LV
EST
LT
ROK
CN
Page 17

D
GB
F
I
E
NL
P
N
FIN
DK
S
TR
CZ
SK
PL
SLO
HR
H
GR
RUS
LV
EST
LT
ROK
CN
Gebruiksrisico's
VOORZICHTIG:
Pas op voor foutieve metingen bij gebruik van
een defect product, na een val of andere niet toegestane belastingen resp. modificaties aan het product.
Voorzorgen:
Verricht periodiek controlemetingen.
Speciaal na overbelasting van het product, en voor en
na belangrijke meettaken.
Zorg er voor, dat de lens van de Makita LD060P
schoon wordt gehouden en dat er geen mechanische
beschadigingen ontstaan aan de stootranden.
VOORZICHTIG:
Bij het gebruik van de producten voor afstandsmetingen of voor het positioneren van bewegende
objecten (bijv. kranen, bouwmachines, platforms,
enz.) kunnen door onvoorziene gebeurtenissen
foutieve metingen optreden.
Voorzorgen:
Gebruik de producten alleen als meetsensor en niet
als besturingsapparaat. Uw systeem moet dusdanig
functioneren en zijn geconstrueerd, dat bij een
foutieve meting, storing van het product of uitval van
de stroomtoevoer door een geschikte veiligheidsinrichting (bijv. veiligheids-eindschakelaar) wordt gegarandeerd, dat geen schade kan ontstaan.
Werking
Aan/uitschakelen
1x kort: het instrument en de laser schakelen in.
Het display toont het batterijpictogram
totdat de volgende toets wordt ingedrukt.
Lang indrukken van deze toets schakelt het
instrument uit.
Het instrument schakelt automatisch uit na drie
minuten zonder activiteit.
Instellen van het instrument
Lang ingedrukt houden totdat de gewenste
eenheid wordt weergegeven.
Mogelijke eenheden:
Afstand Oppervlakte Inhoud
1. 0.000 m
2. 0'0''
3. 0 in
4. 0.00 ft
1
/
1
/
16
16
0.000 m² 0.000 m³
0.00 ft² 0.0 ft³
0.00 ft² 0.0 ft³
0.00 ft² 0.0 ft³
WIS-toets
1x kort: de laatste actie wordt afgebroken.
4
Makita LD060P
Page 18

Verlichting
1x kort: de displayverlichting wordt in- of uitgeschakeld.
Referentie instellen
De standaard referentie-instelling is vanaf de achterzijde van het instrument mogelijk.
Het instrument kan worden ingesteld voor de onderstaande metingen:
• Meten vanaf een rand (zie illustratie {D}), klap de
beugel uit totdat deze op de ee rste stop klikt. Zie
illustratie {E}.
• Om vanuit een kamerhoek te meten (zie illustratie
{D}), klap de beugel uit totdat deze op de stop
klikt, duw met lichte druk op de rechterzijde van
de beugel; de beugel kan nu volledig worden
uitgeklapt. Zie illustratie {E}.
VOORZICHTIG:
Zorg er voor, dat bij meting met uitgeklapt
eindstuk, de meetreferentie staat ingesteld op "Eindstuk"!
1x kort: de volgende meting wordt genomen
vanaf de voorzijde.
2x kort: de volgende meting wordt genomen
vanaf het uitgeklapte eindstuk.
Na een meting gaat de referentie automatisch terug
naar de standaard stand (achterzijde referentie).
Makita LD060P
1x lang: de metingen worden genomen met de
voorzijde als referentie totdat een nieuwe
meetreferentie wordt ingesteld
2x lang: de metingen worden genomen vanaf
het uitgeklapte eindstuk totdat een nieuwe
meetreferentie wordt ingesteld.
Zie illustratie {F}.
Meten
Enkelvoudige afstandmeting
1x kort: de laser wordt geactiveerd.
1x kort: er wordt een afstandmeting genomen.
Het resultaat wordt direct weergegeven.
Continue meting
Met deze functie kunnen afstanden worden gemeten
1x lang: er klinkt een "piep". Er wordt een
continue meting gestart.
1x kort: de continue meting wordt gestopt.
De laatste gemeten waarde wordt weergegeven op
de resultaatregel.
5
Meten
D
GB
F
I
E
NL
P
N
FIN
DK
S
TR
CZ
SK
PL
SLO
HR
H
GR
RUS
LV
EST
LT
ROK
CN
Page 19

D
GB
F
I
E
NL
P
N
FIN
DK
S
TR
CZ
SK
PL
SLO
HR
H
GR
RUS
LV
EST
LT
ROK
CN
Minimum-/Maximum-meting
Deze functie maakt het mogelijk om de minimale of
maximale afstand van een specifiek meetpunt te
bepalen, bijv. het vaststellen van kamerdiagonalen
(maximum waarde) of horizontale afstand (minimum
waarde).
Schakel de continue meting in (zie boven).
De overeenkomstige maximum en minimum waarde
worden weergegeven.
Functies
Optellen / Aftrekken
Afstandmeting.
1x kort: de volgende meting wordt opgeteld bij
de vorige.
1x kort: de volgende meting wordt afgetrokken
van de vorige.
Herhaal deze procedure zo vaak als nodig is. Het
resultaat wordt weergegeven op de samenvattingregel, de vorige gemeten waarde staat op tussenresultaatregel 2, de waarde die wordt opgeteld staat op
tussenresultaatregel 1.
1x kort: de laatste stap wordt afgebroken.
Functies
Oppervlaktefunctie
1x kort: Het pictogram wordt weergegeven.
1x kort: neemt de eerste afstandmeting (bijv.
lengte)
1x kort: neemt de tweede afstandmeting (bijv.
breedte)
Het resultaat van de oppervlaktemeting wordt weergegeven op de samenvattingregel, de individuele
gemeten waarden worden weergegeven op tussenresultaatregels 1 en 2.
Optellen en aftrekken van oppervlakten
Oproepen van de oppervlaktefunctie en het meten
van vlakken.
Druk op of .
1x kort: neemt de eerste afstandmeting (bijv.
lengte)
1x kort: neemt de tweede afstandmeting (bijv.
breedte)
Het resultaat van de tweede oppervlaktemeting, "+"
knippert.
1x kort: bevestig de optelling; de som van de
oppervlakten wordt weergegeven op de samenvattingregel.
6
Makita LD060P
Page 20

Inhoud functie
2x kort: Het pictogram wordt weergegeven.
1x kort: neemt de eerste afstandmeting (bijv.
lengte)
1x kort: neemt de tweede afstandmeting (bijv.
breedte)
Het resultaat van de oppervlakteberekening van de
eerder gemeten waarden wordt weergegeven op de
samenvattingregel.
1x kort: neemt de derde afstandmeting (bijv.
hoogte). De waarde wordt weergegeven op
tussenresultaatregel 1.
Het resultaat van de oppervlaktemeting wordt weergegeven op de samenvattingregel, de twee vorige
gemeten waarden worden weergegeven op tussenresultaatregels 1 en 2.
Indirecte Meting
Het instrument kan afstanden meten met de
methode van Pythagoras. Deze procedure maakt het
mogelijk om moeilijk bereikbare afstanden te meten.
Volg nauwgezet de voorgeschreven reeks
)
metingen:
• Alle richtpunten moeten verticaal of horizontaal
op het muurvlak liggen.
Makita LD060P
• De beste resultaten worden bereikt als het instrument om een vast punt wordt gedraaid (bijv. de
beugel is volledig uitgeklapt en het instrument
wordt tegen een wand gehouden).
• Om de metingen te nemen kan de minimum/
maximum functie worden opgeroepen. De
minimum waarde wordt gebruikt voor metingen
die loodrecht op het richtmerk staan; de
maximum afstand wordt gebruikt voor alle
overige metingen.
Let op, dat de eerste meting en de te bepalen
)
afstand loodrecht op elkaar staan. Gebruik de
minimum/maximum functie.
Indirecte meting - bepalen van een afstand met behulp van 2 hulpmetingen
Zie illustratie {G}
3x kort: Het pictogram wordt weergegeven.
De afstand, die moet worden gemeten, knippert in
het pictogram.
1x kort: voert de afstandmeting uit
De tweede afstand, die moet worden gemeten, knippert in het pictogram.
1x kort: meet de horizontale afstand
Het resultaat van de functie wordt weergegeven op
de samenvattingregel.
Als de toets lang ingedrukt wordt gehouden
tijdens het meten van een afstand, dan wordt de
maximum of minimum continue meting geactiveerd.
7
Functies
D
GB
F
I
E
NL
P
N
FIN
DK
S
TR
CZ
SK
PL
SLO
HR
H
GR
RUS
LV
EST
LT
ROK
CN
Page 21

D
GB
F
I
E
NL
P
N
FIN
DK
S
TR
CZ
SK
PL
SLO
HR
H
GR
RUS
LV
EST
LT
ROK
CN
Indirecte meting - bepalen van een afstand met behulp van 3 hulpmetingen
Zie illustratie {H}
4x kort: Het pictogram wordt weergegeven.
De afstand, die moet worden gemeten, knippert in
het pictogram.
1x kort: voert een afstandmeting uit
De tweede afstand, die moet worden gemeten, knippert in het pictogram.
1x kort: meet een horizontale afstand.
De derde afstand, die moet worden gemeten,
knippert in het pictogram.
1x kort: voert de afstandmeting uit
Het resultaat van de functie wordt weergegeven op
de samenvattingregel.
Als de toets lang ingedrukt wordt gehouden
tijdens het meten van een afstand, dan wordt de
maximum of minimum continue meting geactiveerd.
Uitzetfunctie
Deze functie is nuttig bij het uitzetten van gelijke
afstanden, bijv. bij de constructie van houten raamwerken. Zie illustratie {I}
5x kort: Het pictogram wordt weergegeven.
Er wordt een waarde weergegeven op de samenvat-
Functies
tingregel (standaard waarde 1.000 m). Deze waarde
kan worden aangepast aan de gewenste uitzetafstand.
De waarde wordt verhoogd.
De waarde wordt verlaagd.
Ingedrukt houden van de toets versnelt het tempo
waarin de waarde verandert.
1x kort: start continue meting.
In tussenresultaatregel 1 wordt de ingestelde afstand
of het volgende van toepassing zijnde veelvoud weergegeven.
In de samenvattingregel wordt de afstand naar het
volgende van toepassing zijnde punt weergegeven.
Als een uitzetpunt wordt genaderd (op minder dan
0,10 m), dan gaat het instrument piepen. Als het
punt is bereikt, verandert de piep en begint tussenresultaatregel 1 te knipperen.
1x kort: de afstandmeting wordt onderbroken
en het instrument schakelt terug naar de meetmodus voor enkelvoudige afstandmetingen.
Geheugen
1x kort: het pictogram en de laatste
gemeten waarde worden weergegeven.
Gebruik de "+" of "-" toetsen om door de laatste 10
waarden te bladeren. De waarden kunnen ook
worden gebruikt in functies.
8
Makita LD060P
Page 22

Gebruik van opgeslagen waarden in functies
Gebruik van opgetelde afstanden in oppervlaktefuncties (bijv. muurvlakken of nissen):
Optellen van afstanden (zie optellen/ aftrekken)
Roep de oppervlaktefunctie op om bijv. de
hoogte van een kamer te meten.
1x kort: roept het geheugen op zodat de juiste
waarde kan worden opgezocht.
1x lang: de waarde wordt in de functie ingevoerd en het resultaat van de functie (bijv.
oppervlakte) wordt weergegeven.
Zelfontspanner (timer)
1x lang: Het pictogram wordt weergegeven.
De zelfontspanner staat standaard op 5 seconden.
De waarde wordt opgehoogd.
De waarde wordt verlaagd.
Vasthouden van de toets verhoogt de snelheid
waarmee de waardes veranderen.
Het aftellen begint automatisch (als de laser wordt
geactiveerd) en vervolgens start de meting.
Makita LD060P
Uitschakelen van de piep
Tegelijkertijd 5 seconden ingedrukt houden:
De piep wordt uitgeschakeld.
Om weer in te schakelen, tegelijkertijd 5 seconden
ingedrukt houden:
Appendix
Display meldingen
Alle display meldingen worden weergegeven met
of met "Error". De onderstaande fouten kunnen
worden gecorrigeerd.
Oorzaak Correctie
204
Rekenfout Procedure herhalen
252
Temperatuur te
hoog
253
Temperatuur te laag Warm het apparaat op
255
Retoursignaal te
zwak, meettijd duurt
te lang.
256
Ontvangstsignaal te
sterk
257
Foutieve meting,
teveel omgevingslicht
258
Buiten meetbereik Kies een (deel) meetaf-
9
Laat het apparaat afkoelen.
Gebruik een richtplaat
Gebruik richtplaat
(grijze zijde)
Gebruik richtplaat
(bruine zijde)
stand binnen het meetbereik
Appendix
D
GB
F
I
E
NL
P
N
FIN
DK
S
TR
CZ
SK
PL
SLO
HR
H
GR
RUS
LV
EST
LT
ROK
CN
Page 23

D
GB
F
I
E
NL
P
N
FIN
DK
S
TR
CZ
SK
PL
SLO
HR
H
GR
RUS
LV
EST
LT
ROK
CN
Error Oorzaak Correctie
Error Hardwarefout Als deze melding actief
blijft na het instrument
meerdere malen te
hebben uit- en ingeschakeld, neem dan
contact op met uw
dealer.
Technische Specificaties
Bereik 0,05 m tot 60 m*
Meetnauwkeurigheid (2 σ)
Kleinste weergegeven
eenheid
Laser klasse 2
Laser type 635 nm, < 1 mW
Bescherming tegen spat-
water en stof
Autom. uitschakelen:
Laser
Instrument
Verlichting
Uitklapbaar eindstuk
Batterij levensduur,
Type 2 x AAA
Afmetingen 112 x 43 x 25 mm
Gewicht 100 g
Temperatuurbereik:
Opslag
Werking
Appendix
gemiddeld ± 1.5 mm**
1 mm
IP 54, stofdicht,
spatwaterdicht
na 60 s
na 180 s
9
9
Tot
5 000 metingen
-25°C tot +70°C
0°C tot +40°C
* Gebruik een richtplaat om het meetbereik te vergroten bij
daglicht of als het richtpunt slecht reflecteert!
** Onder gunstige omstandigheden (goed reflecterend richtmerk, kamertemperatuur) tot 10 m. Onder ongunstige omstandigheden, zoals bij fel zonlicht, slecht reflecterend richtmerk of
grote temperatuurschommelingen, kan de afwijking bij
afstanden boven de 10 m toenemen met ± 0.15 mm/m.
Elektromagnetische compatibiliteit (EMC)
Onder de term "Elektromagnetische Compatibiliteit"
verstaan wij het vermogen van het product om soepel
te functioneren in een omgeving met elektromagnetische straling en elektrostatische ontladingen,
zonder elektromagnetische storingen in andere
apparatuur te veroorzaken.
WAARSCHUWING
De Makita LD060P voldoet aan de strengste
eisen van de relevante normen en voorschriften.
Toch kan de mogelijkheid dat het instrument storing
veroorzaakt in andere apparatuur niet volledig
worden uitgesloten.
10
Makita LD060P
Page 24

Laserclassificatie
Laserstraling
Kijk niet in de laserstraal
Laser klasse 2
volgens IEC 60825-1:2007
Max. uitgezonden vermogen*: <1mW
Uitgezonden golflengte:620-690nm
Straal divergentie 0,16 x 0,6 mrad
Pulsduur 1 x 10
-9
s
De Makita LD060P produceert een zichtbare laserstraal die uit de voorzijde van het instrument uittreedt.
Zie illustratie {K}.
Het product is een Klasse 2 laserproduct in overeenstemming met:
• IEC60825-1 : 2007 "Veiligheid van laserinrichtingen"
Klasse 2 laserproducten:
Kijk niet in de straal en richt deze niet onnodig op
andere personen. De bescherming van het oog wordt
gewoonlijk bewerkstelligd door afwendingreacties
inclusief knipperreflex .
WAARSCHUWING
Direct in de laserstraal kijken met optische
hulpmiddelen (bijv. verrekijkers, telescopen) kan
gevaarlijk zijn.
Voorzorgen:
Kijk niet in de laserstraal met optische hulpmiddelen.
VOORZICHTIG
Het kijken in de laserstraal kan gevaarlijk zijn
voor het oog.
Voorzorgen:
Staar niet in de laser. Kijk niet in de laserstraal. Let
op, dat de laser boven of onder ooghoogte wordt
gericht (met name bij vaste opstellingen, in machines,
etc.).
Makita LD060P
Etikettering
Voor de positie van het typeplaatje, zie illustratie {J}.
Verzorging
Vuil en vocht afvegen met een vochtige, zachte doek.
Het instrument niet onderdompelen in water. Gebruik
geen agressieve schoonmaak- of oplosmiddelen.
11
Appendix
D
GB
F
I
E
NL
P
N
FIN
DK
S
TR
CZ
SK
PL
SLO
HR
H
GR
RUS
LV
EST
LT
ROK
CN
Page 25

D
GB
F
I
E
NL
P
N
FIN
DK
S
TR
CZ
SK
PL
SLO
HR
H
GR
RUS
LV
EST
LT
ROK
CN
Verwijderen
VOORZICHTIG
Lege batterijen mogen niet worden weggegooid met het huisvuil. Denk aan het milieu en lever
ze in bij de verzamelpunten overeenkomstig nationale of plaatselijke voorschriften.
Het product mag niet bij het huisvuil worden
weggegooid.
Het verwijderen van het instrument moet in
overeenstemming zijn met de geldende
regels in uw land.
Houdt u aan de nationale en landspecifieke voorschriften.
Alle rechten voorbehouden voor wijzigingen (illustraties, beschrijvingen en technische gegevens).
Appendix
EC-Verklaring van Conformiteit
12
Makita LD060P
 Loading...