


Magic Chef 9522WUA, 9522WUV, 9522XUB, 9612WUV, 9612XUB Owner's Manual
...
Owner’s Guide
24-inch Electric Wall Oven
with
Time-Of-Day Clock and Timer
TABLE OF CONTENTS
IMPORTANT SAFETY INSTRUCTIONS . . . . . . . . . 2-3
CLOCK AND TIMER . . . . . . . . . . . . . . . . . . . . . . . . . . . . |
4 |
USING YOUR OVEN . . . . . . . . . . . . . . . . . . . . . . . . . 5-10 Oven characteristics . . . . . . . . . . . . . . . . . . . . . . . . . . . 5 Fan . . . . . . . . . . . . . . . . . . . . . . . . . . . . . . . . . . . . . . . . . 5 Oven indicator light . . . . . . . . . . . . . . . . . . . . . . . . . . . . 5 Use of aluminum foil . . . . . . . . . . . . . . . . . . . . . . . . . . . 5 Preheating . . . . . . . . . . . . . . . . . . . . . . . . . . . . . . . . . . . 5 Oven controls . . . . . . . . . . . . . . . . . . . . . . . . . . . . . . . . 5 How to set oven controls . . . . . . . . . . . . . . . . . . . . . . . 6 Double wall oven - lower oven . . . . . . . . . . . . . . . . . . 6 Oven racks . . . . . . . . . . . . . . . . . . . . . . . . . . . . . . . . . . . 7 Baking tips . . . . . . . . . . . . . . . . . . . . . . . . . . . . . . . . . . . 8 Roasting tips . . . . . . . . . . . . . . . . . . . . . . . . . . . . . . . . . 8
Common baking problems chart . . . . . . . . . . . . . . . . . 9 Broil tips and broil chart . . . . . . . . . . . . . . . . . . . . . . . 10
CONTINUOUS CLEANING OVEN . . . . . . . . . . . . . . . . 11
CARE AND CLEANING CHART . . . . . . . . . . . . . . . . . 12
MAINTENANCE . . . . . . . . . . . . . . . . . . . . . . . . . . . . . . . 13 Oven door . . . . . . . . . . . . . . . . . . . . . . . . . . . . . . . . . . 13 Oven light . . . . . . . . . . . . . . . . . . . . . . . . . . . . . . . . . . . 13 Oven vent . . . . . . . . . . . . . . . . . . . . . . . . . . . . . . . . . . . 13 Oven window . . . . . . . . . . . . . . . . . . . . . . . . . . . . . . . . 13
SERVICE . . . . . . . . . . . . . . . . . . . . . . . . . . . . . . . . . . 14-15 Troubleshooting chart . . . . . . . . . . . . . . . . . . . . . . 14-15
WARRANTY . . . . . . . . . . . . . . . . . . . . . . . . . . . . . . . . . . 16
INSTALLER Please leave this manual with this appliance.
CONSUMER To save you
time, energy and money, read and keep this manual for future reference.
Model Number:
Serial Number:
Date of Purchase:
Model and serial numbers are on the rating plate located on the front oven frame for single wall ovens. For double wall ovens, the rating plate is located on the front oven frame of the lower oven. Open the oven door to see the rating plate.
- |
- - |
FOR CUSTOMER ASSISTANCE CALL |
1-800-688-9900 USA |
|
1-800-688-2002 Canada8112P322-60 |
|
8112P322(02-99-00)-60 |
A/01/06
2 |
IMPORTANT SAFETY INSTRUCTIONS |
|
|
Thank You. . . for purchasing our cooking
appliance. To help you obtain the maximum in cooking satisfaction, we offer these suggestions:
.Read this manual before using the appliance.
.Review all safety and caution instructions.
.Review the Troubleshooting Chart on
pages 14 and 15 if service becomes necessary.
.Include the model and serial numbers of your appliance when requesting service.
SProof of purchase such as sales receipt will be needed for warranty service.
.You can contact us at:
Maytag Appliances Sales Company Attn: CAIRSM Center
P. O. Box 2370 Cleveland, TN 37320-2370
1-800-688-9900 USA 1-800-688-2002 Canada
In our continuing effort to improve the quality and performance of our cooking appliances, it may be necessary to make changes to the appliance without revising this manual.
IMPORTANT INSTRUCTIONS
Read and follow all instructions before using this appliance to prevent the potential risk of fire, electric shock, personal injury or damage to the appliance as a result of improper usage of the appliance. Use appliance only for its intended purpose as described in this manual.
To ensure proper and safe operation: Appliance must be properly installed and grounded by a qualified technician.
IN CASE OF FIRE
1.Turn off appliance to avoid spreading the flame.
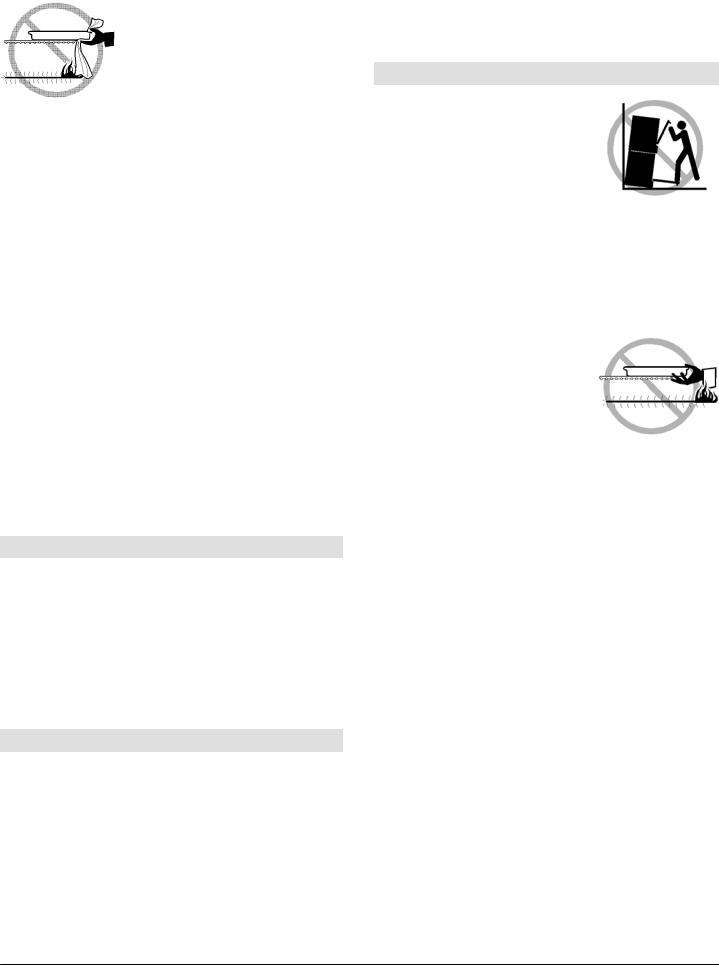
2.NEVER pick up or move a flaming pan.
3.Smother fire or flame by closing the oven door.
4.Do not use water on grease fires. Use baking soda, a dry chemical or foam-type extinguisher to smother fire or flame.
GENERAL INSTRUCTIONS
WARNING: NEVER use appliance door, as a step stool or seat as this may result in possible tipping of the appliance, damage to the appliance, and serious injuries.
If appliance is installed near a window, proper precautions should be taken to prevent curtains from blowing over elements.
NEVER use appliance to warm or heat the room. Failure to follow this instruction can lead to possible burns, injury, fire, or damage to the appliance.
NEVER wear loose-fitting or hanging garments while using the appliance. Clothing could catch utensil handles or ignite and cause burns if garment comes in contact with hot heating elements.
To ensure proper operation and to avoid damage to the appliance or possible injury, do not adjust, service, repair or replace any part of the appliance unless specifically recommended in this manual. Refer all other servicing to a qualified technician.
NEVER store or use gasoline or other combustible or flammable materials in the oven or in the vicinity of this appliance as fumes could create a fire hazard or an explosion.
To prevent grease fires, do not let cooking grease or other flammable materials accumulate in or near the appliance.
Use only dry potholders. Moist or damp potholders on hot surfaces may result in a steam burn. Do not let potholder touch hot heating elements. Do not use a towel or other bulky cloth which could easily touch hot heating elements and ignite.
Always turn off all controls when cooking is completed.
NEVER heat unopened containers in the oven. Pressure build-up in the container may cause container to burst resulting in burns, injury or damage to the appliance.
NEVER use aluminum foil to cover an oven rack or oven bottom. Misuse could result in risk of electric shock, fire, or damage to the appliance. Use foil only as directed in this manual.

IMPORTANT SAFETY INSTRUCTIONS |
3 |
|
|
CHILD SAFETY
NEVER leave children alone or unsupervised in area where appliance is in use or is still hot.
NEVER allow children to sit or stand on any part of the appliance as they could be injured or burned.
CAUTION: NEVER store items of interest to children in cabinets above an appliance. Children climbing on appliance or door to reach items could
damage the appliance or be burned or seriously injured.
Children must be taught that the appliance and utensils in or on it can be hot. Let hot utensils cool in a safe place, out of reach of small children. Children should be taught that an appliance is not a toy. Children should not be allowed to play with controls or other parts of the unit.
OVEN
Use care when opening door. Let hot air or steam escape before removing or replacing food.
For proper oven operation and performance, do not block or obstruct oven vent duct.
Always place oven racks in desired locations while oven is cool. If rack must be moved while oven is hot, do not let potholder contact hot heating element in oven.
Only certain types of glass, glass/ceramic, ceramic, earthenware, or other glazed utensils are suitable for oven service without breaking due to the sudden change in temperature. Follow utensil manufacturer’s instructions when using glass.
HEATING ELEMENTS
NEVER touch oven heating elements, areas near elements or interior surfaces of oven.
Heating elements may be hot even though they are dark in color. Interior surfaces of an oven may
become hot enough to cause burns. During and after use, do not touch or let clothing or other flammable materials contact heating elements, areas near elements, or interior surfaces of oven until they have had sufficient time to cool.
Other potentially hot surfaces include: Oven vent opening, surfaces near the vent opening, oven door, areas around the door, and oven window.
ABOUT SPECIALTY COOKWARE
This appliance has been tested for safe performance using conventional cookware. Do not use any devices or accessories that are not specifically recommended in this manual. Do not use add-on oven convection systems.
The use of devices or accessories that are not expressly recommended in this manual can create serious safety hazards, result in performance problems, and reduce the life of the components of the appliance.

4 |
CLOCK AND TIMER |
|
|
Clock
Timer
Y
B
The display will flash when the appliance is first connected to power or if power is interrupted. The display will stop flashing once the time-of-day clock has been set.
TIME-OF-DAY CLOCK
The display will flash when electrical power is first supplied to the appliance or if there has been a power failure.
To set the clock:
1.Press the CLOCK pad.
S A beep will sound when the CLOCK pad is pressed.
2.Press or press and hold the Y or B pad until the correct time of day appears in the display.
S Press to change the time in 1 minute increments.
S Press and hold to change the time in 10 minute increments.
To recall the time of day when the timer operation is displayed, press the CLOCK pad.
TIMER FEATURE
The timer can be set from one minute (0:01) up to 12 hours (12:00). The timer does NOT control the oven.
To set the timer:
1.Press the TIMER pad.
S A beep will sound when the TIMER pad is pressed. S 0:00 will appear in the display.
2.Press or press and hold the Y or B pad until the correct time appears in the display.
S Press to change the time in 1 minute increments.
S Press and hold to change the time in 10 minute increments.
S The timer will start automatically after a few seconds. The flashing colon indicates that the timer is in use.
S If the CLOCK pad is pressed, the colon will continue to flash to indicate the timer is in use.
3.A beep will sound at 1 minute (0:01).
4.At the end of the timer operation, 0:00 will appear in the display and three beeps will sound.
S One beep will sound every 10 seconds for 10 minutes or until the timer operation is canceled.
To cancel the timer, press the TIMER pad and the current time of day will reappear in the display. NOTE: When 0:00 is displayed, pressing either the TIMER or CLOCK pad will also cancel the timer operation.
USING YOUR OVEN |
5 |
|
|
 CAUTION
SBe sure all packing material is removed from oven before turning on.
S Do not use oven for storing food or cookware.
SMany aerosol-type spray cans are EXPLOSIVE when exposed to heat and may be highly flammable. Avoid their use or storage near the oven.
SAllow steam and hot air to escape before reaching into oven to check, add, or remove food.
SPrepared Food Warning: Follow food manufacturer’s instructions. If a plastic frozen food container and/or its cover distorts, warps, or is otherwise damaged during cooking, immediately discard the food and its container. The food could be contaminated.
SFollow the manufacturer’s directions when using oven cooking bags.
OVEN CHARACTERISTICS
Every oven has its own characteristics. You may find that the cooking times and temperatures you were accustomed to with your previous oven may need to be altered slightly with your new oven. It is normal to notice some differences between this oven and your previous oven.
FAN
A fan automatically turns on whenever the oven is set for a cooking operation. The fan will turn off when the oven is turned off. (Note: The lower oven of the double wall oven model has a fan and operates as described above.)
OVEN INDICATOR LIGHT
The OVEN indicator light, located on the control panel below the knob, turns on whenever the oven is turned on. When the oven reaches the preset temperature, the indicator light will turn off and then cycle on and off as the oven elements cycle on and off.
USE OF ALUMINUM FOIL
Do not cover entire rack with aluminum foil or place foil directly under cookware. To catch spillovers, place a piece of foil, a little larger than the pan, on the rack below the pan. Do not place aluminum foil across the bottom of the oven.
PREHEATING
Preheating is necessary for proper baking results. It is not necessary for broiling or roasting. Allow the oven to heat until the desired oven temperature is reached, approximately 10 to 15 minutes.
Selecting a temperature higher than desired will not preheat the oven any faster. Preheating at a higher temperature may have a negative effect on baking results.
 Loading...