

Page 1

Using
ADOBE®
®
9FRAMEMAKER
Page 2

Copyright
© 2009 Adobe Systems Incorporated. All rights reserved.
Using Adobe® FrameMaker® 9 for Windows®
If this guide is distributed with software that includes an end-user agreement, this guide, as well as the software described in it, is furnished under license and
may be used or copied only in accordance with the terms of such license. Except as permitted by any such license, no part of this guide may be reproduced, stored
in a retrieval system, or transmitted, in any form or by any means, electronic, mechanical, recording, or otherwise, without the prior written permission of Adobe
Systems Incorporated. Please note that the content in this guide is protected under copyright law even if it is not distributed with software that includes an enduser license agreement.
The content of this guide is furnished for informational use only, is subject to change without notice, and should not be construed as a commitment by Adobe
Systems Incorporated. Adobe Systems Incorporated assumes no responsibility or liability for any errors or inaccuracies that may appear in the informational
content contained in this guide.
Please remember that existing artwork or images that you may want to include in your project may be protected under copyright law. The unauthorized
incorporation of such material into your new work could be a violation of the rights of the copyright owner. Please be sure to obtain any permission required
from the copyright owner.
Any references to company names in sample templates are for demonstration purposes only and are not intended to refer to any actual organization.
This work is licensed under the Creative Commons Attribution Non-Commercial 3.0 License. To view a copy of this license, visit
http://creativecommons.org/licenses/by-nc/3.0/us/
Adobe, the Adobe logo, Adobe AIR, Adobe Captivate, Adobe Type Manager, Acrobat, Distiller, Flash, FrameMaker, Illustrator, PageMaker, Photoshop,
PostScript, Reader, RoboHelp, and RoboScreenCapture are trademarks of Adobe Systems Incorporated in the United States and/or other countries.
Microsoft, Windows, and Windows Vista are either registered trademarks or trademarks of Microsoft Corporation in the United States and/or other countries.
SVG is a trademark of the World Wide Web Consortium; marks of the W3C are registered and held by its host institutions MIT, INRIA, and Keio. Helvetica is
a registered trademark of is a trademark of Heidelberger Druckmaschinen AG exclusively licensed through Linotype Library GmbH, and may be registered in
certain jurisdictions. ITC Zapf Dingbats is a trademark of International Typeface Corporation. Times New Roman is a registered trademark of The Monotype
Corporation registered in the U.S. Patent and Trademark Office and may be registered in certain other jurisdictions. All other trademarks are the property of
their respective owners.
This product contains either BSAFE and/or TIPEM software by RSA Data Security, Inc.
This product contains color data and/or the Licensed Trademark of The Focoltone Colour System.
PANTONE® Colors displayed in the software application or in the user documentation may not match PANTONE-identified standards. Consult current
PANTONE Color Publications for accurate color. PANTONE
Inc. is the copyright owner of color data and/or software which are licensed to Adobe Systems Incorporated to distribute for use only in combination with Adobe
FrameMaker. PANTONE Color Data and/or Software shall not be copied onto another disk or into memory unless as part of the execution of Adobe
FrameMaker software.
Software is produced under Dainippon Ink and Chemicals Inc.'s copyrights of color-data-base derived from Sample Books.
This product contains ImageStream® Graphics and Presentation Filters Copyright ©1991-1996 Inso Corporation and/or Outside In® Viewer Technology ©1992-
1996 Inso Corporation. All Rights Reserved.
This product includes software developed by the Apache Software Foundation (http://www.apache.org/).
Portions contributed by Gilles Vollant.
Certain Spelling portions of this product is based on Proximity Linguistic Technology. ©Copyright 1990 Merriam-Webster Inc. ©Copyright 1990 All rights
reserved. Proximity Technology A Division of Franklin Electronic Publishers, Inc. Burlington, New Jersey USA. ©Copyright 2003 Franklin Electronic Publishers
Inc.©Copyright 2003 All rights reserved. Proximity Technology A Division of Franklin Electronic Publishers, Inc. Burlington, New Jersey USA. Legal
Supplement ©Copyright 1990/1994 Merriam-Webster Inc./Franklin Electronic Publishers Inc. ©Copyright 1994 All rights reserved. Proximity Technology A
Division of Franklin Electronic Publishers, Inc. Burlington, New Jersey USA. ©Copyright 1990/1994 Merriam-Webster Inc./Franklin Electronic Publishers Inc.
©Copyright 1997All rights reserved. Proximity Technology A Division of Franklin Electronic Publishers, Inc. Burlington, New Jersey USA ©Copyright 1990
Merriam-Webster Inc. ©Copyright 1993 All rights reserved. Proximity Technology A Division of Franklin Electronic Publishers, Inc. Burlington, New Jersey
USA. ©Copyright 2004 Franklin Electronic Publishers Inc. ©Copyright 2004 All rights reserved. Proximity Technology A Division of Franklin Electronic
Publishers, Inc. Burlington, New Jersey USA. ©Copyright 1991 Dr. Lluis de Yzaguirre I Maura ©Copyright 1991 All rights reserved. Proximity Technology A
Division of Franklin Electronic Publishers, Inc. Burlington, New Jersey USA. ©Copyright 1990 Munksgaard International Publishers Ltd. ©Copyright 1990 All
rights reserved. Proximity Technology A Division of Franklin Electronic Publishers, Inc. Burlington, New Jersey USA. ©Copyright 1990 Van Dale Lexicografie
bv ©Copyright 1990 All rights reserved. Proximity Technology A Division of Franklin Electronic Publishers, Inc. Burlington, New Jersey USA. ©Copyright 1995
Van Dale Lexicografie bv ©Copyright 1996 All rights reserved. Proximity Technology A Division of Franklin Electronic Publishers, Inc. Burlington, New Jersey
USA. ©Copyright 1990 IDE a.s. ©Copyright 1990 All rights reserved. Proximity Technology A Division of Franklin Electronic Publishers, Inc. Burlington, New
Jersey USA. ©Copyright 1992 Hachette/Franklin Electronic Publishers Inc. ©Copyright 2004 All rights reserved. Proximity Technology A Division of Franklin
Electronic Publishers, Inc. Burlington, New Jersey USA. ©Copyright 1991 Text & Satz Datentechnik ©Copyright 1991 All rights reserved. Proximity Technology
A Division of Franklin Electronic Publishers, Inc. Burlington, New Jersey USA. ©Copyright 2004 Bertelsmann Lexikon Verlag ©Copyright 2004 All rights
reserved. Proximity Technology A Division of Franklin Electronic Publishers, Inc. Burlington, New Jersey USA. ©Copyright 2004 MorphoLogic Inc.
©Copyright 2004 All rights reserved. Proximity Technology A Division of Franklin Electronic Publishers, Inc. Burlington, New Jersey USA. ©Copyright 1990
William Collins Sons & Co. Ltd. ©Copyright 1990 All rights reserved. Proximity Technology A Division of Franklin Electronic Publishers, Inc. Burlington, New
Jersey USA. ©Copyright 1993-95 Russicon Company Ltd. ©Copyright 1995 All rights reserved. Proximity Technology A Division of Franklin Electronic
Publishers, Inc. Burlington, New Jersey USA. ©Copyright 2004 IDE a.s. ©Copyright 2004 All rights reserved. Proximity Technology A Division of Franklin
Electronic Publishers, Inc. Burlington, New Jersey USA. The Hyphenation portion of this product is based on Proximity Linguistic Technology. ©Copyright
2003 Franklin Electronic Publishers Inc.©Copyright 2003 All rights reserved. Proximity Technology A Division of Franklin Electronic Publishers, Inc.
Burlington, New Jersey USA. ©Copyright 1984 William Collins Sons & Co. Ltd. ©Copyright 1988 All rights reserved. Proximity Technology A Division of
Franklin Electronic Publishers, Inc. Burlington, New Jersey USA. ©Copyright 1990 Munksgaard International Publishers Ltd. ©Copyright 1990 All rights
reserved. Proximity Technology A Division of Franklin Electronic Publishers, Inc. Burlington, New Jersey USA. ©Copyright 1997 Van Dale Lexicografie bv
©Copyright 1997 All rights reserved. Proximity Technology A Division of Franklin Electronic Publishers, Inc. Burlington, New Jersey USA. ©Copyright 1984
Editions Fernand Nathan ©Copyright 1989 All rights reserved. Proximity Technology A Division of Franklin Electronic Publishers, Inc. Burlington, New Jersey
USA. ©Copyright 1983 S Fischer Verlag ©Copyright 1997 All rights reserved. Proximity Technology A Division of Franklin Electronic Publishers, Inc.
Burlington, New Jersey USA. ©Copyright 1989 Zanichelli ©Copyright 1989 All rights reserved. Proximity Technology A Division of Franklin Electronic
® and other Pantone, Inc. trademarks are property of Pantone, Inc. © Pantone, Inc. 2003. Pantone,
Last updated 9/27/2011
Page 3

Publishers, Inc. Burlington, New Jersey USA. ©Copyright 1989 IDE a.s. ©Copyright 1989 All rights reserved. Proximity Technology A Division of Franklin
Electronic Publishers, Inc. Burlington, New Jersey USA. ©Copyright 1990 Espasa-Calpe ©Copyright 1990 All rights reserved. Proximity Technology A Division
of Franklin Electronic Publishers, Inc. Burlington, New Jersey USA. ©Copyright 1989 C.A. Stromberg AB. ©Copyright 1989 All rights reserved. Proximity
Technology A Division of Franklin Electronic Publishers, Inc. Burlington, New Jersey USA.
Portions of Adobe Acrobat include technology used under license from Autonomy, and are copyrighted.
Adobe Systems Incorporated, 345 Park Avenue, San Jose, California 95110, USA.
Notice to U.S. government end users. The software and documentation are “Commercial Items,” as that term is defined at 48 C.F.R. §2.101, consisting of
“Commercial Computer Software” and “Commercial Computer Software Documentation,” as such terms are used in 48 C.F.R. §12.212 or 48 C.F.R. §227.7202,
as applicable. Consistent with 48 C.F.R. §12.212 or 48 C.F.R. §§227.7202-1 through 227.7202-4, as applicable, the Commercial Computer Software and
Commercial Computer Software Documentation are being licensed to U.S. Government end users (a) only as Commercial items and (b) with only those rights
as are granted to all other end users pursuant to the terms and conditions herein. Unpublished-rights reserved under the copyright laws of the United States. For
U.S. Government End Users, Adobe agrees to comply with all applicable equal opportunity laws including, if appropriate, the provisions of Executive Order
11246, as amended, Section 402 of the Vietnam Era Veterans Readjustment Assistance Act of 1974 (38 USC 4212), and Section 503 of the Rehabilitation Act of
1973, as amended, and the regulations at 41 CFR Parts 60-1 through 60-60, 60-250, and 60-741. The affirmative action clause and regulations contained in the
preceding sentence shall be incorporated by reference.
Last updated 9/27/2011
Page 4

Contents
Chapter 1: Getting Started
Resources . . . . . . . . . . . . . . . . . . . . . . . . . . . . . . . . . . . . . . . . . . . . . . . . . . . . . . . . . . . . . . . . . . . . . . . . . . . . . . . . . . . . . . . . . . . . . . . . . . . . . . . . . . . . . 1
Activation and registration . . . . . . . . . . . . . . . . . . . . . . . . . . . . . . . . . . . . . . . . . . . . . . . . . . . . . . . . . . . . . . . . . . . . . . . . . . . . . . . . . . . . . . . . . . . . 1
Help and support . . . . . . . . . . . . . . . . . . . . . . . . . . . . . . . . . . . . . . . . . . . . . . . . . . . . . . . . . . . . . . . . . . . . . . . . . . . . . . . . . . . . . . . . . . . . . . . . . . . . . . 2
Services, downloads, and extras . . . . . . . . . . . . . . . . . . . . . . . . . . . . . . . . . . . . . . . . . . . . . . . . . . . . . . . . . . . . . . . . . . . . . . . . . . . . . . . . . . . . . . . . 2
What’s new in FrameMaker 9 . . . . . . . . . . . . . . . . . . . . . . . . . . . . . . . . . . . . . . . . . . . . . . . . . . . . . . . . . . . . . . . . . . . . . . . . . . . . . . . . . . . . . . . . . . 3
Chapter 2: FrameMaker Basics
User interface . . . . . . . . . . . . . . . . . . . . . . . . . . . . . . . . . . . . . . . . . . . . . . . . . . . . . . . . . . . . . . . . . . . . . . . . . . . . . . . . . . . . . . . . . . . . . . . . . . . . . . . . . 7
Accessibility features in FrameMaker . . . . . . . . . . . . . . . . . . . . . . . . . . . . . . . . . . . . . . . . . . . . . . . . . . . . . . . . . . . . . . . . . . . . . . . . . . . . . . . . . . 27
Opening, saving, and closing documents . . . . . . . . . . . . . . . . . . . . . . . . . . . . . . . . . . . . . . . . . . . . . . . . . . . . . . . . . . . . . . . . . . . . . . . . . . . . . . 27
Chapter 3: Templates and Page Layout
Templates . . . . . . . . . . . . . . . . . . . . . . . . . . . . . . . . . . . . . . . . . . . . . . . . . . . . . . . . . . . . . . . . . . . . . . . . . . . . . . . . . . . . . . . . . . . . . . . . . . . . . . . . . . . . 35
Formats . . . . . . . . . . . . . . . . . . . . . . . . . . . . . . . . . . . . . . . . . . . . . . . . . . . . . . . . . . . . . . . . . . . . . . . . . . . . . . . . . . . . . . . . . . . . . . . . . . . . . . . . . . . . . . 36
Master pages and reference pages . . . . . . . . . . . . . . . . . . . . . . . . . . . . . . . . . . . . . . . . . . . . . . . . . . . . . . . . . . . . . . . . . . . . . . . . . . . . . . . . . . . . 54
Page layouts . . . . . . . . . . . . . . . . . . . . . . . . . . . . . . . . . . . . . . . . . . . . . . . . . . . . . . . . . . . . . . . . . . . . . . . . . . . . . . . . . . . . . . . . . . . . . . . . . . . . . . . . . 64
Multiflow documents . . . . . . . . . . . . . . . . . . . . . . . . . . . . . . . . . . . . . . . . . . . . . . . . . . . . . . . . . . . . . . . . . . . . . . . . . . . . . . . . . . . . . . . . . . . . . . . . . 74
Variables . . . . . . . . . . . . . . . . . . . . . . . . . . . . . . . . . . . . . . . . . . . . . . . . . . . . . . . . . . . . . . . . . . . . . . . . . . . . . . . . . . . . . . . . . . . . . . . . . . . . . . . . . . . . . 80
Templates . . . . . . . . . . . . . . . . . . . . . . . . . . . . . . . . . . . . . . . . . . . . . . . . . . . . . . . . . . . . . . . . . . . . . . . . . . . . . . . . . . . . . . . . . . . . . . . . . . . . . . . . . . . . 93
Create documents . . . . . . . . . . . . . . . . . . . . . . . . . . . . . . . . . . . . . . . . . . . . . . . . . . . . . . . . . . . . . . . . . . . . . . . . . . . . . . . . . . . . . . . . . . . . . . . . . . . . 98
iv
Chapter 4: Text
Adding and editing text . . . . . . . . . . . . . . . . . . . . . . . . . . . . . . . . . . . . . . . . . . . . . . . . . . . . . . . . . . . . . . . . . . . . . . . . . . . . . . . . . . . . . . . . . . . . . 100
Working with elements in structured documents . . . . . . . . . . . . . . . . . . . . . . . . . . . . . . . . . . . . . . . . . . . . . . . . . . . . . . . . . . . . . . . . . . . . . 102
Formatting text . . . . . . . . . . . . . . . . . . . . . . . . . . . . . . . . . . . . . . . . . . . . . . . . . . . . . . . . . . . . . . . . . . . . . . . . . . . . . . . . . . . . . . . . . . . . . . . . . . . . . 120
Search for items . . . . . . . . . . . . . . . . . . . . . . . . . . . . . . . . . . . . . . . . . . . . . . . . . . . . . . . . . . . . . . . . . . . . . . . . . . . . . . . . . . . . . . . . . . . . . . . . . . . . . 127
Check spelling . . . . . . . . . . . . . . . . . . . . . . . . . . . . . . . . . . . . . . . . . . . . . . . . . . . . . . . . . . . . . . . . . . . . . . . . . . . . . . . . . . . . . . . . . . . . . . . . . . . . . . . 130
Manage personal, document, and site dictionaries . . . . . . . . . . . . . . . . . . . . . . . . . . . . . . . . . . . . . . . . . . . . . . . . . . . . . . . . . . . . . . . . . . . 134
Use the Thesaurus . . . . . . . . . . . . . . . . . . . . . . . . . . . . . . . . . . . . . . . . . . . . . . . . . . . . . . . . . . . . . . . . . . . . . . . . . . . . . . . . . . . . . . . . . . . . . . . . . . . 136
Multiple Undo/Redo . . . . . . . . . . . . . . . . . . . . . . . . . . . . . . . . . . . . . . . . . . . . . . . . . . . . . . . . . . . . . . . . . . . . . . . . . . . . . . . . . . . . . . . . . . . . . . . . . 137
Equations . . . . . . . . . . . . . . . . . . . . . . . . . . . . . . . . . . . . . . . . . . . . . . . . . . . . . . . . . . . . . . . . . . . . . . . . . . . . . . . . . . . . . . . . . . . . . . . . . . . . . . . . . . . 139
Working with multiple languages . . . . . . . . . . . . . . . . . . . . . . . . . . . . . . . . . . . . . . . . . . . . . . . . . . . . . . . . . . . . . . . . . . . . . . . . . . . . . . . . . . . . 176
Chapter 5: Tables
About tables . . . . . . . . . . . . . . . . . . . . . . . . . . . . . . . . . . . . . . . . . . . . . . . . . . . . . . . . . . . . . . . . . . . . . . . . . . . . . . . . . . . . . . . . . . . . . . . . . . . . . . . . 180
Insert, move, or remove a table . . . . . . . . . . . . . . . . . . . . . . . . . . . . . . . . . . . . . . . . . . . . . . . . . . . . . . . . . . . . . . . . . . . . . . . . . . . . . . . . . . . . . . 182
Text and graphics in tables . . . . . . . . . . . . . . . . . . . . . . . . . . . . . . . . . . . . . . . . . . . . . . . . . . . . . . . . . . . . . . . . . . . . . . . . . . . . . . . . . . . . . . . . . . 184
Formatting tables . . . . . . . . . . . . . . . . . . . . . . . . . . . . . . . . . . . . . . . . . . . . . . . . . . . . . . . . . . . . . . . . . . . . . . . . . . . . . . . . . . . . . . . . . . . . . . . . . . . 192
Table position and spacing . . . . . . . . . . . . . . . . . . . . . . . . . . . . . . . . . . . . . . . . . . . . . . . . . . . . . . . . . . . . . . . . . . . . . . . . . . . . . . . . . . . . . . . . . . 200
Chapter 6: Graphics
Graphics and objects . . . . . . . . . . . . . . . . . . . . . . . . . . . . . . . . . . . . . . . . . . . . . . . . . . . . . . . . . . . . . . . . . . . . . . . . . . . . . . . . . . . . . . . . . . . . . . . . 206
Using color in text and objects . . . . . . . . . . . . . . . . . . . . . . . . . . . . . . . . . . . . . . . . . . . . . . . . . . . . . . . . . . . . . . . . . . . . . . . . . . . . . . . . . . . . . . . 233
Last updated 9/27/2011
Page 5

USING FRAMEMAKER 9
Contents
Anchored frames . . . . . . . . . . . . . . . . . . . . . . . . . . . . . . . . . . . . . . . . . . . . . . . . . . . . . . . . . . . . . . . . . . . . . . . . . . . . . . . . . . . . . . . . . . . . . . . . . . . . 239
Using RoboScreenCapture . . . . . . . . . . . . . . . . . . . . . . . . . . . . . . . . . . . . . . . . . . . . . . . . . . . . . . . . . . . . . . . . . . . . . . . . . . . . . . . . . . . . . . . . . . . 251
Chapter 7: Dynamic Documents
Markers . . . . . . . . . . . . . . . . . . . . . . . . . . . . . . . . . . . . . . . . . . . . . . . . . . . . . . . . . . . . . . . . . . . . . . . . . . . . . . . . . . . . . . . . . . . . . . . . . . . . . . . . . . . . . 254
Hypertext and view-only documents . . . . . . . . . . . . . . . . . . . . . . . . . . . . . . . . . . . . . . . . . . . . . . . . . . . . . . . . . . . . . . . . . . . . . . . . . . . . . . . . . 255
Hypertext commands . . . . . . . . . . . . . . . . . . . . . . . . . . . . . . . . . . . . . . . . . . . . . . . . . . . . . . . . . . . . . . . . . . . . . . . . . . . . . . . . . . . . . . . . . . . . . . . 260
Create hypertext links . . . . . . . . . . . . . . . . . . . . . . . . . . . . . . . . . . . . . . . . . . . . . . . . . . . . . . . . . . . . . . . . . . . . . . . . . . . . . . . . . . . . . . . . . . . . . . . 268
Create ways to start, open, and close applications . . . . . . . . . . . . . . . . . . . . . . . . . . . . . . . . . . . . . . . . . . . . . . . . . . . . . . . . . . . . . . . . . . . . 270
Test and troubleshoot hypertext documents . . . . . . . . . . . . . . . . . . . . . . . . . . . . . . . . . . . . . . . . . . . . . . . . . . . . . . . . . . . . . . . . . . . . . . . . . 272
Add hypertext links to generated files . . . . . . . . . . . . . . . . . . . . . . . . . . . . . . . . . . . . . . . . . . . . . . . . . . . . . . . . . . . . . . . . . . . . . . . . . . . . . . . . 273
FluidView format . . . . . . . . . . . . . . . . . . . . . . . . . . . . . . . . . . . . . . . . . . . . . . . . . . . . . . . . . . . . . . . . . . . . . . . . . . . . . . . . . . . . . . . . . . . . . . . . . . . . 276
Cross-references . . . . . . . . . . . . . . . . . . . . . . . . . . . . . . . . . . . . . . . . . . . . . . . . . . . . . . . . . . . . . . . . . . . . . . . . . . . . . . . . . . . . . . . . . . . . . . . . . . . . 277
Chapter 8: Books and Long Documents
About books . . . . . . . . . . . . . . . . . . . . . . . . . . . . . . . . . . . . . . . . . . . . . . . . . . . . . . . . . . . . . . . . . . . . . . . . . . . . . . . . . . . . . . . . . . . . . . . . . . . . . . . . 290
Create books . . . . . . . . . . . . . . . . . . . . . . . . . . . . . . . . . . . . . . . . . . . . . . . . . . . . . . . . . . . . . . . . . . . . . . . . . . . . . . . . . . . . . . . . . . . . . . . . . . . . . . . . 291
Managing books . . . . . . . . . . . . . . . . . . . . . . . . . . . . . . . . . . . . . . . . . . . . . . . . . . . . . . . . . . . . . . . . . . . . . . . . . . . . . . . . . . . . . . . . . . . . . . . . . . . . 294
Generate and update books . . . . . . . . . . . . . . . . . . . . . . . . . . . . . . . . . . . . . . . . . . . . . . . . . . . . . . . . . . . . . . . . . . . . . . . . . . . . . . . . . . . . . . . . . 302
Tables of contents or other lists . . . . . . . . . . . . . . . . . . . . . . . . . . . . . . . . . . . . . . . . . . . . . . . . . . . . . . . . . . . . . . . . . . . . . . . . . . . . . . . . . . . . . . 305
Creating indexes . . . . . . . . . . . . . . . . . . . . . . . . . . . . . . . . . . . . . . . . . . . . . . . . . . . . . . . . . . . . . . . . . . . . . . . . . . . . . . . . . . . . . . . . . . . . . . . . . . . . 312
Formatting lists and indexes . . . . . . . . . . . . . . . . . . . . . . . . . . . . . . . . . . . . . . . . . . . . . . . . . . . . . . . . . . . . . . . . . . . . . . . . . . . . . . . . . . . . . . . . . 327
Footnotes and endnotes . . . . . . . . . . . . . . . . . . . . . . . . . . . . . . . . . . . . . . . . . . . . . . . . . . . . . . . . . . . . . . . . . . . . . . . . . . . . . . . . . . . . . . . . . . . . . 334
Conditional documents . . . . . . . . . . . . . . . . . . . . . . . . . . . . . . . . . . . . . . . . . . . . . . . . . . . . . . . . . . . . . . . . . . . . . . . . . . . . . . . . . . . . . . . . . . . . . . 340
Troubleshooting books . . . . . . . . . . . . . . . . . . . . . . . . . . . . . . . . . . . . . . . . . . . . . . . . . . . . . . . . . . . . . . . . . . . . . . . . . . . . . . . . . . . . . . . . . . . . . . 349
v
Chapter 9: Working with Documents
Importing and linking files . . . . . . . . . . . . . . . . . . . . . . . . . . . . . . . . . . . . . . . . . . . . . . . . . . . . . . . . . . . . . . . . . . . . . . . . . . . . . . . . . . . . . . . . . . 354
Embedding objects . . . . . . . . . . . . . . . . . . . . . . . . . . . . . . . . . . . . . . . . . . . . . . . . . . . . . . . . . . . . . . . . . . . . . . . . . . . . . . . . . . . . . . . . . . . . . . . . . . 373
Export text and graphics . . . . . . . . . . . . . . . . . . . . . . . . . . . . . . . . . . . . . . . . . . . . . . . . . . . . . . . . . . . . . . . . . . . . . . . . . . . . . . . . . . . . . . . . . . . . . 376
Managing files using WebDAV . . . . . . . . . . . . . . . . . . . . . . . . . . . . . . . . . . . . . . . . . . . . . . . . . . . . . . . . . . . . . . . . . . . . . . . . . . . . . . . . . . . . . . . 380
Chapter 10: Editing Content
Identify changes by tracking edited text . . . . . . . . . . . . . . . . . . . . . . . . . . . . . . . . . . . . . . . . . . . . . . . . . . . . . . . . . . . . . . . . . . . . . . . . . . . . . . 392
Identify revised text with change bars . . . . . . . . . . . . . . . . . . . . . . . . . . . . . . . . . . . . . . . . . . . . . . . . . . . . . . . . . . . . . . . . . . . . . . . . . . . . . . . . 394
Compare versions to view changes . . . . . . . . . . . . . . . . . . . . . . . . . . . . . . . . . . . . . . . . . . . . . . . . . . . . . . . . . . . . . . . . . . . . . . . . . . . . . . . . . . 396
Determine word and character count . . . . . . . . . . . . . . . . . . . . . . . . . . . . . . . . . . . . . . . . . . . . . . . . . . . . . . . . . . . . . . . . . . . . . . . . . . . . . . . . 399
Import PDF comments . . . . . . . . . . . . . . . . . . . . . . . . . . . . . . . . . . . . . . . . . . . . . . . . . . . . . . . . . . . . . . . . . . . . . . . . . . . . . . . . . . . . . . . . . . . . . . 399
Chapter 11: Structured Authoring
Introduction to structured authoring . . . . . . . . . . . . . . . . . . . . . . . . . . . . . . . . . . . . . . . . . . . . . . . . . . . . . . . . . . . . . . . . . . . . . . . . . . . . . . . . . 401
Migrating from unstructured FrameMaker to XML . . . . . . . . . . . . . . . . . . . . . . . . . . . . . . . . . . . . . . . . . . . . . . . . . . . . . . . . . . . . . . . . . . . . 406
Converting unstructured files to structured documents . . . . . . . . . . . . . . . . . . . . . . . . . . . . . . . . . . . . . . . . . . . . . . . . . . . . . . . . . . . . . . . 413
XML with FrameMaker . . . . . . . . . . . . . . . . . . . . . . . . . . . . . . . . . . . . . . . . . . . . . . . . . . . . . . . . . . . . . . . . . . . . . . . . . . . . . . . . . . . . . . . . . . . . . . . 415
Filter By Attribute . . . . . . . . . . . . . . . . . . . . . . . . . . . . . . . . . . . . . . . . . . . . . . . . . . . . . . . . . . . . . . . . . . . . . . . . . . . . . . . . . . . . . . . . . . . . . . . . . . . 421
Last updated 9/27/2011
Page 6

USING FRAMEMAKER 9
Contents
Chapter 12: Structured Authoring Using DITA
Why DITA . . . . . . . . . . . . . . . . . . . . . . . . . . . . . . . . . . . . . . . . . . . . . . . . . . . . . . . . . . . . . . . . . . . . . . . . . . . . . . . . . . . . . . . . . . . . . . . . . . . . . . . . . . . 429
DITA support in FrameMaker . . . . . . . . . . . . . . . . . . . . . . . . . . . . . . . . . . . . . . . . . . . . . . . . . . . . . . . . . . . . . . . . . . . . . . . . . . . . . . . . . . . . . . . . 430
DITA topics . . . . . . . . . . . . . . . . . . . . . . . . . . . . . . . . . . . . . . . . . . . . . . . . . . . . . . . . . . . . . . . . . . . . . . . . . . . . . . . . . . . . . . . . . . . . . . . . . . . . . . . . . . 434
DITA maps and bookmaps . . . . . . . . . . . . . . . . . . . . . . . . . . . . . . . . . . . . . . . . . . . . . . . . . . . . . . . . . . . . . . . . . . . . . . . . . . . . . . . . . . . . . . . . . . . 437
DITA content references (conrefs) . . . . . . . . . . . . . . . . . . . . . . . . . . . . . . . . . . . . . . . . . . . . . . . . . . . . . . . . . . . . . . . . . . . . . . . . . . . . . . . . . . . . 441
DITA cross-references and links . . . . . . . . . . . . . . . . . . . . . . . . . . . . . . . . . . . . . . . . . . . . . . . . . . . . . . . . . . . . . . . . . . . . . . . . . . . . . . . . . . . . . . 444
Conditional processing . . . . . . . . . . . . . . . . . . . . . . . . . . . . . . . . . . . . . . . . . . . . . . . . . . . . . . . . . . . . . . . . . . . . . . . . . . . . . . . . . . . . . . . . . . . . . . 449
Chapter 13: Generating Output
Generating PDFs . . . . . . . . . . . . . . . . . . . . . . . . . . . . . . . . . . . . . . . . . . . . . . . . . . . . . . . . . . . . . . . . . . . . . . . . . . . . . . . . . . . . . . . . . . . . . . . . . . . . 452
Generating print output . . . . . . . . . . . . . . . . . . . . . . . . . . . . . . . . . . . . . . . . . . . . . . . . . . . . . . . . . . . . . . . . . . . . . . . . . . . . . . . . . . . . . . . . . . . . . 461
Generating HTML . . . . . . . . . . . . . . . . . . . . . . . . . . . . . . . . . . . . . . . . . . . . . . . . . . . . . . . . . . . . . . . . . . . . . . . . . . . . . . . . . . . . . . . . . . . . . . . . . . . 468
Chapter 14: Using FrameMaker with RoboHelp
Importing FrameMaker documents into RoboHelp . . . . . . . . . . . . . . . . . . . . . . . . . . . . . . . . . . . . . . . . . . . . . . . . . . . . . . . . . . . . . . . . . . . 485
Chapter 15: Keyboard Shortcuts
About keyboard shortcuts . . . . . . . . . . . . . . . . . . . . . . . . . . . . . . . . . . . . . . . . . . . . . . . . . . . . . . . . . . . . . . . . . . . . . . . . . . . . . . . . . . . . . . . . . . . 508
Navigating through documents . . . . . . . . . . . . . . . . . . . . . . . . . . . . . . . . . . . . . . . . . . . . . . . . . . . . . . . . . . . . . . . . . . . . . . . . . . . . . . . . . . . . . . 510
Keys for screen modes . . . . . . . . . . . . . . . . . . . . . . . . . . . . . . . . . . . . . . . . . . . . . . . . . . . . . . . . . . . . . . . . . . . . . . . . . . . . . . . . . . . . . . . . . . . . . . . 510
Dialog boxes . . . . . . . . . . . . . . . . . . . . . . . . . . . . . . . . . . . . . . . . . . . . . . . . . . . . . . . . . . . . . . . . . . . . . . . . . . . . . . . . . . . . . . . . . . . . . . . . . . . . . . . . 511
Keys for selection . . . . . . . . . . . . . . . . . . . . . . . . . . . . . . . . . . . . . . . . . . . . . . . . . . . . . . . . . . . . . . . . . . . . . . . . . . . . . . . . . . . . . . . . . . . . . . . . . . . . 514
Menu commands . . . . . . . . . . . . . . . . . . . . . . . . . . . . . . . . . . . . . . . . . . . . . . . . . . . . . . . . . . . . . . . . . . . . . . . . . . . . . . . . . . . . . . . . . . . . . . . . . . . . 514
Tables . . . . . . . . . . . . . . . . . . . . . . . . . . . . . . . . . . . . . . . . . . . . . . . . . . . . . . . . . . . . . . . . . . . . . . . . . . . . . . . . . . . . . . . . . . . . . . . . . . . . . . . . . . . . . . . 527
Book commands . . . . . . . . . . . . . . . . . . . . . . . . . . . . . . . . . . . . . . . . . . . . . . . . . . . . . . . . . . . . . . . . . . . . . . . . . . . . . . . . . . . . . . . . . . . . . . . . . . . . 529
Keys for finding and changing . . . . . . . . . . . . . . . . . . . . . . . . . . . . . . . . . . . . . . . . . . . . . . . . . . . . . . . . . . . . . . . . . . . . . . . . . . . . . . . . . . . . . . . 530
Documents . . . . . . . . . . . . . . . . . . . . . . . . . . . . . . . . . . . . . . . . . . . . . . . . . . . . . . . . . . . . . . . . . . . . . . . . . . . . . . . . . . . . . . . . . . . . . . . . . . . . . . . . . 531
Document design . . . . . . . . . . . . . . . . . . . . . . . . . . . . . . . . . . . . . . . . . . . . . . . . . . . . . . . . . . . . . . . . . . . . . . . . . . . . . . . . . . . . . . . . . . . . . . . . . . . 533
Document utilities . . . . . . . . . . . . . . . . . . . . . . . . . . . . . . . . . . . . . . . . . . . . . . . . . . . . . . . . . . . . . . . . . . . . . . . . . . . . . . . . . . . . . . . . . . . . . . . . . . . 534
Text formatting . . . . . . . . . . . . . . . . . . . . . . . . . . . . . . . . . . . . . . . . . . . . . . . . . . . . . . . . . . . . . . . . . . . . . . . . . . . . . . . . . . . . . . . . . . . . . . . . . . . . . 536
Character and Paragraph Designers . . . . . . . . . . . . . . . . . . . . . . . . . . . . . . . . . . . . . . . . . . . . . . . . . . . . . . . . . . . . . . . . . . . . . . . . . . . . . . . . . . 538
Text . . . . . . . . . . . . . . . . . . . . . . . . . . . . . . . . . . . . . . . . . . . . . . . . . . . . . . . . . . . . . . . . . . . . . . . . . . . . . . . . . . . . . . . . . . . . . . . . . . . . . . . . . . . . . . . . . 538
Track Text Edit . . . . . . . . . . . . . . . . . . . . . . . . . . . . . . . . . . . . . . . . . . . . . . . . . . . . . . . . . . . . . . . . . . . . . . . . . . . . . . . . . . . . . . . . . . . . . . . . . . . . . . 541
Editing text . . . . . . . . . . . . . . . . . . . . . . . . . . . . . . . . . . . . . . . . . . . . . . . . . . . . . . . . . . . . . . . . . . . . . . . . . . . . . . . . . . . . . . . . . . . . . . . . . . . . . . . . . 542
Entering special characters . . . . . . . . . . . . . . . . . . . . . . . . . . . . . . . . . . . . . . . . . . . . . . . . . . . . . . . . . . . . . . . . . . . . . . . . . . . . . . . . . . . . . . . . . . 543
Function keys . . . . . . . . . . . . . . . . . . . . . . . . . . . . . . . . . . . . . . . . . . . . . . . . . . . . . . . . . . . . . . . . . . . . . . . . . . . . . . . . . . . . . . . . . . . . . . . . . . . . . . . 544
Keys for drawing . . . . . . . . . . . . . . . . . . . . . . . . . . . . . . . . . . . . . . . . . . . . . . . . . . . . . . . . . . . . . . . . . . . . . . . . . . . . . . . . . . . . . . . . . . . . . . . . . . . . 545
Keys for editing objects . . . . . . . . . . . . . . . . . . . . . . . . . . . . . . . . . . . . . . . . . . . . . . . . . . . . . . . . . . . . . . . . . . . . . . . . . . . . . . . . . . . . . . . . . . . . . . 547
Keys for adding color . . . . . . . . . . . . . . . . . . . . . . . . . . . . . . . . . . . . . . . . . . . . . . . . . . . . . . . . . . . . . . . . . . . . . . . . . . . . . . . . . . . . . . . . . . . . . . . . 549
Keys for equations . . . . . . . . . . . . . . . . . . . . . . . . . . . . . . . . . . . . . . . . . . . . . . . . . . . . . . . . . . . . . . . . . . . . . . . . . . . . . . . . . . . . . . . . . . . . . . . . . . . 550
Filter By Attribute . . . . . . . . . . . . . . . . . . . . . . . . . . . . . . . . . . . . . . . . . . . . . . . . . . . . . . . . . . . . . . . . . . . . . . . . . . . . . . . . . . . . . . . . . . . . . . . . . . . 563
Markers and variables . . . . . . . . . . . . . . . . . . . . . . . . . . . . . . . . . . . . . . . . . . . . . . . . . . . . . . . . . . . . . . . . . . . . . . . . . . . . . . . . . . . . . . . . . . . . . . . 564
Working with structure . . . . . . . . . . . . . . . . . . . . . . . . . . . . . . . . . . . . . . . . . . . . . . . . . . . . . . . . . . . . . . . . . . . . . . . . . . . . . . . . . . . . . . . . . . . . . . 564
Element menu . . . . . . . . . . . . . . . . . . . . . . . . . . . . . . . . . . . . . . . . . . . . . . . . . . . . . . . . . . . . . . . . . . . . . . . . . . . . . . . . . . . . . . . . . . . . . . . . . . . . . . 565
Other useful shortcuts . . . . . . . . . . . . . . . . . . . . . . . . . . . . . . . . . . . . . . . . . . . . . . . . . . . . . . . . . . . . . . . . . . . . . . . . . . . . . . . . . . . . . . . . . . . . . . . 566
vi
Index ...............................................................................................................567
Last updated 9/27/2011
Page 7

Chapter 1: Getting Started
Resources
Before you begin working with FrameMaker 9, take a few moments to read an overview of activation and the many
resources available to you. You have access to instructional videos, plug-ins, templates, user communities, seminars,
tutorials, RSS feeds, and much more.
Activation and registration
To review complete system requirements and recommendations for your Adobe® FrameMaker® 9 software, see the
FrameMaker product page at
Install the software
1 Close any Adobe applications open on your computer.
2 Insert the installation disc into your disk drive, and follow the onscreen instructions.
You can also install FrameMaker 9 from the command line. You can get Help on the command-line parameters:
www.adobe.com/products/framemaker.
1
❖ Type setup.exe /help
Help with installation
For help with installation issues, see the Installation Support Center at www.adobe.com/go/learn_fm_install_en.
License activation
During the installation process, your Adobe software contacts an Adobe server to complete the license activation
process. No personal data is transmitted. For more information on product activation, visit the Adobe website at
www.adobe.com/go/activation.
A single-user retail license activation supports two computers. For example, you can install the product on a desktop
computer at work and on a laptop computer at home. If you want to install the software on a third computer, first
deactivate it on one of the other two computers. Choose Help
> Deactivate.
Register
Register your product to receive complimentary installation support, notifications of updates, and other services.
❖ To register, follow the onscreen instructions in the Registration dialog box, which appears when you first start the
software.
If you postpone registration, you can register at any time by choosing Help > Registration.
Last updated 9/27/2011
Page 8

USING FRAMEMAKER 9
Getting Started
Help and support
Community Help
Community Help is an integrated environment on Adobe.com that gives you access to community-generated content
moderated by Adobe and industry experts. Comments from users help guide you to an answer. Search Community
Help to find the best content on the web about Adobe products and technologies, including these resources:
• Videos, tutorials, tips and techniques, blogs, articles, and examples for designers and developers.
• Complete online Help, which is updated regularly and may contain more information than the Help delivered with
FrameMaker 9. If you are connected to the Internet when you access Help, you automatically see the updated online
Help. You can access the Help delivered with FrameMaker 9 from the Help menu.
• All other content on Adobe.com, including knowledgebase articles, downloads and updates, Adobe Developer
Connection, and more.
Use the Help search field in your product’s user interface to access Community Help. You can search for content
within the Adobe.com site and also in websites that have useful information about your product. Moderators continue
to identify the most relevant web content for your product. You can add comments to online Help and view comments
added by other users. For a video of Community Help, see
www.adobe.com/go/learn_community_help_en.
2
Adobe Help Viewer 2
Adobe Help Viewer 2 is an Adobe® AIR™ application that seamlessly merges the online and offline experience. When
online, you get the most recently updated product Help on the web. You can also access an Adobe PDF version of Help.
When offline, you access Help installed with the product on your system. Adobe Help Viewer 2 has a user-friendly
interface that supports advanced navigation features. For example, you can get overviews of topics through mini TOCs
and bookmark local and online content.
The search feature supports both online and offline modes. Adobe Help Viewer 2 searches content in Community
Help when you are online and the Help installed with the product when you are offline. Online search suggestions offer
relevant results from product Help, Adobe.com, and other websites. Offline search uses indexes to return preferred
topics for key terms.
You can use the commenting feature to post your comments to Adobe.com or add notes for your own reference. Your
feedback on Help content is welcome.
Note: For a video of Adobe Help Viewer, see www.adobe.com/go/learn_air_viewer2_en.
Other resources
Online Help also includes a link to the complete, updated PDF version of Help.
Visit the Adobe Support website at www.adobe.com/support to learn about free and paid technical support options.
Services, downloads, and extras
You can enhance your product by integrating various services, plug-ins, and extensions in your product. You can also
download samples and other assets to help you get your work done.
Last updated 9/27/2011
Page 9

USING FRAMEMAKER 9
Getting Started
Adobe downloads
Visit www.adobe.com/go/downloads to find free updates, trials, and other useful software.
Adobe Labs
Adobe Labs at www.adobe.com/go/labs gives you the opportunity to experience and evaluate new and emerging
technologies and products from Adobe. At Adobe Labs, you have access to resources such as these:
• Prerelease software and technologies
• Code samples and best practices to accelerate your learning
• Early versions of product and technical documentation
• Forums, wiki-based content, and other collaborative resources to help you interact with like-minded users
Adobe Labs fosters a collaborative software development process. In this environment, customers quickly become
productive with new products and technologies. Adobe Labs is also a forum for early feedback. The Adobe
development teams use this feedback to create software that meets the needs and expectations of the community.
Adobe TV
Visit Adobe TV at http://tv.adobe.com to view instructional and inspirational videos.
3
What’s new in FrameMaker 9
Adobe® FrameMaker® 9 includes many key enhancements, an improved user interface, ability to customize the
workspace, and new ways to organize files in books. Support for DITA is also enhanced. You now have the ability to
import Adobe PDF comments and work with files on a server.
Interface enhancements
FrameMaker 9 has a new interface that includes these features:
Tabbed document windows Multiple open documents are organized into a tabbed document view for easy switching.
Pods Pods are panes that can float anywhere in the FrameMaker workspace. FrameMaker 9 provides pods for some
of the most frequently used features, such as conditional text, cross-references, markers, variables, fonts, and insets.
Tabbed and dockable panels Most commonly used dialog boxes have been converted to modeless panels. You can
dock, stack, and minimize these panels as you work in FrameMaker.
Toolbars Commonly used icons are now available in new toolbars for text, table, and paragraph formats; graphics;
object alignment; and properties.
Predefined and customizable workspaces Default workspaces for various workflows, such as structured authoring,
review, or DITA authoring, are now available. You can create custom workspaces by moving and manipulating the
document windows and panels.
See a demo of the FrameMaker workspaces:
http://www.adobe.com/designcenter/framemaker/videos/Workspaces_demo/ba_workspaces_demo.swf.
More Help topics
“User interface” on page 7
Last updated 9/27/2011
Page 10

USING FRAMEMAKER 9
Getting Started
Pods
The following most frequently used dialog boxes have a new interface designed to simplify your work.
Complete list of instances in a document For example, the Markers pod lists all the markers in a selected document.
Easy selection of an instance For example, you can select a marker entry from the pod instead of the document.
Instant navigation to the document context For example, selecting a marker from the pod simultaneously highlights
the marker in the document.
Ability to perform any operation from the pod For example, you can create, edit, delete, or search for any instance
from a pod.
New pods in FrameMaker 9:
Conditional text pod Manage conditions in a document from a single pod. Create or edit conditions, apply
conditional criteria to documents, and view versions based on conditions.
Cross-references pod Manage cross-references in a selected document or all open documents. Add, edit, and
troubleshoot internal and external cross-references across multiple documents from a single pod.
Markers pod Manage markers in the selected document or all open documents. Add, edit, search, and troubleshoot all
types of markers in a document from a single pod.
Fonts pod Lists fonts, including combined fonts, used in a document. The Replace Font pod lists the pages where a
font is used, making it easier to swap in unavailable fonts.
4
Insets pod Manage and troubleshoot insets in a document, including text insets, graphics, and multimedia objects
imported by reference or copied into documents.
Variables pod Create, insert, edit, and delete variables, or convert them to text. Perform any of the variables-related
operations using the Variables pod.
More Help topics
“Using pods” on page 20
“Conditional text pod” on page 342
“Cross-reference pod overview” on page 279
“Variables pod” on page 83
DITA
FrameMaker 9 has enhanced support for DITA 1.1. Some of the key DITA-related enhancements are as follows.
• New dockable user interface for editing and managing DITA maps and bookmaps like a FrameMaker book.
• Enhanced support for <xref> and <conref> elements, including support for nontextual elements, such as graphic
objects, tables, and table components as well as <conref> elements from DITA maps.
• Conditional processing through a DITAVAL file to create custom outputs.
• Enhanced support for relationship tables and <lockTitle> attributes.
• DITA indexing specialization, which allows for Index, See, and See Also entries.
• Ability to save a DITA map as a composite FrameMaker document for further processing. You can directly print a
composite document to a PDF without using DITA Open Toolkit.
Last updated 9/27/2011
Page 11

USING FRAMEMAKER 9
Getting Started
More Help topics
“Structured Authoring Using DITA” on page 429
Book enhancements
The book feature has been considerably enhanced in FrameMaker 9. You can create mixed hierarchical books that can
include XML and DITA files, folders, groups, and child books at multiple sublevels.
Mixed books You can now include multiple file types, such as XML and DITA files along with FM files in a book.
Structured FrameMaker provides full support for XML files, including the ability to specify conditional text and
numbering information.
Folders You can use folders in a book to organize files and set numbering properties on a folder. You can include
multiple subfolders within a folder and associate templates with a folder. A folder, depending on where it appears in
the book hierarchy, works like a chapter, section, or subsection with subordinate components.
Groups You can also organize files into groups.
Book in a book You can now include a book within a book to build a complex hierarchical parent book.
Bookmaps and DITA maps in a book You can also include XML maps, such as bookmaps and DITA maps in a book.
Search Search and replace works on all book components except child books, DITA maps, and folder templates.
5
Section and subsection numbering You can use the new variables <$sectionnum> and <$subsectionnum> to set
numbering properties for book components at the section or subsection level.
Exclude property You have the flexibility to prevent the publishing of selected files by setting the Exclude property.
Saving hierarchical books You can save hierarchical books as MIF, XML, SGML, or HTML files, FrameMaker 8 book
files, or PDFs.
More Help topics
“About books” on page 290
PDF comments
In FrameMaker 9 you can import comments and text edits from a tagged PDF into your source FrameMaker files. You
can import the following types of comments into a FrameMaker 9 document:
• Sticky notes
• Highlights
• Highlights with comments
• Text additions
• Text replacements
• Text edits, such as underlining
• Text deletion or strikethrough
Comments are inserted as tracked text edits or tracked markers that you can accept or reject as required.
More Help topics
“Import PDF comments” on page 399
Last updated 9/27/2011
Page 12

USING FRAMEMAKER 9
Getting Started
Enhanced access to files using their HTTP paths
FrameMaker 9 is IPv6 compliant and supports IPv6 URLs. FrameMaker also supports HTTP paths ubiquitously in all
FrameMaker workflows. You can create, open, save, update, check in, and check out files directly on a WebDAVenabled server by specifying the HTTP path of the file through the Browse URL dialog box. This feature provides a
quicker and more intuitive way of working with files stored on remote WebDAV-enabled servers. You can access and
cross-reference all FrameMaker supported files, including graphics, by specifying the HTTP path of the file.
More Help topics
“Managing files using WebDAV” on page 380
Character palette and Hex Input palette
Unicode support in FrameMaker 9 has been extended. You can now use a UTF-32-enabled character palette and Hex
Input palette to enter Unicode characters in a document.
More Help topics
“Using the Character palette” on page 177
“Using the Hex Input palette” on page 178
6
Last updated 9/27/2011
Page 13

Chapter 2: FrameMaker Basics
User interface
Basics
The Welcome screen
From the FrameMaker Welcome screen, you can perform the following tasks:
• Open recently accessed documents
• Create documents, books, and DITA maps in case of Structured FrameMaker
• Access FrameMaker templates
• Access FrameMaker Help and guides
• Access other resource pages and updates from Adobe
Note: To switch off the Welcome screen, specify the following line in the Preferences section of the maker.ini file:
DontShowWelcomeScreen=On.
7
Workspace overview
A particular arrangement of elements, such as panels and pods that you use frequently while working on documents,
is called a workspace. You can dock, stack, minimize, or make these elements free-floating in your workspace. You can
select from several preset workspaces or create one of your own. Once you have arranged the panels and pods, you can
save the workspace settings for use later.
The FrameMaker interface has the following components.
• The Application bar across the top contains a workspace switcher, menus, and other application controls.
• The document window displays the file you’re working on. Document windows can be tabbed and, in certain cases,
grouped and docked.
• Panels help you monitor and modify your work. Examples include character, paragraph, and table designers; and
marker, variables, cross-references panels. You can minimize, group, stack, or dock panels.
• The status bar shows text formatting and pagination information for the current document.
Last updated 9/27/2011
Page 14
USING FRAMEMAKER 9
FrameMaker Basics
Note: Open the PDF help with Adobe Acrobat® 9 to view the FrameMaker 9 Workspaces video.
8
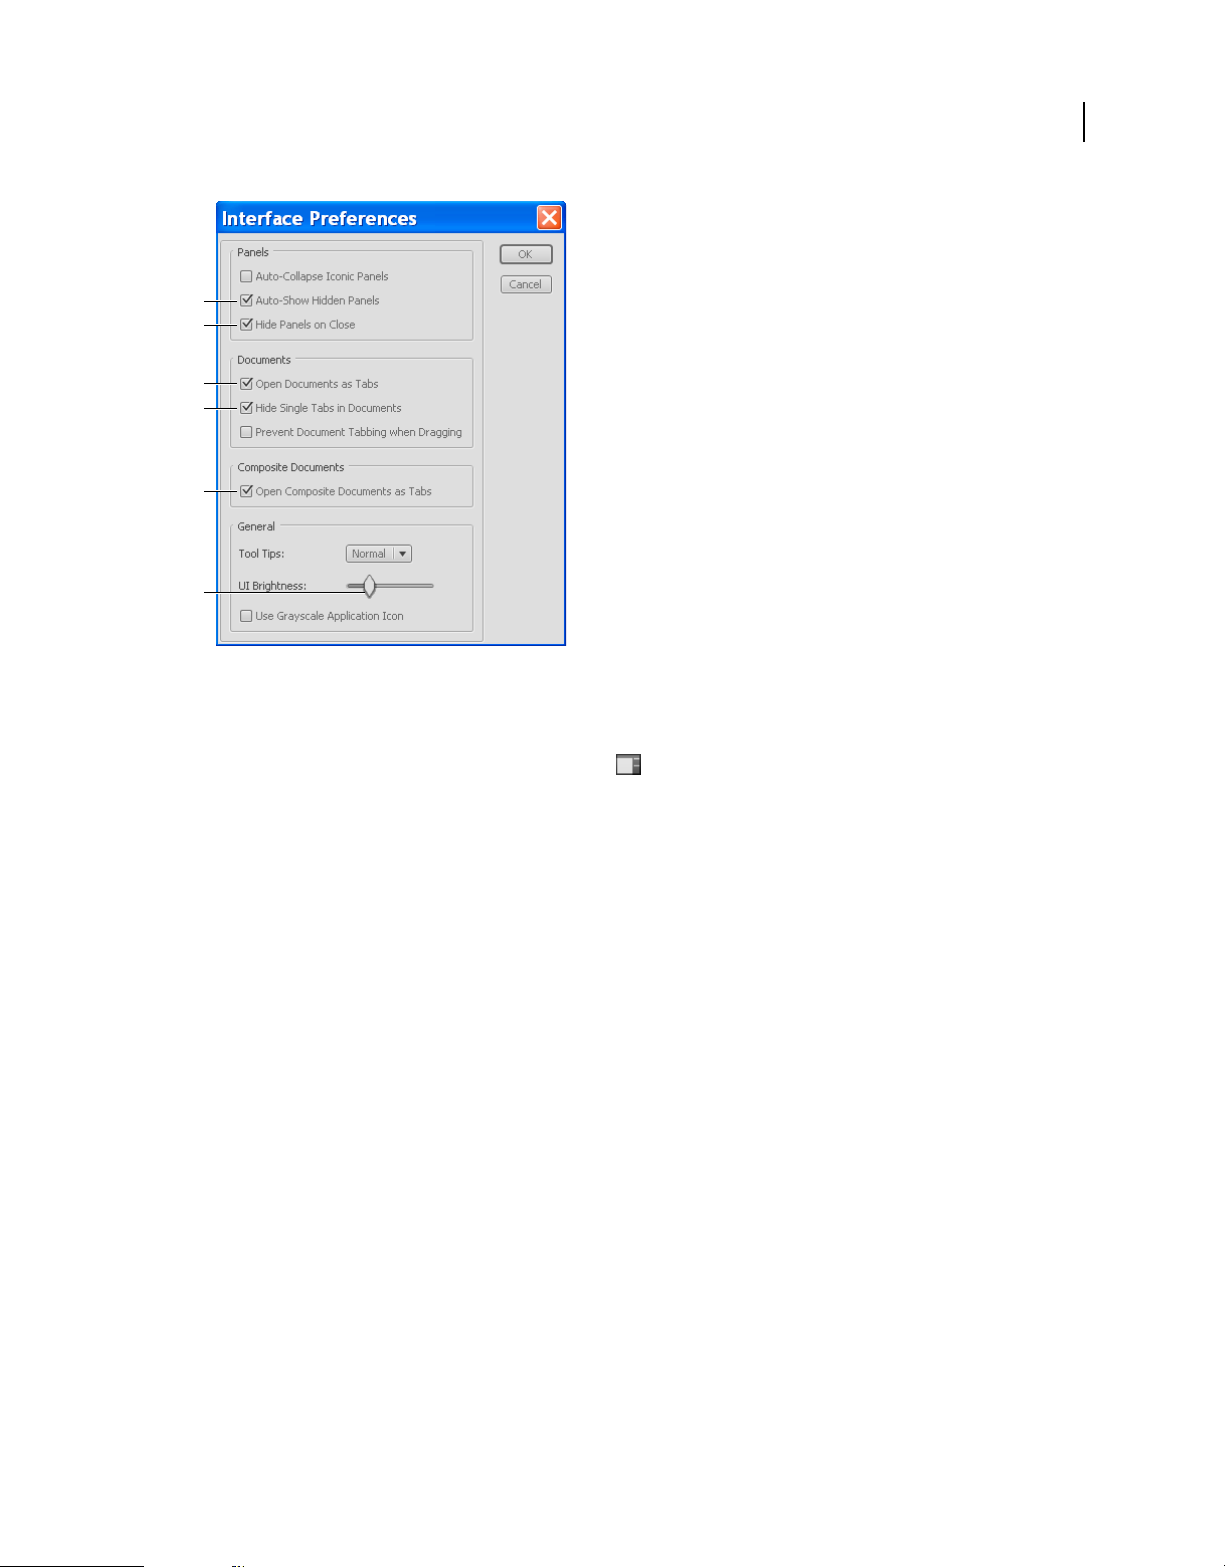
Interface preferences
Use this dialog box to specify whether FrameMaker should auto-collapse panels to icons or always open documents as tabs.
❖ Select File > Preferences > Interface and select the options you want.
Last updated 9/27/2011
Page 15
USING FRAMEMAKER 9
FrameMaker Basics
A
B
C
D
E
F
Default interface properties
A. Display hidden panels automatically B. On closing, panels are automatically hidden. C. Every time you open a document it is tabbed
automatically D. Hide single tabs in a document E. Composite documents like books and DITA maps are also opened as tabbed windows
F. Use the brightness slider to adjust the brightness of the FrameMaker application
9
Auto-Show Hidden Panels When you click UI Visibility all the docked panels are hidden and gray strips appear at
the docked sides. The docked panels appear automatically when you move the pointer near the gray strips. If you
deselect this option, all docked panels are permanently hidden.
Hide Panels On Close When you close panels they are hidden but are still active in memory and may occasionally
result in slow FrameMaker performance. For example, a document with multiple broken references to graphic files
may take longer to open even if you close the Insets pod.
If you deselect this option, FrameMaker removes panels when you close them. To display them again, you must choose
them from FrameMaker menus.
Open Documents As Tabs Opens all documents as tabbed documents. If you deselect this option, the document
windows become floating windows.
Hide Single Tabs In Documents Floating document windows display the document name only in the title bar. If you
deselect this option, the document name appears in both the title bar and the tab bar.
Open Composite Documents As Tabs Opens composite documents as tabbed documents. If you clear this option, the
composite document windows become floating windows.
Panels
Dock and undock panels
A dock is a collection of panels or panel groups displayed together in a vertical orientation. A dock is an arrangement
of non-floating panels. You dock and undock panels by moving them into and out of a dock.
Last updated 9/27/2011
Page 16
USING FRAMEMAKER 9
FrameMaker Basics
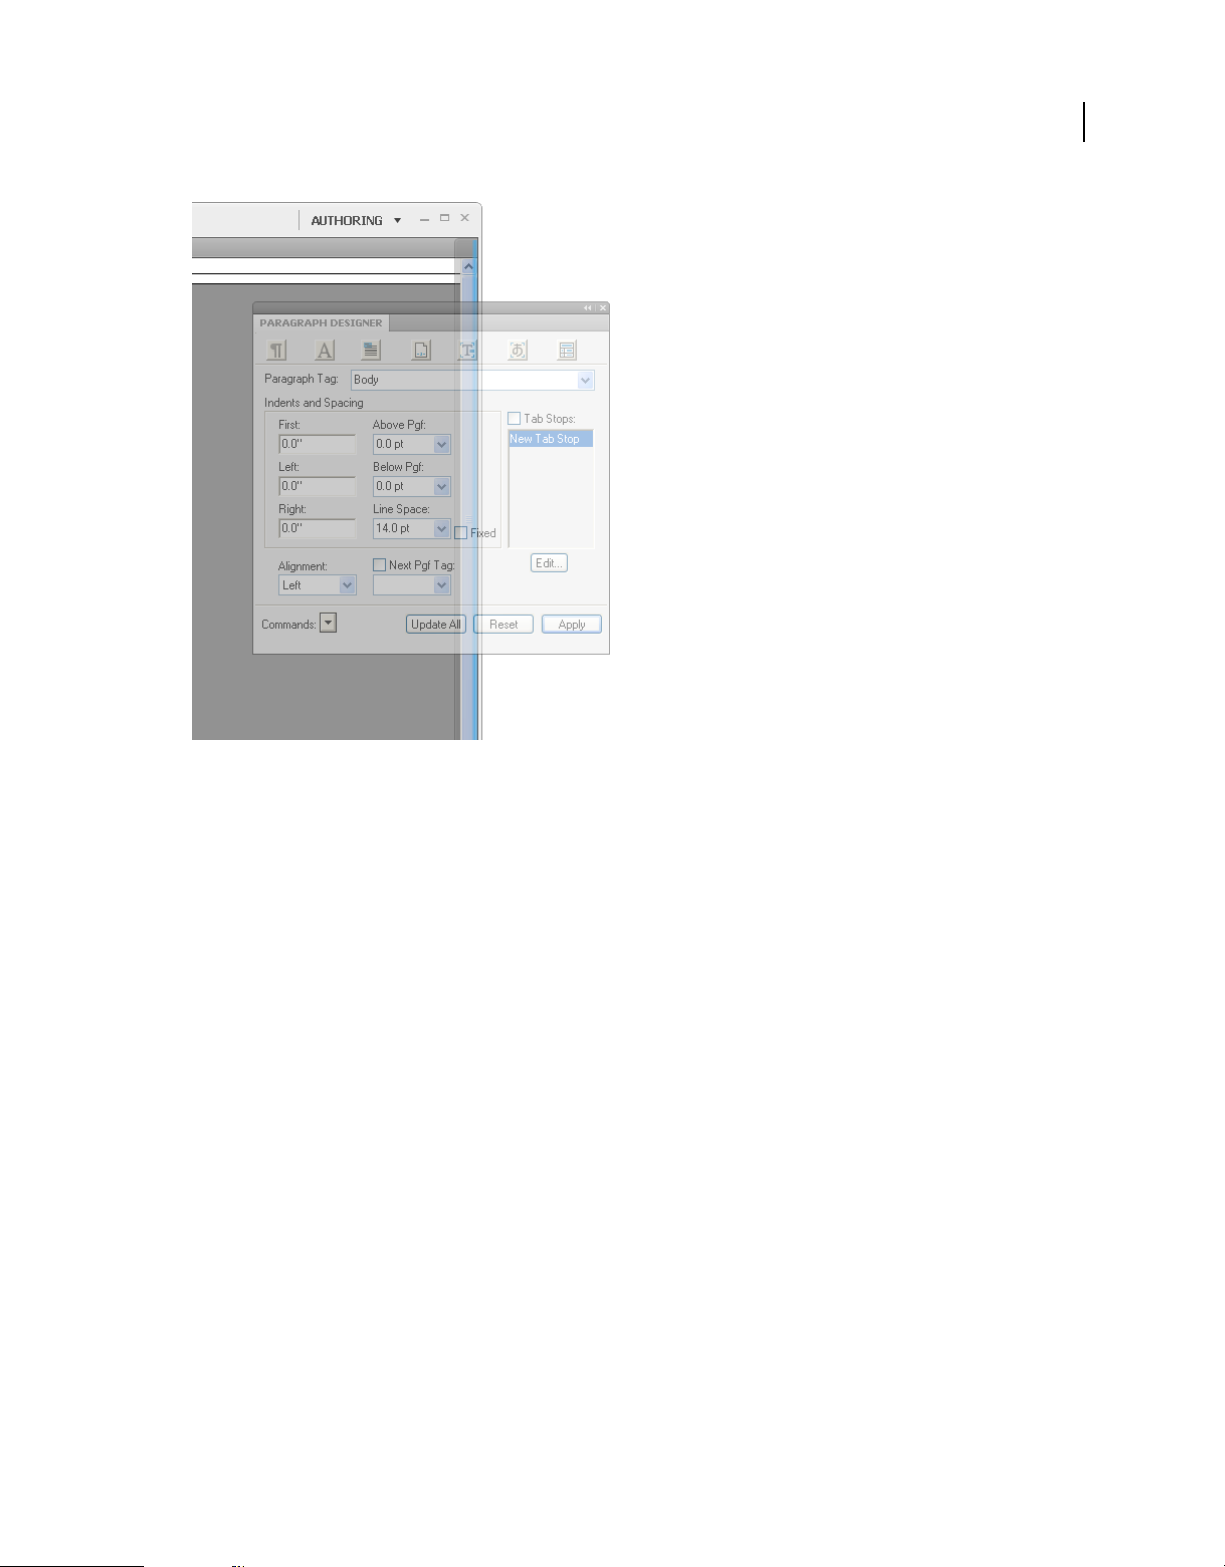
10
Docking a panel to the right of the document window. The blue highlight indicates the drop zone on the dock.
Note: Docking is not the same as stacking. A stack is a collection of floating panels or panel groups, joined top to bottom.
• To dock a panel, drag it by its tab into the dock, at the top, bottom, or in between other panels.
• To dock a panel group, drag it by its title bar (the solid empty bar above the tabs) into the dock.
• To remove a panel or panel group, drag it out of the dock by its tab or title bar. You can drag it into another dock
or make it free-floating.
Move panels
As you move panels, blue highlighted drop zone areas appear where you can drop the panel. For example, move a panel
up or down in a dock by dragging it to the narrow blue drop zone above or below another panel. If you drag to an area
that is not a drop zone, the panel floats freely in the workspace.
• To move a panel, drag it by its tab.
• To move a panel group or a stack of floating panels, drag the title bar.
Manipulate panel groups
• To move a panel into a group, drag the panel’s tab to the highlighted drop zone at the top of the group.
Last updated 9/27/2011
Page 17

USING FRAMEMAKER 9
FrameMaker Basics
Adding a panel to a panel group
• To rearrange panels in a group, drag a panel’s tab to a new location in the group.
• To remove a panel from a group so that it floats freely, drag the panel by its tab outside the group.
• To move a group, drag the title bar (the area above the tabs).
Stack floating panels
When you drag a panel out of its dock but not into a drop zone, the panel floats freely. You can position the floating
panel anywhere in the workspace. You can stack floating panels or panel groups so that they move as a unit when you
drag the topmost title bar.
11
Last updated 9/27/2011
Page 18
USING FRAMEMAKER 9
FrameMaker Basics
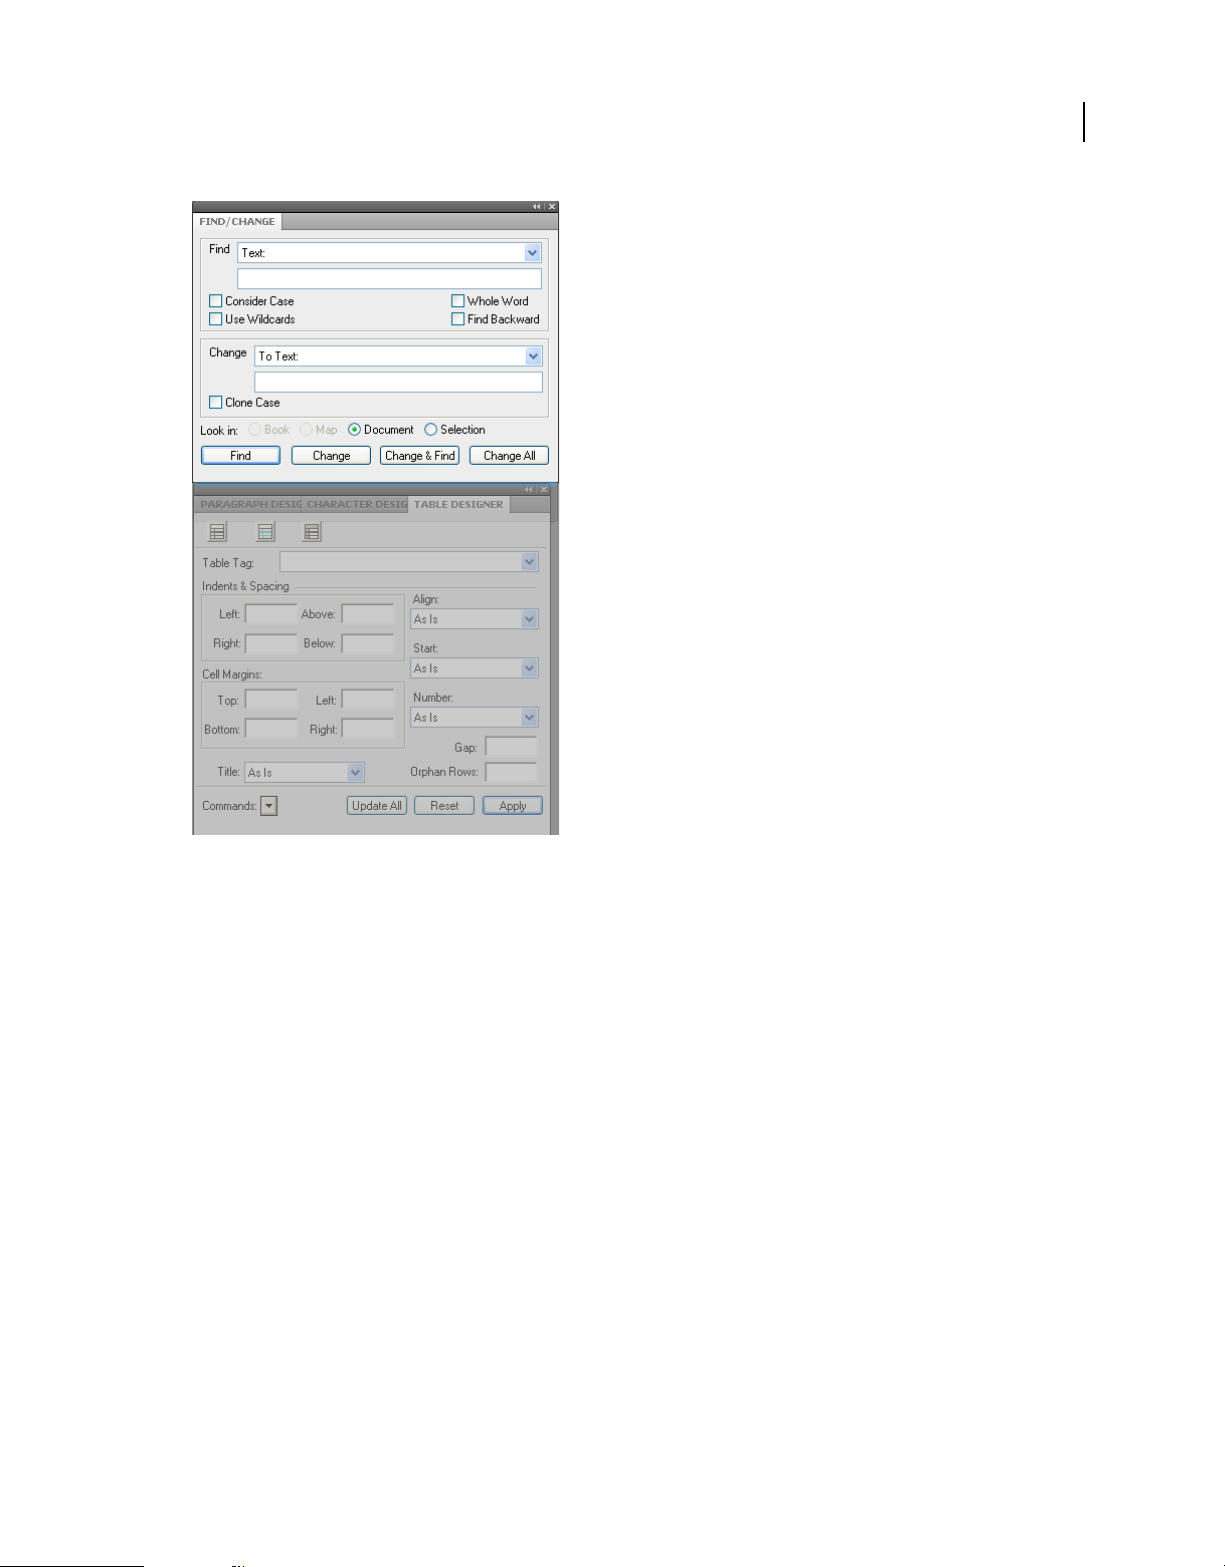
12
You can collect floating panels and group them into a stack.
• To stack floating panels, drag a panel by its tab to the drop zone at the bottom of another panel.
• To change the stacking order, drag a panel up or down by its tab.
Note: Be sure to release the tab over the narrow drop zone between panels, rather than the broad drop zone in a title bar.
• To remove a panel or panel group from the stack, so that it floats by itself, drag it out by its tab or title bar.
Resize panels
• To minimize or maximize a panel, panel group, or stack of panels, double-click a tab. You can also single-click the
tab area (the empty space next to the tabs).
• To resize a panel, drag any side of the panel.
Manipulate panels collapsed to icons
You can collapse panels to icons to reduce clutter on the workspace. In some cases, panels are collapsed to icons in the
default workspace.
Last updated 9/27/2011
Page 19
USING FRAMEMAKER 9
FrameMaker Basics
13
A
B
Collapse panels to icons
A. Panel icons B. Panel icons expanded
• To collapse or expand all panel icons in a dock, click the double arrow at the top of the dock.
• To expand a single panel icon, click it.
• To resize panel icons so that you see only the icons (and not the labels), adjust the width of the dock until the text
disappears. To display the icon text again, make the dock wider.
• To collapse an expanded panel back to its icon, click its tab, its icon, or the double arrow in the panel’s title bar.
• To add a floating panel or panel group to an icon dock, drag it in by its tab or title bar. (Panels are automatically
collapsed to icons when added to an icon dock.)
• To move a panel icon (or panel icon group), drag the icon. You can drag panel icons up and down in the dock, or
into other docks (where they appear in the panel style of that dock). You can also drag panel icons outside the dock
(where they appear as floating, expanded panels).
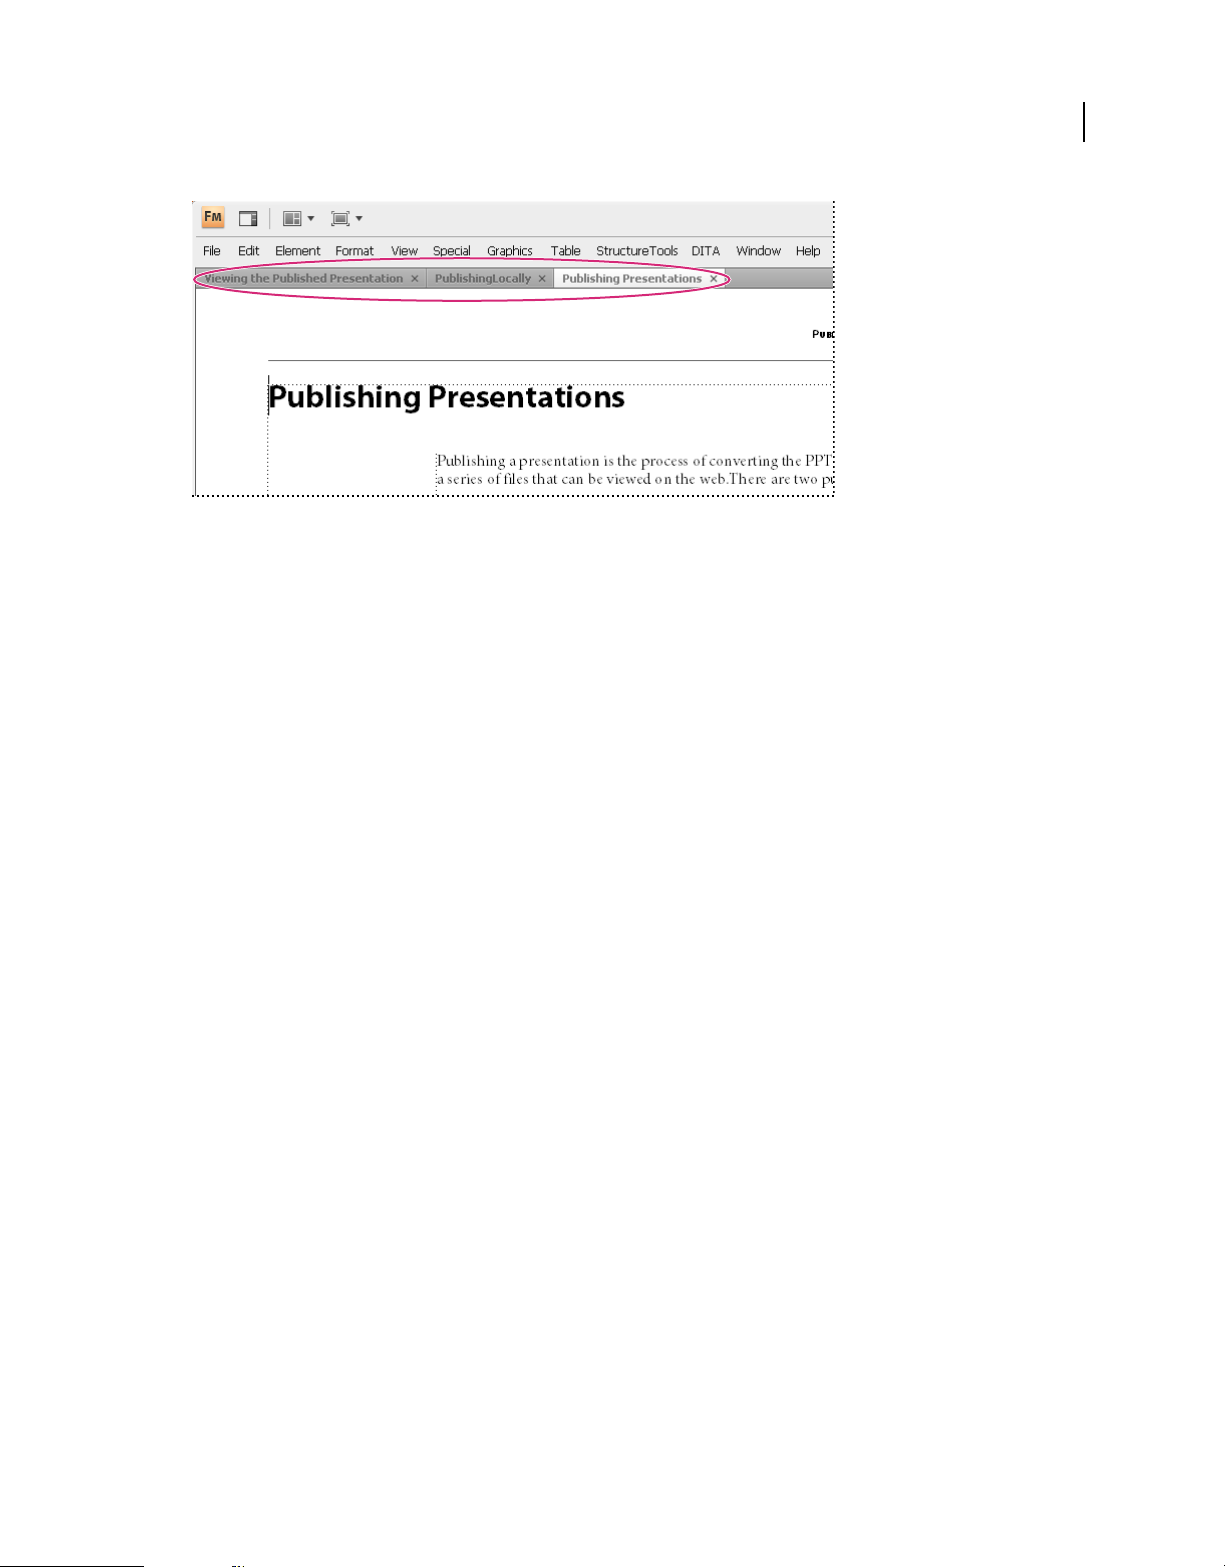
Tabbed documents
When you open more than one file, the document windows are tabbed. You can open documents as floating windows
by clearing the Open Documents As Tabs option in the Interface Preferences dialog box.
Last updated 9/27/2011
Page 20
USING FRAMEMAKER 9
FrameMaker Basics
Documents appear as tabs in the document view.
However, when you add a generated file, such as a Table Of Content, the generated file appears minimized in the lower
left corner of your workspace. There are multiple ways in which you can organize floating and tabbed document
windows.
• To dock a document window in a group of document windows, drag the window into the group.
• To rearrange the order of tabbed document windows, drag a window’s tab to a new location in the group.
• To undock a document window from a group of windows, drag the window’s tab out of the group.
Note: When you minimize a floating document window, it covers a part of the FrameMaker status bar. You cannot
move the minimized window to a new location.
14
Tips on working with the new interface
Adjust the UI brightness Adjust the UI brightness by using the UI Brightness slider under File > Preferences >
Interface.
Combine document windows To consolidate all document windows, floating, minimized, or docked, right-click the
tab bar of the docked document window and select Consolidate All To Here from the menu.
Float document windows Click Arrange Documents icon on the top Application bar and select Float All In Windows.
This arranges all the document windows as cascaded floating panels.
Tile documents Use the Arrange Documents icon to tile document windows vertically or horizontally. This is specially
useful for manually comparing documents and layering them side by side.
Bring hidden pods to the front Sometimes while working with floating document windows or when switching
workspaces, the pods may seem difficult to bring to the front.
• Undock the pods by dragging them out using the pod title bar.
• Dock all floating document windows. Right-click the docked tab bar and select Consolidate All To Here or drag
and dock the floating document windows.
Minimize pods to icons Right-click on the pods tab bar and select Collapse To Icons from the menu. This option is
available only if the pods are floating and not docked. To collapse docked pods, click anywhere in the tab bar.
Reopen the pods Choose View > Pods and click any pod name. The entire group of pods open at the bottom of the
workspace.
Reopen a panel Choose Windows and select Panels and select the panel you want to reopen.
Collapse all open panel groups to icons Right-click the tab bar of the panel group and select Collapse To Icons.
Last updated 9/27/2011
Page 21

USING FRAMEMAKER 9
FrameMaker Basics
Exit the full screen mode Right-click outside the text frame in the document window and select Toggle Screen Mode.
More Help topics
“Keys for screen modes” on page 510
Customize and manage workspaces
Default workspaces
You can choose from default workspaces or create custom workspaces and switch between them. The default
workspaces are designed so that you can quickly switch between workspaces according to what you want to
accomplish. For example, the Review workspace has review toolbars, commonly used pods, and panels prearranged to
help you review a document quickly.
• Authoring
• DITA Authoring (available only in Structured FrameMaker)
• Manage Content
• Manage Graphics
• Review
• Structured Authoring (available only in Structured FrameMaker)
15
Save a custom workspace
1 Configure the workspace the way you want it and choose Save Workspace from the workspace switcher on the
Application bar.
2 Type a name for the workspace and click OK.
FrameMaker remembers the last used workspace across sessions. If you were working in the Review workspace and
you close and relaunch FrameMaker, it loads the Review workspace.
Switch workspaces
❖ Select a workspace from the workspace switcher in the Application bar.
Use the workspace switcher to switch between workspaces designed for your workflow.
Reset a workspace
By saving the current configuration of panels as a named workspace, you can restore that workspace even if you move
or close a panel. The names of saved workspaces appear in the workspace switcher in the Application bar.
❖ Select the Reset Workspace option from the workspace switcher in the Application bar.
Last updated 9/27/2011
Page 22

USING FRAMEMAKER 9
FrameMaker Basics
Rename a custom workspace
1 Select Manage Workspace from the workspace switcher in the Application bar.
2 Select the workspace and click Rename.
3 Type a new name and click OK twice.
Delete a custom workspace
❖ Select Manage Workspace from the workspace switcher in the Application bar, select the workspace, and then click
Delete.
Interface view options
Display pages more quickly
❖ Do the following:
• Open the document by bypassing the update of imported graphics, cross-references, and text insets. (Opening
a document without updating references makes a document open faster but can slow down the display of
individual pages.)
• Turn off the display of graphics by choosing View > Options, deselecting the Graphics option, and clicking Set.
Important: If you deselect the Graphics option and generate a PDF, the graphics do not appear in the PDF.
16
• Display small text as gray bars by choosing File > Preferences > General, entering a point size in the Greek Screen
Text Smaller box, and clicking Set. Whenever text in your document is in a point size smaller than the size you
specified, it appears on the screen as a gray bar.
Change the preset display units
Some text boxes in dialog boxes require a unit of measurement (such as points or inches) for the value you enter. You
can specify the default units for font size and line spacing (font size units) and for other measurements (display units).
The default units of measurement appear after the values in the text boxes. If you enter a value without a unit of
measurement, FrameMaker uses the default unit.
• To change the preset units, make the appropriate window is active. Select View > Options. Select the values for
Display Units and Font Units, and then click Set.
• To enter different units in a box, make the appropriate window active. Enter an abbreviation for the unit along with
the numeric value. Use cm for centimeters, mm for millimeters, " or in for inches, pc, pi, or pica for picas, pt or
point for points, dd for didots, cc or cicero for ciceros, Q for Q units (refers to font size and line spacing for the
Japanese language only).
FrameMaker converts the entry to the preset display units when you click a command button in the dialog box. For
example, if your document display units are picas and you want to set a paragraph indent of 1 inch, enter 1" in the
First Indent box. When you click Apply, the measurement changes to the number of picas that corresponds to 1 inch.
Change the spacing of ruler or grid intervals
1 Make the appropriate document window or book window active. If a book window is active, select the documents
you want to affect.
2 Select View > Options. Select a new setting from the Rulers menu or the Grid menu, and click Set.
Last updated 9/27/2011
Page 23
USING FRAMEMAKER 9
FrameMaker Basics
Show or hide visual guides
You can show several of these visual guides in a document window:
• Borders around text frames, graphic frames, and imported objects
• Markers, paragraph returns, and other symbols in running text
• Rulers along the top and left side of the window
You can also show a grid of horizontal and vertical lines for drawing, resizing, and aligning graphics. All visual guides
are nonprinting, so you do not need to hide them when you print.
1 Make the appropriate document window or book window active. If a book window is active, select the documents
you want to affect.
2 Do the following:
• To show or hide borders, select View > Borders.
• To show or hide the text symbols, select View > Text Symbols.
• To show or hide the rulers, select View > Rulers.
• To show or hide grid lines, select View > Grid Lines.
• To show the element boundaries, select View > Element Boundaries or Element Boundaries (As Tags) in
Structured FrameMaker. FrameMaker automatically toggles these two options.
17
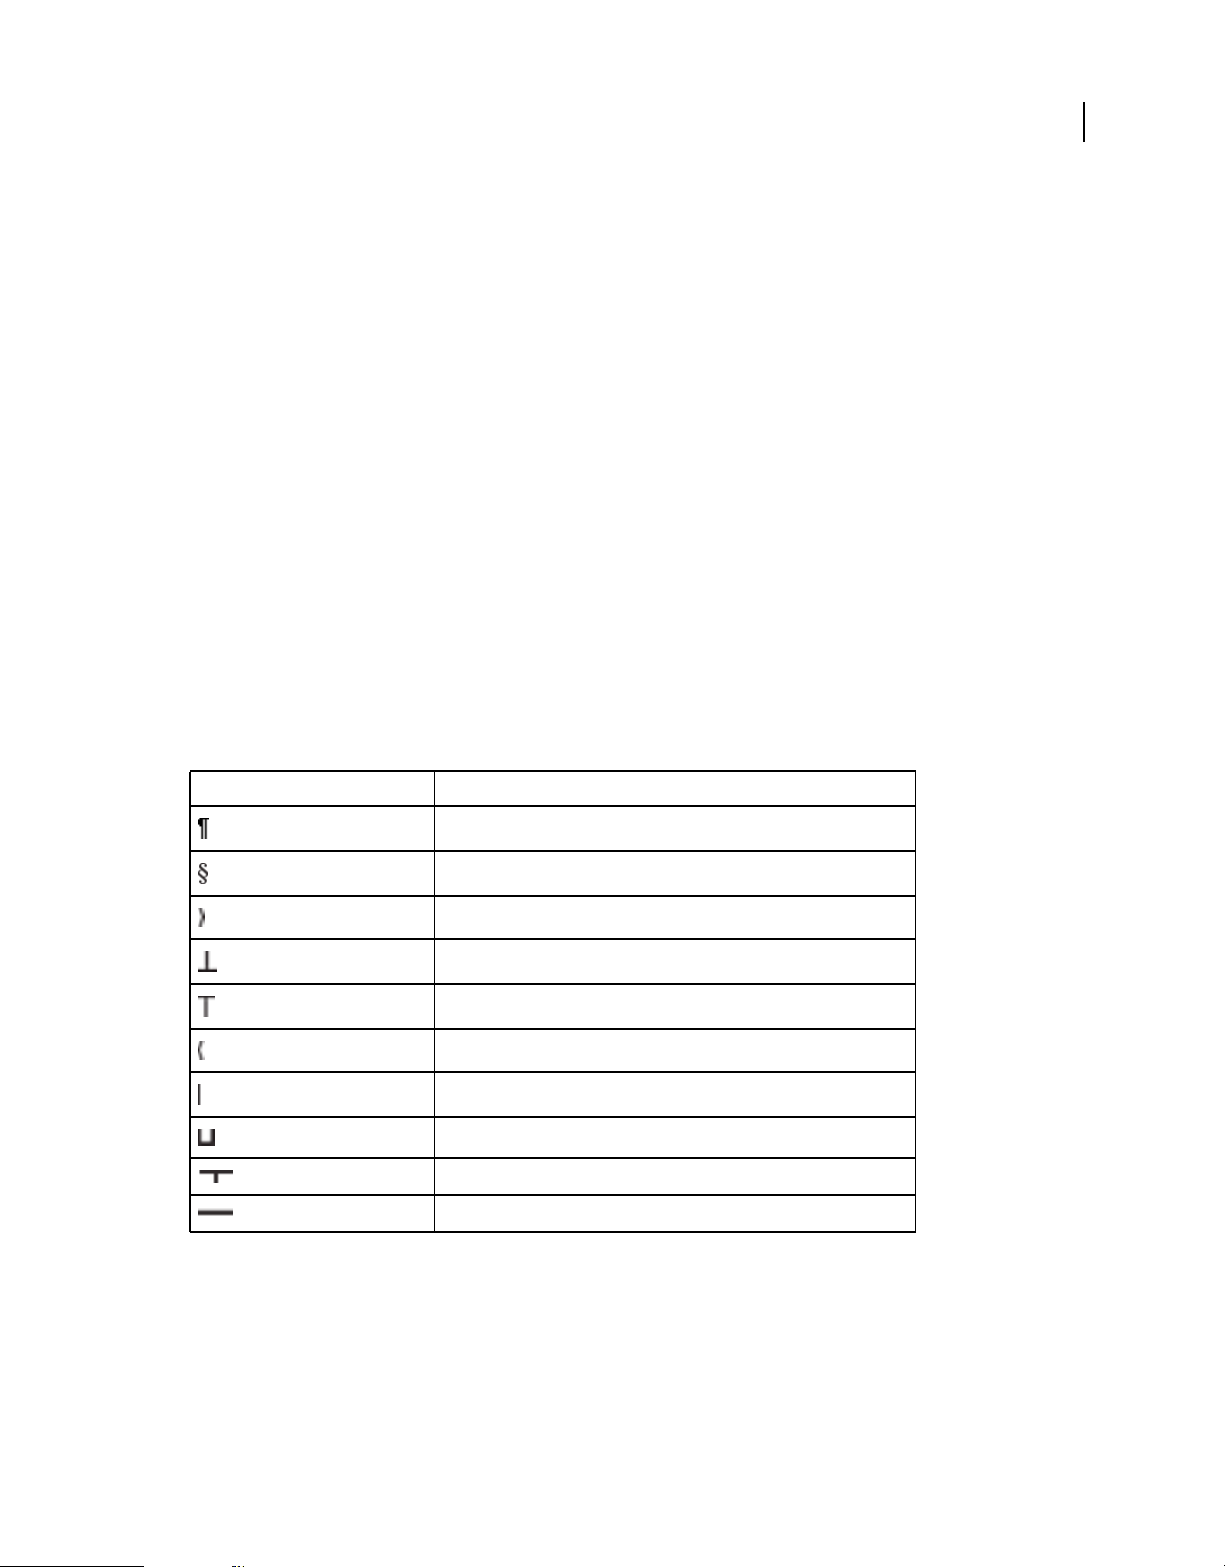
Text symbols
Text symbol Meaning
End of paragraph
End of flow and end of table cell
Tab
Anchored frame and table anchor
Marker
Forced return
Manual equation alignment point
Nonbreaking space
Discretionary hyphen
Suppress hyphenation
Display a subset of menu commands
You can display a subset of menu commands called quick menus. The quick menus do not have commands for
formatting text, editing some aspects of graphics, and inserting some objects such as markers and variables.
If you do not see the full set of menu commands, the quick menus is probably displayed.
Last updated 9/27/2011
Page 24

USING FRAMEMAKER 9
FrameMaker Basics
Note: If you’re using a structured document, your application developer can change the commands available in the
complete menus.
• To display quick menus, select View > Menus > Quick.
• To restore the complete menu, select View > Menus > Complete.
• To customize menus, add, move, or remove menus and commands as described in the online manual Customizing
FrameMaker on the Adobe website
www.adobe.com/go/lr_FrameMaker_support_en.
Display a high-contrast workspace
FrameMaker uses system colors to draw window backgrounds, text, and other graphics. Users who have trouble
discerning colors or variations in contrast, or who have low visual acuity, can set high-contrast color schemes and
custom text and background colors. This setting makes the information in the user interface easier to view.
1 Open the Windows Control Panel, double-click Accessibility Options, and select the Display tab.
2 Change contrast globally or change the color theme, as follows:
• To change the appearance of all editable interface elements at once, select the Use High Contrast option.
• To change the color theme, click Settings and select one of the High Contrast Appearance Scheme options.
3 Click Apply.
Note: FrameMaker does not adjust colors of all items. Some of these include the background color, and the fill color of
graphic objects.
18
Use custom system cursors
You can use custom system cursors instead of the built-in FrameMaker cursors. For example, you can use your
preferred system cursors for operations, such as text select or precision select, instead of the default FrameMaker
cursors.
1 After you install FrameMaker, locate the maker.ini file in the FrameMaker9 folder.
2 Open the maker.ini file in a text editor.
3 Change the value of UseSystemCursor to On.
4 Save the maker.ini file and restart FrameMaker.
Customize the display of filenames
FrameMaker contains an option for displaying the filename before the pathname in the frame titles of document
windows. The position at the end of a long pathname often obscures the filename in titles.
❖ In the initialization file, maker.ini, set the value of the flag DisplayFileLeafFirstto On. This setting displays the
filename in the title of the document or book window.
This setting also displays the filename in the dialog box listing all open files. By default the flag is set to Off, the line is
marked as a comment, and the filename is displayed in the format pathname filename, as previously.
The flag does not affect how the root name of the folder or directory tree appears in individual filenames in the book
window.
Use status bar controls
The FrameMaker status bar provides all the navigational controls, pagination information, and zoom controls.
Last updated 9/27/2011
Page 25

USING FRAMEMAKER 9
FrameMaker Basics
A C DB E F G H
Navigational controls on the status bar
A. First page B. Previous C. Go to page number D. Next E. Last page F. Go to line number G. Go to insertion point H. Zoom controls
Zoom in and out
• To magnify or decrease magnification, text, and objects, click the + (Increase Zoom) or - (Decrease Zoom) buttons
on the status bar. FrameMaker zooms in or out on the area of the page containing the insertion point or selection.
If the document doesn’t contain an insertion point or a selection, FrameMaker zooms in on the center of the page.
• To display text and objects at a particular magnification, select a percentage from the Zoom pop-up menu.
• To display the entire page in the current window, select Fit Page In Window from the Zoom pop-up menu.
• To fit the page or text frame to the window, select Fit Window To Page or Fit Window To Text Frame from the
Zoom pop-up menu. If the view options are set to display facing pages, the window is resized to accommodate two
pages side by side.
• To change the available zoom settings, click Set from the Zoom pop-up menu, select the percentage you want to
change and enter the new percentage. Enter any percentage from 25% to 1600%. Click Set. To return to the default
percentages, click Get Defaults.
• To make 100% zoom match the page size, select File > Preferences > General. For Monitor Size, specify the diagonal
size of your monitor, and then click OK. If screen-to-paper fidelity is not critical, leave Monitor Size set to Default,
which ensures cross-application compatibility.
Note: You can customize the default zoom settings. For information, see the online manual Customizing FrameMaker
on the Adobe website
www.adobe.com/go/lr_FrameMaker_support_en.
19
Turn pages and set scrolling
You can page through a document window using controls in the status bar.
You can also define how FrameMaker displays pages when you scroll up and down, left and right, or two pages at a time.
If the document you are paging through is part of an open book, FrameMaker sometimes displays an alert message
prompting you to choose to open the next or previous document in the book. For example, if you click Previous Page
on the first page of a document, clicking Yes in the alert message box opens the previous document in the book. The
last page of that document appears.
1 Make the appropriate document window or book window active. If a book window is active, select the documents
you want to affect.
2 Choose View > Options.
3 Choose one of the following options from the Page Scrolling pop-up menu:
• To display pages from top to bottom (for example, page 2 below page 1), choose Vertical.
• To display pages from left to right (for example, page 2 to the right of page 1), choose Horizontal.
• To display pages two at a time, side by side, choose Facing Pages.
• To display as many pages as will fit in the window from left to right, choose Variable.
4 Click Set.
Last updated 9/27/2011
Page 26

USING FRAMEMAKER 9
FrameMaker Basics
Go to another page
❖ Do one of the following:
• To go to the next page, click the Next Page button.
• To go to the previous page, click the Previous Page button.
• To go to the first page in the document, click the First Page button.
• To go to the last page in the document, click the Last Page button.
• To go to a specific page, click in the Page Number area and specify the page number you want to display.
• To go to a specific line number, click in the Line Number area and specify the line number you want to display.
• To go to the page containing the insertion point, click the Insertion Point button.
• To move quickly through the pages, scroll vertically.
In case of structured documents, click or select in the Structure View to display the corresponding page in the
document window. This is often the quickest way to go to the page you want.
Using toolbar shortcuts
You can access all commonly used commands from the following toolbars for use in structured or unstructured
documents. You can display a toolbar from the View > Toolbars menu.
20
Graphics Toolbar Provides all the shortcuts for graphic creation and edits.
Quick Access Bar Provides all the commands for opening and saving documents, editing text, graphics, and tables.
Text Formatting Provides all the text formatting commands, such as font styles.
Table Formatting Provides all the table editing commands, such as add rows, columns, merge cells, and text alignment
options for table cells.
Paragraph Formatting Provides all the commands for formatting paragraphs, such as tab stops, text alignment,
spacing, as well as the paragraph tag list.
Object Alignment Provides commands to change sequence, alignment, and orientation of objects.
Object Properties Provides commands to group objects, change layer order, reshape, scale, and snap objects.
Track Text Edits Provides all the commands for tracking, accepting, and rejecting text edits.
You also have keyboard shortcuts for all commands accessible through the toolbars and menus. For a list of all the
keyboard shortcuts see
“Keyboard Shortcuts” on page 508.
More Help topics
“Keyboard Shortcuts” on page 508
Using pods
About pods
These frequently used dialog boxes have an interface designed to simplify your work:
• Conditional text pod
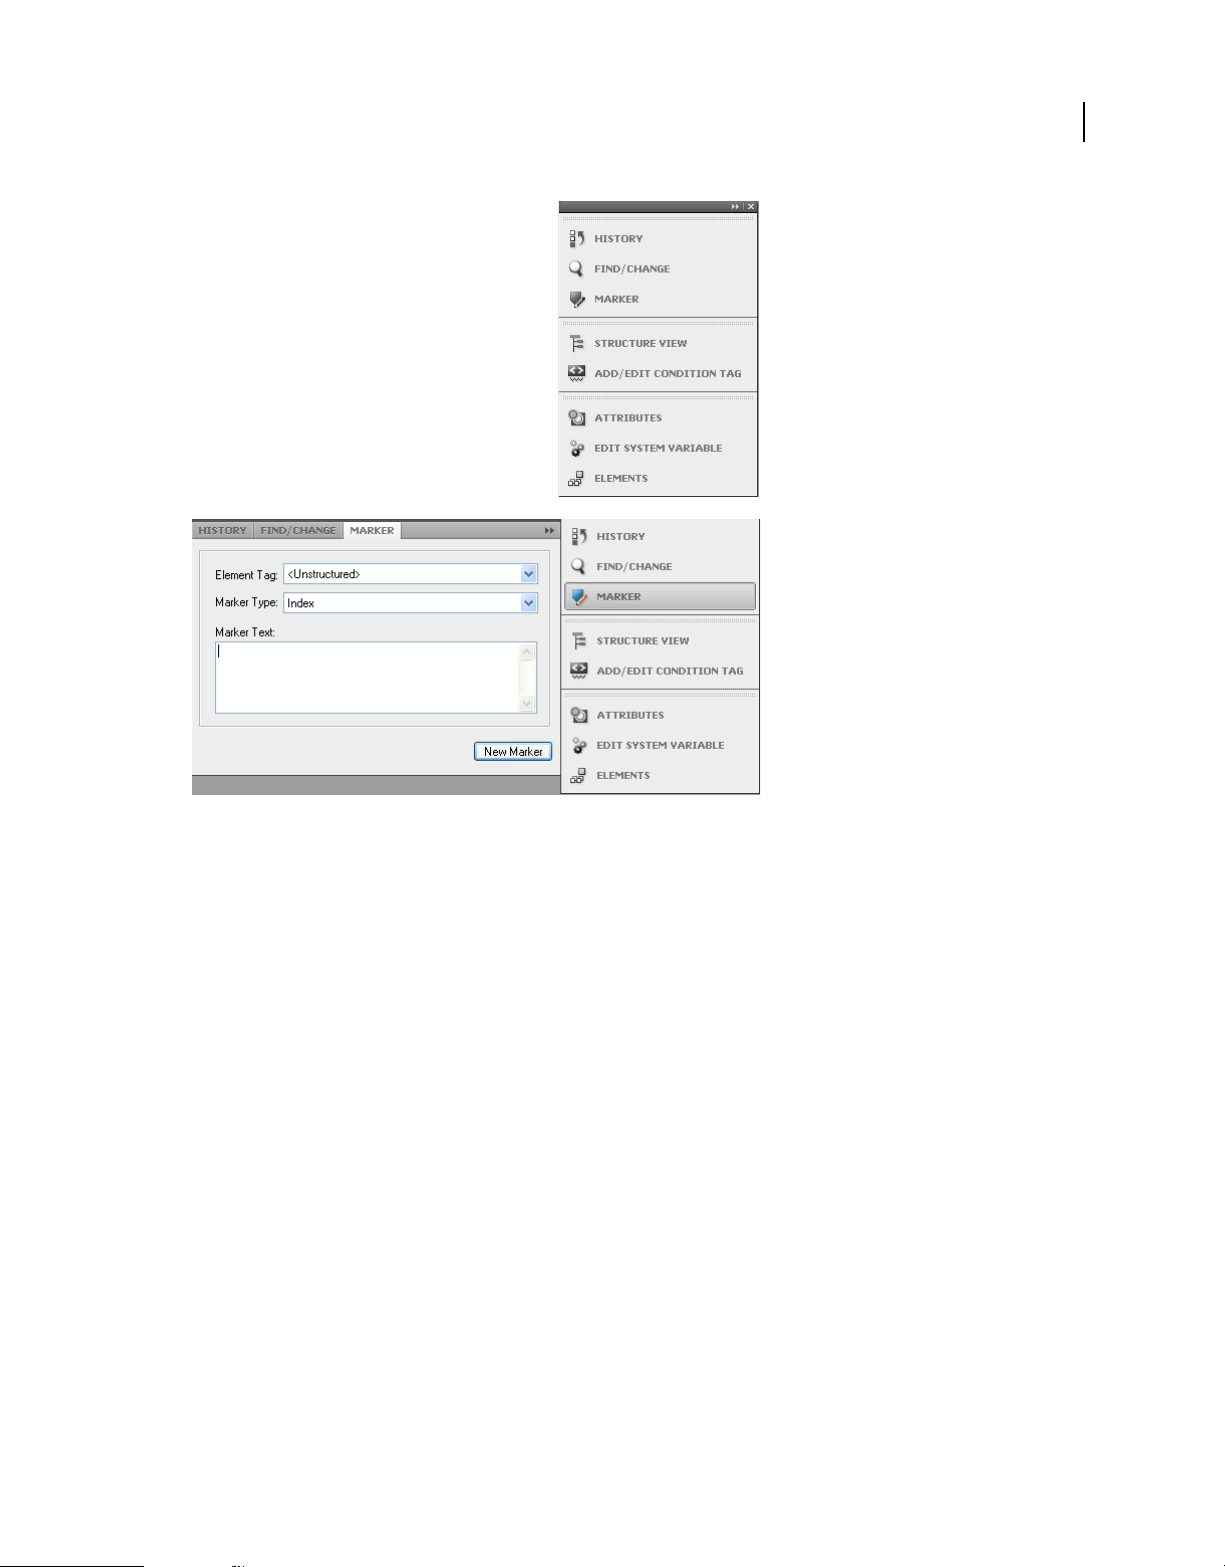
• Cross-references pod
• Marker pod
Last updated 9/27/2011
Page 27

USING FRAMEMAKER 9
FrameMaker Basics
• Fonts pod
• Insets pod
• Variables pod
A C
D
E
Explaining the pod interface
A. Select document B. Pod-specific toolbar buttons C. Search pod entries D. Arrow on column headers indicates sort order E. Pod list area.
F. Details of each instance include location. You can customize the location using Pods Location Criteria dialog box.
B
F
21
About the pod list area
The Select pop-up displays a list of all open documents, including books and DITA maps. If you select All Open Docs,
the pod list area displays all the variables from all the open documents. If you select a specific open document, the pod
list area displays variables from the selected document even when you switch to other open documents. The pod list
area continues to display the list of instances from the selected document.
If you select the Current option, the pod list area displays the list of instances from the selected document. The list area
refreshes when you switch between open documents. However, when you switch between pods, you may need to click
the Refresh button.
If you select an open document
• Single-click an instance in the pod to display the corresponding instance in the document. For example, if you select
an image instance from the Insets pod, the corresponding image is also selected in the document view.
• Double-click an instance to do the following for each pod:
Conditional text pod Displays the Add/Edit Condition Tag panel for the selected condition.
Cross-references pod Displays the Cross-Reference panel for editing the selected cross-reference.
Markers pod Displays the Marker panel so that you can edit the selected marker definition.
Fonts pod Displays the Replace Font panel for selecting a replacement font.
Insets pod Displays the Object Properties panel for the selected inset.
Variables pod Adds the selected variable at the insertion point in the current document.
• Click a column name to sort the data in the list area in ascending or descending order.
Last updated 9/27/2011
Page 28
USING FRAMEMAKER 9
FrameMaker Basics
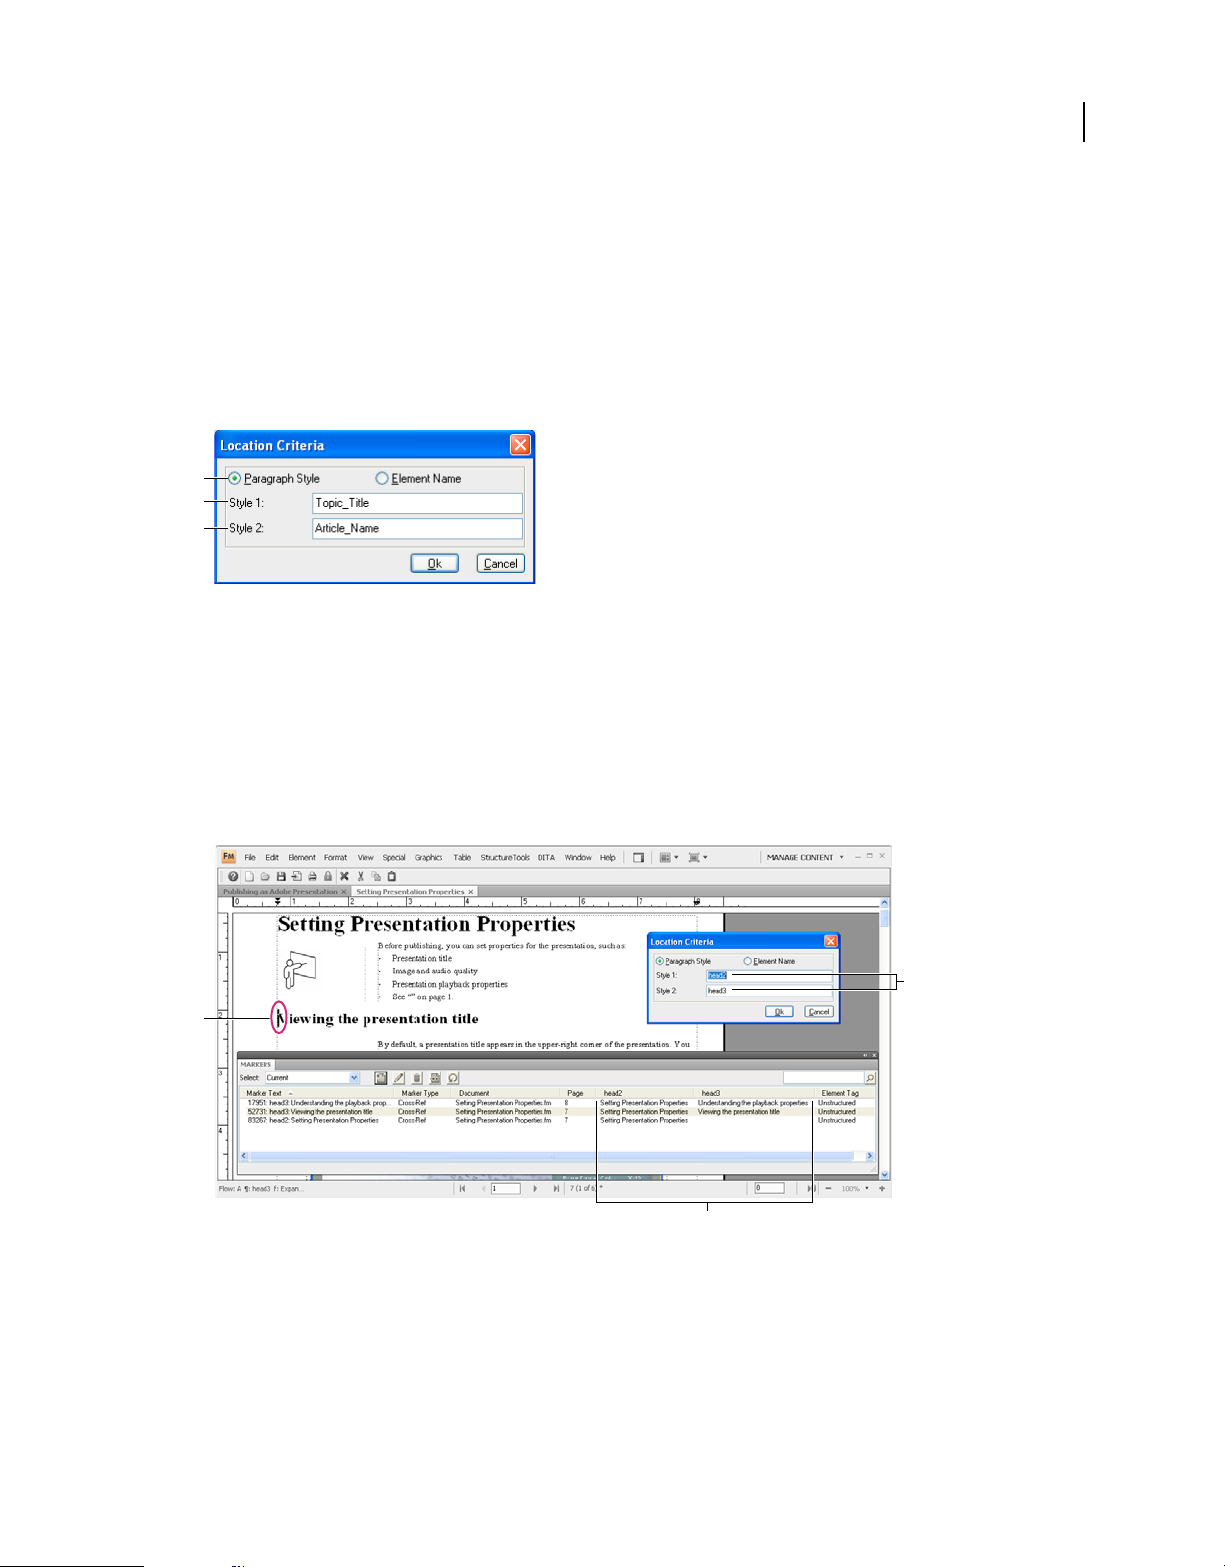
Setting pod location criteria
The pod location criteria determine what should be displayed in the pod list area for an instance by way of identifying
its location in the document.
For example, you can define two Paragraph tags that should be displayed as the location identifier for a marker.
FrameMaker searches backwards for the first match of the first Paragraph tag that you have specified and displays it
in the pod. Suppose you specify the first Paragraph tag as Topic_Title in the Location Criteria dialog box. FrameMaker
locates a marker and traverses backwards to display the first topic title in which the marker occurs. If you specify the
second Paragraph tag as Article_Name, then FrameMaker displays the exact article name to which the topic belongs.
A
B
C
Pod location criteria
A. In structured interface, you can specify either the paragraph styles or the element names. In unstructured FrameMaker, you can only specify
paragraph styles. B. Specify the first paragraph style. C. Specify the second paragraph style.
1 Choose File > Preference > Pods Location Criteria.
2 Select Element Name if you want the pod to display the element names in which the instance is located.
3 Specify valid element names and click OK.
For example, select Paragraph Style and specify head 2 and head 3 in the Style 1 and Style 2 boxes. In the Markers pod,
for each instance of a marker, the first head 2 and head 3 it occurs under is displayed in the pod.
22
B
A
C
The Markers pod displays the setting for marker location
A. Marker is selected in the document view B. Paragraph styles that you specify in Pod Location Criteria C. Markers pod displays the first
head3 title and head2 title in which the marker occurs.
Document window overview
The first time that you launch FrameMaker, it prompts you to select the product interface. Subsequently, it opens with
the last used interface.
Last updated 9/27/2011
Page 29
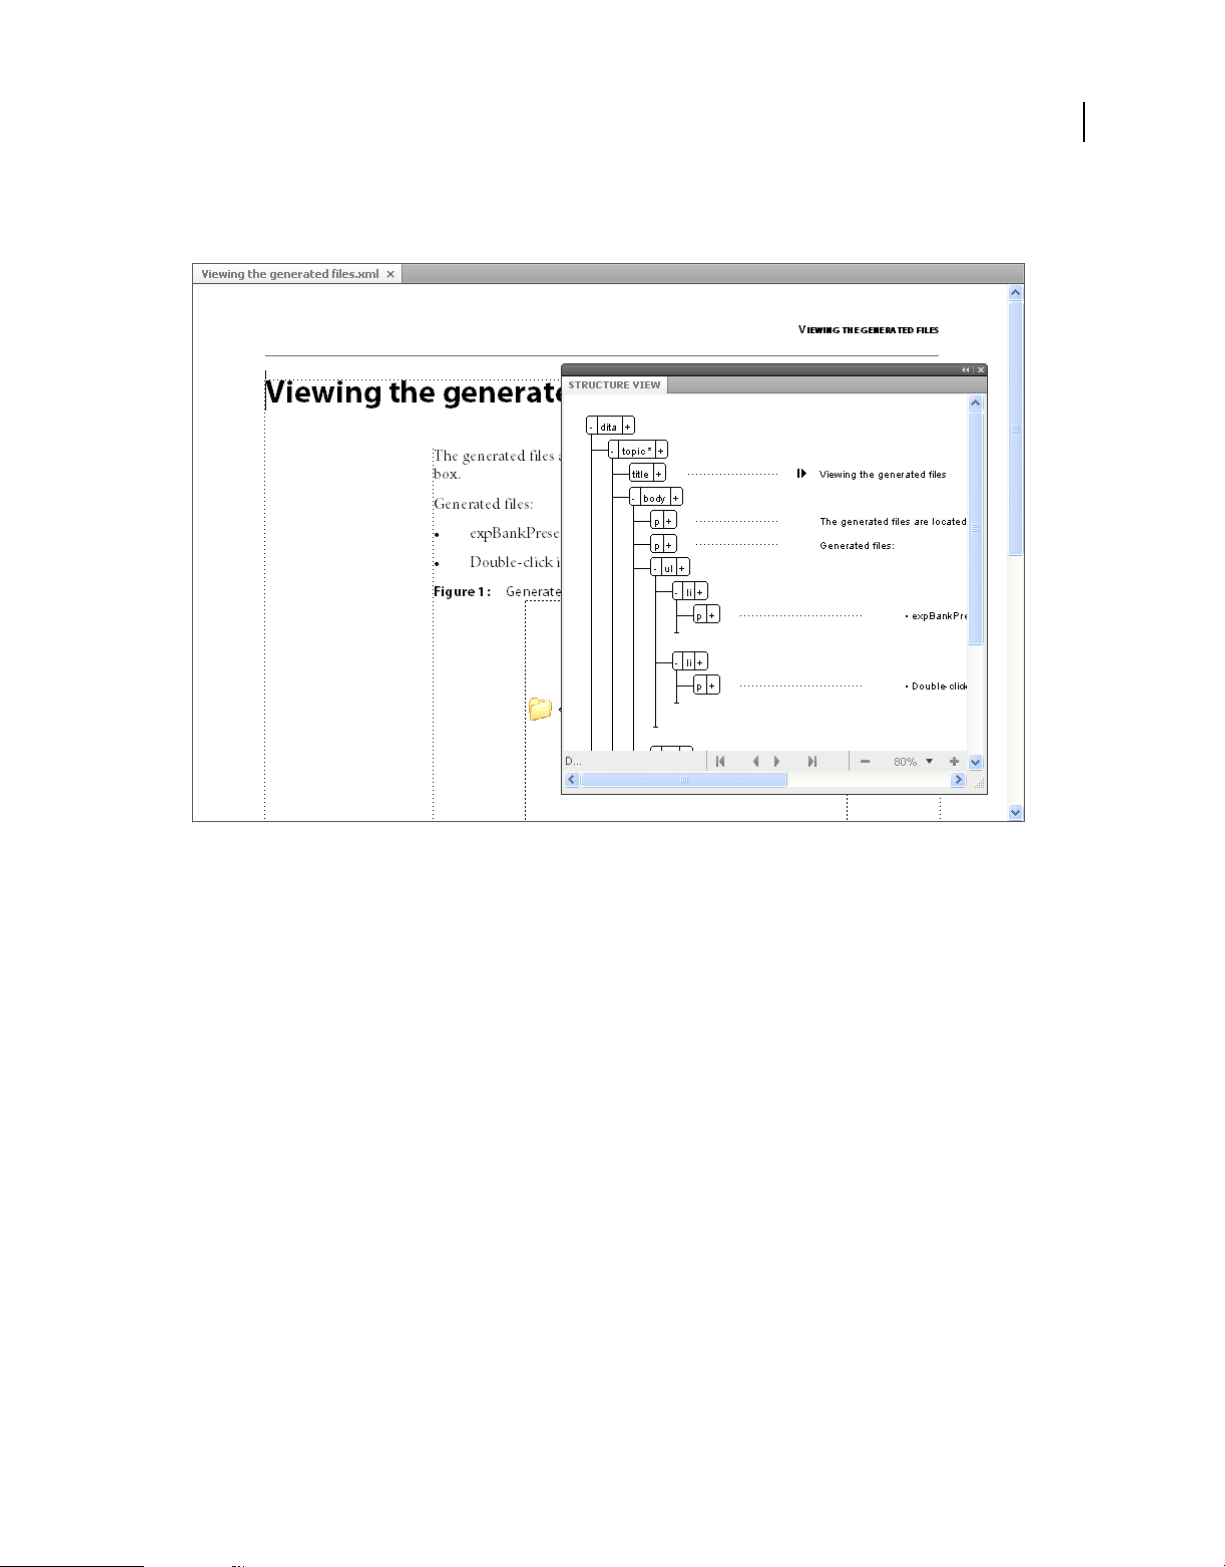
USING FRAMEMAKER 9
FrameMaker Basics
All features of unstructured FrameMaker are available in the structured workspace, including the paragraph and
character catalogs for formatting documents. You can work on both structured and unstructured documents.
23
Contents and structure information
More Help topics
“About elements” on page 102
Document window
A document window appears when you open a structured or unstructured FrameMaker document. The window
shows the document text formatted, with graphics and other items in place, and everything laid out in a page design.
If more than one document is open, a document window appears for each one.
The document window is the only window available in the unstructured workspace. In the structured workspace, you
can also view element boundaries in the document window.
Structure View window
The Structure View window displays the underlying XML structure. The view uses bubbles to represent elements and
their relationship to one another. It also identifies errors in the document structure. In Structure View, you can insert,
select, expand, collapse, move, merge, or split elements. When you work with structured documents, you’ll use the
document window and the Structure View together. These windows help you organize elements in a valid structure.
Last updated 9/27/2011
Page 30

USING FRAMEMAKER 9
FrameMaker Basics
Both windows are editable, and anything you do in one is mirrored in the other. You can have the two views open side
by side, to keep track of both contents and structure. If you click or select in one view, an insertion point or selection
appears at the equivalent place in the other view. Any editing you do in one is reflected in the other. It’s easier to make
your changes in Structure View, where you can drag and drop bubbles to rearrange elements or select bubbles to edit
them in other ways. If you click or select in an unstructured flow in a document window, Structure View is empty.
❖ To display, choose Structure Tools > Structure View.
Elements catalog
The Elements catalog lists the elements you can use at the current location and provides commands for adding and
editing elements. It also displays other information about the current location, such as whether you can type text there.
The information in the Elements catalog comes from content rules in the definition for the current element.
The catalog is preset to show only the elements that are valid at the current location, though you can have it display
more elements if you want greater flexibility. The catalog is empty if you click or select in an unstructured flow, if the
document has no element definitions, or if no more elements are required at the current location.
❖ To display, click the Element Catalog button at the upper-right corner in the document window.
The Element Catalog uses the following symbols to identify whether an element is valid:
Heavy check mark The element is valid at the current location. If you insert the element, the current (parent) element
will be correct and complete up to this location.
24
Plus sign (+) The element is an inclusion (SGML only) in the current element and is valid at the current location. The
plus sign always appears next to a heavy check mark. Inclusions are valid only in SGML documents, so this sign does
not appear in XML documents.
Although inclusions are as valid as elements identified with just a heavy check mark, you might find it helpful to list
inclusions separately. If a document has many inclusions, it can be difficult to find other valid elements in the catalog.
Question mark (?) The element is a possible replacement for the element right after the insertion point or for the
selected elements. It is valid at the current location, but will make child elements after it invalid. If you insert an
element with a question mark, the current (parent) element will be complete and correct up to this location, but you’ll
have to correct errors after the new element.
Light check mark The element is valid later in the current element. If you insert one of these elements, the current
(parent) element will be correct but incomplete up to this location. You’ll have to go back and fill in missing child
elements.
No symbol If an element in the catalog has no symbol, it is not valid at the current location or later in the current
element. It may be valid earlier in the current element or outside the element.
The Element Catalog may also include the following indicators to provide other information about the current
location:
<TEXT> You can type text at this point.
<UNDEFINED> The current element does not have a definition in the document. The element was probably pasted
from a document with different element definitions. (This does not appear when the catalog is set to display all
elements.)
<INVALID> The contents of the current element are invalid. (This does not appear when the catalog is set to display
all elements.)
You can use buttons in the Element Catalog to insert an empty element, wrap an element around contents, and change
the type of an existing element.
Last updated 9/27/2011
Page 31

USING FRAMEMAKER 9
FrameMaker Basics
Change the default interface
1 Select File > Preferences > General.
2 In the Product Interface list, select FrameMaker or Structured FrameMaker.
3 Click Set. You are prompted to restart FrameMaker for the preference change to take effect.
Working with the Structure View
Expand or collapse structure
In the Structure View, you can expand or collapse elements, showing or hiding a detailed outline of your document.
(When elements are expanded or collapsed in Structure View, text in the document window does not change.)
An element is sometimes defined to have attributes, which provide supplemental information about the element. You
can also expand and collapse the attributes associated with an element.
Collapse elements to get a higher-level look at the document structure. Collapsed elements are also easier to move
around. It’s especially helpful to collapse long lists of items and procedures with many steps.
• To expand or collapse elements, click the plus (+) or minus (-) symbol on the left side of element bubbles.
• To expand or collapse attributes, click the plus (+) or minus (-) symbol on the right side of element bubbles.
• To expand or collapse all child elements or attributes, hold down Shift while you click a plus or minus sign.
25
View element boundaries in the document window
Element boundaries shown in the document window mark the beginning and end of each element. Working with
visible boundaries helps you see how the document content is divided into elements. Viewing the boundaries also
makes it easier to place an insertion point properly or to make the right selection.
For most elements, the boundaries appear as opening and closing brackets ( [ ] ) or as two boxes with an element tag.
For some elements (graphics, footnotes, markers, tables, and equations), the element location is marked only by one
box with a tag.
When elements are inside other elements, their brackets or tags nest to show the hierarchy.
• To surround each element with brackets, choose View > Element Boundaries.
• To surround each element with a text label, choose View > Element Boundaries (As Tags)
• If the book window is active, select View > Show Element Boundaries or View > Hide Element Boundaries.
• To hide element boundaries, choose View > Hide Element Boundaries or Element Boundaries (As Tags)
Note: The brackets and tags that mark element boundaries are characters that both print and occupy document space.
Hide them before printing to suppress them in print output. Also hide them to see the document layout unaltered by
element boundaries.
Show and hide attributes for new elements
You can show or hide attributes for new elements in Structure View. The view can display all the attributes in the flow,
none of the attributes, or only required attributes or attributes that have a value. This setting applies to new elements
as you enter them.
1 Make the appropriate document window or book window active. If a book window is active, select the documents
you want to affect.
2 Select View > Attribute Display Options, choose the display option you want, and click Set.
Last updated 9/27/2011
Page 32

USING FRAMEMAKER 9
FrameMaker Basics
Change the scope of elements available in a structured document
When adding elements to a structured document, insert only elements that are valid at the current location. (Valid
elements have heavy check marks, heavy check marks and a plus sign, and question marks in the Element Catalog.) If
you add elements this way, you can work from the beginning of a document to the end and be sure that its structure
is valid at every point along the way.
Sometimes you want to work more loosely, and in these cases you can make more elements available. For example,
some draft documents must adhere strictly to a predefined structure but follow the structure only as a guideline. Or,
you can plan your document to conform to a structure without having all the information to complete it from start to
finish.
When more elements are available, the additional elements appear in the Element Catalog and are available if you
insert elements from the keyboard. You can also list inclusions after other valid elements in the catalog.
1 Make the appropriate document window or book window active. If a book window is active, select the documents
you want to affect.
2 Select Element > Set Available Elements. You can also click Options in the Element Catalog.
3 Select one of the following options in the Show Tags For area:
• To show only elements that are valid for the current location, select Valid Elements For Working Start To Finish.
Use this option if you plan to go through a document from start to finish and fill in the elements in their correct
order and hierarchy.
• To show elements that are valid for the current location or later in the current element, select Valid Elements
For Working In Any Order. Use this setting if you plan to build a valid document but not necessarily by working
from start to finish. This is helpful if you don’t have all the information you need.
• To show elements allowed anywhere in the current element, select Elements Allowed Anywhere In Parent. Use
this setting if you want more flexibility for filling in elements. You can insert elements that are invalid and
correct the errors later.
• To show all elements defined for the document, select All Elements. Use this setting if you’re not building a valid
document, if you want flexibility and will correct errors later, if you’re wrapping elements around contents, or
if you want to see what’s available elsewhere in the document.
• To show a set of elements that you specify, select Customized List. Use this setting to work with a subset of the
elements, to display elements in a fixed order, or to work with a list that is static instead of context sensitive.
4 If you selected Customized List, click Edit and create or change a list of elements.
To move element tags between the Show and Don’t Show lists, use the arrow buttons or double-click the element
tags. Transfer all of the elements from one list to another by holding down Shift as you click an arrow button. Click
the Move Up and Move Down buttons to arrange the elements in the Show list in the order you want them to appear
in the Element Catalog. Click Set when the list is the way you want it.
26
Note: A customized list of tags is always the same regardless of the location of the insertion point, so be careful to
include all the tags you need. The only indication of validity is a check mark next to a tag.
5 To list inclusions separately in the Element Catalog, turn on List After Other Valid Elements.
This groups the inclusions right after the other valid elements. Use this setting if you have a large number of
inclusions that you rarely need.
6 Click Set.
Last updated 9/27/2011
Page 33

USING FRAMEMAKER 9
FrameMaker Basics
Accessibility features in FrameMaker
The FrameMaker software provides a number of features that improve access for visually impaired users. In particular, it:
• Provides support for high-contrast viewing for users with low visual acuity.
• Creates tagged Adobe PDF files when converting FrameMaker files to tagged PDF, making it easier for people who
use screen reader software to navigate a document in the proper reading order. For information on how to turn
your FrameMaker documents into tagged Adobe PDF files, see
• Supports assistive technology, such as screen reader software for the Windows® platform.
Screen readers let visually impaired users interact with the computer by interpreting what is happening on the screen
and sending that information to speech-synthesis devices. The screen reader will follow the logical structure of the
document. Screen readers can read FrameMaker documents viewed in FrameMaker, or tagged PDF documents
viewed in Adobe Acrobat® or Adobe Reader®. Refer to your screen reader documentation for information on
installation and use with documents viewed in FrameMaker or Acrobat.
For more information on accessibility in Adobe Acrobat and Adobe PDF documents, see the Acrobat online Help and
the Adobe website.
Launch the soft keyboard
1 From the Start menu, select Programs > Accessories > Accessibility > On-Screen Keyboard.
2 Click OK. You can then start using the onscreen keyboard.
“Tagged PDF” on page 457.
27
More Help topics
“Display a high-contrast workspace” on page 18
Opening, saving, and closing documents
Open a document
In addition to FrameMaker documents, you can open text files, files in MIF (Maker Interchange Format), files in MML
(Maker Markup Language), and XML and SGML documents. If the required filter is installed, you can also open files
created in other applications, such as Microsoft® Word. Much of the file’s formatting is retained when you open the file.
To open files created using FrameMaker 7 or earlier, you must save them as MIF files.
Open a file
1 Select File > Open.
2 Locate the document and click Open.
Opening a document usually updates graphics imported by reference, text insets, cross-references, and system
variables (if any exist). Recently opened files are listed at the bottom of the File menu.
Messages alerting you to possible issues with the file sometimes appear. You can click OK and resolve the problems
later.
Last updated 9/27/2011
Page 34

USING FRAMEMAKER 9
FrameMaker Basics
Open a text file
Text-only files do not contain graphics or formatting information. When you open a text-only file, you are asked to
confirm that it is a text file.
1 Select File > Open, and open a .txt file. The Unknown File Type dialog box appears.
2 Select the Text option.
3 Click Convert.
4 Select one of the following options:
• To break the text into paragraphs only at blank lines, select Merge Lines Into Paragraphs. Use this option for a
paragraph-oriented text file, such as a file containing document text.
• To break the text into paragraphs at the end of each line, select Treat Each Line As A Paragraph. Use this option
for a line-oriented text file, such as a file containing computer code.
• To convert the text into a table, select the Convert Text To Table. Use this option if the content of your source
file is tabulated.
Select additional options in the Convert To Table dialog box, such as number of columns, cell separators, and
heading rows, to obtain the data in the appropriate tabular form.
5 Select the desired Encoding scheme. By default, the ANSI (Windows) encoding scheme is selected.
6 Click Read. The text appears in a document that is created from a special template. You can customize the template
so that documents created from text files are formatted differently.
28
Open a document in use
A lock file (*.lck) is created every time you open a document. This lock file prevents others from changing the file while
you work in it. A lock file is in the same folder as the original document and is removed when you close the document.
You can turn off file locking.
If you try to open a document that’s already open and if you have write permission to the document, a dialog box
displays the name of the document, who opened it last and when, and the computer on which it is open. You
sometimes see this dialog box after a system crash when you open a document you were last using.
❖ Open the file and do one of the following:
• If you want to look at the file but not change it, click Open For Viewing Only, and then click Continue. The
document appears in View Only format.
• If you want to edit a copy of the file, click Open Copy For Editing, and then click Continue. A copy of the file is
opened and when you save this file you are prompted to provide a new filename.
• If you want to edit the file and you know that no one else is using it, click Reset Lock And Open, and then click
Continue. Use this option after a system crash to edit a document that was open at the time of the crash.
Open a document without updating references
A document opens more slowly if it contains many cross-references to other files, large imported graphics, or many text
insets. You can open a document faster by bypassing the update of imported graphics, cross-references, and text insets.
However, if you use this method to open documents, keep in mind that FrameMaker does not warn you about missing
items or unresolved cross-references. For this reason, it is best to occasionally open a document in the usual way.
1 Choose File > Open, and select the file you want to open.
2 Control-click Open.
Last updated 9/27/2011
Page 35

USING FRAMEMAKER 9
FrameMaker Basics
After the file is open, FrameMaker imports and displays graphics as needed on a page-by-page basis. You can manually
update cross-references and text insets by using Edit > Update References. If the page display is too slow, reopen the
document in the usual way.
SGML, XML, MIF, and MML are all text formats, so they open as text in unstructured FrameMaker.
In the case of .xml or .mif files in structured FrameMaker, control-clicking the Open button opens them as text files.
You are prompted to specify the text reading options in the Reading Text File dialog box. Opening these files as text
lets you view or edit the markup.
Markup in an SGML file
29
Reopen a file after a system crash
If your system crashes, the file is saved automatically in the following situations:
• If you selected Automatic Save in the General Preferences dialog box, autosave files (whose filename contains .auto)
are created at the specified interval. This file is deleted when you save and close a file.
• If your system becomes unstable, FrameMaker tries to create a recover file (filename contains .recover) with your
most recent changes.
An automatically saved copy of the file contains recent changes to the file.
1 Open the file you were working on last.
2 Do one of the following:
• If a recover file exists, open it when prompted and check whether your latest changes are there. If they are, save the
recover file with the same name as the document you were originally working on and then delete the recover file.
• If no recover file exists, open the autosave file when prompted and save it with the same name as the document
you were originally working on. The autosave file contains all the changes you made until the time of the last
automatic save. The amount of work lost depends on the time interval you set between saves and when your
system crashed.
Troubleshooting unavailable fonts
You sometimes get an alert message that indicates the document you are opening uses unavailable fonts. Fonts can
become unavailable for a few reasons:
• The document was edited on a different system using fonts that are not installed on your system.
• A font is removed or has become damaged.
• The default printer for your system has changed.
If the Remember Missing Font Names option in the Preferences dialog box is selected, FrameMaker preserves the
names of unavailable fonts. Selecting this option causes the original fonts to reappear when you open the document
on a computer that has the fonts installed, even if you save the document with substitute fonts.
Last updated 9/27/2011
Page 36

USING FRAMEMAKER 9
FrameMaker Basics
To fix the problem of missing fonts, consider the following options:
Check for damaged fonts Determine whether the fonts that are unavailable in FrameMaker are installed on your
system and available in another application. If another application can use fonts that FrameMaker cannot use, the fonts
may be damaged. Reinstall them using the original media. For more information on troubleshooting font problems,
isolating damaged fonts or a damaged fonts folder, or reinstalling PostScript fonts, see the Adobe website.
Remap unavailable fonts If you cannot install or reinstall the unavailable fonts, you may want to permanently remap
the unavailable fonts to available fonts, so that the alert message does not appear when you open the document. You
do this by deselecting the Remember Missing Font Names option in the Preferences dialog box before you open the
file. However, be aware that doing this causes you to lose the original font information referenced in the document.
Switch printers FrameMaker reads font information stored in the printer driver so that it can make fonts stored at the
printer available for use within FrameMaker. In some cases, changing the default printer can change one or more fonts
available in FrameMaker.
Obtain and install the missing fonts For example, if you and a co-worker are editing the same documents, and you
would like to use the same fonts as your co-worker, consider purchasing and installing copies of the fonts.
Add metadata to a document
FrameMaker includes built-in support for Extensible Metadata Platform (XMP). Metadata, or file information, is
descriptive information that can be searched and processed by a computer. Use it to provide information about the
contents of a document, and to preserve information about a document that will be opened in other Adobe
applications. If you export the file to PDF, much of this metadata will appear in Acrobat.
30
Metadata tags travel with the document and describe its content. By embedding them in your documents, you make
the documents easier to track, manage, and retrieve.
Note: Metadata in a book file sometimes overrides metadata in a document file. If your document is part of a book file,
open the book file and select the document before you add metadata.
1 Make the appropriate document window or book window active. If a book window is active, select the documents
you want to affect.
2 Choose File > File Info.
3 Enter the desired information in the box next to any or all categories.
4 For Marked, choose Yes if the document is copyrighted, or No if the document is explicitly in the public domain.
Choose Unknown if you’re not sure.
5 Click Set.
Save documents
You can save a document using its current name and location, or save a copy of the document using a different name
or location. You can save a document in several formats, including Hypertext Markup Language (HTML), Extensible
Markup Language (XML), and Portable Document Format (PDF).
When a document or a book has unsaved changes, an asterisk (*) appears in the Page Status area of the status bar.
An asterisk indicates unsaved changes.
Last updated 9/27/2011
Page 37

USING FRAMEMAKER 9
FrameMaker Basics
More Help topics
“About Adobe PDF” on page 452
“Import properties from a template” on page 372
Save a document
1 Do one of the following:
• To save changes in the current file, choose File > Save.
• To save the file in a different folder or with a different filename, choose File > Save As.
2 If you choose the Save As command, or if the file has never been saved, specify the new filename and location. If
you want to save the file in a different format, choose the format from the pop-up menu.
3 Click Save. If you choose Text Only format, specify how to treat the text and tables in the document.
Save a book
1 Do one of the following:
• To overwrite the current version on the disk, choose File > Save Book.
• To save the file in a different folder or using a different name, choose File > Save Book As.
2 If you choose the Save Book As command, or if the file has never been saved, specify the new filename and location.
31
Save all open documents
❖ Hold down Shift and choose File > Save All Open Files.
Return to the saved version of your document
❖ Choose File > Revert To Saved and click OK.
File formats you can save in
You can use the Save As command to save a file in the following formats:
Document 9.0 Saves the FrameMaker 9 document or book as a document or book that you can open and edit in
FrameMaker 9.
View Only 9.0 Produces a book or document that you can open but cannot edit. If you accidentally save a file in View
Only format, you can make it editable by pressing Esc Shift+f l (lowercase L) k. Then you can save the document or
book in Document or Book format.
Document 8.0 Saves the FrameMaker 9 document or book as a 8.0 document or book that you can open and edit in
FrameMaker 8.0. FrameMaker 9 specific features are ignored in FrameMaker 8.0.
MIF 9.0 Creates a text file containing FrameMaker 9 statements that describe all text and graphics. To avoid
overwriting your original document, save the MIF file under a different name. (For example, add a .mif extension to
the name.) For information on MIF, see the online manual MIF Reference.
MIF 7.0 Creates a text file containing FrameMaker 7.0 statements that describe all text and graphics. To avoid
overwriting your original document, save the MIF file under a different name. (For example, add a .mif extension to
the name.) For information on MIF, see the online manual MIF Reference.
Text Only Creates a text file without graphics or formatting information. To avoid overwriting your original
document, save the text file under a different name. (For example, add a .text extension to the name.)
Last updated 9/27/2011
Page 38

USING FRAMEMAKER 9
FrameMaker Basics
PDF Creates a Portable Document Format (PDF) file that can be viewed in Adobe Acrobat® and other applications that
support PDF files.
SGML Creates an SGML file with the content, elements, and attributes from your document.
HTML Creates an HTML document that can be viewed on the World Wide Web. For information on adjusting the
mapping of paragraph and character tags to predefined HTML elements, see “Set up and adjust HTML mappings.”
Note: When you save a structured FrameMaker document as HTML, all attributes with the same name are mapped to
the same value, even if the attributes have different values for different elements. To use different values for these
attributes after exporting, use a text editor to edit the resulting file.
XML Creates an XML document that can be used for data exchange and viewed on the World Wide Web.
Microsoft RTF Create files in Rich Text Format 1.6 (RTF), which is supported by many word processors and can be
read by other applications. Most formatting is preserved as formats are usually converted to word-processing styles.
Note: You can use the Print command to save a PostScript® file.
More Help topics
“Create PostScript files” on page 467
“Using Save As to export to other formats” on page 377
32
“Set up and adjust HTML mappings” on page 473
Filename extensions for saved files
When you save a file for the first time in Windows, FrameMaker automatically adds these extensions: .fm for
documents, .book for book files, and .mif for MIF files. With these extensions, the files are recognized as FrameMaker
files by the Windows operating system.
If you don’t want these special extensions added to the filenames you assign, enclose the filenames in double quotation
marks. Windows doesn’t recognize a file without one of these extensions as a FrameMaker file, but you can still open
the file in FrameMaker.
If you assign an extension that’s registered by another application, such as .doc, the extension is not replaced by the
FrameMaker extension and you can still open the file in FrameMaker.
Save documents in Text Only format
Saving a document in Text Only format creates a text file with the text encoding of your choice: ANSI (Windows), or
ASCII. (On Japanese-language systems, you can also use JIS, Shift-JIS, or EUC. On other Asian-language systems, you
can use encoding for the supported languages.) Only ordinary text—those in text frames and tables—is saved;
graphics, text in graphic callouts, footnotes, and formatting information are not saved. Reformat line lengths and
hyphenation as needed before saving the file.
If some characters are not available in the text encoding that you choose, those characters are replaced in the text file.
For example, when you save a document in Text Only format using ANSI (Windows) or ASCII encoding, spaces
(including thin, en, em, and numeric spaces) are converted to regular spaces.
1 Choose File > Save As.
2 Specify the filename and location, and choose Text Only format.
3 Click Save.
Last updated 9/27/2011
Page 39

USING FRAMEMAKER 9
FrameMaker Basics
4 Do one of the following:
• To break each line into a separate paragraph, click At The End Of Each Line. This option maintains a file’s
original line breaks and blank lines. Use this option for a line-oriented file such as computer code.
• To merge adjacent lines into paragraphs and insert a carriage return only at blank lines, click Only Between
Paragraphs. Use this option for paragraph-oriented files, such as files containing document text.
5 If you want to save table text, select Include Text From Table Cells. Then do the following:
• Specify the order in which you want the table cells saved (row by row or column by column).
• Choose whether to separate cells with tabs or with carriage returns by choosing items from the pop-up menus.
6 If the text file will be used on a platform that uses a different text encoding, choose an appropriate encoding from
the Text Encoding pop-up menu, and then click Save.
More Help topics
“Change hyphenation and line breaks” on page 123
“Indentation, alignment, and spacing” on page 44
Use Save As to export XML from unstructured documents
You can export both structured and unstructured files to XML. The mapping used to specify what element to create
for each paragraph tag in the source FrameMaker file is defined on a reference page. The export function creates an
XML file and a corresponding cascading style sheet (CSS), which can be used with the document.
33
1 Do one of the following:
• Select File > Save As XML.
• Select File > Save As and choose XML from the pop-up menu. Give the filename an extension of .xml.
2 Specify the file location.
3 Click Save.
Back up and save automatically
FrameMaker can back up and save your work automatically.
1 Choose File > Preferences > General.
2 Do the following:
• To create a backup file every time you save, select Automatic Backup On Save. This option creates a copy of the
file before your latest changes are saved. If a backup file exists, the new backup file overwrites it. (The filenames
of backup files contain .backup.)
• To create an autosave file at regular intervals, select Automatic Save and enter an interval (in minutes) in the
box. This causes a copy of the file to be saved periodically without your having to choose File > Save. (The
filenames of autosave files contain .auto.) When you save manually or revert to the last saved version with the
Revert To Saved command, the autosave file is deleted.
3 Click Set.
Close documents
You can close a document at any time. If you have unsaved changes, you’ll be asked whether you want to save the
changes. (A document with unsaved changes contains an asterisk in the Page Status area of its status bar.)
Last updated 9/27/2011
Page 40

USING FRAMEMAKER 9
FrameMaker Basics
If imported graphics, text insets, cross-references, or system variables were updated when you opened your document,
the document is marked as changed (with an asterisk in the status bar) when it opens. Similarly, because printing a
document updates existing cross-references, printing a file sometimes causes a document to be marked as changed.
❖ Do one of the following:
• To close a document, choose File > Close.
• To close all open documents, hold down Shift and choose File > Close All Open Files.
34
Last updated 9/27/2011
Page 41

Chapter 3: Templates and Page Layout
Templates
Multiple components that make up a FrameMaker template. These components include paragraph formats, character
formats, master page layouts, reference pages, and cross-reference formats. Both unstructured and structured
templates require careful planning and upfront design before you create a template.
About unstructured templates
A template is a document that stores properties that are used in more than one place. You can create a document from
a template to give it all the template properties, or you can import specific properties from the template later. a
templates give your documents consistent layout and formatting.
Templates can store the following properties:
• Paragraph, character, and table formats that work with formatting information in the element definitions
• Page layouts that determine the number and position of columns on pages, and background items such as running
headers
• Reference pages that store repeatedly used graphics and formatting information
• Variables you use as placeholders for text that FrameMaker updates
• Formatting information for cross-references, equations, and conditional text
• Definitions for colors you can apply to text and objects
• Document-wide settings, including footnote properties, custom marker types, and feathering options for line
spacing
• Specifications for combined Japanese and Western fonts (on Japanese-language systems)
35
About structured templates
Structured FrameMaker comes with Structured Templates for letters, memos, faxes, envelopes, reports, outlines,
newsletters, books, FAQs, and single source books.
Structured templates can store the following properties:
• Element definitions that specify allowable contents, attributes, and formatting for elements
• Paragraphs and characters that work with formatting information in the element definitions
• Variables you use as placeholders for text that FrameMaker updates
• Formatting information for cross-references and conditional text
• Definitions for colors you can apply to text and objects
Note: If you’re working with structured files, an application developer can set up special documents that handle the
translation to and from the structured application. These documents can include a template that formats the structured
files in FrameMaker. This template is applied automatically when you import from the structured application.
Last updated 9/27/2011
Page 42

USING FRAMEMAKER 9
Templates and Page Layout
Formats
Paragraph formats
Paragraph formats contain settings for how the text looks and the format applies to the entire paragraph. Paragraph
formats are the basis of document formatting in unstructured FrameMaker documents though they can also be the
basis of document formatting in structured FrameMaker documents.
Paragraph Designer
The Paragraph Designer is used to create and manage paragraph formats.
GFEDCBA
H
36
I
J
Paragraph Designer
A. Basic properties B. Default font properties C. Pagination related properties D. Numbering lists E. Advanced properties F. Properties for
Asian text G. Table cell properties H. Paragraph tag list I. Edit the tab stop properties J. Commands menu
The Paragraph Catalog lists all the paragraph formats available for a document. To apply a paragraph tag, select the
text and select the tag from the Paragraph Catalog.
The Paragraph Catalog displays a list of all the Paragraph tags present in the template
Last updated 9/27/2011
Page 43

USING FRAMEMAKER 9
Templates and Page Layout
Create a paragraph format
1 Click in a paragraph whose format is like the one you want to create. Be careful not to select multiple paragraphs
so that no properties are set to As Is.
2 Choose New Format from the Commands pop-up menu in the Paragraph Designer and enter a name for the new
format in the Tag box.
3 To later update the new format or copy it to other documents by using the File > Import > Formats command, select
Store In Catalog. Formats that aren’t stored in the catalog can be applied to other paragraphs only by copying and
pasting.
4 To apply the new format to the current paragraph, select Apply To Selection.
5 Click Create.
6
If you didn’t select Apply To Selection in step 4, choose the new format name from the Paragraph Tag pop-up menu.
7 Modify any of the properties you want.
Don’t set any property to As Is. Paragraph formats must have all properties specified.
8 Click Update All.
Character formats
Character tags allow you to format one or more characters or words inside a paragraph. By applying character tags,
you can quickly format text without overriding the properties of the entire paragraph. Creating character tags helps
maintain format consistency as well as apply format changes globally. Character tags also serve as building blocks for
other FrameMaker features, such as cross-reference formats or variables.
37
Character Designer
The Character Designer is used to create and manage character formats. All character formats are listed in the
character catalog.
A
B
E
C
D
Character Designer
A. Character tag list B. Font properties C. Set the language for the character tag D. Commands menu E. Tsume property
Last updated 9/27/2011
Page 44
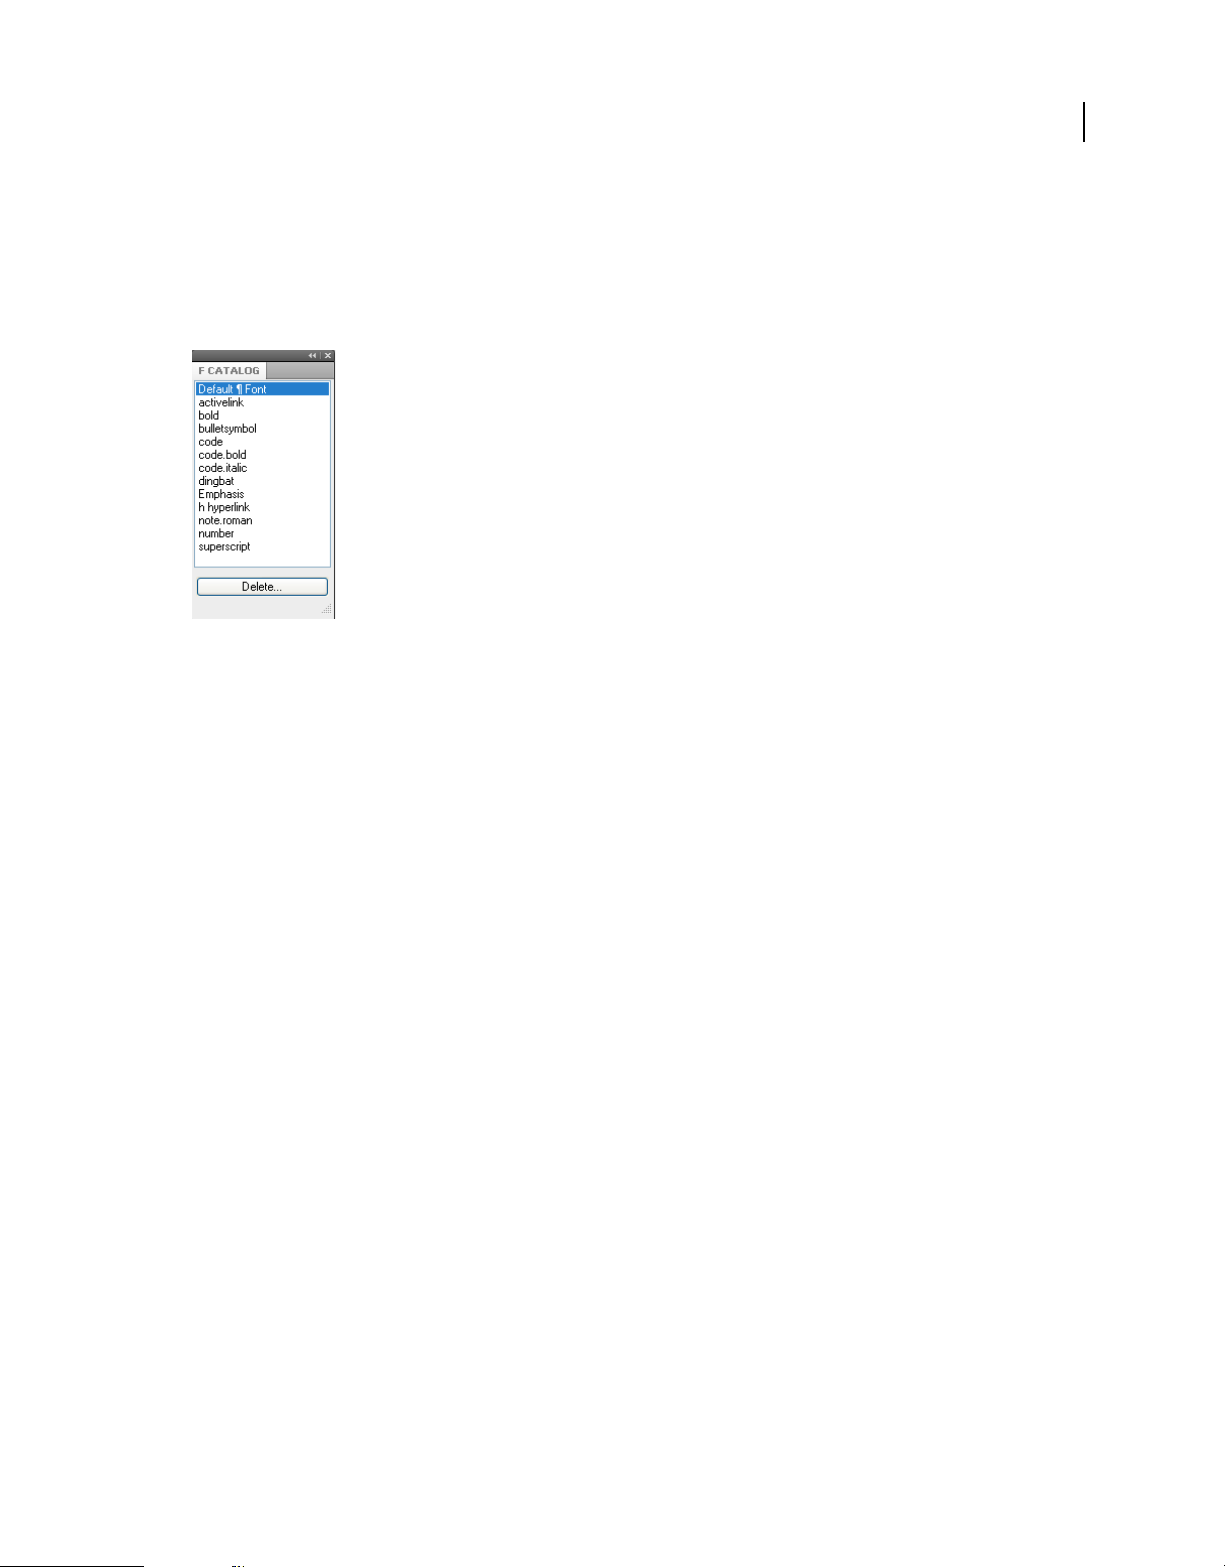
USING FRAMEMAKER 9
Templates and Page Layout
Select As Is for the properties that you want the paragraph tag to determine. For example, when creating an Italics
character tag, set all other properties to As Is and change just the Angle setting to Italic. The font, font size, style, and
other settings of the paragraph tag are preserved.
The Character Catalog lists all the character formats available for a document. To apply a character tag, select the text
and select the tag from the Character Catalog.
The Character Catalog displays a list of all the Character tags present in the template
Create a character format
1 In the Character Designer, choose Set Window To As Is from the Commands pop-up menu. Properties set to As Is
do not change when you apply the character format. When set to As Is, text boxes are blank, check boxes are dim,
and pop-up menus display As Is.
2 Change only the properties you want to include in the character format.
3 Choose New Format from the Commands pop-up menu in the Character Designer, and enter a name for the new
format in the Tag box.
4 Select Store In Catalog.
5 To apply the new format to the current selection, select Apply To Selection.
6 Click Create.
38
Manage paragraph and character formats
Update formats
You can change format properties and then use them to redefine, or update, the stored formats and all the text in the
document tagged with them.
When you update a format, you can update all properties or just one group of properties. For example, you can change
the default font family for all formats in a document without changing any other properties.
Importing paragraph or character fonts is also possible through the File > Import > Formats command.
Update a paragraph or character format
1 For paragraph format changes, indicate the scope of the changes you want to make by doing one of the following:
• To update one paragraph format or all paragraph formats in the document with a property group from a
paragraph, click in that paragraph or select consecutive paragraphs.
• To update more than one paragraph format but not all paragraph formats, select consecutive paragraphs that
use the formats you want to update.
Last updated 9/27/2011
Page 45

USING FRAMEMAKER 9
Templates and Page Layout
2 Choose the appropriate designer.
3 Display the properties by doing one of the following:
• To display the properties of a paragraph including any overrides, click in the paragraph.
• To display properties of a format stored in the catalog, choose the format from the Paragraph Tag or Character
Tag pop-up menu.
4 Change any properties, and then click Update All. FrameMaker asks whether you want to remove overrides.
If you change properties in a designer and then decide against updating the format, you can cancel the operation and
reset the properties by clicking in text. You can also choose Reset Window From Selection from the Commands pop-
up menu in the designer.
Update specific format properties or single property group
1 Choose one of the following:
• If you are updating specific properties, set Window to As Is; then change only properties you want to update.
• If you are updating a single property group of a paragraph format, choose Format > Paragraphs > Designer, and
delete the tag from the Paragraph Tag box if the box isn’t empty. Deleting the tag sets the box to As Is;
FrameMaker does not change the tags of the formats that you update. Then display the property group; change
the properties as needed.
2 Choose Global Update Options from the Commands pop-up menu.
3 Click the current property group in the Use Properties area.
4 Do one of the following:
• To update all formats in the document, click All Paragraphs And Catalog Entries or All Characters And Catalog
Entries.
• To update all paragraphs or characters in the selection and all paragraphs or characters with the same tags, click
All Matching Tags In Selection.
• To update formats with a specific tag, click All Tagged and choose a tag from the pop-up menu.
5 Click Update All in the Designer dialog box.
39
Rename or delete formats
When designing a template or importing a catalog from a template, you sometimes must rename or delete a format.
Deleting a format from a catalog does not affect any paragraphs or characters that have the same tag. The paragraphs
or characters simply have a tag that isn’t in the catalog.
1 Choose a designer, and choose the format to rename or delete from the Paragraph Tag or Character Tag pop-up
menu.
Do this even if the format you want is already displayed. This step ensures that the properties do not include any
format overrides or As Is settings.
2 Do one of the following:
• To rename, enter a new name in the Paragraph Tag or Character Tag box and click Update All, and then OK.
• To delete a format, click Delete, and then Select the format in the scroll list and click Delete. Click Done.
• To delete all unused formats from a catalog, click Delete. Then click Delete until all formats have been removed,
and click Done. Choose File > Utilities
or character format used in the document is added back to the catalog.
> Create And Apply Formats, and then click Continue. Any paragraph
Last updated 9/27/2011
Page 46

USING FRAMEMAKER 9
Templates and Page Layout
To avoid creating paragraphs for every override in your document, import the formats from your template.
Importing formats from a template overrides any changes to paragraph and character tags and does not create
additional tags in your document.
Create new formats
When working from a stable template, you rarely have to create a format. If you’re designing a new template or if the
template you’re using is incomplete, you sometimes must create new formats.
The easiest way to create a format is to modify the properties of an existing format.
When you’re naming new formats, consider these suggestions:
• Use consistent naming conventions for similar kinds of paragraphs or text items within a paragraph, such as Head1
and Head2.
• To apply formats by using the keyboard, name the formats so that often-used ones are unique or alphabetically first
in their letter group, such as “H1 Head2” or “H2 Head2.”
• Give each format a name that’s easy to remember, recognize, and type. If you assign a tag based on its use and not
its appearance (for example, Emphasis rather than Italics), you can later change the format properties without
having to change the tag.
• Be aware of capitalization. Tags are case sensitive. Also, you sometimes want related tags to appear together in the
catalog, with names such as Body and BodyIndent.
• If you have many formats, precede them with a period to avoid excessive scrolling in the catalogs; an initial period
brings often-used formats to the top of the catalog. To force occasionally used formats to the bottom of the catalog,
precede them with a z or a tilde (~).
40
Specify formats for the paragraphs that follow
Well-designed templates often connect formats so that FrameMaker automatically applies a format to the paragraph
that follows the current one.
1 Click in the paragraph.
2 Display the Basic properties of the Paragraph Designer, and choose a tag from the Next Pgf Tag pop-up menu.
FrameMaker applies this tag when you press Return to create a paragraph.
3 Click Apply To Selection.
Add graphics to paragraph formats
A paragraph format can include a line or other graphic that appears above or below a paragraph. Perhaps all top-level
headings in a document rest on a long thin line.
1 On a reference page, draw or import the graphic in a reference frame, or locate one already there that you want to
use.
2 Click in the paragraph you want to change. To place a line above or below several adjacent paragraphs, select all the
paragraphs.
3 Display the Advanced properties of the Paragraph Designer, and choose the name of a reference frame from the
Frame Above Pgf or from the Frame Below Pgf pop-up menu. All reference frames appear in the pop-up menus.
4 Click Apply To Selection.
Because the Frame Above Pgf and the Frame Below Pgf settings can’t place graphics to the right or left of a paragraph,
you can’t use these settings to place boxes around text. Box text by using a single-cell table with outside ruling.
Last updated 9/27/2011
Page 47

USING FRAMEMAKER 9
Templates and Page Layout
Fonts
Replace fonts using the Fonts pod
You can use the Fonts pod to identify all the fonts used in an open document or all open documents. The pod list area
lists all the fonts used in a document. You can replace any font used in a document using the fonts pod including
missing fonts. The missing fonts are indicated by a red cross sign.
A B CD
E
41
Fonts pod lists all the fonts used in open documents.
A. Select all open documents or currently open document. B. Display only missing fonts or all fonts used in a document. C. Replace font to
display the Replace Fonts panel. D. Refresh the list of fonts displayed in the pod list area. E. Missing fonts indicated by a red cross sign.
To replace a missing font:
1 Select a font from the list and click the Replace icon.
2 From the Replace Font panel, select the new font from the Replace With list box and click Apply.
A
B
C
ED
Replace fonts pod lists all the paragraphs in a document that use a selected font.
A. Name of the selected font. B. Replace With list box lists all the fonts installed on your system. C. Locations list displays all the paragraphs
in the document that use the selected font. D. Refresh the locations list. E. Go To Location takes you to the location in the document that
uses the selected font.
Last updated 9/27/2011
Page 48

USING FRAMEMAKER 9
Templates and Page Layout
Manual font changes
Format changes you make using the Format menu commands take effect immediately.
When changing font properties, keep in mind the following:
• To remove other style properties, choose Plain.
• If you change the font properties of selected text, those properties are retained when you later update the properties
of the entire paragraph.
• You can change the font properties of text created with the Text Line tool as well as paragraph text.
• Do not use the Courier® font when Adobe Type Manager® is turned off or not installed. If you do use Courier
without ATM, FrameMaker products do not accurately display the Courier font.
• If a font has more than one weight—for example, Helvetica® Condensed Bold and Helvetica Condensed Black—the
Format > Style submenu lists only Bold. To choose other weights, use the Default Font properties of the Paragraph
Designer or use the Character Designer instead.
Font changes using the designers
To change the default font properties of an entire paragraph, use the Paragraph Designer. The font families and styles
available depend on which fonts are installed.
42
To change specific text within a paragraph, select the text and use the Character Designer.
You’ve probably seen many of the settings in other word processors, but a few can be new to you.
Numeric Underlining To use a single offset and thickness for an underline regardless of the character’s font or size,
choose Numeric Underlining. Regular and numeric underlining does not affect tab characters. If you want the tab
space to be underlined, format that tab stop so that it uses a nonbreaking space as a leader.
Numeric and regular underlining
Change Bar To display a change bar next to text, select Change Bar.
Color To display the text in a different color, choose a color from the Color pop-up menu. If you define your own
colors, they appear in the pop-up menu.
Spread To add or subtract space between characters, enter a percentage for Spread. Spread—also called tracking—is
expressed as a percentage of an em space. Normal spread is 0%.
-10% spread (top), 0% spread (center), 10% spread (bottom)
Stretch To set the width of the character shapes, enter a percentage for Stretch.
Capitalization To display all characters in uppercase but use slightly smaller capital letters for text that was in
lowercase, choose Small Caps.
Last updated 9/27/2011
Page 49

USING FRAMEMAKER 9
Templates and Page Layout
Using a designer to apply a capitalization style to text changes only the appearance of the text (for example, makes
lowercase text appear in uppercase letters). To permanently change the text itself, use the Capitalization dialog box to
replace selected text with text that is all uppercase, all lowercase, or initial caps.
Language To change the language associated with the text, choose from the Language pop-up menu. The language
you choose affects the text in system variables as well as both spell-checking and hyphenation. Also, changing the
language to None prevents the selected text from being spell-checked.
Pair Kern To adjust the space between two characters in the same word, select Pair Kern. The kerning pairs that have
been defined depend on the font.
Kerning pairs turned on and off
Tsume To move a Japanese character closer to the characters next to it, select Tsume. The amount of space a variable-
width character, such as a parenthesis, can move is determined by the metrics for that character.
Adjust superscripted, subscripted, and small cap text
Adjustments to the properties of subscript, superscript (including footnote references), and small cap text apply to all
such text in the document.
43
1 In the Text Options dialog box, specify a size, offset, and stretch percentage.
When calculating the size and offset, FrameMaker multiplies the percentage you enter by the point size of the
affected characters. For example, a 40% superscript offset value raises a 10-point character 4 points.
The stretch percentage is the amount that characters are condensed or expanded.
2 Click Apply.
Condense and expand characters
You can achieve some effects by stretching characters.
Text unchanged (top) and condensed 75% (bottom)
1 Depending on whether you are changing the entire paragraph or specific text in the paragraph, choose one of the
following:
• Default Font from the Properties pop-up menu in the Paragraph Designer.
• Character Designer.
2 Enter a percentage in the Stretch box. A value of 100% means that the width of characters is as defined for the font.
A value less than 100% condenses the width; a value greater than 100% expands the width.
3 Click Apply To Selection.
Last updated 9/27/2011
Page 50

USING FRAMEMAKER 9
Templates and Page Layout
In Japanese documents, use a stretch value greater than 100 to simulate heitai (horizontally stretched characters).
Use a stretch value less than 100 and increase the point size of text to simulate chotai (vertically stretched
characters).
You can also change the width of a text line by dragging to stretch the text.
❖ Select the text line you want to change, and then drag one of its handles until the text is stretched to the shape you
want. Dragging a corner handle changes the point size as well as the character width. You can also select a grouped
object that includes a text line.
Create or change combined fonts of Japanese and Western characters
In addition to containing the full Japanese syllabaria, Japanese fonts include a set of Western characters to facilitate
entering non-Japanese characters and numbers. You can define your own combined font—a font that uses a specified
Western font with a specified Japanese font.
If you’re working on a system that supports Japanese text and if combined fonts are included as part of a template, they
are available to you automatically. (The specified fonts must be installed.) If your system supports the typing of
Japanese text in documents and dialog boxes, combined fonts appear at the top of the font lists along with regular
Western and Japanese ones.
FrameMaker supports Japanese single-byte, half-width katakana characters in combined fonts. Changes to the
combined fonts apply to the entire document.
44
1 In the Combined Fonts dialog box, do one of the following:
• To create a new combined font, enter a name in the Combined Font Name box.
• To change a combined font, select its name from the Combined Fonts list.
2 Do the following:
• To specify the Japanese font, choose from the pop-up menu of font families in the Asian Text area.
• To specify the Western font, choose from the pop-up menu of font families in the Western Text area.
• To adjust the relative size and baseline offset of the Western text, enter values for Size and Offset. The size and
offset of the Western text are percentages of the Asian point size. Use a negative offset to move the text below
the baseline.
3 Click Add or Change.
4 Click Done.
Note: You can turn off the Allow Bolded And Obliqued Styles setting in the Asian Text area of the Edit Combined Fonts
dialog box so that bolding or italicizing the Western font does not automatically enbold or italicize the Asian text.
❖ To copy a set of combined fonts, choose File > Import > Formats and select Combined Fonts.
Indentation, alignment, and spacing
Change paragraph alignment
The alignment property of a paragraph determines how the paragraph is positioned between the left and right indents,
not between the edges of the text column.
❖ Do one of the following:
• To use the ruler, drag the indent symbol to a new location on the ruler.
Last updated 9/27/2011
Page 51

USING FRAMEMAKER 9
Templates and Page Layout
A
B
C
A. First indent B. Left indent C. Right indent
To align an indent with a ruler marking, turn on the snap grid (use Graphics > Snap). When you drag an indent
symbol, it snaps to locations corresponding to the snap grid.
• To use an indent value, display the Basic properties of the Paragraph Designer. Enter the indents you want in
the First, Left, and Right boxes, and then click Apply To Selection.
• Choose an alignment from the Alignment pop-up menu on the formatting bar or in the Basic properties of the
Paragraph Designer.
Note: If you use Shift+Enter or Shift+Return to insert a forced return within a fully justified paragraph, the line
that ends with the forced return is not justified.
Change tab stops
If you press Tab and the insertion point doesn’t move, a tab stop hasn’t been defined.
45
You can choose from four types of tab stops—left, center, right, and decimal.
A B C D
Everest Everest Everest 2.6794
Lhotse Lhotse Lhotse 293.1
K2 K2 K2 18.36
A. Left tab stop B. Center tab stop C. Right tab stop D. Decimal tab stop
You can also specify a pattern of characters—a leader—to fill the space between a tab and the character following it.
Typically, a leader is a series of periods. Tab leaders are useful in tables of contents that have a wide gap between
columns.
Change tabs in formatting bar
1 Display the Paragraph Format toolbar. Only the tab stops common to all the selected paragraphs appear on the top
ruler.
2 Do one of the following:
• To add a tab stop, click a tab stop symbol from Paragraph Format toolbar and click the desired position below
the top ruler.
• To move a tab stop, drag it to a new position.
To align tab stops with ruler markings, turn on the snap grid (Graphics > Snap). When you drag a tab symbol, it
snaps to locations corresponding to the snap grid.
• To add multiple tab stops at regular intervals, on the top ruler, double-click the existing tab stop that you want
to duplicate. Enter the interval between tabs in the Repeat Every box and click Edit.
• To change a tab stop, double-click it, enter a new tab position in the New Position box, and choose a different
alignment. The position is the distance from the left edge of the column to the tab stop. Then click Edit. You can
also drag a new tab stop on top of an existing one on the ruler to replace it.
Last updated 9/27/2011
Page 52

USING FRAMEMAKER 9
Templates and Page Layout
• To delete a tab stop, drag it off the bottom of the top ruler.
• To delete all tab stops, double-click a tab stop and click Delete All.
Change tabs in Paragraph Designer
1 Display the Basic properties of the Paragraph Designer.
2 In the Tab Stops area, create, edit, or delete, choosing the appropriate settings.
3 Click Apply To Selection.
Define a leader or decimal tab character
1 Double-click the tab stop on the ruler.
2 Do one of the following:
• In the Leader area of the dialog box, click one of the predefined tab leaders or enter your own custom leader,
and then click Edit.
• To specify a decimal character—for example, a comma when you’re working with European decimals—enter
the decimal character in the Align On box in the Alignment area and click Edit.
Change paragraph and character spacing
Vertical spacing is the space between paragraphs and lines. Horizontal spacing is the space between words and
characters. Spacing properties go by different names in different contexts. The space between characters is often called
pair kerning; adjusting the letterspacing in a line is spread or tracking; the line spacing of a paragraph— measured from
the baseline of one line to the baseline of the next—includes its leading.
46
Adjust vertical spacing
When adjusting vertical spacing, keep in mind the following:
• If a paragraph falls at the top of a column, FrameMaker ignores the Space Above setting. If the paragraph falls at
the bottom of a column, FrameMaker ignores the Space Below setting.
• When an anchored frame is positioned below the current line and its anchor symbol appears in the last line of a
paragraph, the space below the paragraph usually appears between the frame and the next paragraph. If the frame
is anchored in a straddle paragraph, the space below is discarded. If the frame is a straddle frame but is not anchored
in a straddle paragraph, the space below appears between the anchor symbol and the frame.
• In a multicolumn layout, you can also adjust vertical spacing in columns by vertically justifying, or feathering, the
text in them.
Several properties affect the vertical spacing of a paragraph: the space above the paragraph, the space below the
paragraph, and the line spacing.
1 Display the Basic properties of the Paragraph Designer and do one of the following:
• Specify values for Space Above and Space Below. The space between paragraphs is determined by the Space
Below setting of the first paragraph or the Space Above setting of the second paragraph, whichever is larger.
• Choose a type of line spacing from the Line Spacing pop-up menu, or enter a value in the box.
2 To allow extra space between lines to accommodate superscripts, subscripts, rubi text, and larger font sizes that
appear in the paragraph, turn off Fixed.
3 Click Apply To Selection.
Last updated 9/27/2011
Page 53

USING FRAMEMAKER 9
Templates and Page Layout
Adjust horizontal spacing
As FrameMaker fills a line of text, it adjusts the space between characters according to kerning and tracking properties.
The spacing between words is based on the following values, which are stored as part of the paragraph format:
• The minimum spacing is the smallest space allowed between words.
• The maximum spacing is the largest space allowed between words before FrameMaker tries to hyphenate words or
add space between letters in justified paragraphs.
• The optimum spacing is what FrameMaker tries to achieve.
These values are expressed as a percentage of the standard space character for the default font of a paragraph. Values
below 100% create tighter word spacing with a more justified look; values above 100% create looser spacing, with a
more ragged right edge.
1 To adjust the space between words, click a paragraph or select several paragraphs whose spacing you want to
change.
2 Display the Advanced properties of the Paragraph Designer and specify the minimum, optimum, and maximum
space to allow between words.
3 Click Apply To Selection.
Note: Lines of text in a justified paragraph can have more than the maximum space between words if FrameMaker
can’t fit a word on a line and can’t hyphenate it. To avoid this, add extra space between characters in justified text by
choosing Allow Automatic Letter Spacing in the Word Spacing area.
47
4 To apply pair kerning or spread, in the Character Designer, choose Pair Kern option or fill in the Spread field.
Adjust spacing in Japanese documents
If your system supports the typing of Japanese text in documents and dialog boxes, you can adjust the following
spacing properties:
• Special group of properties in the Paragraph Designer that controls some aspects of Japanese character spacing.
• Size, spacing, and alignment of rubi text throughout a document.
• Spacing of variable-width Japanese characters through selection of the Tsume font property.
Adjust the space around characters and punctuation
1 In the Paragraph Designer, display the Asian properties.
2 Do the following:
• To adjust the space between Japanese characters and Western ones, use the upper group of boxes; to adjust the
space between Japanese characters, use the lower group of boxes. Enter minimum, maximum, and optimum
percentages.
• To determine the space between characters and special punctuation characters (yakumono), choose from the
Punctuation pop-up menu. Squeeze As Necessary means that space around punctuation is reduced only when
special punctuation handling (kinsoku shori) occurs. Never Squeeze means that no space adjustment is made
around punctuation. Always Squeeze means that space is always reduced around punctuation.
• To achieve a monospaced look in Japanese text, choose Never Squeeze from the Punctuation pop-up menu and
turn off Tsume.
Last updated 9/27/2011
Page 54

USING FRAMEMAKER 9
Templates and Page Layout
Adjust rubi text size, placement, and spacing
Rubi text is made up of small characters (usually kana) appearing above other text, called oyamoji. Your settings affect
rubi text throughout a document.
1 In the Format > Document > Rubi Properties dialog box, choose a value from the Size pop-up menu or enter a value
in the box. The value you enter can be a percentage of the point size of the underlying oyamoji, a point size, or any
other unit of measurement, including Q units.
2 Do the following:
• To let rubi text overhang non-oyamoji text, click Let Rubi Overhang Surrounding Hiragana.
• To remove preceding or trailing space when rubi text appears at the start or end of a line, click Align All
Characters At Line Boundaries.
3 Click an option in the Rubi Alignment For Japanese Oyamoji or the Rubi Alignment For Other Oyamoji area. The
illustrations in the dialog box show how rubi text is spaced and aligned when it’s above Japanese or non-Japanese
characters and when its length is less than or greater than the underlying text.
4 Click Set.
Lists and autonumbering
You create numbered and bulleted lists by using paragraph formats that have an autonumber format defined. As you
add autonumbered paragraphs to your document, FrameMaker numbers them appropriately and renumbers existing
autonumbered paragraphs if necessary.
48
Autonumbered paragraphs are numbered consecutively in a text flow. If your document contains several text flows,
autonumbered paragraphs in each flow are independent of the others.
You define autonumbering in the Numbering properties of the Paragraph Designer. An autonumber format does not
have to specify paragraph numbering. When used without building blocks, it is handy for inserting automatic text or
symbols. An autonumber format can include a series label, a counter, tabs, and any additional text you need.
Series label Series labels identify different types of autonumber series within the same text flow. For example, to
number figures independently of tables or headings, you specify a different series for each formatting item ((headings,
figures, and tables).
On the other hand, table and figure numbers must all be in the same series to be based on section numbers.
Counter A counter is a placeholder (building block) that FrameMaker replaces with a number or letter in the
autonumber. For example, the counter <n+> increments the paragraph’s number by 1; if the paragraph is the second
in a series, FrameMaker replaces <n+> with the number 2. You can use multiple counters in a format.
You can also add chapter <$chapnum> and volume <$volnum> building blocks in a format.
Tabs, text, and punctuation An autonumber format can also include tabs, text, bullets, spaces, or punctuation.
Last updated 9/27/2011
Page 55

USING FRAMEMAKER 9
Templates and Page Layout
Format text as numbered lists
Creating a numbered list sometimes involves formatting the first item in the list with a paragraph format that resets
the counter to 1, and then formatting the remaining items with a different format that increments the counter. For
example, perhaps you apply a Step1 format to the first item in a list and then StepNext to the rest. The template also
sometimes defines formats that let you apply a single format to all items in a numbered list.
1 Display the Numbering properties of the Paragraph Designer and enter a series label in the Autonumber Format
box if you need more than one autonumber series in the document.
A series label consists of any single printable character followed by a colon (for example, S:). If you use a series label,
it must appear at the beginning of the format.
2 Enter any text you want to have appear automatically with the autonumber format. You can enter tabs or counters
from the Building Blocks scroll list. When you select an item, it appears at the insertion point in the Autonumber
Format box.
3 Select a Character Format for the autonumber in the Character Format scroll list. If you don’t specify a format, the
autonumber appears in the paragraph’s default font.
4 Choose a position for the autonumber from the Position pop-up menu. Autonumbers at the end of paragraphs are
rare except in equation formats.
5 Click Apply To Selection.
6 If you inserted a tab (\t) in step 2, set a corresponding tab stop for the paragraph format.
49
Format text as bulleted lists
In addition to the regular bullet symbol found in all text fonts, you can use any character in any installed font, including
a dingbat font such as Zapf Dingbats®.
1 Click in a single paragraph or select adjacent paragraphs that you want to make into a bulleted list.
2 Display the Numbering properties of the Paragraph Designer and click the bullet and tab symbols (\b and \t) in the
Building Blocks scroll list.
3 Click Apply To Selection.
4 If you inserted a tab (\t) in step 1, set a corresponding tab stop for the paragraph format.
Specify a special bullet symbol
Before specifying a special bullet symbol, create a character format that uses the font of the bullet symbol you want to
use. For example, to use 9-point Zapf Dingbats, create a character format using that font. Give the format a descriptive
name such as BulletFont.
1 Display the Numbering properties of the Paragraph Designer and enter the character corresponding to the bullet
symbol you want in the Autonumber Format box.
For example, if you want a Zapf Dingbats square bullet, enter a lowercase n, which appears as ■ in that font. To find
the character that corresponds to the bullet symbol you want, see the character set for that font.
2 Click the tab symbol (\t) in the Building Blocks scroll list or enter spaces.
Note: You sometimes must use special codes to enter characters such as nonbreaking spaces or em spaces.
3 In the Character Format scroll list, click the bullet character format that you created.
4 Click Apply To Selection.
Last updated 9/27/2011
Page 56

USING FRAMEMAKER 9
Templates and Page Layout
Remove autonumbering or a bullet from a paragraph
1 Turn off Autonumber Format in the Numbering properties of the Paragraph Designer. Click the option twice to
turn off the setting; clicking it only once changes it to As Is.
2 Click Apply To Selection.
Counters in autonumber formats
A counter consists of angle brackets (< >) that surround a display style and an increment value. The Custom
Autonumbering feature supports the Unicode text encoding standard.
A B
A. Display style B. Increment value
To indicate the display style, use a counter with one of the following letters.
For this numbering style Use
Numeric (1, 2, 3, …) n
50
Lowercase Roman (i, ii, iii, iv, …) r
Uppercase Roman (I, II, III, IV, …) R
Lowercase alphabetic (a, b, c, …, aa) a
Uppercase alphabetic (A, B, C, …, AA) A
To indicate how an autonumber is incremented, use a counter with an increment value, as shown in the following
examples.
To Use
Keep the value the same <n>
Set the value to 1 or to any other number you enter after the equal sign <n=1>
Increase the value of the counter by 1 <n+>
Keep the value the same but not display it < >
Reset to zero (or any other number) but not display it < =0>
By default, each counter is initially set to zero. The counter can maintain its current value, be incremented by 1, or be
reset to a different value. For example, use <n=1> in the format that resets numbering to 1 at the beginning of a new
set of numbered steps.
To keep the value the same but not display it, place a blank space between the angle brackets. If you leave out the blank
space, the angle brackets appear as part of the autonumber format.
Base autonumbering on book component numbers
You can insert <$volnum>, <$chapnum>, <$sectionnum>, or <$subsectionnum> building blocks in paragraph
formats. The book component numbers are determined by the settings in the Numbering Properties dialog box.
Last updated 9/27/2011
Page 57

USING FRAMEMAKER 9
Templates and Page Layout
Example Autonumber format
51
Volume 3
Chapter 3
Volume <$volnum>
Chapter <$chapnum>
The following table illustrates how you can combine the chapter building block with other building blocks:
Example Autonumber format
Section 1.1
Section 1.1.1
Figure 1-1
Table 1-1
S:Section <$chapnum>.<n+><=0>
S:Section <$chapnum>.<n>.<n+>
F:Figure <$chapnum>-<n+>
T:Table <$chapnum>-<n+>
Base autonumbering on section numbers
Table and figure numbers must all be in the same series for autonumbering in sections, as shown in the following table:
Section number Figure number Table number
Section 1
1.1
1.2
Section 2
2.1
2.2
Figure 1-1
Figure 1-2
Figure 2-1
Figure 2-2
Table 1-1
Table 1-2
Table 2-1
Table 2-2
To achieve this type of numbering, construct autonumber formats in a single series using the same series label for each
format. The following table shows possible autonumber formats. The formats are presented in a table so that you can
clearly see the position of each counter in the string. Counter position determines how the counter is incremented.
Paragraph format Autonumber
SectionTitle H:Section <$chapnum> < =0> < =0> < =0>
Head1 H: <$chapnum> .<n+> < > < >
FigureTitle H:Figure <$chapnum> < > -<n+> < >
TableTitle H:Table <$chapnum> < > < > -<n+>
format
Whenever a paragraph tagged SectionTitle occurs, the section number is incremented by 1, and the remaining counter
values are reset to zero. Each <n+> counter in the remaining formats refer to a different type of item, so they’re
incremented independently.
The < > counters keep FrameMaker from resetting values back to zero.
Use multiple counters in an autonumber format
An autonumber format can contain more than one counter. For example, perhaps autonumbers for a series of section
and subsection titles each contain two counters.
Last updated 9/27/2011
Page 58

USING FRAMEMAKER 9
Templates and Page Layout
These counters In this format Would appear as
<$chapnum>.<n=0> Head1 1.0
<$chapnum>.<n+> Head2 1.1
<$chapnum>.<n+> Head2 1.2
<$chapnum>.<n=0> Head1 2.0
The counters in each format are independent of each other. The position of a counter in the string determines how it’s
displayed and incremented. When incrementing a counter, FrameMaker bases its value on the corresponding counter
in the previous autonumber paragraph in the same flow.
The following example shows multiple counters in section titles and subtitles. The counter before the period is
incremented independently from the counter after the period.
Example Autonumber format Tag
52
1.0 Getting started
1.1 Installing
1.2 Backing up
1.2.1 Errors
1.3 Entering data
<n+>.<n=0>\t
<n>.<n+>\t
<n>.<n+>\t
<n>.<n>.<n+>\t
<n>.<n+>\t
Head1
Head2
Head2
Head3
Head2
The following example demonstrates outline style autonumber formats.
Example Autonumberformat Tag
I Getting started
A Installing
B Backing up
II Entering data
A Opening a file
B Saving a file
<R+>< =0>\t
< ><A+>\t
< ><A+>\t
<R+>< =0>\t
< ><A+>\t
< ><A+>\t
Head1
Head2
Head2
Head1
Head2
Head2
The autonumber in the heading Opening a file is reset to A; the second counter in the previous paragraph’s format
resets the numbering to zero without displaying it, so <A+> increments the counter to 1 or A.
The < > counter in the Head2 format keeps the value of the first counter the same but doesn’t display it. If the < >
counter is not in that position, the <A+> in the Head2 format refers to the first counter (not the second), and
FrameMaker produces the following result:
Incorrect outline style autonumber format
Last updated 9/27/2011
Page 59

USING FRAMEMAKER 9
Templates and Page Layout
Reset a series
Some numbering series—such as a list of numbered steps—start at 1 every time they are used. You can reset such a
series in two ways.
The first example shows how to restart series numbering by using the <n=1> building block for the first step in the
series, and then using <n+> for subsequent steps.
Example Autonumber format Tag
53
Step 1. Unpack it.
Step 2. Back it up.
Step 3. Run setup.
Step 1. Save your file.
S:Step <n=1>.\t
S:Step <n+>.\t
S:Step <n+>.\t
S:Step <n=1>.\t
Step1
StepNext
StepNext
Step1
The second example shows another way to reset the counter so that you don’t have to use a unique format to start a
numbered list. Instead, a paragraph that introduces the list uses a format that resets the counter.
Example Autonumber format Tag
To install the software:
Step 1. Unpack it.
Step 2. Back it up.
Step 3. Run setup.
S:< =0>
S:Step <n+>.\t
S:Step <n+>.\t
S:Step <n+>.\t
StepIntro
Step
Step
Step
The < =0> counter in the StepIntro format resets the S series to zero but doesn’t display the number.
If a counter is incremented, any omitted counters in the series to the right of it are reset to zero. For example, the
following autonumber formats are equivalent:
S:<n+>< =0>\t
S:<n+>\t
About Japanese numbering options
The following counters in autonumber formats are allowed in Japanese text and with Japanese fonts.
Building block Meaning Characters, in this order
<zenkaku a> Fixed-width lowercase Roman alphabet
<zenkaku A> Fixed-width uppercase Roman alphabet
<zenkaku n> Fixed-width Arabic numbers
<kanji kazu> Standard kanji numbering, where double-
digit numbers are made up from the
traditional kanji characters for ten, one
hundred, and so on
Last updated 9/27/2011
Page 60
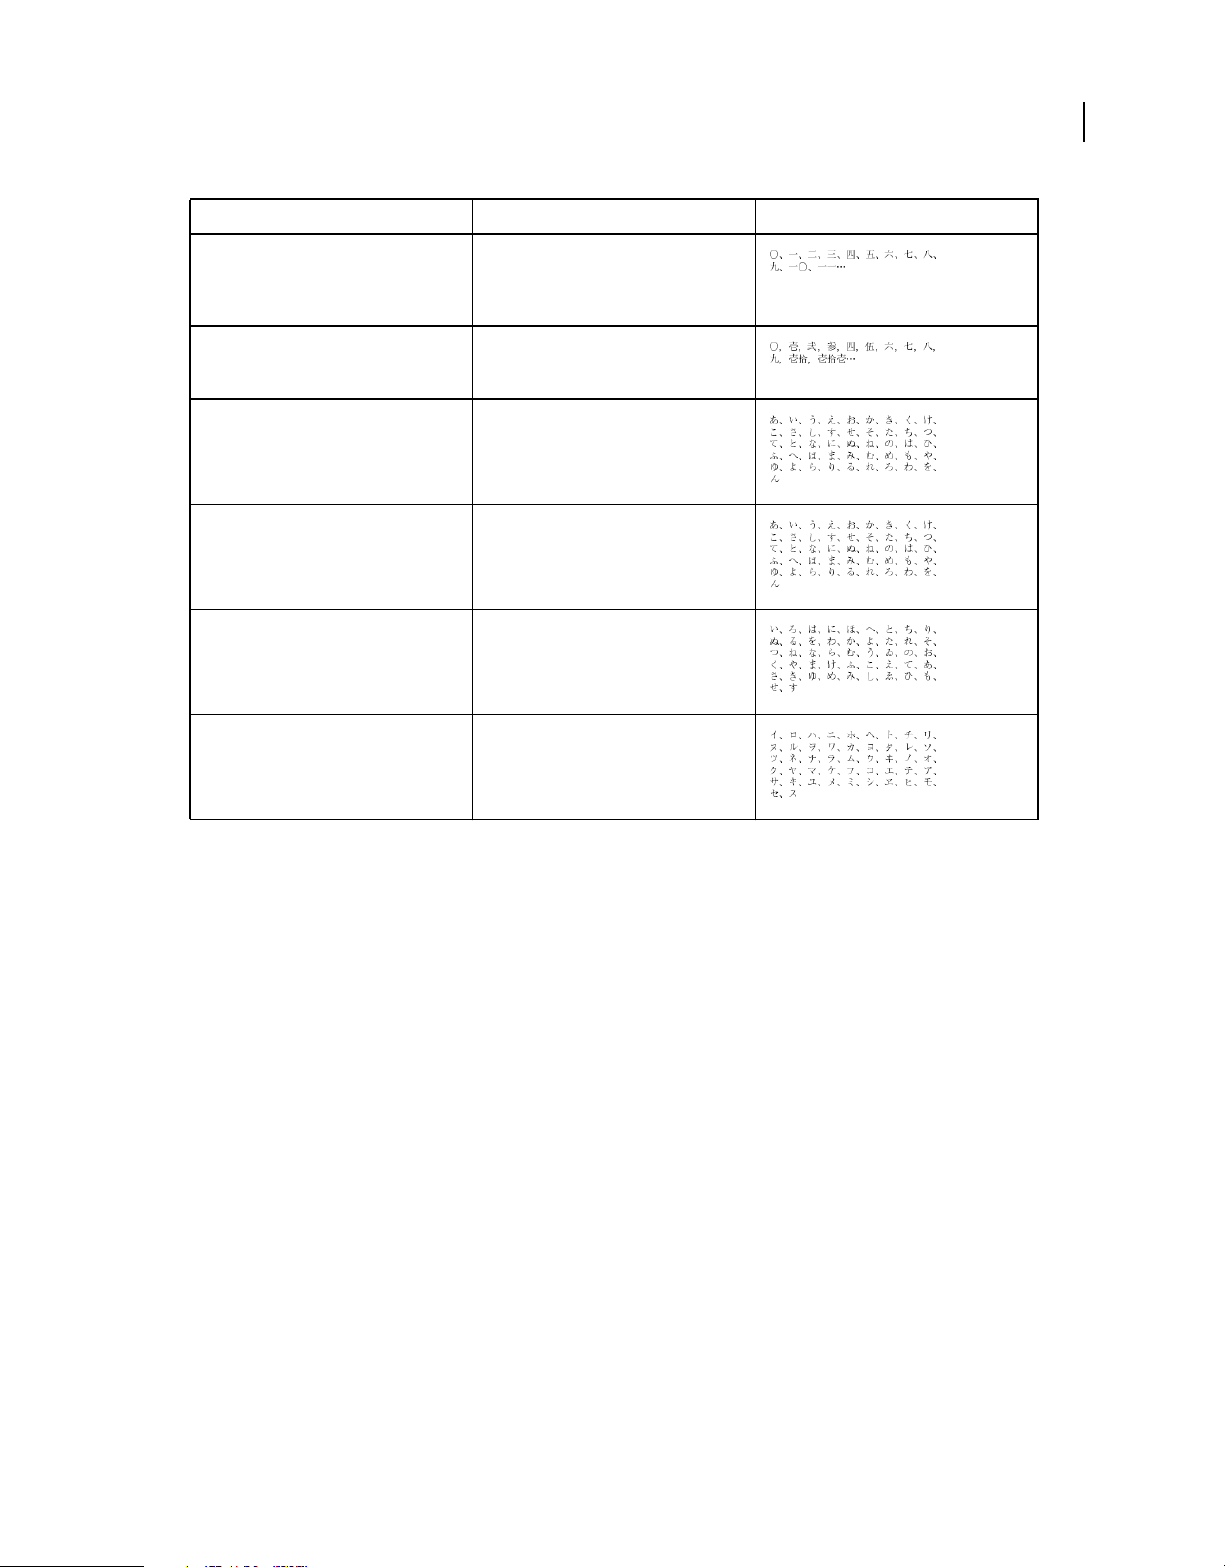
USING FRAMEMAKER 9
Templates and Page Layout
Building block Meaning Characters, in this order
54
<kanji n> Numbers used for street addresses, phone
<daiji> Numbers used in financial or banking
<hira gojuon> Hiragana characters in the standard order
<kata gojuon> Katakana characters in the standard order
<hira iroha> Hiragana characters in the literary order
<kata iroha> Katakana characters in the literary order
numbers, postal codes, and so on, where
double-digit numbers are made up from
the kanji characters for zero through nine
contexts made up of old-style kanji
numerals
(rare)
(rare)
Master pages and reference pages
About body, master, and reference pages
FrameMaker documents contain three types of pages that help you set up your page layout:
• Master pages specify the page layout and the background text for document pages (for example, page headers and
footers).
• Reference pages can contain frequently used graphics, formatting information, hypertext commands, mappings for
HTML conversion, and boilerplate matter.
• Body pages show the background text and graphics from the corresponding master page and contain the document
content.
Last updated 9/27/2011
Page 61
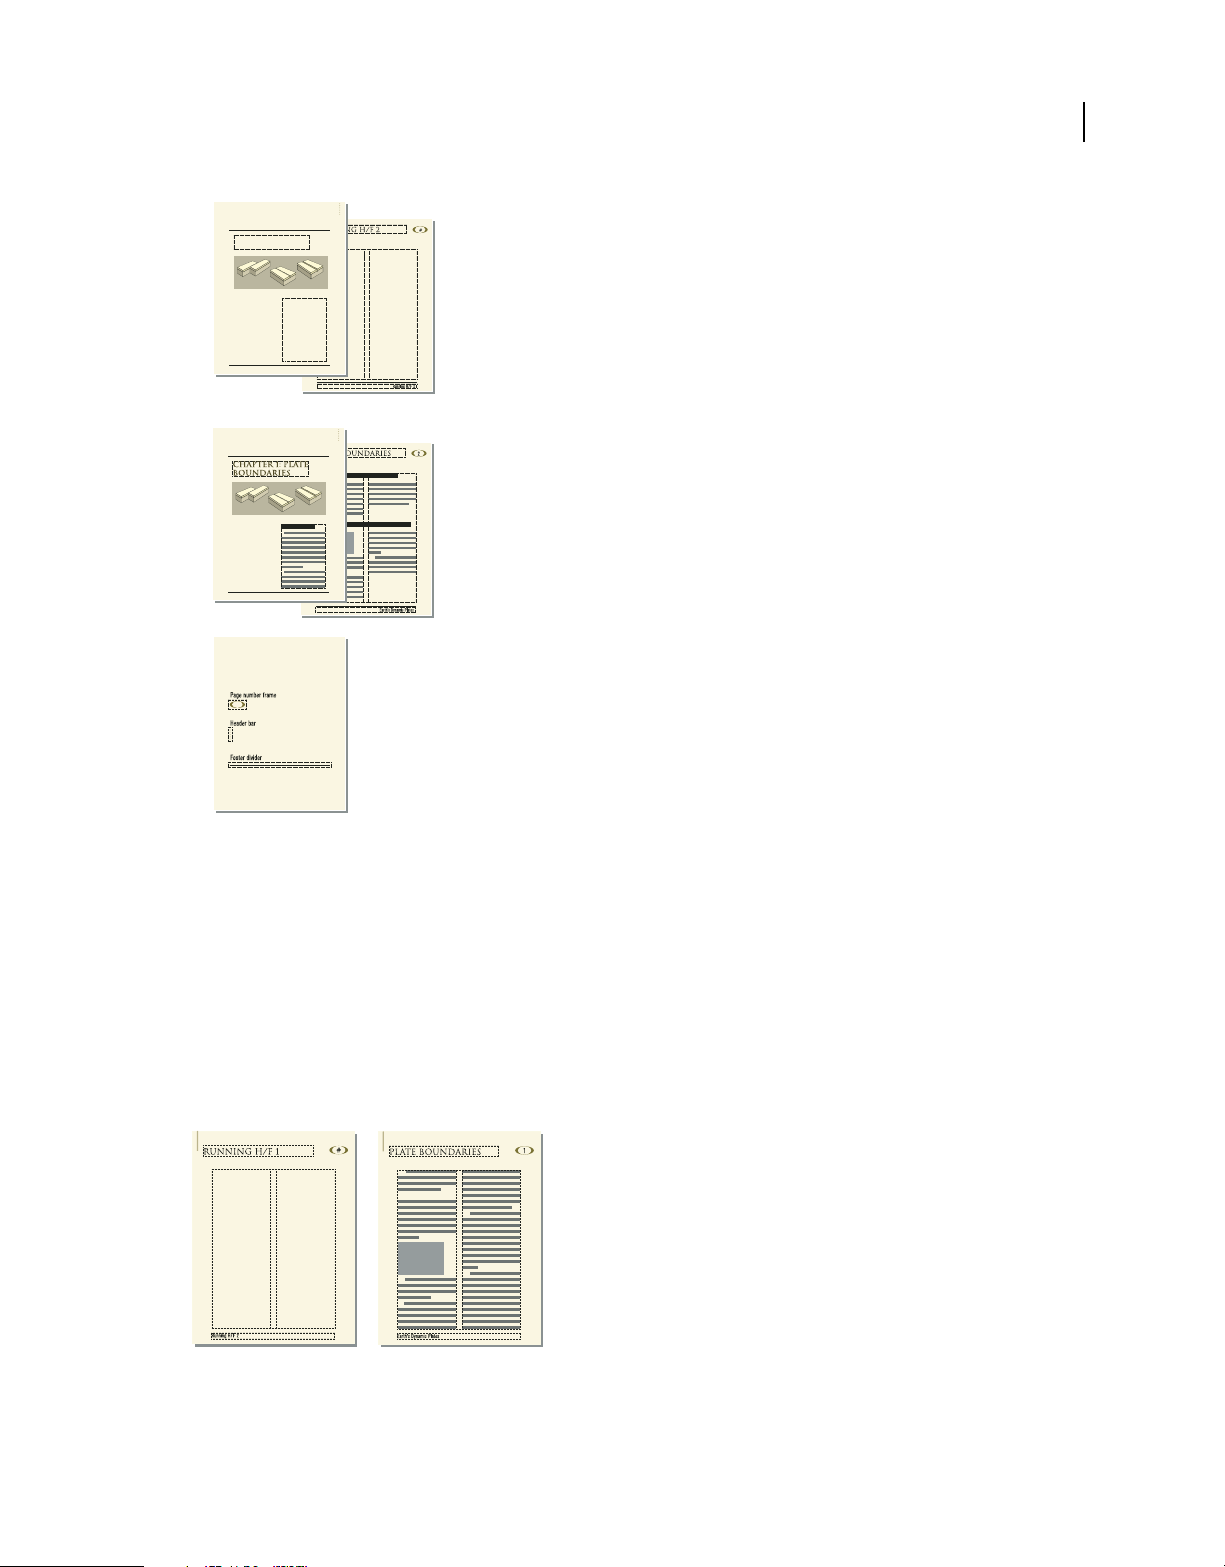
USING FRAMEMAKER 9
Templates and Page Layout
A
B
55
C
A. Master pages: first and right B. Body pages: first chapter page and right page C. Reference page
Master pages
FrameMaker uses master pages to keep track of a document’s page layout. A double-sided document contains at least
two master pages, one for left pages and one for right pages. A single-sided document uses the right master page only.
Documents can also contain custom master pages, which you can use for special types of pages. You can also create
layouts directly on body pages for one-time-only use.
If your page layout is complex, or if you need to create design components such as page headers and footers, work with
the components directly on the master pages. You can draw or import graphics—such as lines, boxes, or company
logos—anywhere on a master page, as well as type text on them. Graphics and text appear on the corresponding body
pages exactly as they appear on the master page, as part of the body page’s background.
Master page and body page
Last updated 9/27/2011
Page 62
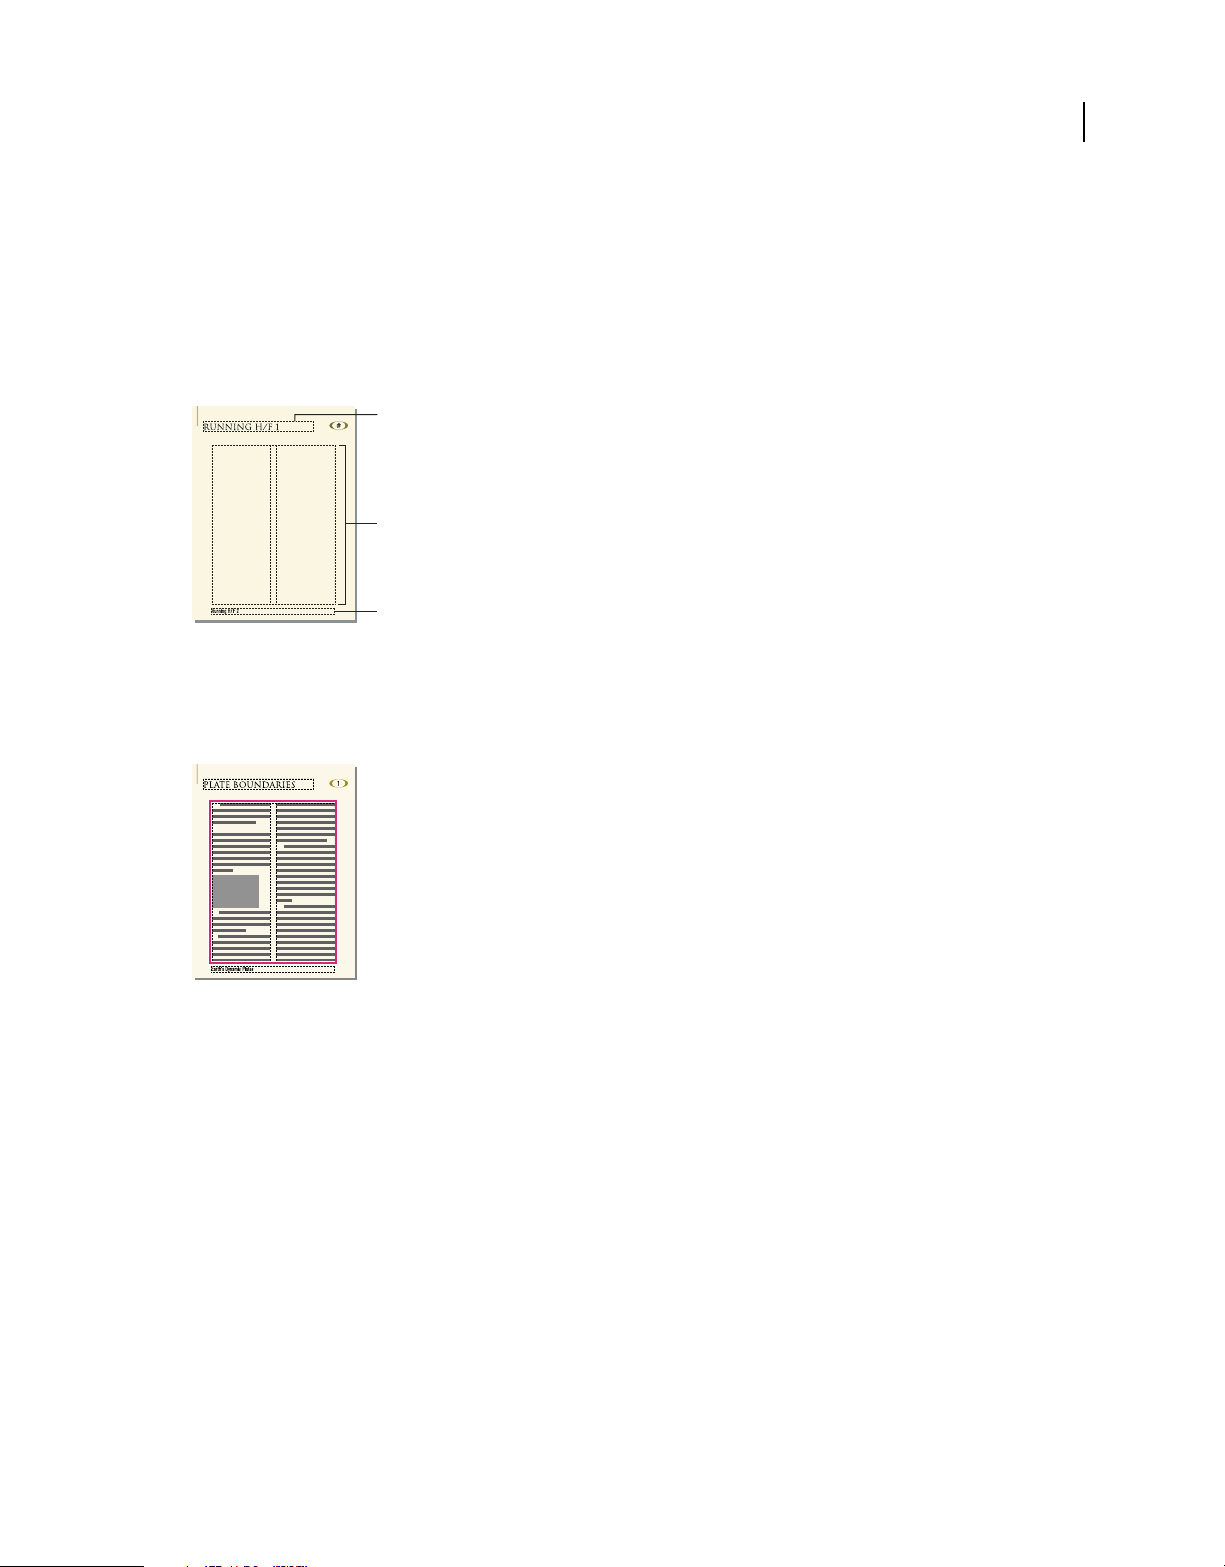
USING FRAMEMAKER 9
Templates and Page Layout
Master pages can contain the following types of text frames:
• A template text frame contains a tagged text flow—a flow with a name. When you add a body page, the template
text frame is copied to the new body page. You then type the document’s text in this text frame on the body page.
You can type text in a template text frame on a master page, but the text does not appear on body pages.
• A background text frame contains an untagged text flow—a flow with no name. Its contents appear on
corresponding body pages, but you can edit them only on the master pages. Background text frames are typically
used for page headers and footers.
A
B
A
Master page
A. Untagged background text frame B. Template text frame
56
When you add text and illustrations to your document on body pages, FrameMaker adds body pages as necessary and
automatically uses the page layout from the left or right master page.
On body pages, you type in a text frame copied from the template text frame.
Reference pages
You can use reference pages to store frequently used graphics that you want to position consistently throughout a
document, and then use the graphics on body pages where they’re needed. If you place a graphic in a reference frame—
an unanchored graphic frame on a reference page—you can use the frame as a property of a paragraph format. For
example, to design a heading with a line below it, draw the line in a reference frame, and then include the reference
frame in the paragraph format of the heading.
Last updated 9/27/2011
Page 63

USING FRAMEMAKER 9
Templates and Page Layout
Reference page and body page
Reference pages can also hold boilerplate material or clip art that you can copy and paste on body pages—for example,
symbols for cautions and notes. And specialized reference pages can contain hypertext commands, formatting
information for generated lists and indexes, definitions of custom math elements, and mappings for converting to
XML and HTML.
A document normally contains at least one reference page. You can add your own graphics to an existing reference
page, and you can create additional reference pages (up to 100).
Create custom master pages
Documents may need body pages with layouts that differ from those of the left and right master pages. For example,
you can create a different look for the first page of a document, or you can include a landscape page in a portrait
document. For such cases, you create custom master pages. (A document can contain up to 100 master pages.)
57
After you create the custom master page, change its column layout, and add background text and graphics. You then
assign the custom master page to one or more body pages.
Create a custom master page that is empty or based on another master page’s layout
1 Display the master page that you want to use as a basis for the new master page.
2 Choose Special > Add Master Page and enter a name for the new master page in the Name text box.
3 Do one of the following:
• To create a master page with a layout that matches the layout of an existing master page, choose the master page
from the Copy From Master Page pop-up menu.
• To create an empty master page, click Empty.
4 Click Add.
Create a custom master page based on a body page’s layout
1 Make the column layout changes you want on a body page.
2 With the body page displayed, choose Format > Page Layout > New Master Page.
3 Enter a name for the master page and click Create.
More Help topics
“Assign master pages to body pages” on page 58
Last updated 9/27/2011
Page 64

USING FRAMEMAKER 9
Templates and Page Layout
Reorder, rotate, or delete custom master pages
Reorder custom master pages
When you reorder custom master pages, the Right and Left master pages always remain at the beginning.
1 Open a master page, and then choose Format > Page Layout > Reorder Custom Master Pages.
2 Select a master page in the Custom Master Pages list, and click Move Up or Move Down to move the page
accordingly.
3 Click Set. If you were previously viewing a custom master page, note that a different master page may now be
visible.
Rotate a master page
You can create a custom master page that changes the orientation of a body page. For example, you can create a rotated
orientation for a body page with a very wide table.
58
Right page uses a rotated master page.
1 On a new master page, set up any text frames and background text and graphics that you want to have the same
orientation (unrotated) as headers and footers on the other master pages.
2 Choose one of the Format > Customize Layout > Rotate Page commands. When FrameMaker rotates the page, part
of the page will probably be out of view. You can adjust the window size to see as much of the page as possible.
3 Create the text frames, background text, and background graphics that you want to display rotated.
You can type in rotated text frames, or you can unrotate the page to make typing faster. To unrotate a page, choose
Format > Customize Layout > Unrotate Page. When you’re finished, you can rotate the page again.
More Help topics
“Creating and modifying background text frames” on page 67
Rename or delete a custom master page
❖ Display the master page, and choose Special > Delete Page.
Note: You cannot rename the master pages named Left and Right, and you cannot delete the left or right master page or
any master page currently assigned to a body page.
Assign master pages to body pages
You can assign a master page to a body page at any time. FrameMaker uses the template text frame from the master
page and displays background text and graphics.
Last updated 9/27/2011
Page 65

USING FRAMEMAKER 9
Templates and Page Layout
You can also choose to assign no master page to a body page. Because it’s not associated with a master page, this type
of body page has no headers, footers, or other background text or graphics. (If the body page contains a text frame, the
text frame is unaffected.) For example, if each chapter in a book must contain an even number of pages, and if the last
page of a chapter contains no body text, you may not want that page to use a master page, so that it will be completely
blank.
Assign a different master page
1 With a body page displayed, choose Format > Page Layout > Master Page Usage.
2 In the Use Master Page area, do one of the following:
• To assign the left or right master page, click Right (in a single-sided document) or Right/Left (in a double-sided
document).
• To assign a custom master page, choose the page name from the Custom pop-up menu.
• To assign no master page, choose None from the Custom pop-up menu.
3 In the Apply To area, do one of the following:
• To apply the change to the current body page, click Current.
• To apply the change to a range of pages, enter the starting and ending page numbers in the Pages text boxes.
• To apply the changes only to odd or even pages within a range, select Even or Odd.
• To apply the changes only to pages within a range that currently use a particular master page, choose a page from
the pop-up menu in the Apply To area.
4 Click Apply.
Note: If the master page contains a template text flow not found on the body page, FrameMaker adds the text frames that
contain that flow to the body page. If the body page contains a flow not found on the master page, FrameMaker leaves
the text frames that contain that flow unchanged. This action could result in overlapping text frames.
59
Assign a master page to pages with specified paragraph tags
You can assign master pages to body pages that contain specified paragraph tags. For example, you may want all pages
that include the Title paragraph tag to be formatted with a custom master page called First.
You map the paragraph tags to the master pages using the Reference Pages mapping table. When you choose the Apply
Master Pages command, the master page will be applied to the body pages on which the referenced paragraph tag
appears.
In this example, the First master page will be applied to body pages containing Title paragraph tags.
1 Choose View > Reference Pages.
2 Click the Next Page button until the five-column UnstructMasterPageMaps table appears.
If the mapping table does not appear in the reference pages, choose Format > Page Layout > Apply Master Pages.
Last updated 9/27/2011
Page 66

USING FRAMEMAKER 9
Templates and Page Layout
3 For Book Update (Yes Or No), type Yes or No to determine whether the specified master page will be applied when
you choose Apply Master Pages from a book.
4 Edit the mapping table by doing the following:
• Under the Paragraph Tag Name column heading, type the name of the paragraph tag to which you want the
master page to be applied. This column is required for master pages to be applied. Spell the paragraph tag name
correctly, using the same capitalization that the paragraph tag uses.
• Under the Right-Handed Master Page column heading, type the name of the master page you want to apply.
This column is required for master pages to be applied. The specified master page will be applied to all body
pages, including left-handed pages in double-sided documents on which the paragraph tags appear, unless you
specify a different master page under the Left-Handed Master Page column. Master page names are casesensitive.
• Under the Left-Handed Master Page column heading, type the name of the master page that you want to apply
to the left-handed body pages on which the paragraph tags appear in double-sided documents. This column is
optional.
• Under the Range Indicator column heading, type Single to apply the master page only to the body page on which
each paragraph tag appears; type Span pages to apply the master page to the entire span of pages to which the
paragraph tag is applied; or type Until changed to apply the master page to all pages, until the next body page
with a different paragraph tag listed in the mapping table is encountered. If this cell is blank, master pages are
applied to single pages.
• Add notes to the Comments column. Text you type in this column does not affect how master pages are applied
in any way.
• To map additional master pages to paragraph tags, add and fill out additional table rows.
5 When you are done, choose View > Body Pages.
6 Make the appropriate document window or book window active. If a book window is active, select the documents
you want to affect.
7 Choose Format > Page Layout > Apply Master Pages, and then click Yes to override manually applied master pages.
Adobe FrameMaker searches each body page for the first occurrence of any paragraph tag specified in the Master Page
Maps table. When it finds text containing the specified paragraph tag, it applies the specified master page.
60
Assign a master page to body pages of structured documents
To assign master pages to body pages containing elements in structured documents, you map the elements to the
master pages using the Reference Pages mapping table. When you choose Apply Master Pages, the master page will be
applied to the body page on which the referenced element appears.
1 In Structured FrameMaker, choose View > Reference Pages.
2 Click the Next Page button until the eight-column StructMasterPageMaps table appears.
If you’re working on a document created in a previous version of FrameMaker, choose Format > Page Layout >
Apply Master Pages, so that the mapping table appears in the reference pages.
3 To the right of Book Update (Yes Or No), type Yes or No to determine whether the specified master page will be
applied when you choose Apply Master Pages from a book.
Last updated 9/27/2011
Page 67

USING FRAMEMAKER 9
Templates and Page Layout
4 Edit the mapping table by doing the following:
• Under the Element/Paragraph Tag Name column heading, type a valid prefix (E: for element tag, or P: for
paragraph tag), followed by the name of the element or paragraph tag to which you want the master page to be
applied. If no prefix is applied, an element tag is assumed. Spell the name correctly, using the same capitalization
that the element or paragraph tag uses. This column is required for master pages to be applied.
• Under the Right-Handed Master Page column heading, type the name of the master page you want to apply. The
specified master page will be applied to all body pages, including left-handed pages in double-sided documents
on which the elements or paragraph tags appear, unless you specify a different master page under the LeftHanded Master Page column. Master page names are case-sensitive. This column is required for master pages
to be applied.
• Under the Left-Handed Master Page column heading, type the name of the master page that you want to apply
to the left-handed body pages on which the elements or paragraph tags appear in double-sided documents. This
column is optional.
• Under Attribute Name, type a valid attribute name to further define the mapping context.
• Under Attribute Value, type a valid attribute value to further define the mapping context.
• Under Context, type a value for an element’s context label to further define the mapping context.
• Under the Range Indicator heading, type Single to apply the master page only to the body page on which each
element or paragraph tag appears; type Span pages to apply the master page to the entire span of pages to which
the element or paragraph tag is applied; or type Until changed to apply the master page to all pages until the
next body page with a different element or paragraph tag listed in the mapping table is encountered. If this cell
is blank, master pages are applied to single pages.
• Add notes to the Comments column. Text you type in this column does not affect how master pages are applied
in any way.
• To map additional master pages to elements or paragraph tags, add and fill out additional table rows.
5 Choose View > Body Pages.
6 Make the appropriate document window or book window active. If a book window is active, select the documents
you want to affect.
7 Choose Format > Page Layout > Apply Master Pages, and then click Yes to override manually applied master pages.
FrameMaker searches each body page for the first occurrence of any element or paragraph tag specified in the Master Page
Maps table. When it finds text containing the specified element or paragraph tag, it applies the specified master page.
61
Display master pages
When working with master pages, you move back and forth between them and the body pages. When a master page
is visible, its name and the number of master pages in the document appear in the Page Status area of the status bar.
Page Status area of status bar
❖ Choose View > Master Pages. The master page used by the current body page appears, with the text frame and
column borders visible.
Last updated 9/27/2011
Page 68

USING FRAMEMAKER 9
Templates and Page Layout
View other master pages when a master page is visible
❖ Do one of the following:
• Click the Next Page or Previous Page button.
• Press the Page Up or Page Down key.
• Use the scroll bar.
Return to body pages while master pages are visible
❖ Choose View > Body Pages. The most recently displayed body page appears. If FrameMaker detects any layout
overrides on body pages, an alert message asks how you want to handle them.
More Help topics
“About layout overrides” on page 69
View, create, and delete reference pages
Display reference pages
❖
Choose View > Reference Pages. The name of the current reference page appears in the Page Status area of the status bar.
62
Page Status area
If the document doesn’t contain any reference pages, the Add Reference Page dialog box appears. Create the first
reference page by entering a page name and clicking Add.
View other reference pages when a reference page is visible
• Click the Next Page or Previous Page button.
• Press the Page Up or Page Down key.
• Use the scroll bar.
Create a reference page
1 Display reference pages and choose Special > Add Reference Page.
2 Enter a name for the reference page and click Add.
Return to body pages
❖ Choose View > Body Pages. The most recently displayed body page appears.
Rename or delete a reference page
You can rename a reference page—for example, to avoid overwriting the reference page when you import reference
pages from a template that contains a reference page with the same name.
Last updated 9/27/2011
Page 69

USING FRAMEMAKER 9
Templates and Page Layout
If you delete a reference page that contains a graphic used in a paragraph format, the graphic no longer appears in
paragraphs using that format. When this happens, the Frame Above or the Frame Below pop-up menu in the
Advanced properties
❖ Display the reference page and do one of the following:
of the Paragraph Designer is set to As Is for the paragraphs.
• To rename the page, click the page name in the status bar, and type the new name. Click Set.
• To delete the page, choose Special > Delete Page.
Use reference frames on reference pages
You can use a graphic as part of a paragraph format if you have placed the graphic in a reference frame on a reference page.
63
Graphics in reference frames
When you select a reference frame on a reference page, its name appears in the status bar after the word Frame.
Create a reference frame on a reference page
1 Click the Graphic Frame tool on the Tools panel, and then drag to draw the frame. To draw a square frame,
Shift-drag.
2 Enter a name in the Name text box and click Set. Use a short, descriptive name you’ll recognize later when the name
appears in the Frame Above and the Frame Below pop-up menus in the Advanced properties
of the Paragraph
Designer.
3 Put a graphic in the frame. You can draw the graphic, import a graphic file, or combine drawn and imported
graphics.
4 Adjust the frame’s size and shape if necessary. When you use a reference frame above or below a paragraph on a
body page, the whole frame—not just the graphic inside it—appears on the body page. The height of the frame
affects the spacing of text above and below the frame.
5 Use the Text Line tool to type the frame’s name above the frame. Typing the name helps you identify the frame
when you view the reference page. It does not rename the reference frame.
Rename a reference frame
1 Select the reference frame and click the frame’s name in the status bar.
2 Enter the new name and click Set. You should also type the new name in the text line above the reference frame. If
you rename a reference frame used in a paragraph format, you need to update the format so that it uses the new
frame name.
Change other properties of a reference frame
❖ Select the frame and use either Graphics > Object Properties or the options on the Tools panel.
Last updated 9/27/2011
Page 70

USING FRAMEMAKER 9
Templates and Page Layout
Set up boilerplate graphics on reference pages
You can set up boilerplate graphics—for example, margin symbols—in anchored frames on a reference page. Then you
can copy the anchored frames to body pages. When you do this, the graphics appear correctly positioned in their
anchored frames.
You can copy and paste boilerplate graphics onto body pages.
You can also place graphics directly on reference pages and then copy and paste them anywhere on body pages.
1 Create a reference page with the same column layout as the body page on which you want to display the graphic.
This ensures that the graphic is positioned correctly when you copy it to body pages. To set up the column layout,
you can copy the text frame from a body page and paste it on the reference page.
On the reference page, set up the anchored frame exactly as you want it to appear on body pages.
64
2 Draw the graphic in the anchored frame, or paste or import it into the frame. You may want to add some text
outside the anchored frame to identify the graphic. For example, in the illustration, Caution Symbol identifies the
graphic.
Page layouts
You can make changes to a document’s basic page layout directly from a body page. FrameMaker automatically
updates both the left and right master pages, and updates the layout of any body pages that use those master pages. If
any of these body pages contain layout overrides, you are asked to confirm that you want to make the updates.
If your document uses another master page—for example, for the first page of the document—you must make any
layout changes on that master page.
Change page size
1 Make the appropriate document window or book window active. If a book window is active, select the documents
you want to affect.
2 Choose Format > Page Layout > Page Size.
3 Do one of the following:
• Choose a standard size from the Page Size pop-up menu. The correct dimensions appear in the Width and
Height text boxes.
• Enter dimensions in the Width and Height text boxes. Custom appears in the pop-up menu. The custom page
size you specify can be very small, depending on the document’s margin settings, or as large as 216 inches by 216
inches (approximately 548 centimeters by 548 centimeters).
4 Click Set.
Last updated 9/27/2011
Page 71

USING FRAMEMAKER 9
Templates and Page Layout
Note: If the document contains custom master pages, FrameMaker won’t let you change to a page size that can’t
accommodate the text frames on those master pages.
Change pagination
You can change a single-sided document to double-sided documents or the reverse. When you set up a double-sided
document, you specify whether the first page is a left or a right page.
1 Make the appropriate document window or book window active. If a book window is active, select the documents
you want to affect.
2 Choose Format > Page Layout > Pagination.
3 Select one of the options in the Pagination area. If you select Double Sided, also specify whether the first page is a
left or right page. If you are applying pagination in a book, you can choose Read from File to use the page side
specified in the file, or you can choose Next Available Side to avoid a blank page.
Depending on which option you selected, a blank page may be added to the previous file in the book so that the
document can start on the page you specified.
4 Click Set. If the document contains custom master pages or page layout overrides, an alert message asks how you
want to proceed.
65
Add or delete empty pages
You can specify that you want a document to have an even or odd number of pages. If necessary, FrameMaker adds a
blank page at the end of the document to achieve the correct pagination.
Conversely, a document may contain unwanted blank pages at the end, left there because you deleted or reworked text.
You can tell FrameMaker to delete these empty pages whenever you save or print the document.
FrameMaker deletes a blank page only if it uses the left or right master page, doesn’t contain the start of a flow, and
has no layout overrides. FrameMaker doesn’t delete a page if it contains an empty paragraph but is otherwise blank.
If you use the document window to change the pagination of a document that is part of a book, the settings may be
overridden when you update the book. You can make sure the book pagination is correct by changing a document’s
setup from the book window.
1 Make the appropriate document window or book window active. If a book window is active, select the documents
you want to affect.
2 Choose Format > Page Layout > Pagination.
3 From the Before Saving & Printing pop-up menu, choose an option and click Set.
If blank pages are not added or deleted as expected, make sure that all pages in the document are autoconnected.
More Help topics
“About layout overrides” on page 69
Change page margins and number of columns
The margin is the distance between the page edge and the text frame. For a single-sided document, you set margins for
the top, bottom, left, and right sides of the text frame. For a double-sided document, you set the top, bottom, inside,
and outside margins for a symmetrical look.
Last updated 9/27/2011
Page 72

USING FRAMEMAKER 9
Templates and Page Layout
To set up asymmetrical left and right margins, you change the text frames directly on the master pages. For example,
you could make the text frames on both the left and right pages appear on the right side of the page, leaving an area of
white space on the left.
You can divide a text frame into two or more equally spaced columns of equal widths. To create a multi column layout
with unequal column widths or gaps, use one text frame for each column of text and position the text frames one by
one. Draw the text frames or set up one text frame the way you want it and then duplicate it.
1 Place the insertion point in the main text flow or click in the page margin. If a book window is active, select the
documents you want to affect.
2 Choose Format > Page Layout > Column Layout.
If the layout is asymmetrical (for example, with a different number of columns, or a different inside or outside
margin on the left and right master pages), an alert message asks whether you want to proceed. To retain the
asymmetry, change the layout directly on the master pages.
3 To change the margins, enter the values in the Margins area. The margins and the gap (space) between columns
determine the individual column width.
4 To change the number of columns or the gap between columns, enter new values in the Columns area.
All columns will be the same width and will be separated by a uniform gap.
66
5 Click Update Entire Flow. If the new column width is too narrow to accommodate some anchored frames or tables
in the document, an alert message asks whether you want to proceed. If you click OK, you can manually resize the
tables and frames.
More Help topics
“Changing page layout on specific pages” on page 69
“Add a template text frame on a master page” on page 70
“Adding text frames on body pages” on page 70
Headers, footers, and other background text
You set up headers and footers by displaying master pages and typing text in background text frames. The contents of
background text frames appear on body pages, but you can only edit them on master pages. The headers and footers
might include the page number, date, chapter number and title, section number and title, author, revision number,
and draft release (such as preliminary and final).
Header and footer text frames on master page
Last updated 9/27/2011
Page 73

USING FRAMEMAKER 9
Templates and Page Layout
You create and edit header and footer text as you do any other paragraph text. You can apply paragraph and character
formats, add and move tab stops, and add graphics such as a line above or below the text. In addition, you can add
system variables for information such as the page number or the current date, and you can change the size and
placement of the header and footer text frames. When you modify these text frames on a master page, FrameMaker
automatically updates any body pages that use that master page.
You can also add other background text on master pages. For example, in the FrameMaker fax template, the
informational headings are in a background text frame on the master page.
A
B
Background text frames
A. Informational headings in background text frames B. Template text frame
67
More Help topics
“Entering header or footer information” on page 68
Creating and modifying background text frames
When you create a new, blank document, FrameMaker creates background text frames for headers and footers on the
left and right master pages. To make it easy to add centered and right-aligned information in headers and footers,
FrameMaker automatically adds center and right tab stops at the center of the text frame and at the right margin. You
can draw background text frames for additional header and footer information or for other background text.
Note: You can create single lines of background text by using the Text Line tool, but you can’t apply paragraph formats
to the text or insert variables in it.
Add a background text frame on a master page
1 Draw the text frame by using the Text Frame tool.
2 In the Add New Text Frame dialog box, click Background Text and click Add. The new text frame, like all text
frames for background text on master pages, is untagged.
3 Double-click in the text frame to place the insertion point, and then insert the header, footer, or other background
text.
Resize or move a background text frame
1 Select the text frame by Control-clicking the text frame.
2 Do any of the following:
• To resize the text frame, drag a handle.
• To move the text frame, drag its border (not a handle).
Last updated 9/27/2011
Page 74

USING FRAMEMAKER 9
Templates and Page Layout
Entering header or footer information
You can create simple headers and footers by typing text in the header and footer text frames on the master pages. In
addition, you can specify items such as the current chapter and page numbers, the document’s total page count, and
the current date. FrameMaker displays a system variable in the header or footer on the master page and replaces it with
the correct value on each body page that uses that master page.
You can also create running headers and footers in which the text changes from page to page. In the following figure,
the running header contains the current section heading; the footer contains the page number and some text typed
directly into the background text frame.
Running headers and footers
68
To create running headers and footers, you insert running header/footer variables in background text frames on
master pages.
Enter text, page numbers, dates, and other information
1 On a master page, click in the header or footer where you want to add information.
2 Do any of the following:
• To insert static text, type the text.
• To insert system variables, access the Variables pod and double-click the variable name in the Variables scroll
list. You can insert any system variable, such as:
Numbering for book components Volume Number, Chapter Number, Section Number, or Sub Section
Number
Page numbers Current Page # or Page Count
Date information Current Date (Long), Current Date (Short), Modification Date (Long), Modification Date
(Short), Creation Date (Long), or Creation Date (Short)
Other variables Chapter Title Name, Filename (Long), Filename (Short), Table Continuation, or Table Sheet
• To insert user variables, access the Variables pod and double-click the variable name (if already defined) in the
Variables scroll list.
To add centered information in headers and footers, press Tab to move the insertion point to the centered tab stop.
To add right-aligned information, press Tab again to move the insertion point to the right-aligned tab stop.
More Help topics
“System variables” on page 80
“User variables” on page 82
Last updated 9/27/2011
Page 75

USING FRAMEMAKER 9
Templates and Page Layout
Changing page layout on specific pages
You can create an asymmetrical layout by adding or changing text frames directly on the master pages. For example,
you may want the left margin to be wider than the right on both left and right pages. Or you may want a single-column
layout on the left page and a two-column layout on the right. You can even create a layout that contains columns with
different widths or with different gaps by using several text frames on a page—one text frame for each column.
About layout overrides
When you make changes on a master page, FrameMaker automatically updates all body pages using that master page.
When you make layout changes on a body page (for example, by changing the number of columns, the gap between
columns, or the margins), you create an override to its master page’s layout. You can then do any of the following:
• Update the master page and all corresponding body pages with your changes.
• Create a new master page based on the body page changes.
• Do neither of the above, leaving the override as a one-time-only page layout.
More Help topics
“Updating body and master page layouts” on page 70
“Create custom master pages” on page 57
69
“Creating one-time-only page layouts” on page 71
Change margins and column layout on specific pages
The following steps always produce either a single-column layout or a multi column layout with equal-width columns.
If you want to create a multi column layout with unequal column widths or gaps, use one text frame for each column,
and position the text frames one by one.
1 Select the text frame whose margins you want to change by Control-clicking the frame.
2 Choose Format > Customize Layout > Customize Text Frame.
3 Do the following:
• To change the margins, specify the new size and position in the Unrotated Size and Offset From areas. The
Offset From Top and Offset From Left options specify the top and left margins. The bottom and right margins
are then determined by the text frame’s width and height.
• To change the number of columns or the gap between columns, change the values in the Columns area.
4 Click Set.
Another way to change the margins is to select a text frame and then drag a resize handle. When you resize a multi
column text frame, the column widths change to fit within the text frame, but the column gap remains the same.
More Help topics
“Add a template text frame on a master page” on page 70
“Adding text frames on body pages” on page 70
Last updated 9/27/2011
Page 76

USING FRAMEMAKER 9
Templates and Page Layout
Add a template text frame on a master page
For a master page to contain unequal-width columns of text, or to set up the layout for a newsletter or other document
in which the articles don’t flow continuously from the first page to the last, you use multiple text frames—one for each
column. For example, for a page with two unequal-width columns, you would add a second template text frame. You
can add a template text frame by drawing it or by duplicating an existing one.
1 To draw the text frame, use the Place A Text Frame tool on the Graphics Toolbar. To draw more than one text
frame, draw them in the order you want them connected.
2 In the Add New Text Frame dialog box, click Template For Body Page Text Frame, and choose a tag from the Flow
Tag pop-up menu. Choose the current flow tag, unless you’re setting up a text frame for a different flow in a
multiflow document.
3 In the Columns area, specify the number of columns in the text frame and (if it’s more than 1) the gap between
adjacent columns. If you’re setting up a layout with unequal-width columns, set the number of columns to 1,
because you use a separate text frame for each column.
4 Click Add.
5 Move the text frame as needed.
To copy an existing text frame, select the frame, choose Edit > Copy, and then choose Edit > Paste. FrameMaker copies
the text frame, its contents, and its properties (including the flow tag).
70
Adding text frames on body pages
When you draw a text frame on a body page, you are prompted for the number of columns and the gap between them.
However, FrameMaker does not assign a flow tag and does not connect the text frame to existing text frames on the
page. To use the new text frame as part of the document’s text flow, connect it to the flow. If the new text frame is the
first one in the flow, also select Autoconnect so that new pages will be added automatically as needed.
More Help topics
“Connect text frames” on page 77
Updating body and master page layouts
You can change template text frames on more than one master page and then update all corresponding body pages in
one step. However, if you make column layout changes on a body page, you must update the corresponding master
page before you can update the other body pages that use that master page.
Before FrameMaker updates body pages, it checks whether any body pages have column layouts that override their
master page. If any pages contain layout overrides, you specify whether to keep the overrides.
Update body pages with master page changes
1 After making layout changes on master pages, display body pages.
2 If FrameMaker displays an alert message, specify whether to keep or remove layout overrides, and then click
Continue. If you keep layout overrides, FrameMaker updates those body pages with the master page’s background
text and graphics, but does not update the template text frames.
Update a master page with body page changes
1 Choose Format > Page Layout > Update Column Layout. A message asks you to confirm the master page and body
pages that are to be updated.
2 Click Update.
Last updated 9/27/2011
Page 77

USING FRAMEMAKER 9
Templates and Page Layout
3 If FrameMaker displays an alert message, specify whether to keep or remove layout overrides on the pages being
updated, and then click Continue.
More Help topics
“About layout overrides” on page 69
Creating one-time-only page layouts
You may need to change the layout of only one body page in a document. For example, you can make a text frame
longer to fit one more line of text on the page, or shrink a text frame to make room for a graphic placed directly on the
body page. When you change the column layout of a body page without updating the master page, you create a layout
override.
More Help topics
“Change margins and column layout on specific pages” on page 69
“Adding text frames on body pages” on page 70
Align text across columns
71
Balance text across columns
In a layout that uses a multi column text frame, you can balance the text across columns that aren’t full of text—for
example, columns on partly empty pages that precede forced page breaks, and columns on the last page of a document.
You can balance text across columns throughout a text flow or in an individual text frame.
Balancing off and on
Balance text across columns throughout a text flow
1 If a document window is active, place the insertion point in the main text flow or click in the page margin. If a book
window is active, select the documents you want to affect.
2 Choose Format > Page Layout > Column Layout.
3 Select Balance Columns and click Update Entire Flow.
Balance text across columns in a single text frame
❖ Click in the text frame and choose Format > Customize Layout > Customize Text Frame.
Select Balance Columns and click Set.
Last updated 9/27/2011
Page 78

USING FRAMEMAKER 9
Templates and Page Layout
Feather text to the bottom of text frames
When FrameMaker feathers text, it first adds space between paragraphs, up to a limit that you set. If more adjustment
is necessary, it adds space between lines, up to another limit that you set. FrameMaker does not feather the text in a
text frame in which text runs around graphics.
Before and after feathering
In a multi column text frame that contains straddles—paragraphs, tables, or anchored frames—FrameMaker adds
vertical space to align the last baselines of text in adjacent columns above each straddle.
72
Before and after feathering with straddling
When text is feathered, the display of pages may be slower. For this reason, you may want to feather text only after you
finish editing a document.
1 If a document window is active, place the insertion point in the main text flow. If a book window is active, select
the documents you want to affect.
2 Choose Format > Page Layout > Line Layout.
3 Select Feather, and enter the maximum amount of space FrameMaker can add between lines (Maximum Interline
Padding) and between paragraphs (Maximum Inter-Pgf Padding).
FrameMaker won’t exceed the padding limits you set. If it’s not possible to feather text in a column without
exceeding the limits, FrameMaker does not feather text in that column.
4 Click Update Flow.
Note: Feathering leaves room for the largest possible descender in the largest font size used in the line, even if no character
with such a descender actually appears. If the last line in a column seems too high, check to see whether the column
contains a nonprinting character (such as an anchor symbol) in a font that’s larger than that of the surrounding text.
Synchronizing baselines
When you synchronize (align) text in a flow, FrameMaker creates an invisible grid in each text frame and aligns the
baseline of the first line of each specified paragraph to the grid. FrameMaker also aligns the first line after an anchored
frame and tries to align the first line in each column.
Last updated 9/27/2011
Page 79

USING FRAMEMAKER 9
Templates and Page Layout
Note: If feathering and synchronization are both on for a flow, feathering takes precedence over synchronization.
However, the first lines in the columns are synchronized with each other.
Before and after synchronizing
Because headings in large fonts often appear at the tops of columns, you can specify a first-line synchronization limit.
This limit controls whether the baseline of a heading is placed on the first grid line when the heading falls at the top of
a column, even when the heading’s default font is larger than the grid can accommodate. To place the baseline of a
heading on the first grid line, FrameMaker lets the heading extend above the top of the column as shown in the
illustration. FrameMaker does not synchronize font sizes larger than the limit you set.
73
Synchronize baselines across columns
1 Check the paragraph formats of the paragraph types you want to synchronize to make sure they all have the same
default font size and line spacing. Fixed line spacing should be on.
2 Click in the flow you want to synchronize (or select the documents in the book that you want to affect) and choose
Format > Page Layout > Line Layout.
3 Select Baseline Synchronization and turn off Feather.
4 In the Synchronization area, enter the line spacing you want to use for the text frame grid in the Synchronize Pgf’s
With Line Spacing Of text box. Use the same line spacing as in the paragraphs you want to synchronize. Otherwise,
FrameMaker won’t synchronize the paragraphs with the text frame grid.
5 In the First-Line Synchronization Limit text box, enter the largest font size to align at the top of a column. For
example, suppose the line spacing for body paragraphs is 12 points, the column grid is 12 points, and the headings
are 18 points. If you want the headings to be aligned when they appear at the top of a column, specify 18 as the firstline limit.
6 Click Update Flow. Because no descenders appear above the first line in a column, the first grid line is offset from
the top of the column a distance equaling two-thirds of the specified line spacing.
Synchronize baselines in adjacent text frames
If the tops of adjacent text frames start at different positions on a page, you may need to adjust their tops to line up
their grids.
❖ Line up the grids by resizing adjacent text frames so that the distance between their tops is evenly divisible by the
grid. For example, if the grid is 12 points, you can start a text frame 144 points (12 times 12 points) from the top of
an adjacent text frame.
Last updated 9/27/2011
Page 80

USING FRAMEMAKER 9
Templates and Page Layout
74
PLATE BOUNDARIES
A. Grid spacing B. Distance evenly divisible by the grid
1
B
A
Use the snap grid to correctly position the text frames. To do so, specify a snap grid equal to the text frame grid.
Then resize the text frames until their tops snap to the grid.
Multiflow documents
A document can have separate text flows, each with its own text frame connections. For example, a bilingual document
may contain side-by-side translations of the same text.
When a text frame fills in a multiflow document, you can tell FrameMaker not to add a new page. That way, you can
add pages yourself and control the connections. Because each flow’s autonumbering is independent of the numbering
in other flows, you can maintain separately numbered lists, headings, and figure titles for each flow.
Set up a multiflow document
About text flows and flow tags
A text flow is a series of connected text frames through which the text flows in a document. Most documents have a
single text flow, from the first page to the last, in which FrameMaker handles the text frame connections automatically.
You make the text frame connections yourself only for documents in which you need to weave several text flows
together—for example, with a newsletter in which you need to continue a front-page article on the back page, skipping
over other articles on the intervening pages.
The current text frame’s flow tag appears in the Tag area of the status bar.
Tag area of status bar
Set up a side-by-side flow
You set up a document with side-by-side text flows by laying out and connecting the text frames on the master pages.
Because the text frame connections are the same throughout the document, you usually don’t need to make further
changes on the body pages.
1 Set up the flows on one of the master pages. Use a text frame for each flow and assign a different flow tag to each
text frame. Make sure that Autoconnect is on for each flow so that FrameMaker adds a new body page whenever
text reaches the end of one of the flows.
Last updated 9/27/2011
Page 81

USING FRAMEMAKER 9
Templates and Page Layout
75
A
Left and right master pages for a side-by-side flow
B
A
B
2 Repeat the previous step for the remaining master pages. All master pages should have the same flow tags.
Otherwise, FrameMaker won’t alternate properly between the left and right master pages when adding body pages.
Important: To create a new body page correctly when text reaches the bottom of a text frame, the appropriate left or
right master page must contain all of the flow tags on the current body page. If any flow tag is missing, FrameMaker
creates the new page with the current body page’s master page instead.
3 Update the body pages with the master page changes by displaying body pages.
More Help topics
“Add a template text frame on a master page” on page 70
“Change a flow’s tag or Autoconnect setting” on page 77
Set up a flow for a newsletter or magazine
You set up a newsletter or magazine that requires nonparallel, multiple flows by establishing a column layout on the
master pages. However, the master pages act only as the basic layout grid. You resize, delete, connect, and disconnect
the text frames on the body pages until they look right. This approach gives you the greatest flexibility in determining
the way text flows through the document.
Note: If you’re creating a newsletter or magazine that has articles that flow consecutively from the first page to the last,
you don’t need to use the techniques described here. Instead, you can use a single text flow. You can create special effects
by making text run around graphics, and by making paragraphs, tables, and frames straddle columns. For an example of
this technique, see the newsletter template provided with FrameMaker.
1 Decide on the number of columns, and place that number of single-column text frames on each master page. All of
the text frames should be in the same flow. You’ll use these text frames as the layout grid within which you’ll have
text flow.
AAA
First master page
Last updated 9/27/2011
Page 82

USING FRAMEMAKER 9
Templates and Page Layout
76
AAA
Left and right master pages with the same flow
2 Turn off Autoconnect so that FrameMaker won’t automatically add pages.
3 Update body pages with the master page changes by displaying body pages.
4 On each body page, resize, disconnect, and connect text frames as necessary. Don’t update the master pages as you
AAA
make changes on the body pages.
5 To synchronize text baselines in the newsletter, make sure the text frames are placed appropriately. If the document
contains several text flows, synchronize baselines for each flow.
6 Manually create new disconnected body pages as necessary.
7 Connect text frames between pages as necessary.
More Help topics
“Add a template text frame on a master page” on page 70
Control the flow of text
A flow’s basic properties are its Autoconnect setting and its flow tag. In a document with one flow or parallel flows,
Autoconnect is usually on to tell FrameMaker to add a new page whenever the flow’s text frames are full. The new page
takes the column layout of the appropriate master page (left or right), and the text frames on the new page are
automatically connected to the text frames on the original pages.
When working on a document with nonparallel, multiple flows, you’ll usually turn off Autoconnect. This allows you
to add a new, disconnected body page wherever you want, and to control the connections between it and existing
pages. If Autoconnect is off, and if the flow contains more text than it can hold in its text frames, the text overflows at
the end of the last text frame in the flow. The bottom border of an overflowing text frame appears as a solid line when
borders are visible.
Overflowing text frame
Last updated 9/27/2011
Page 83

USING FRAMEMAKER 9
Templates and Page Layout
If you try to type in an overflowing text frame, you’ll hear a beep. Overflowing text is not deleted; it’s just hidden from
view. As soon as you connect the overflowing text frame to another text frame, the hidden text reappears in the next
text frame.
If you need to assign a flow tag (for example, when creating side-by-side text flows), you can do so at any time. (In a
new, blank document, the main flow is tagged A.) You need to assign a tag only once for a flow. After that, connecting
a text frame to the flow assigns the tag to the text frame. If you change the flow tag or the Autoconnect setting in one
text frame in a flow, the change is made to the entire flow.
Change a flow’s tag or Autoconnect setting
You normally change flow tags and the Autoconnect setting on master pages. If two text frames are connected, you
must disconnect them before you can change one of their flow tags.
1 Click in a text frame in the flow.
2 Choose Format > Customize Layout > Customize Text Frame.
3 Enter a tag for the flow in the Flow Tag text box. You should keep flow tags short so they won’t obscure other
information in the Tag area of the status bar. You can’t assign a tag that is already used on the current page.
Note: If you want two text frames on a page to have the same flow tag, connect the text frames.
4 If you want FrameMaker to add a new page when you fill the last column on a page, select Autoconnect.
5 Click Set.
77
More Help topics
“Connect text frames” on page 77
“Disconnect text frames” on page 78
Add a new, disconnected page
In documents with one main flow or two parallel flows, you normally don’t add disconnected body pages; you let
FrameMaker add connected pages automatically when necessary. In a multiflow document in which Autoconnect is
off, or in other specialized documents, you can add new, disconnected body pages. When the text reaches the end of a
text frame, you add a new page and connect the text frames.
1 From a body page, choose Special > Add Disconnected Pages.
2 Choose the location and number of pages you want to add.
3 Choose a master page from the Use Master Page pop-up menu and click Add.
Delete disconnected pages
When you delete disconnected pages in a multiflow document, FrameMaker also deletes the pages’ contents.
1 Click in a page you want to delete and choose Special > Delete Pages.
2 Specify the first and last disconnected pages you want to delete and click Delete. If you want to delete only one page,
enter its page number in both text boxes.
Connect text frames
When two text frames are connected, the text flows from the end of the first text frame to the beginning of the second.
You can connect a text frame on a master page to any other text frame on the same master page, and you can connect
a text frame on a body page to any text frame on any body page. You can also connect a text frame in the middle of a flow.
Last updated 9/27/2011
Page 84

USING FRAMEMAKER 9
Templates and Page Layout
When you connect two text frames, FrameMaker assigns the first text frame’s flow tag to the second frame. If the first
text frame is untagged, the second frame’s tag is used. That way, all connected text frames belong to the same flow and
have the same tag. If the first text frame contains overflowing text, the text flows into the second frame when you make
the connection.
1 Select the two text frames in the order in which you want text to flow. To select the text frames, Control-click the
text frames.
If the text frames are on different pages, the first frame is deselected when you select the second one, but
FrameMaker keeps track of the first selection.
Note: To add a text frame to the middle of a flow, first select the text frame you want to add, and then select the frame
that should follow it.
2 Choose Format > Customize Layout > Connect Text Frames. If the first text frame you selected isn’t on a page that’s
currently visible, an alert message asks whether you want to connect to that frame.
Disconnect text frames
You disconnect text frames when you want to create separate flows—for example, to place an article in a specific
location in a newsletter, or to create a pull-quote. If you need to start a new flow in the middle of a column, you can
split the text frame that contains the column in two, and then disconnect the two text frames.
78
You can disconnect a text frame from the preceding text frame, the following one, or both. You can also remove a text
frame from the middle of a flow.
Disconnecting text frames does not affect existing text in the frames. To move text to a different text frame, cut and
paste it after disconnecting the frames.
Note: When you disconnect text frames on the same body page, FrameMaker creates separate flows with no flow tags.
When you disconnect text frames on different body pages, FrameMaker creates separate flows with the same flow tag. In
either case, if you’re creating a newsletter-type document where Autoconnect is off for each flow, the flow tags don’t
matter. FrameMaker won’t create new pages automatically and, thus, won’t need to make text frame connections.
1 Select the text frame you want to disconnect by Control-clicking the text frame.
2 Choose Format > Customize Layout, and then choose Disconnect Previous, Disconnect Next, or Disconnect Both.
Remove a text frame from the middle of a flow
1 Select the text frame immediately preceding the one you want to remove. To do this, Control-click the text frame.
2 Select the text frame immediately following the text frame you want to remove.
3 Choose Format > Customize Layout > Connect Text Frames. If the first text frame you selected isn’t on a page that’s
currently visible, an alert message asks whether you want to connect to that frame.
Split or unsplit text frames
You can split a text frame in two, and then disconnect the two text frames to start a new flow. For example, you may
want a new article with its own flow to start in the middle of a text frame.
Last updated 9/27/2011
Page 85

USING FRAMEMAKER 9
Templates and Page Layout
79
A
A
AA
The second of three text frames is split, disconnected from the first text frame, and retagged.
A
BB
Split text frames
1 Click in the line above where you want to split the text frame and choose Format > Customize Layout > Split Text
Frame. FrameMaker splits the text frame below the line that contains the insertion point, creating two separate but
connected text frames.
2 Select the bottom text frame by Control-clicking the text frame.
3 Disconnect the text frame from the previous one by choosing Format > Customize Layout > Disconnect Previous.
If the flow was tagged, FrameMaker removes the flow tag. If Autoconnect was on before you disconnected the text
frames, it is now off for both text frames.
4 Resize the text frames as necessary.
Unsplit text frames
• If you haven’t made any other changes since splitting the text frame, choose Edit > Undo.
• If you made another change but you haven’t yet disconnected the two text frames, delete the lower frame and then
resize the remaining text frame to the size of the original unsplit frame.
• If you have already disconnected the two frames, cut the text from the second text frame and paste it at the end of
the first text frame. Then delete the second text frame and resize the first one to the size of the original unsplit frame.
If you need to turn Autoconnect back on or reassign a flow tag for the text flow, use Format > Customize Layout >
Customize Text Frame.
Cross-reference a disconnected text frame
When an article in a newsletter or magazine continues from one page to another, you can use cross-references to tell
the reader where to turn to continue reading and to indicate where the end of the article is continued from.
Indicate where the flow continues, and where it is continued from.
1 Resize the two text frames to make room for the cross-references. Drag the bottom of the first text frame upward
and the top of the continuation text frame downward.
Last updated 9/27/2011
Page 86

USING FRAMEMAKER 9
Templates and Page Layout
2 Draw a small text frame below the text frame on the first page, and another above the text frame on the continuation
page. Don’t connect either text frame to any other text frame.
3 Insert a cross-reference in the empty text frame on the first page, referring to the continuation page of the article.
4 Insert a cross-reference in the empty text frame on the continuation page, referring to the first page of the article.
Tracking a text flow
In a document with many flows, it’s easy to lose sight of where a flow continues. You can zoom out to see more of a
text flow or move from one text frame in a flow to the next.
1 Zoom out to 25% and adjust the window size to see as many pages as necessary.
2 Click in the flow you want to check and choose Edit > Select All In Flow. The flow is highlighted, showing how it
traverses the pages of the document.
3 To move through a flow’s text flow’s text frames, do one of the following:
• To display the next connected text frame, click in the last line of a text frame and press the Down Arrow key.
• To display the preceding connected text frame, click in the first line of a text frame and press the Up Arrow key.
80
Variables
About variables
You can include text that frequently changes and appears often in your document as variables. Variables are also useful
for providing information that is updated automatically, such as the current date. In FrameMaker, you have system
variables and user variables. System variables are maintained by FrameMaker, such as current date or filename. User
variables are variables that you define in FrameMaker, such as company name or product name.
System variables
Each system variable has a name and a definition. Although you cannot rename system variables, you can edit their
definitions. A system variable definition can contain the following items:
• Building blocks for system information, such as the month, day, year, and filename
• Text characters, such as the comma and the spaces that appear in the date May 1, 2010
• Building blocks for character format changes
For example, the Table Sheet variable that appears in a table title as (Sheet 3 of 5) has the following definition.
A
B
A. Text you type B. Building blocks
Last updated 9/27/2011
Page 87

USING FRAMEMAKER 9
Templates and Page Layout
You can change the definition—the way the information is displayed—by adding, removing, or rearranging building
blocks and by editing the text in the definition. For example, you can change the format used to display the current
date.
The most common way to use system variables is in document templates as part of background text frames, such as
headers and footers. A background text frame is on a master page and doesn’t have a flow tag. For example, the Current
Page # and Running H/F variables can reside only in a background text frame on a master page. The values of these
variables appear on the corresponding body pages. You can use system variables to create running headers and footers
that contain chapter titles, section headings, or information that changes from page to page.
System variable names appear on master pages.
81
FrameMaker provides values on body pages.
The values of system variables inserted on master pages are updated automatically. However, if you place a system
variable on a body or reference page, the value is updated only when you open or print the file.
You can also manually update the value of the variable when the file is open. Access the Variables pod and click
Update.
Note: Variables and variable names support the Unicode text encoding standard.
Default values for system variables
System variable Default definition (US English version) Example of display
Current Page # <$curpagenum> 3
Page Count <$lastpagenum> 18
Current Date (Long) <$monthname> <$daynum>, <$year> October 11, 2010
Current Date (Short) <$monthnum>/<$daynum>/<$shortyear> 10/11/10
Modification Date (Long) <$monthname> <$daynum>, <$year>,
<$hour>:<$minute00> <$ampm>
September 24, 2011, 10:48 am
Last updated 9/27/2011
Page 88

USING FRAMEMAKER 9
Templates and Page Layout
System variable Default definition (US English version) Example of display
Modification Date (Short) <$monthnum>/<$daynum>/<$shortyear> 9/24/11
Creation Date (Long) <$monthname> <$daynum>, <$year> July 1, 2010
Creation Date (Short) <$monthnum>/<$daynum>/<$shortyear> 7/1/10
Filename (Long) <$fullfilename> c:\Memos\Staffing.fm
Filename (Short) <$filename> Staffing.fm
Table Continuation (Continued) (Continued)
Table Sheet (Sheet <$tblsheetnum> of <$tblsheetcount>) (Sheet 1 of 2)
Volume Number <$volnum> 3
Chapter Number <$chapnum> 3
Section Number <$sectionnum> 3
Sub Section Number <$subsectionnum> 3
Chapter Title Name <$chaptertitlename> Cyclonic storms
Running H/F 1 <$paratext[Title]> The Turbulent Oceans
82
Running H/F 2 <$paratext[Heading1]> Threat of Extinction
Running H/F 3 <$marker1> Plate tectonics
Running H/F 4 <$marker2> Volcanoes
Running H/F 5–12 <$paratext[paratag]> Lava
You can use the <$chaptertitlename> variable to propagate the folder name in the template associated with the folder.
More Help topics
“Add a folder” on page 292
User variables
Each user variable has a name and a definition. A definition includes text and optional building blocks for the character
format of the text. For example, suppose you define a variable as follows:
<BookTitleFormat>The Earth Sciences
If the BookTitleFormat character format is defined as italics, this variable appears on the page as The Earth Sciences.
You can change the definition of any user variable, for example, when the book title changes. When you change the
definition, all occurrences of the variable in your document are updated to use the new definition.
The standard templates don’t provide any user variables. If you’re using one of these templates, create your own user
variables. If you’re using a template created at your site, perhaps it already includes some user variables.
Valid variables in structured documents
You can add a system variable to a structured flow, with or without a special variable element. You do not use special
variable elements for user variables but insert them directly in elements defined for text.
The following building blocks in running header/footer variables are used in elements:
Last updated 9/27/2011
Page 89

USING FRAMEMAKER 9
Templates and Page Layout
Building block Meaning
83
<$elemtext[tag]> The text (up to the first paragraph break), excluding its autonumber, but including any
<$elemtextonly[tag]> The text (up to the first paragraph break), excluding its autonumber and any prefix and
<$elemtag[tag]> The tag of the source element
<$elemparanum[tag]> The entire autonumber of the first paragraph of the element.
<$elemparanumonly[tag]> The autonumber counters of the first paragraph, including any characters between
<$attribute[AttributeName]> The value of the attribute with the specified name (or, if no value is specified, the
<$attribute[AttributeName:ElementName]> The value of the attribute of the specified element (example, structured book element)
prefix and suffix specified in the element definition.
suffix specified in the element definition.
them.
default value)
Variables in FrameMaker are exported as entities, and usually the entity name is the same as the variable name.
However, if you create a variable whose name is not a valid XML or SGML name, the entity name is not the same as
the variable name.
Here are some examples of invalid names:
• A name with multibyte (Asian-language) characters.
• A name that includes anything other than alphanumeric characters, hyphens, or periods.
• A name containing more characters than the number specified by the value of NAMELEN in the XML or SGML
declarations for the particular application.
Working with variables
Variables pod
You can use the Variables pod to insert, edit, or delete system and user variables.
Last updated 9/27/2011
Page 90

USING FRAMEMAKER 9
Templates and Page Layout
A B C D E F G H I
J
K
L M
Variables pod
A. Select the file B. Insert a variable in your document C. Create a new user variable D. Edit a variable definition E. Delete a user variable
F. Convert a variable to text G. Update all system variables H. Refresh the pod data I. Search for a variable J. System variables K. User
variables L. Variable format M. Document in which the variable exists
84
More Help topics
“Using pods” on page 20
Insert a variable
You can insert most system variables on a body, reference, or master page.
1 Access the Variables pod from View > Pods > Variables.
2 Click to place the insertion point where you want the variable to appear in the document. If you’re inserting the
Current Page # variable or a running header/footer variable, click in a background text frame on a master page.
3 Double-click a variable from the Variables pod to insert it in your document. Alternatively, click the Insert icon on
the pod toolbar.
The Variables pod contains the variables allowed at the insertion point in the document. For example, if the
insertion point is in a text frame on a body page, the scroll list doesn’t contain the Current Page # variable. If the
insertion point is in a text frame on a master page, then more variables are displayed in the Variables pod.
In most cases, the value of a variable inserted on a master page appears on both the master and the corresponding body
pages. However, if you insert the Current Page # variable, a number sign (#) appears on the master page, and the actual
page number appears on the body page. If you insert a running header/footer variable, the variable name appears on
the master page, and the value appears on the body page.
Insert variable elements in structured documents
You can use an element to insert a variable in a structured flow. You can also insert a variable directly in text, without
using a special variable element. For example, you can include the Chapter Title Name as part of a body element.
FrameMaker comes with a set of system variables. The format rules of a variable element determine which variable to
use with it. You cannot change a system variable element to use a different variable.
Last updated 9/27/2011
Page 91

USING FRAMEMAKER 9
Templates and Page Layout
The values of system variables you insert are updated when you open or print the document. You can also update
system variables manually. (System variables in headers or footers are updated when the page is redisplayed.)
1 Click where you want to insert the variable.
2 Select a system variable element in the Element Catalog and click Insert.
3 If the Attributes for the New Element dialog box appears, enter attribute values for the element and click Insert
Element.
The current value of the variable appears at the insertion point. A bubble for the variable appears in the Structure
View, with a text snippet that shows the beginning of the variable text.
4 To update all variables in the current document, click Update on the pod toolbar. To update variables in all open
documents, first select All Open Docs and then click Update on the pod toolbar.
If your application has user variables already defined, you can insert variable elements in your document. You can
insert a user variable directly in text, without using a variable element. Perhaps your application has user variables
already defined. You can define and maintain other user variables as needed. If the value of a user variable changes, it
is updated automatically wherever it occurs.
Edit or delete a variable occurrence
If a variable is added to a master or reference page, you cannot edit its occurrence in the body pages. In the master or
reference page, you can swap the variable with another variable or edit the variable definition. If you edit a variable
definition, then all occurrences of the variable in the document are updated.
85
Alternatively, you can convert a variable to editable text and then edit the text in the document. If you convert the
variable to text, however, the text is no longer updated when the variable definition changes.
You can delete variable occurrences from a body page but you cannot delete a variable included in the header or footer
of a master page from the body page. Also, backspacing the insertion point over a variable in the document doesn’t
delete the variable. You can remove or edit a variable in the following ways:
• To delete one occurrence of a variable:
1 Select the variable name from the Variables pod and click Edit.
2 From the Add/Edit Variables panel or the Edit System Variables panel, select the instance from the Location list
and click Delete.
• To copy or move a variable, select it and choose Edit > Copy, Edit > Cut, or Edit > Paste.
• To replace a variable, select the variable in the Document view, and then double-click a different variable in the
Variables pod.
• To delete a variable in a text inset, delete the variable in the source document.
Note: Deleting a variable definition converts all occurrences of the variable in your document to editable text.
Convert a variable to text
1 Select the variable, click Convert To Text from the Variables pod.
2 Do one of the following:
• To convert a single occurrence of a variable, click Selected Variable.
• To convert all occurrences of a particular variable, select the variable in the Variables Named scroll list. For
structured documents, you can also choose the variable element tag from the Variables With Element Tag popup menu.
• To convert all variables in the document, click All Variables.
Last updated 9/27/2011
Page 92

USING FRAMEMAKER 9
Templates and Page Layout
3 Click Convert.
Import variable definitions
❖ To import variable definitions from another document, choose File > Import > Formats.
Update variables across all files in a book
1 Update the variables in one document from the book.
2 Select all the remaining files in the book and choose File > Import > Formats.
Create a user variable
A user variable is useful for a product name that can change or for a long manual name that is difficult to type each
time. You can add a new variable and edit its definition from the Add/Edit Variable panel.
A
B
86
C
F
G
D
E
I JH
Add or edit existing user variable definitions from the Add/Edit Variable panel
A. Name of the new variable or variable selected in the Variables pod B. Specify or edit the format definition for the variable C. Select from the
list of building blocks to define the variable format D. Name of the file that contains the selected variable instance in the Variables pod
E. Location list displays the location of the selected variable in the document. It displays the page number and the headings under which it
appears F. Add a new user variable G. Edit the definition of a variable H. Highlights the selected variable in the Document view. Select an
instance from the Location list and click this button. I. Refreshes the data in the Location list J. Deletes the selected variable instance selected
in the Location list from the document.
If you don’t specify a character format in the variable definition, the variable uses the format at the insertion point. If
you change the character format for the variable, the change applies only to the variable, not to the text that follows.
1 Click Create New User Variable from the Variables pod.
2 Enter the name and definition of the variable. Use these guidelines:
• Variable names are case-sensitive.
• The complete definition, including typed text and character formats, can be up to 255 characters long.
• You cannot use system variable building blocks for user variables.
• To include an angle bracket in a variable definition as text, precede it with a backslash (\).
Last updated 9/27/2011
Page 93
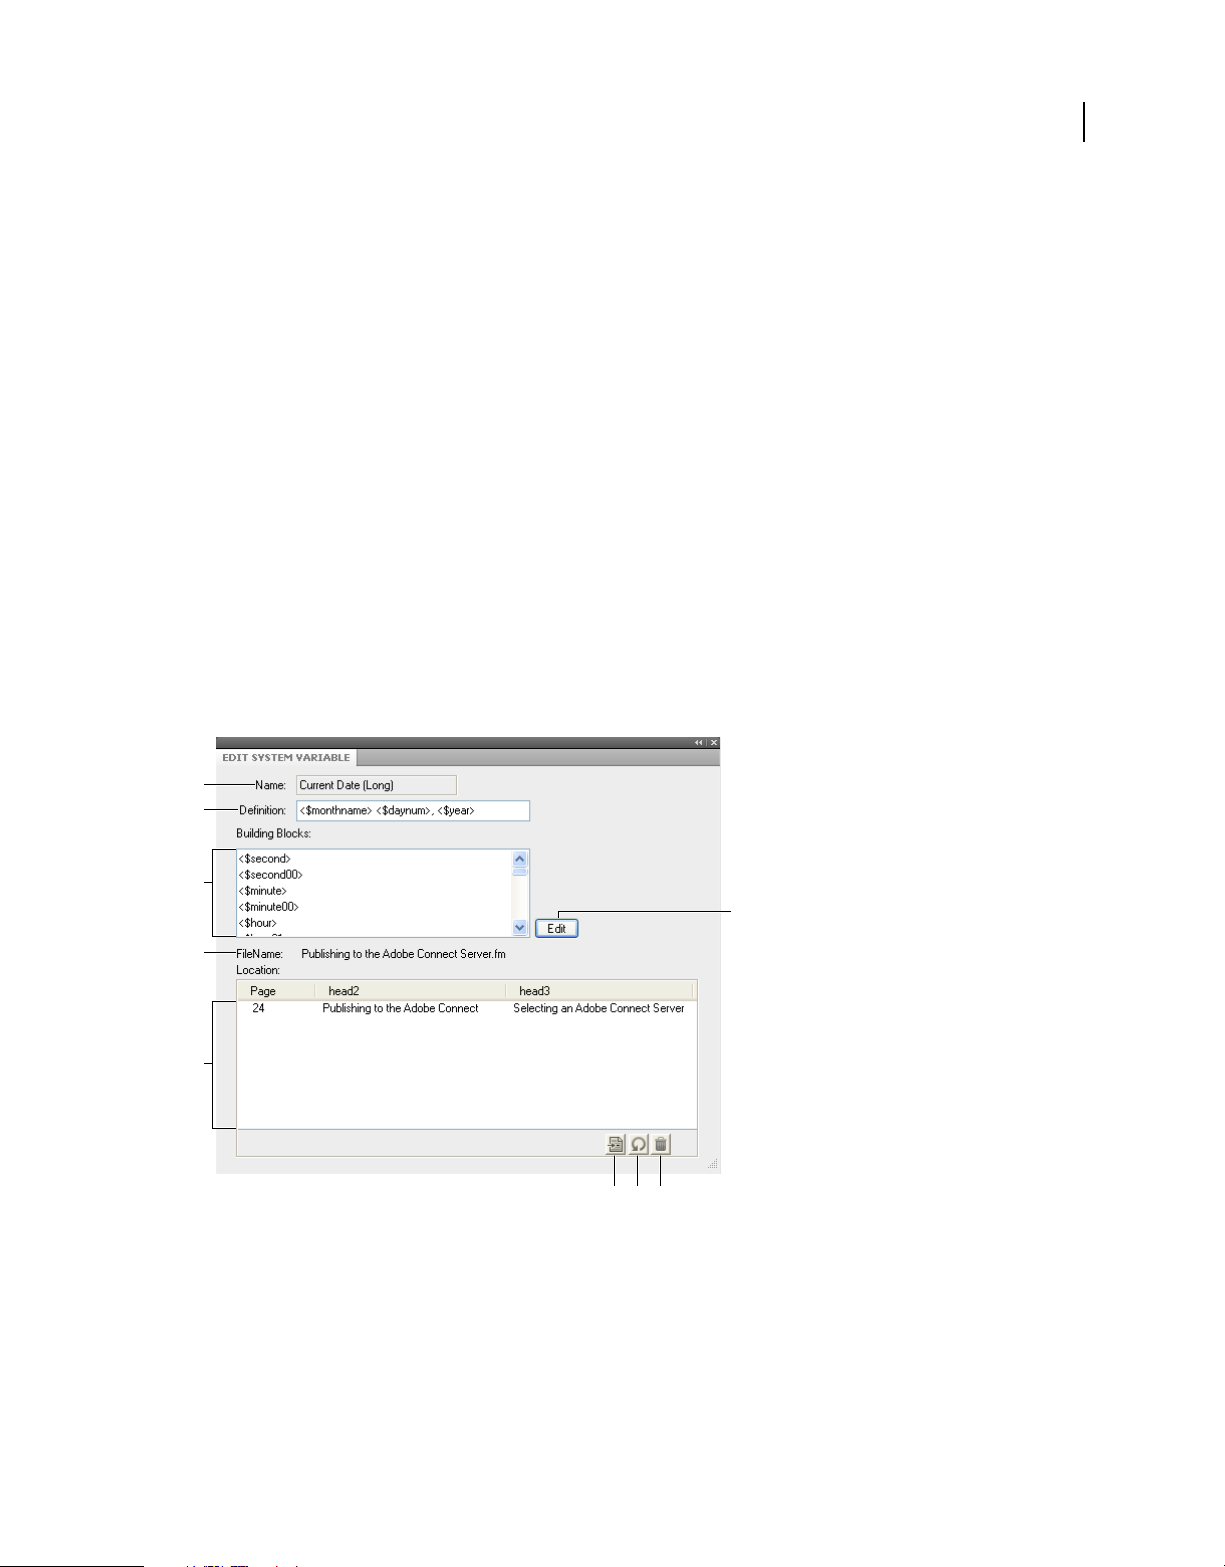
USING FRAMEMAKER 9
Templates and Page Layout
• Enter a sequence of characters beginning with a backslash (\).
• To create a multiline variable such as multiline address, append \r for each line. Do not press Enter to insert a
line break.
3 To change the character format within the variable definition, do the following:
• To use a character format stored in the Character Catalog, place the insertion point in the Definition box where
you want to change the character format. Then click the character format in the Character Formats scroll list.
The scroll list includes all the formats in the Character Catalog of the current document.
Important: Don’t use a character format whose tag includes angle brackets.
• To return the character format to the paragraph default font at the end of the variable, place the insertion point
in the Definition box where you want to change the character format. Then click <Default Font> in the
Character Formats scroll list.
4 Click Add.
5 To add more user variables, repeat steps 3 through 5.
Edit a variable definition
You can edit both system variables and user variables. For a system variable, you can edit its format by changing its
building blocks in the Edit System Variable panel. To do so, select the system variable in the pod and click the Edit
button.
87
A
B
C
F
D
E
H IG
Edit system variable definitions from the Edit System Variable panel
A. Name of the variable selected in the Variables pod B. Displays the format definition for the variable C. Select from the list of building blocks
to define the variable format D. Displays the name of the file that contains the selected variable instance in the Variables pod E. Location list
displays the location of the selected variable in the document. It displays the page number and the headings under which it appears F. Edits the
definition of the selected variable G. Highlights the selected variable in the document. Select an instance from the Location list and click this
button. H. Refreshes the data in the Location list I. Deletes the selected variable instance selected in the Location list from the document.
If the variable is in a header or footer on a master page, redisplay a body page to see the updated definition.
For user variables, you can change the variable name and the variable format from the Add/Edit Variable panel.
Last updated 9/27/2011
Page 94

USING FRAMEMAKER 9
Templates and Page Layout
A
B
C
F
G
D
E
I JH
Add or edit existing user variable definitions from the Add/Edit Variable panel
A. Name of the new variable or variable selected in the Variables pod B. Specify or edit the format definition for the variable C. Select from the
list of building blocks to define the variable format D. Name of the file that contains the selected variable instance in the Variables pod
E. Location list displays the location of the selected variable in the document. It displays the page number and the headings under which it
appears F. Add a new user variable G. Edit the definition of a variable H. Highlights the selected variable in the Document view. Select an
instance from the Location list and click this button. I. Refreshes the data in the Location list J. Deletes the selected variable instance selected
in the Location list from the document.
88
Note: If a variable is in a text inset that uses the source document formats, change the variable definition in the source
document.
1 Select the variable from the Variables pod and click Edit .
2 Do one of the following:
• For user variables, edit the variable name or change its definition in the Add/Edit Variable panel and click Edit.
• For system variables, edit the definition and click Edit.
Insert a building block for system-supplied information or for a character format at the insertion point. Click
the building block in the Building Blocks scroll list. Only the building blocks appropriate for the variable appear
in the scroll list. For example, <$fullfilename> and <$filename> appear for the filename variables. All the
character formats in the Character Catalog appear at the bottom of the scroll list.
All instances of the variable in the document are updated with the new format.
Changing definitions of date and time variables
FrameMaker includes both long and short versions of variables for the current date, the date the document was last
modified, and the document creation date. FrameMaker provides the following building blocks for date and time
variables.
Last updated 9/27/2011
Page 95

USING FRAMEMAKER 9
Templates and Page Layout
Building block What it displays Example
89
<$second>
<$second00>
<$minute>
<$minute00>
<$hour>
<$hour01>
<$hour24>
<$ampm>
<$AMPM>
<$daynum>
<$daynum01>
<$dayname>
<$shortdayname>
<$monthnum>
<$monthnum01>
<$monthname>
<$shortmonthname>
<$year>
<$shortyear>
Seconds 8 or 32
08 or 32
Minutes 8 or 32
08 or 32
Hours 8 or 12
08 or 12
08 or 22
Morning or evening designation am or pm
A.M. or P.M.
Number of the day 8 or 28
08 or 28
Name of the day Monday
Mon
Number of the month 8 or 12
08 or 12
Name of the month August
Aug
Year 1997
97
FrameMaker uses the language of the current paragraph to determine the language used in date and time variables.
For example, the current day name variable sometimes appears as Wednesday in an English paragraph but as Miercoles
in a Spanish paragraph. If you change the language of a paragraph, the system variables in the paragraph are updated
to use the new language.
If your system supports the typing of Japanese text in documents and dialog boxes, the following additional building
blocks are available for Japanese dates.
Building block Example
<$daynumkanjikazu>
<$daynumkanjinumeric>
<$monthnumkanjikazu>
<$monthnumkanjinumeric>
<$imperialyear> 1 or 10
<$imperialyear01> 01 or 10
<$imperialyearspecialkanjikazu>
or
or
or
or
or
Last updated 9/27/2011
Page 96

USING FRAMEMAKER 9
Templates and Page Layout
Building block Example
90
<$imperialyearspecialkanjinumeric>
<$imperialyearkanjikazu>
<$imperialyearkanjinumeric>
<$imperialera>
or
or
or
Japanese dates appear in a variable when the variable uses a Japanese font family and the Language property is set to
Nihongo.
Creating variables for running headers and footers
A running header/footer variable gives information about the contents of a page and can change from page to page.
Running header/footer variables can include the number and title of the current chapter, the name of the current firstlevel section, or the current page number.
You can also use the <$chapnum> , <$volnum>, <$sectionnum>, or <$subsectionnum> building blocks to add
chapter, volume, section, or sub-section numbers to headers and footers.
About running header/footer variables
Running headers and footers use common system variables and 12 system variables provided especially for running
headers and footers.
Running header/footer variables sometimes reference a paragraph with a particular tag—usually a title or heading
paragraph—or marker text. You can use these variables with their default definitions. You can also customize them by
changing the tag that appears in the variable definition.
You insert a running header/footer variable in a background text frame on a master page in the same way that you
insert variables elsewhere.
By default, the Running H/F 1 and Running H/F 2 variables use definitions that reference the Title and Heading 1
paragraph tags, respectively. The Running H/F 3 and Running H/F 4 variables use definitions that reference markers.
The Running H/F 5–12 variables use definitions that reference paragraph tags you specify. You can change these
default definitions either before or after you insert the variable.
Running headers and footers based on paragraph tags
The following table contains examples of running headers and footers that reference paragraph tags.
Running header/footer variable
definition
<$paratext[Head1]> The text of the first paragraph that
<Header><$paratext [Head1]> The text of the first paragraph with the tag
<$paranum[SectTitle]> The complete autonumber of the first
Explanation Examples of display
Types of plate boundaries
FrameMaker finds with the tag Head1
TYPES OF PLATE BOUNDARIES
Head1 (The text appears in the Header
character format—uppercase, italic letters.)
Chapter 2
paragraph with the tag SectTitle
Last updated 9/27/2011
Page 97

USING FRAMEMAKER 9
Templates and Page Layout
91
Running header/footer variable
definition
<$paranumonly[SectTitle]> The autonumber counters for the first
<$paratag[Chapter]> The tag of the first paragraph with the tag
<$paratext[SectTitle, AppendixTitle]> The text of the first paragraph with either
Explanation Examples of display
2
paragraph with the tag SectTitle
Chapter
Chapter
PLATE TECTONICS
the SectTitle or AppendixTitle tag
Displaying paragraph text, tags, or autonumbers
The most common use of running headers and footers is to show the text, autonumber, or tag of paragraphs with a
specified tag. For example, a running header perhaps shows the current section heading or chapter number.
FrameMaker searches each body page to find a paragraph with the specified tag. Then it places the paragraph text,
autonumber, or tag in the running header or footer for that page. If a page doesn’t contain a paragraph with the
specified tag, FrameMaker searches backward through the preceding pages and uses information from the first
appropriate paragraph it finds.
The following building blocks in running header/footer variables reference a paragraph tag.
Building block What it displays
<$paratext[paratag]> The paragraph text
<$paranum[paratag]> The paragraph autonumber, including any text in the autonumber format
<$paranumonly[paratag]> The paragraph autonumber counters, including any characters between them
<$paratag[paratag]> The paragraph tag
Follow these guidelines for using paragraph tag building blocks:
• Don’t use a paragraph tag that includes brackets.
• Replace paratag in the building block with the tag of the paragraph for which you want to display information.
Don’t delete the brackets.
• You can include more than one paragraph tag in the [paratag] part of a building block. When you include multiple
paragraph tags, FrameMaker uses the first paragraph it finds with one of the tags. Separate the tags with commas,
as in the following example: <$paratext[Head1, Head2]>
Display text from a marker
If the text you want for a header or footer doesn’t appear in its own paragraph, you can show text associated with a
marker. For example, you can use a marker to show an abbreviated version of a title or to summarize the contents of
a page. When text symbols are visible, marker symbols indicate the location of markers.
Page header contains abbreviated heading.
Last updated 9/27/2011
Page 98

USING FRAMEMAKER 9
Templates and Page Layout
In this example, the marker in the heading contains the marker text Plate boundaries. A running header/footer variable
then displays the marker text in the page header.
You can use two marker types for running headers or footers: Header/Footer $1 and Header/Footer $2.
1 Insert a Running H/F variable in the header or footer on a master page. By default, the Running H/F 3 and Running
H/F 4 variables use definitions that look for markers.
2 Edit the definition of the variable to use a <$marker1> or <$marker2> building block. The <$marker1> building
block displays the text of a Header/Footer $1 marker. The <$marker2> building block displays the text of a
Header/Footer $2 marker.
3 Display a body page and click where you want to insert a marker.
4 Choose Special > Marker.
5 In the Marker dialog box, choose either Header/Footer $1 or Header/Footer $2 from the Marker Type pop-up
menu, enter the marker text, and click New Marker. When you enter the marker text, make sure that the spaces,
punctuation, and capitalization are as you want them.
Note: You can’t format marker text in the Marker Text box. To format the marker text, insert a character-format
building block before the marker building block in the system variable definition.
Display a condition tag
In a document that uses conditional text, you can show a condition tag that appears on the current page in the running
header or footer. A predefined variable is not included for this purpose. You can redefine any of the existing running
header and footer variables to use the condition tag building block. Unlike the system variables that reference a
paragraph or a marker, variables with the condition tag building block search only on the current page.
92
1 Insert a Running H/F variable in the header or footer on a master page.
2 Edit the definition of the variable to use the <$condtag [hitag, … ,lotag,nomatch]> building block.
Replace hitag, lotag, and the ellipsis with one or more condition tags you want FrameMaker to find. Replace
nomatch with the text you want to display if FrameMaker doesn’t find one of the tags in the definition. If you don’t
want to display any text when no match exists, enter a nonbreaking space (a backslash followed by a space) in place
of nomatch.
FrameMaker searches a page for the condition tags you specify. If it finds one of the tags, the tag appears in the running
header or footer. If it finds more than one tag, the tag that appears first in the definition appears as the value of the
variable.
Display the security level
If your document contains classified information, you can use condition tags in running headers or footers to display
the highest security level on a page.
1 Apply condition tags, such as Top Secret and Secret, to the classified information.
2 Set up headers or footers to include these tags on pages that contain classified information. For example, define the
building block as <$condtag[Top Secret,Secret,Unclassified]>. This building block displays Top Secret on pages
that contain both Top Secret and Secret information and Unclassified on pages that contain neither condition tag.
Create a dictionary-style header or footer
You can use dictionary-style headers or footers to show the range of information that appears on one body page or on
two facing body pages. Dictionary-style headers or footers appear frequently in documents such as dictionaries,
indexes, and glossaries.
Last updated 9/27/2011
Page 99

USING FRAMEMAKER 9
Templates and Page Layout
Headers show first entry on left and last on right.
1 Insert a different running header/footer variable in the header or footer of each of two facing master pages.
2 Edit the definition of the variable on the left master page to use the <$paratext[paratag]> building block. Replace
paratag with the paragraph tag of dictionary terms.
3 In the same way, edit the definition of the variable on the right master page to use the <$paratext[+,paratag]>
building block. The plus sign (+) tells FrameMaker to find the last paragraph on the page matching the tag rather
than the first paragraph.
93
Templates
When you set up a template, you lay out master pages, define and apply formats, and define special text, such as crossreference formats and variables.
For templates you create, set up a template folder that contains the related templates as well as a document that
describes the templates and how to use them.
Design the page layout
1 Create a new document. You can start with either a custom new document or a copy of an existing document you
plan to modify.
To see how facing pages look as you design the page layout, display them side by side. Choose View > Options, and
then choose Facing Pages from the Page Scrolling pop-up menu. Make the document window larger and zoom out,
if necessary, to fit both pages in the window.
2 Define the column layout. If you started with a custom document, you have already specified the margins and the
number of columns. If you’re modifying an existing document, you may want to change the column layout.
3 Add and name any custom master pages you’ll need.
4 Enter background text and graphics on the master pages, including headers and footers.
If a running header or footer shows the text or an autonumber of a document paragraph, such as a chapter or
section title, it contains a Running H/F variable that refers to the paragraph. To set this up, decide what the tag for
that paragraph will be.
5 Define the custom document properties, such as numbering and text options, and specify the view options.
Designing text formats
After designing the page layout, define how you want the text to be formatted:
• If your document will be opened or printed on computers other than your own, use fonts that are widely available.
Last updated 9/27/2011
Page 100

USING FRAMEMAKER 9
Templates and Page Layout
• Paragraph formats provide the foundation of text formatting, so set them up before setting up the character
formats.
• When creating a character format, set all the options in the Character Designer as As Is, and then specify only the
settings you want to change. This way, the format will work with any paragraph format.
• Use tags that express the purpose rather than the appearance of the text. For example, name a format for
emphasized text Emphasis rather than Bold. Then if you decide to change to italics for emphasized text, you can
redefine the Emphasis format without having to retag any text.
• Use names that are easily recognizable. For example, you might name the formats for numbered lists Step1 and
StepNext rather than st1 and stn. Or, if you want to use the keyboard to apply paragraph and character tags, consider
naming your tags st1 Step1 and stn StepNext. That way the tags and descriptions are quickly available from the
keyboard.
• If the template uses more than one series of autonumbers, add a series label to the format for each autonumber. For
example, define step autonumbers as S:<n+>, where S: is the series label.
• In paragraph formats, use either Space Above or Space Below consistently to add space above or below the
paragraph. (FrameMaker uses only the larger of the two values to determine the space between paragraphs.)
Standardizing graphics, frames, and tables
If the documents will contain graphics, frames, or tables, follow these guidelines to maintain consistency:
94
• Place standard items on a reference page. You can include graphics that users will need again and again—for
example, a symbol that calls attention to notes and cautions, or an anchored frame with a standard height and
width. Users can copy and paste these items as needed.
• Create a paragraph format for anchored frames to provide consistent spacing around graphics. For example, a
paragraph format named Frame could contain a Space Below setting of 20 points and a Line Spacing setting of zero.
Then, each frame could be anchored to a blank paragraph with the Frame tag. Alternatively, you can use single-cell
tables and their titles for graphics and their captions.
• If you’ll use text frames for graphic callouts, create a paragraph format for the callouts. If you’ll use text lines for
callouts, create a character format. (You can’t apply a paragraph format to a text line.)
• Choose a color model and redefine colors and color views if necessary.
• Prepare standard table formats. Not all the properties you set for tables can be imported into another document.
The width of text in actual tables varies greatly, as do other properties. So, regardless of how you prepare your tables,
users will probably need to adjust some of these properties themselves. Think of your tables as models for users to
start with.
Setting up numbering
The page numbering for new documents is set to Restart at 1. If you’re building a template for continuous page numbering
in books, you may want to set the page numbering in the template to Continue Numbering From Previous Page In Book.
In addition, you may want to set the chapter numbering to Continue Numbering From Previous File In Book.
Define special text and fonts
You may need to do the following to set up special text items:
• Select a footnote numbering style and number format, and other footnote properties.
• Define formats for cross-references. Standardize as much of the cross-reference format as possible. For example, if
cross-references should always be introduced by see, include that word in the format definition.
Last updated 9/27/2011
 Loading...