

Page 1

TM
PC CardPC Card
Your Mobile Broadband Connection
User’s Guide
Page 2

Table of Contents
Table of Contents
1 About ORiNOCO
Kit Contents 1-1
ORiNOCO Network Scenarios 1-3
Peer-to-Peer Workgroup 1-3
■
Home Networking 1-5
■
Enterprise Networking 1-6
■
It’s Easy 1-8
■
ORiNOCO PC Card Features 1-9
ORiNOCO PC Card Types 1-10
■
About the Software CD-ROM 1-12
Optionally Available 1-16
ORiNOCO Adapter Cards 1-16
■
External Antennas 1-16
■
2 Installation for Windows
Introduction 2-1
Insert your ORiNOCO PC Card 2-5
ORINOCO PC Card - User’s Guide
i
i
Page 3

Table of Contents
Install Drivers 2-6
Before You Start the Installation 2-6
■
What You Need to Know 2-6
■
Driver Installation for Windows 95/98 2-7
■
Windows Network Properties 2-9
■
Set Basic Parameters 2-11
Basic Settings for Enterprise Networks 2-13
■
Basic Settings for Residential Gateways 2-15
■
Basic Settings for Peer-to-Peer Workgroups 2-17
■
Finish the Installation 2-19
After Restarting Your Computer 2-20
■
3 Using ORiNOCO and Windows
Introduction 3-1
Using your PC Card 3-2
Radio Antennas 3-2
■
Removing the PC Card 3-2
■
Maintenance of your PC Card 3-4
■
View Other Computers 3-5
Using the Client Manager 3-7
View Wireless Link Quality 3-7
■
View/Modify PC Card Set tings 3-9
■
Finding More Information 3-11
ii
ORINOCO PC Card - User’s Guide
Page 4

4 Advanced Configuratio ns
Introduction 4-1
Encryption Parameters Tab 4-1
■
Advanced Parameters Tab 4-3
■
Admin Parameters Tab 4-4
■
Table of Contents
A Card Specifications
Physical Specifications A-1
■
Power Characteristics A-1
■
Networking Characteristics A-2
■
Radio Characteristics A-3
■
ORiNOCO Fixed Wireless PC Card A-9
■
Supported Frequency Sub-bands A-9
■
Can I Upgrade ORiNOCO Cards? A-11
■
B Troubleshooting
Introduction B-1
Common Troubleshooting Tips B-2
LED Activity B-2
■
Can Not Connect To The Network B-5
■
Windows Operating Systems B-7
Generic Problems B-7
■
Hardware Conflict B-10
■
Upgrading the ORiNOCO Miniport Driver B-20
■
Removing the Miniport Driver B-28
■
MS-DOS Systems B-31
Error Messages B-31
■
ORINOCO PC Card - User’s Guide
iii
Page 5

Table of Contents
C Installation for Windows CE
Introduction C-1
Installing the ORINOCO Driver C-3
■
Using ORiNOCO with Windows CE C-6
■
Modifying Configuration Parameters C-7
■
D Installation for MS-DOS
Introduction D-1
What You Need to Know D-1
■
Driver Types D-2
■
Installation Overview D-2
■
Copy the ORiNOCO Software D-4
Setup the WaveCAD Program D-5
Card & Socket Services D-5
■
Intel 82365 PCIC D-6
■
Install the Network Client Software D-10
Setup the ORiNOCO Parameters D-11
DOS ODI Driver Configuration D-11
■
Packet Driver Configuration D-21
■
Finishing Installation D-28
Advanced Options D-30
Dual Card Configuration D-30
■
Start-up Menu Configuration D-30
■
iv
ORINOCO PC Card - User’s Guide
Page 6

E Installation for Apple MacOS
Introduction E-1
Before you start... E-2
■
Installing the ORiNOCO Driver E-3
Install PC Card Software E-3
■
Installing Networking Protocols E-5
■
Enabling your ORiNOCO PC Card E-6
■
Customize PC Card Settings E-8
Basic Parameters E-9
■
Advanced Parameters E-12
■
Encryption Settings Window E-14
■
Using ORiNOCO with PowerBooks E-15
Monitoring Wireless Performance E-15
■
Modifying Configuration Parameters E-16
■
Removing the ORiNOCO PC Card E-16
■
Removing the ORiNOCO Driver E-17
F Installation for Windows NT
Introduction F-1
Installing the ORiNOCO Driver F-3
Overview F-3
■
Starting Installation F-3
■
Enabling PCMCIA Services F-5
■
Enabling Network Support F-6
■
Table of Contents
ORINOCO PC Card - User’s Guide
v
Page 7

Table of Contents
Warranty Repair Card
About Warranty and Repair W-1
■
Limited Warranty W-2
■
Technical Support
List of Figures
List of Tables
Index
vi
ORINOCO PC Card - User’s Guide
Page 8

About ORiNOCO
1
Kit Contents 1
The ORiNOCO PC Card kit includes the items as pictured in Figure 1-1:
a. One ORiNOCO PC Card.
b. Transparent protective casing
(for storing your PC Card while not in use).
c. The “OR IN O CO PC Card - Gettin g Started” guide
d. The ORiNOCO Software CD-ROM.
Figure 1-1 ORiNOCO Kit Contents
ORINOCO PC Card - User’s Guide
1-1
Page 9

About ORiNOCO - Kit Contents
The printed document “ORINOCO PC Card - Getting Started” is an abstract
of the “ORINOCO PC Card - User’s Guide”.
NOTE:
In order to extend the life of the PC Card hardware it is advised to
store the card in the protective casing whenever carrying the
computer on travel without operating the device.
1-2
ORINOCO PC Card - User’s Guide
Page 10

About ORiNOCO - ORiNOCO Network Scenarios
ORiNOCO Network Scenarios 1
The ORiNOCO PC Card Kit enables you to:
Connect your computer to a Peer-to-Peer workgroup of wireless
■
computing devices (see Figure 1-2 on page 1-4).
Connect your computer to a Small Office/Home Office (SOHO) network
■
that includes a Lucent Technologies Residential Gateway (RG) access
point (see Figure 1-3 on page 1-5).
Connect your computer to a Local Ar ea N etwork (LAN) Infrastruct ur e
■
that includes Lucent Technologies ORiNOCO AP-1000s
Points), or other IEEE 802.11 compliant LAN systems (see Figure 1-4 on
page 1-6 and Figure 1-5 on pag e 1-7).
Expand the capabilitie s of your AP-1000s, to suppor t wirel ess devices
■
that have been equipped with ORiNOCO PC Cards.
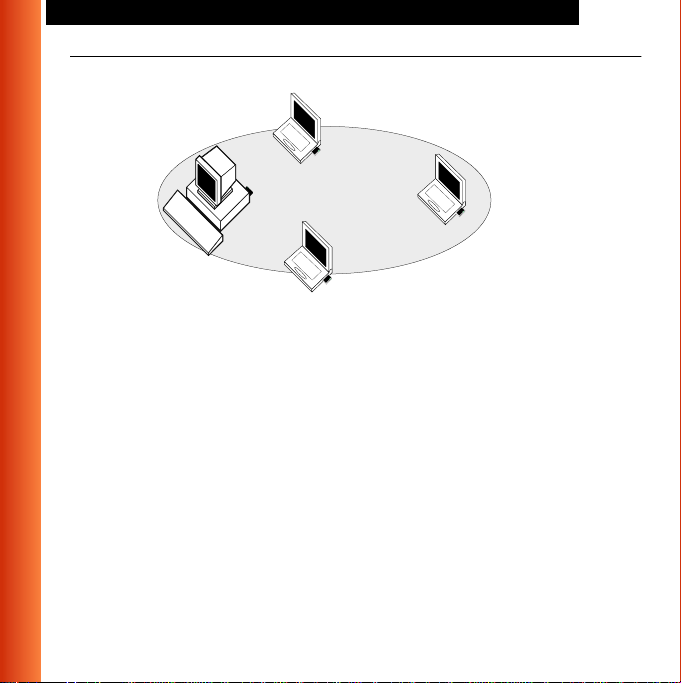
Peer-to-Peer Workgroup 1
The Peer-to-Peer workgroup configuration enables you to quickly set up a
small wireless workgroup, where the workgroup participants can exchange
files using features like “Files and Printer Sharing” as supported by Microsoft
Networking.
1
(Access
1 The AP-1000 is formerly identified as WavePOINT-II AP.
ORINOCO PC Card - User’s Guide
1-3
Page 11
About ORiNOCO - ORiNOCO Network Scenarios
Figure 1-2 Peer-to-Peer Wireless Workgroup
You can use this option to set up a temporary or ad-hoc network in
environments where no acc ess poi nt s are available (for example in Small
Office/Home Office (SOHO) environments).
As long as the stations are w ithin range of one another, this is the easiest
and least expensive way to set up a wir eless network.
1-4
ORINOCO PC Card - User’s Guide
Page 12

About ORiNOCO - ORiNOCO Network Scenarios
Home Networking 1
With the Lucent Technologies ORiNOCO Resident i al G at eway (RG),
wireless access to the Int ernet or other computers is at your fingertips.
Figure 1-3 C onnect to a Residential Gateway (RG)
All you need to do is connect the wireless computers to the ORiNOCO
Resident i al Gateway (RG), and you ar e r eady to:
Share files and printer s, and
■
Access the Inter net via t he built-i n m odem of the RG.
■
Optionally the RG allows you to connec t your wirel ess stations to previously
installed wired computers and/or an external cable, an xDSL or a ISDN
modem.
ORINOCO PC Card - User’s Guide
1-5
Page 13

About ORiNOCO - ORiNOCO Network Scenarios
Enterprise Networkin g 1
Figure 1-4 Stand Alone Wireless LAN
With the ORiNOCO AP-1000 you can connect to a corporate Local Area
Network (LAN) infrastructure to have wireless access to all network facilities.
LAN Infras t r uctures may either be:
Stand-alone wireless LANs as pictured in Figure 1- 4.
■
Wireless network infrast r uctures connected to an existing E th ernet
■
network as pictured in Fig ur e 1- 5 on page 1-7.
1-6
ORINOCO PC Card - User’s Guide
Page 14

About ORiNOCO - ORiNOCO Network Scenarios
Figure 1-5 LAN Infrastru cture
ORINOCO PC Card - User’s Guide
1-7
Page 15

About ORiNOCO - ORiNOCO Network Scenarios
It’s Easy 1
The ORiNOCO PC Card functions like any standard wired Ethernet card, but
ORiNOCO does not need any wires!
Where an Ethernet card requires a cable connect ion t o a hub and/or patch
panel, the cable physically ties you down to the location of t he w ired
connection.
ORiNOCO allows you to connect your computer to a Local Area Network
(LAN) system from anywh er e wi th in the w irel ess coverage area. Expanding
or re-designing your network is easy: Add or relocate AP-1000s, power-up
your (new) ORiNOCO computers, and you’re done!
Unlike Ethernet, ORiNOCO will enable you to roam throughout the network
while remaining connected to the LAN.
NOTE:
The ORiNOCO PC Ca rd is a radio product. Refer to the flyer
“Information to the User” for regulatory information that may apply in
your country.
1-8
ORINOCO PC Card - User’s Guide
Page 16

About ORiNOCO - ORiNOCO PC Card Features
ORiNOCO PC Card Features 1
The ORiNOCO PC Card is a wireless network PC Card that fits into any
standard PC Card Type II slot.
The ORiNOCO PC Card has two LED ind ic at or s an d two int egrated
antennas. Optionally you can use the ORiNOCO PC Card in combination
with an external antenna (s ee page 1-16).
Figure 1-6 The ORiNOCO PC Card
a. Integrated Antennas
b. Transmit/ Receive LED
Off - No wireless activity
■
Blinking - Sensing/transmitting wireless data
■
c. Power ON/OFF LED
Solid Green - standar d operational mode
■
Blinking Green - Power Management mode
■
d. Connector for optional External Antenna (see “Ex te rnal Antennas” on
page 1-16).
ORINOCO PC Card - User’s Guide
1-9
Page 17

About ORiNOCO - ORiNOCO PC Card Features
ORiNOCO PC Card Types 1
The ORiNOCO PC Card is a wireless network PC Card that complies with
the IEEE 802.11 standard on wireless LANs (Revision B). The ORiNOCO
PC C ard support s data rates up to 11 Mbit/s and is available in two variants:
ORiNOCO Silver Label, and
■
ORiNOCO Gold Label.
■
Both types of ORiNOCO PC Cards are:
Wi-Fi (Wireless Fidelity) certified by the Wireless Ethernet
■
Compatibility Alliance (WECA). This means that your
ORiNOCO hardware will communicate with other vendors’
IEEE 802.11 compliant wireless LAN products.
Fully compatible with any other wireless LAN system based
■
on Direct Sequence Spre ad Spectrum (DSSS) radio tec hno lo gy that
complies with the “IEEE 802.11 standard on wireless LANs (Revision
B)”.
Backwards compatible with any other previously released model of the
■
WaveLAN/IEEE product family.
1-10
ORINOCO PC Card - User’s Guide
Page 18

About ORiNOCO - ORiNOCO PC Card Features
Silver Label Cards 1
The ORiNOCO Silver PC Cards supports the following wireless LAN
features:
Automatic Transmit Rate Select mechanism in the transmit range of 11,
■
5.5, 2 and 1 Mbit/s.
Frequency Channel Selection (2.4 GH z) .
■
Roaming over multiple channels.
■
Card Power Management.
■
Wired Equivalent Privacy (WEP) data encryption, based on the 64 bit
■
RC4 encrypt i on al go rithm as defined in the IEEE 802.11 standard on
wireless LANs.
These features are described in more detail in the ORINOCO PC Card -
User’s Guide provided on the CD-ROM.
Gold Label Cards 1
The ORiNOCO Gold PC Cards sup port the sam e funct i onality as the
ORiNOCO Silver cards. The Gold card however provides an enhanced type
of WEP data encr yption, based on the 128 bit RC 4 algorithm.
NOTE:
The ORiNOCO Gold PC Card may not be marketed in all parts of
the world, subject to nat ional legislation or local regulations. For
availability in your country, please consult your authorized
ORiNOCO Reseller.
ORINOCO PC Card - User’s Guide
1-11
Page 19

About ORiNOCO - About the Software CD-ROM
About the Software CD-ROM 1
The ORiNOCO software CD-ROM contains both software and
documentation for all ORiNOCO products in indoor environments.
If you wish to install ORiNOCO driv er softw are, tu rn to Chapter 2 ”Installati on
for Windows” and follow the instructions as described for installing your
ORiNOCO PC Card.
If you wo uld like to explore the conte nts of the CD-ROM, t he contents map
as pictured in Figure 1-7 on page 1-13, may help you find the items you are
looking for:
ORiNOCO User Gui des and other reference documents are located in
■
“D:\Docs\”
Software for ORiNOCO client stations and/or infrastructure products,
■
such as the AP-1000s, are located in “D:\Software\”
1
.
1
.
NOTE:
Prior to copying or installing the software, you are advised to read
the Software License Agreement “License.txt”, located in the root
folde r o f th e C D-ROM. By instal li ng, co pying or usin g th e OR i NOCO
software, you are consenting to be bound by this agre em ent. If you
do not agree to all of the terms of the Software License Agreem e nt ,
do not download, copy or install the ORiNOCO software.
1 The drive letter of your CD-ROM drive may differ from this example.
1-12
ORINOCO PC Card - User’s Guide
Page 20

About ORiNOCO - About the Software CD-ROM
Figure 1-7 Contents of the Software CD-ROM
ORINOCO PC Card - User’s Guide
1-13
Page 21

About ORiNOCO - About the Software CD-ROM
NOTE:
It is the policy of Lucent Technologies to improve products as new
technology, components, software and firmware become available.
Before you proceed with the installation of this product, we
recommend you to consult the ORiNOCO website to:
Verify if newer versions of the sof t ware th at was shi pped with
■
your product are available.
Download and install the latest software with your purchased
■
product.
You can download the latest software and docum entation from
the ORiNOCO website at:
http://www.lucent.com/orinoco
Looking again at Figure 1-7 on page 1 -13 y o u will see tha t the CD-ROM also
includes a folder named “Xtras”. This folder contai ns additional tools, that
may help you install and manage your ORiNOCO Network.
.
1-14
The folder “Acrobat” includes a co py of the
Adobe Acrobat Reader ®,
required to view and/or print the ORiNOCO user documenta tio n inclu ded on
this CD-ROM.
NOTE:
The Adobe Acrobat Reader is owned by and licensed from Adobe
Systems Incor porated. This software is provided “as is.”
ORINOCO PC Card - User’s Guide
Page 22

About ORiNOCO - About the Software CD-ROM
Lucent makes no warranty or representation, express or implied,
relating to the completeness, reliability, effectiveness , accuracy,
performance, or operation of the Adobe software, or as to its
suitability, merchantability or fitness for a particular purpose or
against infringement of intellectual property rights of any party.
For mor e informatio n about Adobe A crobat software, please consult
the Adobe Website at:
http:\\www.adobe.com\acrobat
ORINOCO PC Card - User’s Guide
1-15
Page 23

About ORiNOCO - Optionally Available
Optionally Available 1
ORiNOCO Adapter Cards 1
The Lucent Technologies ORiNOCO solution has been based upon a single
wireless PC Card that can be used in a variety of computing syst em s.
Optionally available are the following adapters for computer systems t hat do
not have a PC Card Type II slot:
ISA and PCI adapter cards, that enable you to use the ORiNOCO
■
PC Card inside desktop co m puters
WaveLAN/EC and WaveLAN/EC-S1 devices, that allow you to connect
■
computer with a standard 10Base-T interface to your ORiNOCO
network.
External Antennas 1
The ORiNOCO PC Card has been provided with two integrated antennas
(see Figure 1-6 on page 1- 9) , wh ic h perform best in an open environmen t
with as few obstacles as possible.
Optionally available are the following types of external antennas :
Range Extender Antenna.
■
Vehicle-M oun t An te nna.
■
1 The WaveLAN/EC-S features an additional Serial Port.
1-16
ORINOCO PC Card - User’s Guide
Page 24

About ORiNOCO - Optionally Available
These antennas have a Lucent Technologies proprietar y connector, that
allows you to connect the card directly to t he socket on the extended side of
the your ORiNOCO PC Card (pictured in Figure 1-6 on page 1-9).
Range Extender Antenna 1
Use the ORiNOCO Range Extender Antenna to ensure optimal transmission
and receiving quality for situations in whi ch t he integrated antennas are
shielded, for example when:
The ORiNOCO PC Card is close to metal surfaces.
■
The ORiNOCO PC Card is inserted into a AP-1000 device or computer
■
that is installed in a “hidden” loc at ion, e.g. under a desk or inside a
cabinet.
Objects like thick stacks of books shield the ant enna.
■
In most situations the ORiNOCO Range Extender Antenna may provide a
performance increas e of up t o 50%.
You can connect the Range Extender Antenna to the ORiNOCO PC Card by
inserting the connector into the socket on the extended side of the PC Card.
To protect the socket from dust, it is shielded with a little cap, that should be
removed prior to connecting the ant enna.
The ORiNOCO Range Extender Antenna has a mounting bracket and a
base for perfect vertical positioning that allows you to put the antenna on top
ORINOCO PC Card - User’s Guide
1-17
Page 25

About ORiNOCO - Optionally Available
of on your desktop compute r, a table or filing cabinet, or to hang it on t he
wall, or cei ling etc.
!
CAUTION:
Many computer monitors today support a degauss option, that can either
be enabled manually by the user, but is often also enabled automatically
whenever you turn on the monitor. The electromagnetic discharge that
may occur when degaussing the monitor may cause damage to the
ORiNOCO equipment.
To avoid damage to your sensitive ORiNOCO equipment, do not place
the Range Extender Antenna on top of, or too close to, your monitor.
Vehicle-Mount Antenna 1
The ORiNOCO Vehic le-Mount Antenna enab les you to connect vehicle s with
an on-board terminal to your LAN infrastructur e.
The ruggedized design of this antenna allows you to mount it on vehicles (for
example fork-lift trucks) that need cont inuo us access to networked data,
whether inside or outsi de of the building.
The Vehicle-Mount Antenna is equipped with a 2.5 m an te nna cable to
connect it directly to the ORiNOCO PC Card.
1-18
ORINOCO PC Card - User’s Guide
Page 26

Installation for Windows
2
Introduction 2
The complete installation of your PC Card and the necessary drivers (for
Windows 95/98) consis t of th e following steps :
1. Insert the ORiNOCO Software CD-ROM and install the Client Manager
software by clicking the
the CD-ROM. (see page 2-3).
2. Insert your ORiNOCO PC Card (see page 2-5).
3. Install drivers (see page 2-6).
4. Set basic parameters (see page 2-11).
5. Finish installation (s ee pa ge 2-19).
This chapter describes the installation of the ORiNOCO PC Card for
Microsoft Windows 95 an d 98 op erat in g syst ems only.
Install Software
button on the start-up screen of
ORINOCO PC Card - User’s Guide
2-1
Page 27

Installation for Windows - Introduction
For other operating systems pleas e consult the following appendices:
Document Operating System
Appendix C Windows CE
Appendix D DOS
Appendix E Apple/MAC OS
Appendix F Windows NT
Readme.txt Linux
NOTE:
If you intend to use the ORiNOCO PC Card in a ORiNOCO
AP-1000
the User Documentation that was shipped with th e device.
Alternatively you can download these documents from the
ORiNOCO website at:
1
(Access Point), or WaveLAN/EC device, please refer to
http://www.lucent.com/orinoco
.
1 The AP-1000 is formerly identified as the WavePOINT-II AP
2-2
ORINOCO PC Card - User’s Guide
Page 28

Installation for Windows - Introduction
Installing the Client Manager Software 2
The ORiNOCO Client Manag er pro gram is a so ftware t ool that you can use
to check the quality of your network connection.
NOTE:
It is not mandatory to install the Client Manager program in order to
establish a network conn ecti on, but it provides you with more
options to:
View/change the settings of your networ k connection.
■
Monitor your network connection.
■
To ins ta ll the C l i ent Mana ger software, proceed as follows:
1. Insert the ORiNOCO software CD-ROM that came with your PC Card kit
in your CD-ROM drive.
Your operatin g system will automaticall y st art the CD and dis play the
menu pictured in Figure 2-1 on pa ge 2-4.
ORINOCO PC Card - User’s Guide
2-3
Page 29

Installation for Windows - Introduction
Figure 2-1 Start-Up Screen ORiNOCO Software CD-ROM
2-4
2. Select button
3. Select
Install Clie nt Ma nager
Install Software
.
.
4. Follow the instructions on your screen.
NOTE:
If the CD-ROM does not start automatical ly :
1. Click the Windows
2. Select
Run
3. Browse to the CD-ROM
4. Select the file “setup.exe”.
ORINOCO PC Card - User’s Guide
Start
button
Page 30

Installation for Windows - Insert your ORiNOCO PC Ca rd
Insert your ORiNOCO PC Card 2
1. Unpack your ORiNOCO PC Card kit and verify that all items are pre sent,
as described in “Kit Conte nt s” on page 1-1.
If any of the items described appear to be damaged or missing, please
contact your supplier.
2. Insert the ORiNOCO PC Card into the PC Card slot of your computer as
pictured in Figure 2-2.
Figure 2-2 Inserting the PC Card into Your Computer
If you want to install the PC Card into a desktop comp ut er, use an
ISA Adapter or PCI Adapter.
ORINOCO PC Card - User’s Guide
2-5
Page 31

Installation for Windows - Install Drivers
Install Drivers 2
Before You Start the Installation 2
Before you start the installation, you are advised to keep the Windows
CD-ROM or software diskettes close at hand. If your computer came with a
factory-installed Windows operating system, these files will be stored on
your computer’s hard disk, in the form of cabinet (*.cab) files.
NOTE:
If you are upgrading from an earlier version of the ORiNOCO
Minipor t driver, please re ad Ap pendix B .
What You Need to Know 2
Installing a ORiNOCO PC Card requires the same level of expertise that you
would need to install a standar d Et hernet networ k ada pt er car d. It is
assumed that you have a working knowledge of st andard Windows 95/98
operations and of installin g net wo r k adapter cards. Refer to the Windows
Help when necessary (on the Windows tas k bar, press the
select
Help
).
Start
button and
2-6
ORINOCO PC Card - User’s Guide
Page 32

Installation for Windows - Install Drivers
Driver Installation for Windows 95/98 2
Windows 95/98 operating systems support “Plug & Play” for PC Cards. Once
you insert the ORiNOCO PC Card into your computer, these operating
systems will automatically:
Detect the card, and enable the ORiNOCO Driver, or
■
Start the
■
Add New Hardware
when the operating system cannot find the required driver.
This would typically occur when inserting the ORiNOCO PC Card into
your computer for the very first time.
To ins ta ll the driver proceed as follows:
1. If Windows starts the
the
New Hardware Found
When you are prompted to locate the driver installation file s:
■
— Select the ORiNOCO CD-ROM that was included with your
PC Card kit and.
— If you downloaded the drivers from the ORiNOCO website
navigate to the folder that matches your Operating s yst em .
Windows 95:D:\Dr ivers\Wi n_95
Windows 98:D:\Dr ivers\Wi n_98
Windows 2000:D:\Drivers\Win_2000
When finished insta lli ng t he drivers, Windows automatically op ens
the
Add/Edit Configuration Profile
wizard and prompt you to install the driver,
Add New Hardware
wizard follow t he instructions of
wizard to install the dr ivers.
window.
ORINOCO PC Card - User’s Guide
2-7
Page 33

Installation for Windows - Install Drivers
2. Continue with setting the basic parameters as described on page 2-11.
NOTE:
If your computer does not detect the new hardware consult
Appendix B.
2-8
ORINOCO PC Card - User’s Guide
Page 34

Installation for Windows - Install Drivers
Windows Net work Properties 2
If this is the very first time that Networking support is installed onto your
computer, the Windows operating system will prompt you to enter a
computer and workgroup name. These names will be used to identify your
computer on the Micros of t Network Neighborhood.
Figure 2-3 Window s N etwork Identification Properties
ORINOCO PC Card - User’s Guide
2-9
Page 35

Installation for Windows - Install Drivers
NOTE:
The screen displayed in Figure 2-3 on page 2-9 w i ll no t ap pear if
network support had not been inst al le d. If so, move to page 2-11
and proceed with setting th e basic parameters.
1. The window will pop-up automatically.
2. In the
3. In the
Computer Name
Workgroup
4. (Optional) Provide a description of the computer in th e
Description
field.
For more information about setting your Windows Network Properties,
consult your Windows docume ntat i on or the Windows on-line help
information.
field, enter a unique name for your computer.
field, enter the name of your workgroup.
Computer
2-10
ORINOCO PC Card - User’s Guide
Page 36

Installation for Windows - Set Basic Parameters
Set Basic Parameters 2
After installing the drivers, Windows will open t he Add/Edit Configuration
Profile window for your ORiNOCO PC Card as pictured in Figure 2-4.
Figure 2-4 Add/Edit Configuration Profile window
The Add/Edit Configuration Prof ile window enables you to specify one or
more network connection profiles.
For example you can setup profiles for:
■
■
■
, to connect to an Enterprise Network via an Access Point.
Office
Workgroup Computing
, to share files with colleagues or friends in small
Peer-to-Peer workgroups without access point.
, to connect to a Residential Gatew a y (RG) that pro vides access to
Home
the Internet or your home printers.
ORINOCO PC Card - User’s Guide
2-11
Page 37

Installation for Windows - Set Basic Parameters
For more information abo ut the different types of networks, refer to
“ORiNOCO Network Scenarios” on page 1-3.
To co nnect your computer to a wireless netwo r k you will need to:
1. Assign a name to the network conn ection profile
2. Use the pull-down menu on the right to select how you wish to connect to
the wireless network.
3. Click the
Edit Profile
button to view/modify the para met er s for the
selected profile.
For first-time installations, you are advised t o se tu p th e si ngle profile using
only the Basic Settings.
NOTE:
The number and type of paramet er s you need to s pec ify may differ
according to the select ed connection type. See page 2-1 3 for
Access Point connection settings and page 2-15 for the Residential
Gateway connection settings.
2-12
For information about various option pr ess the key or click the
F1
button.
ORINOCO PC Card - User’s Guide
Help
Page 38

Installation for Windows - Set Basic Parameters
Basic Settings for Enterprise Networks 2
If you wish to connect to an Enterprise Networ k, use th e Add/Edit
Configuration Profile window to:
Select to connect to an
■
Set the correct
■
Network Name
Access Point
Figure 2-5 Edit Configuration window
.
.
ORINOCO PC Card - User’s Guide
2-13
Page 39

Installation for Windows - Set Basic Parameters
1. In the field
Network Name
define the name of the wirele ss net work to
which you want to connect. You can either use:
■
The value “ANY”
To connect to any ORiNOCO network in the vicinity of your
computer.
■
An “exact” value to connect to
Consult your LAN Administrator for the value that applies to your
network.
The Network Name c an be any alp hanum eric string in the range of
“a” to “z”, “A” to “Z” and “0” to “9” with a maximum of 32 characters
(case-sensitive).
2. Click
to confirm and return to the Add/Edit Conf igurati on Pr of i le
OK
window.
3. Click
again to finish with the insta llat ion as described on page 2-19.
OK
The ORiNOCO Edit Configuration window, also provides you the possibility
to change other parameter s ( Encryption, Advancedan dAdmin parameters).
These parameters are described in the on-line help file of the drivers, and in
Chapter 4.
You are advised to leave these parameters to their default set tings, unless
there are special situations, fo r example, upon advice of an ORiNOCO
expert.
2-14
ORINOCO PC Card - User’s Guide
Page 40

Installation for Windows - Set Basic Parameters
Basic Settings for Residential Gateways 2
If you w ish to conn ect to a Ho me Netw ork vi a a Re side nti al Gat e way, use the
Add/Edit Configuration Profile win dow to:
Select to connect to a
■
Set the correct
■
Residential Gateway
Network Name and Encryption Key
Figure 2-6 Edit Configuration window: Residential Gateway
.
.
ORINOCO PC Card - User’s Guide
2-15
Page 41

Installation for Windows - Set Basic Parameters
1. In the field
Network Name
enter the 6-character RG ID to define the
name of the wireless net wo r k to which you want to connect.
The
Network Name
has to match the unique RG ID (which can be found
on the device).
2. In the
Encryption Key
field enter the last 5 digits of the RG ID (defau l t).
NOTE:
If you changed the default Encryp tion Key on the Residential
Gateway (RG) y o u will need to enter the new value here as well.
3. Click OK to confirm and return to the Add/Edit Conf igurati on Pr of i le
window.
4. Click
again to finish the installation as described on page 2-19.
OK
2-16
ORINOCO PC Card - User’s Guide
Page 42

Installation for Windows - Set Basic Parameters
Basic Settings for Peer-to-Peer Workgroups 2
If you wish to connect to a Peer-to-Peer workgroup, use the Add/Edit
Configuration Profile window to:
Select to connect to a
■
Set the correct
■
Peer-to-Peer Workgroup
Network Name and Encryption Key
Figure 2-7 Edit Configuration window: Peer-to-Peer
.
.
ORINOCO PC Card - User’s Guide
2-17
Page 43

Installation for Windows - Set Basic Parameters
1. In the field
Network Name
define the name of the wirele ss net work to
which you want to connect.
The Network Name can be any alphanumeric string in the range of “a” to
“z”, “A” to “Z” and “0” to “9” with a maximum of 32 characters
(case-sensitive).
If there is al re ady a Peer-to-P eer g ro up wi th this name a v ai lab le yo ur
■
computer will automatically connect to this workgroup.
If there is not yet such a group available, your computer will
■
automatically start one with this name.
2. Click
to confirm and return to the Add/Edit Conf igurati on Pr of i le
OK
window.
3. Click
again to proc eed with the instal l ation.
OK
Continue with “Finish the Installation” on page 2-19 to complete the
installation procedure.
2-18
ORINOCO PC Card - User’s Guide
Page 44

Installation for Windows - Finish the Installation
Finish the Installation 2
When you have finished “Set Basic Parameters”, click the OK button to cl ose
the Add/Edit Configuration wind ow an d to pro ceed with the installation
process. Windows will finish building the driver configuration database a nd
copy some files to your computer’s hard disk.
If the Windows operating system pr om pts you to identify the location of
■
the Windows files, specify the drive and directory of th e Windows
Installation CD-ROM or diskettes.
When you had a PC Card installed on your computer before, most of
these files are already available on your hard disk drive. If you do not
have the Windows CD-ROM available, you may tr y re pl acing the
proposed path in the Copy Files From dialog box with:
“C:\Windows\System” or “C:\Windows\”
If the Windows operating system pr om pts you to identify the location of
■
the ORiNOCO driver files (typically file names starting with the
characters wv*.v) specify the drive and directory of the ORiNOCO
Software:
— if installing from the ORiNOCO CD-ROM specify the drive in one of
the following directories on the ORiNOCO Software CD-ROM.
Windows 95:D:\Drivers\Win_95
Windows 98:D:\Drivers\Win_98
Windows 2000:D:\Drivers\Win_2000
— if installing files that you downloaded from the Internet, point to the
disk drive or directory where you saved the downloaded files.
ORINOCO PC Card - User’s Guide
2-19
Page 45

Installation for Windows - Finish the Installation
When Windows has finish ed the copying of files, it will prompt you to restart
your computer (see Figure 2-8). Clic k the
button to restart your computer.
OK
Figure 2-8 Finished Setting up the Hardware
After Restarting Your Computer 2
After you have restarted your computer, the Windows operating system will
detect the ORiNOCO PC Card (you can hear the two-tone sound of the
PC Card Socket Controller ).
Load the ORiNOCO driver, in a dialog box enter a Windows user name and
password.
The password you enter here will be the one used to login to the Windows
Network Neighbo rh ood.
2-20
ORINOCO PC Card - User’s Guide
Page 46

Installation for Windows - Finish the Installation
Verifying installation 2
To verify if the in st al la t io n of th e drivers was completed success fu lly:
Check if the PC Card icon on the Windows task bar is visible as pictured
■
in Figure 2-9.
Check the LEDs on your PC Card. The following should be visible:
■
— A steady green Power LED to indicate the PC Card is active.
— A flickering green Transmit/Receive LED to indicate wireless activity
while transmitting data.
For other LED behavior see Appendix B.
(Optional) T o check the quality of the network connection, install the
■
ORiNOCO Client Manager program as described in “Installing the
Client M anager Software”.
Figure 2-9 PC Card icon on the Windows task bar
ORINOCO PC Card - User’s Guide
2-21
Page 47

Page 48

Using ORiNOCO and Windows
3
Introduction 3
This chapter provides general information about:
Using your PC Card
■
View Other Computers
■
View Wireless Link Quality
■
View/Modify PC Card Settings
■
ORINOCO PC Card - User’s Guide
3-1
Page 49

Using ORiNOCO and Windows - Using your PC Card
Using your PC Card 3
Radio Antennas 3
The built-in radio and antennas of your OR iN O CO PC Card perform best in
an open environment with as few obstacles as po ssible.
To achieve the maximum range for wireless communications do not
■
cover the card with objects such as bo oks or thick stacks of paper.
If you are using the card inside a de sktop computer you may consider
■
the purchase of the optional Range Extender Antenna.
Removing the PC Card 3
If you do not need the wireless connectivity of your ORiNOCO PC Card, you
can remove the PC Card from its slot as pictured in Figure 3-1.
!
CAUTION:
When removing the ORiNOCO PC Card you will lose your
connection to the network. Prior to removing the PC Ca rd, make
sure you have closed all files and network appl ic at ions (such as
e-mail).
3-2
ORINOCO PC Card - User’s Guide
Page 50

Using ORiNOCO and Windows - Using your PC Card
You are advi sed to always disable the PC Card
prior to removing the card
from the PC Card slot. This will allow the Windows operating system to:
Log off from the network server
■
Disable the ORiNOCO PC Card driver
■
Disconnect power to the PC Card slot (whic h w ill extend batt ery life for
■
mobile computers).
Figure 3-1 Removing the PC Card
To stop using the ORiNOCO PC Card:
1. Click once on the PC Card icon on the right side of the Windows task
bar.
2. Select the option
1 Alternatively, disable the PC Card via the PC Card icon on the Control Panel menu.
Stop ORiNOCO PC Card
1
.
ORINOCO PC Card - User’s Guide
3-3
Page 51

Using ORiNOCO and Windows - Using your PC Card
3. Wait a few seconds until the operating system s di splays a pop-up
message to indicate you can sa fely remove the PC Card.
Maintenance of your PC Card 3
If you are not using the ORiNOCO PC Card for wireless communications,
extend its life by storing it inside the transparent plastic casing that was
shipped with the produ ct .
To cl ean the PC Card, gently wipe it with a soft (da m p) cl ot h.
!
CAUTION:
To avoid damage to the P C Card do no t use abrasive materials, or
rinse the card with liquids.
3-4
ORINOCO PC Card - User’s Guide
Page 52

Using ORiNOCO and Windows - View Other Computers
View Other Computers 3
When multiple ORiNOCO stations are up-and-running in your wireless
network, you can use the proce dur e described below to displ ay the other
computers:
1. Start Windows Explorer.
2. Scroll down the list of files and folders to look for the item
Neighborhood
3. Double-click the
.
Network Neighborhood
item to display all stations in
your Microsoft Networking Group.
4. To display other workgroups in the network environment, double-click the
Entire Network
icon.
If you cannot find other (ORiNOCO) networked computers, verify whether
the other ORiNOCO computers are:
Powered up and logged on to the network.
■
Configured to operate with identical Microsoft Network settings
■
concerning:
— Networking Protocol.
— Wireless Network N am e
— Workgroup Name
Network
ORINOCO PC Card - User’s Guide
3-5
Page 53

Using ORiNOCO and Windows - View Other Computers
To view or modi fy t he
Station Name
or
Workgroup
of your computer, proceed
as follows:
1. Click the button from the Windows task bar.
2. Click on
Settings
, and then on
Control Panel
3. In the Control Panel window, double-click the
4. In the Network Settings window, select the
You can verify and change the
Station Name
.
Network
Identification
or
icon.
Workgroup
tab.
parameters.
NOTE:
You have to restart your computer before changes to the Network
Settings will be effected.
To verify the radio connection with other stations refer to “View Wireless Link
Quality” on page 3-7.
3-6
ORINOCO PC Card - User’s Guide
Page 54

Using ORiNOCO and Windows - Using the Client Manager
Using the Client Manager 3
If you installed the ORiNOCO Client Manager as described in “Installing the
Client Manager Software” on pag e 2- 3, you can use the Client Manager to:
Verify the qual i t y of your wir eless connection to the network.
■
View/Modify the configuration setting s of your wireles s PC Card.
■
The Client Manager will start automatically every time you pow er up y our
computer.
The Client Manager icon is displayed in the “System Tray” of your
Windows task bar at the rig ht -s i de on the bottom of your screen,
indicating that the Client Manager program is running.
Click the icon once with your
■
detailed status overview.
Click the icon once with your
■
more options.
View Wireless Link Quality 3
You can use th e Cl ie nt Mana ger icon on the Windows task bar to verify t he
link quality of your network connection.
An overview of all possible icons is given in Table 3-1. When the
Client Manager icon is not indicat ing excellent or good radio connection, act
as described below.
mouse button to retrieve a more
left
mouse button to display a menu with
right
ORINOCO PC Card - User’s Guide
3-7
Page 55

Using ORiNOCO and Windows - Using the Client Manager
Table 3-1 Client Manager Icon
Icon Description Color
Excellent radio connection Green
Good radio connection Green
3-8
Marginal radio connection:
Yellow
The radio signal is weak. Move closer to the:
ORiNOCO AP-1000, or
■
ORiNOCO Base Station
■
Poor radio connection:
Red
The radio signal is very weak. Save your files and move
closer to the:
ORiNOCO AP-1000, or
■
ORiNOCO Base Station
■
No radio connection because:
Looking for initial connection, or
■
You have moved out of range of the network.
■
Red
Peer-to-Peer network connection Blank
ORINOCO PC Card - User’s Guide
Page 56

Using ORiNOCO and Windows - Using the Client Manager
View/Modify PC Card Settings 3
If you would like to view or modify ORiNOCO parameter s, for example
because you would like to connect to another netwo r k or type of network,
proceed as follows:
1. Right-click on the Client Manage r icon on the Wi nd ows task bar.
2. From the menu, select
■
Add/Edit Profile
■
One of the existing profiles
Configuration Profile
to add a new profile or to modify an existing profile.
(if present) to select a profi le w itho ut
viewing or modifying the settings.
After selecting and another profile, the PC Card will use the selected profile
to connect to the wireless net wo r k.
Figure 3-2 Edit Wireless Configuration Settings
(see Figure 3-2) and select :
ORINOCO PC Card - User’s Guide
3-9
Page 57

Using ORiNOCO and Windows - Using the Client Manager
If your Client Manager icon is not visible, you have to start the
Client Manager program again:
1. Click the button from the Windows task bar.
2. Select
Programs
3. Next select
, and then select the
Client Manager
ORiNOCO
to start the C lient Manager program.
workgroup.
Alternatively you can to change th e PC Card co nf i guration via the Control
Panel:
1. Click the button from the Windows task bar.
2. Click on
Settings
, and then on
Control Panel
3. In the Control Panel window, double-click the
.
Wireless Network
icon.
4. (Optional) Change th e parameters you would like to modify, and click
the OK button to confirm your changes, or
■
the
■
button to ignore your modifications.
Cancel
3-10
ORINOCO PC Card - User’s Guide
Page 58

Using ORiNOCO and Windows - Finding More Information
Finding More Information 3
If you are looking for more information than contained in this manual, please
consult one of the following options:
■
The online “
about the Client Manager program and for information about installing
the ORiNOCO PC Card in other operating systems, such as:
—MS Windows NT
—MS Windows CE
—MS DOS
— Apple Macintosh
The online “ORINOCO PC Card - User’s Guide” can be found on the
ORiNOCO Software CD-ROM that came with your PC Card kit.
■
The on-line help system
information about software and driver fu nctionality.
To view the on-li ne help system click the
function key on your keyboard in any ORiNOCO window, or
■
The “ORiNOCO Manager Suite User’s Guide”
LAN Administrators that need to set up, monitor and m anage corporate
LANs.
ORINOCO PC Card - User’s Guide” - for more information
of your ORiNOCO wireless system - for
button or press the
Help
F1
- a reference guide for
ORINOCO PC Card - User’s Guide
3-11
Page 59

Page 60

Advanced Configurations
4
Introduction 4
Although your ORiNOCO PC Card will work fine in most network
envir on ment wit h t he Ba si c Parameters as des c rib ed o n page 2 -1 1, y o u m ay
wish to explore the advanced parameters optio ns as displayed on the
ORiNOCO PC Card’s Edit Configuration windows.
Only if connected to an existing net wor k advanced parameters can be
specified for an ORiNOCO PC Card. Consult your LAN Administrator for
information about whether th ese parameters apply to your situatio n.
Encryption Parameters Tab 4
The encryption t ab enables you to define the encryption keys that your
ORiNOCO PC Card should use to:
Decrypt wireless messages received via its wireless interface.
■
Encrypt data that will be transmitted via the wireless interface.
■
!
CAUTION:
Encrypti on needs to be the same for all ORiNOC O st at i ons.
ORINOCO PC Card - User’s Guide
4-1
Page 61

Advanced Configurations - Introduction
Figure 4-1 Setup ORiNOCO Encryption Parameters
You can ident i fy up t o 4 different key values to decr yp t wi re l ess da ta, and
select one of these keys to encrypt wireless data transmissions.
For more information consult your LAN Administrator. You can also refer to
the helpfile and the “ORiNOCO Manager Suite User’s guide”.
4-2
ORINOCO PC Card - User’s Guide
Page 62

Advanced Configurations - Introduction
Advanced Parameters Tab 4
On the Advanced parameters tab of the Edit Conf i gura tion w indow you can
adjust a number of parameters.
Figure 4-2 Setup ORiNOCO Ad vanced Parameters
ORINOCO PC Card - User’s Guide
4-3
Page 63

Advanced Configurations - Introduction
Card Power
■
Management
Interference
■
Robustness
To extend the bat t ery life of (mobile) wireless
devices.
Can be activated in exceptional cases when
troubleshooting slow performance of the ORiNOCO
network that could be related to in-band interference
from e. g. mic rowave ovens.
RTS/CTS
■
Medium
Reservation
This parameter can be activated:
— if density of ORiNOCO stations and access
points is very low
— as a result of poor network performance due to
excessive frame collisions at the access po i nts.
For more information consult your LAN Administrator. You can also refer to
the helpfile and the “ORiNOCO Manager Suite User’s guide”.
Admin Parameters Tab 4
On the Admin parameters tab of the Edit Configuration win dow the fol lowing
parameters can be speci fie d.
4-4
ORINOCO PC Card - User’s Guide
Page 64

Advanced Configurations - Introduction
Figure 4-3 Setup ORiNOCO Admin Parameter s
Distance between
■
Access Points
Depending on the numbe r of access points in a
ORiNOCO network this parameter controls the
network performanc e.
MAC Address Can be activated in exceptional cases when
■
troubleshooting slo w performance of th e
ORiNOCO network that could be related to inband interference from e.g. microwave ovens.
For more information consult your LAN Administ rator. You ca n al so refer to
the helpfile and the “ORiNOCO Manager Suite User’s guide”.
ORINOCO PC Card - User’s Guide
4-5
Page 65

Page 66

Card Specifications
Physical Specifications A
A
Form Factor
1
Color
Dimensions
Weight
Temperature & Humidity
Operation
Transit
Storage
1 Color of the Range Extender Antenna is related to the Radio Characteristics
described on page A-3
2 Although the PC Card may still operate in the range of -20° to 70°C, operation
outside the range of 0° to 55° C may no longer be according to specifications.
PC Card Type-II Extended
■ Black for ORiNOCO PC Card (both Gold and Silver Label)
■ Red for IEEE Fixed Wireless PC Cards
(LxWxH) 117.8 x 53.95 x 8.7 mm
45 gram (PCCard)
0° to 55° C
-20° to 70° C 15 to 95% (no condensation allowed)
-10° to 60° C 10 to 90% (no condensation allowed)
2
maximum humidity 95%
Power Characteristics A
Doze Mode
Receive Mode
Transmit Mode
Power Supply
10 mA
180 mA
280 mA
5 V
ORINOCO PC Card - User’s Guide
A-1
Page 67

Card Specifications
Networking Characteristics A
A-2
Compatibility ■ IEEE 802.11 Standard for Wireless LANS (DSSS)
Network Operating
System
Host Operating System
Media Access Protocol
Data Rate ■ High 11 Mb/s
■ Wi-Fi (Wireless Fidelity) certified by the Wireless Ethernet
Compatibility Alliance (WECA).
■ Novell® Client 3.x & 4.x
■ Microsoft Windows® Networking
Microsoft Windows® 95:
■ NDIS3 Miniport Driver
Microsoft Windows® NT v4.0:
■ NDIS4 Miniport Driver
Microsoft Windows® 98 and 2000:
■ NDIS5 Miniport Driver
MS-DOS & Microsoft Windows 3.x:
■ DOS ODI Driver
■ Packet Driver
Windows CE
■ Windows CE v.2.0 & 2.11
Apple Macintosh Operating Systems:
■ Apple PowerBook G3
CSMA/CA (Collision Avoidance) with Acknowledgment (ACK)
■ Medium 5.5 Mb/s
■ Standard 2 Mb/s
■ Low 1 Mb/s
The cards use an automatic Transmit Rate Select mechanism.
ORINOCO PC Card - User’s Guide
Page 68

Card Specifications
Radio Characteristics A
Radio Characteristics of ORiNOCO PC Cards may vary:
According to the country where the product was purchased.
■
According to the type of product that was purchased.
■
Wireless communicatio n i s of ten subject to local radio regulati ons. Alt hou gh
ORiNOCO wireless networking products have been designed for operation
in the license-free 2.4 GHz band, local radio regulations may impose a
number of limitations to the us e of wirel ess communication equipm ent.
NOTE:
Refer to the flyer “Information to the User” for regulatory information
that may apply in your country.
To comply with such regulations, ORiNOCO PC Cards are marketed with
dedicated channel-sets with a number of factory-programmed channels
identified by the following acronyms:
ETS for countries that adhere to the reg ulat io ns as defined by the
■
European Telecommunications Standards Institute (ETSI).
FCC for countries that adhere to t he r egulations as defined by the US
■
Federal Communications Commissi on (FCC).
FR for France, and
■
JP for Japan.
■
ORINOCO PC Card - User’s Guide
A-3
Page 69

Card Specifications
The acronym of the channel-set supported by your card is printed on a label
on the back-side of your ORiNOCO PC Card (see Table “ORiNOCO IEEE
802.11 Channels Sets” on page A-10 for a detailed list of channels).
If you plan to install and use ORiNO CO PC Cards to connect your AP-1000
or other computing device to an out door antenna installation , ad di t io nal
regulati ons may apply.
To co mply with such regulation s Lucent Technologies offers two types of
ORiNOCO PC Cards:
In countries that adhere to the FCC regulations, you can use the
■
standard black-colo re d ORiNOCO PC Card.
In countries that adhere to the ETSI regulations, including France and
■
Japan, you must select the card-type based upon the antenna that w i ll
be used:
You can use the black-colored ORiNOCO PC Card when connecting
■
the device to standard Lucent Technologies omni-directional
antennas.
You must use the red-colored IE EE Fixed Wire l ess PC Card when
■
connecting the device to the standard Lucent Technologi es 14 dBi
directional antenna for outdoor use.
A-4
ORINOCO PC Card - User’s Guide
Page 70

Card Specifications
When you ordered the ORiNOCO Outdoor Router kit1 for outdoor antenna
installations, your kit includes the correct card type that complies with the
regulations that apply in your coun try.
!
WARNING:
At all times, it will be the responsibility of the end-user to ensure that
an outdoor antenna installation complies with local radio regulations.
The end-user must verify that :
The antenna installer is aware of these re gul at i on s.
■
The correct type of PC Card is used to con nect the host device
■
to the outdoor antenna in st al l atio n.
Lucent Technologies and its resellers or distributors are not liable for
any damage or violation of gover nment regulations that may arise
from failing to comply with these guidelines.
1 Formerly identified as the WaveLAN Office Router, Wave ACCESS LINK WP-II, or
WaveLAN IEEE PTP Kit
ORINOCO PC Card - User’s Guide
A-5
Page 71

Card Specifications
Radio Characteristics ORiNOCO PC Card A
R-F Frequency Band 2.4 GHz (2400-2500 MHz)
Number of selectable
sub-channels
Modulation Technique Direct Sequence Spread Spectrum
Spreading 11-chip Barker Sequence
Bit Error Rate (BER) Better than 10
Nominal Output Power 1 5 dBm
Range (100 bytes User
Data) / Transmit Rate
Open Office Environment
Semi-Open Office
Environment
Closed Office
Receiver Sensitivity
Delay Spread
(at FER of <1%)
North America (FCC) 11
Europe (ETS) 13
France (FR) 4
Japan (JP) 1
Other Countries: FCC 11, ETS 13
■ C C K for High & Medium Tran smi t Rate
■ DQPSK for Standard Transmit Rate
■ DBPSK for Low Transmit Rate
-5
High Speed
11 Mb/s
160 m
(525 ft.)
50 m
(165 ft.)
25 m
(80 ft.)
Medium Speed
5.5 Mb/s
270 m
(885 ft.)
70 m
(230 ft.)
35 m
(115 ft.)
Standard Speed
2 Mb/s
400 m
(1300 ft.)
90 m
(300 ft.)
40 m
(130 ft.)
-83 dBm -87 dBm -91 dBm -94 dBm
65 ns 225 ns 400 ns 500 ns
Low Speed
1 Mb/s
550 m
(1750 ft.)
115 m
(375 ft.)
50 m
(165 ft.)
A-6
ORINOCO PC Card - User’s Guide
Page 72

Card Specifications
The range of the wireless signal is related to the Transmit Rate of the
wireless communicati on. Communications at lower Transmit range may
travel larger distances.
NOTE:
The range values listed in Table “Radio Characteristics” are typical
distances as measured at the Lucent Technologies ORiNOCO
laboratories. These values may provide a rul e of thu m b and may
vary according to the actual radio conditions at the lo cat ion where
the ORiNOCO product will be installed.
The range of your wireless devices can be affected when the
■
antennas are placed near metal surfaces and solid high-density
materials.
Range is also impact ed du e t o “obstacles” in the signal pat h of
■
the radio that may either absorb or reflect th e radio signal.
Table “Radio Characteristics” on page A-3 lists the typical ranges when used
indoors in “office environment s” th at can be described as follows:
In
■
Open Office environments
are no physical obstructions between them.
In
■
Semi-open Office environments
height, hollow wall elements; anten nas are at desktop level.
, antennas can “see” each other, i.e. there
, work space is divided by shoulder-
ORINOCO PC Card - User’s Guide
A-7
Page 73

Card Specifications
In
Closed Office environments
, work space is separated by floor-to-ceiling
brick walls. If you intend using the ORiNOCO PC Card as part of an outdoor
antenna installation, the range of the outdoor antenna installations will be
related to:
Type of outdoor antennas connected to the ORiNOCO PC Card.
■
Length of antenna cables.
■
Clearance of the radio signal pa th .
■
For more information please consult the “ORiNOCO Outdoor Antenna
Installation Guide”
A-8
ORINOCO PC Card - User’s Guide
Page 74

ORiNOCO Fixed Wireless PC Card A
Card Specifications
R-F Frequency Band 2.4 GHz
Number of selectable
sub-channels:
Modulation Technique: Direct Sequence Spread Spectrum
Spreading 11-chip Barker Sequence
Bit Error Rate (BER) Better than 10
Nominal Output Power: 8 dBm
Range Consult the “ORiNOCO Outdoor Antenna Installation
1 The Fixed Wireless PC Card is not available in FCC regulated countries.
2 This card i s desig ned fo r outdo or an tenna in stalla tions i n coun tries tha t adhe re to r adio
regulations as defined by the ETSI.
Europe (ETS) 13
France (FR) 4
Japan (JP) 14
Other Countries (ETS)
■ CCK for High & Medium Transmit Rate
■ DQPSK for Standard Transmit Rate
■ D BPSK for Low Tr ansm it Rate
Guide”
(2400-2500 MHz)
-5
2
1
13
Supported Frequency Sub-bands A
Subject to the radio regulations that apply in your country, your ORiNOCO
PC C ar d m ay support a different set of 2.4 GHz cha nnels (see table below).
Consult your Authorized ORiNOCO Reseller or Lucent Technologies Sales
office for information about the radio regulat i ons that apply in your country.
ORINOCO PC Card - User’s Guide
A-9
Page 75

Card Specifications
ORiNOCO IEEE 802.11 Channels Sets A
Frequency Range 2400-2500 MHz
Channel ID FCC ETSI France Japan
1
2
3
4
5
6
7
8
9
10
11
12
13
14
1 printed in bold are the factory-set default channels
2412 2412 - 2412
2417 2417 - 2417
2422 2422
2427 2427 - 2427
2432 2432 - 2432
2437 2437 - 2437
2442 2442 - 2442
2447 2447 - 2447
2452 2452 - 2452
2457 2457 2457 2457
2462 2462
- 2467 2467 2467
- 2472 2472 2472
---
When installing ORiNOCO PC Cards the channel configuration is managed
as follows:
For wireless clients that operate in an ORiNOCO Infrastructure, the
■
ORiNOCO PC Card will automatically star t operation at the channel
identified by the AP-1000s. When roaming between different access
1
- 2422
2462
2462
2484
A-10
ORINOCO PC Card - User’s Guide
Page 76

Card Specifications
points the station can dy nam i ca l ly switch to another channel if required.
For ORiNOCO PC Cards installed into wireless clients that operate in an
■
“Peer-to-Peer” mode, the PC Card will default use channel 10.
When inserted into a AP-1000, the ORiNOCO PC Card will use the factoryset default channel (printed in bold), unless the LAN Administrator selected a
different channel when configuring the AP-1000 device.
Can I Upgrade ORiNOCO Cards? A
To enhance (wireless) performance of your ORiNOCO PC Cards, future
updates will be made available via the ORiNOCO website.
Whenever an update becomes available, you will be able to download
■
the latest WSU tool from our website at:
You are advi sed to visit the ORiNOCO web si te at regular intervals to
check if newer versions are available for your product.
http://www.lucent.com/orinoco
.
ORINOCO PC Card - User’s Guide
A-11
Page 77

Page 78

Troubleshooting
B
Introduction B
This appendix is divided into a number of sections, each with it’s own specific
troubleshooting tips:
1. Common T roubleshooting tips - A section with troubleshooting tips which
are operating system inde pendent.
2. Windows Operating System s - A section with troubleshooting t ips for
Windows 95, 98 and NT.
3. MS-DOS Systems - A section with troubleshooting tips for MS-DOS
operating systems.
ORINOCO PC Card - User’s Guide
B-1
Page 79

Troubleshooting
Common Troubleshooting Tips B
LED Activity B
If you encounter dif ficulty using and/o r inst alling y our ORiNOCO pro duct, th e
error may be related to various causes:
Out-of range situation, which prevents the ORiNOCO PC Card from
■
establishing a wireless connection with the networ k.
Configuration mismatch, whi ch prevents the ORiNOCO PC Card from
■
establishing a wireless connection with the (correct ) net work.
Absence of, or conflict of the ORiNOCO Driver.
■
A problem or conflict with the PC Card slot which prevents the PC Card
■
from powering on.
A conflict of the ORiNOCO hardware with another device.
■
The starting point to troubleshoot problems with your ORiNOCO PC Card is
looking at the LED activity of the ORiNOCO PCCard.
Table B-1 on page B-3 provides an overview of the various mode s of
operation and the associated LED activity. Table B-1 also includes a number
of troubleshooting hints, if required, that may help you solve the problem.
B-2
ORINOCO PC Card - User’s Guide
Page 80

Table B-1 LED Activity Table
Power LED Transmit
Description/Action
Receive LED
Continuous
Green
Flicker Flicker Power Management mode:
Both LEDs blink once every
10 seconds
Blinking Standard ope rat i ona l mode.
Off ■ Card is powered on.
■ Card is powered on.
■ S ens i ng/t ran smit ti ng wirel e ss data.
■ No wireless activity.
No action is required.
■ Card is powered on, but set to power saving mode, to conserve
battery life.
■ Flashes indicates that the card wakes up at regular intervals to
verify if there is wireless data addressed to your computer.
The PC Card works fine, but did not yet succeed esta bli shin g a
wireless connection with the wireless Infrastructure.
Actions:
■ Contact the LAN Administrator to verify the ORiNOCO Network
Name assigned to the wireless infrastructure.
■ Contact the LAN Administrator to verify the correct value(s) of
the encryption keys.
■ Contact the LAN Administrator to verify whether the network
infrastructure has been closed
■ Change the configuration of your ORiNOCO PC Card to enter
the correct Network Name
■ If there are no AP-1000 devices available, change the
configuration of your ORiNOCO PC Card to run in “Peer-toPeer” mode.
Troubleshooting
1
.
ORINOCO PC Card - User’s Guide
B-3
Page 81

Troubleshooting
Table B-1 LED Activity Table—Continued
Power LED Transmit
Description/Action
Receive LED
Off Off Card is not powered on, so it can not transmit/receive data.
1 Only for networks that include ORiNOCO AP-1000s.
The cause may either be:
■ No Driver loaded/installed
■ Card - Driver mismatch which prevented the driver from loading
■ Device conflict which prevented the driver from loading
Actions:
■ Verify if a driver has been installed, if not install the driver.
■ Verify the device settings of the PC Card to determine the
occurrence of a conflict with another device. If so, change the
settings of either your PC Card or the conflicting device to
resolve the problem.
■ Verify the versions of the driver, and the embedded software in
the PC Card (also refe rr ed to as Stat ion fi rm ware ).
■ Consult the ORiNOCO website at:
to see if newer versions are available and if s o,
orinoco
upgrade both the embedded software and driver to the latest
available version.
http://www.lucent.com/
B-4
ORINOCO PC Card - User’s Guide
Page 82

Troubleshooting
Can Not Connect To The Network B
If your PC Card seems to be working fine, but you are not able to connect to
the network, this error m ig ht be due to a configuration mismatch.
For example if both LEDs of your PC Card blink once every ten seconds, the
problem is likely to be caused by a configuration mism atych of:
Network Name
■
Encryption Key
■
The ORiNOCO Network Name is case-sensitive.
On MS-DOS systems the Network Name sh oul d be entered between
quotation marks. If you omit the quotation marks, the driver will interpret the
value as all upper-case e.g. 12CAFE in st ead of "12Cafe".
If your AP-1000s have been configured with both lower- and upper-case
characters, the driver will not be able to establish a radio connection.
LEDs Work But Can’t Connect to Network B
If you can not connect to the network while the LEDs indicate tha t the
network is working properly (Powe r LED is on, Transmit Receive LED blinks)
probably the TCP/IP settings of your network are not properly set .
NOTE:
Some older versions of the Windows 9 5 operating system will not
automatically install th e necessary TCP/IP netw ork protocol.
ORINOCO PC Card - User’s Guide
B-5
Page 83

Troubleshooting
Changing TC P/IP Settings
Consult your LAN Administrator for your the values of your TCP/IP settings.
To change the TCP/IP Settings :
1. On the Windows task bar cli ck the
2. Select
Settings
and then select
Control Panel
3. On the Control Panel window, double click on the
the
Network Properties
.
4. From the list of installed components, check if the
PC Card
■
protocol is installed.
If this protocol is not yet installed, click the
protocol from the list. Refer to the Windows Help for more
TCP/IP
information.
If this protocol is installed, sel ect this protocol and click the
■
Properties
button. Check if the parameters resemble the settings
provided by your LAN Administrator. Make Changes if necessary,
and click
when you’re done.
OK
5. When prompted, restart your computer.
Start
button
.
Network
Add
icon to view
TCP/IP -> ORiNOCO
button and select the
B-6
ORINOCO PC Card - User’s Guide
Page 84

Troubleshooting
Windows Operating Systems B
Generic Problems B
Windows does not detect my new card B
Windows NT operating system s v 3. 51 and v4.0 do not support “Plug &
■
Play”. On such systems, you will need to manually introduc e th e
PC C ar d t o your ope rating system as described i n Appendix F
”Installation for Windows NT”
In some occasions, Windows 95 and/or Windows 98 do not detect a new
■
card either. This may be the case in one of the following situations:
The laptop computer into which you wish to install the ORiNOCO
■
PC Card is a brand-new “out-of-the-box” comput er, where the
Windows 95/98 operating system was already factory-installed (see
“Enabling the PC Card Controller” on pa ge B-8).
A previous installation of the ORiNOCO PC Card was aborted
■
before it was finished.
ORINOCO PC Card - User’s Guide
B-7
Page 85

Troubleshooting
Enabling the PC Card Controller B
Today, most brand-new “out-of-the-box” laptop computers com e wi t h th e
Windows 95/98 operating sy st em factory-installed. On som e of these
computers, a number of option s like PC Card & Socket Services have been
disabled by default to save on disk and memory spac e. In order to use such
options you must first finalize the Windows 95/98 installation in order to
enable such options.
If a Windows 95/98 computer does not detect your ORiNOCO PC Card,
proceed as described below, to enable the PC Card socket interface, or to
verify that it has been enabled, proc eed as follows:
1. Click the
2. Click on
3. In the Control Panel window, double-click the
to open the PC Card Properties window (see Figure B-1).
4. In the PC Card Properties window, double-click one of the
PC Card Sockets.
If the PC Card socket interface was not yet enabled, the Windows
operati ng system will disp l ay a message that it is finalizing the PC Card
Socket installation.
5. Click the
button on the Windows Taskbar.
Start
Settings
OK
, then
Control Panel
button to confirm and close the PC Card Properties window.
.
PC Card
icon
B-8
ORINOCO PC Card - User’s Guide
Page 86

Figure B-1 Enabling the PC Card Controller
Station Cannot Connect to the NetworkB
This situation may occur in any of the following situations:
Incorrect ORiNOCO Network Name
■
No driver loaded
■
Station not authorized to access network.
■
Card defect
■
Hardware Conflict
■
Troubleshooting
ORINOCO PC Card - User’s Guide
B-9
Page 87

Troubleshooting
Hardware Conflict B
When installing adapter cards or periph eral devices on a com puter you may
occasionally ru n i nt o hardware conflict that may:
prevent your ORiNOCO PC Card from working properly, or
■
disturb operation of other devices after the installation of the ORiNOCO
■
drivers.
Such prob l ems a re m ost of t he t i me s c aus ed wh en m ul t ip le devices inst al le d
onto your computer are using identical values for I/O Base Address and/or
Interrupt Request (IRQ).
The factory-set values of your ORiNOCO PC Card have been set to use the
following defaults:
Table B-2 Default Strappings of the ORiNOCO Hardware
Device Resource Default Value
ORiNOCO PC Card
1 For older driver versions the default I/O Base Address value is 0300
Unlike the Windows 95 or Windows 98 operating systems, Windows NT is
not able to check automatically whether the proposed values are already
used by another device.
1
I/O Port 0400-0437
IRQ 10
B-10
ORINOCO PC Card - User’s Guide
Page 88

Troubleshooting
To avoid or troubleshoot hardware conflicts with another device, you are
advised to use the Windows NT Diagnos t ic pro gram, to det ermine whether
the default I/O port and IRQ for your ORiNOCO PC Card are availab le, and if
not to select an alternative value.
NOTE:
Sometimes it may be pretty difficu lt to det ermine where a device
conflict i s located. As a rule of thum b, you can use the fo l lowing
troubleshooting hint:
When the conflict is related to an conflicting I/O Base setting, in
■
most cases the ORiNOCO PC Card will not work at all: i.e. you
will not see any LED activity.
If the problem is related to a conflicting IRQ value, LEDs may
■
flicker, but you can not connect to the net wo r k.
In a number of cases you may be able to verify that the PC Card
succeeded i n establishing a radio connection with a AP-1000
device, but fails to really connecting to the network operati ng
system.
Running Windows NT Diagnostics B
When installing the ORiNOCO PC Card, the Windows NT operating system
will prompt you to confirm or modify the factory-set device values for your
ORiNOCO PC Card.
ORINOCO PC Card - User’s Guide
B-11
Page 89

Troubleshooting
Starting Windows NT Diagnostics
1. Click the
2. Click on
3. From the list of
Windows NT Diagnostics
button on the Windows NT Taskbar.
Start
Programs
, and then
Administrative Tools
Administrative Tools
.
.
, click the item
Verifying IRQ Settings
To di splay the IRQ values that are already in use by other devices installe d
on your computer:
1. Click the
Resources
display the window pictured in Figure B-2.
tab in the Windows NT Diagnostics window . This will
B-12
ORINOCO PC Card - User’s Guide
Page 90

Figure B-2 Verifying IRQ Availability
Troubleshooting
2. Click the
button to display the Interrupt Reques t ( IR Q ) vectors
IRQ
currently in use by other devices in your computer.
The default IRQ value for ORiNOCO PC Card is 10. Is the value 10
already listed?
If No, you can use the ORiNOCO default. Write down IRQ 10 and
■
proceed with the next step.
If
■
, this means that another device is alre ady using the IRQ, i.e.
Yes
you will need to select another value for your ORiNOCO PC Card .
ORINOCO PC Card - User’s Guide
B-13
Page 91

Troubleshooting
3. See whether one of the following values is available (i.e. not listed in the
Windows NT Diagnostics window):
03, 04, 05, 07, 09, 10, 11, 12, 15.
4. Select one non-listed value and write it down before you proceed with
“Verifying I/O Port Settings”.
Verifying I/O Port Settings
To display the values of I/O Ports that are already in use by other devices
installed on your computer, proceed as follows:
1. On the
button
Resources
I/O Port
The default I/O Po rt value for ORiNOCO PC Card is 0400
Is this appropriate value alr eady listed for your version of the Miniport
driver?
If No, you can use the ORiNOCO default. Write down
■
I/O Port 0400 and proceed with the next step.
If
■
address, i.e. you will need to select another value for your
ORiNOCO PC Ca rd .
1 This applies to ORiNOCO Miniport driver version 1.33 and higher. For earlier versions of this
driver, the default I/O Base Address is 0300.
If you are unsure about the version of the Miniport driver that is currently installed, use the
Client Manager tool. Use the menu option
numbers of the card’s hardware, embedded software and driver. For the latest ORiNOCO
Miniport driver, consult the ORiNOCO website at:
tab of the Windows NT Diagnostics program, click the
. This will display the window pictured in Figure B-3.
1
.
, this means that another device is already using this por t
Yes
Help
and select
Version Info
to list the version
http://www.lucent.com/orinoco
B-14
ORINOCO PC Card - User’s Guide
Page 92

Figure B-3 Verifying I/O Port Availability
Troubleshooting
ORINOCO PC Card - User’s Guide
B-15
Page 93

Troubleshooting
If the default ORiNOCO I/O Port has already been assigned to another
device, select an alternative I/O Port value from the range listed below:
0200 0300* 0400** 0500 0600 0700
- - 0440 0540 0640 0740
0280 0380 0480 0580 0680 0780
- - 04C0 05C0 06C0 07C0
* For driver versions 1.32 or earlier, the default was 0300.
** For version 1.33 or higher, the default setting is 0400.
2. Verify th at th e al t ernative value is available (i.e. not listed in the
Windows NT Diagnostics window).
3. Write dow n the alternative I/O Port value and close the Window sNT
Diagnostics Program.
Having finished these steps, you shoul d now have a note that iden tifi es
the following (alternative) values:
IRQ value
■
I/O Port Address
■
You can use these values to install the ORiNOCO Miniport Driver as
described later in this chapter.
B-16
ORINOCO PC Card - User’s Guide
Page 94

Troubleshooting
Despite NT Diagnostics, still facing
problems B
The Windows NT Diagnostics program is not “bullet-proof”. Occasionally you
may run into a hardware conflicts de spite the fact that the Windows NT
Diagnostics program displayed resources as being available to your
ORiNOCO PC Card .
This may be the case when your computer has one or more devices and/or
peripherals installed which claimed an I/O Base Address and/or IRQ value
without notifying the Wind ows NT operating sys te m : Your Windows NT
Diagnostics program will not be able to display these values, simply because
it “doesn’t know”.
If this is the case, a value you perceived as being available to your
ORiNOCO PC Card, had already claimed by a conflicting device resulting in:
A ORiNOCO PC Card that does not work, and/or
■
A conflicting device that does not work properly.
■
It will depend on your preferences and the conf iguration options supported
by each of the conflicting devices to determine which device settings should
be changed to allow flawless operation.
In most situations the ORiNOCO Minipor t dr iver will prove most flexible to
select alternative settings for I/O Base Address or IRQ values. However
since the conflicting device appa re nt l y did not communicate its Syste m
ORINOCO PC Card - User’s Guide
B-17
Page 95

Troubleshooting
Resource claims to Windows NT, you may need to try multiple values before
the problem will be resolved.
Consult the documentation that came with your comp ut er and/or the
■
conflicting device to find out which values are used by the conflicting
device that have not been listed in the Windows NT Diagnos tics.
!
CAUTION:
To isol at e t he pr oblem, you are ad vi sed to change only one
parameter at a time. For example: first try to r eso lve a poss ible
conflict with the I/O Base Address. If that does not work, try to
resolve a possible IRQ conflict.
PC Card Conflict B
When your ORiNOCO PC Card installation has completed successfully, but
it does not become operational, it is possible that there is an I/O Port conflict.
The Windows Resource Ma nager may not have been able to detect the
conflict, allowing the installation to complete successfully, but not allowing
the PC Card to operate properly because another device has been assigned
the specif i ed port.
The default I/O Base address used by your ORiNOCO PC Card is 0400
(when using Miniport driver version 1.33 or highe r) and 0300 (when using
Minipor t version 1.32 or earlier).
B-18
ORINOCO PC Card - User’s Guide
Page 96

Troubleshooting
You are advised to try different I/O Port values, as described in “Verifying I/O
Port Settings” on page B-14.
Table B-3 Defaul t Configuration Settings
Description Default Value
Station Name (none)
Connect to Network Type IEEE 802.11 Infrastructure
ORiNOCO Network Name (none)
MAC Address (none: use Universal MAC Address)
Distance between APs High Distance
Transmit Rate High - Auto Rate Select
RTS/CTS Medium Reservation OFF
Card Power Management OFF
■ Receive All Multicasts Enabled
■ Maximum Sleep Duration 100
Encryption OFF
1 The Universal MAC Address of your ORiNOCO PC Card is printed on a label on the
backside of the card.
■ Connect via access points
■ Peer-to-Peer (Ad-H oc) disabled
1
ORINOCO PC Card - User’s Guide
B-19
Page 97

Troubleshooting
Upgrading the ORiNOCO Miniport Driver B
Upgrading the ORiNOCO Miniport Driver instal led may be required in one of
the following situations:
You would like t o use new feat ures that have become available for your
■
ORiNOCO PC Card.
You instal l ed a newer version of the Client Manager tool.
■
Your Client Man ager “Card Diagnostics” r epo rted a Dr iver/Firmware
■
mismatch.
!
CAUTION:
Upgrading the ORiNOCO Miniport Driver should only be done by a
skilled LAN Administrator or support engi neer that has a working
knowledge of the Microsoft Windows 95, 98 and/or the Windows NT
operating system.
The procedure to upgrade device dri vers differs between the vario us
Windows operating systems:
Windows 98 and Windows NT systems feature an “upd at e driver”
■
function that allows you to easily replace the current driver with a mor e
recent version.
Windows 95 systems usually require you to first to completely remove
■
the driver from your computer, prior to installing th e la t est driver. This is
described on page B-25.
B-20
ORINOCO PC Card - User’s Guide
Page 98

Upgrading the driver for Windows 98 B
1. On the Windows Taskbar, click the
2. Click on
Settings
, and then click
3. In the Control PaneI window, double-click the
4. In the System Properties window, select the tab
Manager
.
Figure B-4 The Windows 98 Device Manager tab
button.
Start
Control Panel
Troubleshooting
.
icon.
System
Device
ORINOCO PC Card - User’s Guide
B-21
Page 99

Troubleshooting
5. In the top section of the
devices by type
as pictured in Figure B-4 on page B-21.
Device Manager
6. In the list of computer devices, double-click
7. Select the item
ORiNOCO PC Card
tab, select the option
Network Adapters
and click the
Properties
8. In the ORiNOCO PC Card Properties window, select the
display the window pictured in Figure B-5.
Figu re B-5 Windows 98 Update Dri ver Window
To displ ay informat io n about the currently installed driver, click the
■
Driver File Details
To upgrade your current driver to a newer version click the
■
button and follow the instructions displayed on your screen.
Driver
button.
button.
Driver
View
.
tab to
Update
B-22
ORINOCO PC Card - User’s Guide
Page 100

Troubleshooting
9. Restart your computer to finish the driver upgrade procedure and to have
the new driver loaded by the operating system.
10. (Optional) Upgrade the Client Manager program.
NOTE:
The procedure described above may look familiar to users of
computers that run Windows 95 operating systems which are
identified as OSR2 versions. Although such systems may also show
an
Update Driver
Technologies ORiNOC O labs have proven that this procedure does
not work for the Windows 95 systems (the operating system will
NOT replace the current driver). Fo r Wi ndows 95 systems, proc eed
as described on page B-25.
button, thorough testing in the Lucent
ORINOCO PC Card - User’s Guide
B-23
 Loading...