

Page 1
Contents
Select a Category Below:
System Planning and
Completion of Forms
Installation, Initial
Configuration and
Programming
Ongoing Maintenance and
Administration
Page 2

Contents
Select a Category Below:
System Planning and Completion of Forms
Installation, Initial Configuration and Programming
Ongoing Maintenance and Administration
Page 3

Contents
System Planning and Completion of Forms
Getting Started
System Overview
Call Handling Planning
Completing the MERLIN Messaging System Planning Forms
Appendix A: MERLIN Messaging System Planning Forms
Page 4

Contents
System Planning and Completion of Forms
Getting Started
Introduction
Customized Paths
Navigation
Pop-Up Windows
Button Bar
Programming Conventions
System Overview
Call Handling Planning
Completing the MERLIN Messaging System Planning Forms
Appendix A: MERLIN Messaging System Planning Forms
Page 5
Introduction
The MERLIN Messaging Online Guide contains detailed information about the MERLIN
Messaging System.
You can use the Online Guide to:
Locate general information about MERLIN Messaging System features and services.●
Access step-by-step instructions for programming, managing and using the system.●
View and print MERLIN Messaging System Planning Forms.●
This section, Getting Started, will walk you through a brief explanation of the conventions
and procedures used in the Online Guide and will help you to use this reference effectively.
Page 6
Customized "Paths" through Information/Procedures
The MERLIN Messaging System Online Guide provides three customized "paths" through the
guide’s contents:
System Planning and Completion of Forms●
Installation, Initial Programming and System Configuration●
Ongoing Maintenance and Administration●
This content helps you locate and access information based on the tasks you have to perform
with respect to the system.
Each path contains:
Access to general information about the system.●
Detailed information and step-by-step instructions for completing the tasks specific to
the selected path.
●
Page 7
Navigation
You can move from one topic to another in the Online Guide by activating topic-associated
hypertext links. This can be done from:
A topic listed in the Contents Panel on the left side of the screen●
The Technology Bar at the bottom of the screen●
Within the topic text●
The Contents Panel
The Contents Panel is displayed along the left side of the window. It provides a way for you to
quickly identify and access the information you need to locate. Because it is displayed in a
stationary part of the window (that is, it doesn’t change or move), you can easily locate the topic
you want to view. Note that the
arrow pinpoints your current location in the topic listing.
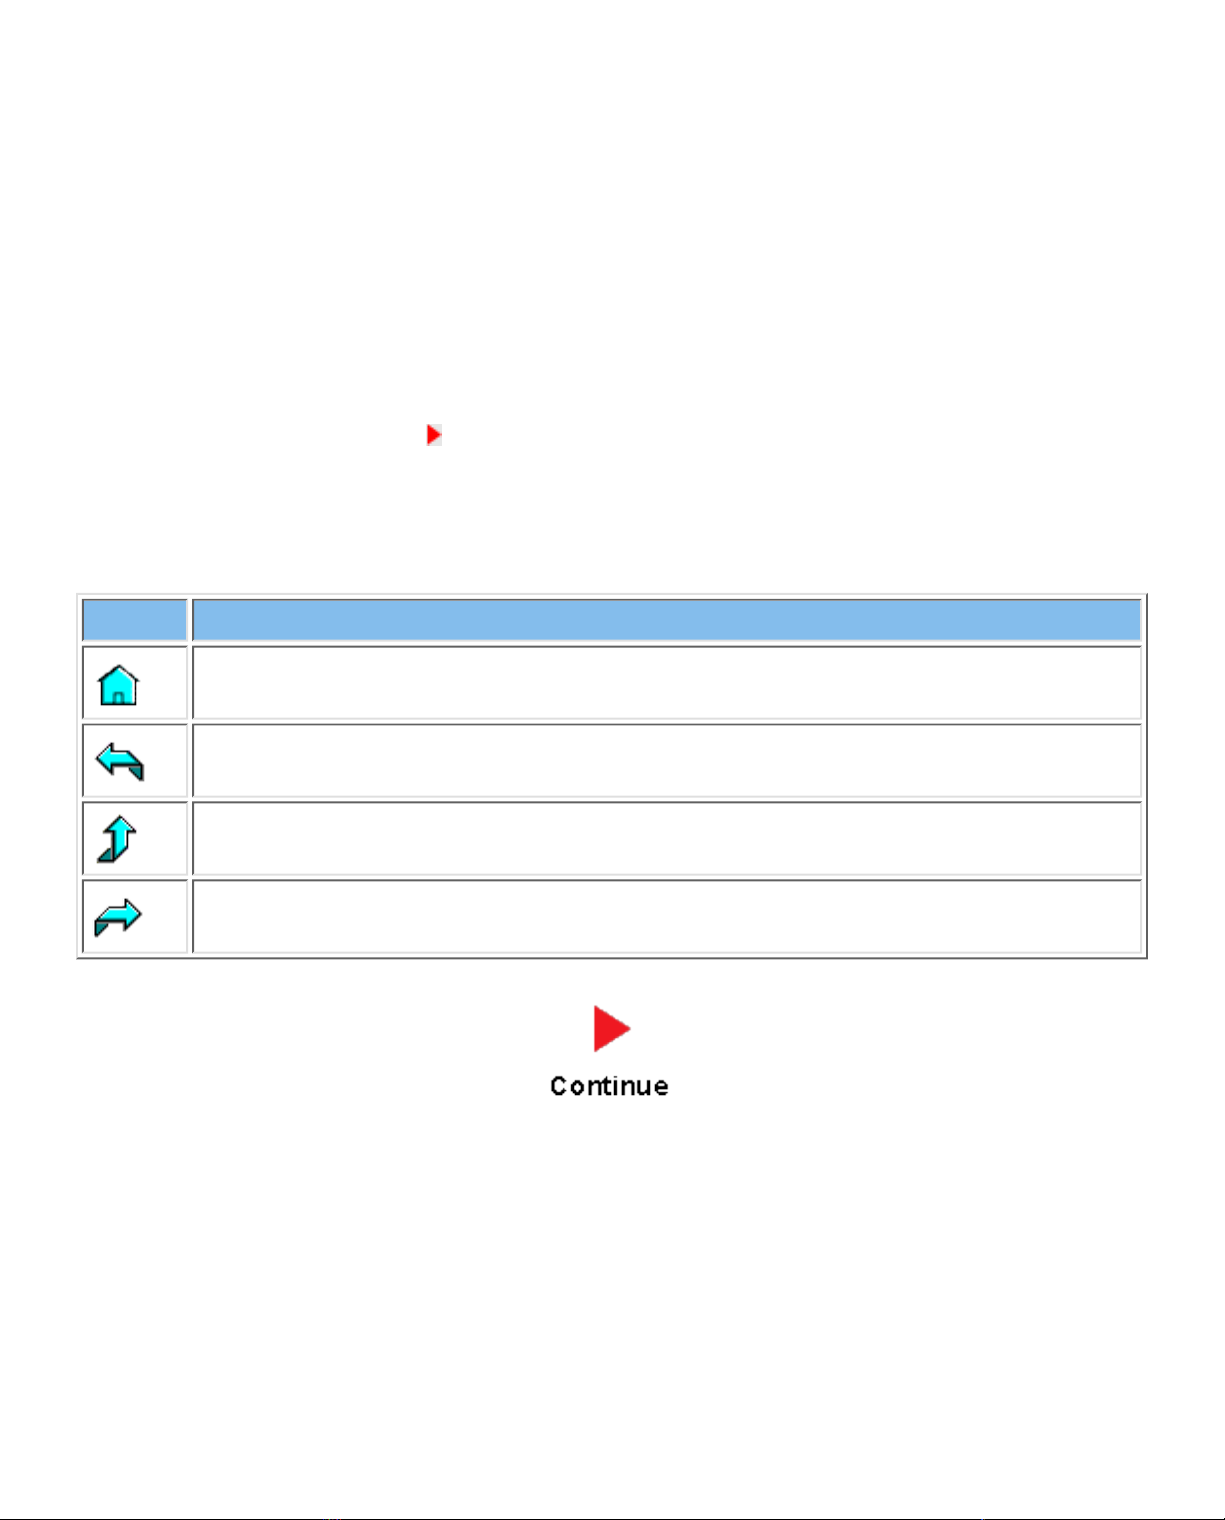
The Technology Bar
The Technology Bar located at the lower right-hand corner of the screen contains a number of
icons. Each icon is responsible for a different navigational action.
Icon Action
Redisplays the Main menu options in the Contents Panel
Links to the previous topic in the sequence
Takes you to the top of the window
Links to the next topic in the sequence
Page 8
An element that triggers a change on an item (usually a graphic) in a Web page when the mouse passes over it. The change usually signifies that the item is a link to related or
additional information.
Pop-Up Windows
The MERLIN Messaging System Online Guide makes use of pop-up windows and mouseovers (through which
your movement of the cursor over a screen object or image initiates another display or activity) or to provide
additional information. Typically, pop-up windows and mouseovers contain material that supplements
information appearing in the main window (for example, a more detailed explanation, a link to a Glossary term, a
field description, etc.).
Page 9
The Button Bar
The Button Bar is displayed in a non-scrolling panel across the top of the screen. It provides
access to additional online features and capabilities. To view a feature or access a capability, click
the associated button. Note that in the case of features displayed in pop-up windows (for example,
the Glossary), you must close the window before you can proceed.
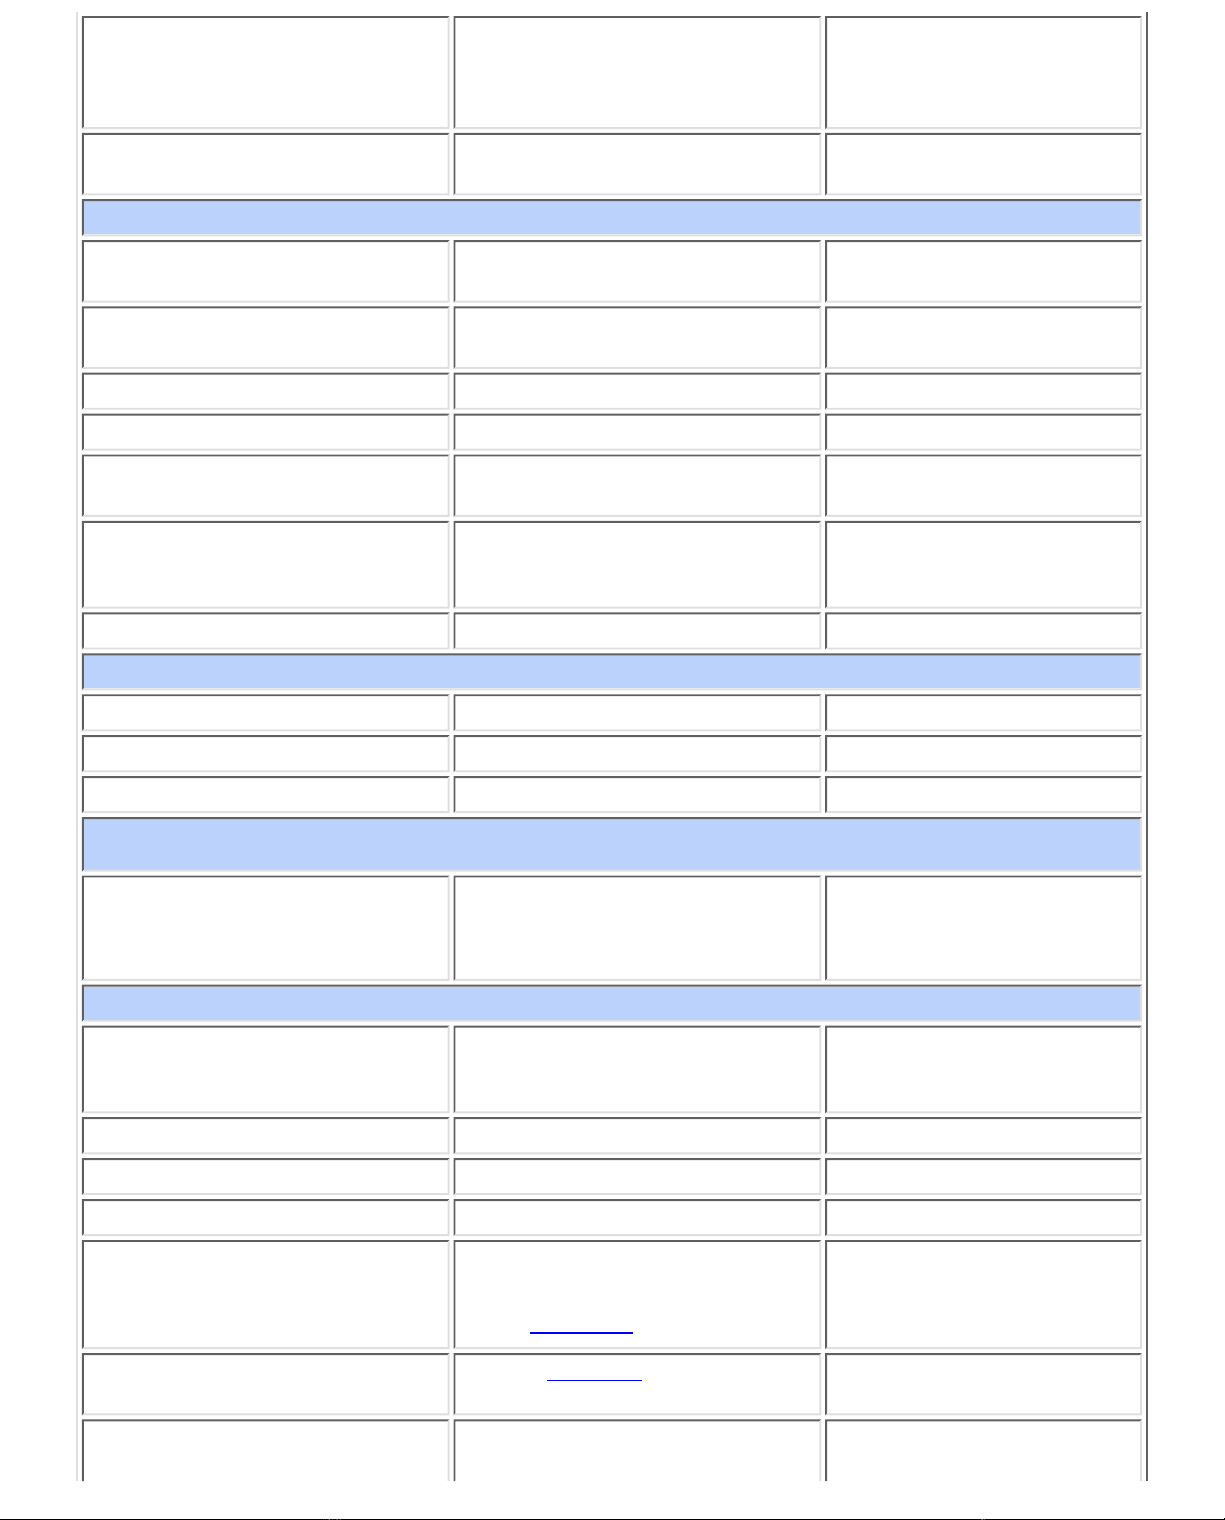
Button Action
Redisplays the Main menu
options in the Contents
Panel
Allows you to search for
information by entering a
key word
Links you to the MERLIN
Messaging System Glossary
Provides access to the
online Help feature
Displays a table containing
Touch Tones and rules
which are valid for all
menus
Page 10
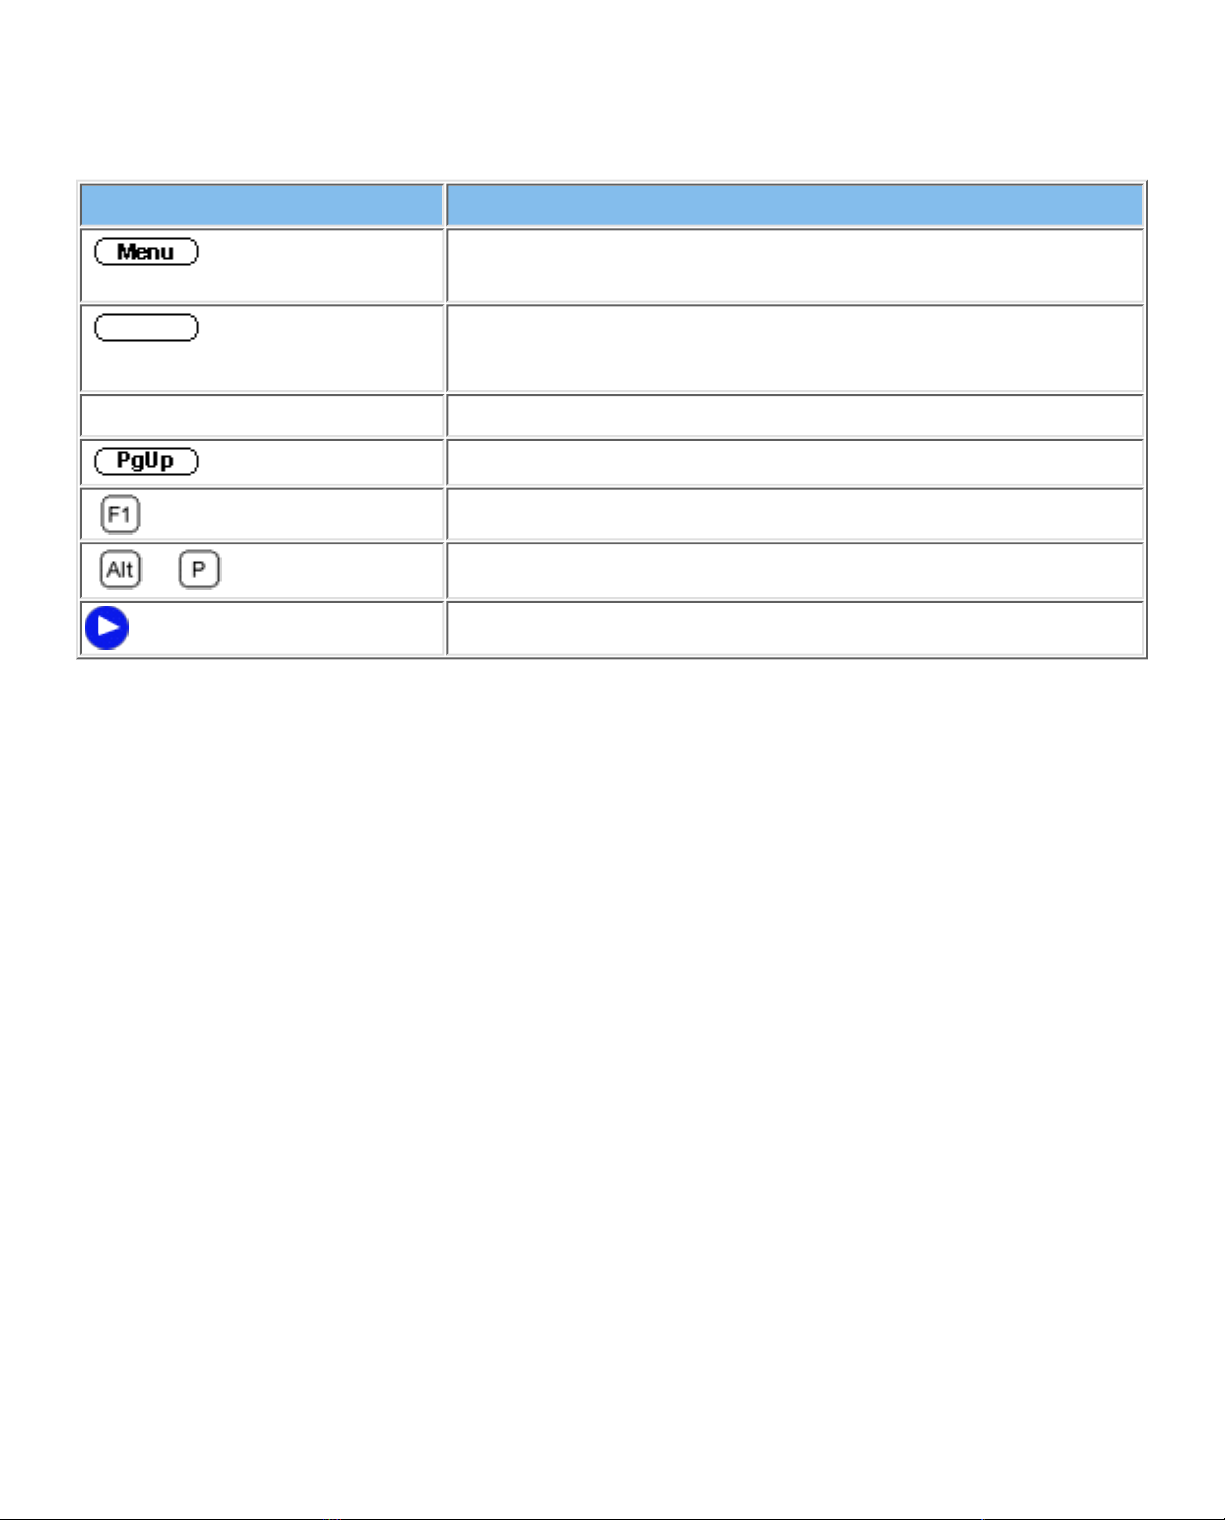
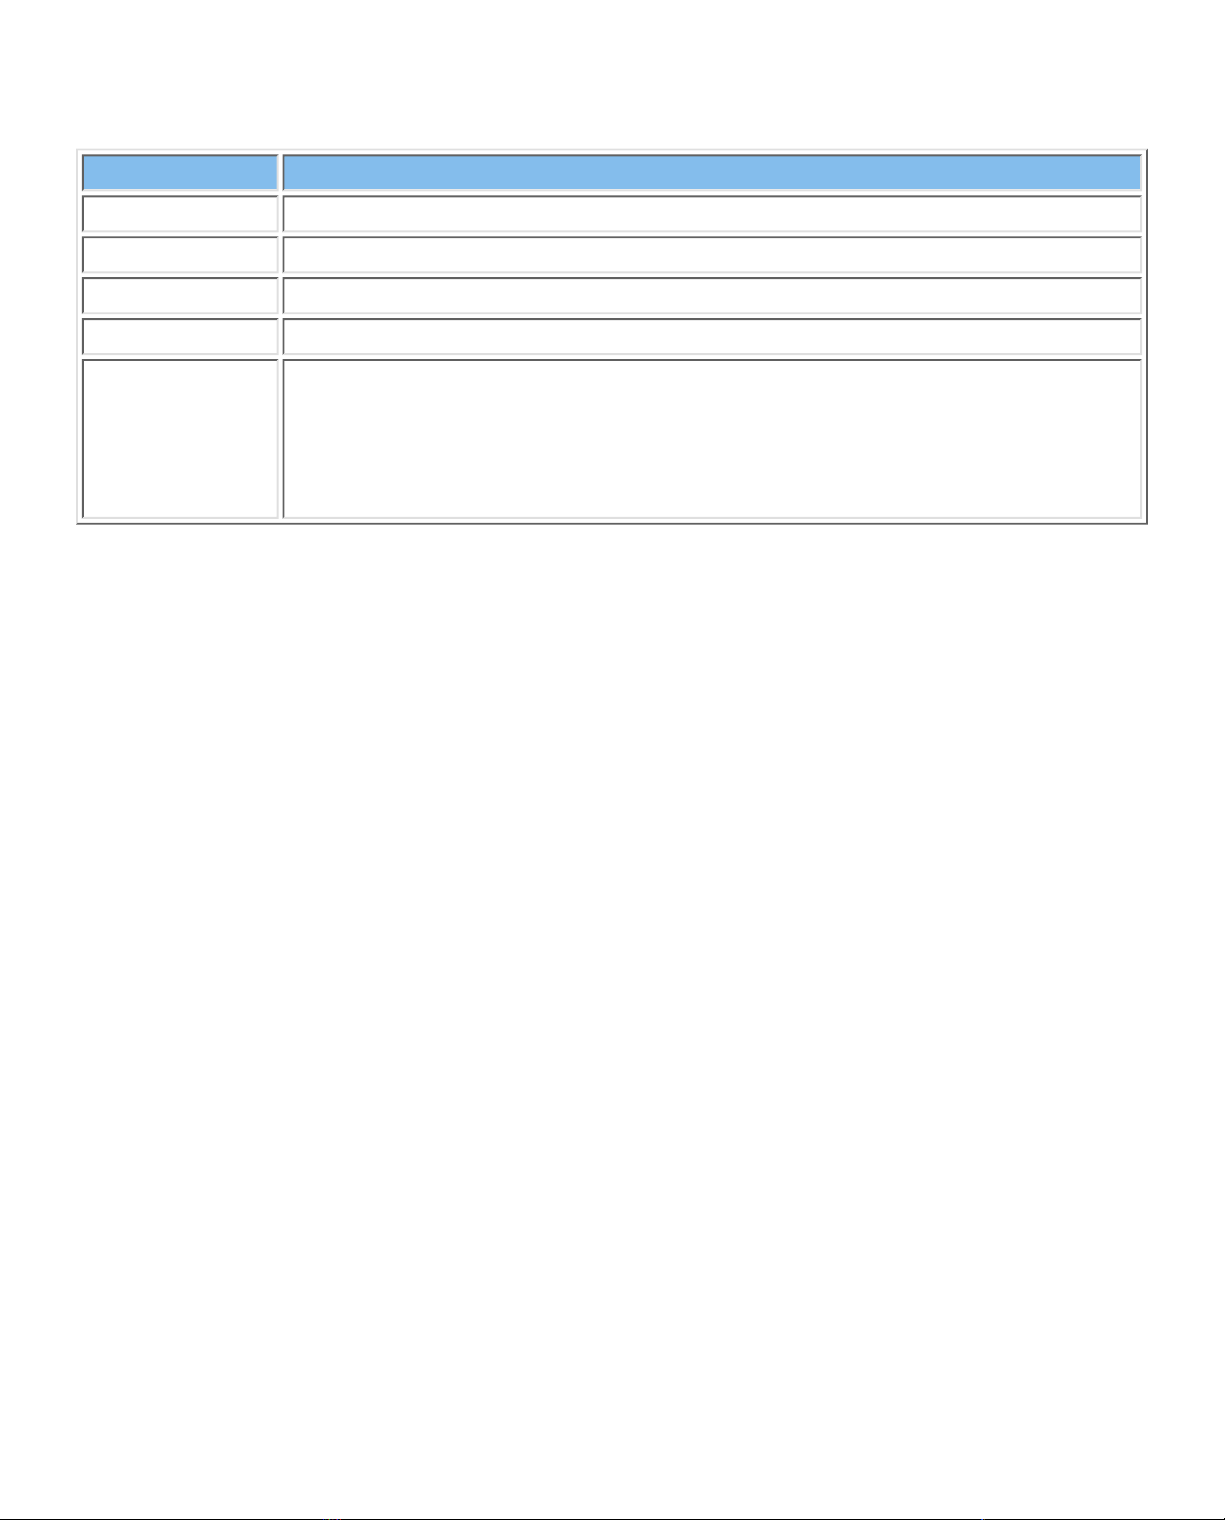
Programming Conventions
The procedures for programming the MERLIN Messaging System in this Online Guide use
several conventions to indicate what the steps involve. The conventions are described in the
following table:
Typeface Sample Meaning
To select this option, press this imprinted button on the
console
GrpCalling
To select this menu option, press the unlabeled display button
next to the option
[nnn] Enter the variable information in brackets
Press this key on the PC
Press this function key on the PC
+ On the PC, hold down the first key and press the second key
Continuation of procedures
That completes the walk-through of the MERLIN Messaging Online Guide. To begin accessing
information related to your selected path, click one of the topics listed in the Contents Panel.
Page 11

Contents
System Planning and Completion of Forms
Getting Started
System Overview
Introduction
Services and
Features
System
Configuration
Port Assignments
System LEDs
System Capacities
System
Components
Environmental
Requirements
Installer/
Programmer
Responsibilities
Company
Personnel
Responsibilities
Security
Features
Call Handling Planning
Completing the MERLIN Messaging System Planning Forms
Appendix A: MERLIN Messaging System Planning Forms
Page 12
PCMCIA Slots
The left-most PCMCIA slot houses the 2-Port, 4-Port, 6-Port, 8-Port, 10-Port, or 12-Port PC
Card required for operation of the MERLIN Messaging System.
NOTE: Only the left-most of the two PCMCIA slots can be used. The right-most slot is
reserved for future use.
The 2-Port, 4-Port, 6-Port, 8-Port, 10-Port, or 12-Port PC Card contains:
Port licensing data that triggers the activation of the appropriate number of voice
messaging ports.
●
A Remote Maintenance Device (RMD), used for remote access to diagnostic and
maintenance features of the system.
●
Media for performing system backup.●
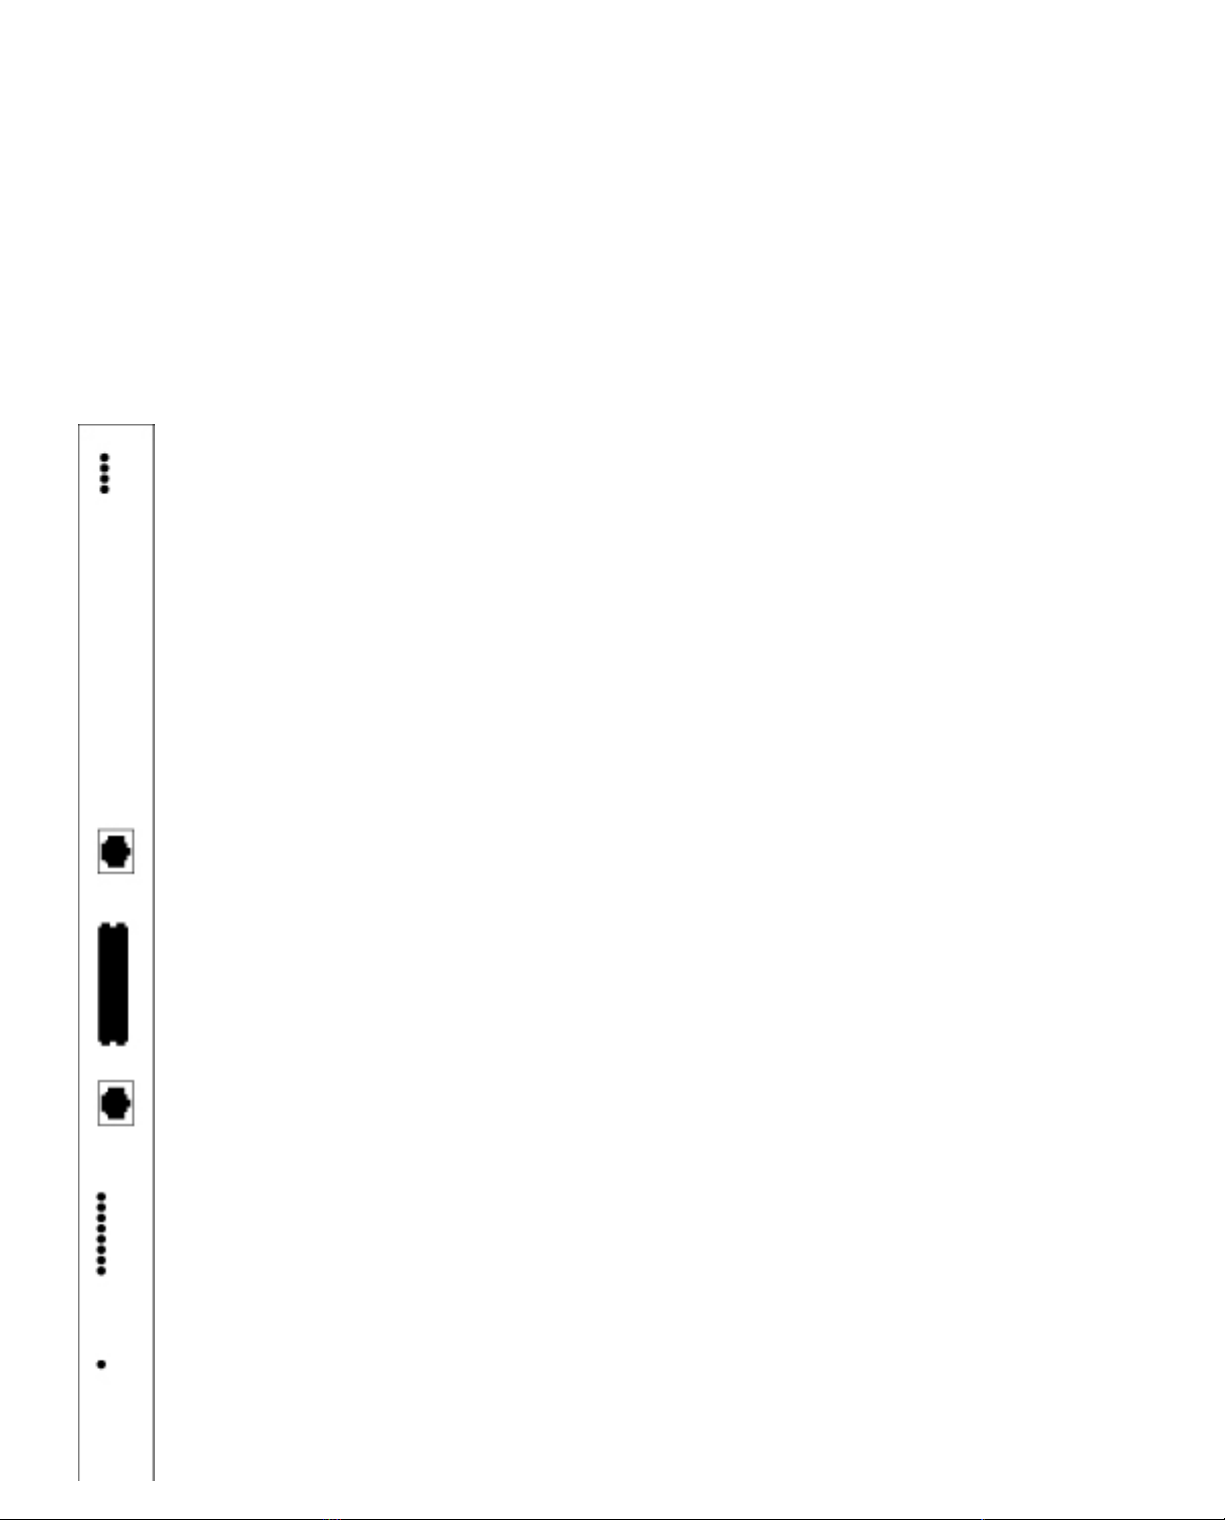
Page 13

Introduction
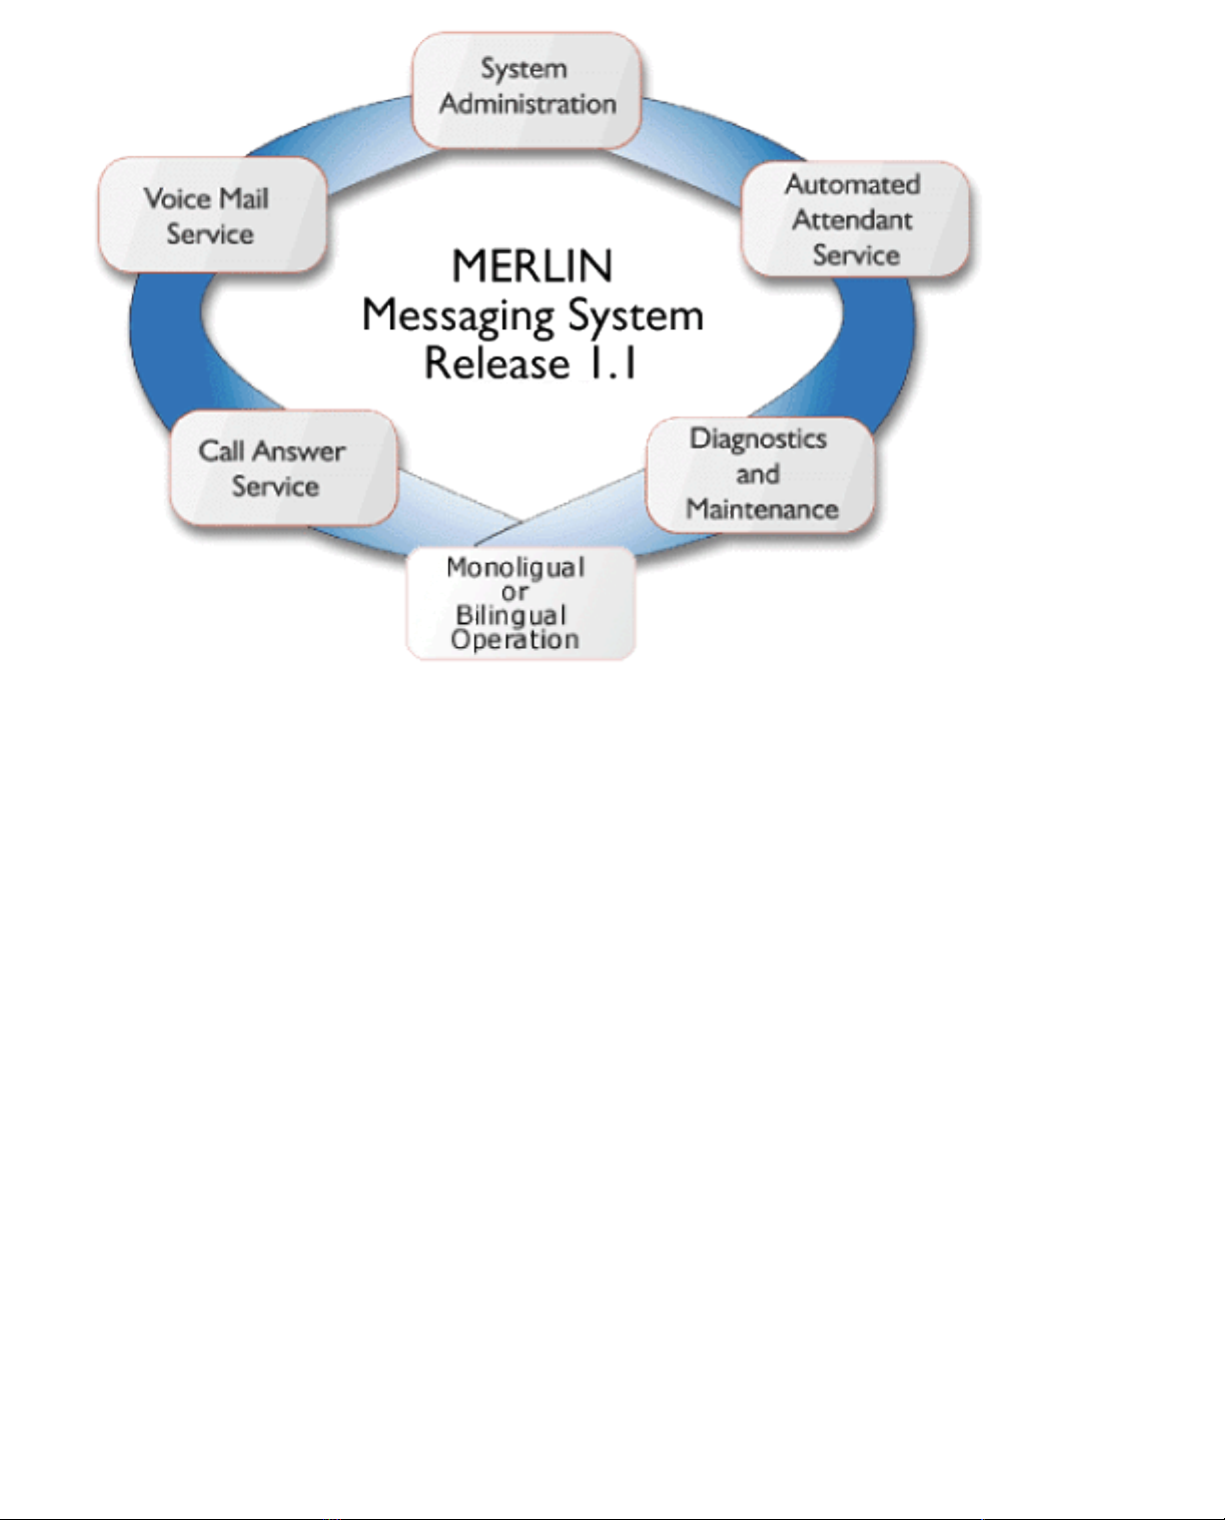
MERLIN Messaging System Release 2 is an embedded voice messaging system housed in a module (circuit
pack) that plugs into the switch's carrier. Release 2 is available in a 2-, 4-, 6-, 8-, 10-, or 12-Port configuration.
Release 1 and 1.1 is available in a 2-, 4-, or 6-Port configuration. For a description of each module component,
move the mouse pointer over the graphic below.
Port Level LEDs: The port-specific LEDs on the Merlin Messaging faceplate indicate the current status of each voice messaging port. The possible variations are:
Not available●
In service and idle●
In service and in use●
Note: The port-specific LEDs that correspond to voice messaging ports are in ascending order
(that is, from the bottom up).
RS232 Port: This is a serial port used for local access to the MERLIN Messaging System via a PC or laptop computer for report, maintenance and administrative purposes. Access to the MERLIN Messaging System using the RS-232 port is both login and password protected.
System Status LED:
This LED reflects the status of the MERLIN Messaging System. The LED displays a red,
green or amber light to indicate various stages of system status and readiness (for example,
booting, self-test failure, system upgrade in progress, etc.).
Local Area Network (LAN) Connection:
This port is used to connect the system to a LAN (Release 2 or later). Port Status LEDs:
The port-specific LEDs on the MERLIN Messaging System faceplate indicate the current
status of each voice messaging port. The possible variations are:
Not available●
In service and idle●
In service and in use●
Note: The port-specific LEDs that correspond to voice messaging ports are in ascending order
(that is, from the bottom up).
Page 14
Allows mailbox owners to:
Record and send messages.●
Listen to messages.●
Forward and reply to messages.●
Record their names or Personal Greetings.●
Activate a Personal Greeting.●
Change their Personal Operators.●
Change their passwords.●
Set up Outcalling (if permission provided).●
Create Personal Group Lists.●
Change Call Answer mode.●
Transfer to another extension.●
Allows individuals responsible for programming the MERLIN Messaging System to:
Administer System Parameters such as System Language mode and System Date
and Time.
●
Administer an extension to be either a Mailbox, Fax, Transfer-Only or Automated
Attendant Extension.
●
Administer up to four Automated Attendants.●
Administer System Security Options.●
Administer System Group Lists (Release 2 or later).●
Perform a System Backup or System Restore.●
Page 15

Answers incoming lines and presents callers with a list of options. Based on callers'
resulting input, they may be:
Transferred to an extension.●
Played an informational announcement.●
Transferred to a voice mailbox.●
Presented with a submenu containing additional options.●
The Automated Attendant Service can also detect and route fax calls to a
predetermined fax extension.
Functions as a personal answering machine, allowing a caller to:
Hear the Personal Greeting recorded by the mailbox owner.●
Switch to the alternate language, if the system is configured in Bilingual mode.●
Leave a voice message, if this capability has been programmed by the mailbox
owner.
●
Optionally designate voice message as a priority or private message (Release 2 or
later).
●
Transfer to an operator or to another extension.●
Provides on-site and remote system serviceability functionality, including:
Terminal-based reporting●
Trouble/fault isolation●
Backup and Restoration●
The MERLIN Messaging System can operate in either Monolingual or Bilingual mode. In
Monolingual mode, all system prompts are played in one of the following languages:
U.S. English●
Latin American Spanish●
Canadian French●
Brazilian Portuguese (Release 2 or later)●
In Milingual mode, the caller can choose to hear prompts in either the Primary or
Secondary language.
Services and Features
For a description of each MERLIN Messaging System service or feature, move the mouse
pointer over the graphic below.
Page 16

System Configuration
There is one common module (circuit pack) for all six MERLIN Messaging System
configurations (that is, a 2-port, 4-port, 6-port, 8-port, 10-port, or 12-port configuration). A
2-port, 4-port, 6-port, 8-port, 10-port, or 12-port PC Card, included with each system, contains
the following components:
Port licensing for the system's port configuration (that is, a 2-port, 4-port, 6-port, 8-port,
10-port, or 12-port configuration)
●
Media for backing up and restoring the system●
A 14.4 kbps Remote Maintenance Device (modem) used for remote diagnostics●
For Release 1 and 1.1, one common module supports three configurations (that is, a 2-port,
4-port, or 6-port configuration). A 2-port, 4-port, or 6-port PC card is included with each
system.
Page 17
Port Assignments
The communications system assigns logical IDs and extensions to each port on the MERLIN
Messaging System module. The first logical ID and extension assigned to the MERLIN Messaging
System module is assigned to Port 1, the second to Port 2, etc. The communications system assigns 12
logical IDs and extensions to the MERLIN Messaging System module.
In Release 2 or later, if a Message-Waiting Light (MWL) update or Outcalling action needs to be
performed, the following ports are used:
Port 2 on a 2-port system●
Port 4 on a 4-port system●
Ports 5 and 6 on a 6-port system●
Ports 7 and 8 on an 8-port system●
Ports 9 and 10 on a 10-port system●
Ports 11 and 12 on a 12-port system●
The Remote Maintenance Device (RMD) is not assigned to a dedicated logical ID and extension.
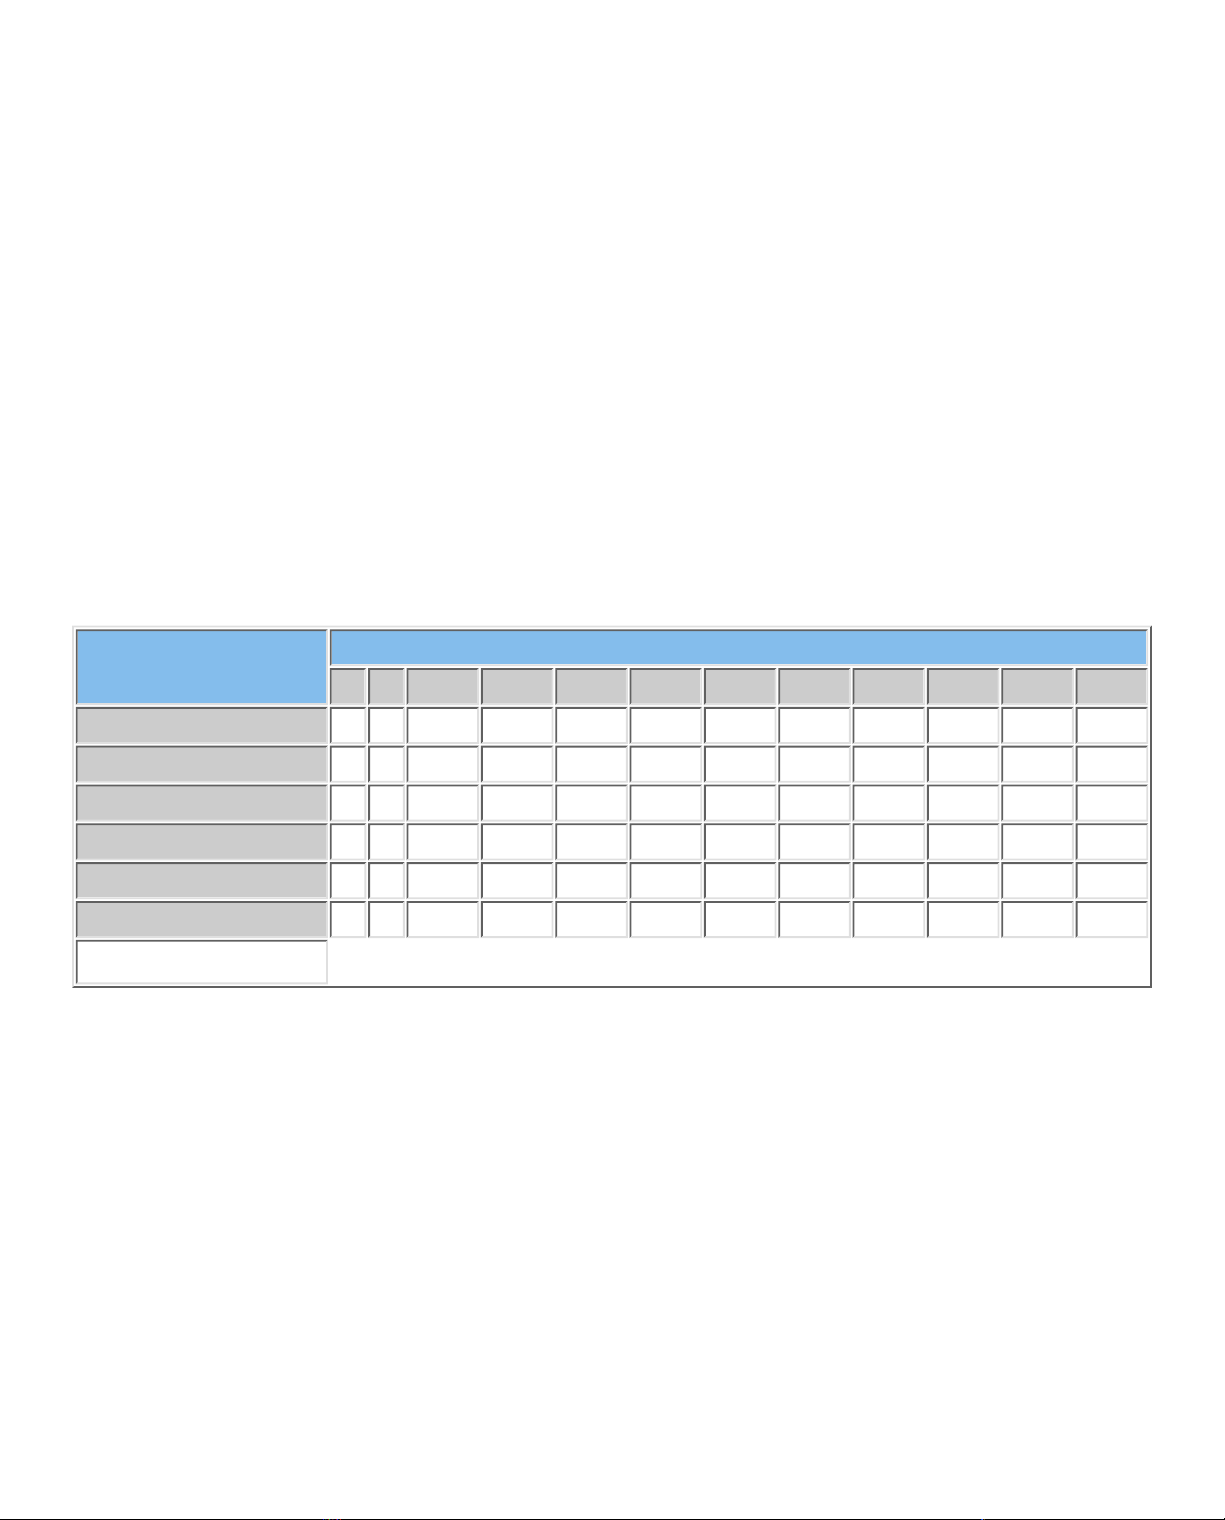
The following table defines the Port Assignments for the MERLIN Messaging System Release 2 or
later.
System
Configuration
Ports
1 2 3 4 5 6 7 8 9 10 11 12
2-port V V N/E N/E N/E N/E N/E N/E N/E N/E N/E N/E
4-port V V V V N/E N/E N/E N/E N/E N/E N/E N/E
6-port V V V V V V N/E N/E N/E N/E N/E N/E
8-port V V V V V V V V N/E N/E N/E N/E
10-port V V V V V V V V V V N/E N/E
12-port V V V V V V V V V V V V
V = Voice
N/E = Not Equipped
In Release 1 or 1.1, if a Message-Waiting Light (MWL) update or Outcalling action needs to be
performed, the following ports are used:
Port 2 on a 2-port system●
Port 4 on a 4-port system●
Port 6 on a 6-port system●
The Remote Maintenance Device (RMD) is assigned to the twelfth logical ID and extension.
Page 18
System LEDs
The MERLIN Messaging System module faceplate contains:
One system status LED●
One LED for each of the voice ports●
The color(s) and status (that is, on, off or blinking) of the LEDs provide information regarding the
operation of the MERLIN Messaging System module.
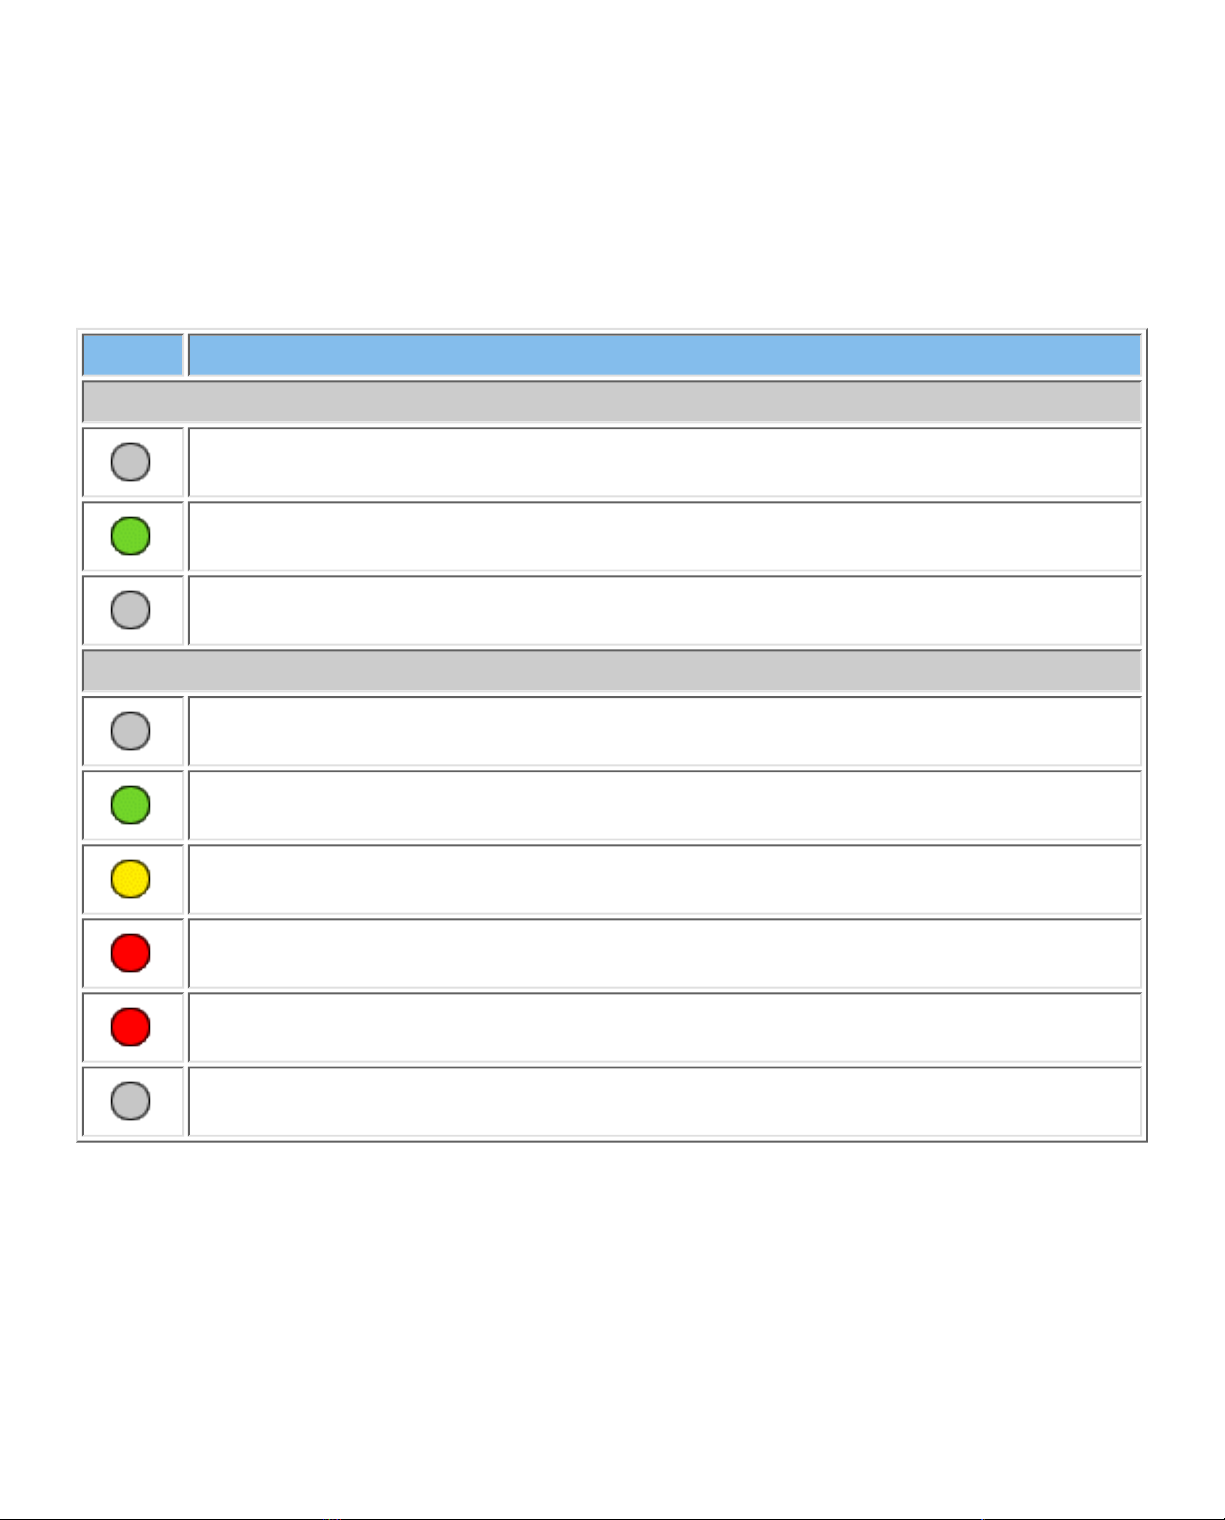
The table below provides a description of the port-level and system status LED display variations.
Display Meaning
Port-Level LEDs
Port not available for use (off)
Port in service and idle (on-hook)
Port in use (off-hook)
System Status LED
System is not powered up or there is a fault condition
System is in a ready state (off-hook; speaking or recording; receiving Touch Tones)
There is a self-test failure or system is out-of-service
There is a self-test failure or system is out-of-service
System software is being upgraded
Hard disk is active
Page 19
System Capacities
The following table provides a summary of MERLIN Messaging System capacities.
| System Parameters | Extensions | Automated Attendants | System Security | System Group
Lists | User Options |
Feature Capacity Factory Settings
System Administration Prompt Language
U.S. English, Latin American
Spanish, Canadian French,
Brazilian Portuguese (Release
2 or later)
● U.S. English●
System Parameters
System Language● U.S. English, Latin American
Spanish, Canadian French,
Brazilian Portuguese (Release
2 or later)
● U.S. English●
Language Mode● Monolingual or Bilingual● Monolingual●
Call Answer Service Operator● 1 maximum● Ext. 768●
General Mailbox Owners● 1 per General Mailbox● 10 (total)●
Maximum Extension Length● 2, 3 or 4 digits● 2 digits●
Message Storage● 100 hours● N/A●
Extensions
Mailbox Extensions● 200 maximum for any port
configuration
● None●
Maximum Number of
Messages per Mailbox
❍ 120 messages❍ N/A❍
Mailbox Size❍ 5 – 180 minutes
(administered per
mailbox)
❍ 20 minutes❍
Message Length❍ 2 – 60 minutes
(administered per
mailbox)
❍ 4 minutes❍
Mailbox Language❍ U.S. English, Latin
American Spanish,
Canadian French,
Brazilian Portuguese
(Release 2 or later)
❍ System/Primary
Language
❍
Outcalling Permission❍ On or Off❍ Off❍
Transfer-Only Extensions● 400 maximum● None●
Automated Attendant
Extensions
● 10 maximum● None●
Page 20
Fax Extensions● 4 (One for each Automated
Attendant; Fax Extensions
can be shared by multiple
Automated Attendants)
● None●
General Mailbox● 4 (one for each Automated
Attendant)
● 9991, 9992, 9993, 9994●
Automated Attendants
Number of Automated
Attendants
● 4 maximum● 4●
Modes of Operation● 2 (Day mode and Night
mode)
● N/A●
Submenus● 99 maximum● None●
Announcements● 99 maximum● None●
Schedule Controller● Follow Switch mode, Weekly
Business Schedule or both
● Switch Mode●
Main menu Prompts,
Submenu Prompts and
Announcements
● 2 minutes in length maximum
for each
● N/A●
Number of Line Assignments● 80 per Messaging System● N/A●
System Security
Minimum Password Length● 0 –15 digits● 6 digits●
Maximum Password Length● 15 digits● 15 digits (fixed)●
Transfer Restrictions● On or Off● On●
System Group Lists
10 maximum with up to
50 mailbox extensions in
each list
● N/A●
User Options
Outcalling Telephone/Pager
Numbers (administered by
user)
● 5 maximum● N/A●
Outcalling Cycles● 1–9● 3●
Outcalling Interval● 5 – 99 minutes● 15 minutes●
Outcalling Schedule● Range is 0000 – 2359● 24 hours●
Outcalling Activation● Outcalling for all
messages or priority
messages only
● All messages●
Personal Greetings (recorded
by user)
● 6 maximum● System Greeting●
Group Lists (administered by
user)
● 10 maximum with up to 50
extensions in each list
● N/A●
Page 21

Personal Operator● 1 per user● Call Answer Service
Operator
●
Call Answer Mode● Record mode or
answer-only mode
● Record mode●
Page 22

System Components
The MERLIN Messaging System module resides in a slot in the communications system carrier.
One common module supports a 2-port, 4-port, 6-port, 8-port, 10-port, or 12-port configuration. (In
Release 1 or 1.1, the module supports a 2-port, 4-port, or 6-port configuration.)
Component Description
Module
LEDs●
RS-232 Serial Port●
Local Area Network
(LAN) connection
●
PCMCIA Slots●
Touch-Tone Receivers (TTRs)●
One LED indicates system status and one LED
for each port indicates port status. See the
MERLIN Messaging System Installation,
Programming, and Troubleshooting Online
Guide for more information about the LEDs.
●
Used to directly connect a PC or laptop to the
system.
●
Used to connect the system to a LAN (Release
2 or later).
●
Used to house the 2-port, 4-port, 6-port, 8-port,
10-port, or 12-port PC card. Only the left-most
slot should be used.
●
Two TTRs serve as communications system
resources (an internal component of the
module).
●
PC Card
2-port, 4-port, 6-port, 8-port, 10-port, or
12-port PC Card
The PC Cards provide:
Remote Maintenance Device (RMD).●
Media for performing system backup.●
Port licensing required for the 2-port, 4-port,
6-port, 8-port, 10-port, or 12-port
configuration.
●
Port LEDs
The port LEDs are single lights which function according to the configuration. For example, in a
2-port configuration, only the LEDs for Port 1 and Port 2 operate while, in an 8-port configuration,
LEDs for Ports 1 through 8 operate.
Page 23
Environmental Requirements
For proper operations, the MERLIN Messaging installation site must meet the environmental
requirements described in the table below.
Condition Requirement
Relative Humidity 15% - 90% non-condensing
Temperature Range 32° F to 122° F (0° C to 50° C)
Air Quality Dust-free area (preferably in an office environment)
Environment No exposure to liquids. Avoid areas near drinking fountains, coffee makers, etc.
Power Supply For the USA, Canada and other countries that use a USA-type outlet (nominal voltage 117
VAC), the communications system must have a 391A3 or newer power supply module
installed in the same carrier in which the MERLIN Messaging System module is installed.
In countries with nominal voltage of 220 VAC, a 391B2 or newer power supply module is
required in the same carrier in which the MERLIN Messaging System module is installed.
Page 24

Installer and Programmer Responsibilities
The individual installing and programming the MERLIN Messaging System is responsible for
the following tasks:
Installing the MERLIN Messaging System module.●
Programming the MERLIN Messaging System module to provide the services specified
by the customer.
●
Programming the communications system to support MERLIN Messaging System
operation.
●
Reviewing configuration reports to ensure that all system parameters, line assignments,
Automated Attendant menus and Announcements are correct and current.
●
Page 25

Company Personnel Responsibilities
Before the MERLIN Messaging System is programmed, company personnel should be
designated to serve in the following support roles:
System Manager
Call Answer Service Operator
General Mailbox Owner(s)
Page 26

System Manager Responsibilities
The System Manager is responsible for performing the following routine maintenance tasks:
Maintaining Voice Mailboxes, for example:
Adding and deleting voice mailboxes.❍
Resetting (initializing) voice mailbox passwords when forgotten.❍
Changing user's mailbox language.❍
●
Maintaining Transfer-Only, Automated Attendant and Fax Extensions.●
Changing Automated Attendant Menus, Announcements and Line Assignments to
reflect changes in line assignment, personnel, company operations or company services.
●
Maintaining the Automated Attendant Schedule to assure that the appropriate
Automated Attendant menus and announcements are played in connection with holidays
and temporary company closings or openings.
●
Maintaining System Parameters to make system-wide changes (for example, changing
date and time, the Call Answer Service Operator extension or General Mailbox
Owners).
●
Maintaining System Security by responding to user inquiries and by taking measures
to prevent toll fraud and to safeguard the contents of mailboxes.
●
Performing System Backups periodically or when changes are made to the MERLIN
Messaging System.
●
Maintaining Directory Listings to reflect changes in personnel.●
Reviewing Configuration Reports to ensure that all system parameters, line
assignments, Automated Attendant menus and Announcements are current and correct.
●
More Support Roles
Call Answer Service Operator
General Mailbox Owner(s)
Page 27
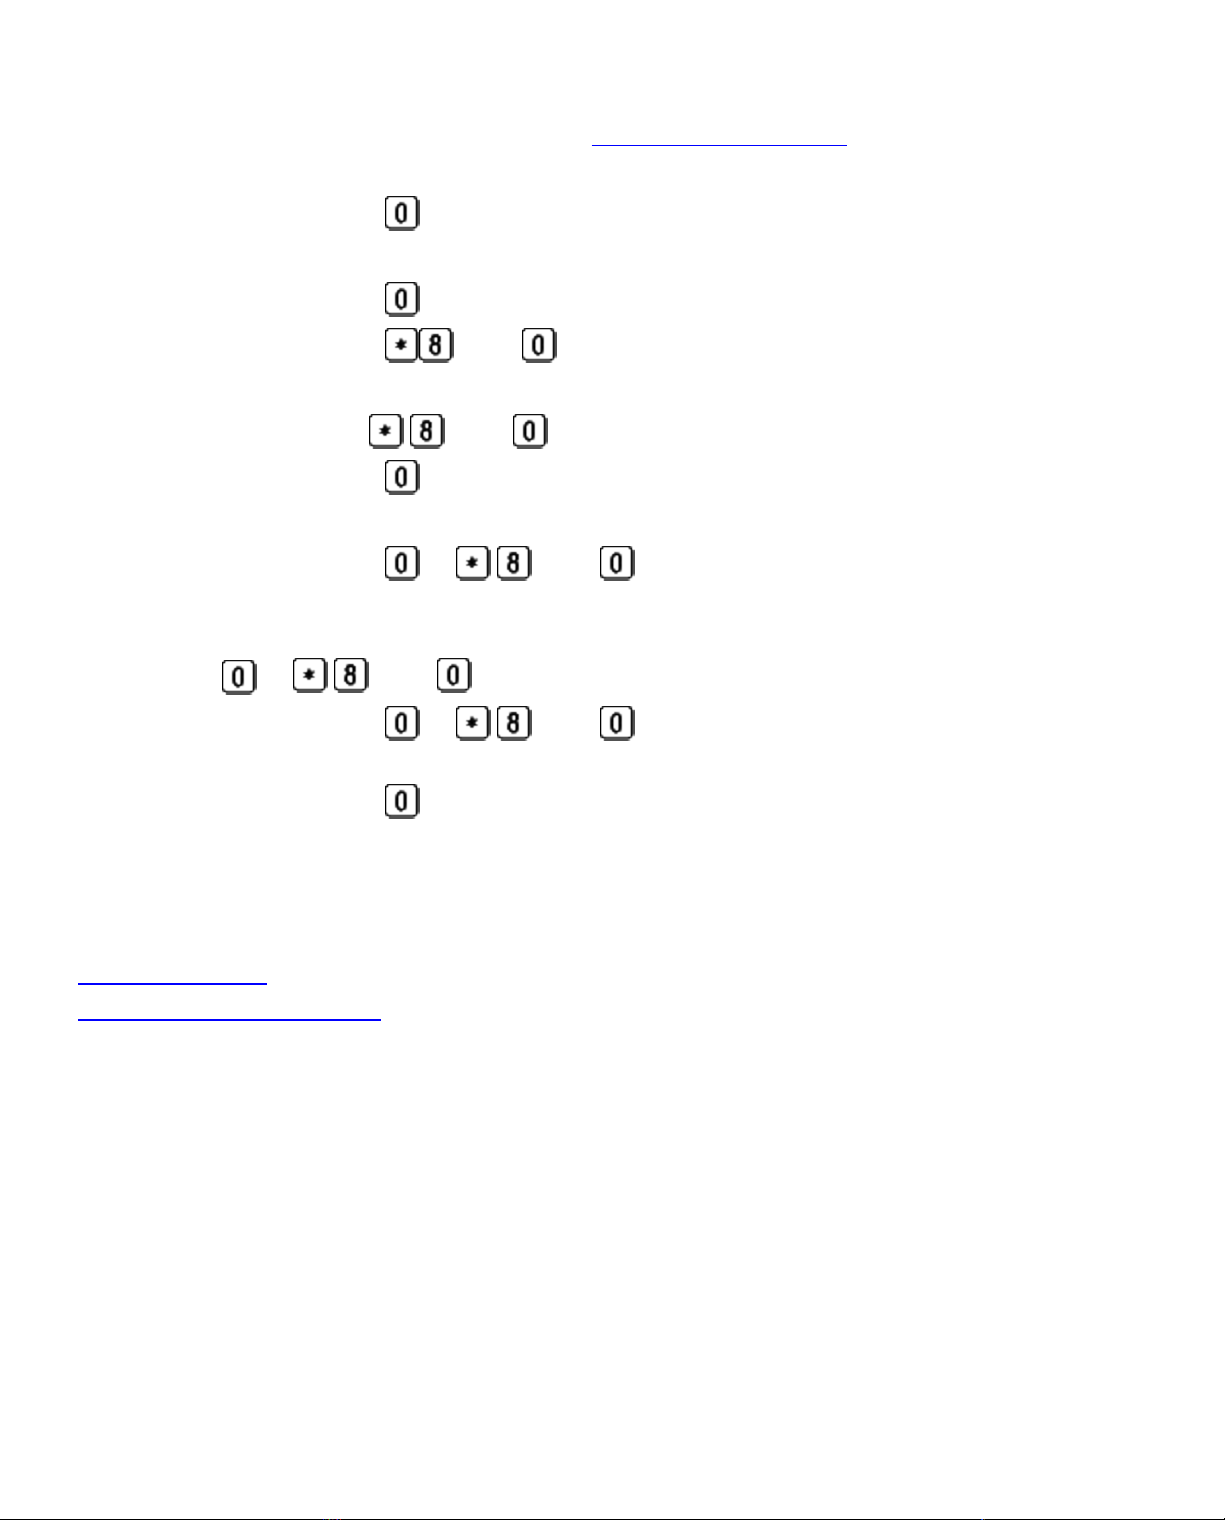
Call Answer Service (CAS) Operator Responsibilities
The Call Answer Service Operator answers calls when:
In Automated Attendant Service, the Dial 0/Timeout Action is set to CAS Operator
and:
Caller presses .❍
Caller makes no selection.❍
Caller presses while using the directory to transfer.❍
Caller presses , then to transfer.❍
●
In Voice Mail Service:
User presses , then .❍
Caller presses while using the directory to transfer.❍
●
In Call Answer Service:
Caller presses or , then while the greeting is playing and the
extension does not have a Personal Operator.
❍
Mailbox is in Answer-Only mode without a Personal Operator and caller presses
or , then during the five-second timeout following the greeting.
❍
Caller presses or , then before or after leaving a message in a
mailbox that does not have a Personal Operator.
❍
Caller presses while using the directory to transfer.❍
●
The factory setting for the Call Answer Service Operator is 768. It is recommended that you do
not change the factory setting.
More Support Roles:
System Manager
General Mailbox Owner(s)
Page 28

General Mailbox Owner Responsibilities
A person designated as a General Mailbox Owner is responsible for forwarding messages left
in the General Mailbox to the intended user's mailbox.
Calls are directed to the General Mailbox when the Automated Attendant’s Dial 0/Timeout
Action has been set to "Record a Message in the General Mailbox" and the caller does any of
the following:
The caller presses from an Automated Attendant Main menu, Submenu or an
Announcement.
●
The caller makes no Touch-Tone response to an Automated Attendant Main menu or
Submenu.
●
The caller presses while using the directory to transfer.●
More Support Roles:
System Manager
Call Answer Service Operator
Page 29

Security Features
The MERLIN Messaging System includes security features to help protect your system from
toll fraud abuse. These features include:
A Transfer Restriction capability that allows the System Manager to restrict call transfer
destinations only to those extensions administered by the System Manager.
●
A Minimum Password Length setting that allows the System Manager to choose a
minimum length for the passwords of users' voice mailboxes. A Minimum Password
Length setting of at least six digits is recommended.
●
Password Protection for Mailboxes and the Diagnostic and Maintenance Interface.●
Page 30

Contents
System Planning and Completion of Forms
Getting Started
System Overview
Call Handling Planning
Introduction
Immediate Call Handling
Delayed Call Handling
Night Only Call Handling
Fax Call Handling
Centralized Voice Messaging in a Private Network
Completing the MERLIN Messaging System Planning Forms
Appendix A: MERLIN Messaging System Planning Forms
Page 31

Call Handling Planning
Before you fill out the planning forms for the MERLIN Messaging System, you must decide
which call handling method your system will use.
The MERLIN Messaging System and the communications system can be programmed to work
together to provide the following Call Handling methods:
Immediate Call Handling●
Delayed Call Handling●
Night Only Call Handling●
Fax Call Handling●
Centralized Voice Messaging in a Private Network●
Page 32

Immediate Call Handling
If you want most incoming calls to be answered by an Automated Attendant with overflow
calls handled by a communications system operator or any other extension, use Immediate Call
Handling. With Immediate Call Handling, Automated Attendant Service answers all incoming
calls and callers hear the Day Main menu or Night Main menu depending on the time of day
and the Automated Attendant Schedule that you specify.
When the MERLIN Messaging System is busy and cannot answer a call, you can arrange for
the call to ring at another extension, such as Direct-Line Console (DLC) or Queued Call
Console (QCC) operator position.
To configure Immediate Call Handling, do the following:
On the MERLIN Messaging System, assign lines to be answered immediately to the
appropriate MERLIN Messaging Automated Attendant.
●
On the communications system, assign the lines you want answered by the Automated
Attendant to the MERLIN Messaging System Calling Group. Program backup Call
Handling as follows:
If you want a DLC or other telephone that is not a QCC to provide backup Call
Handling for the Automated Attendant, assign the lines answered by the
Automated Attendant as Personal Line buttons on the DLC or other telephone and
set the Personal Line buttons to Delay Ring.
❍
If you want a QCC to provide backup for the Automated Attendant, program the
MERLIN Messaging System Calling Group to overflow to the QCC queue and set
the calling overflow thresholds as desired.
❍
●
Also, if the communications system uses Night Service, assign the MERLIN Messaging
System Calling Group as a Night Service Receiver for each appropriate Night Service
group.
●
Related Topics
Delayed Call Handling●
Night Only Call Handling●
Fax Call Handling●
Centralized Voice Messaging in a Private Network●
Page 33

Delayed Call Handling
If you want most incoming calls to be answered by a Direct-Line Console system operator (or
other telephone that is not a Queued Call Console (QCC) system operator position), use
Delayed Call Handling. With Delayed Call Handling, incoming calls ring at a DLC system
operator console (or at other telephones that have a Personal Line button for the line with the
incoming call). If the call is not answered within a certain number of rings, the call is
automatically sent to the MERLIN Messaging System and is answered by the Automated
Attendant Service. Callers hear the Day Main menu or Night Main menu depending on the
time of day and the Automated Attendant Schedule that you specify.
To configure Delayed Call Handling:
On the communications system, configure the following:
Assign lines for immediate ring on the Direct-Line Console (DLC or other
telephone that is not a Queued Call Console (QCC) system operator position).
❍
Next, select an unused calling group extension with no members (called a
phantom calling group) and assign the lines that you want answered on a delayed
basis by the Automated Attendant Service. Assign the MERLIN Messaging
System Calling Group as the Overflow Coverage receiver for the Delayed Call
Handling Calling Group and program the following Overflow Coverage settings:
Set the Time-Based Overflow to the number of seconds that corresponds to
the number of rings that you want the system operator to hear before the
call is sent to the Automated Attendant
■
Set the Number-Based Overflow for the Delayed Call Handling Calling
Group to 99.
■
❍
●
On the MERLIN Messaging System, assign the new Delayed Call Handling Calling
Group extension as an Automated Attendant extension with no phone.
Note:
It is not necessary to assign lines to the Automated Attendant in this
configuration.
●
Related Topics
Immediate Call Handling●
Night Only Call Handling●
Fax Call Handling●
Centralized Voice Messaging in a Private Network●
Page 34

Night Only Call Handling
If you want incoming calls handled by the MERLIN Messaging System Automated Attendant
only when the communications system is in Night Service, use Night Only Call Handling. You
can use Night Only Call Handling with Immediate Call Handling.
To configure Night Only Call Handling:
On the communications system, configure the following:
Assign the lines answered by the Automated Attendant Service to the appropriate
Night Service groups.
Note:
The lines assigned for Night Only Call Handling treatment should not be
assigned to the MERLIN Messaging System Calling Group.
❍
Assign the MERLIN Messaging System as the Night Service receiver for all
applicable Night Service groups.
❍
●
On the MERLIN Messaging System, assign lines to be answered immediately to the
appropriate MERLIN Messaging Automated Attendant.
●
Related Topics
Immediate Call Handling●
Delayed Call Handling●
Fax Call Handling●
Centralized Voice Messaging in a Private Network●
Page 35

Fax Call Handling
If you want the Automated Attendant Service to automatically route fax calls to a
communications system fax extension or Fax Calling Group, use Fax Call Handling. With Fax
Call Handling, you can associate an individual fax or fax calling group extension with each
Automated Attendant. When the Automated Attendant detects a fax tone, the MERLIN
Messaging System sends the call to the associated extension.
Note:
The sending machine must produce industry-standard (CNG) tones to allow the fax call
to be routed properly.
Fax Call Handling should be used with Immediate Call Handling only. Fax Call Handling
cannot be used with Delayed Call Handling because the sending machine stops sending the fax
calling (CNG) tone and hangs up after approximately 35 seconds. This may not be enough
time for the call to be directed to the fax machine.
To configure Fax Call Handling:
On the communications system, configure the following:
Identify the tip/ring jacks used to connect the fax machines. If you want more
than one fax machine extension to be used for each Automated Attendant, create a
Fax Calling Group and assign the fax extensions as members of the group. This
allows calls to be directed to a single extension to be answered by an available fax
machine assigned to the Fax Calling Group.
❍
Identify the extension that will receive the Message-Waiting indication when a
fax is received.
❍
●
For each Automated Attendant on the MERLIN Messaging System, designate an
individual fax extension or Fax Calling Group extension as the transfer destination for
calls that the Automated Attendant detects as fax calls.
●
Related Topics
Immediate Call Handling●
Delayed Call Handling●
Night Only Call Handling●
Centralized Voice Messaging in a Private Network●
Page 36

Centralized Voice Messaging in a Private Network
The MERLIN Messaging System can also be used in a Centralized Voice Messaging
configuration in a private network. MERLIN LEGEND Communications Systems (Release 7.0
(and later) and/or MERLIN MAGIX Integrated Systems connected in a private network by
tandem trunks may share a centralized MERLIN Messaging System connected to one of the
MERLIN LEGEND systems, which is then known as the "VMS hub" system. "Remote"
MERLIN LEGEND systems which are directly connected to the "VMS hub" system by
tandem trunks can then share the centralized MERLIN Messaging System.
Coverage and overflow calls using Calling Groups from the VMS hub and any of the remote
systems can be sent to the centralized MERLIN Messaging System. System users retrieving
voice mail can call the same number from any location and be directly connected to the
centralized MERLIN Messaging System. The centralized MERLIN Messaging System updates
Message–Waiting lights across the private network for its subscribers on remote systems.
The following are general guidelines for configuring a centralized MERLIN Messaging
System. For complete details and programming instructions for networked systems, refer to the
Network Reference for the communications system.
On the communications systems in the private network, configure the following:
The extensions and lines on all networked communications systems should be
numbered unambiguously. For example, on communications system 1, extensions
could be numbered between 1000–1999, on communications system 2, between
2000–2999 and on communications system 3 between 3000–3999, etc. The lines
on communications system 1 could be 1801–1880, on communications system 2
2801–2880; and on communications system 3, 3801–3880.
❍
On the VMS Hub system (where the MERLIN Messaging System module is
physically located), program the communications system for the MERLIN
Messaging System as if it were a stand-alone communications system.
❍
On each remote communications system that will share the MERLIN Messaging
System, program the communications system for the MERLIN Messaging System
as if it were a stand-alone communications system with the following exception:
For the MERLIN Messaging System Calling Group, program only one
member — a non–local Uniform Dial Plan (UDP) number that directs calls
to the MERLIN Messaging System Calling Group on the VMS Hub
system.
■
❍
For Message–Waiting lights to work across private networks, the communications
systems must be connected via PRI, T1–TIE or E&M TIE lines. Also, the Switch
Number must be programmed (refer to the Network Reference for complete
details).
❍
●
On the MERLIN Messaging System, configure the following:
Create a mailbox for each local and non–local extension that is to receive Voice
Mail coverage.
❍
Create a transfer–only mailbox for each local and non–local extension as required.❍
●
Page 37

Miscellaneous configuration information:
Only the VMS Hub system can put the MERLIN Messaging into open and closed
schedules.
❍
To use Night Only Call Handling, Delayed Call Handling or Immediate Call
Handling, use the configuration and programming instructions for each type; for
the communications system actions, program each of the communications system
in the private network that will share the MERLIN Messaging System using
instructions in the Network Reference.
❍
●
Related Topics
Immediate Call Handling●
Delayed Call Handling●
Night Only Call Handling●
Fax Call Handling●
Page 38

Contents
System Planning and Completion of Forms
Getting Started
System Overview
Call Handling Planning
Completing the MERLIN Messaging System Planning Forms
Introduction
Planning Form 1: System Parameters
Planning Form 2: Extension Administration
Planning Form 3: Automated Attendant
Planning Form 4: Line Assignment
Planning Form 5: Security Settings
Planning Form 6: System Group Lists
Appendix A: MERLIN Messaging System Planning Forms
Page 39

Introduction
This section of the Online Guide has been designed to help you complete each of the MERLIN
Messaging System Planning Forms. Once completed, these forms are used to program the
MERLIN Messaging System.
The material that follows contains:
Directions for displaying and printing blank copies of each of the Planning Forms.
During the system planning process, you can use the forms that you print to record
information specific to your site.
●
Sample completed forms.●
Field-by-field instructions for completing the forms. These instructions include
explanations and recommendations for settings to ensure an optimum system
configuration.
●
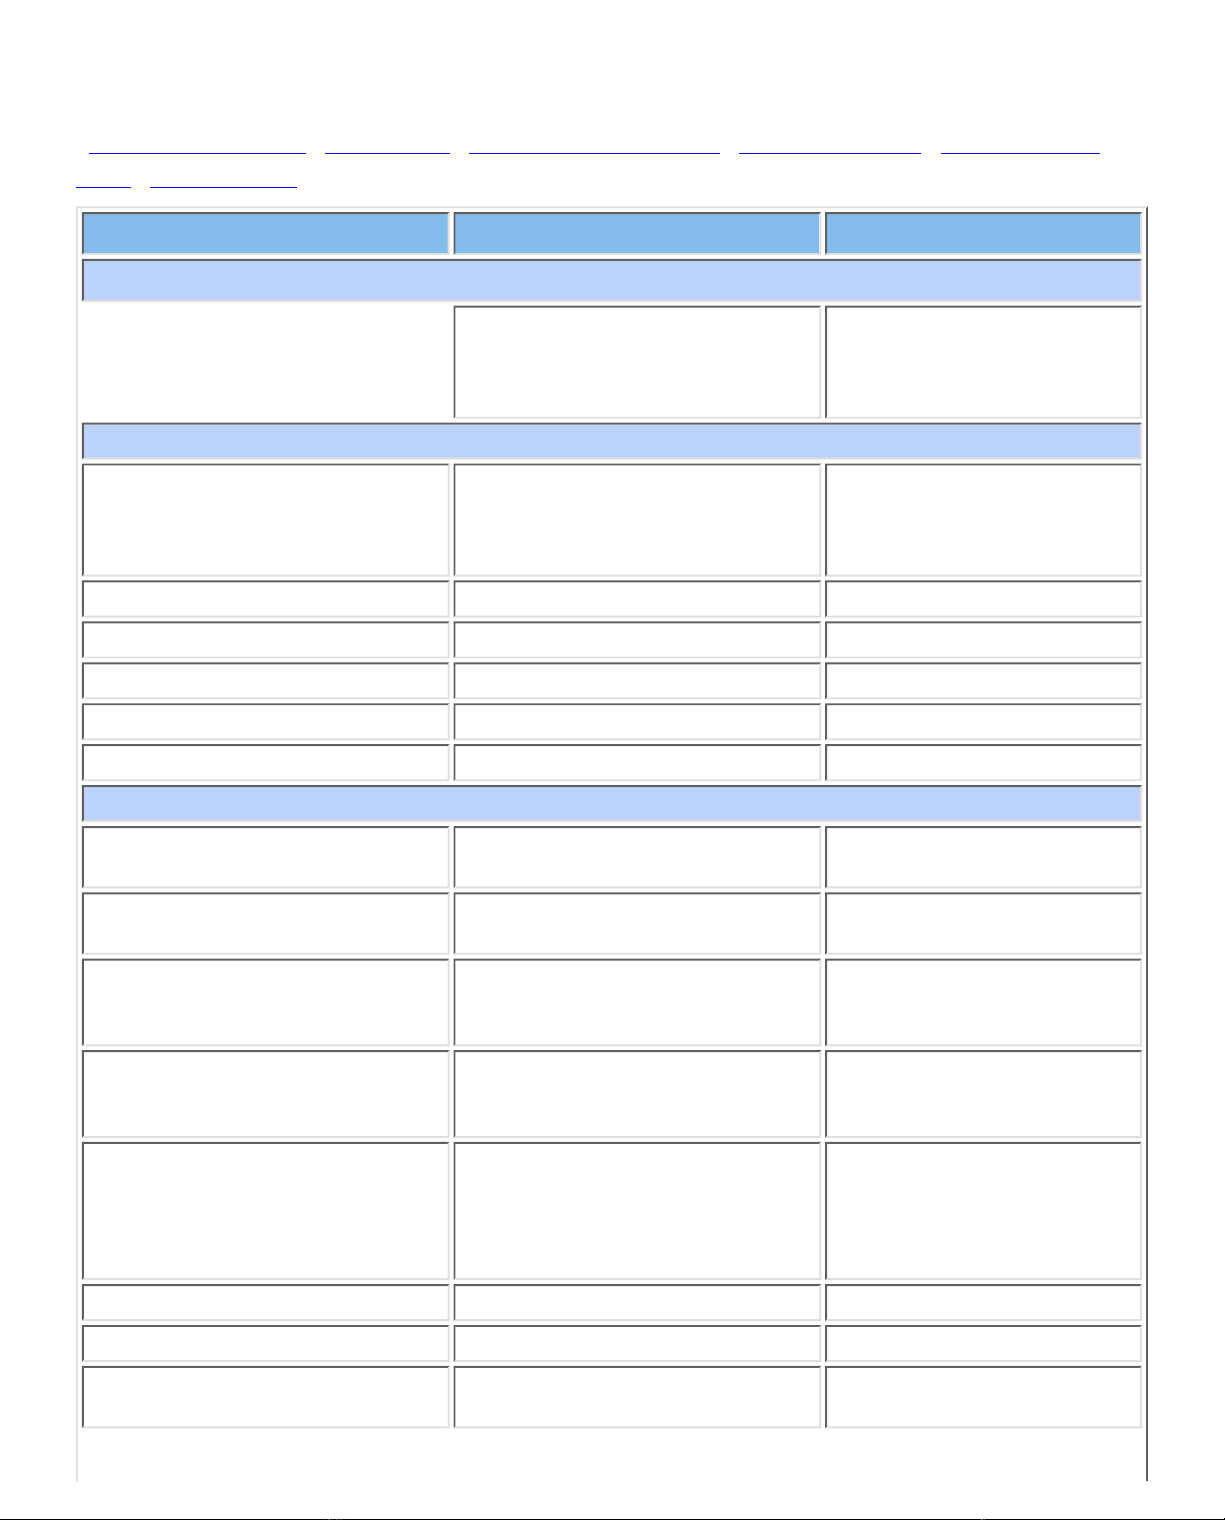
The table on the next page lists the MERLIN Messaging System Planning Forms and
describes how each is used in the system planning process.
Note:
The information that you enter on the MERLIN Messaging System Planning Forms
must be coordinated with certain requirements and specifications of your
communications system. Be sure to obtain a copy of your communications System
Planning Forms before you begin MERLIN Messaging System planning. Use them as
a resource and update them with the MERLIN Messaging System information as
required.
Related Topic
Overview of the MERLIN Messaging System Planning Forms
Page 40

The MERLIN Messaging System Planning Forms
Form Name Used to:
1 System Parameters Specify the System Programming Prompt
Language
●
Define the System Language Mode and
System Language(s)
●
View the System Date and Time format●
Indicate the Call Answer Service
Operator extension
●
Identify the General Mailbox Owner(s)●
Specify the Maximum Extension Length●
2 Extension Administration Indicate a type for each extension in the
system
●
Indicate the Automated Attendant number●
Indicate the telephone status for an
extension
●
Indicate the name for an extension●
Record Directory Listing information for
extensions
●
Assign the appropriate characteristics to
each Mailbox extension, including
Mailbox Size and Message Length, if
Outcalling is on or off, and Mailbox
Language
●
3a Automated Attendant Schedule
and Fax Assignment
Specify the Schedule Controller and, if
applicable, the Weekly Business Schedule
for each Automated Attendant
●
Indicate the Fax Extension for each
Automated Attendant
●
3b Day/Night Main Menu Specify the Day/Night Main menu
Selector Codes and Selector Code Action.
●
Specify the Day/Night Main menu Dial
0/Time-out Action selections
●
3c Submenu Specify Submenu Selector Codes and
Selector Code Action
●
3d Recording Scripts Create scripts for Announcements,
Submenus and the Day/Night Main menu
●
4 Automated Attendant Line
Assignments
Indicate which Automated Attendant
should answer each line
●
Page 41

5 Security Settings Indicate whether Transfer Restrictions
should be turned on or off
●
Specify a Minimum Password Length for
users
●
6 System Group Lists (Release 2
or later)
Create up to ten System Group Lists that
allow users to address a message to a
group of mailboxes.
●
Page 42

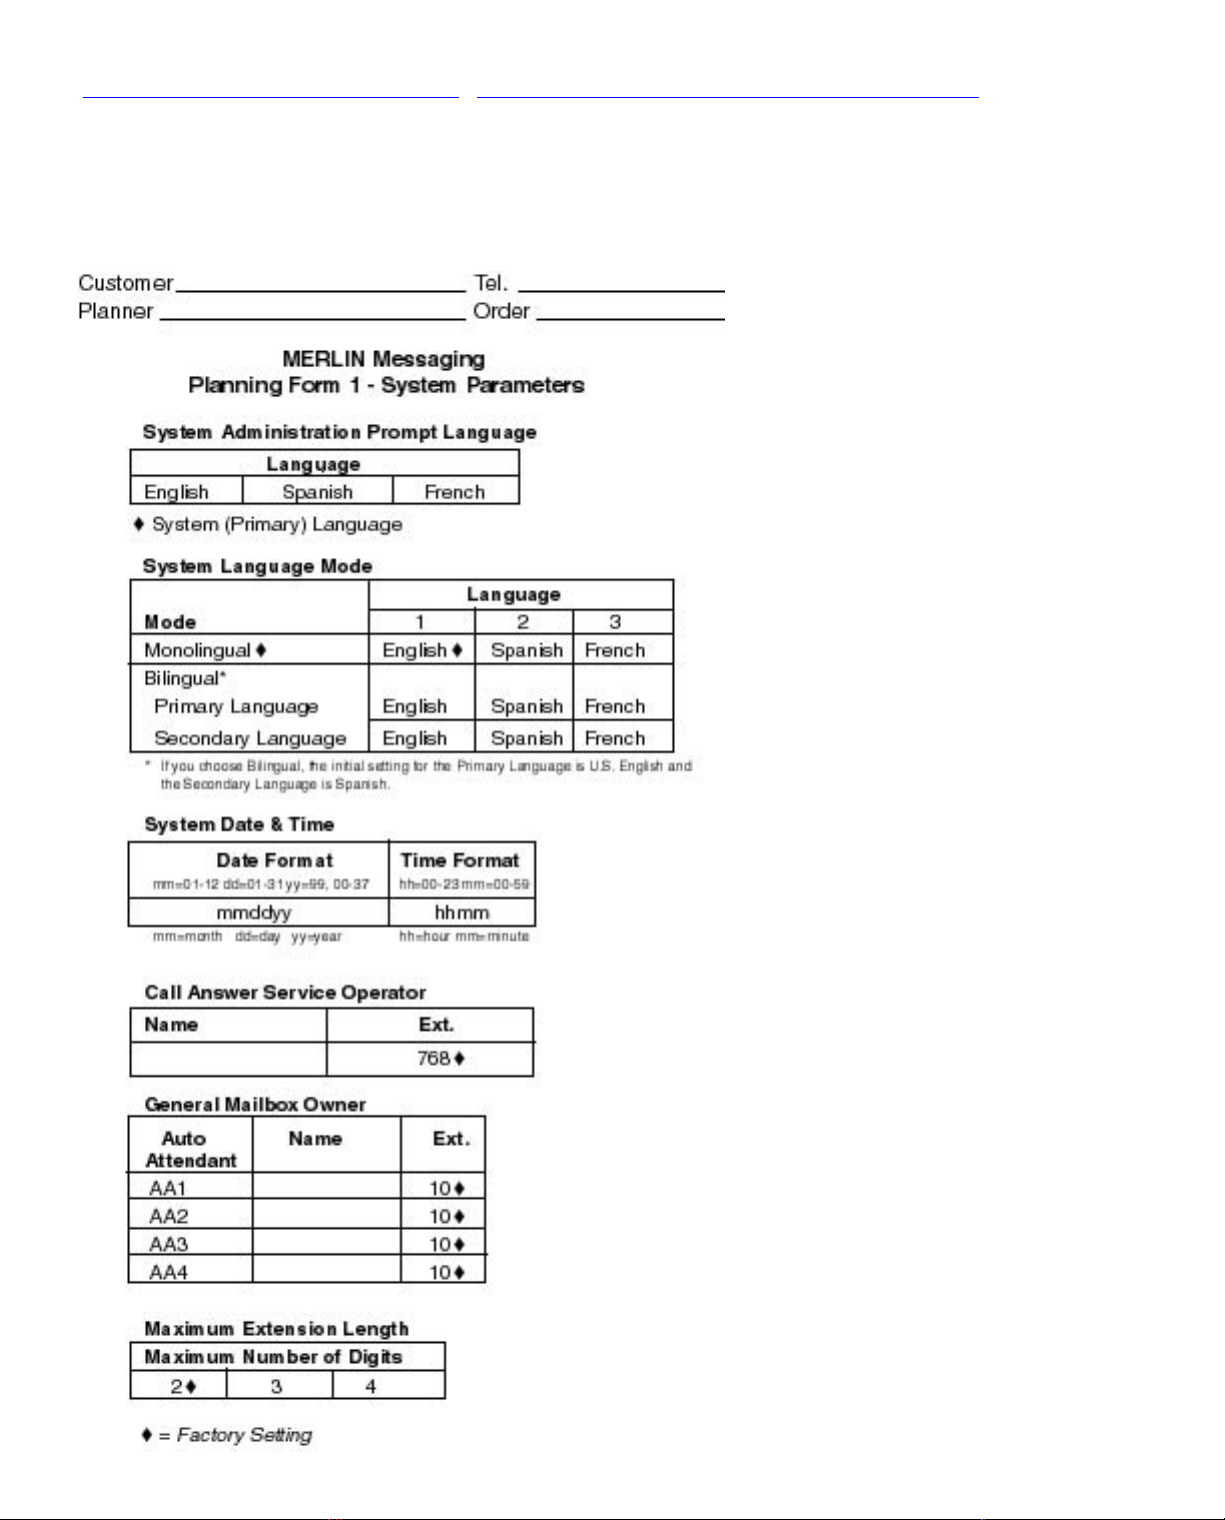
Form 1: System Parameters
Form Name Used to:
1 System Parameters Specify the System Programming Prompt
Language
●
Define the System Language Mode and
System Language(s)
●
View the System Date and Time format●
Indicate the Call Answer Service Operator
extension
●
Identify the General Mailbox Owner(s)●
Specify the Maximum Extension Length●
The information that you enter on the System Parameters Form is used to program a number of
characteristics that affect the general operation of the system. For example, whether the system
operates in Monolingual or Bilingual mode affects the announcements, prompts and menus that
callers will hear in Voice Mail Service (VMS), Call Answer Service (CAS) and Automated
Attendant Service (AAS).
Related Topics
Print a blank System Parameters Form
View a sample, completed System Parameters Form
Access field-by-field instructions for completing the System Parameters Form
Page 43

Form 1: System Parameters
| Print a blank System Parameters Form | Access field-by-field instructions for Completing the System
Parameters Form |
Below is a sample of the completed form:
Page 44
Form 1: System Parameters
| Print a blank System Parameters Form | View a sample, completed System Parameters Form |
To view form completion instructions, click in the fields on the form facsimile
below.
●
To change a factory setting, cross out the factory setting and fill in the desired
information.
●
Page 45

Form 2: Extension Administration
Form Name Used to:
2 Extension Administration Indicate a type for each extension in the system●
Indicate the Automated Attendant number●
Indicate the phone status for an extension●
Indicate the name for an extension●
Record Directory Listing information for user
extensions
●
Assign the appropriate characteristics to each user
Mailbox, including Mailbox Size and Message
Length, if Outcalling is on or off and Mailbox
Language
●
You must assign a specific extension type and specify other information for each extension
in the MERLIN Messaging System to assure the enforcement of transfer restrictions and to
dictate transfer destinations (for example, to a mailbox or Automated Attendant). There
are four possible extension types:
Mailbox●
Transfer-Only●
Automated Attendant●
Fax●
Related Topics
Print a blank Extension Administration Form
View a sample, completed Extension Administration Form
Access field-by-field instructions for completing the Extension Administration Form
Page 46

Form 2: Extension Administration
|Print a blank Extension Administration Form | Access field-by-field instructions for completing the
Extension Administration Form |
Below is a sample of the form:
Page 47

Form 2: Extension Administration
|Print a blank Extension Administration Form | View a sample, completed Extension
Administration Form |
To view form completion instructions, click the fields on the form facsimile below.●
To change a factory setting, cross out the factory setting and fill in the desired
information.
●
Page 48

Page 49

Planning Form 3: Automated Attendant Planning
| Form 3a | Form 3b | Form 3c | Form 3d |
Form 3a
Form Name Used to:
3a Automated Attendant Schedule
and Fax Assignment
Specify the Schedule Controller and if
applicable the Weekly Business
Schedule for each Automated
Attendant
●
Indicate the Fax Extension for each
Automated Attendant
●
The Automated Attendant Schedule Options control the Day and Night Service operation of each
Automated Attendant. The Schedule Options are:
Schedule Controller – Determines which schedule the Automated Attendants follow the
Switch Mode, the Weekly Business Schedule or a combination of both.
●
Weekly Business Schedule – If the Schedule Controller is set to follow the Weekly Business
Schedule or to follow both the Switch mode and the Weekly Business Schedule, you must
specify a Weekly Business Schedule.
●
Temporary Schedule – Allows the Automated Attendants to operate in temporary closure or
temporary open mode. The Temporary Schedule overrides both the Switch mode and the
Weekly Business Schedule. For each day with a temporary opening or temporary closing
schedule, you specify the start and end time of the special schedule. During other periods of
that day, the Automated Attendant operates in the appropriate mode based on its Scheduler
Controller setting. The Temporary Schedule can be programmed for the current day and/or the
following six days. It can also be canceled anytime before or during the Temporary Schedule.
The Temporary Schedule does not carry over from week to week; it expires at the ending time
you specify on the day for which you created it.
●
Automated Attendant Service can also detect a fax tone and route the call to a fax machine extension
assigned to the Automated Attendant.
Make a copy of this form for each Automated Attendant.
Related Topics
Print a blank Automated Attendant Schedule and Fax Assignment Form
View a sample, completed Automated Attendant Schedule and Fax Assignment Form
Access field–by–field instructions for completing the Automated Attendant Schedule and Fax
Assignment Form
| Form 3a | Form 3b | Form 3c | Form 3d |
Page 50

Form 3b
Form Name Used to:
3b Day/Night Main Menu Specify the Day/Night Main menu
Selector Codes and Selector Code Action.
●
Specify the Day/Night Main menu Dial
0/Time–out Action selections
●
The MERLIN Messaging System supports up to four Automated Attendants. The multiple Automated
Attendant capability is available to accommodate co–located (shared tenant) businesses and/or
businesses that require more than one Automated Attendant. Each Automated Attendant has its own
unique:
Day menu structure and Night menu structure.●
Day Main menu prompt and Night Main menu prompt.●
The MERLIN Messaging Automated Attendant Service answers incoming lines and presents callers
with a list of pre–administered choices (Selector Codes) contained on the Automated Attendant Main
menu. During scheduled or temporary open hours, callers hear the Day Main menu. During scheduled
or temporary closed hours, callers hear the Night Main menu. The Day/Night menu consists of a
recorded prompt listing menu options and the corresponding digit (Selector Code) the caller presses to
select each option. Depending on the Touch–Tone input, the Automated Attendant Service performs
the action (Selector Code Action) specified for the Selector Code:
Transfer to an extension●
Play a pre–recorded announcement (an Automated Attendant announcement)●
Play another menu of choices (an Automated Attendant Submenu)●
Transfer to a Mailbox●
Related Topics
Print a blank Day/Night Main menu Form
View a sample, completed Day/Night Main menu Form
Access field–by–field instructions for completing the Day/Night Main menu Form
| Form 3a | Form 3b | Form 3c | Form 3d |
Form 3c
Form Name Used to:
3c Submenu Specify submenu Selector Codes and Selector Code Action ●
A submenu is a menu is accessed by the caller from an Automated Attendant Day/Night Main menu
or from another submenu. To program a submenu as a choice on an Automated Attendant Day/Night
Page 51

Main menu or submenu, assign Selector Action Code 2 to the Selector Code.
The submenu consists of a recorded prompt listing menu options and the corresponding digit (Selector
Code) the caller presses to select each option. Depending on the Touch–Tone input, the Automated
Attendant Service performs the action (Selector Code Action) specified for the selector code:
Transfer to an extension●
Play a pre–recorded announcement (an Automated Attendant announcement)●
Play another menu of choices (an Automated Attendant submenu)●
Transfer to a Mailbox●
Related Topics
Print a blank submenu Form
View a sample, completed submenu Form
Access field–by–field instructions for completing the submenu Form
| Form 3a | Form 3b | Form 3c | Form 3d |
Form 3d
Form Name Used to:
3d Recording Scripts Create Scripts for announcements, submenus and the
Day/Night Main menu
●
Announcements, submenus and the Day/Night Main menu are part of the Automated Attendant
Service. Scripts are recordings of up to two minutes that can be created and changed by the System
Manager only. If the system is in Bilingual mode, then each script consists of one recording in the
Primary Language and one recording in the Secondary Language.
Once you create the script, you can associate it with an Automated Attendant announcement,
submenu or with a Day/Night Main menu.
You can record up to 99 scripts.●
Scripts can be up to two minutes in length.●
The same scripts can be used for more than one Day/Night Main menu or submenu and with
more than one Automated Attendant.
●
Related Topics
Print a blank Recording Scripts Form
View a sample, completed Recording Scripts Form
Access field–by–field instructions for completing the Recording Scripts Form
Page 52

Planning Form 3a: Automated Attendant Schedule and Fax Assignment- Page 1
|Print a blank Automated Attendant Schedule and Fax Assignment Form | Access field-by-field
instructions for completing the Automated Attendant Schedule and Fax Assignment Form |
Below is a sample of the completed form:
| Page 1 | Page 2 | Page 3 | Page 4 |
Page 53
Page 54

Planning Form 3a: Automated Attendant Schedule and Fax Assignment- Page 1
|Print a blank Automated Attendant Schedule and Fax Assignment Form | View a sample,
completed Automated Attendant Schedule and Fax Assignment Form |
To view form completion instructions, click the fields on the form facsimile below.●
To change a factory setting, cross out the factory setting and fill in the desired
information.
●
| Page 1 | Page 2 | Page 3 | Page 4 |
Page 55

Planning Form 3b: Day/Night Main menu
|Print a blank Day/Night Main menu Form | Access field-by-field instructions for completing
the Day/Night Main menu Form |
Below is a sample of the completed form:
| Page 1 | Page 2 | Page 3 | Page 4 |
Page 56

Page 57

Planning Form 3b: Day/Night Main menu
|Print a blank Day/Night Main menu Form | View a sample, completed Day/Night Main menu
Form |
To view form completion instructions, click the fields on the form facsimile below.●
To change a factory setting, cross out the factory setting and fill in the desired
information.
●
| Page 1 | Page 2 | Page 3 | Page 4 |
Page 58

Page 59

Planning Form 3c: Submenu
|Print a blank Sub Menu Form | Access field-by-field instructions for completing the Submenu
form |
Below is a sample of the completed form:
| Page 1 | Page 2 | Page 3 | Page 4 |
Page 60

Planning Form 3c: Submenu
|Print a blank Submenu Form | View a sample, completed Submenu Form |
To view form completion instructions, click the fields on the form facsimile below.●
To change a factory setting, cross out the factory setting and fill in the desired
information.
●
| Page 1 | Page 2 | Page 3 | Page 4 |
Page 61

Planning Form 3d: Recording Scripts
|Print a blank Recording Scripts Form | Access field-by-field instructions for completing the
Recording Scripts Form |
Below is a sample of the completed form:
| Page 1 | Page 2 | Page 3 | Page 4 |
Page 62

Page 63

Planning Form 3d: Recording Scripts
|Print a blank Recording Scripts Form | View a sample, completed Recording Scripts Form |
To view form completion instructions, click the fields on the form facsimile below.●
To change a factory setting, cross out the factory setting and fill in the desired
information.
●
| Page 1 | Page 2 | Page 3 | Page 4 |
Page 64

Planning Form 4: Line Assignments
Note:
This form and the information below apply to systems that use multiple Automated
Attendants only. Skip this form if your system uses a single Automated Attendant.
Form Name Used to:
4 Automated Attendant Line Assignments Indicate which Automated Attendant should
answer each line
When you are completing this form, the following rules apply:
If you indicate that a line is to be answered by Automated Attendant 1, no programming is
needed. Your entry is for record purposes only.
●
If you indicate that a line is to be answered by Automated Attendant 2, 3 or 4,
programming is needed.
●
A line can be assigned to only one Automated Attendant.●
A total of 80 lines can be assigned per MERLIN Messaging System.●
Enter the line numbers for each line connected to the Communications System that you
want answered by an Automated Attendant.
●
Related Topics
Print a blank Line Assignments Form
View a sample, completed Line Assignments Form
Access field-by-field instructions for completing the Line Assignments Form
Page 65

Planning Form 4: Line Assignments
| Print a blank Line Assignments Form | Access field-by-field instructions for completing the
Line Assignments Form |
To view form commpletions instructions, click the fields on the form facsimile below.
Page 66

Planning Form 4: Line Assignment
| Print a blank Line Assignments Form | View a sample, completed Line Assignments Form |
To view form completion instructions, click the fields on the form facsimile below.●
To change a factory setting, cross out the factory setting and fill in the desired
information.
●
Page 67

Planning Form 5: Security Settings
Form Name Used to:
5 Security Settings Indicate whether or not Transfer Restrictions should be turned
on or off
●
Specify a Minimum Password Length for users●
The MERLIN Messaging System includes two features designed to enhance system security by reducing the risk
of toll fraud and abuse by unauthorized users. They are:
Transfer Restrictions●
Minimum Password Length●
Related Topics
Print a blank Security Settings Form
View a sample, completed Security Settings Form
Access field-by-field instructions for completing the Security Settings Form
Page 68

Planning Form 5: Security Settings
|Print a blank Security Settings Form | Access field-by-field instructions for completing the
Security Settings Form |
Below is a sample of the completed form:
Page 69

Page 70

Planning Form 5: Security Settings
|Print a blank Security Settings Form | View a sample, completed Security Settings Form |
To view form completion instructions, click the fields on the form facsimile below.●
To change a factory setting, cross out the factory setting and fill in the desired
information.
●
Page 71

Planning Form 6: System Group Lists
Form Name Used to:
6 System Group Lists Create up to ten System Group Lists that allow users to
address a message to a group of mailboxes
●
Up to 50 Mailbox Extensions can be included in each System GroupList. A Mailbox Extension
can be in more than one System Group List.
Related Topics
Print a blank System Group Lists Form
View a sample, completed System Group Lists Form
Access field-by-field instructions for completing the System Group Lists Form
Page 72

Planning Form 6: System Group Lists
|Print a blank System Group Lists Form | Access field-by-field instructions for completing the
System Group Lists form |
Below is a sample of the completed form:
Page 73

Page 74

Planning Form 6: System Group Lists
|Print a blank System Group Lists Form | View a sample, completed System Group Lists Form
|
To view form completion instructions, click the fields on the form facsimile below.●
Page 75

Appendix A: MERLIN Messaging System Planning Forms
This section of the MERLIN Messaging System Online Guide contains the MERLIN Messaging
System Planning Forms. To view and print these forms, you must have an Adobe Acrobat Reader
plug-in installed on your PC.
After you have installed the Adobe Acrobat Reader plug-in, refer to the following table for
viewing/printing instructions.
If you want to: Action
View the forms Click:
Planning Form 1: System Parameters
Planning Form 2: Extension Administration
Planning Form 3a: Automated Schedule
Planning Form 3b: Day/Night Main menu
Planning Form 3c: Submenu
Planning Form 3d: Recording Script
Planning Form 4: Line Administration
Planning Form 5: Security Settings
Planning Form 6: System Group Lists
Print all of the forms Access the File menu.1.
Select Print All # pages.
Click here to view all forms.
2.
Print a specific form Access the File menu.1.
Select Print.2.
Click OK.3.
Page 76

Customer Tel.
Planner Order
MERLIN Messaging
Planning Form 1 - System Parameters
System Administration Prompt Language
System (Primary) Language
System Language Mode
Mode
Monolingual
Bilingual
Primary Language
Secondary Language
System Date & Time
mm=01-12 dd=01-31 yy=99, 00-37 hh=00-23 mm=00-59
mm=month dd=day yy=yearhh=hour mm=minute
**
Date Format Time Format
mmddyy
Language
12 3 4
English
English Spanish French Portuguese
English Spanish French Portuguese*
Spanish French
hhmm
PortugueseFrenchSpanishEnglish
Language
*
Portuguese*
*
Call Answer Service Operator
General Mailbox Owner
Auto
Attendant
AA1
AA2
AA3
AA4
Maximum Extension Length
Maximum Number of Digits
2
Factory Setting
For Release 2 or later.
*
If you choose Bilingual, the initial setting for the Primary Language is U.S. English and
**
the Secondary Language is Spanish.
Name
Name
3
768
Ext.
10
10
10
10
4
Ext.
Page 77

All
Type Codes
Type
Code
Type
Code 3
only
AA no.
(1-4)
Type
Code
1&3
Phone
Yes=9
No=6
Name
(Optional)
MERLIN Messaging
Planning Form 2 - Extension Administration
All Type Codes
10-Letter Directory Listing
(optional)
*
Msg.
Length
2 - 60 min
4 min
Type Code 1 only
Mailbox
Size
Outcalling
5 - 180 min
20 min
On=9
Off=6 Ext.
Mailbox
Language
1 English
2 Spanish
3 French
4 Portuguese
*
*
Factory Setting
For Release 1 and 1.1, a 4-letter Directory Listing is available.
*
For Release 2 or later.
**
Type
Extension Type Code Capacities
Mailbox 1 200
Transfer-Only 2 400
Automated Attendant 3 10
Fax 4 4 (1 per Automated Attendant)
Letter Key (for directory listing)
A = 21
B = 22
C = 23
D = 31
E = 32
F = 33
G = 41
H = 42
I = 43
J = 51
K = 52
L = 53
M = 61
N = 62
O = 63
P = 71
Q = 72
R = 73
S = 74
T = 81
U = 82
V = 83
W = 91
X = 92
Y = 93
Z = 94
Page 78

MERLIN Messaging
Planning Form 3a - Automated Attendant
Schedule & Fax Assignment
Automated Attendant Number (1-4)
Schedule Controller
(for Day/Night Service
)
Switch Mode
Weekly Business Schedule
Both the Switch Mode and the Weekly Business Schedule
Weekly Business Schedule
Specify a weekly schedule if the Automated Attendant follows the
Weekly Business Schedule or follows both the Switch Mode and the
Weekly Business Schedule. Only enter times if open. For
24-hour open operation, set Open to 0000 and Closed to 2359.
Option Day
Open
or
Closed
Open
(hhmm)
hh=00-23
mm=00-59
Closed
(hhmm)
hh=00-23
mm=00-59
1 Sunday
2 Monday
3 Tuesday
4 Wednesday
5 Thursday
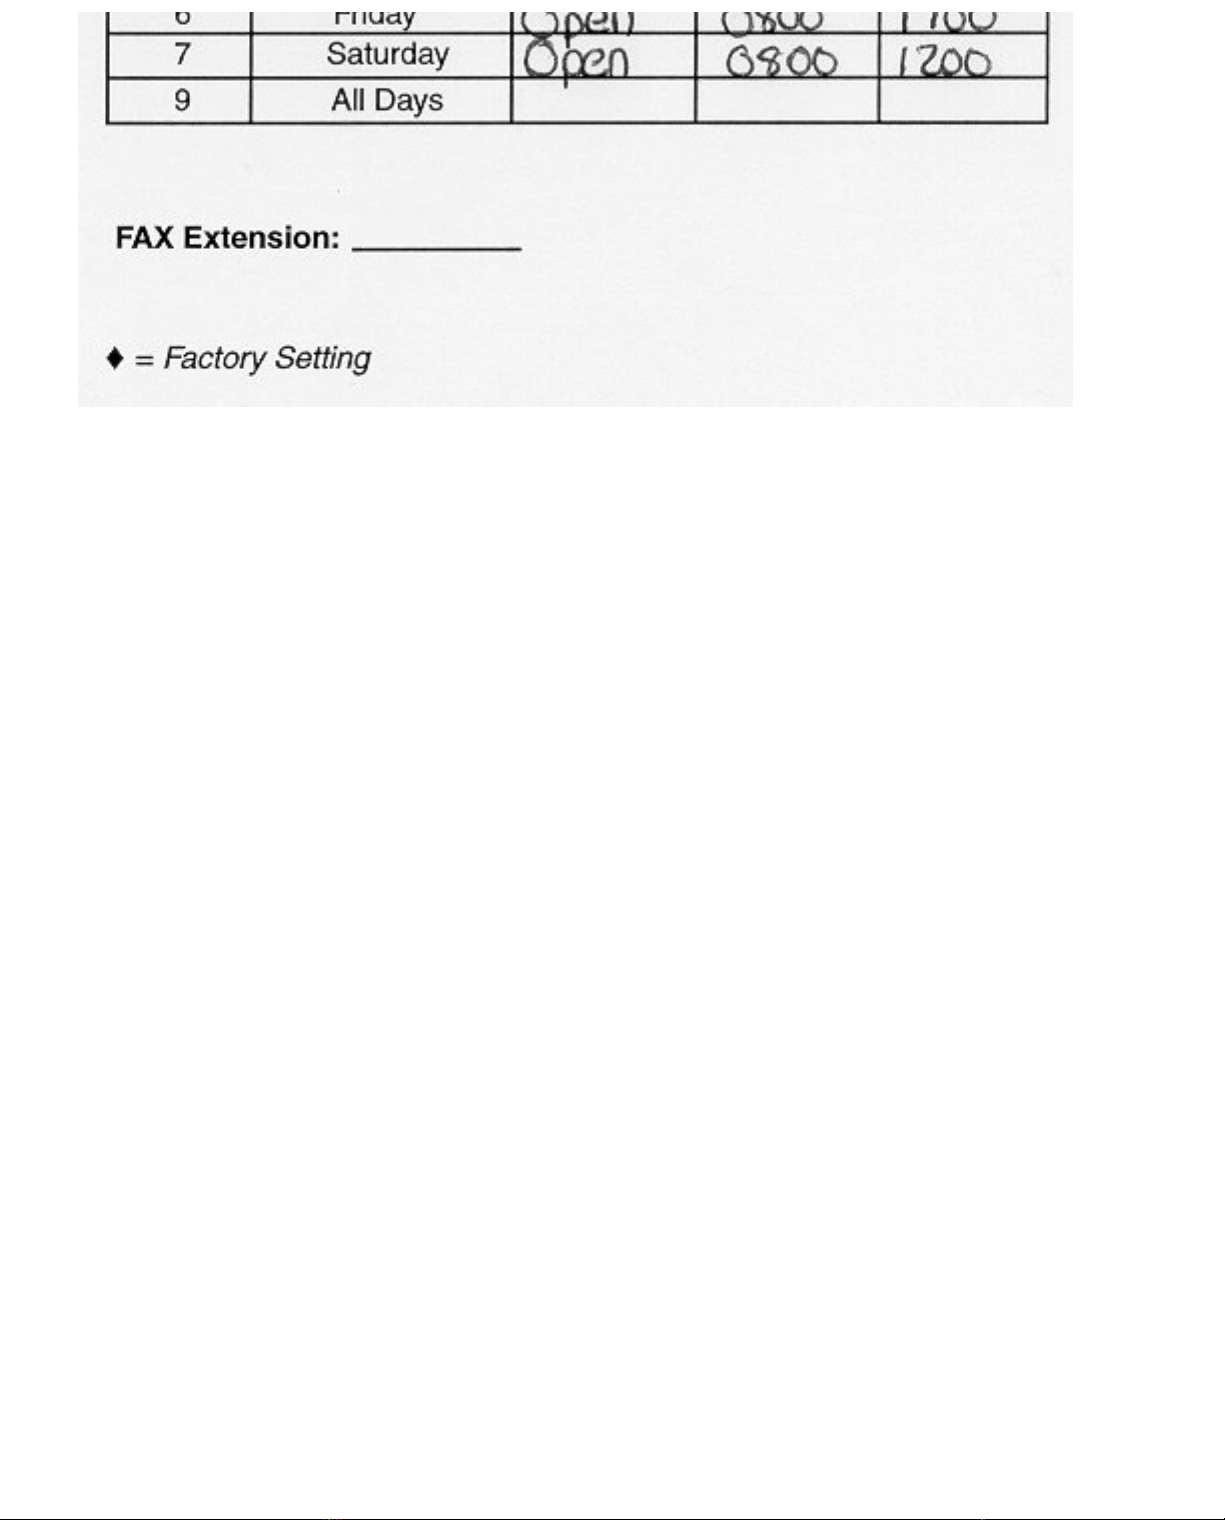
6 Friday
7 Saturday
9 All Days
FAX Extension:
=
Factory Setting
Page 79

MERLIN Messaging
Planning Form 3b - Day/Night Main Menu
Day Main Menu Night Main Menu
Automated Attendant Number (1-4)
Copy this form for each Automated Attendant. Indicate
whether this is for the Day Main Menu or Night Main Menu,
and specify the Automated Attendant number.
Selector Codes
Extension/Mailbox/
Selector Action Announcement No./
Code Code Submenu No. Description
15
25
35
45
5
6
7
8
9
Key
Action
Code Action
1 Selector Code Transfer
2 Play a Submenu
3 Play an Announcement
5 Direct Extension Transfer
6 Mailbox Transfer
Dial 0/Timeout Action
Menu
Selection Day Service Night Service
0
1 General Mailbox General Mailbox
2 Disconnect Disconnect
3 Transfer to Ext. ____ Transfer to Ext. ____
4
=
Factory Setting
Call Answer Service
Operator
Transfer to
Mailbox _____
Call Answer Service
Operator
Transfer to
Mailbox _____
Page 80
MERLIN Messaging
Planning Form 3c - Submenu
Automated Attendant No. (1-4) Submenu No. (1-99)
Copy this form for each Submenu. Specify the Submenu number and
Automated Attendant number.
Selector Codes
Extension/Mailbox/
Selector Action Announcement No./
Code Code Submenu No. Description
1
2
3
4
5
6
7
8
9
Key
Action
Code Action
1 Selector Code Transfer
2 Play a Submenu
3 Play an Announcement
5 Direct Extension Transfer
6 Mailbox Transfer
Page 81

MERLIN Messaging
Planning Form 3d - Recording Script
Automated Attendant Main Menu:
Automated Attendant Number (1-4)
Day Menu
Night Menu
Submenu
Number (1-99)
Announcement
Number (1-99)
Copy this form for each Day Menu Script, Night Menu Script, Submenu Script
and Announcement. Specify the Announcement Number
Script
If your system is set up for bilingual operation, record the message in both the
primary and secondary languages. For Day/Night main Menu only, direct callers
to press *1 to change the language.
(for Day/Night Service, Submenus, Announcements)
Primary Language (maximum length = 2 minutes)
Secondary Language (maximum length = 2 minutes)
Page 82

MERLIN Messaging
Planning Form 4 - Automated Attendant Line Assignments
If you are using multiple Automated Attendants, indicate
which Automated Attendant should answer each line.
You can assign a maximum of 80 lines for all Automated
Attendants. Any line not assigned to AA2, AA3 or AA4 will
be handled by AA1.
Line No. AA1 AA2 AA3 AA4
=
Factory Setting
Page 83

MERLIN Messaging
Planning Form 5 - Security Settings
Transfer Restrictions
Transfers Restrictions On
Transfer Restrictions Off
SECURITY ALERT:
When Transfer Restrictions is set to On, the MERLIN
Messaging System transfers callers only to those extensions
that have been administered by the System Manager. It is
strongly recommended that you choose the Transfer
Restrictions On option. Choosing the Transfer Restrictions
Off option leaves your system vulnerable to toll fraud by
unauthorized persons.
Minimum Password Length
Length
0-15 digits, 6
SECURITY ALERT:
A minimum password length of at least 6 digits is
strongly recommended. The shorter the minimum
password length, the more vulnerable your system is to
toll fraud by unauthorized persons.
= Factory Setting
Page 84

System
Group List
Number
50
51
52
53
54
55
MERLIN Messaging
Planning Form 6 - System Group Lists
Members (Name and/or Mailbox Extension)
56
57
58
59
You can put up to fifty extensions in each System Group List.
Page 85

Contents
Installation Configuration and Programming
Getting Started
System Overview
Installation
Programming Overview
Preparing the Communications System
Programming the MERLIN Messaging System
Programming the Communications System
Page 86

Contents
Installation Configuration and Programming
Getting Started
Introduction
Customized Paths
Navigation
Pop-Up Windows
Button Bar
Programming Conventions
System Overview
Installation
Programming Overview
Preparing the Communications System
Programming the MERLIN Messaging System
Programming the Communications System
Page 87
Introduction
The MERLIN Messaging System Online Guide contains detailed information about the
MERLIN Messaging System.
You can use the Online Guide to:
Locate general information about MERLIN Messaging System features and services.●
Access step-by-step instructions for programming, managing and using the system.●
View and print MERLIN Messaging System Planning Forms.●
This section, Getting Started, will walk you through a brief explanation of the conventions
and procedures used in the Online Guide and will help you to use this reference effectively.
Page 88

Customized "Paths" through Information/Procedures
The MERLIN Messaging System Online Guide provides three customized "paths" through the
guide’s contents:
System Planning and Completion of Forms●
Installation, Initial Programming and System Configuration●
Ongoing Maintenance and Administration●
This content helps you locate and access information based on the tasks you have to perform
with respect to the system.
Each path contains:
Access to general information about the system.●
Detailed information and step-by-step instructions for completing the tasks specific to
the selected path.
●
Page 89

Navigation
You can move from one topic to another in the Online Guide by activating topic-associated
hypertext links. This can be done from:
A topic listed in the Contents Panel on the left side of the screen●
The Technology Bar at the bottom of the screen●
Within the topic text●
The Contents Panel
The Contents Panel is displayed along the left side of the window. It provides a way for you to
quickly identify and access the information you need to locate. Because it is displayed in a
stationary part of the window (that is, it doesn’t change or move), you can easily locate the topic
you want to view. Note that the
arrow pinpoints your current location in the topic listing.
The Technology Bar
The Technology Bar located at the lower right-hand corner of the screen contains a number of
icons. Each icon is responsible for a different navigational action.
Icon Action
Redisplays the Main menu options in the Contents Panel
Links to the previous topic in the sequence
Takes you to the top of the window
Links to the next topic in the sequence
Page 90

An element that triggers a change on an item (usually a graphic) in a Web page when the mouse passes over it. The change usually signifies that the item is a link to related or
additional information.
Pop-Up Windows
The MERLIN Messaging System Online Guide makes use of pop-up windows and mousovers (through which
your movement of the cursor over a screen object or image initiates another display or activity) or to provide
additional information. Typically, pop-up windows and mouseovers contain material that supplements
information appearing in the main window (for example, a more detailed explanation, a link to a Glossary term, a
field description, etc.).
Page 91

The Button Bar
The Button Bar is displayed in a non-scrolling panel across the top of the screen. It provides
access to additional online features and capabilities. To view a feature or access a capability, click
the associated button. Note that in the case of features displayed in pop-up windows (for example,
the Glossary), you must close the window before you can proceed.
Button Action
Redisplays the Main menu
options in the Contents
Panel
Allows you to search for
information by entering a
key word
Links you to the MERLIN
Messaging System Glossary
Provides access to the
online Help feature
Displays a table containing
Touch Tones and rules
which are valid for all
menus
Page 92

Programming Conventions
The procedures for programming the MERLIN Messaging System in this Online Guide use
several conventions to indicate what the steps involve. The conventions are described in the
following table:
Typeface Sample Meaning
To select this option, press this imprinted button on the
console
GrpCalling
To select this menu option, press the unlabeled display button
next to the option
[nnn] Enter the variable information in brackets
Press this key on the PC
Press this function key on the PC
+ On the PC, hold down the first key and press the second key
Continuation of procedures
That completes the walk-through of the MERLIN Messaging System Online Guide. To begin
accessing information related to your selected path, click one of the topics listed in the Contents
Panel.
Page 93

Contents
Installation Configuration and Programming
Getting Started
System Overview
Introduction
Services and
Features
System
Configuration
Port Assignments
System LEDs
System Capacities
System
Components
Environmental
Requirements
Installer/
Programmer
Responsibilities
Company
Personnel
Responsibilities
Security
Features
Installation
Programming Overview
Preparing the Communications System
Programming the MERLIN Messaging System
Programming the Communications System
Page 94

PCMCIA Slots
The left-most PCMCIA slot houses the 2-Port, 4-Port, 6-Port, 8-Port, 10-Port, or 12-Port PC
Card required for operation of the MERLIN Messaging System.
NOTE: Only the left-most of the two PCMCIA slots can be used. The right-most slot is
reserved for future use.
The 2-Port, 4-Port, 6-Port, 8-Port, 10-Port, or 12-Port PC Card contains:
● Port licensing data that triggers the activation of the appropriate number of voice messaging
ports.
● A Remote Maintenance Device (RMD), used for remote access to diagnostic and
maintenance features of the system.
Page 95

● Media for performing system backup.
Introduction
MERLIN Messaging System Release 2 is an embedded voice messaging system housed in a module (circuit
pack) that plugs into the switch's carrier. Release 2 is available in a 2-, 4-, 6-, 8-, 10-, or 12-Port configuration.
Release 1 and 1.1 is available in a 2-, 4-, or 6-Port configuration. For a description of each module component,
move the mouse pointer over the graphic below.
Port Status LEDs: The port-specific LEDs on the MERLIN Messaging System faceplate indicate the current status of each voice messaging port. The possible variations are:
Not available●
In service and idle●
In service and in use●
Note: The port-specific LEDs that correspond to voice messaging ports are in ascending order
(that is, from the bottom up).
RS232 Port: This is a serial port used for local access to the MERLIN Messaging System via a PC or laptop computer for report, maintenance and administrative purposes. Access to the MERLIN Messaging System using the RS-232 port is both login and password protected.
System Status LED:
This LED reflects the status of the MERLIN Messaging System. The LED displays a red,
green or amber light to indicate various stages of system status and readiness (for example,
booting, self-test failure, system upgrade in progress, etc.).
Local Area Network (LAN) Connection:
This port is used to connect the system to a LAN (Release 2 or later). Port Status LEDs:
The port-specific LEDs on the MERLIN Messaging System faceplate indicate the current
status of each voice messaging port. The possible variations are:
Not available●
In service and idle●
In service and in use●
Note: The port-specific LEDs that correspond to voice messaging ports are in ascending order
(that is, from the bottom up).
Page 96

Allows mailbox owners to:
Record and send messages.●
Forward and reply to messages.●
Listen to messages.●
Record their names or Personal Greetings.●
Activate a Personal Greeting.●
Change their personal operators.●
Change their passwords.●
Set up Outcalling (if permission provided).●
Create Personal Group Lists.●
Change Call Answer mode.●
Transfer to another extension.●
Allows individuals responsible for programming the MERLIN Messaging System to:
Administer System Parameters such as System Language mode and System Date
and Time.
●
Administer an extension to be either a Mailbox, Fax, Transfer-Only or Automated
Attendant Extension.
●
Administer up to four Automated Attendants.●
Administer System Security Options.●
Administer System Group Lists (Release 2 or later).●
Perform a System Backup or System Restore.●
Page 97

Answers incoming lines and presents callers with a list of options. Based on callers'
resulting input, they may be:
Transferred to an extension.●
Played an informational announcement.●
Transferred to a voice mailbox.●
Presented with a submenu containing additional options.●
The Automated Attendant Service can also detect and route fax calls to a
predetermined fax extension.
Functions as a personal answering machine, allowing a caller to:
Hear the Personal Greeting recorded by the mailbox owner.●
Switch to the alternate language, if the system is configured in Bilingual mode.●
Leave a voice message, if this capability has been programmed by the mailbox
owner.
●
Optionally designate voice message as a priority or private message (Release 2 or
later).
●
Transfer to an operator or to another extension.●
Provides on-site and remote system serviceability functionality, including:
Terminal-based reporting●
Trouble/fault isolation●
Backup and Restoration●
The MERLIN Messaging System can operate in either Monolingual or Bilingual mode. In
Monolingual mode, all system prompts are played in one of the following languages:
U.S. English●
Latin American Spanish●
Canadian French●
Brazilian Portuguese (Release 2 or later)●
In Milingual mode, the caller can choose to hear prompts in either the Primary or
Secondary language.
Services and Features
For a description of each MERLIN Messaging System service or feature, move the mouse
pointer over the graphic below.
Page 98

System Configuration
There is one common module (circuit pack) for all six MERLIN Messaging System
configurations (that is, a 2-port, 4-port, 6-port, 8-port, 10-port, or 12-port configuration). A
2-port, 4-port, 6-port, 8-port, 10-port, or 12-port PC Card, included with each system, contains
the following components:
Port licensing for the system's port configuration (that is, a 2-port, 4-port, 6-port, 8-port,
10-port, or 12-port configuration)
●
Media for backing up and restoring the system●
A 14.4 kbps Remote Maintenance Device (modem) used for remote diagnostics●
For Release 1 and 1.1, one common module supports three configurations (that is, a 2-port,
4-port, or 6-port configuration). A 2-port, 4-port, or 6-port PC Card is included with each
system.
Page 99

Port Assignments
The communications system assigns logical IDs and extensions to each port on the MERLIN
Messaging System module. The first logical ID and extension assigned to the MERLIN Messaging
System module is assigned to Port 1, the second to Port 2, etc. The communications system assigns 12
logical IDs and extensions to the MERLIN Messaging System module.
In Release 2 or later, if a Message-Waiting Light (MWL) update or Outcalling action needs to be
performed, the following ports are used:
Port 2 on a 2-port system●
Port 4 on a 4-port system●
Ports 5 and 6 on a 6-port system●
Ports 7 and 8 on an 8-port system●
Ports 9 and 10 on a 10-port system●
Ports 11 and 12 on a 12-port system●
The Remote Maintenance Device (RMD) is not assigned to a dedicated logical ID and extension.
The following table defines the Port Assignments for the MERLIN Messaging System Release 2 or
later.
System
Configuration
Ports
1 2 3 4 5 6 7 8 9 10 11 12
2-port V V N/E N/E N/E N/E N/E N/E N/E N/E N/E N/E
4-port V V V V N/E N/E N/E N/E N/E N/E N/E N/E
6-port V V V V V V N/E N/E N/E N/E N/E N/E
8-port V V V V V V V V N/E N/E N/E N/E
10-port V V V V V V V V V V N/E N/E
12-port V V V V V V V V V V V V
V = Voice
N/E = Not Equipped
In Release 1 or 1.1, if a Message-Waiting Light (MWL) update or Outcalling action needs to be
performed, the following ports are used:
Port 2 on a 2-port system●
Port 4 on a 4-port system●
Port 6 on a 6-port system●
The Remote Maintenance Device (RMD) is assigned to the twelfth logical ID and extension.
Page 100

System LEDs
The MERLIN Messaging System module faceplate contains:
One system status LED●
One LED for each of the voice ports●
The color(s) and status (that is, on, off or blinking) of the LEDs provide information regarding the
operation of the MERLIN Messaging System module.
The following table provides a description of the port-level and system status LED display
variations.
Display Meaning
Port-Level LEDs
Port not available for use (off)
Port in service and idle (on-hook)
Port in use (off-hook)
System Status LED
System is not powered up or there is a fault condition
System is in a ready state (off-hook; speaking or recording; receiving Touch Tones)
There is a self-test failure or system is out-of-service
There is a self-test failure or system is out-of-service
System software is being upgraded
Hard disk is active
 Loading...