

LT Security LTD7200-WH Series, LTD7208-WH, LTD7216-WH, LTD7204-WH Quick Operation Manual

UD.6L0202B0040A02
LTD7200-WH Series DVR
Quick Operation Guide
Quick Operation Guide of LTD7200-WH Series DVR
Thank you for purchasing our product. If there is any question or request, please do not hesitate to contact dealer.
This manual is applicable to LTD7204-WH, LTD7208-WH and LTD7216-WH series DVR.
DVR Pre-Installation
The LTD7200-WH Series DVR is highly advanced surveillance equipment that should be installed with care.
Please take into consideration the following precautionary steps before installation of the DVR.
1. Keep all liquids away from the DVR.
2. Install the DVR in a well-ventilated and dust-free area.
3. Ensure environmental conditions meet factory specifications.
4. Install a manufacturer recommended HDD.
DVR Installation
During the installation of the DVR:
1. Use brackets for rack mounting.
2. Ensure there is ample room for audio and video cables.
3. When installing cables, ensure that the bend radius of the cables are no less than five times than its diameter.
4. Connect both the alarm and RS-485 cable.
5. Allow at least 2cm (~0.75-inch) of space between racks mounted devices.
6. Ensure the DVR is grounded.
7. Environmental temperature should be within the range of -10 ºC ~ 55 ºC , 14ºF ~ 131ºF.
8. Environmental humidity should be within the range of 10% ~ 90%.
Hard Disk Installation
Before you start:
Before installing a hard disk drive (HDD), please make sure the power is disconnected from the DVR. A factory
recommended HDD should be used for this installation.
Tools Required: Screwdriver.
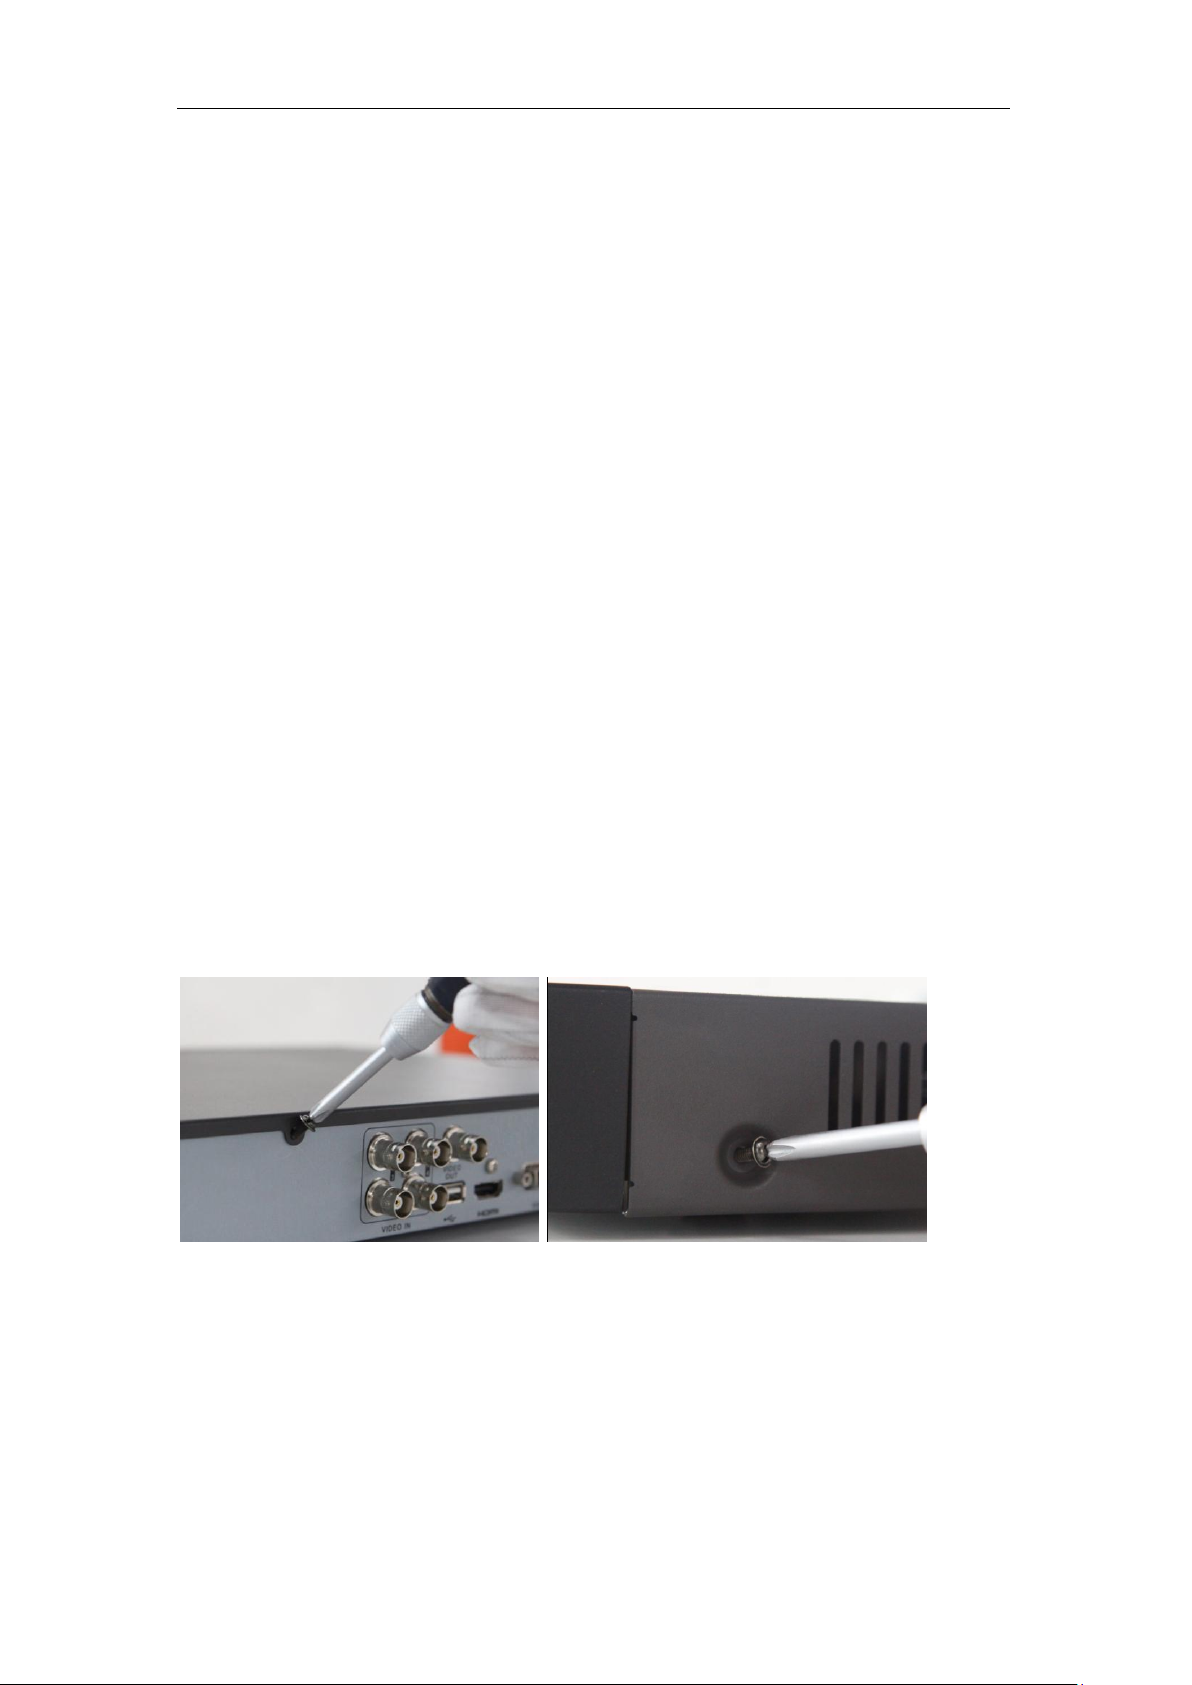
To install a HDD on your DVR:
1. Remove the cover from the DVR by unfastening the screws on the back and side.
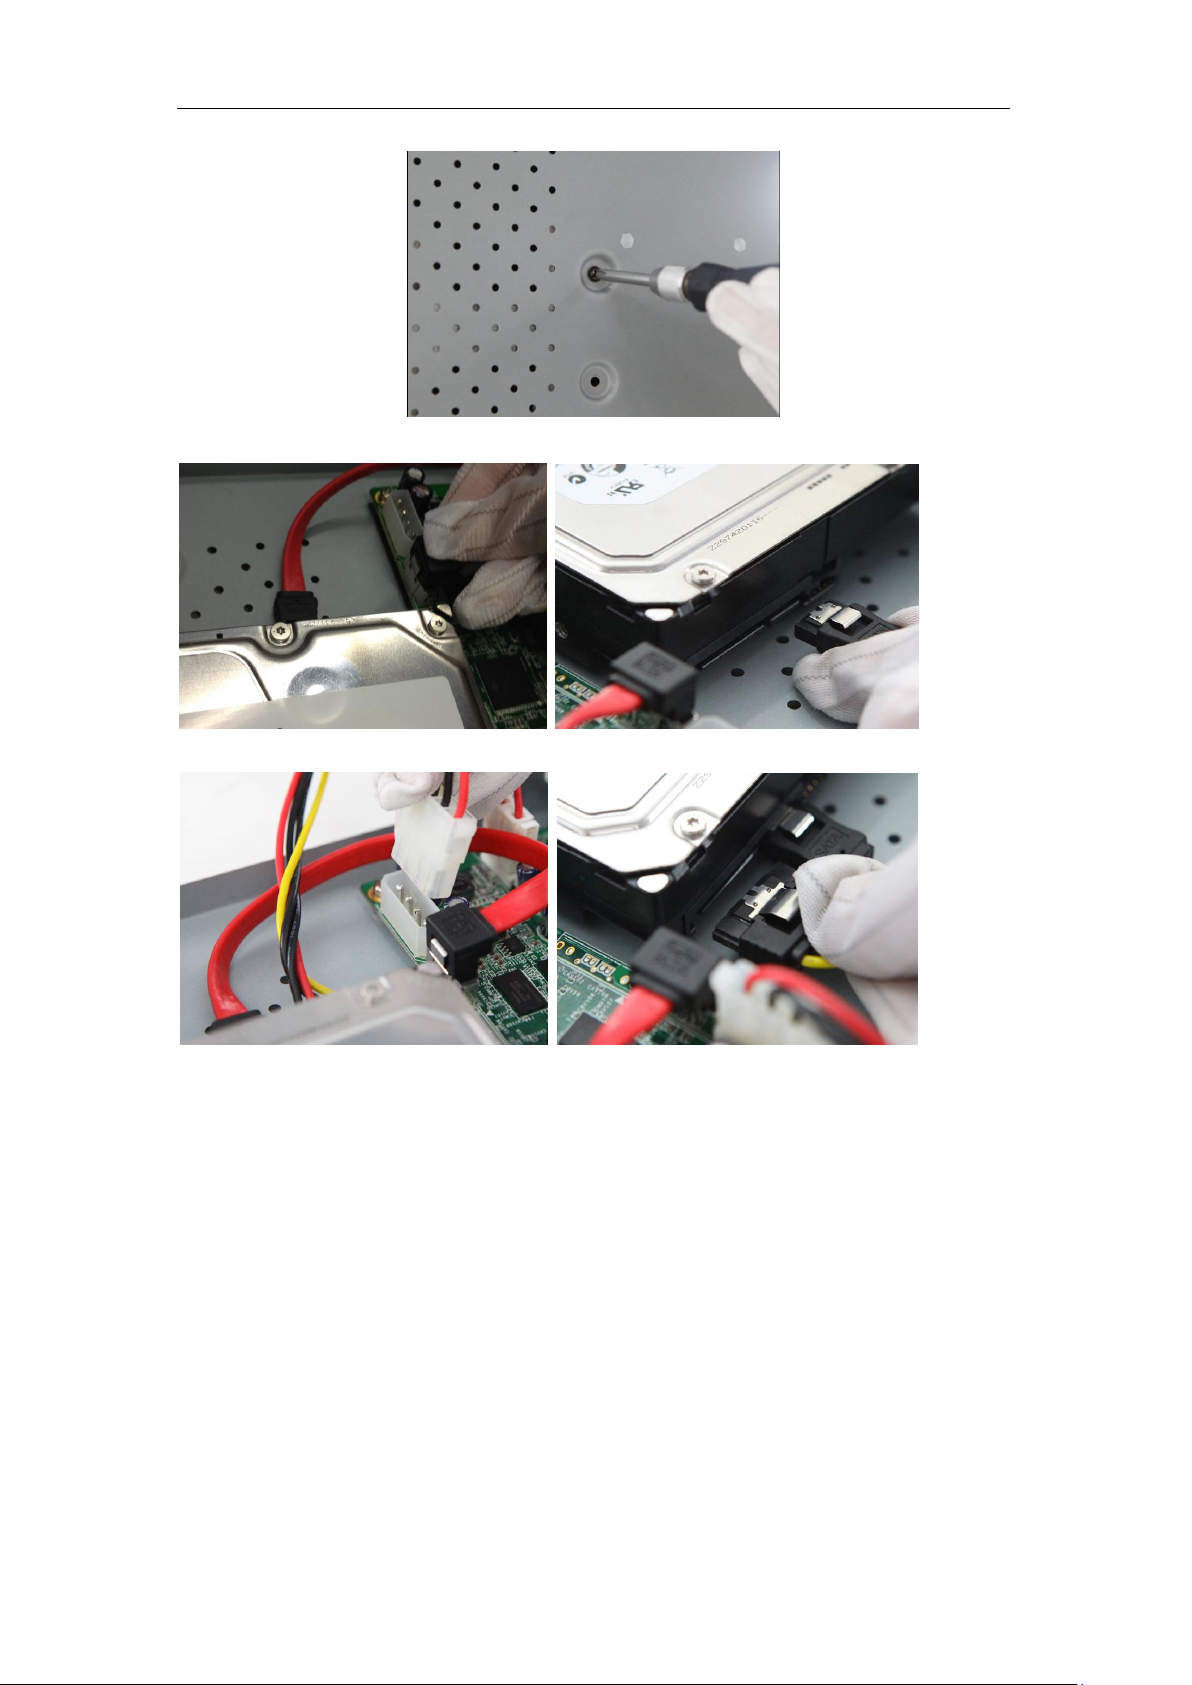
2. Install the HDD in the HDD rack using the provided screws. Fasten the screws on the
bottom to fix the HDD.
1
Quick Operation Guide of LTD7200-WH Series DVR
3. Connect the HDD to the motherboard of the DVR with the included data cable.
4. Connect the power cable to the HDD.
5. Re-install the cover of the DVR and fasten screws.
2
Quick Operation Guide of LTD7200-WH Series DVR
No.
Name
Function Description
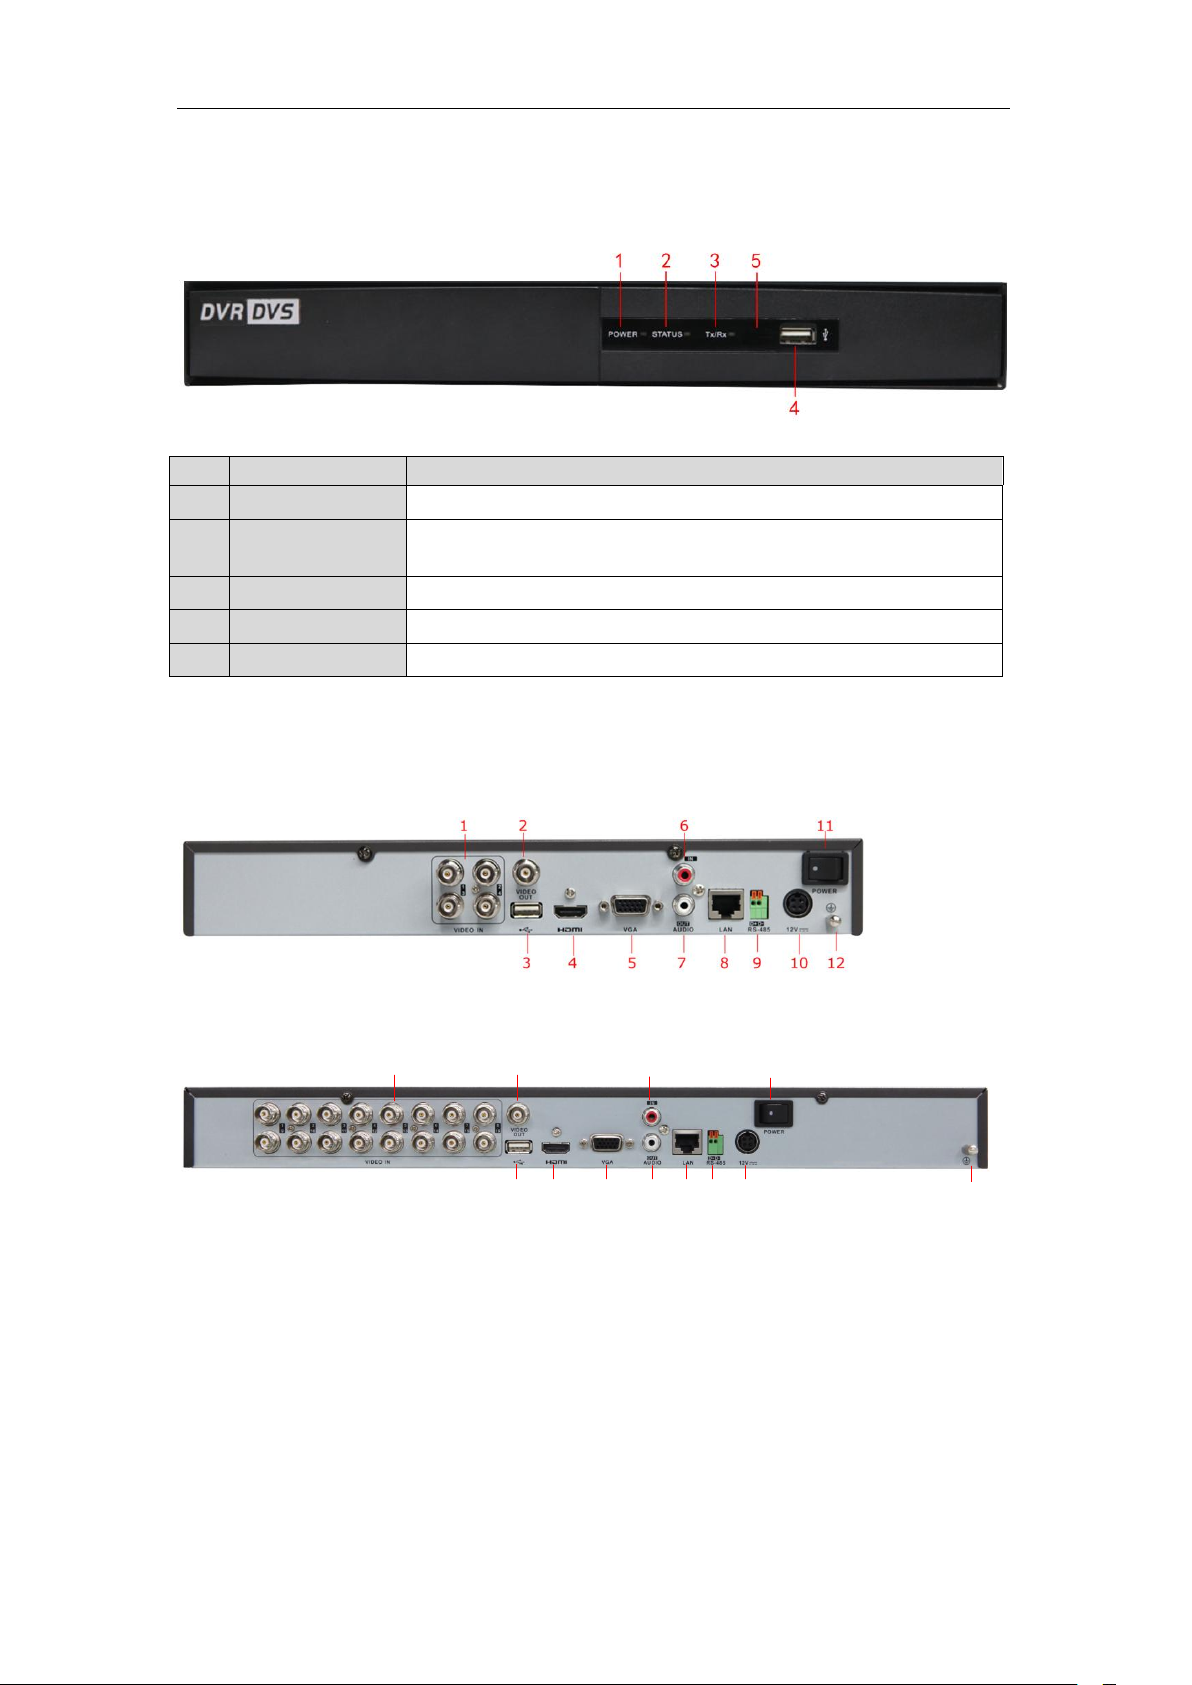
1
POWER
POWER indicator turns green when DVR is powered up.
2
STATUS
STATUS indicator lights in red when data is being read from or written to
HDD.
3
Tx/Rx
Tx/Rx indictor blinks green when network connection is functioning properly.
4
USB Interface
Connects USB mouse or USB flash memory devices.
5
IR Receiver
Receiver for IR remote.
3 4 5 7 8 9 10
11
1 2 6
12
Front Panel
The front panel of LTD7200-WH is shown below:
Table 1 Description of Control Panel Buttons
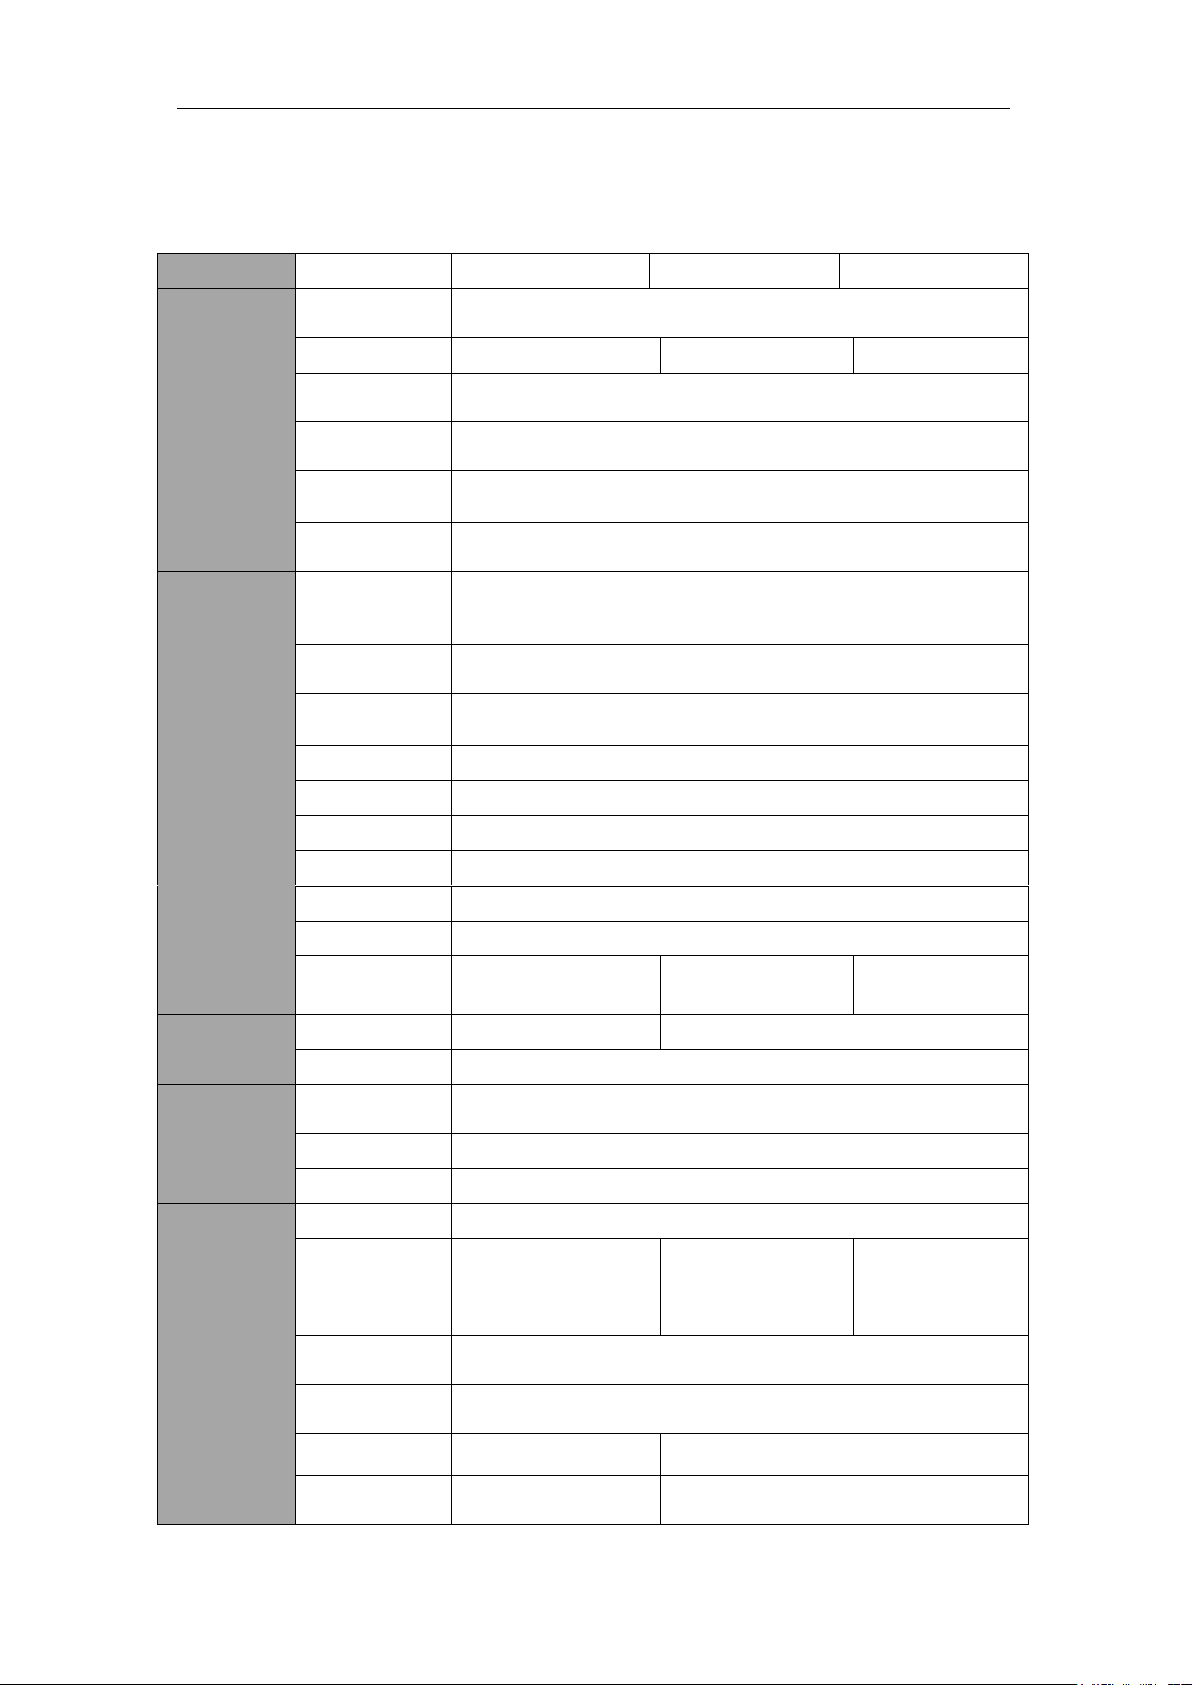
Rear Panel
LTD7204-WH:
LTD7216-WH:
Note: The rear panels of LTD7208-WH provide 8 video input interfaces.
3

Quick Operation Guide of LTD7200-WH Series DVR
No.
Item
Description
1
VIDEO IN
BNC connector for analog video input.
2
VIDEO OUT
BNC connector for video output.
3
USB Interface
Connects USB mouse or USB flash memory devices.
4
HDMI
HDMI video output.
5
VGA
DB15 connector for VGA output. Display local video output and menu.
6
AUDIO IN
RCA connector for audio input.
7
AUDIO OUT
RCA connector for audio output.
8
LAN Interface
RJ45 10M / 100M Ethernet interface.
9
RS-485 Interface
Connector for RS-485 devices. Connect the D+ and D- terminals to R+
and R- terminals of PTZ receiver respectively.
10
12V
12VDC power supply.
11
POWER
Switch for turning on/off the device.
12
GND
Ground(needs to be connected when DVR starts up)
Table 2 Description of Rear Panel
RS-485 Connections
To connect RS-485 devices (e.g., pan/tilt unit) to the DVR:
Press and hold the orange part of the pluggable block; insert signal cables into slots and release the orange part.
Ensure signal cables are in tight.
Note: Make sure the pan/tilt receiver unit is connected to the D+ and D- of the RS-485 terminal of DVR.
4
Quick Operation Guide of LTD7200-WH Series DVR
Model
LTD7204-WH
LTD7208-WH
LTD7216-WH
Video/Audio
input
Video
compression
H.264
Video input
4-ch
8-ch
16-ch
Video input
interface
BNC (1.0 Vp-p, 75 Ω), PAL /NTSC self-adaptive
Audio
compression
G.711
Audio input
1-ch, RCA (2.0 Vp-p, 1 kΩ)
Two-way audio
input
1-ch, RCA (2.0 Vp-p, 1 kΩ) (using the audio input)
Video/Audio
output
HDMI/VGA
output
1-ch, resolution:
1080P: 1920×1080/60Hz; SXGA: 1280×1024/60Hz;
720P: 1280×720/60Hz; XGA: 1024×768/60Hz
CVBS output
1-ch, BNC (1.0 Vp-p, 75 Ω),
resolution: PAL: 704 × 576, NTSC: 704 × 480
Encoding
resolution
WD1 / 4CIF / 2CIF / CIF / QCIF
Frame rate
25 fps (P) / 30 fps (N)
Video bit rate
32 Kbps ~ 3072 Kbps, or user defined (Max. 3072 Kbps)
Audio output
1-ch, RCA (Linear, 1 kΩ)
Audio bit rate
64 Kbps
Dual-stream
Support; sub-stream @ CIF/ QCIF
Stream type
Video, Video & Audio
Synchronous
playback
4-ch
8-ch
16-ch
Hard disk
SATA
1 SATA interface
2 SATA interfaces
Capacity
Up to 4TB capacity for each disk
External
interface
Network
interface
1, RJ45 10M / 100M Ethernet interface
Serial interface
1 RS-485 interface, half-duplex
USB interface
2, USB 2.0
General
Power supply
12 VDC
Consumption
(without hard
disk or
DVD-R/W)
≤ 10 W
≤ 15 W
≤ 20 W
Working
temperature
-10 ºC ~+55 ºC
Working
humidity
10% ~ 90%
Chassis
Standalone 1U chassis
19-inch rack-mounted 1U chassis
Dimensions
(W × D × H)
315 × 230 × 45 mm
445 × 290 × 45mm
Specifications
Table 3 Specifications for LTD7200-WH
5
 Loading...