

Longshine LCS-883R-SW24N User Manual

The device is a powerful, high-performance Fast Ethernet switch,
with all 24 ports capable of 10 or 100Mbps auto-negotiation
operation (NWay), which means the switch could automatically
negotiate with the connected partners on the network speed and
duplex mode. It is ideal for micro-segmenting large networks into
smaller, connected subnets for improved performance, enabling the
bandwidth demanding multimedia and imaging applications.
Moreover, the 10/100Mbps auto-sensing ability provides an easy
way to migrate 10Mbps to 100Mbps network with no pain.
Compared to the shared 10Mbps or 100Mbps networks, the switch
delivers a dedicated 10/100Mbps connection to every attached
client with no bandwidth congestion issue. This switch also supports
auto MDI / MDI-X function. Each port could be used to connect to
another switch or hub with no crossover RJ-45 cable.
Store-and-forward switching mode promises the low latency plus
eliminates all the network errors, including runt and CRC error
packets. To work under full-duplex mode, transmission and
reception of the frames can occur simultaneously without causing
collisions as well as double the network bandwidth.
The switch is plug-n-play without any software to configure and also
fully compliant with all kinds of network protocols. Moreover, the rich
diagnostic LEDs on the front-panel can provide the operating status
of individual port and whole system.
Before you start to install the switch, check the following contents in
this packageΚ
z One NWay switch
z One Power cord
z User’s manual
1
z Rack-mount brackets and screwsΰoptional accessories for
13-inch modelα
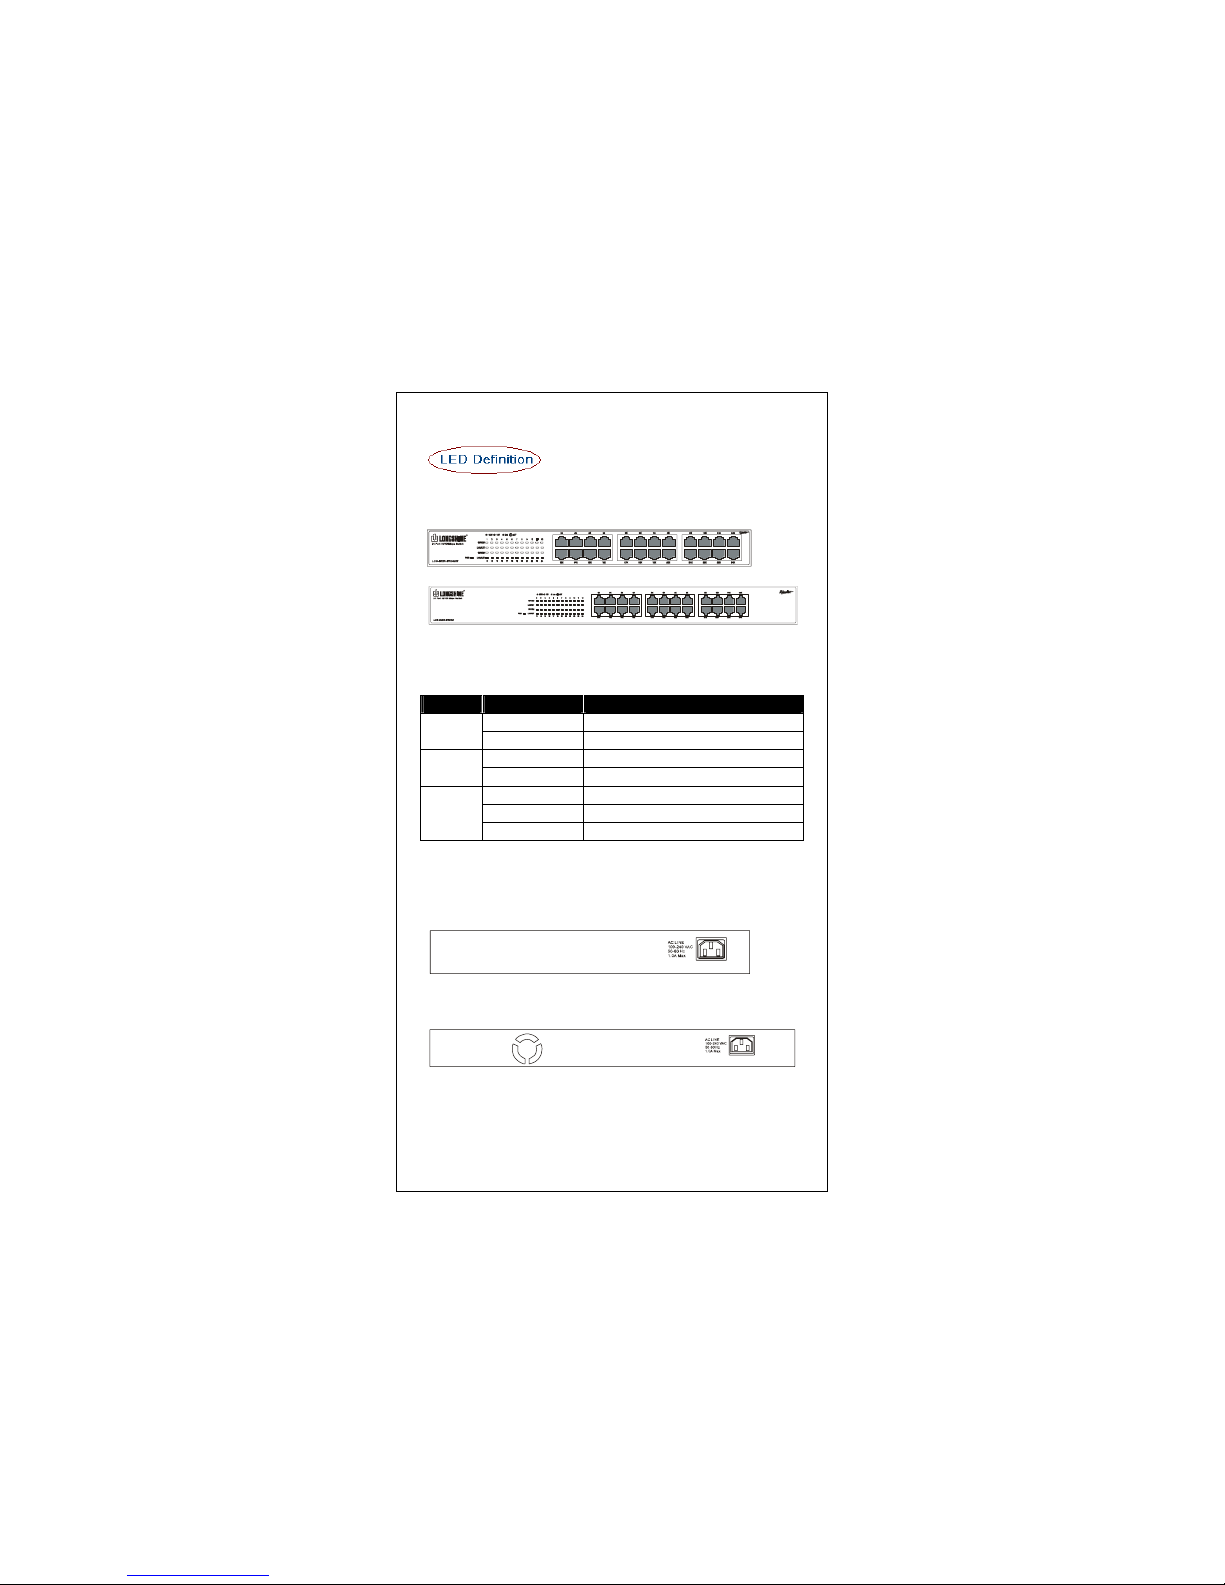
Please refer to the following table for LED definition
13-inch Model
19-inch Model
LED Status Operation
Steady Green Power is on Power
Off Power is off
Steady Green Connected as 100Mbps100M
Off Connected as 10Mbps
Steady Green The port is connected
Blinking Green The port is transmitting/receiving data.
Link/Act
Off No connection
REAR Panel
The rear panel is shown as below,
13-inch Model
19-inch Model
2
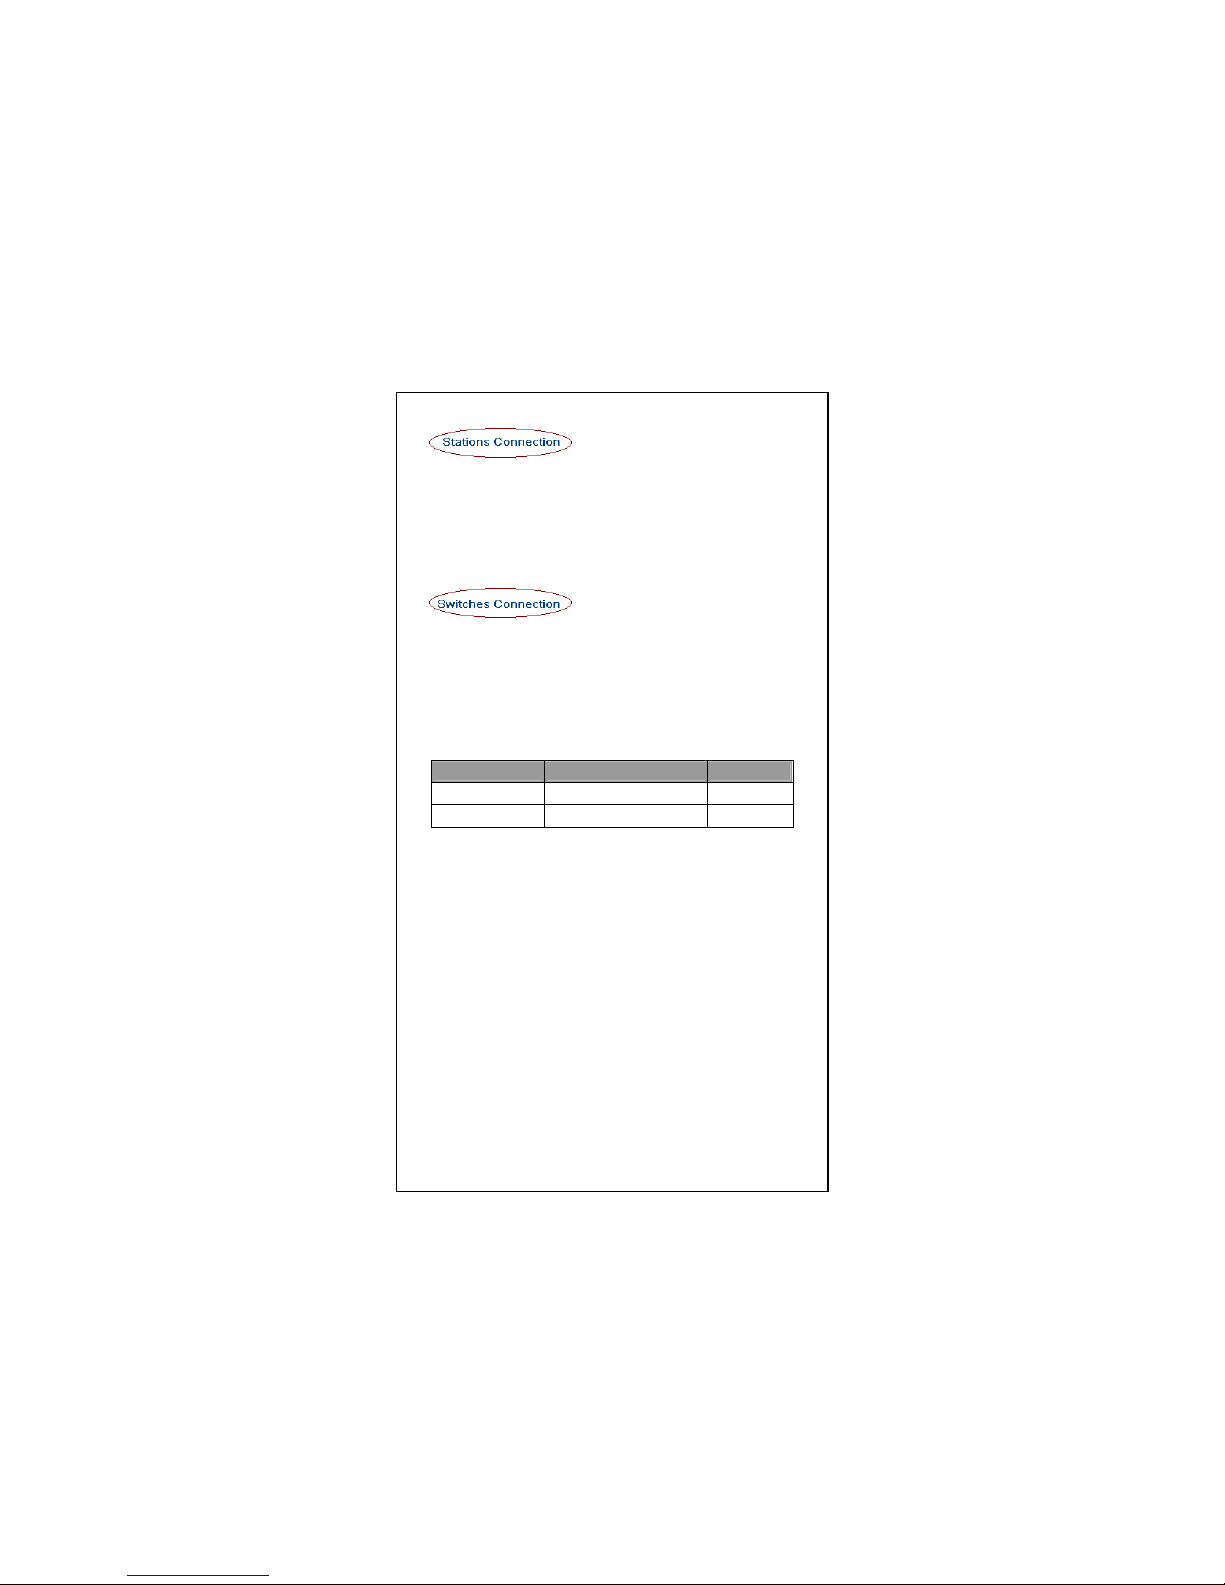
Connect each station to the switch by twisted-pair cable. Plug one
RJ-45 connector into a RJ-45 port of the switch, and plug the other
RJ-45 connector into the station’s network adapter. Power on the
switch and then system is ready.
For cable selection, refer to the following table.
In making a switch interconnection, you could use any port to
connect another switch with straight or crossover cable. As all the
ports support auto MDI / MDI-X function, using a straight cable to
make a switch-to-switch connection is allowed.
For cable selection, refer to the following tableΚ
Network Speed Cable Type Max. Length
10Mbps Cat. 3, 4, 5 UTP/STP 100 meters
100Mbps Cat. 5 UTP/STP 100 meters
Rack-Mount
Rack-Mount Installation (Rack-mount kit is optional for 13-inch
model)
3
The switch may standalone, or may be mounted in a standard
19-inch equipment rack. Rack mounting produces an orderly
installation when you have a number of related network devices.
The switch is supplied with two optional rack mounting brackets and
screws. These are used for rack mounting the unit.
 Loading...