

Page 1
Automation@Home
www.automation-at-home.com
This manual will show you how to setup Logitech Harmony Universal Remote to control X10
home automation system .
Hardware Requirement :
1) Logitech Harmony Universal Remote e.g. Logitech Harmony 880
2) Marmitek IR \ RF Transceiver + Mini Controller , model number : IRRF7243U
3) Several X10 device e.g. X10-2026UK X10 Plug-in Module , X10-2222 Single Button Dimmer Wall
Switch …etc
In following example :
We have several X10 device and already assign specific X10 address.
Bedroom - Light is B1
Living Room - Light 1 is B3
- Light 2 is B4
- Low Voltage Halogen Lamp 1 is B9
- Low Voltage Halogen Lamp 2 is B10
Toilet - Light is B5
Kitchen - Light is B6
Setting for Marmitek IRRF7243U :
Please set the correct House code on IRRF7243U
e.g. for above sample , please set to House Code B
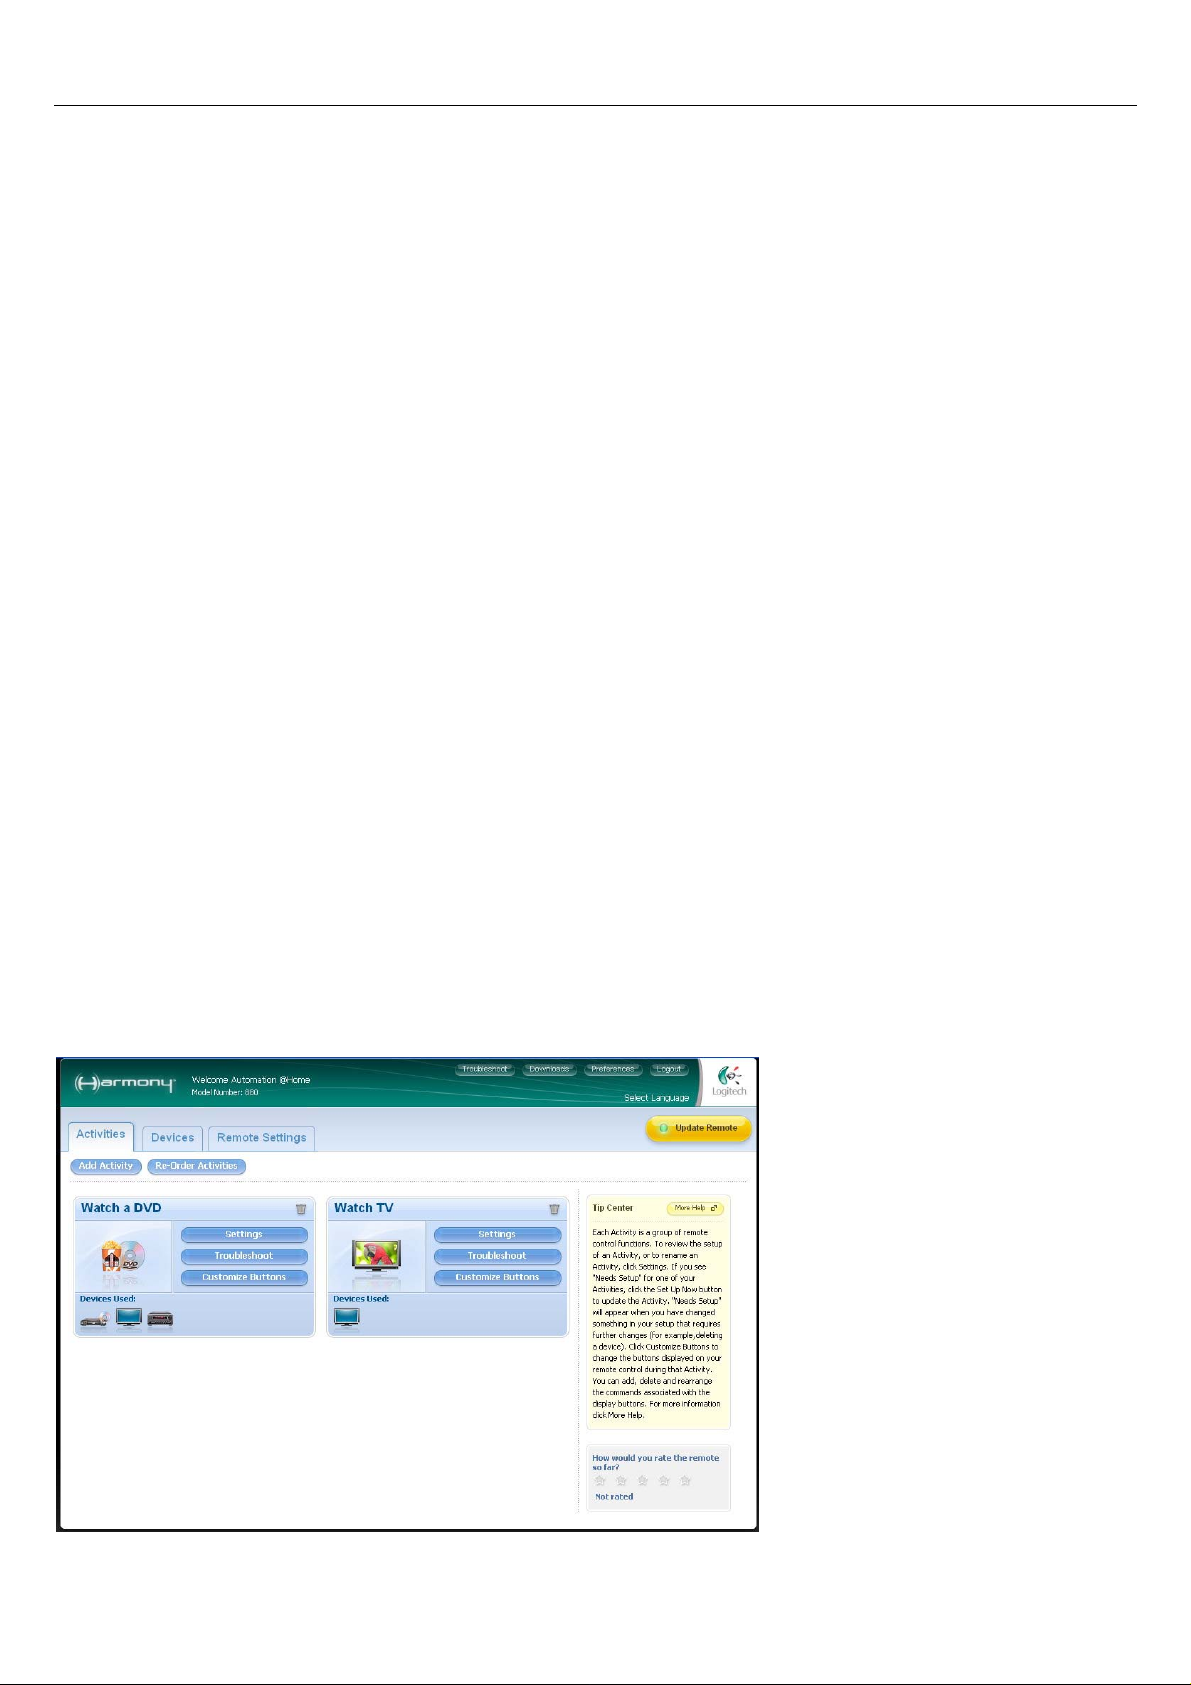
Run the Logitech Harmony Remote Software and follow below step to setup the remote.
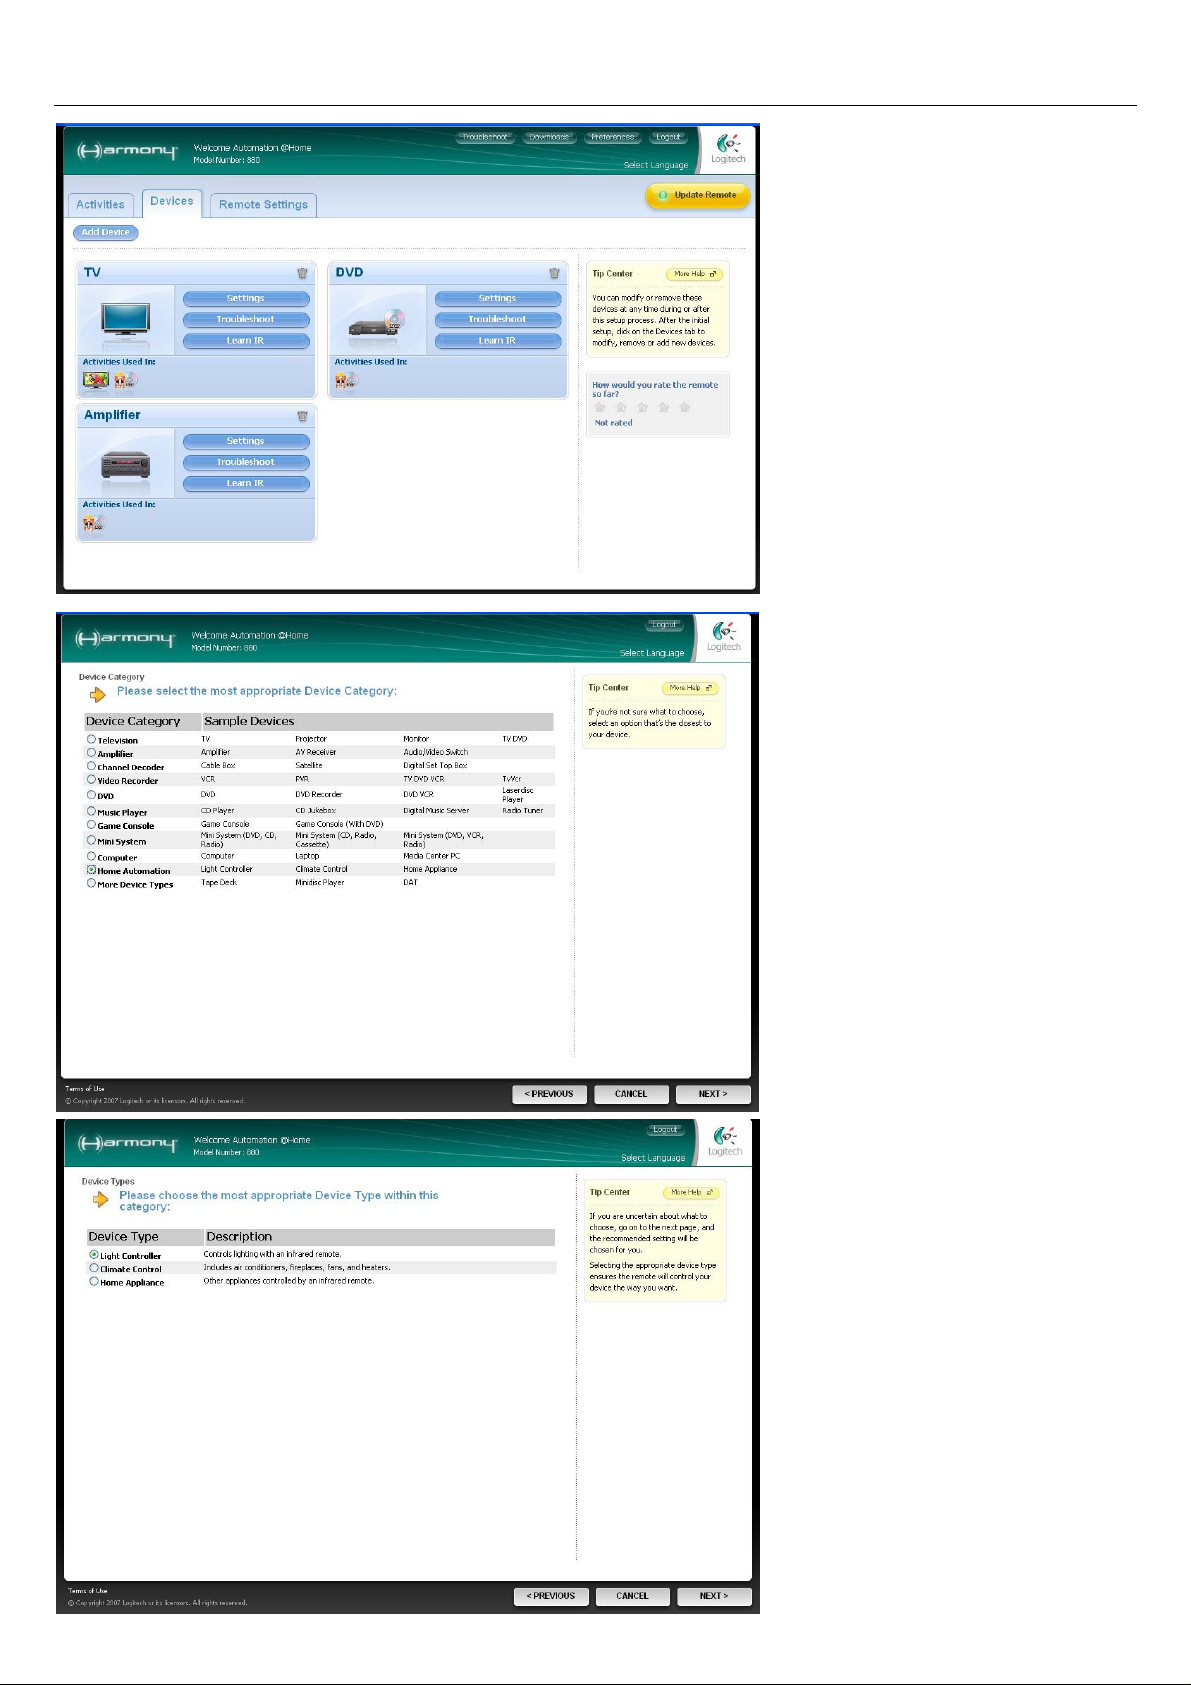
1) Click “Devices” tab.
Page 1
Page 2
Automation@Home
www.automation-at-home.com
2) Click “Add Device” button.
3) Select “Home Automation” then
click “NEXT >”
4) Select “Light Controller” then
click “NEXT >”
Page 2
Page 3

Automation@Home
www.automation-at-home.com
5) Select “Marmitek” then click
“NEXT > “
6) Input “ IR7243 ” then click
“NEXT >”
7) Reconfirm the data is correct
then click “NEXT >”
Page 3
Page 4

Automation@Home
www.automation-at-home.com
8) After you add the Light Controller
it will appear on the “Devices”
page.
Then click “Settings” in “Light
Controller Section”
9) Select “Change the behavior of
buttons” then click “NEXT >”
10) Assign the X10 command to
specific button , e.g.
Mute Button – All Lights Off
Volume Up Button – Bright
Volume Down Button – Dim
Up Arrow Button – On
Down Arrow Button – Off
Prev. Button – All Lights On
Page 4
Page 5

Automation@Home
www.automation-at-home.com
11) Assign the on-screen button
label , in this example :
AllLightOff – AllLightOff
AllLightOn – AllLightOn
Bedroom – Light 1
LivingRoom1 – Light 3
LivingRoom2 – Light 4
Toilet – Light 5
Kitchen – Light 6
Spotlight 1 – Light 9
Spotlight 2 – Light 10
After that , click “ DONE ”
12) Click “DONE” for finish the
setting
13) Click “Update Remote” to
upload the setting into the Harmony
Remote.
Page 5
 Loading...