

Page 1
The LS-RDJ comes standard with the
1
2
3
4
5
6
7
8
following features:
• 1 unique master code
• 9 unique user codes
• Low Battery Alarm
• External power capability
• Manual override keys
• Tamper-proof error function
• Easy installation
1. INSTALLATION
1.1 Lock Diagram
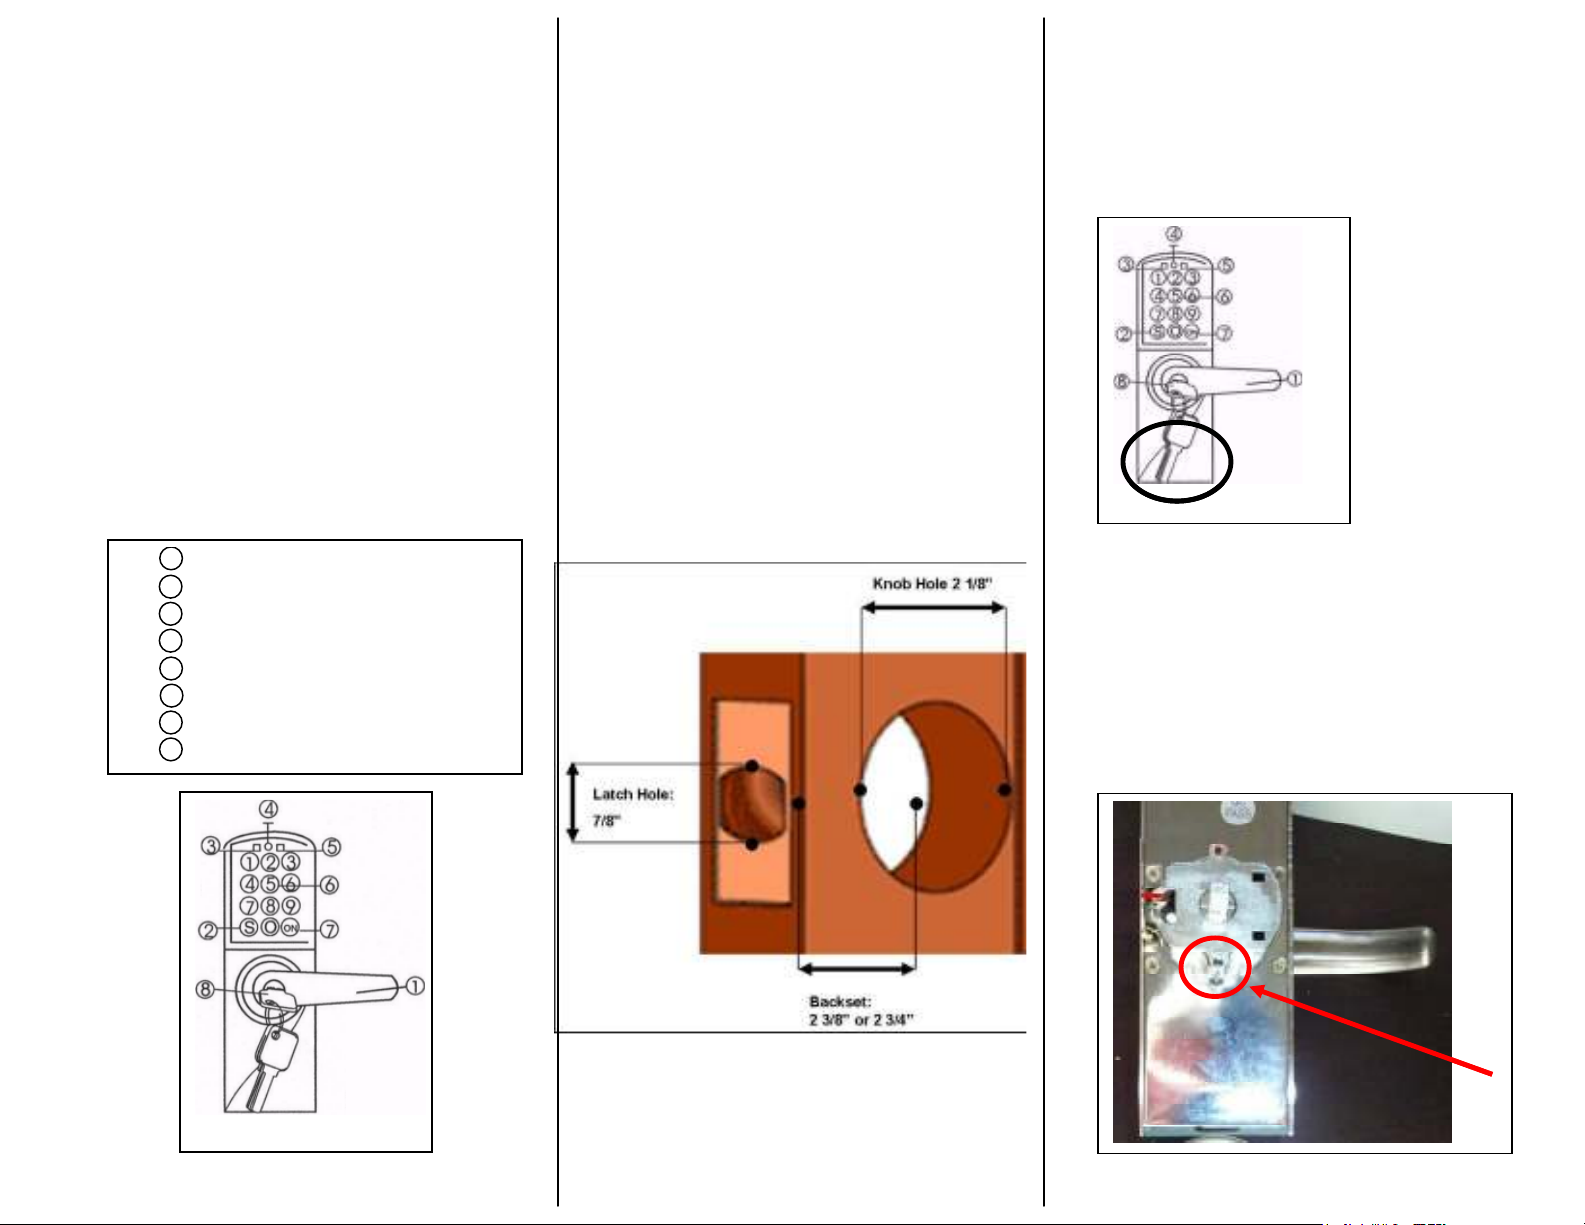
Below is a diagram of the LS-RDJ with
numbers indicating areas of function. These
numbers correspond with their description in
the box below:
Handle (Left handle or Right handle)
"S" key (setup key) for setting new codes
Green light indicating the lock is open
Socket for external power (6V)
Red light indicating the lock is not open
Digital keypad (digits 0-9)
"ON" key used for unlocking the lock
Emergency manual keys
Fig. 1
1.2 Door Diagram
If you are installing the LS-RDJ in a
door with pre-drilled holes, the lock
will fit most standard doors. To
confirm that the lock will fit your door,
please verify the following
measurements:
1. Backset is either 2 3/4” or 2 3/8”
(backset is the measure from the edge of
the door to the center of the knob hole)
2. Door knob hole is 2 1/8”
3. Latch Hole is 7/8”
(see figure below)
1.3 Installing the Batteries
The battery case is located in the lower
half of the outside lock piece.
Remove the battery case by inserting
the small green screw driver through
the bottom hole of the back side of
the front mount (see below). As you
press the screw driver through the
hole the case will release from the
bottom of the mount. Place 4 AA
batteries in the case and replace the
case in the mount.
Page 2
1.4 Installing the Lock
Place the latch through the latch hole positioned
correctly for latching your door. Leave the latch
loose until both the front and rear mounts are
installed.
Place the front mount rubber gasket over the side
of the mount that will touch the door.
Place the front mount through the knob hole while
sliding the latch through the groove in the mount.
(see below).
When the front mount is in place, hold the back
mount rubber gasket against the back side of
the door and place the back mount over the
gasket and onto the stem protruding from the
front mount.
Secure the back mount to the front mount with
the screws provided. Ensure that the lock is
on straight and then screw the remaining
screw directly into the door. When the lock is
completely attached, screw the latch into the
side of the door.
2. PROGRAMMING
The LS-RDJ electronic code lock is
designed with 2 types of entry codes
that will open the lock:
•
1 Master Code and
•
9 User Codes
The master code can open the lock but
is also used to create, change and
cancel user codes. Each of the 9
available user codes can open the lock.
Both the master code and the user
codes can be made up of 1 to 13 digits.
It is important to note that the master
code MUST start with the digit “0”.
factory preset master code is “0123”.
Similarly, each of the user codes can
only start with one of the remaining 9
digits. That is, there can be only one
code that begins with the digit “1”, only
one code that begins with the digit “2”
and so on up to the digit “9”.
The
2.1 Setting & Changing the Master
Code
To change the master code, enter the
existing master code (initially “0123” from the
factory) and press the “ON” button. You will
here a beep after which you can enter a new
master code and then press the “S” button.
Remember, the master code MUST begin
with the digit “0”
has now been saved in the lock.
. Your new master code
2.2 Setting &Changing the User
Codes
To create a user code, enter the existing
master code (initially “0123” from the
factory) and press the “ON” button. You
will here a beep after which you can
enter a new user code and then press
the “S” button.
can NOT start with the digit “0”.
new user code has now been saved in
the lock.
There are two ways to change an
existing user code. You can change
user codes by using the master code or
by using the user code that you would
like to change.
To change a user code using the master
code, enter the existing master code
(initially “0123” from the factory) and
press the “ON” button. You will here a
beep after which you can change a user
code to a new code that begins with the
same digit as the user code you want to
change. After entering the new code
press the “S” button.
codes can NOT start with the digit “0”.
Your user code has now been changed
in the lock.
To change a user code using the user
code, enter the existing user code and
press the “ON” button. You will here a
beep after which you can change the
user code to a new code that begins
with the same digit as the old user code.
After entering the new code press the
“S” button.
can NOT start with the digit “0” and
can only begin with the same digit as
the old user code.
now been changed in the lock.
Remember, user codes
Your
Remember, user
Remember, user codes
Your user code has
Page 3

2.3 Canceling and Resetting Codes
In order to cancel ALL existing user codes,
enter the existing master code and then
press the “ON” button. After you hear a
beep press the digits “0000” and then press
the “S” button. All user codes will then be
canceled.
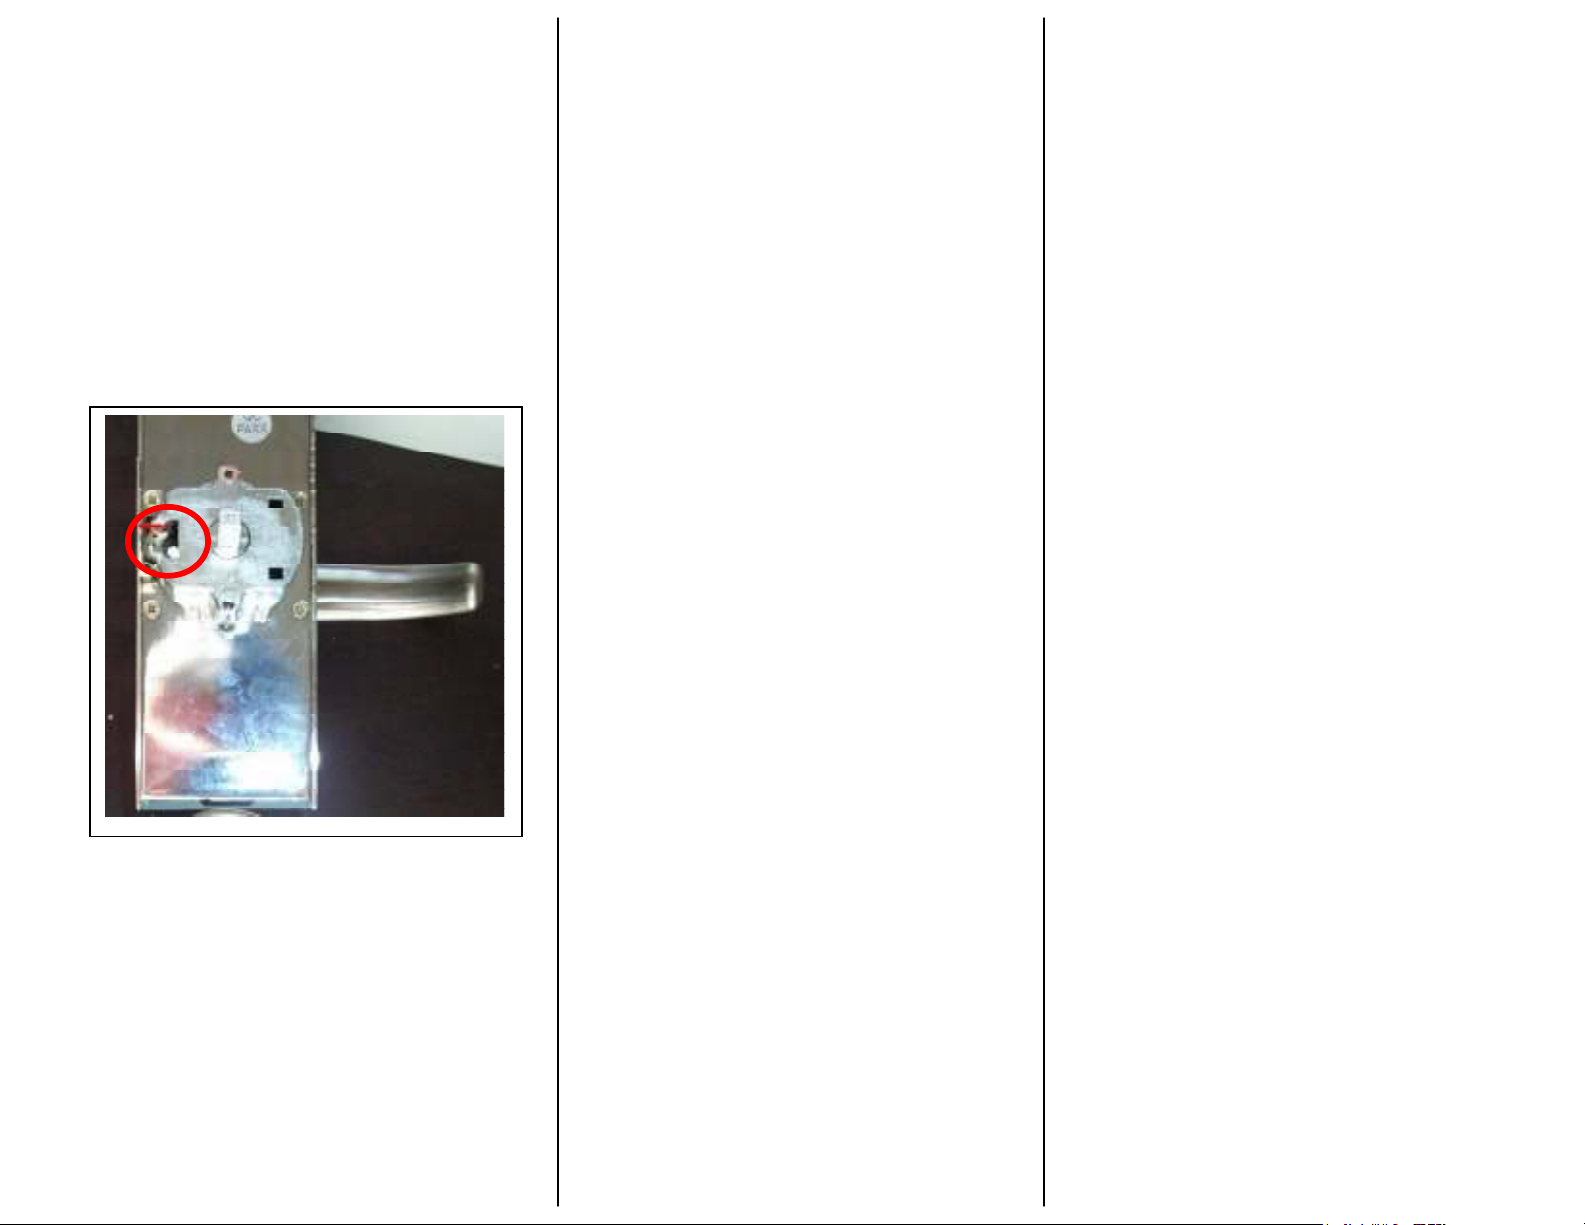
If you need to reset the master code but you
have forgotten the existing master code,
remove the back mount from the door and
find a small hole at the top of the door facing
side of the back mount. Insert the small
green screw driver (or any small screw driver)
into this hole and the master code will be
reset to the factory default of “0123”.
3. OPENING THE LOCK
There are two ways to open the LS-RDJ.
You can open the lock by entering either a
master code or a user code on the keypad,
or you can open the lock with one of the
manual override keys.
3.1 Opening the lock with a User Code
or a Master Code
To open the lock using either a user
code or a master code, enter the code
on the keypad and press the “ON” button.
You will hear a beep during which the
door will be unlocked and you can enter
by turning the door handle downward.
3.2 Opening the lock with an Override
Key
To open the lock using an override key,
first remove the small ¼” cylindrical
metal cap in the center of the door
handle. This cap can be removed with
the magnet that is supplied with the lock.
To remove the cap, place the magnet on
the cap and pull back. The cap will
release from the door handle exposing
the keyhole underneath. If you have lost
the magnet, any other magnet will
remove the cap. Alternatively, any small
screw driver can be used to pop the cap
from the handle. After the cap is
removed, insert the key in the keyhole
and turn to release the locking
mechanism. The handle will now turn an
open the door.
4. KEEPING THE LOCK POWERED
The lock comes with a warning system
when the batteries are running out of
power. If the battery power is low the
lock will sound a series of beeps each
time a code is used notifying the user
that it is time to change the batteries.
The lock will continue to function for
about 10 days (depending on usage)
after this warning is sounded.
If the battery power has completely run
out and you do not have a manual
override key, the lock can be powered
from the outside using any power source
with a 6V output. To power the lock
remove the small plastic cap that covers
the hole at the top of the center of the
outside mount. Insert an adapter into
this hole and the lock will power up.
1-888-924-LOCK (5625)
www.LockState.com
 Loading...