

Page 1
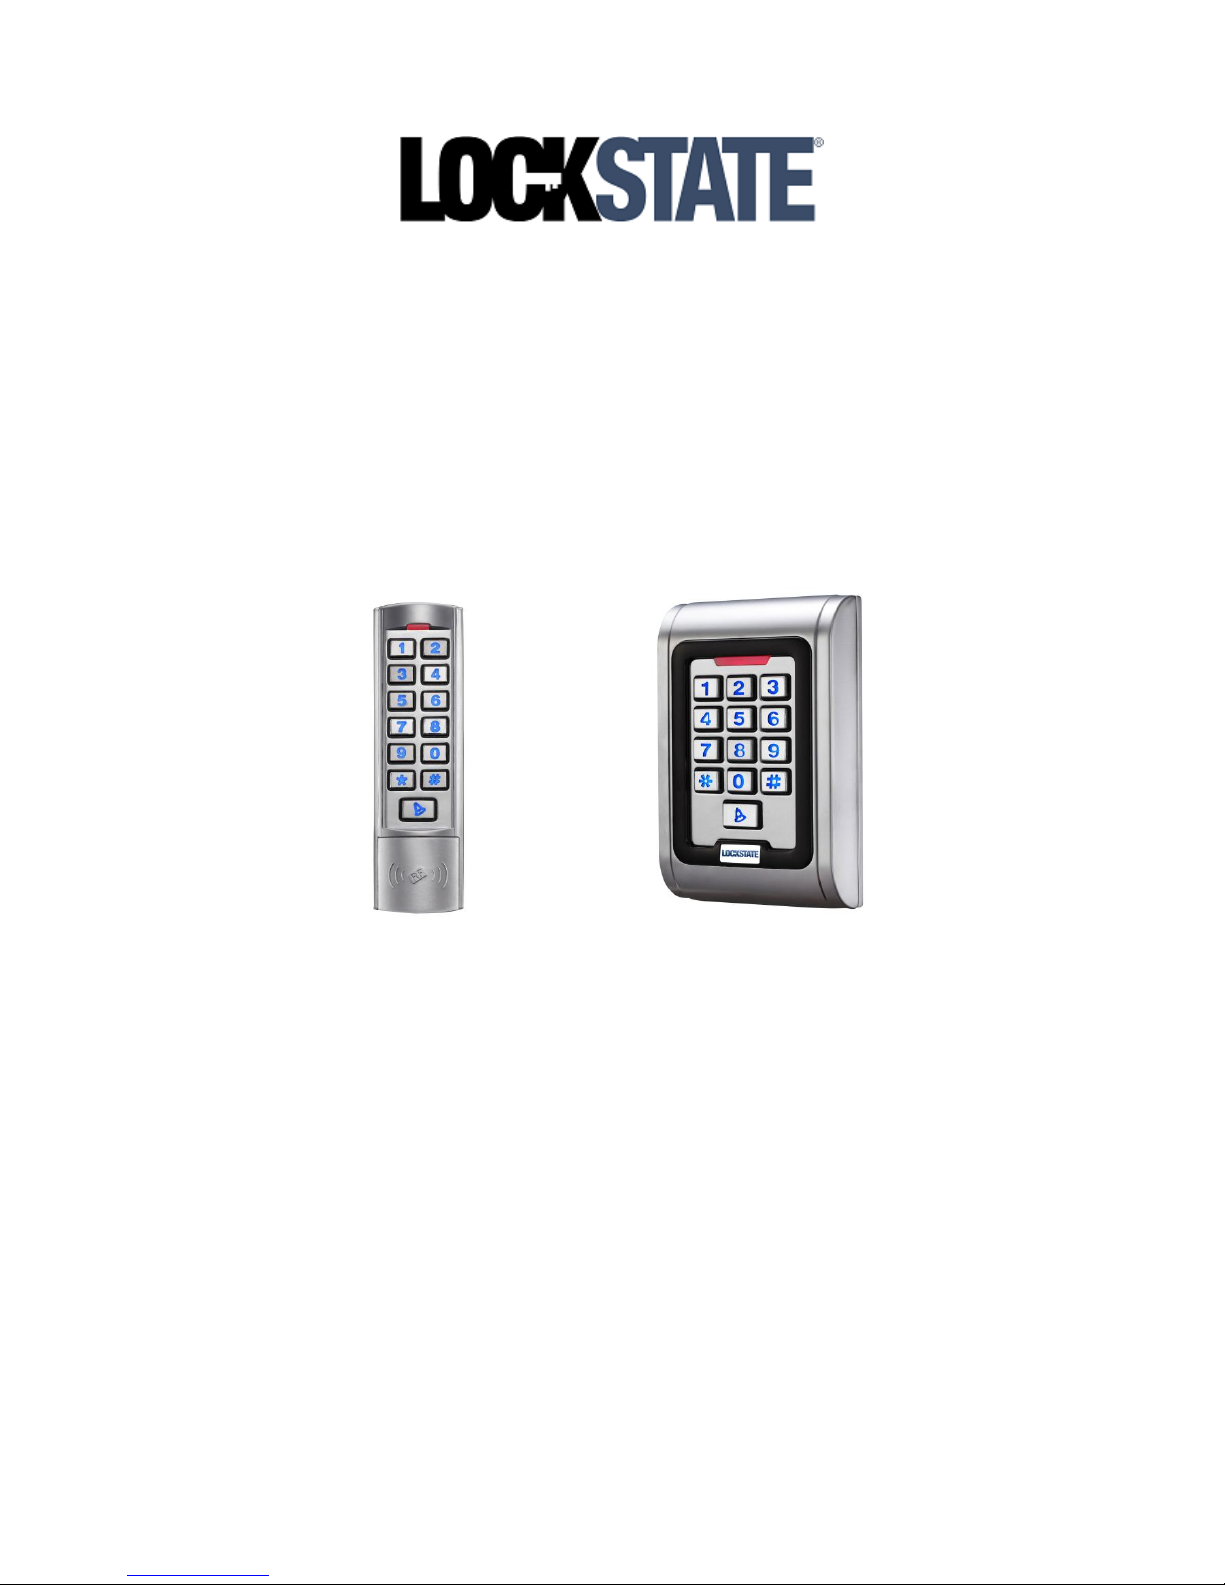
LS-S100 LS-N100
Standalone Keypad Access Control
User Manual
Please read the manual carefully before use this unit
Page 2
2
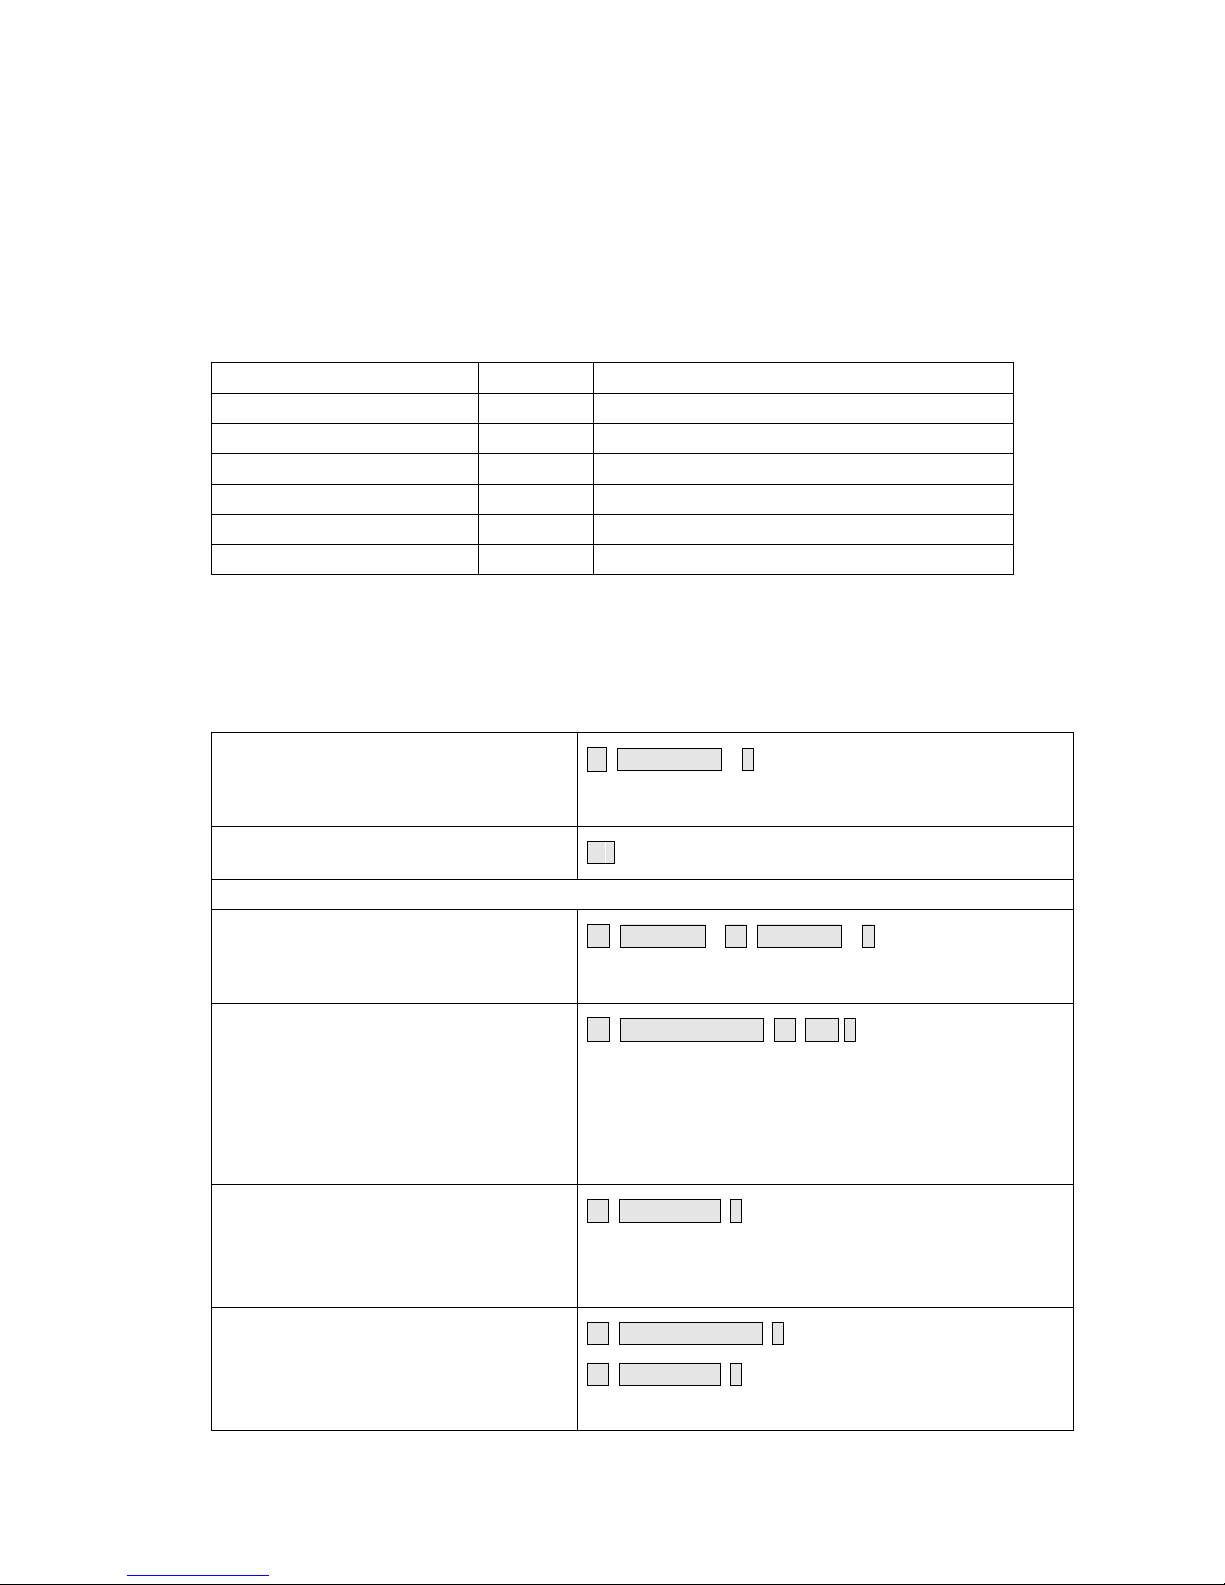
1. Packing List
Name
Quantity
Remarks
Keypad
1
User manual
1
Screw driver
1
Φ20mm×60mm,Special for keypad
Rubber plug
2
Φ6mm×30 mm, used for fixing
Self tapping screws
2
Φ4mm×28 mm, used for fixing
Star screws
1
Φ3mm×6mm,
used for fixing
Please ensure that all the above contents are correct. If any are missing please notify the
supplier of the unit.
2. Quick Reference Programming Guide
To enter the programming mode
* Master code #
999999 is the default factory master code
To exit from the programming mode
*
Note that to undertake the following programming the master user must be logged in
To change the master code
0 New code # New code #
The master code can be 6 to 8 digits
To add a PIN user.
1 User ID number # PIN #
The ID number is any number between 1 & 2000. The
PIN is any four digits between 0000 & 9999 with the
exception of 1234 which is reserved. Users can be added
continuously without exiting programming mode
To add a card user
1 Read Card #
Cards can be added continuously without exiting
programming mode
To delete a PIN or a card user.
2 User ID number # for a PIN user or
2 Read Card # for a card user
Users can be deleted continuously without exiting
Page 3

3
programming mode
To unlock the door for a PIN user
Enter the PIN then press #
To unlock the door for a card user
Present the card
3. Description
The unit is single door multifunction standalone access controller or a Wiegand output
keypad or card reader. It is suitable for mounting either indoor or outdoor in harsh
environments. It is housed in a strong, sturdy and vandal proof Zinc Alloy electroplated
case which is available in either a bright silver or matt silver finish. The electronics are
fully potted so the unit is waterproof and conforms to IP68. This unit supports up to 2000
users in either a Card, 4 digit PIN, or a Card + PIN option. The inbuilt card reader supports
125KHZ EM cards,13.56MHz Mifare cards. The unit has many extra features including
lock output current short circuit protection, Wiegand output , and a backlit keypad. These
features make the unit an ideal choice for door access not only for small shops and
domestic households but also for commercial and industrial applications such as factories,
warehouses, laboratories, banks and prisons.
4. Features
Waterproof, conforms to IP68
Strong Zinc Alloy Electroplated anti-vandal case
Full programming from the keypad
2000 uses, supports Card, PIN, Card + PIN
Can be used as a stand alone keypad
Backlight keys
Wiegand 26 input for connection to external reader
Wiegand 26 output for connection to a controller
Adjustable Door Output time, Alarm time, Door Open time
Very low power consumption (30mA)
Fast operating speed, <20ms with 2000 users
Lock output current short circuit protection
Easy to install and program
Built in light dependent resistor (LDR) for anti tamper
Built in buzzer
Red, Yellow and Green LEDS display the working status
Page 4
4
5. Specifications
Operating Voltage
DC 12V±10%
User Capacity
2000
Card Reading Distance
3-6 cm
Active Current
<60mA
Idle Current
25±5 mA
Lock Output Load
Max 3A
Alarm Output Load
Max 20A
Operating Temperature
-45℃~60℃
Operating Humidity
10%- 90% RH
Waterproof
Conforms to IP68
Adjustable Door Relay time
0 -99 seconds
Adjustable Alarm Time
0- 3 minutes
Wiegand Interface
Wiegand 26 bit
Wiring Connections
Electric Lock, Exit Button, External Alarm,External reader
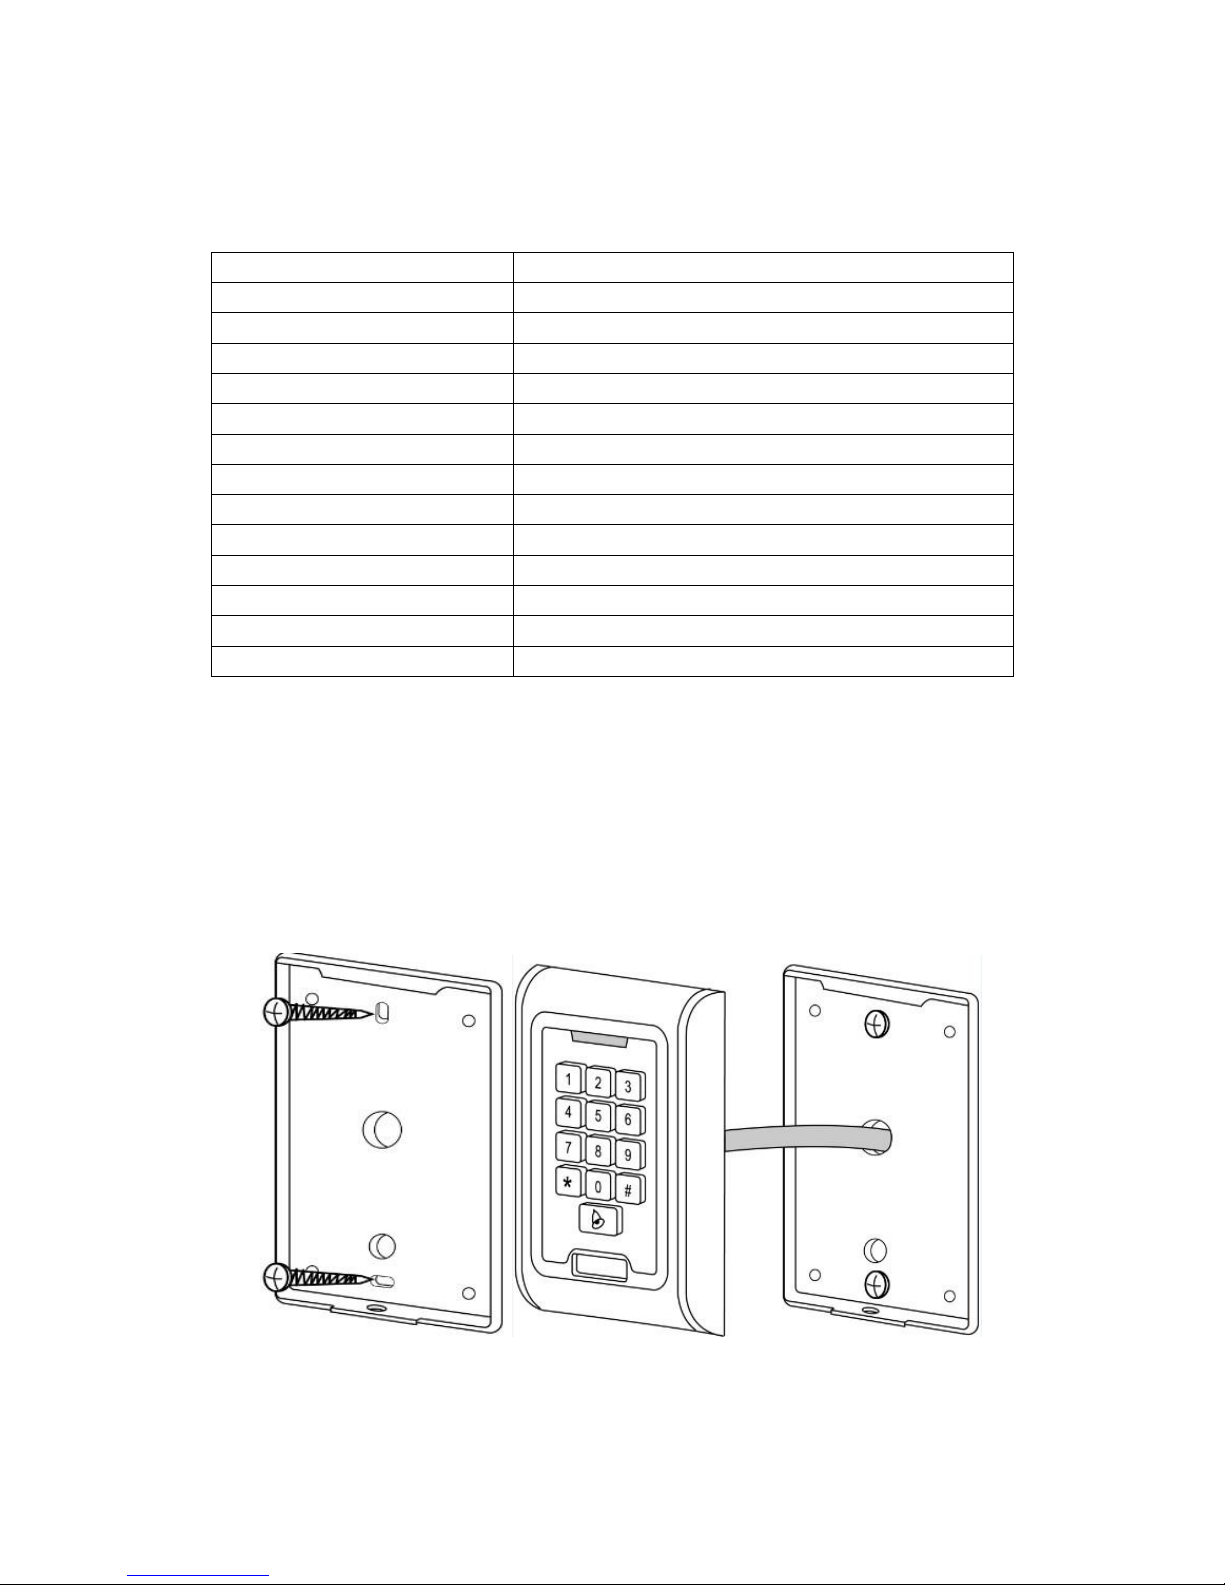
6. Installation
Remove the back cover from the keypad using the supplied special screw driver
Drill 2 holes on the wall for the Self tapping screws and I hole for the cable
Put the supplied rubber bungs to into the two holes
Fix the back cover firmly on the wall with 2 Self tapping screws
Thread the cable through the cable hole
Attach the keypad to the back cover.
Page 5
5
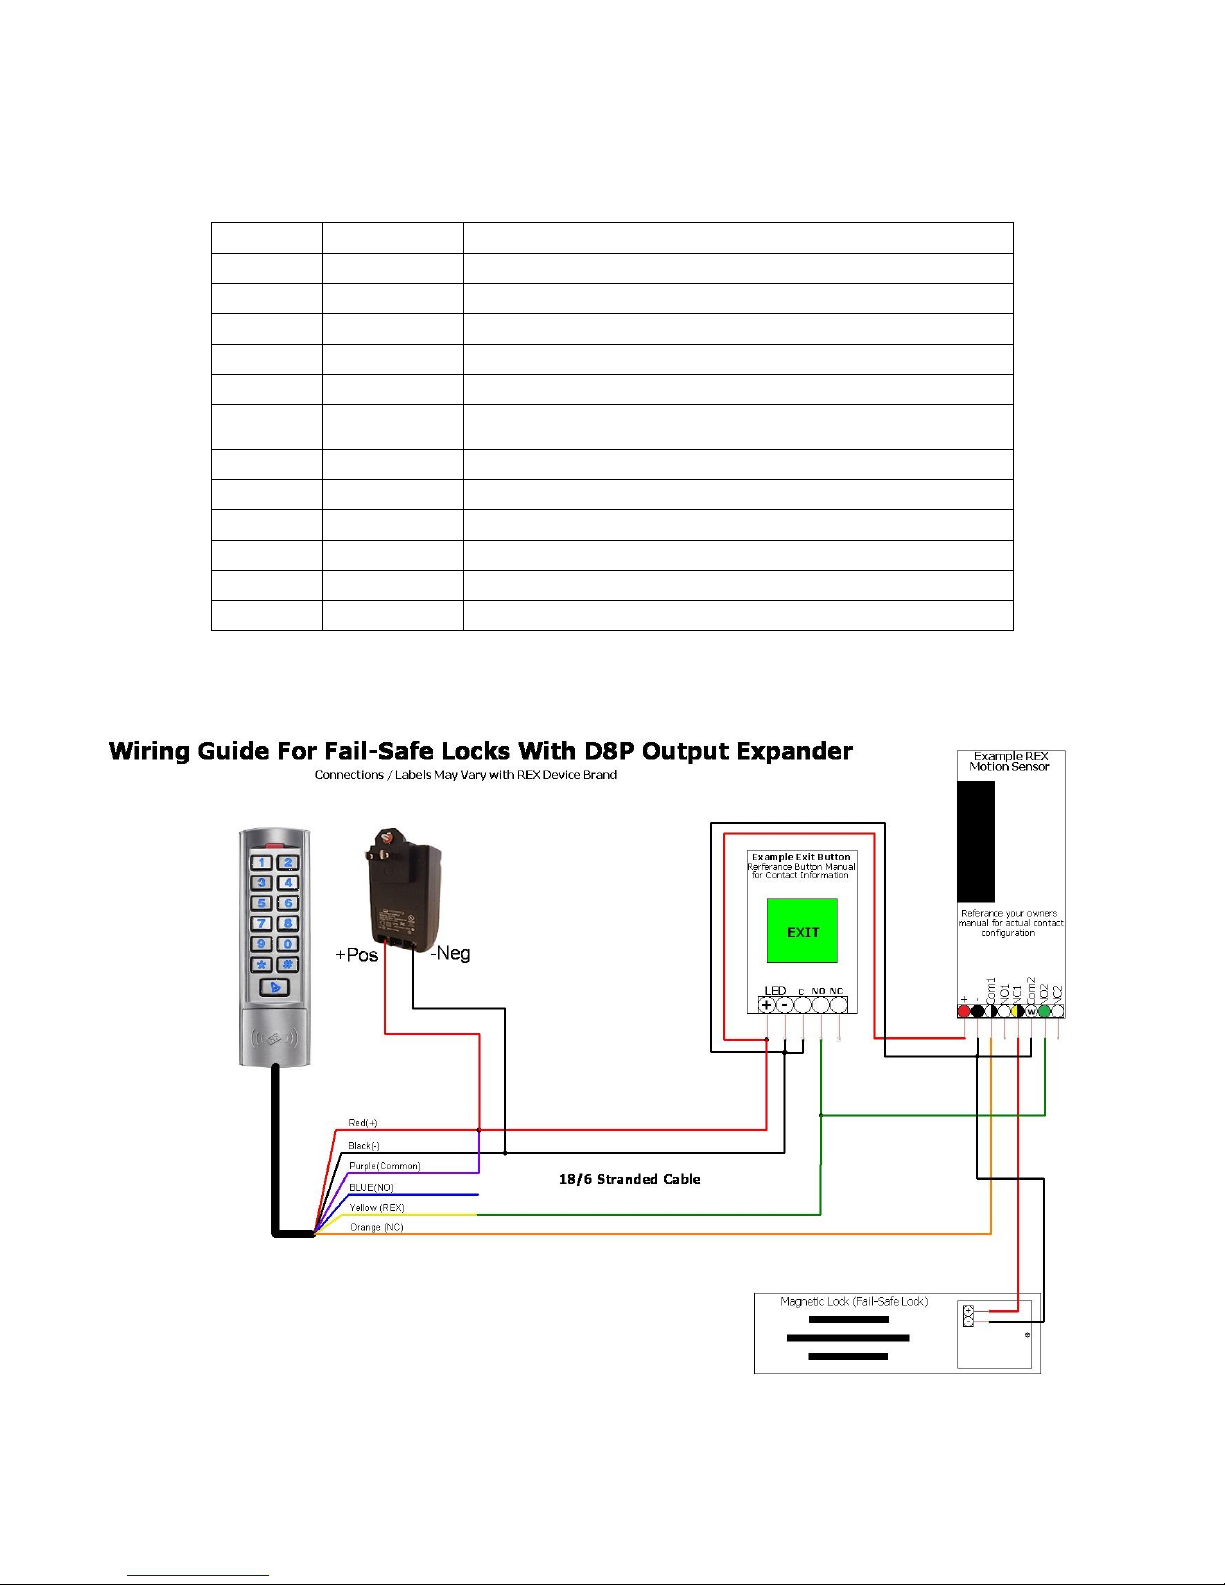
7. Wiring
Colour
Function
Description
Pink
BELL_A
Doorbell button one end
Pale blue
BELL_B
Doorbell button to the other end
Green
D0
WG output D0
White
D1
WG output D1
Grey
ALARM
Alarm negative(alarm positive connected 12 V+)
Yellow
OPEN
Exit button one end(the other end connected GND)
Brown
D_IN
Magnetic switch one end(the other end connected GND)
Red
12V+
12V + DC Regulated Power Input
Black
GND
12V - DC Regulated Power Input
Blue
NO
Relay normally-on end(Connect positive electric lock "-")
Purple
COM
Relay Public end, connect GND
Orange
NC
Relay Closed end(connect negative electric lock "-")
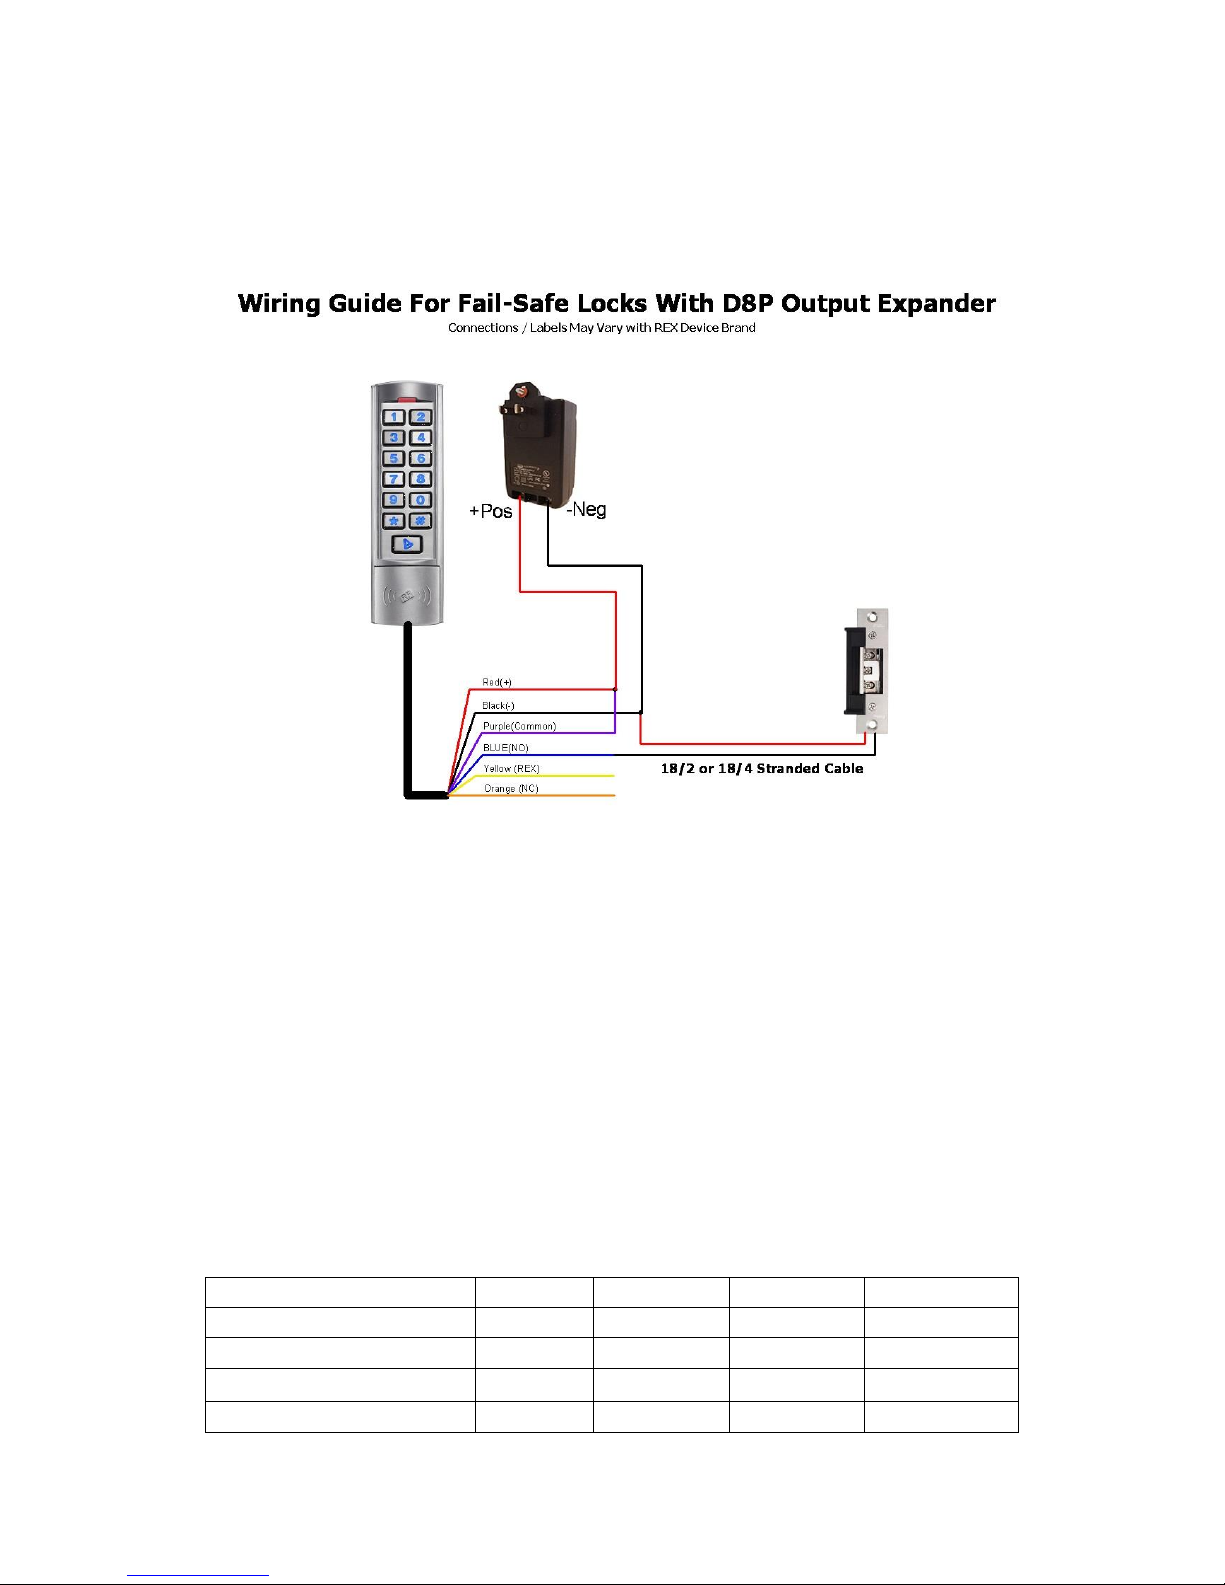
Magnetic lock and Fail-Safe lock diagram:
Page 6
6
Electric Strike and Fail-Secure wiring diagram:
8. To Reset to Factory Default
a. Disconnect power from the unit
b. Press and hold # key whilst powering the unit back up
c. On hearing two “Di” release # key, system is now back factory settings
Please note only installer data is restored, user data will not be affected
9. Anti Tamper Alarm
The unit uses a LDR (light dependent resistor) as an anti tamper alarm. If the keypad is
removed from the cover then the tamper alarm will operate.
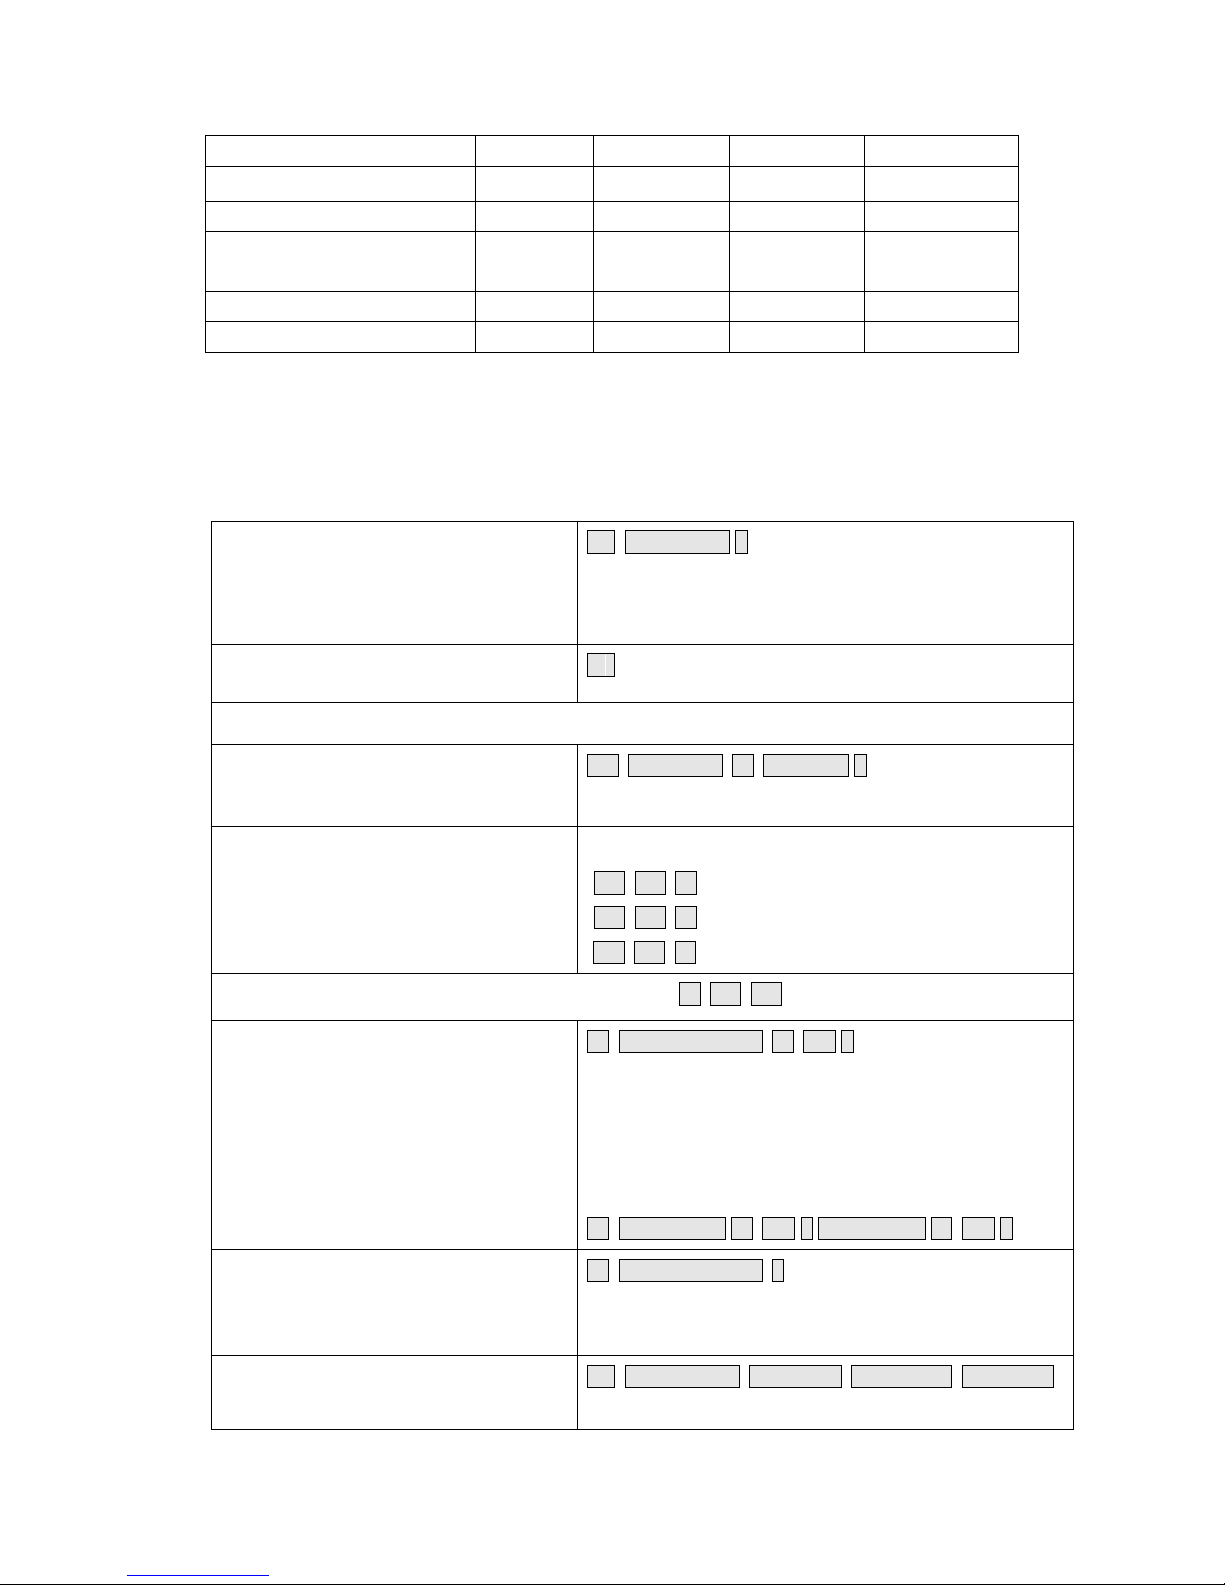
10.Sound and Light indication
Operation Status
Red Light
Green Light
Yellow Light
Buzzer
Power on
-
Bright - Di
Stand by
Bright - -
-
Press keypad
- - -
Di
Operation successful
-
Bright - Di
Page 7
7
Operation failed
- - -
DiDiDi
Enter into programming mode
Bright - -
In the programming mode
- - Bright
Di
Exit from the programming
mode
Bright - -
Di
Open the door
-
Bright - Di
Alarm
Bright - -
Alarm
11. Detailed Programming Guide
11.1 User Settings
To enter the programming mode
* Master code #
999999 is the default factory master code
To exit from the programming mode
*
Note that to undertake the following programming the master user must be logged in
To change the master code
0 New code # New code #
The master code can be 6 to 8 digits long
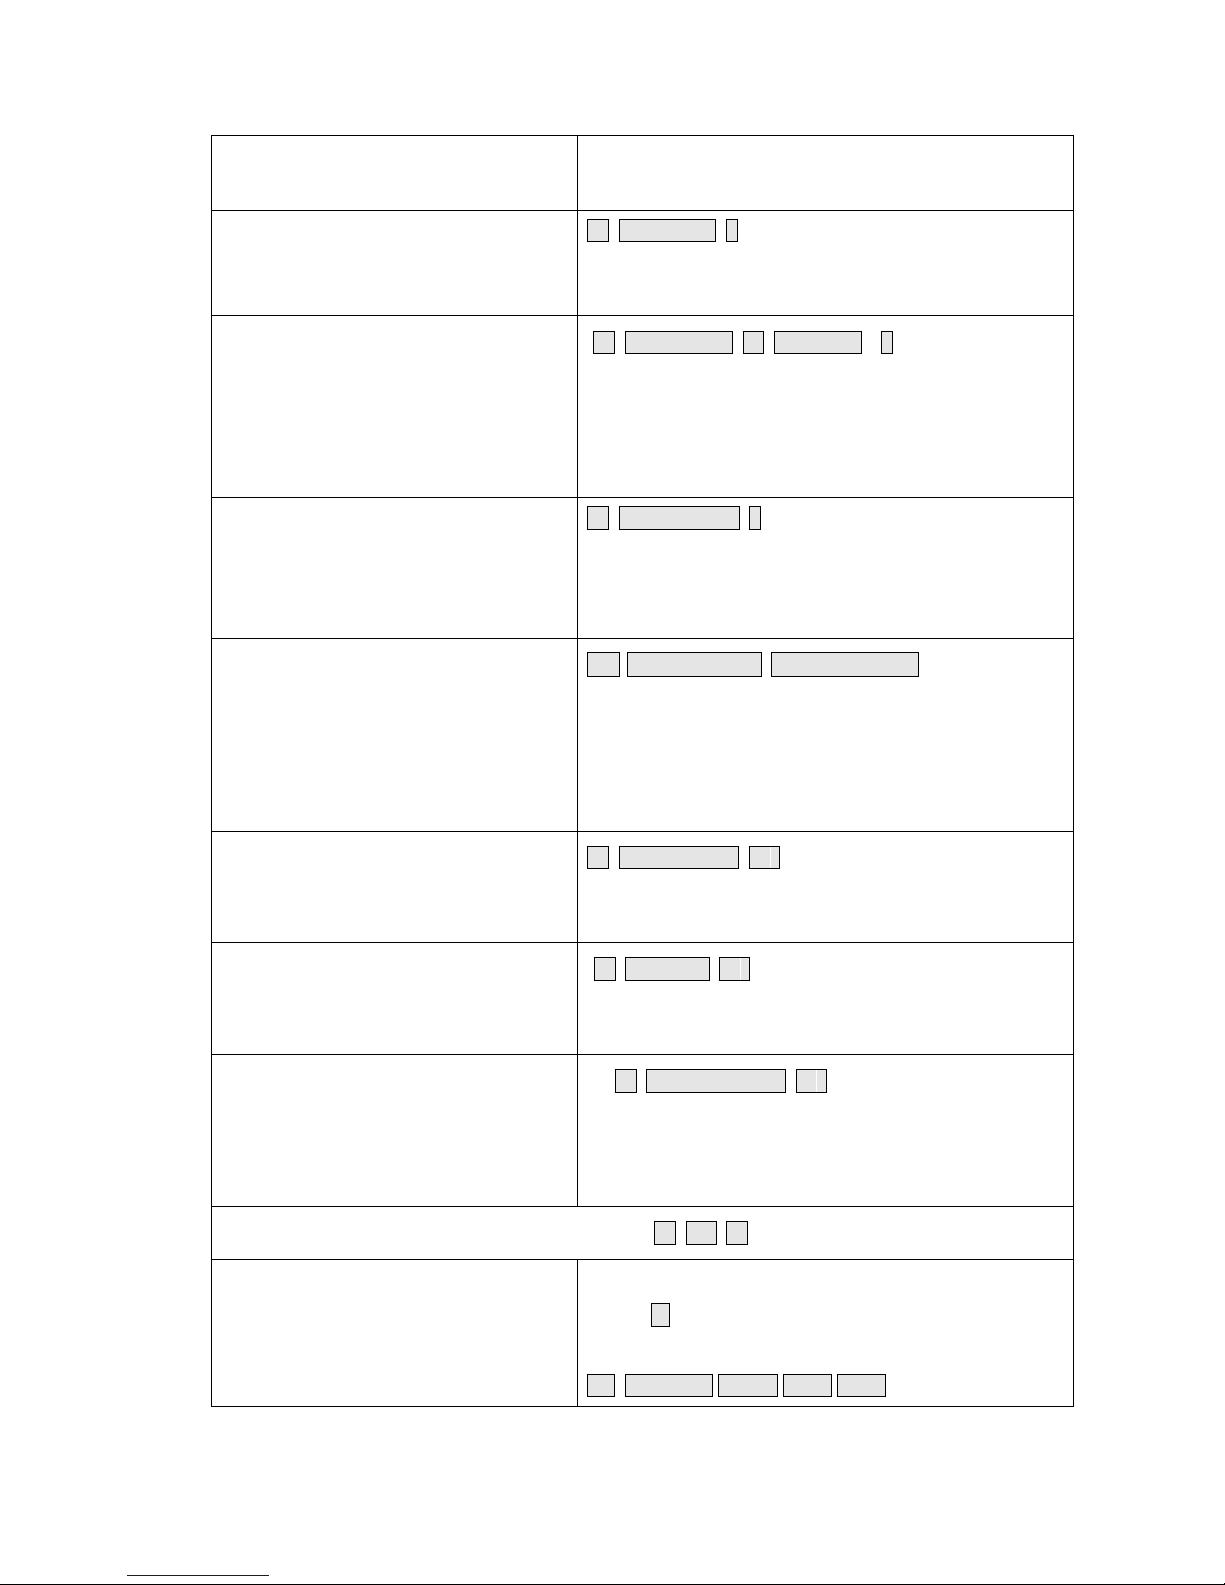
Setting the working mode:
Set valid card only users
Set valid card and PIN users
Set valid card or PIN users
3 0 # Entry is by card only
3 1 # Entry is by card and PIN together
3 2 # Entry is by either card or PIN (default)
To add a user in either card or PIN mode, i.e. in the 3 2 # mode. (Default setting)
To add a Pin user
1 User ID number # PIN #
The ID number is any number between 1 & 2000. The
PIN is any four digits between 0000 & 9999 with the
exception of 1234 which is reserved. Users can be added
continuously without exiting programming mode as
follows:
1 User ID no 1 # PIN # User ID no 2 # PIN #
To delete a PIN user
2 User ID number #
Users can be deleted continuously without exiting
programming mode
To change the PIN of a PIN user
(This step must be done out of
* ID number # Old PIN # New PIN # New PIN #
Page 8
8
programming mode)
To add a card user (Method 1)
This is the fastest way to enter cards,
user ID number auto generation.
1 Read card #
Cards can be added continuously without exiting
programming mode
To add a card user (Method 2)
This is the alternative way to enter cards
using User ID Allocation. In this method a
User ID is allocated to a card. Only one
user ID can be allocated to a single card.
1 ID number # Read card #
User can be added continuously without exiting
programming mode
To add a card user (Method 3)
Card number is the last 8 digits printed
on the back of the card,
user ID number
auto generation
1 Card number #
User can be added continuously without exiting
programming mode
To add a card user (Method 4)
In this method a User ID is allocated to a
card number. Only one user ID can be
allocated to the card number
1 ID number. # Card number. #
User can be added continuously without exiting
programming mode
To delete a card user by card. Note users
can be deleted continuously without
exiting programming mode
2 Read Card #
To delete a card user by user ID. This
option can be used when a user has lost
their card
2 User ID #
To delete a card user by card number.
This option can be used when the user
want to make the change but the card
has lost
2 Card number #
Note users can be deleted continuously without
exiting programming mode
To add a card and PIN user in card and PIN mode (3 1 # )
To Add a card and Pin user
(The PIN is any four digits between 0000
& 9999 with the exception of 1234 which
is reserved.)
Add the card as for a card user
Press * to exit from the programming mode
Then allocate the card a PIN as follows:
* Read card 1234 # PIN # PIN #
Page 9
9
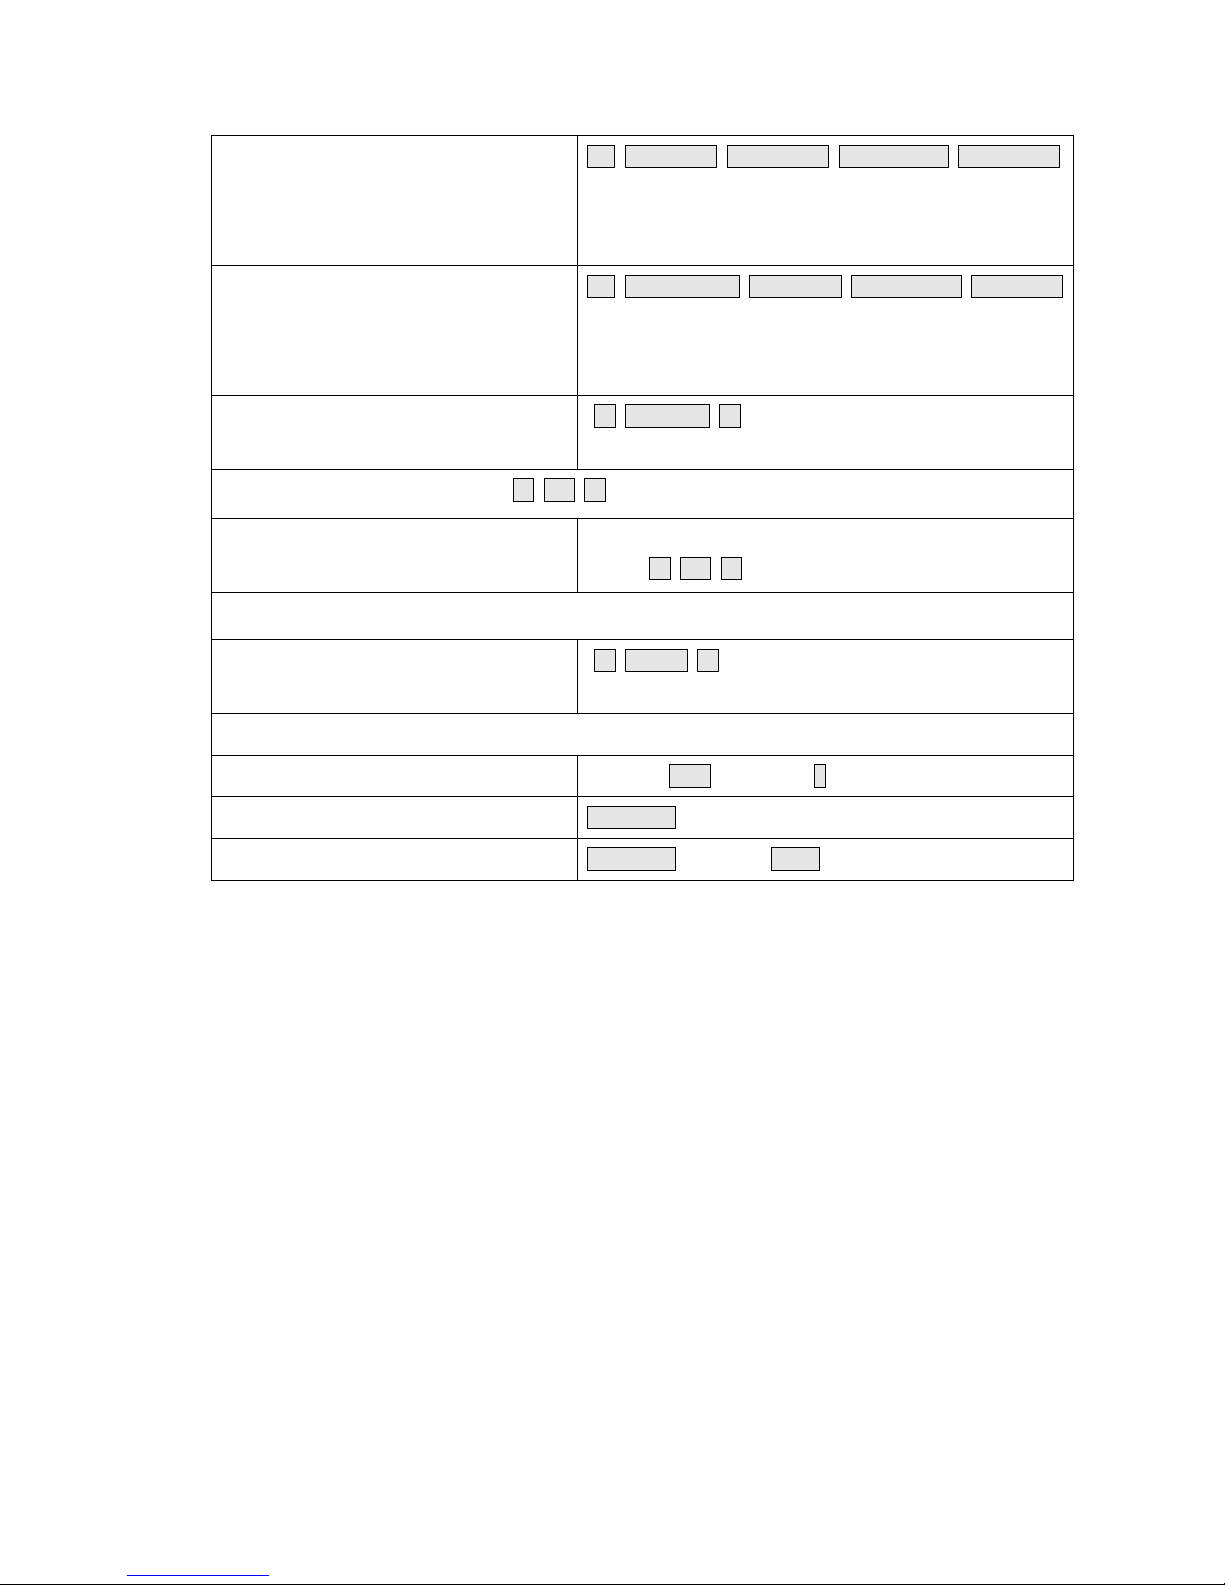
To change a PIN in card and PIN mode
(Method 1) Note that this is done outside
programming mode so the user can
undertake this themselves
* Read Card Old PIN # New PIN # New PIN #
To change a PIN in card and PIN mode
(Method 2) Note that this is done outside
programming mode so the user can
undertake this themselves
* ID number # Old PIN # New PIN # New PIN #
To delete a Card and PIN user just delete
the card
2 User ID #
To add a card user in card mode (3 0 # )
To Add and Delete a card user
The operating is the same as adding and deleting a card
user in 3 2 #
To delete All users
To delete ALL users. Note that this is a
dangerous option so use with care
2 0000 #
To unlock the door
For a PIN user
Enter the PIN then press #
For a card User
Read card
For a card and PIN user
Read card then enter PIN #
Page 10
10
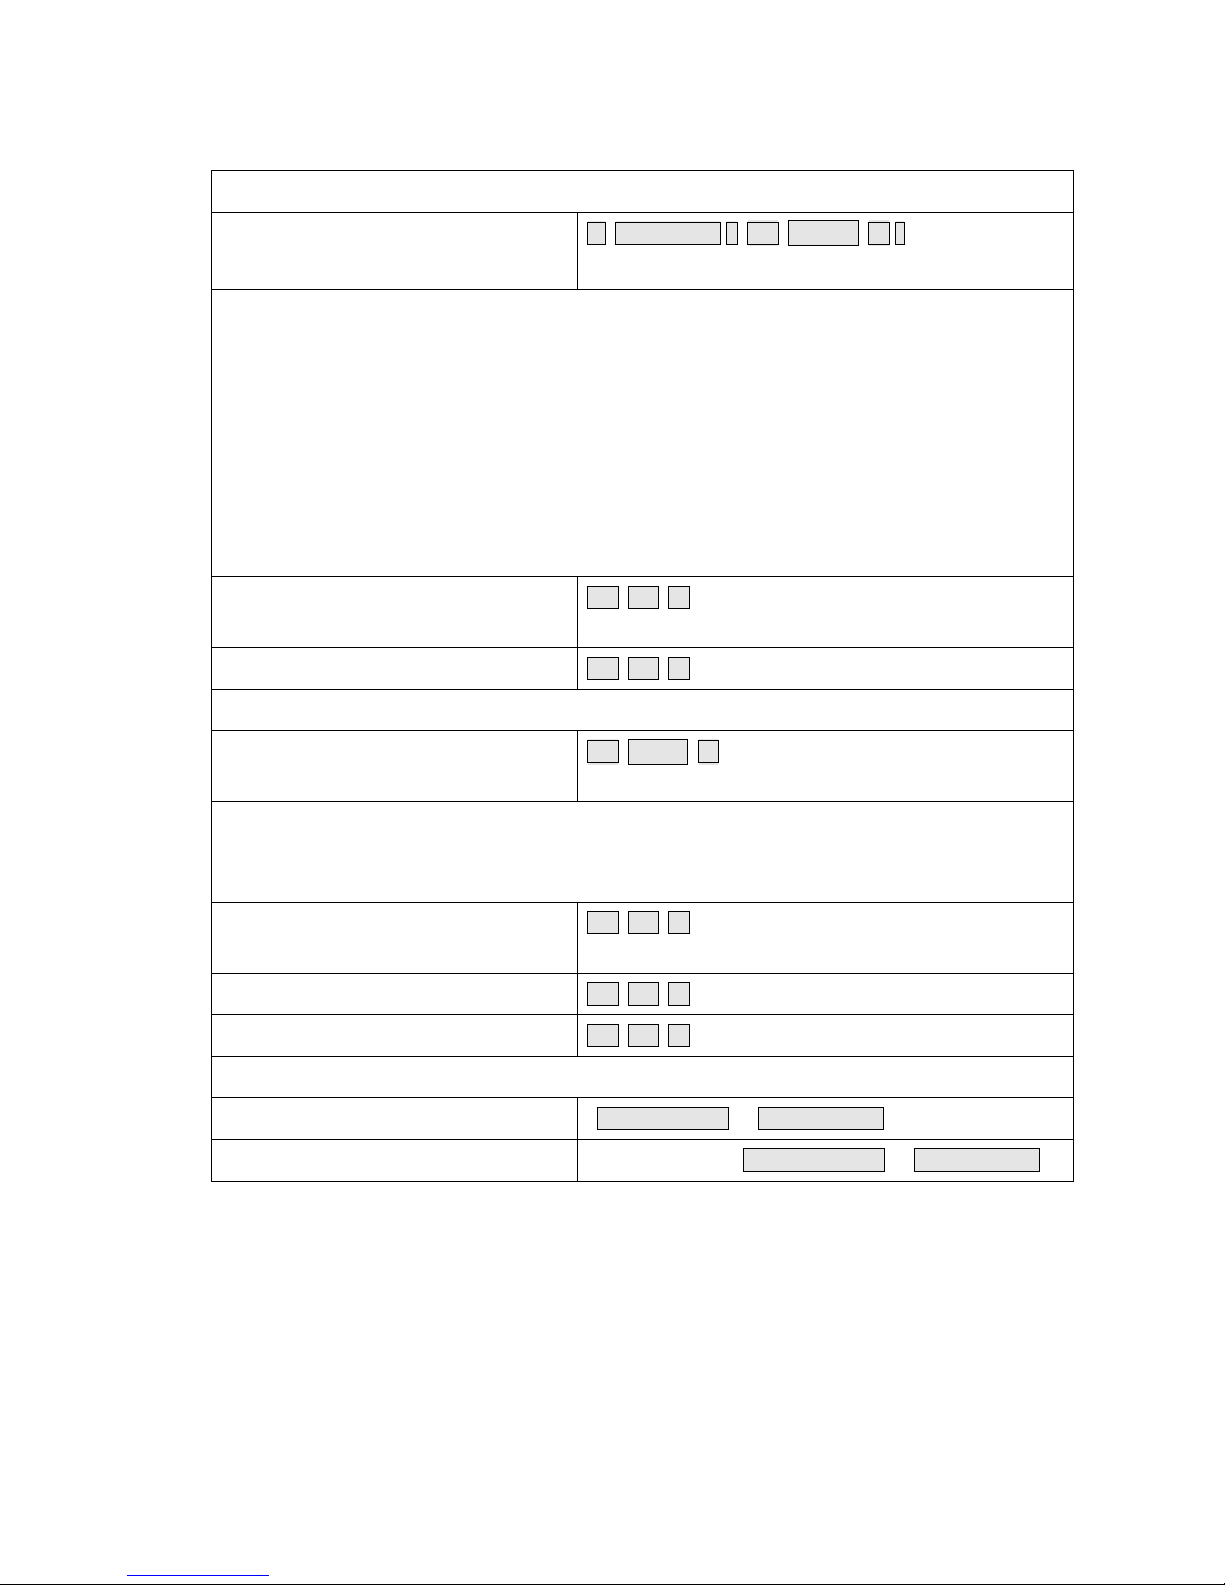
11.2 Door Settings
Relay Output Delay Time
To set door relay strike time
* Master code # 4 0~99 # *
0-99 is to set the door relay time 0-99 seconds
Door Open Detection
Door Open Too Long (DOTL) warning. When used with an optional magnetic contact or built-in
magnetic contact of the lock, if the door is opened normally, but not closed after 1 minute, the inside
buzzer will beep automatically to remind people to close the door and continue for 1 minute before
switching off automatically.
Door Forced Open warning. When used with an optional magnetic contact or built-in magnetic contact
of the lock, if the door is forced open, or if the door is opened after 20 seconds ,the inside buzzer and
alarm output will both operate. The Alarm Output time is adjustable between 0-3 minutes with the
default being 1 minute.
To disable door open detection. (Factory
default)
6 0 #
To enable door open detection
6 1 #
Alarm output time
To set the alarm output time (0-3 minutes)
Factory default is 1 minute
5 0~3 #
Keypad Lockout & Alarm Output options. If there are 10 invalid cards or 10 incorrect PIN numbers
in a 10 minute period either the keypad will lockout for 10 minutes or both the alarm and the inside
buzzer will operate for 10 minutes, depending on the option selected below.
Normal status: No keypad lockout or
alarm (factory default)
7 0 # (Factory default setting)
Keypad Lockout
7 1 #
Alarm and inside buzzer operate
7 2 #
To remove the alarm
To reset the Door Forced Open warning
Read valid card or Master Code #
To reset the Door Open Too Long warning
Close the door or Read valid card or Master Code #
Page 11
11
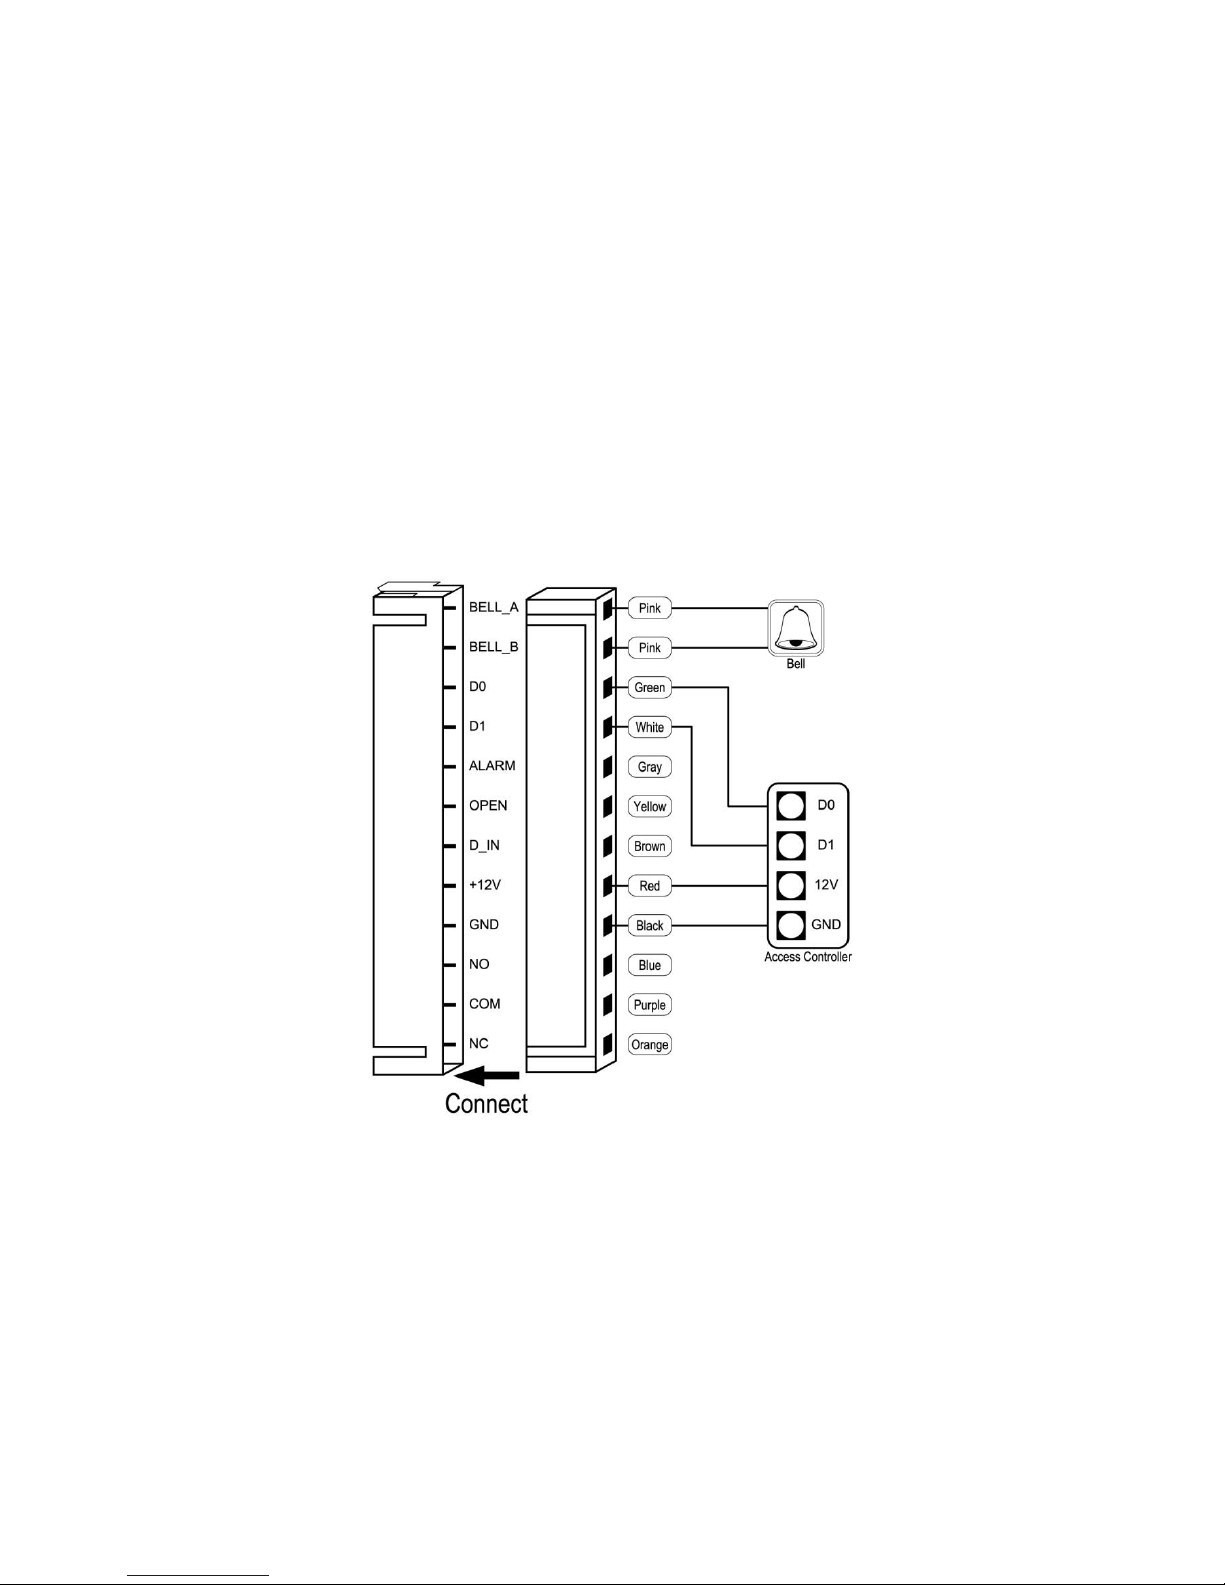
12.The unit operating as a Wiegand Output Reader
In this mode the unit supports a Wiegand 26 bit output so the Wiegand data lines can be
connected to any controller which supports a Wiegand 26 bit input.
 Loading...