

Page 1
Power Over Ethernet
Adapter Kit
Use this guide to install : WAPPOE
User Guide
Page 2

The foregoing limitations will apply even if any warranty or remedy provided under this
Section fails of its essential purpose. Some jurisdictions do not allow the exclusion or limitation of incidental or consequential damages, so the above limitation or exclusion may
not apply to You.
Please direct all inquiries to: Linksys, P.O. Box 18558, Irvine, CA 92623.
FCC STATEMENT
This equipment has been tested and complies with the specifications for a Class B digital device, pursuant to Part 15 of the FCC Rules. These limits are designed to provide
reasonable protection against harmful interference in a residential installation. This
equipment generates, uses, and can radiate radio frequency energy and, if not installed
and used according to the instructions, may cause harmful interference to radio communications. However, there is no guarantee that interference will not occur in a particular installation. If this equipment does cause harmful interference to radio or television
reception, which is found by turning the equipment off and on, the user is encouraged to
try to correct the interference by one or more of the following measures:
• Reorient or relocate the receiving antenna
• Increase the separation between the equipment or device
• Connect the equipment to an outlet other than the receiver’s
• Consult a dealer or an experienced radio/TV technician for assistance
UG-WAPPOE-30623A-KL/CC
COPYRIGHT & TRADEMARKS
Specifications are subject to change without notice. Linksys is a registered trademark or
trademark of Cisco Systems, Inc. and/or its affiliates in the U.S. and certain other countries. Copyright © 2003 Cisco Systems, Inc. All rights reserved. Other brands and product names are trademarks or registered trademarks of their respective holders.
LIMITED WARRANTY
Linksys warrants to the original end user purchaser ("You") that, for a period of one year,
(the "Warranty Period”). Your Linksys product will be free of defects in materials and
workmanship under normal use. Your exclusive remedy and Linksys's entire liability
under this warranty will be for Linksys at its option to repair or replace the product or
refund Your purchase price less any rebates.
If the product proves defective during the Warranty Period call Linksys Technical Support
in order to obtain a Return Authorization Number. BE SURE TO HAVE YOUR PROOF OF
PURCHASE ON HAND WHEN CALLING. When returning a product, mark the Return
Authorization Number clearly on the outside of the package and include a copy of your
original proof of purchase. RETURN REQUESTS CANNOT BE PROCESSED WITHOUT
PROOF OF PURCHASE. You are responsible for shipping defective products to Linksys.
Linksys pays for UPS Ground shipping from Linksys back to You only. Customers located outside of the United States of America and Canada are responsible for all shipping
and handling charges.
ALL IMPLIED WARRANTIES AND CONDITIONS OF MERCHANTABILITY OR FITNESS
FOR A PARTICULAR PURPOSE ARE LIMITED TO THE DURATION OF THE WARRANTY
PERIOD. ALL OTHER EXPRESS OR IMPLIED CONDITIONS, REPRESENTATIONS AND
WARRANTIES, INCLUDING ANY IMPLIED WARRANTY OF NON-INFRINGEMENT, ARE
DISCLAIMED. Some jurisdictions do not allow limitations on how long an implied warranty lasts, so the above limitation may not apply to You. This warranty gives You specific legal rights, and You may also have other rights which vary by jurisdiction.
TO THE EXTENT NOT PROHIBITED BY LAW, IN NO EVENT WILL LINKSYS BE LIABLE
FOR ANY LOST DATA, REVENUE OR PROFIT, OR FOR SPECIAL, INDIRECT, CONSEQUENTIAL, INCIDENTAL OR PUNITIVE DAMAGES, HOWEVER CAUSED REGARDLESS
OF THE THEORY OF LIABILITY, ARISING OUT OF OR RELATED TO THE USE OF OR
INABILITY TO USE THE PRODUCT, EVEN IF LINKSYS HAS BEEN ADVISED OF THE
POSSIBILITY OF SUCH DAMAGES. IN NO EVENT WILL LINKSYS' LIABILITY EXCEED
THE AMOUNT PAID BY YOU FOR THE PRODUCT.
Page 3

Chapter 1: Introduction
The Linksys Power Over Ethernet Adapter Kit lets you put your access points
almost anywhere, by removing the requirement of nearby power outlets. By
using the existing Category 5 Ethernet cabling to deliver power to any standard
5 volt access point or other network device, you save the time, hassle, and
expense of running AC power to the access point's installation location.
The best position for a wireless access point is usually on the ceiling, in the
center of the area to be covered. Second best would be high on a nearby wall.
Unfortunately, there's usually no easily accessible AC power plugs available in
these locations. With the Power Over Ethernet Adapter Kit, installing the
access point in these preferred spots becomes far less trouble.
The Power Over Ethernet Adapter Kit is a two piece set. The "Injector" sends
both power and data over one Category 5 cable to your access point, wireless
router or bridge. Then the tiny "Splitter", placed at the remote location, separates the network data and DC power back into two cables, and delivers them
to the access point. The Injector can also be used by itself with POE-enabled
network devices that accept 48 volts directly on a POE port.
When it's time to expand your wireless network, let the Linksys Power Over
Ethernet Adapter Kit simplify your installation.
• Data and Power Carried Over the Same Cable
• Easy to Read LED
• Low Power Consumption
• Everything You Need In One Box
• Free Technical Support— 24 Hours a Day, 7 Days a Week, Toll-Free U.S.
Calls
• 1-Year Limited Warranty
Table of Contents
Chapter 1: Introduction 1
The Power Over Ethernet Adapter Kit 1
Features 1
Chapter 2: Getting to Know the
Power Over Ethernet Adapter Kit 2
The Injector 2
The Splitter 2
Chapter 3: Connecting the
Power Over Ethernet Adapter Kit 3
For devices using conventional power connections 4
For devices using inline power 4
Appendix A: Specifications 5
Environmental 5
Appendix B: Warranty Information 6
Appendix C: Contact Information 7
1
The Power Over Ethernet Adapter Kit
Features
Page 4

3
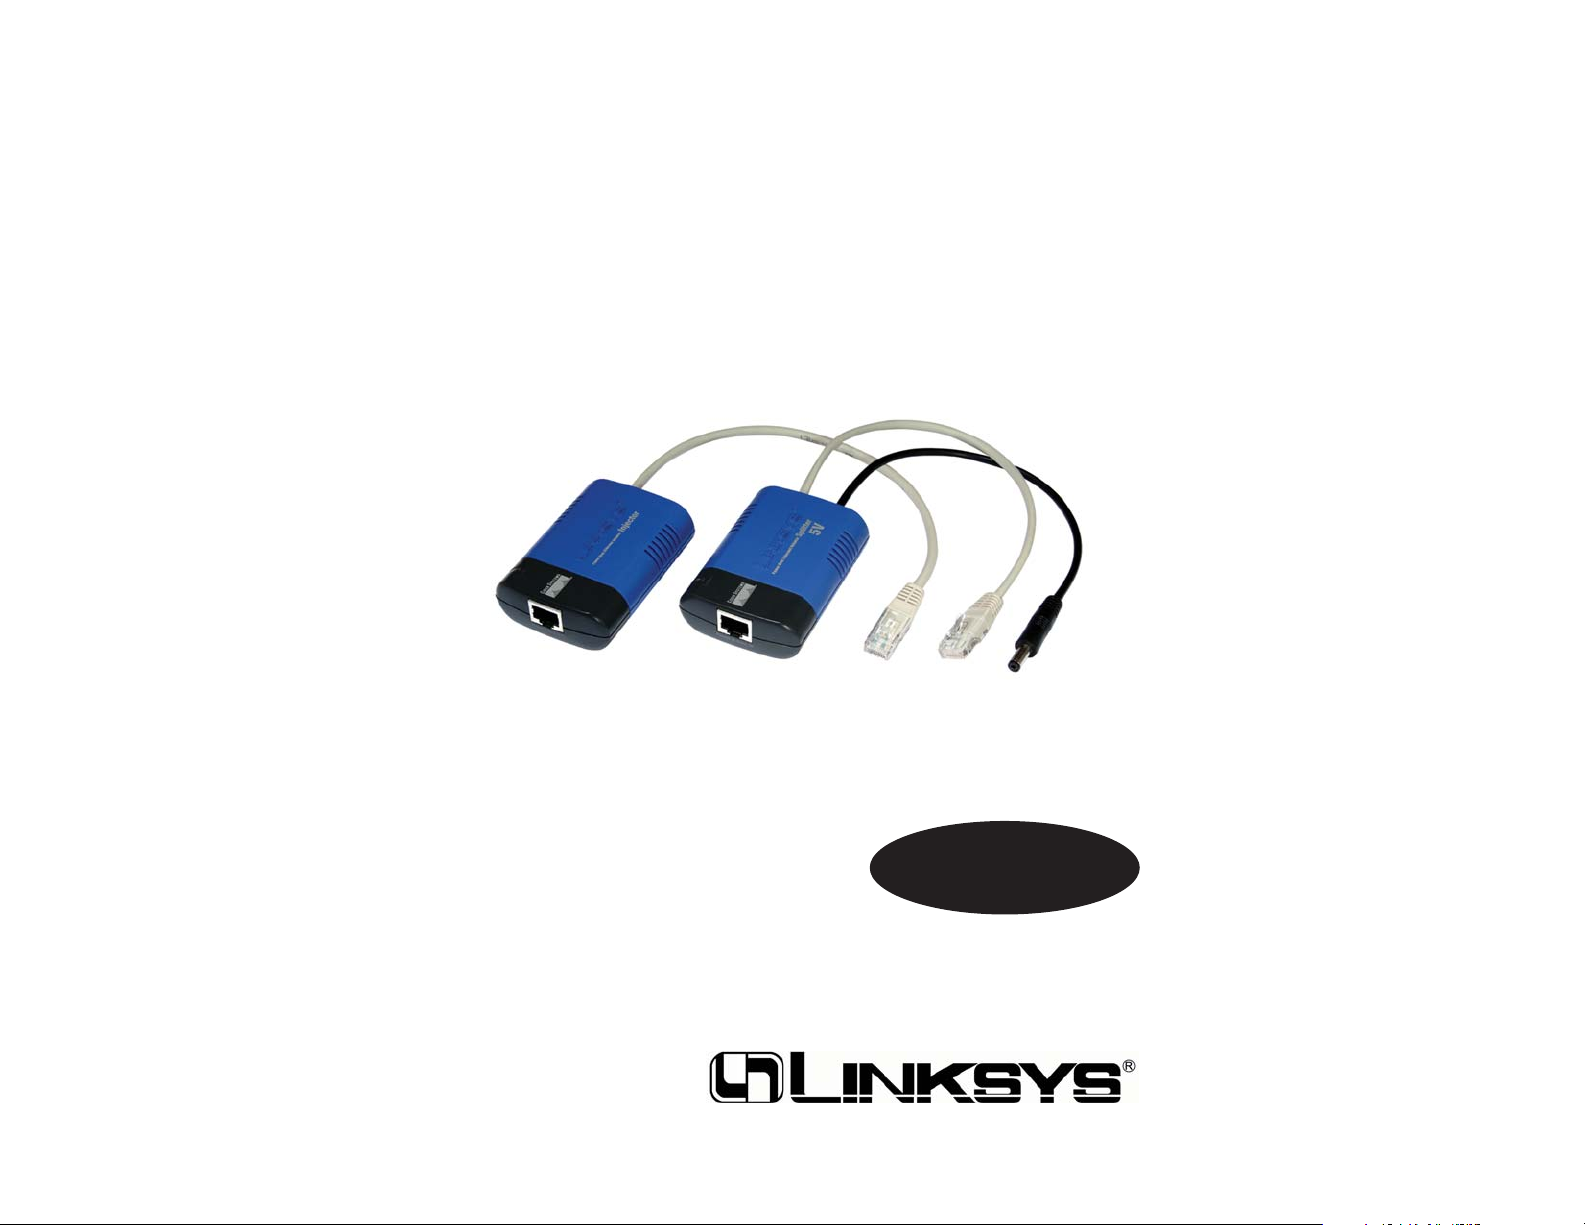
Chapter 2: Getting to Know the Power Over Ethernet Adapter Kit
With the Power Over Ethernet
Adapter’s Injector, you can
transmit both power and data to
any switch, access point, or networking device that has inline
power. Devices with inline
power can accept both a data
stream and power signal from
the same Ethernet cable, once
the Injector’s built-in Ethernet
cable is connected to an RJ-45
port and it’s power port is connected, via the power adapter, to
a power jack.
The Power Over Ethernet Adapter’s Splitter is used when you wish to supply
power over Ethernet to a device that doesn’t have inline power. These are typical devices that require power to be connected via the power port.
The Splitter takes the combined power and data stream from the Ethernet cable
connected to the Injector and splits this stream back into one data stream (in the
Ethernet cable) and one power stream, via the power cable, which are then connected to any switch, access point, or networking device that does not have
inline power
2
Chapter 3: Connecting the Power Over Ethernet Adapter Kit
The Power Over Ethernet Adapter Kit is used to move your access point, wireless router or bridge to a remote location that is not close to a power outlet.
The diagram in Figure 3-1 shows how the Power Over Ethernet Adapter Kit is
connected to your wireless network. Once connected, the kit will transmit data
and power over the Ethernet cable.
Figure 3-1
Figure 2-3
The Injector
The Splitter
Page 5

5
To connect the Power Over Ethernet Adapter Kit:
1) Connect the kit’s power adapter to the Injector and plug the power adapter
into a surge protector or power socket.
2) Connect the Injector’s RJ-45 Cat 5 Ethernet cable to your network.
3) Now, connect the kit’s RJ-45 Cat 5 Ethernet cable to the Injector’s Power &
Data Out port. Connect the other end of the Ethernet cable to the Splitter’s
Power & Data In port.
4) Connect the Splitter’s RJ-45 Cat 5 Ethernet cable to your access point,
router, or other networking device.
5) Finally, connect the Splitter’s Power port to the Power Port on your access
point, router, or other network device.
Data should now transmit freely between the PC and networking device.
To connect the Power Over Ethernet Adapter Kit:
1) Connect the kit’s power adapter to the Injector and plug the power adapter
into a surge protector or power socket.
2) Connect the Injector’s RJ-45 Cat 5 Ethernet cable to your network.
3) Now, connect the kit’s RJ-45 Cat 5 Ethernet cable to the Injector’s Power &
Data Out port. Connect the other end of the Ethernet cable to your access
point, router, or other networking device, via it’s RJ-45 port.
Data should now transmit freely between the PC and networking device.
4
Appendix A: Specifications
Standards: IEEE 802.3, IEEE 802.3u, IEEE 802.3af
Ports: One 10/100 RJ-45 port
One DC power port
Cabling Type: RJ-45 Cat 5 UTP cable
LED Power
Dimensions (per unit): 3.15” x 0.87” x 2.20 inches
(80mm x 22mm x 56mm)
Unit Weight (per unit): 2.7 oz. (0.07 kg)
Power: External, 48V DC, 100-240VAC
Certifications: FCC Class B
Operating Temp: 32ºF to 104ºF (0ºC to 40ºC)
Storage Temp: -4ºF to 158ºF (-20ºC to 70ºC)
Operating Humidity: 10% to 85%, Non-Condensing
Storage Humidity: 5% to 90%, Non-Condensing
Environmental
For devices using conventional power connections
For devices using Inline power
Note: This device must support Inline power on one of its Ethernet
ports.)
Page 6

6 7
Appendix B: Warranty Information
BE SURE TO HAVE YOUR PROOF OF PURCHASE AND A BARCODE
FROM THE PRODUCT’S PACKAGING ON HAND WHEN CALLING.
RETURN REQUESTS CANNOT BE PROCESSED WITHOUT PROOF OF
PURCHASE.
IN NO EVENT SHALL LINKSYS’S LIABILITY EXCEED THE PRICE
PAID FOR THE PRODUCT FROM DIRECT, INDIRECT, SPECIAL, INCIDENTAL, OR CONSEQUENTIAL DAMAGES RESULTING FROM THE
USE OF THE PRODUCT, ITS ACCOMPANYING SOFTWARE, OR ITS
DOCUMENTATION. LINKSYS DOES NOT OFFER REFUNDS FOR ANY
PRODUCT.
LINKSYS OFFERS CROSS SHIPMENTS, A FASTER PROCESS FOR PROCESSING AND RECEIVING YOUR REPLACEMENT. LINKSYS PAYS
FOR UPS GROUND ONLY. ALL CUSTOMERS LOCATED OUTSIDE OF
THE UNITED STATES OF AMERICA AND CANADA SHALL BE HELD
RESPONSIBLE FOR SHIPPING AND HANDLING CHARGES. PLEASE
CALL LINKSYS FOR MORE DETAILS.
Appendix C: Contact Information
For help with the installation or operation of this product, contact Linksys
Technical Support at one of the phone numbers or Internet addresses below.
Sales Information 800-546-5797 (LINKSYS)
Technical Support 800-326-7114
RMA Issues 949-261-1288
Fax 949-261-8868
Email support@linksys.com
We b http://www.linksys.com
FTP Site ftp.linksys.com
Page 7

© Copyright 2003 Cisco Systems, Inc. All Rights Reserved.
http://www.linksys.com
 Loading...