

Page 1
QUICK INSTALLATION GUIDE
ADSL Gateway
There are two ways to set up the Gateway, run the
Setup CD-ROM or use this Quick Installation. Linksys
strongly recommends that you run the Setup CD-ROM.
Run the Setup CD-ROM
Insert the Setup CD-ROM into the CD-ROM
drive, and follow the on-screen instructions.
Use this Quick Installation
Follow the instructions in this Quick
Installation. This method should only be
used if you cannot run the Setup CD-ROM.
Page 2
Installation 1
Make sure that all the devices that you are working with are powered A.
down, including your computer(s) and the Gateway. If you have a
modem connected to your network, disconnect it. The Gateway
replaces your modem.
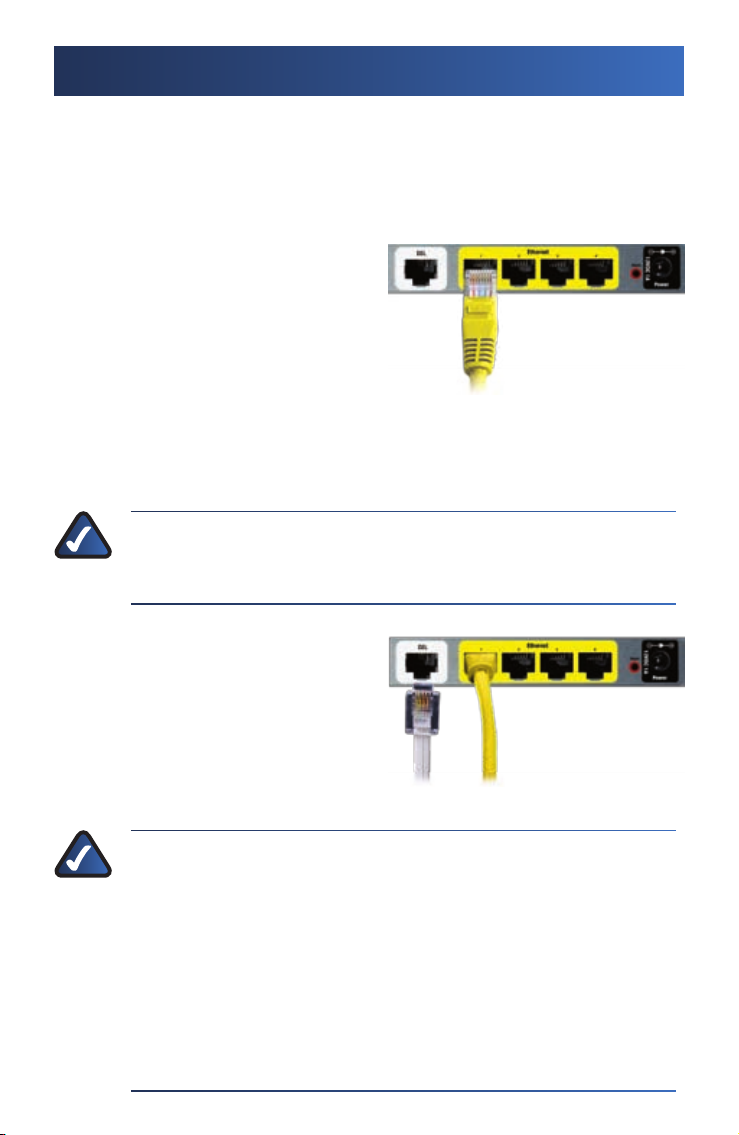
B. Connect one end of the
provided Ethernet cable to your
computer’s Ethernet adapter.
Connect the other end of the
Ethernet cable to one of the
Ethernet ports on the back of
the Gateway.
Repeat step B for every computer or device that you want to connect to C.
the Gateway via Ethernet. If you connect more than four computers to
the Gateway, then you also need to connect a switch to the Gateway.
NOTE: If your computer’s Ethernet adapter is not set up,
refer to the Ethernet adapter’s documentation for more
information.
D. Connect one end of the phone
cable to the DSL port on the
back of the Gateway.
Connect the Computer
Connect the other end of the E.
phone cable to the wall jack
with ADSL service or microfilter.
NOTE: To avoid interference, you may need to place a
microlter or splitter between the phone cable and wall
jack. Contact your ISP to determine if one is required. (UK
residents need to connect the microlter to the wall phone
jack with ADSL service, and then connect one end of the
provided phone cable to the DSL port on it.) If you have more
than one phone and you experience static on the line after
installing the Gateway, then you need to install an additional
microfilter for each phone or fax that you use. If you use
ISDN, then you do not need a microlter.
Connect the DSL
Page 3

F. Connect the power adapter to
the Gateway’s power port and
the electrical outlet.
Power on the computer that G.
you want to use to configure the
Gateway.
The Power, Wireless, and at least one of the numbered Ethernet (1, 2, 3, H.
or 4) LEDs should light up. If not, make sure the Gateway is powered on
and the cables are securely connected.
Connection is complete. Go to Step 2: Configuration.
Conexão da alimentação
Configuration 2
In step 2, configure the Gateway to access the Internet through your ADSL
Internet Service Provider (ISP). Use the setup information provided by your
ISP.
NOTE: You only need to congure the Gateway once.
A. Open your web browser. Enter
http://192.168.1.1 in the web
browser’s Address field. Press
Enter.
Access the Web-Based Utility
B. On the login screen, enter
admin in lowercase letters
in both the User name and
Password fields (admin is
the default user name and
password). Click OK.
Login Screen
The C. Basic Setup screen appears. Refer to the settings provided by your
ISP. Select the Encapsulation method your ISP has specified.
For the Multiplexing setting, select D. LLC or VC.
Page 4

For the Virtual Circuit, enter the VPI and VCI settings.E.
Proceed to the appropriate instructions for your Encapsulation method. F.
Enter the following settings unless otherwise instructed by your ISP.
Encapsulation Settings by Country
Country Encapsulation Multiplexing VPI VCI
Australia PPPoE LLC 8 35
New Zealand PPPoA VC 0 100
UK PPPoA VC 0 38
RFC 2364 PPPoA or RFC 2516 PPPoE
Enter your User Name and 1.
Password.
2. Select Keep Alive if you always
want to be connected to your
ISP, or select Connect on
Demand if you are charged
for the time that you are
connected to your ISP.
Click3. Save Settings.
RFC 2364 PPPoA
RFC 2516 PPPoE
Page 5

RFC 1483 Routed or IPoA
1. Enter the IP Address, Subnet
Mask, and Default Gateway IP
address.
In the2. Primary and/or
Secondary DNS elds, enter at
least one DNS IP address.
Click 3. Save Settings.
RFC 1483 Routed
IPoA
RFC 1483 Bridged - Dynamic IP Address
1. For the IP Setting, select
Obtain an IP Address
Automatically.
Click 2. Save Settings.
RFC 1483 Bridged - Dynamic IP Address
Page 6

RFC 1483 Bridged - Static IP Address
1. For the IP Setting, select Use
the Following IP Address.
Enter the IP Address, Subnet 2.
Mask, and Default Gateway IP
address.
In the3. Primary and/or
Secondary DNS elds, enter at
least one DNS IP address.
Click 4. Save Settings.
RFC 1483 Bridged - Static IP Address
Bridge Mode Only
Use this mode only if you are
using the Gateway as a bridge,
which makes the Gateway act
like a stand-alone modem. Click
Save Settings.
Bridge Mode Only
In the web browser’s G. Address field, enter the appropriate website:
www.linksys.com/uk/registration (United Kingdom),
www.linksys.com/au/registration (Australia), or
www.linksys.com/nz/registration (New Zealand). Then press Enter.
NOTE FOR WIRELESS GATEWAYS: Refer to the User Guide
on the CD-ROM for instructions on wireless conguration.
Linksys recommends that you change the default wireless
settings and enable the appropriate security method.
Congratulations! The installation of the Gateway is complete.
For additional information or troubleshooting help, refer to the User Guide on the CD-ROM.
Additional support is also available by phone or online.
Website
http://www.linksys.com/international
Product Registration
United Kingdom
http://www.linksys.com/uk/registration
Linksys is a registered trademark or trademark of Cisco Systems, Inc. and/or its affiliates in the U.S. and certain other countries. Copyright © 2008
Cisco Systems, Inc. All rights reserved. Other brands and product names are trademarks or registered trademarks of their respective holders.
8031010NC-RR
Australia
http://www.linksys.com/au/registration
New Zealand
http://www.linksys.com/nz/registration
 Loading...