

Page 1
TR500
TR1000-TV
Owners Manual
Version 1.0
Page 2

Page 3

table of contents
Introduction . . . . . . . . . . . . . . . . . . . . . . . . . . . . . . . . . . .1
Specifications. . . . . . . . . . . . . . . . . . . . . . . . . . . . . . . . . 2
Limited Home Use Warranty . . . . . . . . . . . . . . . . . . . . . . 3
page
Important
Safety Precautions . . . . . . . . . . . . . . . . . . . . . 4
Getting Fit . . . . . . . . . . . . . . . . . . . . . . . . . . . . . . . . . . . 5
Assembly Instructions . . . . . . . . . . . . . . . . . . . . . . . . . . 7
Electronics Overview . . . . . . . . . . . . . . . . . . . . . . . . . . .10
Exercise Programs . . . . . . . . . . . . . . . . . . . . . . . . . . . . .12
Treadmill Operations . . . . . . . . . . . . . . . . . . . . . . . . . . .14
Moving and Storage . . . . . . . . . . . . . . . . . . . . . . . . . . . .18
Trouble Shooting . . . . . . . . . . . . . . . . . . . . . . . . . . . . . 20
Maintenance and Cleaning . . . . . . . . . . . . . . . . . . . . . . 22
Page 4

Page 5

Congratulations on the purchase of your LifeSpan treadmill.
We all know that exercise is a key component to achieving the level of Health and Wellness that all
of us desire. Regular activity prevents the development of numerous diseases, helps to reduce
stress, leads to an improved self image, weight loss and increased energy levels.
The LifeSpan product line is designed specifically for people who want to make exercise a part
of their lifestyles. Your treadmill includes the features you want to make your exercise routine
enjoyable and effective. These features include preset programs that you can tailor for your
specific requirements and display readouts to monitor the intensity and duration of your workout.
To complement these features we have designed and manufactured your treadmill to the
highest quality standards. The all steel frame construction, heavy duty deck, pre-lubricated
belt, and durable drive motors are all included to provide years of use and require minimal
ongoing maintenance.
Please read this manual thoroughly before assembly and operation of your LifeSpan treadmill.
It includes basic information on starting an exercise program, and safety tips that will assist
you in reaching your goals for a healthy lifestyle.
To keep your treadmill in optimal condition, please pay attention to the maintenance and
cleaning section of this manual and remember that some kinds of service should only be
performed by a qualified service technician. If service is required, please contact your
authorized PCE Health and Fitness Retailer. If a question or problem arises that cannot be
answered by your retailer, contact us:
PCE Health and Fitness
PO Box 981316
Park City, Utah 84098–1316
Phone: (801) 973-9993
Fax: (801) 973-9923
www.pcefitness.com
Neither PCE Health and Fitness nor its representatives can accept responsibility for any damage
or injury incurred as a result of information presented in the manual except under the terms of
the product warranty.
1
Page 6

product specifi cations
Console and Programming TR500 TR1000-TV
Display Panel Oversize blue backlit display TV Entertainment Package
with program matrix 3 LED Display
Readouts Incline Level, Speed, Time Incline Level, Speed, Time
Distance, Calories, Heart Rate Distance, Calories, Heart Rate
Programs Speed Control Speed Control
Weight Management – Interval Weight Management – Interval
Weight Management-Steady Pace Weight Management-Steady Pace
Heart Health – Pyramid Heart Health – Pyramid
Heart Health – Ladder Heart Health – Ladder
Cardio Cardio
Incline Control Incline Control
Uphill Walking Uphill Walking
Rolling Hills Rolling Hills
Uphill Hike Uphill Hike
Uphill Intervals Uphill Intervals
Pyramid Climb Pyramid Climb
Plateau Climb Plateau Climb
My Zone Heart Rate Control My Zone Heart Rate Control
2 x User Setup Programs 2 x User Setup Programs
Body Mass Analysis Body Mass Analysis
Heart Rate Contact Heart Rate Contact Heart Rate
Speed / Incline Controls Quick Speed & Incline Quick Speed & Incline
Handlebar Speed Handlebar Speed
& Incline Control & Incline Control
Mechanical Performance TR500 TR1000-TV
Speed .06 – 10 MPH (1.0 - 16 KPH) .06 – 10 MPH (1.0 - 16 KPH)
Incline Levels 0 - 12 0 - 12
Belt Size 18” x 52” 20” x 56”
Roller Size 2” Tapered with 2” Tapered with
oversize bearings oversize bearings
Frame Heavy Gauge Heavy Gauge
Steel Welded Frame Steel Welded Frame
Deck 3/4 “ with 8 variable 3/4 “ with 8 variable
density elastomers density elastomers
Drive Motor 1.75 HP Continuous Duty 2.0 HP Continuous Duty
Lift Motor 500 lb. Max Lift 500 lb. Max Lift
Product Weight 167 lb. 198 lb.
Max. User Weight 275 lb. 275 lb.
Floor Space 71”L x 31”W x 50”H 76”L x 33”W x 50” H
2
Page 7

limited home use warranty
The TR500 and TR1000-TV come with the following limited warranty, which applies only to the
use of these treadmills in the home, for residential, non-commercial purposes:
TR500 TR1000-TV
Frame: Lifetime Lifetime
Motor: Lifetime Lifetime
Parts: 1 Year Parts 3 Years Parts
Entertainment Console: 90 Days 90 Days
Labor: 1 Year Labor 1 Year Labor
PCE Health and Fitness warrants that the equipment it manufacturers is free from defects in
material and workmanship under normal use and service. The periods above are based on the
date of purchase. During these periods, PCE Health and Fitness will repair or replace any defective
part. Free labor is included for the first year.
If within the time frames specified above, any part of the LifeSpan product fails to operate, please
contact PCE Health and Fitness via our website at www.pcefitness.com and click on Customer
Support/Customer Service. This is the quickest way to get all the information to us. If you are not
able to get online we can be reached at 801-973-9993.
PCE Health and Fitness reserves the right to make changes and improvements in our products
without incurring any obligations to similarly alter any product purchased. In order to insure our
product warranty and to ensure the safe and efficient operation of your treadmill, only authorized
parts can be used. The warranty is void if any parts other than those provided by PCE Health and
Fitness are used.
Exclusions and Limitations
• This warranty does not apply to any defects caused by negligence, misuse, improper assembly
or maintenance, accident, or an "act of god".
• This warranty does not apply to discoloration of paint or plastics
• PCE Health and Fitness shall not be responsible for incidental or consequential damages.
• This warranty is nontransferable from the original owner.
Registration
You must register your LifeSpan product before a warranty claim can be processed. To
complete your registration card online, go to www.pcefitness.com and fill out the registration
card online or fill out the warranty card provided with your treadmill and mail it today.
Registration Cards must be completed and sent to PCE Fitness within 30 days of purchase
to activate the Product Warranty on your LifeSpan equipment. Product Warranties are not
valid unless properly completed and sent to PCE Fitness within this 30 day period.
Note: Read ALL instructions before using your LifeSpan treadmill.
3
Page 8
important safety precautions
When using electrical equipment, basic precautions should always be followed, including:
• Never drop or insert any object into any opening.
• Never operate this treadmill if it has been damaged, if it is not working properly or if it has been
exposed to water. Return the treadmill to a retailer for examination and repair.
• To reduce the risk of electric shock, unplug the treadmill from the wall outlet when not in use, before
performing any maintenance, or before moving the treadmill.
• Do not use outdoors or in an environment with unregulated temperature control.
• Do not lean against or climb on the treadmill. Doing so may result in the treadmill tipping and falling
and could result in serious personal injury.
• Do not hang or place items on the treadmill. Doing so could result in shifting the weight balance of
the treadmill causing it to tip over or fall causing serious personal injury.
• Do not operate the treadmill with the side rails or dust covers removed.
• Keep the treadmill on a solid surface, with the sides and front a minimum of two feet from any walls
and furniture. Make sure that the area behind the treadmill remains completely clear during use. A
minimum of 4 feet of clearance behind the treadmill is required for safety reasons.
• Do not operate where aerosol spray products are being used or where oxygen is being administered.
• Never place the power cord under carpeting or place any object on top of the cord, which may pinch
or damage it.
• Use this exercise product for its intended use as described in this Owners Manual. Do not use
attachments that are not recommended by PCE Health and Fitness.
• Do not leave your treadmill running while not in use.
Children and Pets
• Keep children off your treadmill at all times.
• When in use, young children and pets should be kept at least 10 feet away.
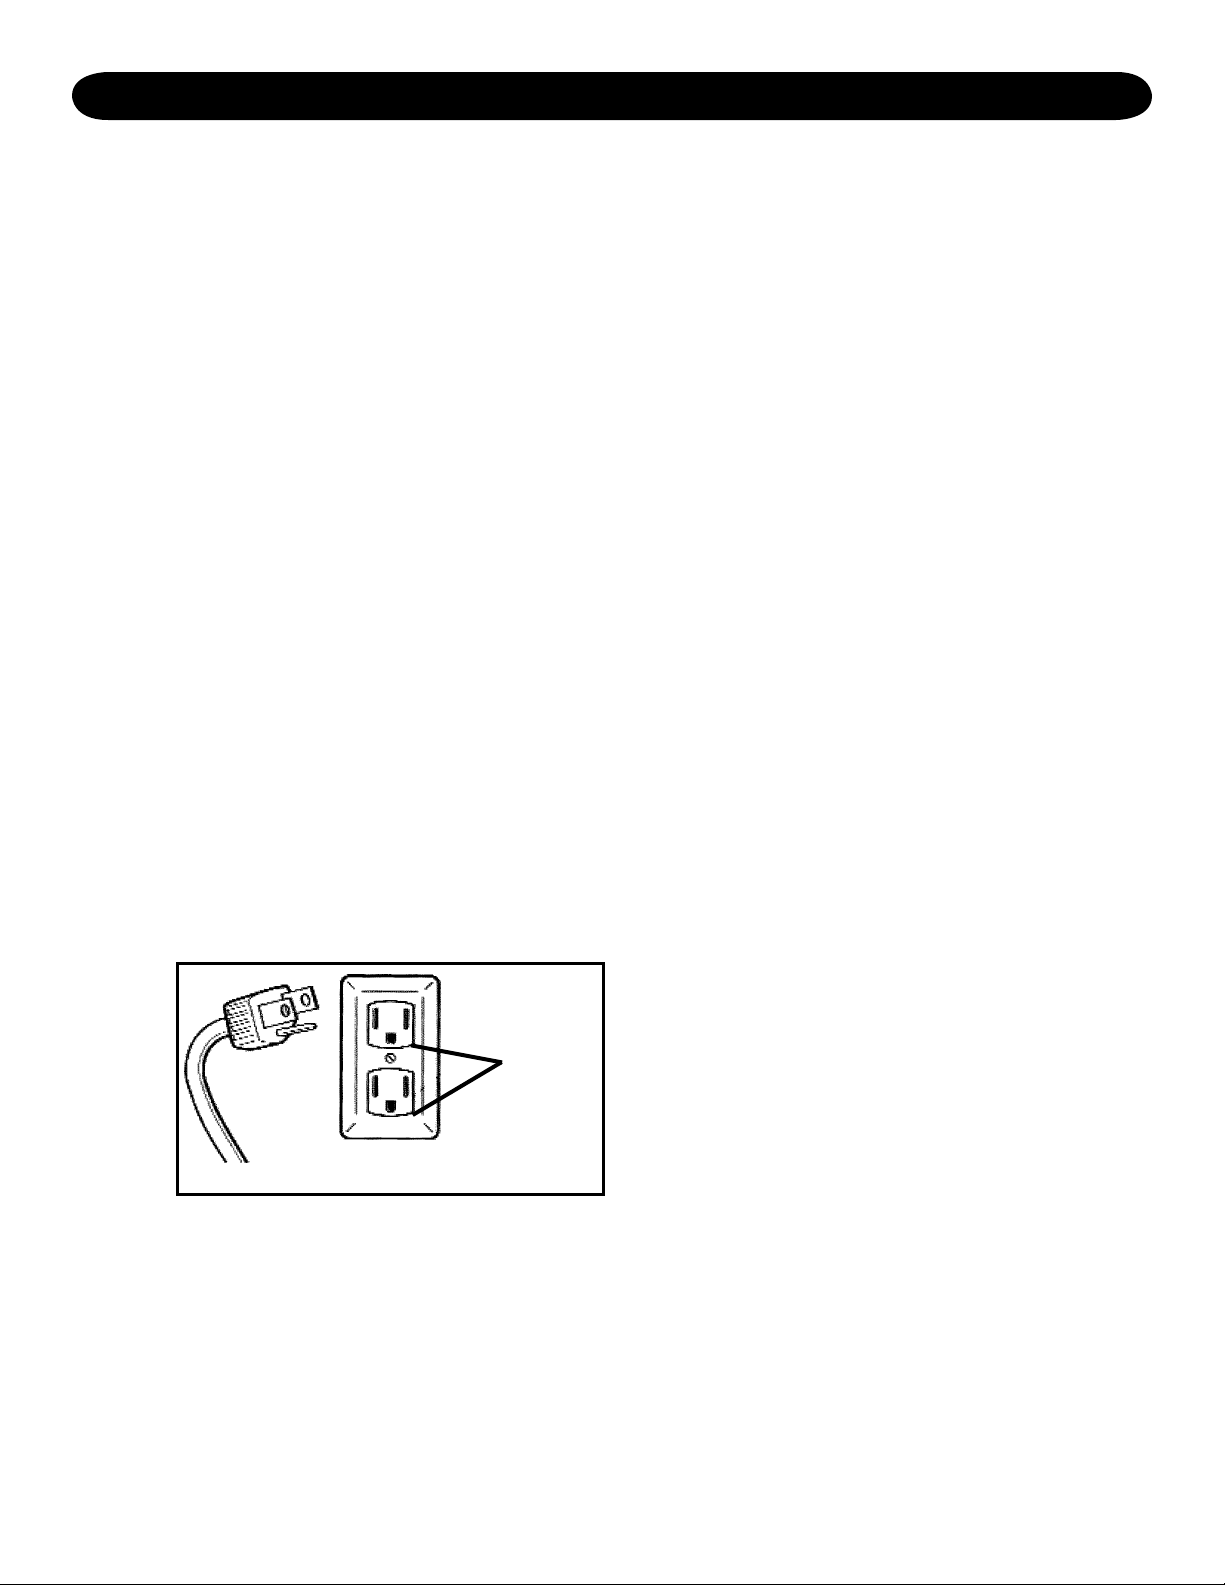
Grounding Instructions
• Never use extension cords between the treadmill and the wall outlet.
• This product for use on a nominal 120 volt / 20 Amp circuit. This unit may not work with a common
GFCI outlet.
•
The power cord comes with a ground terminal. Never remove or otherwise bypass with any kind of adapter.
Danger: Improper connection of the equipment
grounding conductor can result in the risk of
electric shock. Check with a qualified electrician
or service person if you are in doubt as to whether
the product is properly grounded. Do not modify
the plug provided with the product. If it will not fit
in the outlet, have the proper outlet installed by a
qualified electrician.
Treadmill
Plug
Grounded Wall Outlets
Grounded
socket
Other Safety Tips
• Always consult a physician before beginning this or any exercise program.
• If you experience chest pains, nausea, dizziness or shortness of breath, stop exercising immediately
and consult your physician before continuing.
• Do not wear clothing or jewelry that might catch on any part of the treadmill.
• This treadmill is equipped with a safety key. If the key is removed from the display, the treadmill will
immediately stop. Always clip the cord that is attached to the safety key to a part of your clothing so
the key will be pulled from the display, stopping the treadmill, in case of an emergency.
Save These Instructions
4
Page 9

getting fi t
Cardiovascular endurance is the most important component of physical fitness. There are two
types of cardiovascular training, these are interval training and steady state training.
Interval training varies the amount of effort required to workout. The Weight Management, Heart
Health and Cardio programs all modify the speed during the program and the Uphill Walking,
Rolling Hills, Uphill Hike, Uphill Intervals and Pyramid Climb modify the incline to vary the effort
required throughout the workout.
Steady state training keeps the workload constant. Your Manual program on the treadmill
gives you this Steady State workout and allows you to manually control the speed and incline
of your treadmill. If you have a requirement to maintain a steady heart rate during your
workout, the manual program is the best selection.
There is no one exercise program that is right for everyone. Your age, current level of physical
fitness, and your goals should all help determine the program that is right for you.
Regardless of your personal fitness goals and the program that you pursue, warming up and
cooling down before and after you workout will help reduce the risk of injury and improve the
effectiveness of your workout.
Warming up is important to bring your body from its normal level of activity to a state where it is
ready to exercise by increasing the flow of blood to the muscle to raise the muscle
temperature. This will increase the muscle elasticity and protect the joints. The warm up
period also helps to mentally prepare you for your workout.
Warmups should be done at a low intensity level and last for at least five minutes.
Cooling down after your workout is required to gradually bring your cardiovascular system down
to its normal level.
Follow your workout with at least 10 minutes of stretching. Focus on the major muscle groups
of the lower extremity. When stretching, stretch the muscle until you feel gentle
tension, hold it and wait for the tension to relax while the muscle elongates, stretch the
muscle again until you feel gentle tension.
Do not bounce when you stretch, bouncing is not an effective approach to stretching and can lead
to injury.
5
Page 10

200
170
150
120
195
166
146
117
190
162
143
114
185
157
139
111
180
153
135
108
175
149
131
105
170
145
128
102
165
140
124
99
160
136
120
96
155
132
116
93
The three components of a successful cardiovascular exercise program are:
• Frequency
• Intensity
• Time
In terms of frequency, you should exercise at least three times per week and preferably 6 times
per week at least 30 minutes per session.
The intensity of each workout refers to how hard you feel your working and can be measured by
your heart rate. Depending on your fitness goals, exercise between 55% and 90% of your maxi-
mum heart rate. A simple way of estimating your maximum heart rate is by subtracting your age
from 220. As a general rule of thumb, if your fitness objective is to lose weight, you will want to
keep your heart rate at between 60% and 75% of your maximum heart rate. If your objective is
improved aerobic performance keep your heart rate between 75% and 85% of your maximum
heart rate.
TARGET HEART RATE CHART
100%
To achieve benefits from your workout, your workout time should be at least 30 minutes per session.
If you are trying to lose weight focus on longer (more than 30 minutes) less intense workouts, to
improve your aerobic performance focus on shorter more intense workouts.
200
195
190
185
180
175
149
13
10
170
145
128
102
85%
170
166
162
157
75%
150
146
143
60%
120
117
114
20 25 30 35 40 45 50 55 60 65
139
111
153
135
108
AGE
165
140
124
99
160
136
12
155
132
116
Increased Performance Range
Aerobic Training Range
Weight Loss Training Range
Heart Rate BPM
As a rule of thumb when your exercising, if your having trouble completing a sentence, you are
working too hard. When exercising, you should be able to speak freely without gasping for air.
6
Page 11

TR500/TR1000-TV assembly instructions
This treadmill is very heavy. It is a good idea to have two people present if any lifting is required.
We recommend taking off the top portion of the box and slitting the corners of the box that the
treadmill is sitting in. This will allow for the sides of the box to be folded down eliminating the
need to pick the treadmill out of the box.
Prior to starting the assembly process take all of the parts out of the box, remove all plastic bags,
and lay them out on the floor to become familiar with the components. Make sure that you
remove all parts packaged underneath the treadmill. You may need to slightly pick up the back of
the treadmill to get better access to the parts on the bottom. You will notice that the treadmill is
completely assembled except for the handlebars and the console.
D
K
G1
G2
F1
F2
E1
B
J
H
L
L
E2
C
M
I
J
N
L
A
Parts
Hardware / Tools
7
Page 12

Step 1: Base Frame / Support Handle Assembly
1. Remove screw J , and nut N from both right/left sides of base frame.
2. Carefully lift the support handle and handlebars upright. Do not let the handlebars just
drop down, which could damage the wire harness. (FIG-1)
3. Align the holes in the bottom of the base frame and reinstall Bolt J and nut N back
into both sides of the base frame and tighten the bolts. Tighten the bolts removed and
4.
installed as well as the bolts that remain in the frame for the support handle to pivot on. (FIG-2)
Attach the Left and Right Base Frame Covers with Screw L from the hardware packet.
(FIG 2 &
3)
Step 2: Handlebar Assembly
1. Allow the handlebars to fold down in place being careful not to let the wire harness get
pinched between the handlebar and the support handle. Line the holes up and install Bolt
K thru top of both handlebars. Tighten securely.
2. Rotate the console tube up in order to install console.
8
Page 13

Step 3: Console Assembly
1. Lay the console on the console tube and connect harnesses.
the handlebars as it may be difficult tucking the excess wire back into the handle
helpful to have someone hold the console while making these connections.
(b) Connect the 2 sets of 3-pin connectors together.
this connection.
(c) Connect the 2 sets of 2-pin connectors together. These are the pulse grip wires so it
doesn’t matter which side gets plugged to either connector out of the console.
2. Carefully tuck excess wire back into the console and the handlebars and lay the console in
place. Do not pinch the wires between the console and the mounting plate.
3. Install the screws into the console thru the console mounting plate and into the console.
The TR500 has 4 mounting screws and the TR1000-TV has 6 mounting screws.
Warning:
Make sure no cables or wires are pinched when the console screws are tightened.
(a) Connect the 5-pin connector from the console to the 5-pin connector coming from the handlebar.
Just match the colors of the wires for
Do not pull a lot of
wire out of
bars. It is
Step 4: Complete Assembly
Make sure the console bracket and the plastics fit properly (FIG-6 & 7). Tighten 4 bolts M
under both sides of the console tube (FIG-8).
9
Page 14

electronics overview
Display Functions
$VUUPOGVODUJPO
$VUUPO (VODUJPO
219'4101((
/1&'
%*
%*
81.
81.
/'07/PEF#MMPXTUIFVTFSUPBEKVTUUIF$SJHIUOFTT%POUSBTU%PMPSBOE6JOU
*PME©/PEFª7QQFS4JHIU5JEFGPSUPTFDPOETBOESFMFBTF6IFNFOVJTEJTQMBZFE
7TFUIF%*PS%*CVUUPOTUPTFMFDUUIFJUFNZPVXPVMEMJLFUPDIBOHF
7TFUIF81.PS81.CVUUPOTUPBEKVTUFBDIJUFNBTCFMPX
+UFN
$4+)*60'55
%1064#56
%1.14
6+06
4'5'6
/76'
685;56'/
':+6
2SFTTUPQPXFSPOPSQPXFSPGG68EJTQMBZ
2SFTTUPTFMFDU688JEFP/2(VODUJPO68#8/2
*PMEGPSTFDPOETFOUFSJOUP/'07UPTFUVQTDSFFO
+O68NPEF2SFTTUPTFMFDUDIBOOFM
+O/'07NPEF2SFTTUPTFMFDUJUFNUPTFUVQ
+O688JEFP/2NPEF2SFTTUPBEKVTUWPMVNF
+O/'07NPEF2SFTTUPBEKVTUUIFWBMVFPGFBDIJUFN
&FTDSJQUJPO
#EKVTU$4+)*60'55
#EKVTU%1064#56
#EKVTU%1.14
#EKVTU6+06
4FUVSOUP&'(#7.6WBMVF
/VUF
5FMFDU68TZTUFN065%/、$065%,、$2#.$)、
$2#.&-、$2#.#+、$5'%#/$)、$5'%#/&-、
$5'%#/.BDDPSEJOHUP6VOFS
2SFTT81.PS81.§UPFYJU/'07NPEF
10
Page 15

Grounding Instructions
This product must be properly grounded to work safely and properly. If a malfunction should occur,
grounding provides a path for electric current and reduces the risk of electric shock.
Your LifeSpan treadmill includes a standard American ground plug. Do not alter this plug in anyway
and do not by pass the ground with an adapter. Plug your treadmill into a 120 volt / 20 amp
grounded electrical outlet with 120 volts measured at the treadmill. If this breaker switch has
other appliances that run at the same time, you may experience problems with the breaker switch
or erratic performance from your treadmill.
Using electrical power other than the one specified above will void any warranty, implied
or otherwise.
Note: This unit may not work with a common GFCI outlet.
Warnings
Improper connection of the grounded plug can
result in the risk of shock. Check with a qualified
electrician if you have any questions or are in doubt
as to whether the product is properly ground.
Never use extension cords between the treadmill
and wall outlet.
Treadmill
Plug
Grounded Wall Outlets
Grounded
socket
11
Page 16

exercise programs
TR1000-TV treadmill comes with 1 manual and 12 preset programs (5 Speed Programs, 5 Incline
Programs, 2 distance programs and H.R.C. program). Each preset program has 3 different levels.
Speed Programs – Programs P1 – P5 automatically change the speed of the treadmill throughout
the workout. The incline can be manually set by the user in any of the speed programs and this
incline will remain throughout the workout unless modified by the user. The speed can also be
modified, but changes to the speed will only last until the end of each specific program segment.
Profiles for the speed programs are shown below:
Incline Programs – Programs P6 – P10 automatically modify the level of incline for the treadmill
belt. In an incline program, the user sets the speed to a desired level and the program modifies
the incline. The user can override the incline for any segment within the workout but at the end of
each workout segment the program will override any adjustments made to the incline. The range of
incline in programs P6-P10 is from 1 to 11 level. Profiles for the incline programs are shown below:
Programs P11 and P12 are preset distance programs. The preset distance is 5 kilometers for P11
and 10 kilometers for P12. The incline will be changed automatically in these programs. The
range of incline is from 2 to 10 levels.
TARGET HEART RATE PROGRAM: This program automatically modifies the speed and incline to
maintain a preset target heart rate. This target is established in the setup process. The chart on this
owners manual should be used to determine the appropriate target heart rate. To set up the target
heart rate program, you will need to enter the workout time, your age, and your target heart rate.
12
Page 17

Body Mass Program:
Body Mass Index (BMI) - Is a scientific measure that uses a ratio of height and weight. It is a
general measure of health risk, but does not take into account lean body mass. As a result, a
healthy muscular individual with very low body fat can be classified as over weight. The following
are general ranges of BMI measurements:
Below 20
Between 21 and 24
Between 25 and 29
Over 30
User Setup Programs - Provide the ability to establish customized workout programs specific to
a users workout requirements. For each user set up program, the workout time is set and then 10
unique workout segments are set up by the user. For each segment the user can preset the speed
and incline of the segment by using the up and down arrow buttons and then pushing the mode
button to set each program.
Lean - if you are not an athlete you should consider gaining weight
through good diet and exercise.
Ideal - indicates a healthy amount of body fat and the lowest incidence of serious illness.
Slightly Overweight - increased risk for a variety of illnesses. You
should find ways to reduce your weight through diet and exercise.
Overweight - indicates an unhealthy condition with a higher risk of
heart disease, diabetes, high blood pressure, gall bladder disease and
some cancers. You should focus on losing weight by changing your
diet and increasing levels of exercise.
Once a program is set up the user simply scrolls to the User1 program and pushes the start button.
To modify the program after it is established, select the program and then push the mode button.
13
Page 18

treadmill operations
Before starting your treadmill the following actions will need to be properly completed:
Be certain that your treadmill is sitting level and stable. It is also recommended that you locate
1.
your treadmill in a pleasant area that gives you something to look at while working out, such
as a window or television. Maintaining an exercise program with a treadmill located in a
poorly lit basement room is more difficult than when your treadmill is located in an active
and pleasant location.
2. Make sure that your treadmill is plugged into a properly grounded outlet as described in the
grounding section of this document.
3. Turn the On/Off switch, which is located in the front of your treadmill, to the On position.
4. I
nsert the magnetic safety key into the round area centered at the bottom of your display. If
the safety key is not inserted properly you will see lines across the middle of each LED display.
QuickStart
1. Attach the "Safety Key" to your clothing. This key will immediately shut off your treadmill if
removed and is strongly recommended for your safety.
2. QuickStart - The quickest and easiest way to start your treadmill is to push the Quick Start
button. This will cause the display to count down for 3 seconds and then begin in the
“Manual Program” at 0.6 mph.
3. Speed Adjustment - can be increased and decreased in 3 different ways:
Display Console - "/\" "\/" Each time you press the "/\" button on the display console the
speed will increase by 0.1 mile per hour.
Handlebar Speed Control - The heart rate sensor on the right side of the handlebars
includes a speed control switch. Pushing the switch on the right side increases the speed
by 0.1 mile and pushing the button on the right side decreases the speed. It needs to say
right side for increasing and left side for decreasing.
Quick Buttons - The display console includes buttons that immediately set the speed to
3, 4, 5, and 6 mile per hour without having to scroll through the speeds.
4. Incline - Like the speed settings, incline can be adjusted 3 different ways:
Display Console - "/\" "\/" Each time you depress the "/\" or "\/" button on the display
console the incline will increase or decrease by 1 level.
Handlebar Incline Control - The heart rate sensor on the left side of the handlebars
includes an incline control switch. Pushing the switch on the left side increases the
incline by 1 level and pushing the button on the right side decreases the incline by 1 level.
Quick Buttons - The display console includes buttons that immediately set the incline to
4, 6, 8, and 10 level without having to scroll through the incline levels.
5. Display Readouts - Besides "Speed" and "Incline" the center LED window will display Time,
Distance, Calories, Heart Rate and Laps. By pressing the MODE button, you can select the
function that you want displayed on the center LED window, or you can go to the Scan mode
to scan through all functions. In the "Quick Start" mode, time will start to count up from 0:00.
14
Page 19

Programs Setup and Selection (P1-P12)
1. Select Program: To start a program simply select the desired program by pressing on
either " /\ " or " \/ " buttons and then pressing the "Enter" button.
2. Select Level: Select the desired level (L1-L3) by pressing on either the
3.
" \/ "
by one minute. You can also hold these buttons down to
shortest preset program time is 10 minutes and the longest is 99 minutes.
4. Press Start: Once the desired time is selected, push the "Start" button to begin
your workout.
Target Heart Rate Program Setup
1.
shown on the center display. Then press the "Enter" button.
"Enter" button.
3. Set Target Heart Rate: Use either " /\ " or " \/ " arrows to set the target heart rate. Then
press "Enter". After a warm-up period, the program will automatically adjust the speed to
maintain the Target Heart Rate (Range From 60-180 bpm).
4. Set Target Max Speed / Incline: Use either " /\ " or " \/ " arrows to set the target max.
speed/incline. During the workout, the speed/incline of the treadmill will not exceed the
maximum speed or incline set during program setup.
buttons and then pressing the "Enter" button.
Set Time: Now choose how long you would like to workout by pressing either set of
arrows. Each time you push the " /\ " or " \/ " button the workout time will change
quickly scroll through the time. The
Select Program: Use either " /\ " or " \/ " arrows to scroll through the programs
2. Select Age: Use either " /\ " or " \/ " arrows to enter the user age. Then press the
" /\ " or " \/ "
" /\ " or
until "H1" is
5. Enter program Time: Use either " /\ " or " \/ " arrows to enter the program workout time.
Then press the "Start" button.
Notes:
1. This program requires that you keep you hands on the grip pulse pads while using the treadmill.
2. After pressing the “Start” button there is a 3 minute warm up. During the warm up the treadmill
include is adjusted to 5 and the speed is set at 2.0 MPH.
3. After warming up, the Heart Rate program will compare your actual heart rate with the target
heart entered during program set-up. If your actual heart rate is lower than your target heart rate
the treadmill will automatically adjust the belt speed .2 MPH. After 5 adjustments to the speed,
the incline level will be adjusted once. This process will repeat until you desired heart rate is
obtained.
4. If the speed increases up to the maximum speed that you set during program set up, the incline
will change until your heart rate is obtained.
5. If the console does not pick up your heart rate from the grip pulse within 30 seconds after warm
up the treadmill will stop.
15
Page 20

Body Composition Analysis
1. Select Program: Use either set of " /\ " and " \/ " arrows to scroll through the programs
until you reach the "Body Mass" composition program and press the "Enter" button.
2. Select Sex: Press the mode button for a " 1/Male " selection or press either set of " /\ " or
" \/ " buttons to scroll to the " 0/Female " selection and then press the "Enter" button.
Because of the limitations of the LED display these selections are shwon as " 1/Male " and
" 0/Female " on the display console.
3. Enter Height: Use either set of " /\ " and " \/ " arrows to select your height and press the
"Enter" button.
4. Enter Weight: Use either set of " /\ " and " \/ " arrows to select your weight and press the
"Enter" button (50-275lbs).
5. Enter Age: 13-80 years old.
6. Press Start: After all selections are made, press the start button and place both hands over
the heart rate sensors on the handlebars. It will take several seconds for the system to
calculate each readout. If after waiting for 10 seconds the system doesn't show your readouts,
it is not getting a good reading from the heart rate sensors. This can generally be solved by
walking on the treadmill at an average speed for 3-4 minutes to increase your heart rate and
improve the signal pickup from the heart rate sensors.
User Setup Programs (2 users)
1. Select Program: Use either set of " /\ " and " \/ " arrows to scroll through the programs
until you reach U1 or U2 and press the "Enter" button.
2. Set Time: Choose how long you would like to workout by pressing either set of " /\ " and
" \/ " and press the "Enter" button.
3. Enter Segment Speed and Incline: each program is divided into 10 equal segments. Select
the desired speed for each segment by pressing the speed " /\ " and " \/ " buttons. Then
select the desired incline for each segment by pressing the incline " /\ " and " \/ " arrows.
After selecting the incline and speed for the segment , press the "Enter" button and make
the selection for the next segment until all 10 segments are completed. Press the "Start"
button to begin the workout.
4. Editing a User Setup Program: To edit the program, scroll to either "U1" or "U2" programs
and press the "Enter" button. Make the desired changes to the program and press "Enter" at
the end of each segment. Press the "Start" button once completed.
Note: After a user program has been set, to select that program for subsequent workouts, use the
" /\ " and " \/ " arrows to scroll to "U1" or "U2" and press the "START" button.
Pause Function
Pause the treadmill at any time during the operation by pressing the "Stop" button once. To
resume operations, press the "Start" button.
Resetting the Console
Press and hold the Start/Stop button until the console resets.
16
Page 21

TR1000-TV
Speed
Program
Incline
Program
P10
P11
(5km)
(10km)
P1
P2
P3
P4
P5
P6
P7
P8
P9
P12
SEGMENT
1 2 3 4 5 6 7 8 9 10 11 12
LEVEL
1.2
1
LEVEL
2
LEVEL
3
LEVEL
1
LEVEL
2
LEVEL
3
LEVEL
1
LEVEL
2
LEVEL
3
LEVEL
1
LEVEL
2
LEVEL
3
LEVEL
1
LEVEL
2
LEVEL
3
LEVEL
1
LEVEL
2
LEVEL
3
LEVEL
1
LEVEL
2
LEVEL
3
LEVEL
1
LEVEL
2
LEVEL
3
LEVEL
1
LEVEL
2
LEVEL
3
LEVEL
1
LEVEL
2
LEVEL
3
LEVEL
1
LEVEL
2
LEVEL
3
LEVEL
1
LEVEL
2
LEVEL
3
1.2 1.8 2.5 1.8 1.2 1.8 2.5 1.8 1.2 1.8
1.8
1.8
2.5
3.1
2.5
1.8 2.5 3.1
3.13.7
2.5
3.1 3.1 3.1
3.7
3.1
3.7
4.3
5.0
4.3
5.05.0
5.6
5.6
6.2
6.2
4.3 4.3
5.0
5.0
5.65.6
5.6
5.6
6.2
6.2 6.2 6.2
4.3
4.3
5.0
5.0
5.6
5.6
4.3 4.3
5.0
5.0
5.6
5.6
5.0
5.0
5.6
5.6
6.2
6.2
1.2 1.2 1.21.2
1.8 1.8
6.8 6.8 6.8 6.82.5 2.5
1.8
2.5
3.1
2.5
3.1
3.7
1.8
2.5
3.1
4.3
5.0
5.6
3.1
2.5
3.1
3.7
3.7
4.3
5.0
3.7
4.3
5.0
1.2
2.5 2.5
1.2
1.8
2.5
1.2
1.8
2.5
0.6
1.2
1.8
0.6 0.6
1.2 1.2
1.8 1.8
2.5 1.8 2.5
3.7
5.0
5.0
5.6
5.6
6.2
6.2
3.7
3.1
3.7
4.3
5.0
4.3
4.3
4.3
5.0
5.0
5.6
5.6
5.6
5.6
2.5
3.7
4.3
5.0
2.5
3.1
3.7
3.7
4.3
5.0
1.2
1.2
2 2 3 4 3 2 3 4 3 2 3 2
3 3 4 5 4 3 4 5 4 3 4 3
4 4 5 6 5 4 5 6 5 4 5 4
2 3 4 5 6 7 7 8 9 6 4 2
3 4 5 6 7 8 8 9 9 7 5 3
10
4 5 6 7 8 9 9
10
8 6 4
2 4 6 8 8 7 7 6 5 4 3 2
3 5 7 9 9 8 8 7 6 5 4 3
4 6 8
10
9 9 8 7 6 5 4
10
1 3 6 7 7 8 8 7 7 6 3 1
2 4 7 8 8 9 9 8 8 7 4 2
10
3 5 8 9 9
10
9 9 8 5 3
1 7 2 9 9 2 2 9 9 2 7 1
2 8 2
3 9 2
10
11
10
3 3
11
4 4
10
11
10
2 8 2
2 9 3
11
2 4 6 8 8 7 7 6 5 4 3 2
3 5 7 9 9 8 8 7 6 5 4 3
10
4 6 8
10
9 9 8 7 6 5 4
2 3 4 3 3 2 2 3 3 4 3 2
3 4 5 4 4 3 3 4 4 5 4 3
4 5 6 5 5 4 4 5 5 6 5 4
2.5
3.1
3.7
1.8
2.5
3.1
1.8
2.5
3.1
4.3
5.0
5.6
1.2
1.8
2.5
1.2
1.8
2.5
1.2
1.8
2.5
0.6
1.2
1.8
1.2
Speed Program:
Incline Program:
P1 P2 P3 P4 P5
P6 P7 P8 P9 P10 P12
17
P11
(5km)
(10km)
Page 22

moving and storage
The treadmill comes with a folding feature that reduces the amount of storage space required
when your treadmill is not in use and makes the treadmill easier to move.
Folding the Treadmill
1. Make sure that the On/Off switch is turned Off and the power cord is removed from the wall.
2. Make sure that nothing is on or near your treadmill which might spill, be knocked over or
prevent the treadmill from completely folding.
3. (a.) Place both hands under the support bar that is located directly under the back of the
running belt on your treadmill to make sure that you have a solid lifting point.
(b.) Lift the treadmill all of the way forward and make sure that the hydraulic lift is
properly locked in place.
Caution: When lifting, use proper safety precautions and lifting techniques. Bend your knees
and elbows, keep your back straight and pull up evenly with both arms.
(c.) Ensure that the locking mechanism is secure by gently pulling back on the
treadmill and make sure that it doesn’t move. When doing this, be careful to be securely
positioned in case the treadmill lock has not engaged.
Caution:
• Do not fold the treadmill by lifting on the running belt or rear roller. These parts do not
lock in place and are difficult to grip when folding - personal injury or damage to the treadmill
could result.
• Do not lean against the treadmill once it is folded or place items on it that could cause it to
become unstable or fall over. This could result in serious personal injury.
• Do not connect the power cord when the treadmill is folded or try to operate the treadmill in
the folded position
18
Page 23

Unfolding the Treadmill
1. Make sure you have adequate space to lay the treadmill down. There needs to be at least
2 feet of clearance on both sides and in the front of the treadmill. There should be at
least 4 feet of clearance on the back side of the treadmill for safety reasons. If the user
were to fall this would give adequate clearance to get off the treadmill.
2. Inspect to ensure that nothing is on or near your treadmill that might spill, be knocked
over or prevent the treadmill from completely unfolding.
3. Position yourself behind the treadmill. Slightly push the treadmill forward towards the
display and with you left foot lightly push the top portion of the hydraulic lift forward till
the locking tube frees and the treadmill can be pulled back away from the console.
4. The hydraulic lift is set up to drop softly without assistance. It is not a bad idea to hold
onto the treadmill until it is about 2/3 of the way down. Make sure that you use proper
lifting technique, bending your knees and keeping your back straight.
19
Page 24

troubleshooting
The treadmill is designed and manufactured to be reliable and easy to use. However, if
you have a problem, these troubleshooting steps may help you find the cause.
Problem: The console lights do not light up.
Solution: Check to make sure that the treadmill is properly plugged-in, the On/Off switch is
turned to the "On" position, and Safety Key is attached.
Problem: The belt does not stay in the center of the treadmill when in use.
Solution: First check to make sure that the treadmill is level, then refer to the instructions in
this manual on how to tension and adjust the belt.
Problem: The treadmill motor seems strained or the fuse becomes blown.
Solution: The lubricating silicon that is applied to the deck and belt is wearing down and the
belt needs to be lubricated with silicon spray.
Problem: The treadmill belt slips during use.
Solution: The belt may need to be tensioned after a period of use. Refer to the Belt Tensioning
and Adjustment Section of this manual.
Problem: Speed does not match quick keys. Treadmill Starts at 1 and goes to 16.
Solution: The treadmill is set up in Metric Mode. See chart on next page for Metric
English Conversion.
Problem: The console has some static lines going thru the display while the treadmill is
running. Some of this is normal due to interference from the motor.
Solution: Check the connection at the base of the right handlebar support post and at the back
of the console. Make sure the connections are tight and that the rubber boot at the
console connection is pulled up over the metal cable connectors. The boot will keep
the metal connectors from making contact with the metal handlebars or anything
metallic inside the console.
Note: There will be some static lines thru the display when the unit is running while
in TV mode.
20
Page 25

TR1000 – TV Engineering Mode
Press “Enter” and then “Speed Up” buttons until the
console changes to show a number in incline, center
and speed windows. The numbers shown are examples
Press the “Enter” button. The Incline, Center and Speed
windows should change to another set of numbers. The
numbers shown are examples
Press the “Enter” button. The Incline window will
Show “Si” or “En”.
En = English mode
Si = Metric mode
Depending on which mode you would like to use,
pressing the Incline “up” or “down” buttons will allow
you to change between the two modes.
Press the “Enter” button. The Incline window shows
“dis” for total distance the unit has run. The center
and Speed windows show the total miles or kilometers.
Incline Center Speed
006 10.11 2.00
Incline Center Speed
110 4910 001
Incline Center Speed
En or Si
Incline Center Speed
Dis 0 000
Press the “Enter” button. The Incline window shows
“hrs” for the total number of hours the treadmill has
been used. The center and speed window will Show
the total number of hours the treadmill has been used.
Press the “Enter” button. The console goes back into
the set up and run mode.
Incline Center Speed
Hrs 0 000
Incline Center Speed
0 00:00 0
21
Page 26

maintenance and cleaning
Belt Tensioning
If the belt begins to slip during use, it will need to be tensioned. Your treadmill is equipped with
tension bolts that are accessible from the back of the treadmill. Before tensioning the belt,
start the treadmill and set the speed to 3 MPH. Using a 6 mm Allen Wrench, included in your
hardware bag, turn the right and left tension bolts 1/2 turn, alternating back and forth until the
belt slipping stops. After you adjust each side 1/2 turn, test to see if the slipping is eliminated. If
the belt still slips repeat this step and test again.
If you turn one side more than the other, the belt will start to drift to the side of the treadmill
and need to be aligned.
Note: Over tensioning the belt can cause unnecessary friction and wear and tear on
the belt, motor and electronics.
Aligning the Running Belt
Ensure the running belt is centered on your treadmill at all times. Running style and a non- level
surface are two instances that may cause the belt to drift off center. Minor adjustments to the two
bolts at the rear of the treadmill are necessary when the belt has drifted off center.
1. Press "START" to begin running belt, then increase the treadmills speed to 3MPH.
2. Stand at the rear of the treadmill to determine which direction the belt is drifting.
3. If the belt drifts to the left, turn the left adjustment bolt one-quarter turn clockwise and
the right adjustment bolt one-quarter turn counter-clockwise. (See FIG.C)
4. If the belt drifts to the right, turn the left adjustment bolt one-quarter turn counter-clock
wise and the right adjustment bolt one-quarter turn clockwise. (See FIG.D)
5. Observe the tracking of the belt for about two minutes. Repeat step 3, 4 and 5 as needed.
22
Page 27

Belt Lubrication
Your LifeSpan treadmill belt should be lubricated every 3 months of regular use or every 40
hours of use.
Use only 100% Silicon and avoid using aerosol silicon sprays that include additives and
petroleum distillates. One ounce of silicon should be used for each application. LifeSpan
offers 100% silicon lubricant that can be ordered at www.LifeSpanFitness.com or from
801.973.9993
When applying the silicon either apply it directly to the deck surface or to the back of the
running belt. This may be accomplished by folding the treadmill and applying the silicon to
the back of the belt from each back corner. Spray the silicon down and across the belt from
each corner. Rotate the belt 1/2 of the circumference and repeat from each corner.
Note: When lubricating the belt, make sure that the treadmill is located on a surface
that can be easily cleaned. After lubricating your treadmill, clean off any excess
silicon from the belt and frame.
Cleaning
After use, wipe down your treadmill with a soft cloth. On a regular basis, you will also want to
clean the treadmill using a mild detergent to remove all dirt and salt from the belt, painted parts
and the display.
Avoid getting dirt and other materials on the belt as these materials can work their way under the
belt and damage your treadmill or cause components to wear prematurely.
23
Page 28

801-973-9993
www.pcefitness.com
P.O. Box 981316
Park City, Utah 84098-1316
 Loading...