

Page 1

Reversing
door hinges
Models MF / MRB
7083 130-00
Page 2

PLEASE READ AND FOLLOW
THESE INSTRUCTIONS
Reversing Door Hinges
These instructions contain Warning statements.
This information is important for safe and efficient
installation.
Always read and follow all Warning statements!
WARNING
Warning indicates a potentially hazardous situation which, if not avoided, could
result in death or serious injury.
IMPORTANT
This highlights information that is especially
relevant to a problem-free installation.
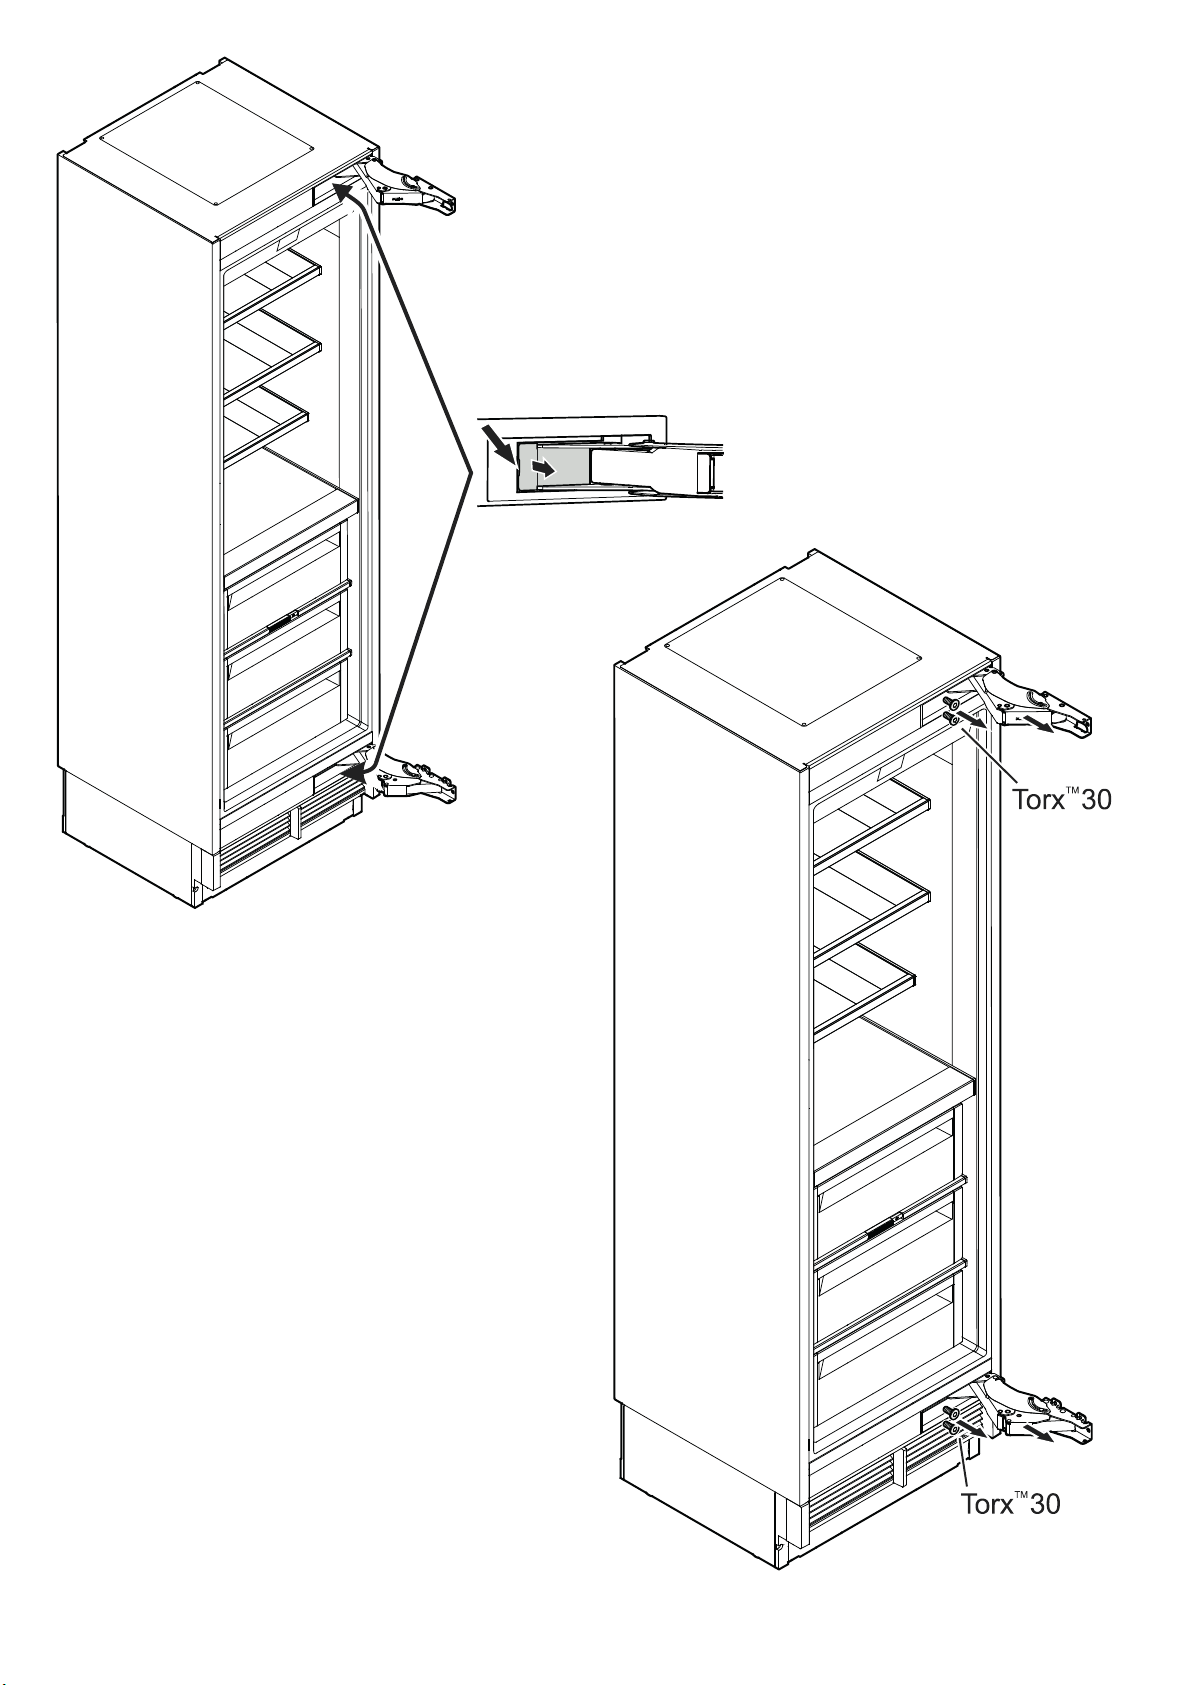
Open the refrigerator door.
1.
Release the spring tension of the top and bottom hinges by
turning the indicated screw counterclockwise.
(Depending on model and options)
Door hinges should only be changed by a trained
expert.
Changing the door hinges must be done by two
people.
WARNING
The doors must be secured to prevent
injury and to stop the doors falling off.
NOTe
This instruction describes the reverse of the door
hinges from right to left.
The procedure described in this instruction manual
can be applied in the opposite direction when
changing the hinges from left to right on appli-
ances.
1.
There are the numbers 1 and 0 stamped on the hinge.
In the tense state the screw is in the 1 position.
During turning, the screw moves to the right.
It requires 8 full turns (360°) until the screw is in the 0 position
and the hinge is released completely.
WARNING
Do not change the door hinges without
tension release of both hinges. If the hinge
accidentally snaps shut, this can cause
serious injury on fingers or hands.
2
Page 3
WARNING
Before performing the next steps,
secure the door from falling off.
One person must hold the door permanently when the screws are removed.
Failure to follow these instrictions can
result in death or serious injury.
Close the refrigerator door.
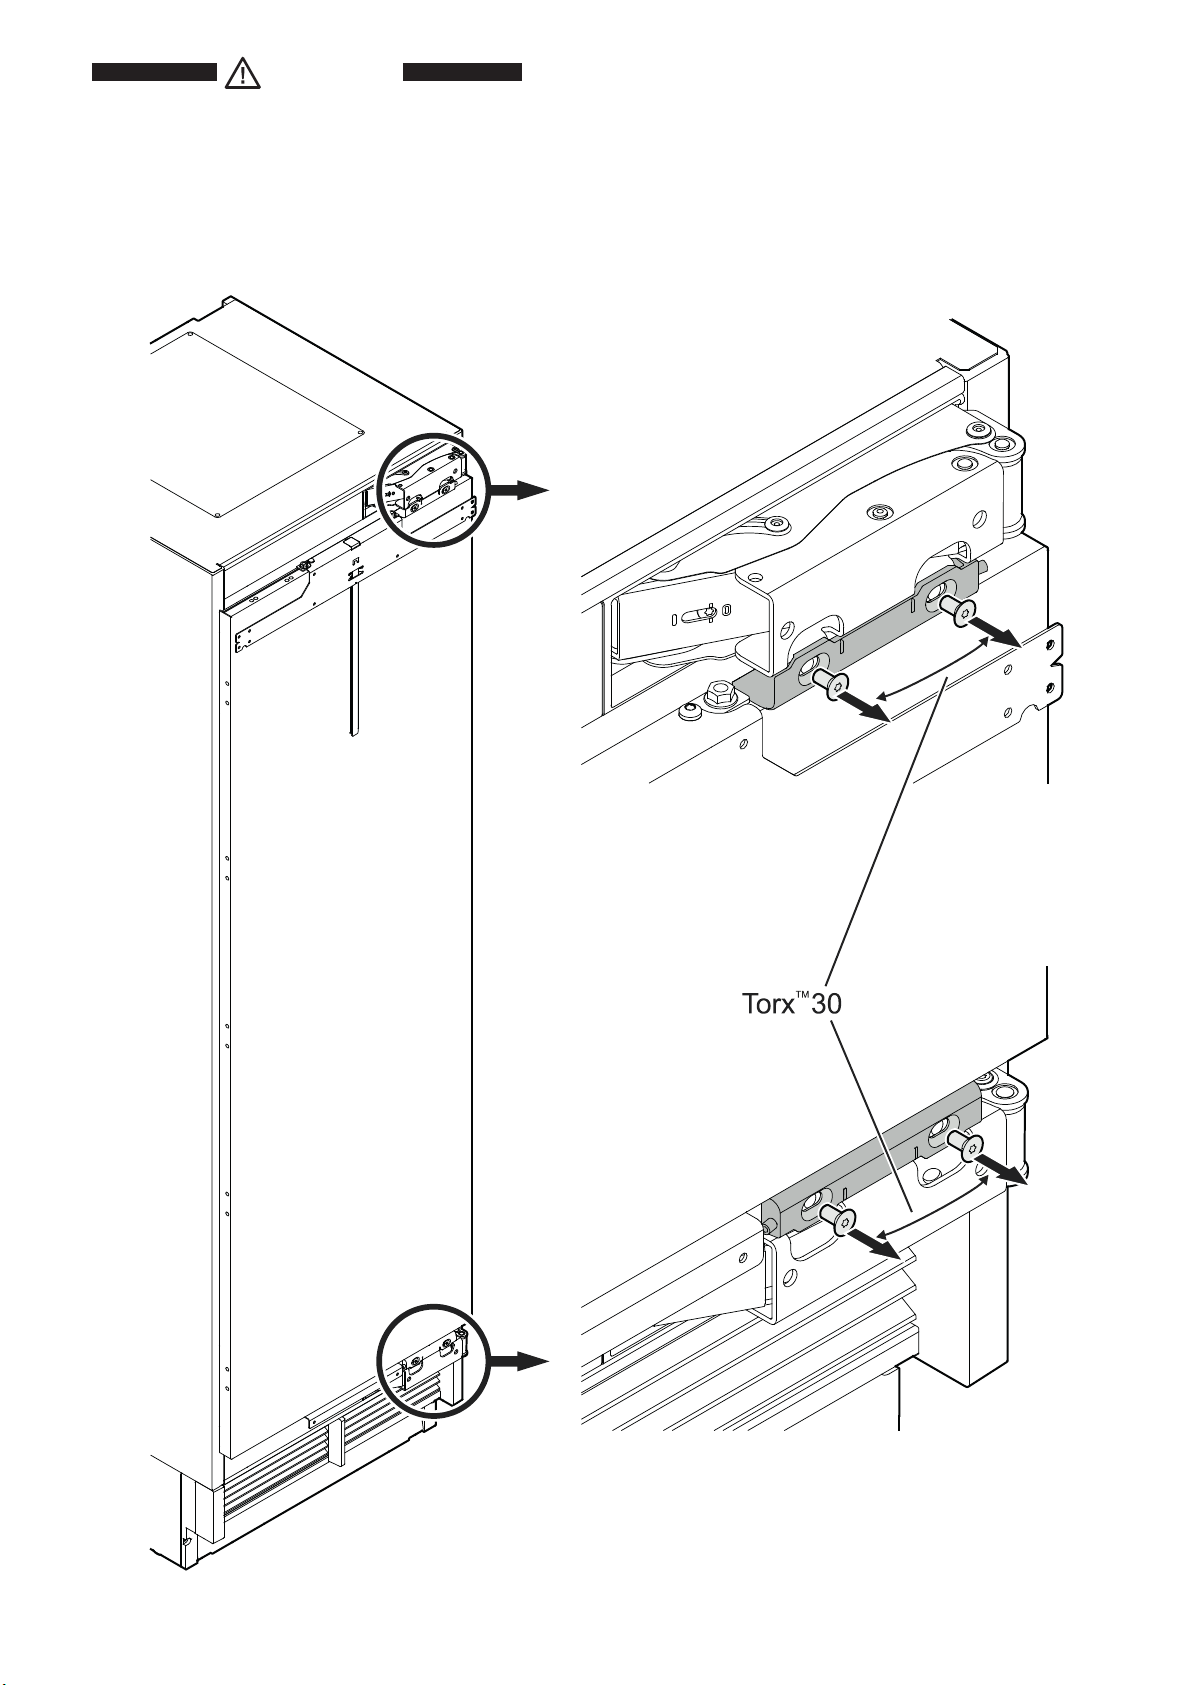
2.
Remove the screws of the bottom hinge bracket.
Remove the screws of the top hinge bracket.
3.
Remove the refrigerator door.
IMPORTANT
The screws are needed to mount the hinges on the
opposite side again.
3.
2.
3
Page 4
4.
Remove the covers inside the opening of the
4.
top and bottom hinge. Pry out the covers at the
marked position using a small flat head screwdriver.
NOTe
These covers can be reused in the opposite
position.
If snap lugs on the covers are broken during
removal, use the new covers provided with the
reverse kit.
Unscrew both hinges.
5.
IMPORTANT
The screws are needed to mount the hinges
on the opposite side again.
5.
4
Page 5

Remove the top covers.
6.
Pry out the covers at the
marked position using a small
flat head screwdriver.
NOTe
These covers can be reused
in the opposite position.
If snap lugs on the covers are
broken during removal, use
the new covers provided with
the reverse kit.
Remove the bottom cover.
7.
Pry out the cover at the
marked position using a small
flat head screwdriver.
NOTe
These cover can be reused in
the opposite position.
If snap lugs on the covers are
broken during removal, use
the new covers provided with
the reverse kit.
6.
7.
8.
Remove the bracket (5) and
8.
cover (4) and turn them by 180°.
5
Page 6

Mount the cover on the left side.
9.
Mount the bracket, the top text
must be readable.
9.
10.
Snap covers into place.
If lugs are broken use the new cover
from the reverse kit.
10.
6
Page 7

Screw the hinge, removed from bot-
11.
tom right, into place on top left. Use the
screws removed in step 5.
Front view of hinge
To screw on the hinge correctly, the
fastening holes of the hinge must be in
line with the bolt holes of the appliance
housing.
Screw the hinge, removed from top
12.
right, into place on bottom left. Use the
screws removed in step 5.
11.
Attach the covers into the opening of the
13.
top and bottom hinge. Hook the cover on
the right (1) and snap in on the left (2).
12.
13.
NOTe
If snap lugs on the covers are broken
during removal, use the new covers pro-
vided with the reverse kit.
7
Page 8

14.
Unscrew the top angle
14.
bracket of the refrigerator door.
Remove the set screw of both brackets.
16.
15.
15.
16.
Unscrew the bottom angle
bracket of the refrigerator door.
IMPORTANT
The screws are needed to
mount the brackets of the
reverse kit.
IMPORTANT
These brackets are not needed anymore.
The set screws will be mounted again in the last
step. Do not discard them.
8
Page 9

Mount one bracket of the reverse kit onto the refrigerator
17.
door on the top left using the screws removed in step 14.
These brackets are stamped with LEFT HINGE on the inside.
If reversing hinges from left to right; use the brackets stamped RIGHT HINGE.
Mount the second bracket of the
18.
reverse kit onto the refrigerator door
on bottom left using the screws
removed in step 15.
17.
18.
9
Page 10

Connect the refrigerator door
19.
to the hinges using the screws
removed in steps 2 and 3.
Turn in the screws through the
top and bottom angle bracket.
Do not fully tighten the screws
for now.
19.
20.
10
Align the refrigerator door
20.
horizontally.
The notches on the top and
bottom angle bracket must
be in line with the marked
edges of the hinges.
Finally tighten the screws.
Page 11

Open the refrigerator door.
21.
Turn the tensioning screw of both hinges clockwise
as far as it will go.
(Depending on model and options)
Be sure to continue until the screw will no longer
turn to provide the correct spring tension in the
hinges to allow the door to seal correctly when
closed.
21.
25.
26.
Turn in the set screw into the
22.
top angle bracket and finger
tighten.
Turn in the set screw into
23.
the bottom angle bracket
and finger tighten.
The door reverse is
finished now.
11
Page 12

For Service in the U.S.
Liebherr Service Center
Toll Free: 1-866-LIEBHER or 1-866-543-2437
Email: Service-appliances.us@liebherr.com
PlusOne Solutions, Inc.
3501 Quadrangle Blvd, Suite 120
Orlando, FL 32817
For Service in Canada
Liebherr Service Center
Toll Free: 1-888-LIEBHER or 1-888-543-2437
www.euro-parts.ca
EURO-PARTS CANADA
39822 Belgrave Road
Belgrave, Ontario, N0G 1E0
Phone: (519) 357-3320
Fax: (519) 357-1326
www.liebherr-appliances.com
 Loading...