

This booklet is printed with soy ink. Printed in Mexico
This booklet is made from 98% post-consumer recycled paper.
VS990
VS990
User Guide
User Guide
Usuario
Guía del
MFLXXXXXXX (1.0) ME
VS990

Copyright©2015 LG Electronics, Inc. All rights reserved.
LG and the LG logo are registered trademarks of LG Corp.
VS990 is a trademark of LG Electronics, Inc.
All other trademarks are the property of their respective
owners.

Important Customer Information
Before you begin using your new phone
Included in the box with your phone are separate information leaflets.
These leaflets provide you with important information regarding your new
device. Please read all of the information provided. This information will
help you to get the most out of your phone, reduce the risk of injury, avoid
damage to your device, and make you aware of legal regulations regarding
the use of this device.
It’s important to review the Product Safety and Warranty Information guide
before you begin using your new phone. Please follow all of the product
safety and operating instructions and retain them for future reference.
Observe all warnings to reduce the risk of injury, damage, and legal
liabilities.
1

2
Table of Contents
Important Customer Information...............................................1
Table of Contents .......................................................................2
The Basics ...................................................................................5
Phone Overview .................................................................................................... 5
Help ........................................................................................................................7
Setting Up Your Phone ........................................................................................ 8
Removing the Battery and SIM Card ................................................................10
Inserting and Removing a Memory Card ...........................................................11
Charging Your Phone ..........................................................................................12
Optimizing Battery Life ...................................................................................... 13
Turning Your Phone On and Off ........................................................................15
Your Google Account .......................................................................................... 18
Touch Screen .......................................................................................................19
Getting to Know the Home Screen ..................................................................20
Apps: How to View, Open, and Switch .............................................................26
Capturing a Screenshot .....................................................................................33
Phone’s Status Icons .........................................................................................33
Managing Notifications .....................................................................................35
Searching Your Phone and the Web .................................................................38
Setting Your Lock Screen ..................................................................................40
Dual Window .......................................................................................................42
Connecting to Networks and Devices ................................... 44
Wi-Fi ....................................................................................................................44
Wi-Fi Direct ........................................................................................................44
Bluetooth .............................................................................................................45
SmartShare ........................................................................................................46
PC connections with a USB cable .................................................................... 47
PC connections with a USB cable for Mac OS X users ................................48
Calls .......................................................................................... 49
Placing and Ending Calls ..................................................................................49
Answering or Rejecting Calls ............................................................................52
Working With the Recent Tab ...........................................................................54
Calling Your Contacts.........................................................................................56
Options During a Call ........................................................................................ 57

Table of Contents
Managing Multiple Calls .................................................................................... 57
Listening to Your Voicemail ............................................................................... 59
Web ............................................................................................ 61
Chrome .................................................................................................................61
Communication ....................................................................... 64
Contacts ..............................................................................................................64
Messaging ........................................................................................................... 70
Email .................................................................................................................... 74
Voicemail ............................................................................................................. 76
Gmail ................................................................................................................... 77
Hangouts .............................................................................................................84
Entertainment .......................................................................... 87
Camera ................................................................................................................ 87
Gallery ................................................................................................................. 97
Music .................................................................................................................. 101
Play Store .......................................................................................................... 106
YouTube™ ..........................................................................................................108
Tools .........................................................................................109
QuickMemo+ .................................................................................................... 109
QSlide ................................................................................................................. 110
QuickRemote ..................................................................................................... 112
Clock ................................................................................................................... 114
Calculator ........................................................................................................... 115
Calendar ............................................................................................................. 116
Maps ................................................................................................................... 118
Voice Mate ......................................................................................................... 119
Voice Search ..................................................................................................... 120
Voice Recorder .................................................................................................. 121
File Manager ..................................................................................................... 123
3

4
Table of Contents
Settings ...................................................................................124
Safety .......................................................................................146
Consumer Information About Radio Frequency Emissions ......................... 148
Consumer Information on SAR ..................................................................... 153
FCC Hearing-Aid Compatibility (HAC) Regulations for Wireless Devices . 154
Caution:
Avoid potential hearing loss. ........................................................................... 156
TIA Safety Information .................................................................................... 158
Safety Information ............................................................................................ 161
FDA Consumer Update ................................................................................... 165
Laser Safety Statement ....................................................................................177
Specifications .........................................................................178
FAQ ..........................................................................................179
LIMITED WARRANTY STATEMENT ....................................185
Index ........................................................................................192

The Basics
Phone Overview
Front View
Proximity
Sensor
Notification
LED
Front Camera
NOTES s All screen shots in this guide are simulated. Actual displays may vary.
s Instructions to perform tasks in this guide are based on the default settings and may
change depending on the mode and software version on your phone.
1. Proximity Sensor Senses proximity toward other objects (such as your
head) so that tap commands are not accidentally activated during a call
or when carried inside a pocket.
It also employs an ambient sensor which measures the surrounding light
and adjusts the LCD brightness to provide a vivid screen.
NOTE Don't block the sensor or near the sensor to avoid problems with the touch screen.
2. Notification LED Flashes to alert you for notifications (e.g., incoming
call, new text message, screen unlock, etc.).
3.
Front Camera Use to take pictures and record videos of yourself. You
can also use this for video chatting. Keep it clean for optimal
performance.
Earpiece Lets you hear callers and automated prompts.
4.
Earpiece
5
6
The Basics
Rear View
Rear Camera
Laser Detection
Auto-focus
Power/Lock Key
NFC Touch Point
Speaker
5. Rear Camera Use to take photos and record videos. Keep it clean for
optimal performance.
Laser Detection Auto-focus Detects the distance between the rear
6.
camera lens and nearby objects using laser technology. This feature
helps the camera to focus quickly and accurately at short or long
distances.
NOTE Don't cover the Proximity Sensor and Laser Detection Auto-focus with a protection film,
pouch, or protection case not authorized by LG as they may cause the device to
malfunction.
7. Power/Lock Key Press to turn off the screen backlight and lock the
screen, or turn the screen backlight back on. Press and hold to turn the
phone on/off, restart it, and activate/deactivate Airplane mode.
NFC Touch Point Tap the back of your phone to an NFC tag or another
8.
NFC compatible device in this location to transfer data between them.
Speaker Use to listen to audio (e.g., music, videos, sound clips,
9.
speakerphone, etc.) from the rear speaker instead of the earpiece.
Volume Keys Press to adjust the ringer, the media volumes, or the
10.
in-call volume during a call. They also access shortcuts when enabled in
the Settings menu.
LED Flash
Volume Keys
The Basics
7
TIPS s With the screen backlight off (asleep), you can press the Volume Down Key twice
to activate the Camera app.
s With the screen backlight off (asleep), you can press the Volume Up Key twice to
access the QuickMemo+ app.
11. LED Flash Brightens up the captured image or recorded video when
you turn on the flash.
Top and Bottom View
Microphone
3.5mm
Headset Jack
Microphone
USB/Charger
Port
12. Microphone Transmits your voice to the other caller. It's also used for
voice-activated functions.
3.5mm Headset Jack Allows you to plug in an optional headset for
13.
convenient, hands-free conversations. You can also plug in headphones
to listen to music.
USB/Charger Port Allows you to connect the phone and the USB cable
14.
for use with the charger adapter, or other compatible accessories.
Help
The Help app allows you to quickly and conveniently view information about
your phone, including how-to videos, Icon glossary, etc.
To access Help, tap the Home Button
> the Apps icon > Help .
8
The Basics
Setting Up Your Phone
Step 1. Remove the Back Cover
With the phone facing down, insert your fingernail into the slot located on
the lower left of the back cover and lift the cover up gently.
Step 2. Insert the Battery
Insert the battery, making sure to align the gold contacts. Press down
gently to secure the battery.
The Basics
Step 3. Replace the Back Cover
Place the cover over the back of the phone, then press down along the
edges to secure the cover.
Step 4. Charge the Phone
Before turning on your phone, fully charge the battery. Be sure to use the
USB cable and charger adapter that came with your phone. Correctly orient
the USB cable plug before inserting it in the USB/Charger Port to avoid
damage to your phone. See Charging Your Phone on pages 12 and 13 for
more information.
NOTE It’s important to fully charge the battery before initial use of the phone to maximize the
battery's lifetime.
9
10
The Basics
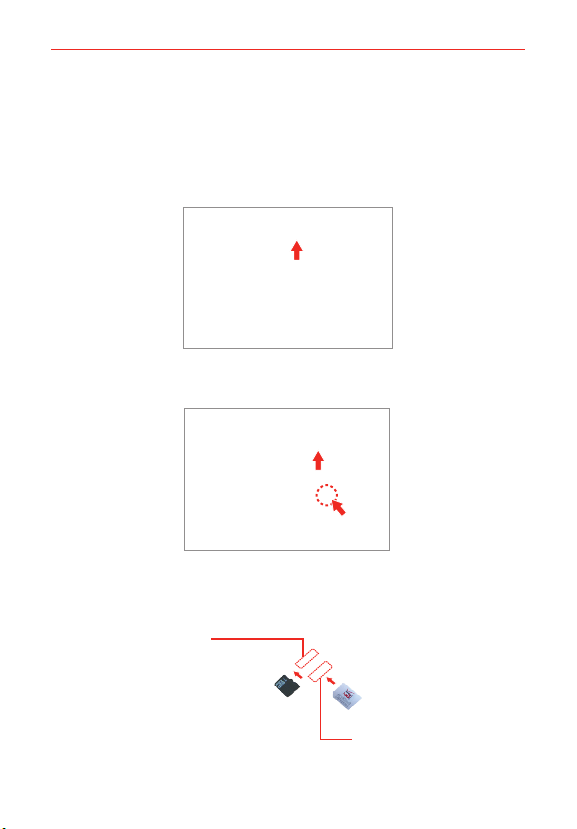
Removing the Battery and SIM Card
Removing the battery
1. With the phone facing down, insert your fingernail into the slot located on
the lower left of the back cover and lift the cover up gently.
2. Use the fingertip cutout at the bottom of the battery compartment to lift
the battery out.
SIM card/microSD card slot location
microSD card
Slot
SIM Card Slot
The Basics
Removing the SIM card
The SIM card is pre-installed in your smartphone. If you need to replace
your SIM card, refer to the following instructions.
1. Turn the phone off, then remove the back cover and the battery (as
demonstrated in the previous instructions).
2. Locate the slot for the SIM card (the lower of the two slots above the
upper-right corner of the battery compartment) and gently slide the SIM
card out to remove it.
11
CAUTION If a microSD card is inserted in your phone, please remove it from the upper slot
before trying to remove the SIM card.
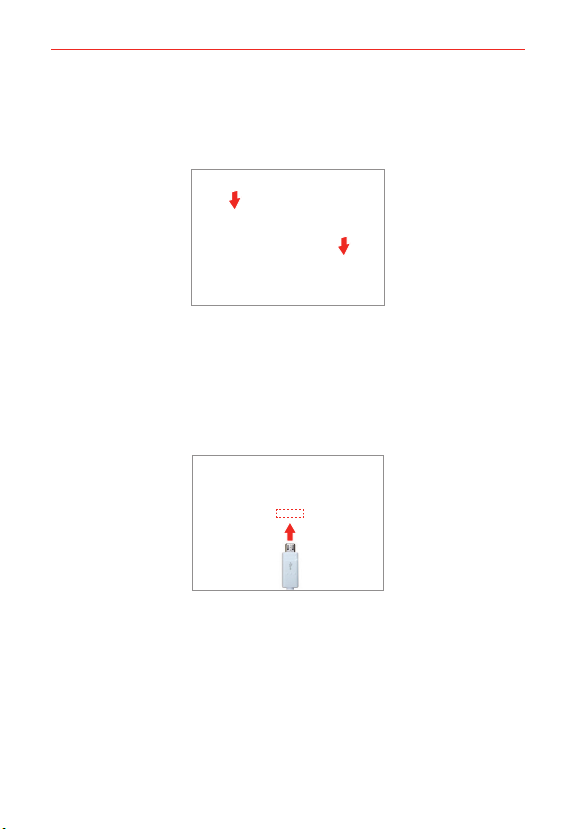
Inserting and Removing a Memory Card
Inserting a microSD card
1. Remove the back cover (as demonstrated in the
previous instructions) and locate the dual slot
just above the upper-right corner of the battery
compartment. (microSD is inscribed near the
slot opening.)
2. Position the microSD card (sold separately) with
the label side facing up and the gold contacts
toward the slot, then carefully slide it into the
upper slot until it's secured in place.
12
The Basics
NOTE The microSD card can be easily damaged by improper operation. Please be careful when
inserting, removing, or handling it.
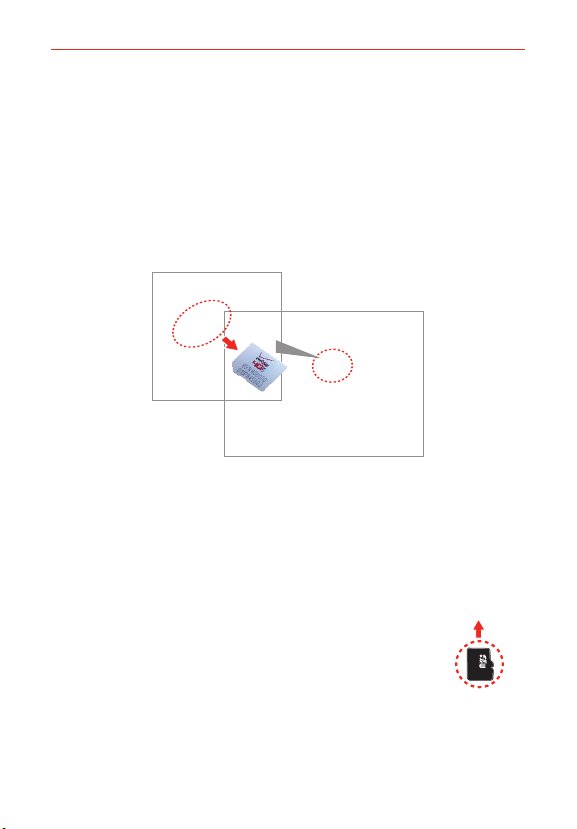
To remove the microSD card
1. Unmount the microSD card.
Tap the Home Button
the Recent Apps Button
> touch and hold
> Settings >
Storage > Unmount SD card.
2. Remove the back cover and locate the microSD
card slot (as demonstrated in the previous
instructions).
3. Carefully pull the microSD card out to remove it.
To unmount the microSD card
It’s important to unmount the microSD card prior to removing it from the
phone to avoid damage to it or the data saved on the card.
1. Tap the Home Button
> touch and hold the Recent Apps Button .
2. Tap Settings > Storage.
3. Tap Unmount SD card.
Charging Your Phone
Your phone comes with a USB cable and a charger adapter. You can
connect them together and charge from a power outlet, or you can use the
USB cable alone to charge from your computer. Correctly orient the plugs
before insertion to avoid damaging your phone and cable.
NOTE Please only use an approved charging accessory to charge your LG phone. Improper
handling of the USB/Charger Port, as well as the use of a incompatible charger, may
cause damage to your phone and void the warranty.
1. Correctly orient the USB cable with the charger adapter, and connect
them. As shown below, both the USB logo on the USB cable and the LG
logo on the adapter will face toward you.
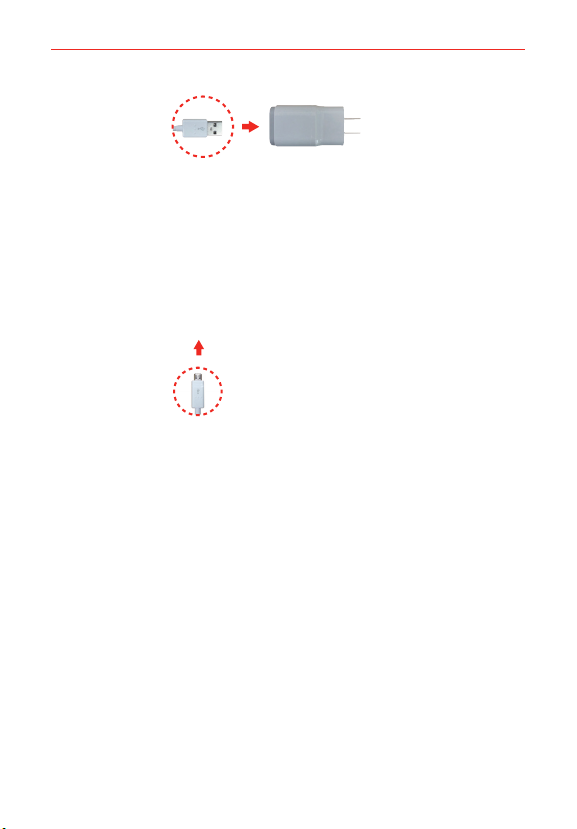
The Basics
13
USB Cable
Charger Adapter
2. The USB/Charger Port is located at the bottom of the phone. Correctly
orient the cable's plug with the port before plugging it in. As shown
below, the USB logo on the cable will face upward.
3. Plug the charger adapter into an electrical outlet to begin charging.
Charging with the USB Cable
NOTE
Make sure to correctly orient the cable's
plug with the port before plugging it in.
When the phone is facing upward, the USB
USB Cable
logo on the cable will also face upward.
You can use your computer to charge your phone. To be able to charge with
the USB cable, you need to have the necessary USB drivers installed on
your PC first. Connect one end of the USB cable to the USB/Charger Port on
your phone (as shown above) and connect the other end to a USB port on
your PC. It’s best to use the rear USB port when connecting to a desktop
PC. The USB hub should be powered by an external power source.
NOTE You may experience a slower charging rate when charging from your computer.
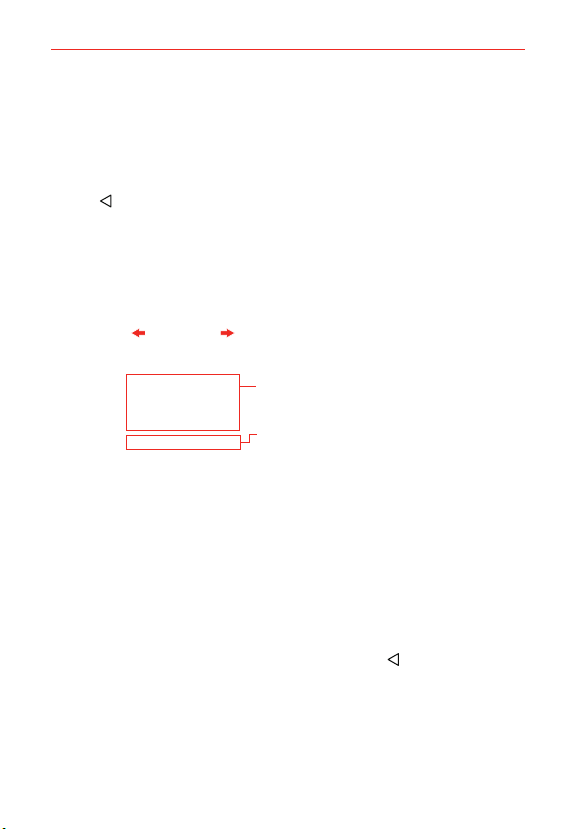
Optimizing Battery Life
You can extend your battery’s life between charges by turning off features
that run in the background. You can also monitor how apps and system
resources consume battery power.
Tips to extend the life of your battery
Reduce the screen brightness and set a shorter screen timeout.
14
The Basics
Turn off radio communications (such as Wi-Fi, Bluetooth, GPS, etc.) that
you're not actively using. (Note that the GPS receiver is only turned on
when you’re using an app that makes use of it.)
Turn off automatic syncing for Gmail, Calendar, Contacts, and other apps
if you don’t need it.
NOTES s Allowing other devices to use your device's hotspot connection will drain your battery
more quickly.
s If you accidently press the Power/Lock Key while the phone is in your pocket, the
proximity sensor prevents the screen from turning on in order to save battery power.
To check the battery charge level
Tap the Home Button > touch and hold the Recent Apps Button >
Settings > Battery.
The battery level (as a percentage of fully charged) and the battery status
(Charging or Discharging) is displayed at the top of the screen.
Checkmark the Battery percentage on Status Bar checkbox to display
the percentage of remaining battery charge on the Status Bar next to the
battery icon.
Tap Battery saver to view and/or modify your Battery saver settings.
To monitor and control what uses the battery
The Battery usage screen allows you to see which apps are consuming the
most battery power. Information on this screen allows you to identify
downloaded apps you may want to turn off when not being used, so you
can get the most out of your battery power.
Tap the
The top of the Battery usage screen displays a usage graph and below it,
Home Button > touch and hold the Recent Apps Button >
Settings
> Battery > Battery usage.
OR
Tap the
Home Button >
Settings
> About phone > Battery > Battery usage.
touch and hold the
Recent Apps Button >
battery usage times. It lists all of the apps or services using battery power
from the greatest amount of energy used to the least amount.
The Basics
Tap an app or service in the Battery usage screen to see details about its
power consumption. Different apps or services offer different kinds of
information, and they may even include options to modify the settings so
you can reduce power consumption by that app (or stop running the app).
Battery saver
Battery saver changes certain settings to conserve battery power until you
can recharge your phone. If you turn Battery saver On, it will automatically
activate when the battery charge level drops to the level you set. If Battery
saver is off, you’ll be prompted to turn on Battery saver when the battery
reaches low levels.
Tap the Home Button
Settings
> Battery >
From the Battery saver screen, select to activate Battery saver
immediately, or when the charge drops to 5% or 15%. If you turn off
Battery saver, when the battery charge becomes low, a notification
prompts you to turn it on.
After you modify the Battery saver settings to your preferences, tap the
switch
to toggle it On (blue) or Off (gray).
> touch and hold the Recent Apps Button >
Battery saver.
Turning Your Phone On and Off
Turning your phone on
Press and hold the Power/Lock Key
couple of seconds until the screen turns on.
Turning your phone off
1. Press and hold the Power/Lock Key on the back of the phone until
the Phone options menu appears.
2. Tap Power off in the Phone options menu.
3. Tap OK to confirm that you want to turn off the phone.
on the back of the phone for a
15
16
The Basics
Turning the screen on using the KnockON feature
The KnockON feature allows you to double-tap the screen to easily turn the
screen on or off.
Quickly double-tap the center of the dark screen to turn on the backlight
and display the Lock screen.
Quickly double-tap the Status Bar, an empty area on the Home screen,
or the Lock screen to turn the screen off.
NOTES s The backlight will not turn on if the proximity sensor is covered.
s When the screen is off and you double-tap the screen with Knock Code activated,
the Knock Code grid is displayed for you to enter your Knock Code.
Turning the screen on using the Knock Code feature
If your Lock screen unlock sequence is set to a Knock Code, tap your
Knock Code on the darkened screen to automatically turn on the backlight
and unlock the screen at the same time.
TIP When the screen is in timeout and a Knock Code is set, pressing the Power/Lock Key
NOTES
(on the back of the phone) displays the Lock screen (e.g., to check the time). You can
tap your Knock Code to unlock the screen or press the Power/Lock Key
double-tap the Status Bar) to turn the backlight back off.
s Entering the incorrect Knock Code 6 times and you'll be prompted you to enter your
backup PIN to unlock your phone.
s Use a fingertip instead of a fingernail to tap your Knock code on the screen.
Setting up the Knock Code feature
1. Tap the Home Button > touch and hold the Recent Apps Button >
Lock screen settings.
2. Tap Select screen lock > Knock Code.
3. Tap the squares in a pattern (from 3 to 8 taps) to set your Knock Code,
tap DONE, enter it again, then tap CONFIRM.
again (or
The Basics
To unlock the phone
If you don’t use the phone for a while, the screen and backlight will turn off
to conserve battery power. To unlock the phone’s default Lock screen:
NOTE The default Lock screen simply locks the screen to prevent unintentional actions. For
more security to guard against unauthorized use, you can set an unlock requirement
(such as a Knock Code, pattern, PIN, password) that will need to be entered to unlock it.
1. Turn the screen on.
Press the Power/Lock Key
phone).
NOTE Avoid covering the proximity sensor when turning the screen
on. Doing so, immediately turns the screen off.
OR
Quickly double-tap the center of the screen
(KnockON).
2. From the center of the screen, swipe in any direction
to unlock it.
To use a shortcut, swipe the shortcut icon (at the bottom of the
screen) in any direction. The screen will unlock and launch the app.
(on the back of the
17

18
The Basics
Your Google Account
You must sign into a Google Account to use Gmail, Hangouts, Google
Calendar, and other Google apps; to download apps from Play Store; to
back up your settings to Google servers; and to take advantage of other
Google services on your phone.
IMPORTANT
ţ If you don’t sign into a Google Account during setup, you're prompted to sign in or to
Setting up your Google Account
If you use Setup Wizard to set up your Google Account, it guides you
through the following steps.
1. On your phone, launch an application that requires a Google Account
2. Enter your email and tap NEXT.
NOTE If you don't already have a Google Account, tap Create a New Account and follow the
3. Enter your password and tap NEXT.
4. Follow the rest of the instructions on the screen.
Your Gmail, Google Contacts, and Google Calendar events will all be
create a Google Account the first time you start an app that requires one, such as Gmail
or Play Store.
ţ When you sign in, you’re prompted to enter your username and password using the
on-screen keyboard.
ţ After you sign in, your contacts, Gmail messages, Calendar events, and other
information from these apps and services on the web are synchronized with your
phone.
ţ If you have an enterprise account through your company or other organization, your IT
department may have special instructions on how to sign in to that account.
(such as Play Store or Gmail).
on-screen prompts to create your new account.
synchronized with your phone automatically.

The Basics
Touch Screen
Your touch screen provides an excellent way to interact with and use your
Android™ phone. With the touch of your finger, you can download and use
available apps, make menu selections, and access data saved to your
phone.
Touch or tap A single finger touch selects items. For example, tap an
icon (e.g., an app, widget, or folder), tap words (e.g., menu selection or to
answer an on-screen question), or touch letters and numbers to type.
NOTE Don't press too hard on the screen. It's sensitive enough to detect a light, firm tap.
Touch and hold Touch an item on the screen and don't lift your finger
until an action occurs. For example, to open a context menu for a contact,
touch and hold the contact entry until the menu pops up.
Drag Touch and hold an item for a moment and then, without lifting your
finger, move your finger on the screen until you reach the target position.
For example, you can drag items on the Home screen to reposition them.
Swipe, slide, or flick Move your finger quickly across the surface of the
screen, without pausing when you first touch it (so you don’t drag an item
instead). For example, you can browse through the Home screens by
swiping left and right, slide the screen up or down to scroll through a list,
or remove an app from the Recent apps screen by flicking its graphic off
the screen.
Double-tap Tap the screen twice quickly to zoom, highlight text, or turn
the screen on/off. For example, quickly double-tap a section of a web
page to zoom that section to fit the width of the screen and control the
zoom in Maps and in other apps. Double-tap a word to highlight it.
Double-tap can also activate the KnockON feature to turn the screen on or
off. Double-tap also activates a new event in the Calendar app.
NOTE The Accessibility settings shortcuts and Touch zoom accessibility features use a
triple-tap.
Pinch-to-zoom Use your index finger and thumb in a pinch motion (to
zoom out) or spread motion (to zoom in) when using Chrome, a map,
photos, the rear camera lens, the Contacts list, the Favorites list, the
19

20
The Basics
Groups list, the Messaging list, and a music list. Spread apart to make
screen information larger (easier to see and read), or pinch together to
view more area and information. The pinch gesture also changes the
Home screen. Pinch in on the Home screen to change to mini panel view,
then spread apart to return to the full screen view. Spread apart on the
Home screen to hide all of your Home screen items, then pinch in to
redisplay them.
Rotate the screen From many apps and menus, the orientation of the
screen adjusts to the phone’s physical orientation by rotating the screen.
You can deactivate this function in the Display settings menu.
Getting to Know the Home Screen
The Home screen is your starting point to access all of the features on your
phone using simple motions on the screen. It’s comprised of multiple
panels (swipe horizontally to switch). You can customize all of your Home
screen panels with app shortcuts, icons, widgets, and other features.
Status Bar
Shows device status
information, including the
time, signal strength, battery
status, and notification icons.
App Icon
Tap an icon (app, widget,
folder, etc.) to open and use
it.
Quick Access Bar
Icons that provide easy,
one-touch access to the
functions used most often.
Apps Icon
Tap here to open the Applications
screen to view all of your installed
apps.
Home Touch Buttons
Displayed on all screens, these
buttons allow you to easily navigate
within the device software.
Quick Access Bar icons
The Quick Access Bar is located on all of your Home screen panels to allow
quick and easy access to the apps you use most often.
The Basics
Modifying the Quick Access Bar icons
Rearrange: Touch and hold the icon to move, then drag it to another
position in the Quick Access Bar.
Add: Open the Applications screen, then drag the icon you want onto
the Quick Access Bar.
Delete: Touch and hold the icon to delete, then drag it to the Remove bar
that appears at the top of the screen.
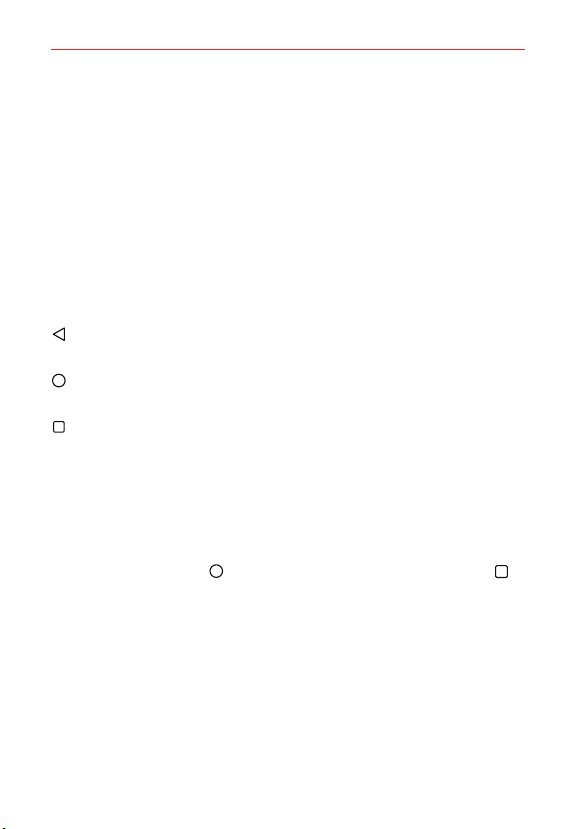
Home Touch Buttons
The Home Touch Buttons are displayed in a bar at the bottom of all of the
screens to provide easy navigation within the device software.
Back Button: Tap to back up one step at a time and close on-screen
items such as pop-up messages, the on-screen keyboard, etc.
Home Button: Tap to immediately return to the Home screen. Touch
and hold it to access the Google Now shortcut.
Recent Apps Button: Tap to display the apps you recently used as well
as all of your open websites. Touch and hold it to access available
options for the current screen or app.
Modifying the Home Touch Buttons
You can change which buttons are displayed in the Home Touch Buttons
Bar, as well as how they’re displayed.
1. Tap the Home Button
Settings > Display > Home touch buttons.
2. Select the modification you want to change.
Tap Button combination to select which Home Touch Buttons you
want in the bar and their location within the bar. Choose from the
Back Button, the Home Button, the Recent Apps Button, the
Notifications Button, the QuickMemo+ Button, the QSlide Button,
and the Dual window Button.
Tap Color to set the button color. Choose White or Black.
> touch and hold the Recent Apps Button >
21
22
The Basics
Tap Hide Home touch buttons to hide the Home Touch Buttons on
the apps you select. To access the Home Touch Button Bar from
those apps, swipe upward from the bottom of the screen to
temporarily redisplay them.
To return to the Home screen
Tap the Home Button
at any time, from any app.
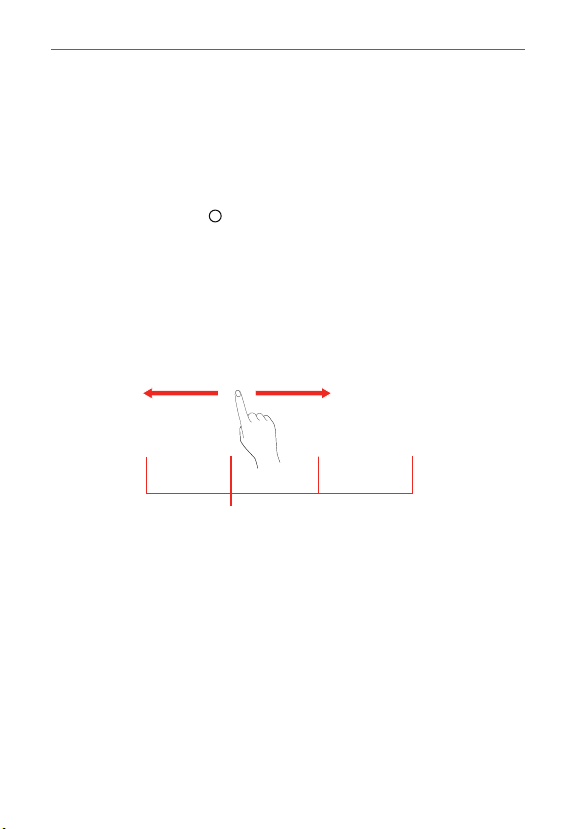
To view other Home screen panels
Swipe (or flick) your finger left or right across the Home screen. The
Home screen is comprised of four sliding panels, but you can add up to
eight panels to allow more space for icons, widgets, shortcuts, and other
items.
The white dot (above the Quick Access Bar) indicates the current Home screen panel.
Tap any of the Home screen panel indicator dots (above the Quick
Access Bar) to immediately jump to that panel.
Pinch in on the Home screen to display the mini panel view, then tap the
Home screen panel you want to access.
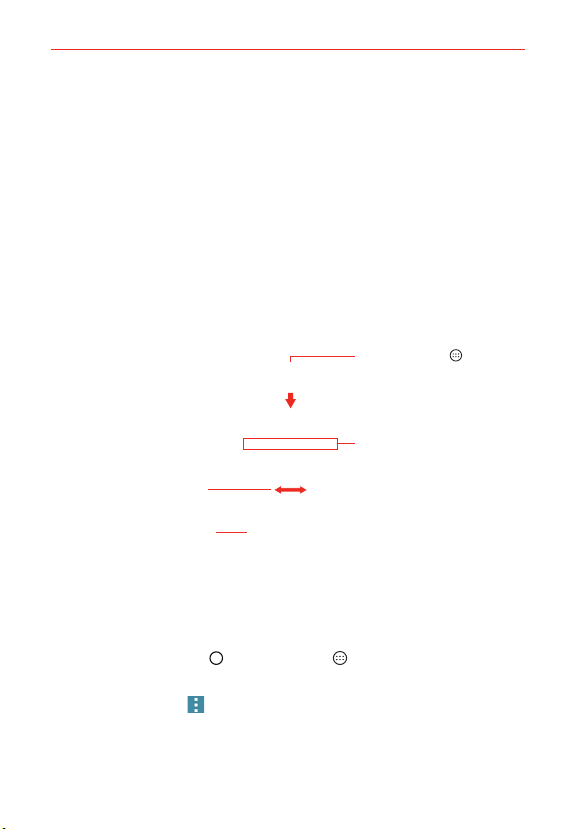
Home Screen Panel Indicator
The Basics
Mini Panel View
Tap here to set this
panel as the default
Home screen.
Tap here to add
another panel.
Full Screen View Mini Panel View
Mini panel view allows direct access to any of the Home screen panels and
also allows you to manage them. You can add, delete, and rearrange the
panel order as well as set the default Home screen panel.
Pinch in on any of the Home screen panels to change from full screen view
to mini panel view. From mini panel view you have the following options:
To go directly to any panel, simply tap the one you want.
To add another panel, tap the Add panel icon
To delete a panel, touch and hold the panel to delete, drag it to the
Remove bar at the top of the screen, then lift your finger.
To rearrange your panels, touch and hold the panel to move, drag it on
top of the panel position where you want it, then lift your finger. The
moved panel takes that position and the remaining panels shift
accordingly.
To set another panel as the default Home screen, tap the Default icon
at the upper-right corner of the mini panel you want to be your default
Home screen panel.
NOTE Changing the default Home screen panel does not change its position with the other
panels, but its Default icon turns blue.
.
23
24
The Basics
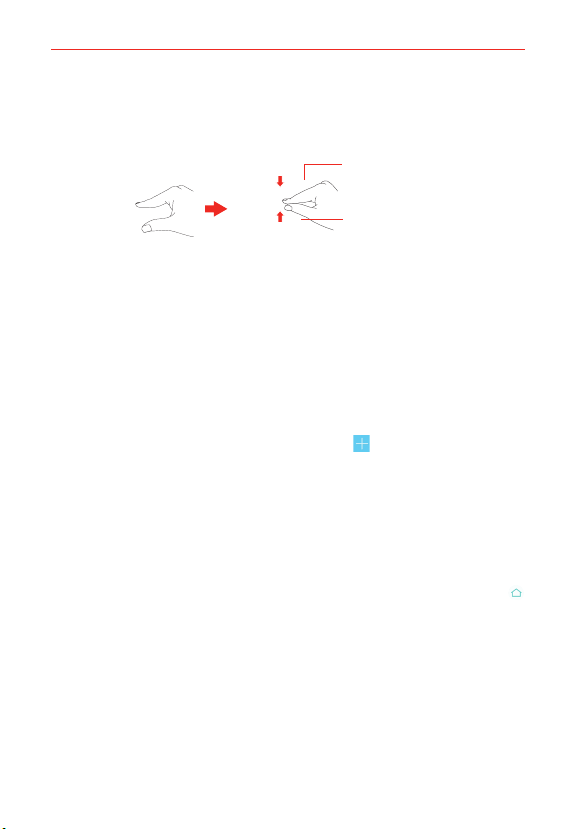
Hiding items on the Home screen
Place two fingers on the screen, then spread them apart to hide the items
on your Home screen so that only your wallpaper, the Status Bar, and the
Home Touch Buttons Bar are displayed. To redisplay your Home screen
with all of its icons and widgets, pinch in on the screen or tap the Back
Button
NOTE The device automatically reverts to the full screen view after screen timeout.
.
Using Dual View
Slide the screen right or left to view
different Home screen panels.
Item List
Touch and hold an icon, then drag it
onto the panel where you want it.
Category Tabs
Tap a category to display its available
Dual view allows you to easily add items to any of the Home screen panels.
Touch and hold an empty spot on a Home screen panel to view your Home
screen on top and selections (Apps tab, Widgets tab, or Wallpapers tab) on
the bottom. Flick sideways to scroll through the Home screen panels to
display the panel you want. Tap the type of item you want to add (from the
categories tabs at the bottom of the screen), then flick sideways to scroll
through the available choices. Simply tap the item you want to
automatically add it to the panel viewed at the top of the screen.
NOTE The Quick Access Bar isn't displayed while in Dual view.
To return to the full screen view, tap the Back Button or tap one of the
Home screen panels.
NOTE The device automatically reverts to full screen view after screen timeout.
items.
The Basics
Home screen version
EasyHome is a more simplified version of the Home screen that you can
choose to use on your phone.
Tap the Home Button
Home screen settings > Select Home > EasyHome.
The EasyHome Home screen has three panels.
Its main panel has 12 application icons that you can use with a single tap.
Touch and hold one to remove or replace it. The top right of the screen
displays the date and time. Tap it to access the Clock app. The top left of
the screen displays a Weather widget. Tap it to access the Weather app.
Swipe to the right on the main panel to access a panel you can
customize with call/text message shortcuts for the contacts you set and
also open your call history. Tap Call logs to open the Phone app's Recent
tab that lists all of your recent calls. Tap one of the 12 Contact shortcut
locations, then tap the contact you want to set. After a shortcut is set,
tap it to use it or delete it.
Swipe to the left on the main panel to access a panel you can customize
with additional app shortcuts and also open the Applications screen. Tap
View all apps to open the Applications screen with all of your installed
apps. To add an app icon, tap the Add icon
want.
To change back to the Android Home screen
Tap the Home Button > touch and hold the Recent Apps Button >
System settings > Home screen > Select Home > Home.
> touch and hold the Recent Apps Button >
, then tap the app you
25
26
The Basics
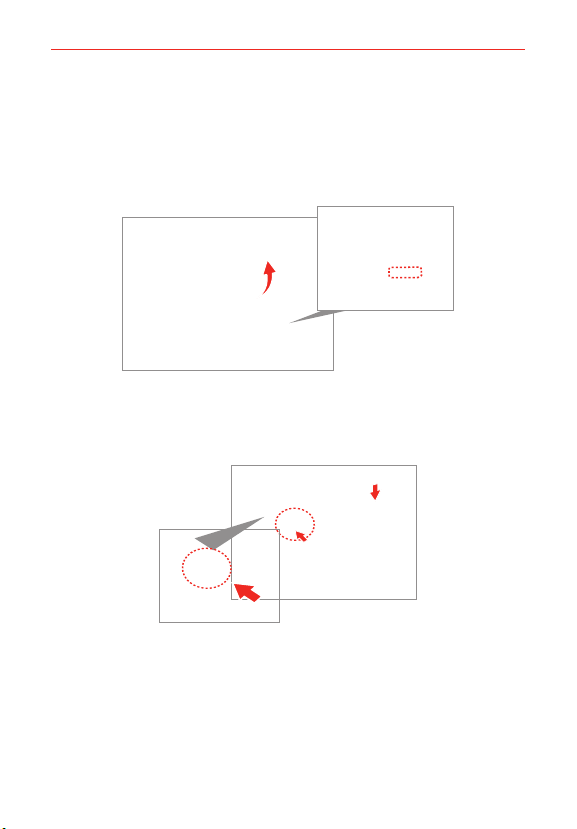
Apps: How to View, Open, and Switch
All of the apps on your phone, including any apps that you downloaded and
installed from Play Store or other sources, are grouped together on the
Applications screen, which you access from your Home screen. If you have
more apps than can fit on the Applications screen, you can slide the screen
left or right to view more.
Home screen
to
Slide the screen left or
right to bring more icons
into view.
Tap an app icon to open
the app.
Applications screen
Tap the Apps icon
open the Applications
screen.
Tap these to select Apps,
Widgets, Search, or
Menu options.
Applications screen options
You can change the look of your Applications screen.
1. Tap the Home Button
> the Apps icon
necessary.
2. Tap the Menu icon to access the following Applications screen options:
View apps by: Tap to sort your apps either in alphabetical order, by
downloaded date, or custom.
, then tap the Apps tab, if
The Basics
Show small/large icons: Tap to change the size (large or small) for the
icons displayed in the Applications screen.
Hide/Show apps: Tap to set which app icons will be displayed in your
Applications screen. Checkmark the icons you want to hide, then tap
the Checkmark icon
.
Edit/Uninstall apps: Tap to view app information or move apps on the
screen. Tap an app icon to view its information. Touch and hold an
app, then drag it to move it.
Home screen settings: Tap to access the Home screen settings
menu.
Opening an app
Open an app simply by tapping its icon on the screen.
TIP You can customize your Home screen with the app icons you use most often. Apps are
located on the Applications screen, but you can copy any app icon to your Home screen
for faster, more convenient access. No matter where the icon is, on the Applications
screen or your Home screen, just tap it to open and use it.
Opening multiple apps
1. Tap an app icon to open it.
2. Tap the Home Button
NOTE If the app icon you want is on your Home screen, simply tap the icon to open and use it.
3. Tap the Apps icon .
4. Tap the Apps tab (if necessary), then tap the icon for the other app you
want to open.
.
27
Switching between multiple apps
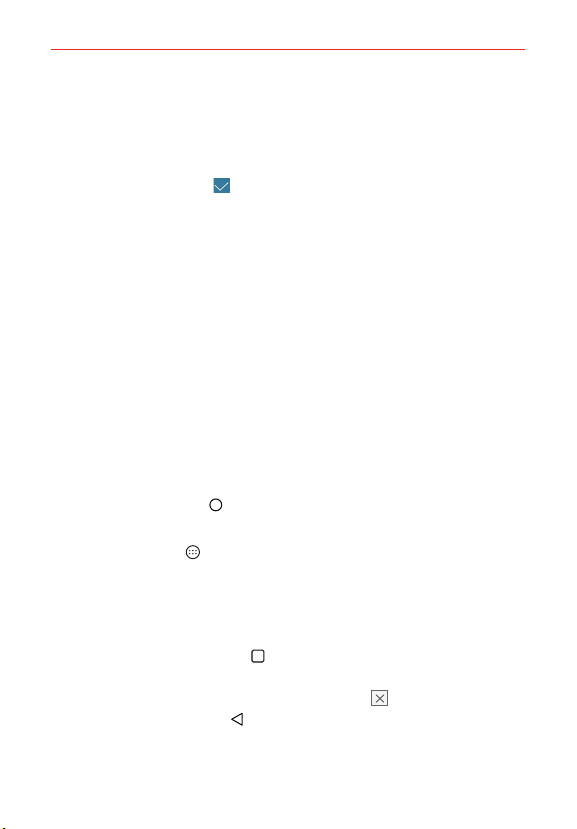
1. Tap the Recent Apps Button . A screen opens and displays screenshot
tabs of all of the apps (and websites) that are currently open.
2. Tap the app you want to use, tap the Close icon
it, or tap the Back Button
to return to the current screen.
on the app to close

28
The Basics
Flick an app icon to the right or left to
close the app and remove it from the list.
Swipe up or down to
view the entire stack of
open apps.
Tap an app to use it.
Tap here to close this app.
Adding items to the Home screen
1. Tap the Home Button > the Apps icon , then tap the Apps tab, if
necessary.
NOTE You can tap the Widgets tab (at the top of the screen) to place a widget on the Home
screen.
2. Touch and hold the icon you want to add to your Home screen. The
Applications screen closes and the Home screen is displayed.
3. Drag the icon to where you want it on the screen, then lift your finger.
Moving apps to other Home screen panels
You can move app icons to any Home screen panel. Touch and hold, then
drag the icon to the left or right edge of the screen to advance to the other
panels before lifting your finger.
Customizing an app icon on your Home screen
You can create your own custom app icon(s) using the images in your
Gallery. Your customized app icon(s) are only applied to icons on your Home
screen. The Applications screen is not affected.
 Loading...