

Page 1

Part 15.21 statement
" Change or Modifications that are not expressly approved by the manufacturer could void
the user's authority to operate the equipment. “
Part 15.105 statement
This equipment has been tested and found to comply with the limits for a class B digital
device, pursuant to Part 15 of the FCC Rules.
These limits are designed to provide reasonable protection against harmful interference in
a residential installation. This equipment generates uses and can radiate radio frequency
energy and, if not installed and used in accordance with the instructions, may cause harmful
interference to radio communications. However, there is no guarantee that interference will
not occur in a particular installation. If this equipment does cause harmful interference or
television reception, which can be determined by turning the equipment off and on, the user
is encouraged to try to correct the interference by one or more of the following measures:
- Reorient or relocate the receiving antenna.
- Increase the separation between the equipment and receiver.
- Connect the equipment into an outlet on a circuit different from that to
which the receiver is connected.
- Consult the dealer or an experienced radio/TV technician for help.
Page 2

Part 15 Class B Compliance
This device and its accessories comply with part15 of FCC rules.
Operation is subject to the following two conditions:
(1) This device & its accessories may not cause harmful interference.
(2) This device & its accessories must accept any interference received,
including interference that may cause undesired operation.
Body-worn Operation
This device has been tested for typical body-worn operations
with the distance of 0.79inches (2.0cm) from the user’s body.
To comply with FCC RF exposure requirements, a minimum separation distance
of 0.79inches(2.0cm) must be maintained from the user's body.
For example, this device must be maintained from the user's body with
an appropriatebelt-clip accessory.[More than 0.79inches(2.0cm)]
Additionally, Belt clips, holsters & other body-worn accessories may not contain
metallic components.
Page 3
The Basics
Phone Overview
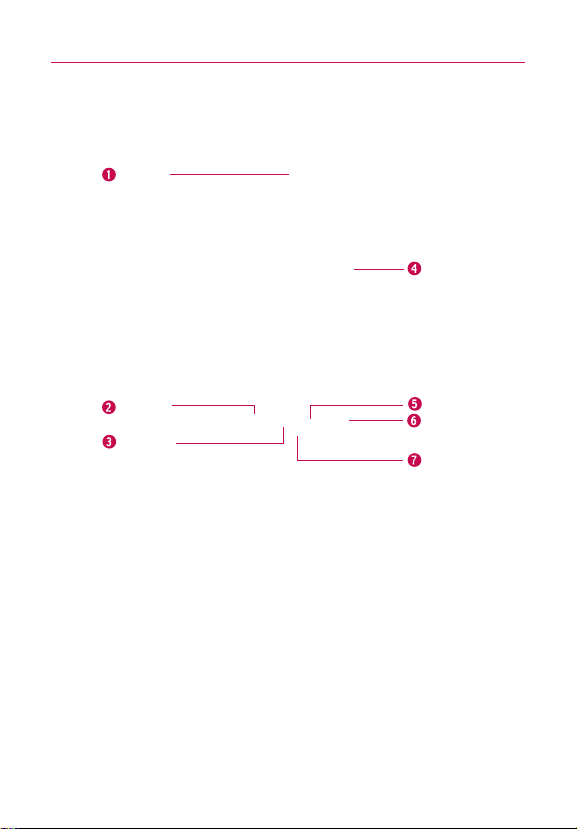
Front View
Earpiece
Touchscreen
Back Key
Search Key
Home Key
1.
Earpiece
lets you hear callers and automated prompts.
2.
Short Key
3.
Home Key
returns to the Home screen. If you're already viewing one of the Home screen
extension panes, it opens the central Home screen pane. Press and hold to view the most
recently used applications.
4.
Touchscreen
applications, call status, date, time, signal status, and battery strength.
5.
Back Key
and dialog boxes.
6.
Search Key
the web. In many applications, you may touch this key to search within the application
itself. Touch twice to open the Quick Search Box from any application. Touch and hold to
open GoogleTMsearch by voice.
7.
Microphone
displays all the information needed to operate your phone, such as
returns to the previous screen. Also closes pop-up display items such as menus
opens Quick Search BoxTM, from the Home screen, to search the phone and
transmits your voice to the other caller and to Voice-activated functions.
Microphone
19
Page 4

The Basics
20
Rear View
8.
Camera Lens
performance.
9.
Camera Flash helps picture quality when taking pictures in low light conditions.
10.
Back Cover
11.
Speaker
speakerphone mode.
use for taking pictures and recording videos. Keep clean for optimal
encloses the battery compartment.
lets you hear ringers and sounds. Also lets you hear the caller’s voice when in
Camera Lens
Camera Flash
Back Cover
Speaker
Page 5

The Basics
Left Side Right Side
Headset Jack
Camera Key
Volume Keys
21
Power/Lock
Key
12.
Camera Key
Video recorder function as well. For more information, see page 197.
13.
Volume Keys
volume during a call.
14. Power/Lock
the following options): Silent mode, Airplane mode, and Power off.
15.
Headset Jack
conversations. The 3.5mm jack also allows you to plug in headphones to listen to music.
16.
Accessory/Charger Port
compatible accessories.
activates the camera. Once the Camera function is open, you can access the
allow you to adjust the ringer and media volumes, or to adjust the in-call
Key
locks the screen. Press and hold to open the phone options menu (for
allows you to plug in an optional headset for convenient, hands-free
allows you to connect the phone charger, USB cable, or other
Accessory/
Charger Port
Page 6
The Basics
22
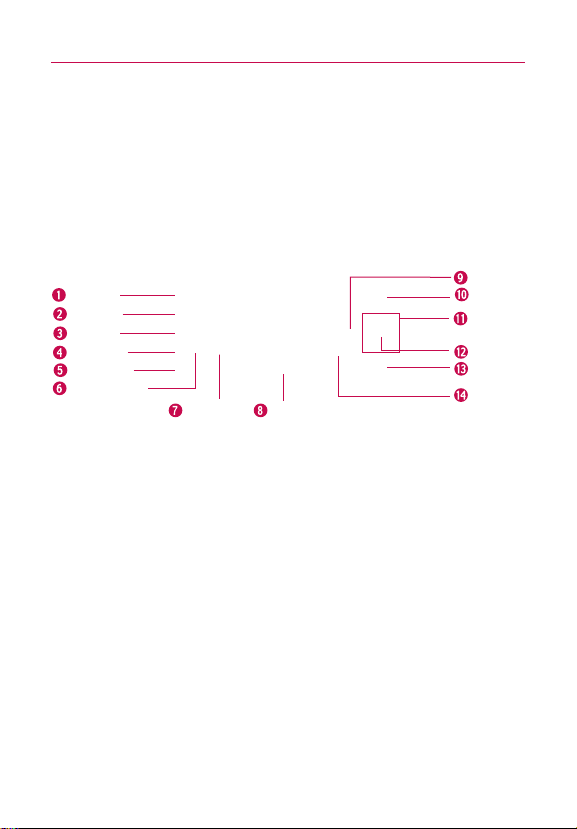
Slide Out QWERTY Keyboard
Short Key
Home Key
Back Key
Search Key
Speaker Key
Caps/Shift Key
Vibrate Key
1.
Short Key
2.
Home Key
returns to the Home screen. If you were viewing one of the Home screen
extension panes, opens the central Home screen pane. Press and hold to open a list of
the applications you accessed most recently.
3.
Back Key
returns to the previous screen. Also closes pop-up display items such as menus
and dialog boxes.
4.
Search Key
opens Quick Search Box, from the Home screen, to search the phone and the
web. In many applications, you may touch this key to search within the application itself.
Touch twice to open the Quick Search Box from any application. Touch and hold to open
Google search by voice.
5.
Speaker
lets you hear ringers and sounds. Also lets you hear the caller’s voice when in
speakerphone mode.
6.
Caps/Shift Key
unlock it, press again.
7.
Vibrate Key
vibrate mode.
8.
Space Key
lets you enter capital letters. To lock the Caps/Shift key, press twice. To
switches to vibrate mode. Press Alt key then the Vibrate key to switch to
enters spaces when in a text entry field.
Space Key
Delete Key
SEND Key
Directional
Key
OK Key
END Key
Enter Key
Page 7

9.
Delete Key
deletes a single space or character with each press. Press and hold to delete
text more quickly.
SEND Key
10.
11.
12.
13.
14.
NOTES
Use to answer incoming calls and to place calls from the Dialpad. From
Standby mode, pressing this key will open the All Calls list.
Directional Key
pressing up, down, left or right.
OK Key
END Key
following options): Silent mode, Airplane mode, and Power off.
Enter Key
message you entered.
scrolls through the menu items and highlights a specific field or object by
selects the highlighted choice.
locks the screen. Press and hold to open the phone options menu (for the
moves the cursor to the next field or text line. In Messaging, this key sends the
●
All screen shots in this guide are simulated. Actual displays may vary.
●
Instructions to perform tasks in this guide are based on the default phone
settings and may change depending on the software version on your phone.
The Basics
23
Page 8

The Basics
24
Installing the Battery and microSD Card
NOTE
It is important to fully charge the battery before initial use of the phone.
The phone comes with a rechargeable battery. Keep the battery
charged while not in use in order to maximize talk, use, and standby
time. The battery charge level is shown at the top of the screen.
Installing the battery
1. Press the bump
on the bottom
part of the cover
and slide the
battery cover
upward to remove
from the back of
the phone.
2. Align the battery
with the terminals
near the bottom
of the phone, then
press the battery
into place.
3. Replace the
battery cover over
the back of the
phone (as
demonstrated).
Slide the battery
cover downward
while applying
steady downward
pressure until it
clicks into place.
Removing the battery
Turn power off. Remove the battery cover (as demonstrated in
the previous instructions). Then use the fingertip cutout to lift the
top edge of the battery out.
Page 9
The Basics
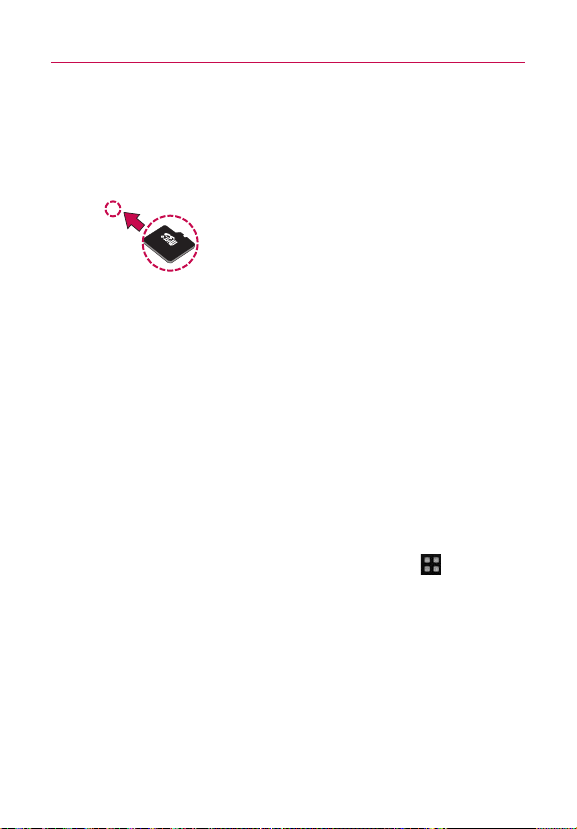
Inserting a microSD card
Gently uncover the microSD slot located on the right side of the
phone. Position the microSD card facing up and slide it into place
until it is fully inserted and locked in place.
NOTE
The microSD card can be easily damaged by improper operation. Please be
careful when inserting, removing or handling it.
Removing the microSD card
Unmount the microSD card (see the steps below). Then, uncover
the microSD slot located on the right side of the phone. Gently
push the exposed edge of the microSD card in with your fingertip
to release it from the slot. Carefully pull the microSD card out of
the slot.
NOTE
To safely remove the microSD card from your phone, unmount it from your
phone first, as described below.
To unmount the microSD card
1. From the Home screen, press the Menu Key .
2. Touch
3. Touch Unmount SD card.
Settings > (scroll the screen up) > SD card & phone
storage.
25
Page 10
The Basics
26
Charging the Phone
Your LG enV-T2 device comes with a cableless travel adapter and a
USB data cable which connect together to charge your phone. To
charge your phone:
NOTICE
Please use only an approved charging accessory to charge your LG phone.
Improper handling of the charging port, as well as the use of an incompatible charger,
may cause damage to your phone and void the warranty.
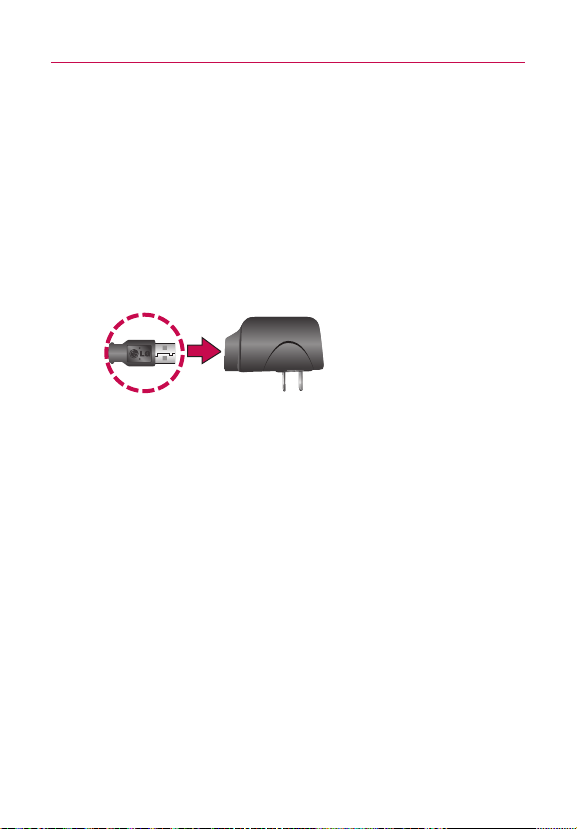
1. Connect the cableless wall adapter and USB data cable.
Connect as shown; the LG logo on the USB cable should
face toward you.
2. Gently uncover the Accessory/Charging port, then plug one
end of the USB cable into the phone's charger port and the
other end into an electrical outlet. The charge time varies
depending upon the battery level.
Battery temperature protection
Though extremely rare, if the battery becomes overheated, the
phone will automatically turn off.
Battery charge level
You can find the battery charge level at the top right of the
screen. When the battery level becomes low, the phone will
notify you and the status light will turn red. Once the battery level
becomes exceedingly low, the phone will shut off without notice.
As a result, unsaved items may be lost.
Page 11

The Basics
Charging with USB
You can use your computer to charge your phone. To be able to
charge with the USB cable, you need to have the necessary USB
drivers installed on your PC first. Connect one end of the USB
cable to the charging accessory port on your phone and connect
the other end to a USB port on your PC (commonly located on the
front panel of the computer). It is best to use the rear USB port
when connecting to a desktop PC. The USB hub should be
powered by an external power source (see NOTES below).
NOTES
●
Low-power USB ports are not supported, such as the USB port on your
keyboard or bus-powered USB hub.
●
LG USB Driver is downloadable from the following site:
http://www.lgmobilephones.com > Click Mobile Support > Select the
Carrier(Verizon) > Select the Model (Ally) > Click USB Cable Driver to
download.
Turning the Phone On and Off
Turning the phone on
©
Press and hold the Power/Lock Key for a couple of
seconds.
NOTE
When you turn on your phone for the first time, follow the instructions on
the screen to activate your device.
Turning the phone off
1. Press and hold the Power/Lock Key until the pop-up
menu appears.
2. Touch
3. Touch OK to confirm that you want to turn off the phone.
Power Off in the pop-up menu.
27
Page 12
The Basics
28
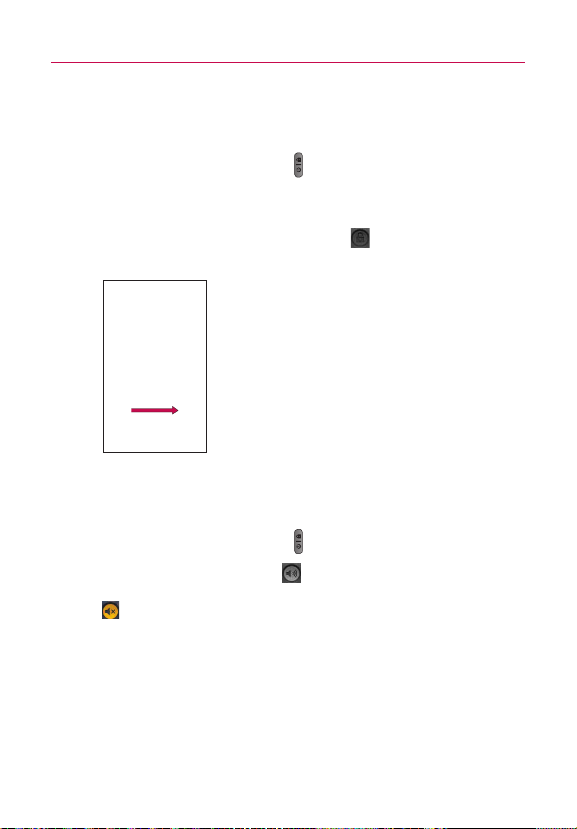
To wake up the phone
If you don’t use the phone for a while, the screen and backlight
will shut off to conserve battery power. To wake up the phone:
1. Press the
Your Lock Screen will appear. See
Power/Lock Key .
“
Locking the Screen”on
page 51
2. Touch and drag the green lock icon to the right.
The last screen you were working on opens.
NOTE
This is the default Lock Screen. If you have set up
an Unlock Pattern, use your fingertip to draw the
pattern.
To turn the phone sounds off
If you're in a place where your phone sounds may disturb others,
you can quickly silence your phone from the lock screen.
1. Press the
2. Drag the
To turn the phone sounds back on, drag the Sounds on icon
Power/Lock Key .
Sounds off icon to the left.
to the left.
Page 13

The Basics
Getting started with your AndroidTMphone
The first time you power on your phone, you’re
prompted to touch the Android logo to begin using
your phone.
You will be offered a chance to learn about your
phone, you will be prompted to create or to sign
into your Google Account, and you will be asked
to make some initial decisions about how you
want to use Android and Google features.
Touch to begin.
Your Google account
You must sign into a Google Account to use GmailTM, Google
TalkTM, Google CalendarTM, and other Google Apps; to download
applications from Android MarketTM; to back up your settings to
Google servers; and to take advantage of other Google services
on your phone.
If you don’t have a Google Account, you will be prompted to
create one. If you have an enterprise account through your
company or other organization, your IT department may have
special instructions on how to sign into that account.
IMPORTANT
●
Some applications, such as Calendar, work only with the first Google Account you add.
If you plan to use more than one Google Account with your phone, be sure to sign
into the one you want to use with such applications first.
When you sign in, your contacts, Gmail messages, Calendar events, and other
information from these applications and services on the web are synchronized with
your phone.
If you don’t sign into a Google Account during setup, you will be prompted to sign in
or to create a Google Account the first time you start an application that requires one,
such as Gmail or Android Market.
●
If you want to use the backup feature to restore your settings to this phone from
another phone that was running Android release 2.0 or later, you must sign into your
Google Account now, during setup. If you wait until after setup is complete, your
settings will not be restored.
29
Page 14
The Basics
30
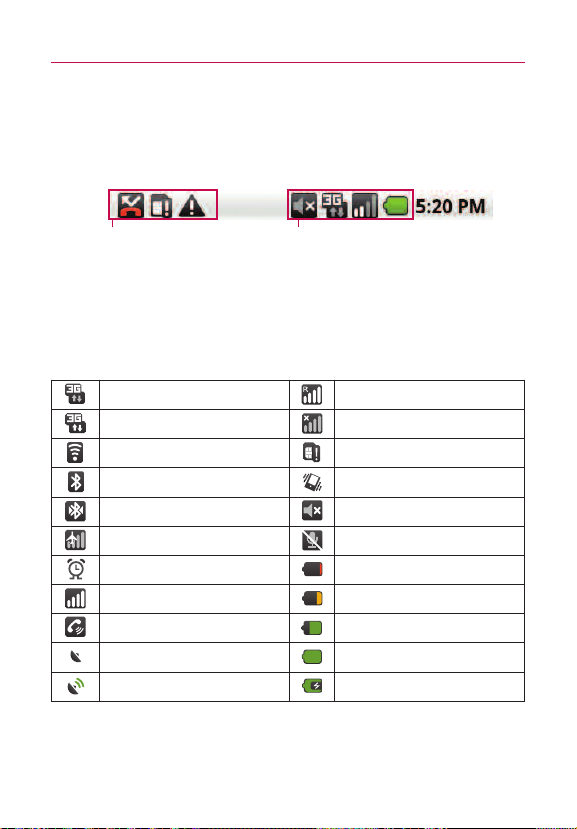
Phone’s Status Icons
The Status bar appears at the top of every screen. It displays icons
indicating that you’ve received notifications (on the left) and icons
indicating the phone’s status (on the right), along with the current time.
Notification icons Status icons
If you have more notifications than can fit in the status bar, a plus
icon prompts you to open the Notifications panel to view them all.
“
Managing Notifications”on page 46.
See
Status icons
The following icons indicate the status of your phone.
3G connected Roaming
3G in use No signal
Connected to a Wi-Fi network No microSD card installed
Bluetooth is on Vibrate mode
Connected to a Bluetooth device Ringer is silenced
Airplane mode Phone microphone is muted
Alarm is set Battery is very low
Signal strength Battery is low
Speakerphone is on Battery is partially drained
GPS is on Battery is full
Receiving location data from GPS Battery is charging
Page 15
The Basics
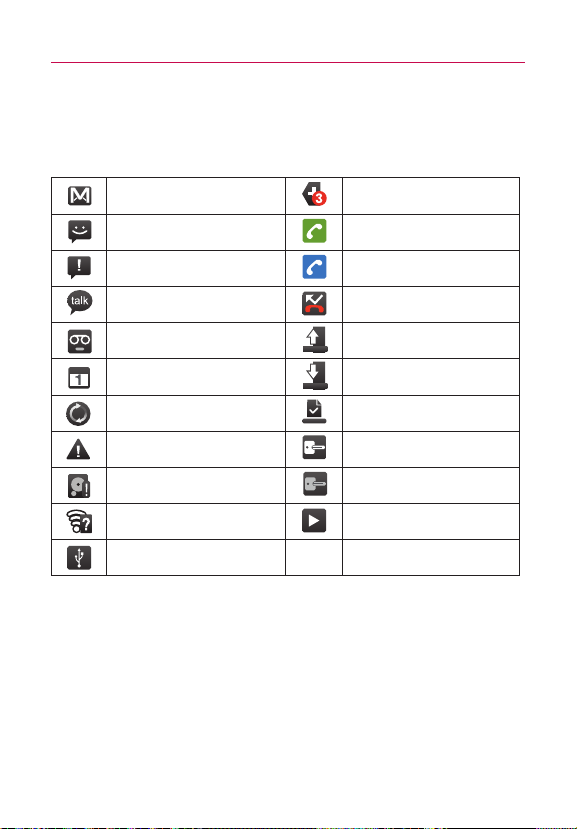
Notification icons
The following icons indicate that you've received a notification.
See “Managing Notifications”on page 46 for information about
responding to these notifications.
New Gmail message
New text or multimedia
message
Problem with text or
multimedia message delivery
New Google Talk message Missed call
New voicemail Uploading data
Upcoming event Downloading data
Data is syncing Download finished
Problem with sign-in or sync Connected to VPN
microSD card is full Disconnected from VPN
An open Wi-Fi network is
available
Phone is connected via USB
cable
3 more notifications not
displayed
Call in progress
Call in progress using
Bluetooth head-set
Song is playing
31
Page 16
The Basics
32
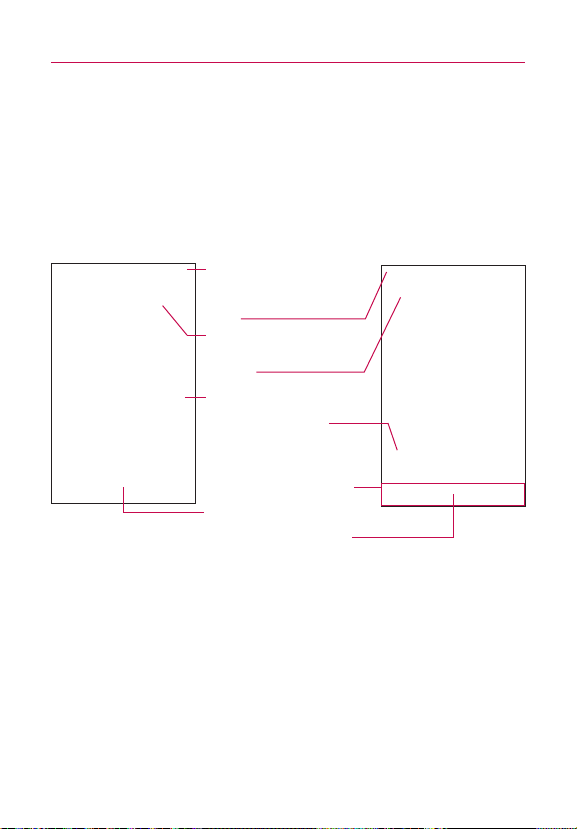
Getting to Know the Home Screen
The Home screen is your starting point to access all the features on
your phone. It displays application shortcuts, icons, widgets,
shortcuts, and other features. You can choose between two Home
screen themes: Android Home and LG Home. They work
essentially the same with slight differences that you may prefer
depending on how you use your device.
Android Home
Status Bar
Shows device status information
including the time, signal strength,
battery status, and notification
icons.
Search Bar
Touch to search for items saved
on your phone. It also searches
the web.
Application Icon
Touch an icon (application, folder,
etc.) to open and use it.
Quick Keys
Provide easy, one-touch access to
the functions you use the most.
Launch Key
Touch to open the Launch screen
to view installed applications.
LG Home
Page 17
The Basics
Quick Keys
When using the LG Home theme, the Quick Keys are located on
the bottom of the screen. If you choose Android Home as your
display theme, these functionalities are moved onto the Home
screen.
: opens the
Phone application which displays the dialpad so
you can dial an unsaved number. Also provides additional
tabs to access Call log, Contacts, and your Favorites.
: opens your Contacts list.
: opens the Launch screen and displays phone options and
applications.
: opens the
: opens the
Messaging application.
Browser application.
Selecting a Home Screen Theme
Initially, you will be prompted to choose a Home screen theme.
You can change themes any time, just access the Launch screen
and open the Theme application.
1. From the Home screen, touch the Launch icon:
●
On Android Home, touch .
●
On LG Home, touch .
2. Touch the Themes icon .
3. Touch either
your preference.
Android Home or LG Home, depending on
33
To return to the Home screen
©
Press the Home Key at any time, from any application.
Page 18
The Basics
34
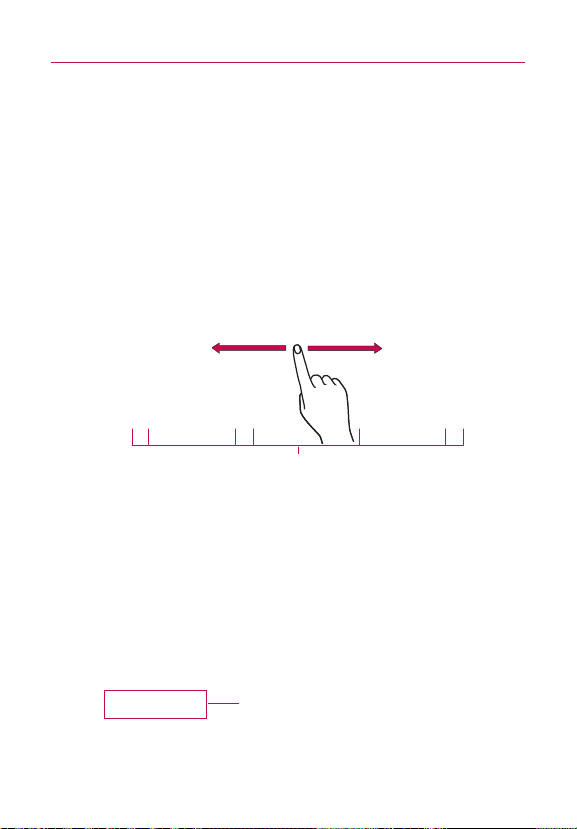
To view other Home screen panes
©
Slide your finger left or right across the Home screen.
The Home screen spans five screen widths allowing more
space for icons, widgets, shortcuts, and other items. The
main pane is in the center with two extension panes on
either side of it. For more information on sliding, see
"Touchscreen" on page 35.
Android Home screen
The dots indicate which Home screen pane you are viewing.
©
Touch and hold the Home screen pane dots on the lower
Location Indicator
left or right of the screen to view thumbnails of the Home
screen panes, then touch one to go to that specific pane.
Home screen pane thumbnails.
Touch one for immediate access.
Page 19
LG Home screen
The Basics
35
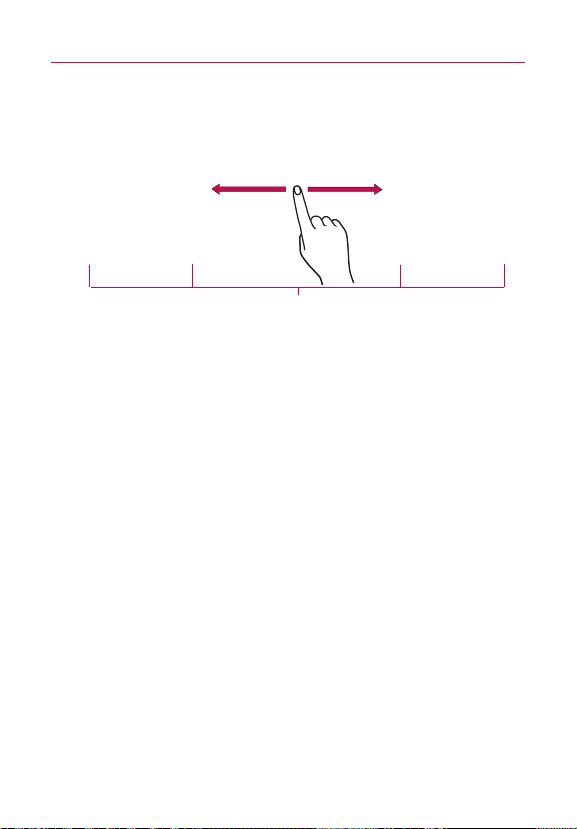
A solid dot on the Launch quick key indicates which Home screen pane you are viewing.
Home screen pane dots
Touchscreen
Your touchscreen provides an excellent way to interact with and
use your Android phone. With the touch of your finger, you can
download and use available applications, make menu selections,
and access data saved to your phone.
The following terms are used for describing the different available
actions using the touchscreen:
Touch A single finger touch selects items. For example, touch an
icon (e.g., application or menu item), touch words (e.g., menu
selection or to answer onscreen question), or touch letters to type.
Touch and hold Touch and hold an item on the screen by
touching it and not lifting your finger until an action occurs. For
example, to open a pop-up menu for customizing the Home
screen, touch an empty area on the Home screen until the menu
pops up.
Drag Touch and hold an item for a moment and then, without
lifting your finger, move your finger on the screen until you reach
the target position. You can drag items on the Home screen to
reposition them, as described in
on page 52, and you drag to open the Notifications panel, as
described in “Managing Notifications”on page 46.
“
Customizing the Home Screen
”
Page 20
The Basics
36
Swipe or slide To swipe or slide, quickly move your finger across
the surface of the screen, without pausing when you first touch it
(so you don’t drag an item instead). For example, you can drag
slide the screen up or down to scroll a list, or browse through the
different Homescreens by swiping from left to right (and vice
versa).
Double-tap Double-tap to zoom a webpage or a map. For
example, quickly double-tap a section of a webpage to zoom that
section to fit the width of the screen. You can also double-tap to
control the Camera zoom, in Google
Maps, and in other applications.
Dynamic touch Use your index finger and thumb in a pinch or
spread motion to zoom in or out when using the browser, map or
pictures.
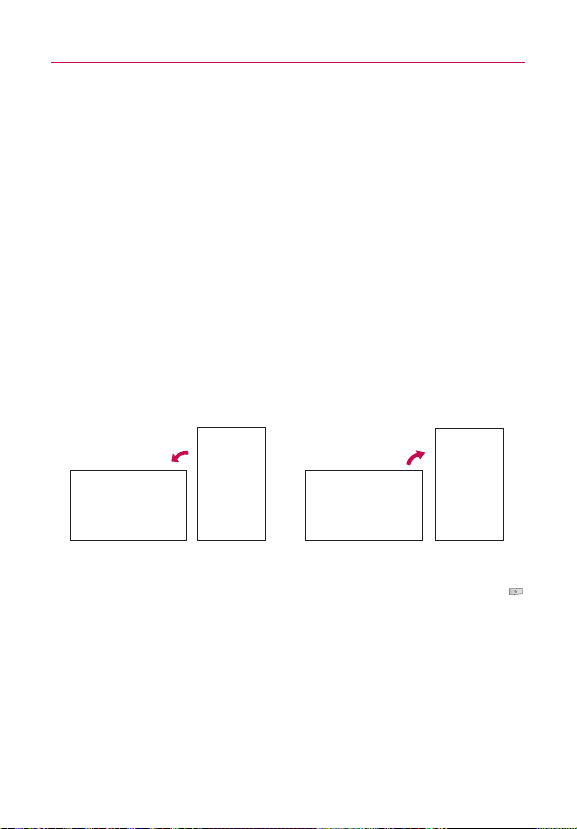
Rotate the screen From many applications, the orientation of the
screen rotates with the phone as you turn it from upright to
sideways and back again.
Rotate the phone counter-clockwise for
landscape orientation.
NOTE
To turn this feature on and off, from the Home screen, press the Menu Key
and touch Settings > Sound & display > then, select/deselect Orientation.
Rotate the phone clockwise for portrait
orientation.
QWERTY Keyboard
Your device has a built-in, slide out QWERTY keyboard, specifically
designed for easy and comfortable text entry. The QWERTY
keyboard uses the same layout and works just like the keyboard on
your computer. Slide the QWERTY keyboard out when you are
ready to enter text. See “Slide Out QWERTY Keyboard”on page 22
for the special key functions.
Page 21
The Basics
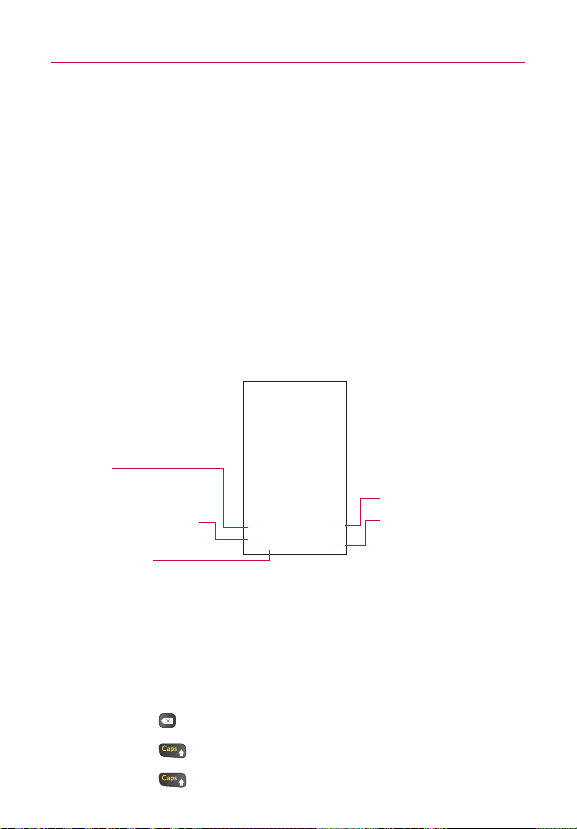
Onscreen Keyboard
You can also enter text using the onscreen keyboard. The onscreen
keyboard displays automatically on the screen when you need to
enter text. To manually display the keyboard, simply touch a text
field where you want to enter text.
Shift Key
Touch once to capitalize the
next letter you type.
Double-tap for all caps.
Number and Symbols Key
Touch to change input to
number and symbol entry.
Voice to Text Key
Touch to enter text by voice.
Delete Key
Emoticon Key
Touch to enter an
emoticon. Touch and hold
for additional emoticons.
Entering Text
37
Using the QWERTY keyboard
1. Slide the QWERTY keyboard out to enter text.
2. Use your fingers to enter text.
●
Press to delete characters to the left of the cursor.
●
Press once to capitalize the next letter you type.
●
Press twice for all caps; press it again to switch back.
Page 22

The Basics
ALT
?123
.
DEL
X
38
●
Press and hold vowels, or the C, N, or S keys, to open a
pop-up window where you can touch other variations for
the letter (e.g., accents, tilda, etc.).
●
Press and to open a pop-up window with a set
of commonly used symbol keys.
●
Press to enter alternate characters, such as @ for the
. To lock the Alt key function, press twice; press it
again to switch back to normal entry mode.
Using the onscreen keyboard
1. Touch a text field where you want to type. The onscreen
keyboard will open automatically.Text fields for phone
numbers and other special purposes may display numbers
and symbols or other custom keyboards to make it easier to
enter the required information.
2. Touch the keys on the keyboard to start typing.
●
Touch to delete characters to the left of the cursor.
●
Touch once to capitalize the next letter you type.
●
Touch and hold for all caps. Touch again to switch back
to normal entry.
●
Touch and hold a vowel or the C, N, or S key to open a
small, pop-up window where you can touch other
variations for the letter (e.g., accents, tilda, etc.).
●
Touch and hold to open a pop-up window with a set of
commonly used symbol keys.
●
Touch to switch to the numbers and symbols keyboard.
Touch to view additional symbols; touch it again to
switch back.
●
Touch and hold almost any of the number and symbol keys
to open a window of additional symbols.
3. When you're finished typing, touch the
close the keyboard.
Back Key to
Page 23

The Basics
NOTE
To change the keyboard orientation, turn the phone sideways or upright.
The keyboard rotates to take best advantage of the new phone
orientation. Many people find the larger horizontal onscreen keyboard
easier to use.
You can control whether the screen
changes orientation automatically
when you turn the phone. See
"Orientation" under "Sound & display
settings screen" on page 245.
Editing text
You can edit the text you enter in text fields and use menu
commands to cut, copy, and paste text, within or across
applications.
To cut or copy and paste all the text
1. Touch and hold the text field that contains the text to edit.
2. A pop-up menu opens with options for cutting, copying, and
performing other tasks with the text field.
3. Touch
4. Touch the text field where you want to paste the text.
5. Put the cursor on the location where you want to paste the
6. Touch and hold the text field.
Cut all or Copy all.
You can paste text that you cut or copied from one
application into a text field in any application.
text.
●
Touch the location where to move the cursor.
●
Press the Directional Key left or right on the QWERTY
Keyboard.
3939
Page 24

The Basics
40
7. When the pop-up menu opens, touch Paste.
The text is inserted at the cursor. The text that you pasted
also remains in a temporary area on the phone, so you can
paste that same text in another location.
To cut or copy and paste some of the text
1. Put the cursor on the starting or ending point of the text to
copy or paste.
●
Touch the location where to move the cursor.
●
Press the Directional Key left or right on the QWERTY
Keyboard.
2. Touch and hold the text field that contains the text to edit.
3. A pop-up menu opens with options for cutting, copying, and
performing other tasks with the text field.
4. Touch
5. Touch the text to select or press the Directional Key left or
6. Touch and hold the text field again.
7. When the pop-up menu opens, touch
8. Touch the text field where you want to paste the text.
9. Put the cursor on the location where you want to paste the
10. Touch and hold the text field.
Select text.
right. Selected text is highlighted in orange.
Cut or Copy.
You can paste text that you cut or copied from one
application into a text field in any application.
text.
●
Touch the location where to move the cursor.
●
Press the Directional Key left or right on the QWERTY
Keyboard.
Page 25
The Basics
11. When the pop-up menu opens, touch Paste.
The text is inserted at the cursor. The text that you pasted
also remains in a temporary area on the phone, so you can
paste that same text in another location.
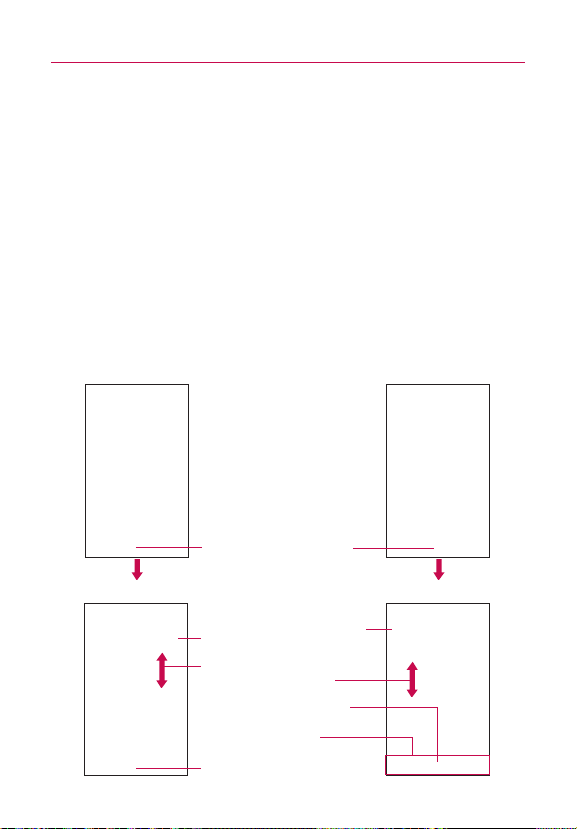
Applications: How to View, Open and Switch
All of the applications on your phone, including any applications that
you downloaded and installed from Android MarketTMor other
sources, are grouped together on one Launch screen that you
access from your Home screen. If you have more applications than
can fit on the Launch screen, you can slide the screen up or down
to view more.
Overview
Android Home screen LG Home screen
Touch to open Launch screen
Launch screen Launch screen
Touch an application icon to open
the application
Slide the screen up or down to
bring more icons into view
Touch to close Launch screen
Quick Keys
Touch to close Launch screen
41
Page 26

The Basics
42
Opening and Closing the Launch screen
Opening the Launch screen
Touch the Launch icon on your Home screen:
©
From Android Home, touch .
©
From LG Home, touch .
Closing the Launch screen
To manually close the Launch screen, press the Home Key ,
or:
©
From Android Home, touch .
©
From LG Home, touch .
NOTE
The Launch screen closes automatically when you touch an icon to
open its application. Dragging an icon onto your Home screen also
closes the Launch screen automatically.
Customizing the LG Home Launch Screen
You can customize the LG Home Launch screen by moving the
position of applications so that you don't have to scroll the screen
up to access the applications you use most often. You can also
add additional categories to the screen to organize your files.
Moving application positions
1. From the Home screen, touch the Launch icon .
2. Press the
3. Drag the application icon to the position you want, then lift
your finger. Application icons to the right of the position shift
accordingly.
Menu Key and touch Move Items.
Page 27

The Basics
Adding a category
1. From the Home screen, touch Launch icon .
2. Press the Menu Key and touch Add category.
3. Touch
New category, enter a category name, then touch the
OK button.
Opening and Switching Applications
Multi-tasking is easy with AndroidTMbecause open applications
keep running even when you open another application. There’s
no need to quit an application before opening another. You can
use and switch among several open applications. Android
manages each application, stopping and starting them as needed,
to ensure that idle applications don’t consume resources
unnecessarily.
Opening an application
©
Open an application simply by touching its icon on the
screen.
TIP
You can customize your Home screen with the application icons you use
most often. Applications are located on the Launch screen, but you can
copy any application icon to your Home screen for faster access. No
matter where the icon is, on the Launch screen or your Home screen,
just touch it to open and use it.
Opening multiple applications
1. Touch an application icon to open it.
2. Press the Home Key .
NOTE
If the application icon you want is on your Home screen, simply touch
the icon to open and use it.
3. Touch the Launch icon.
©
On Android Home, touch .
©
On LG Home, touch .
4. Touch the icon for the other application you want to open.
43
Page 28
The Basics
44
Switching between multiple applications
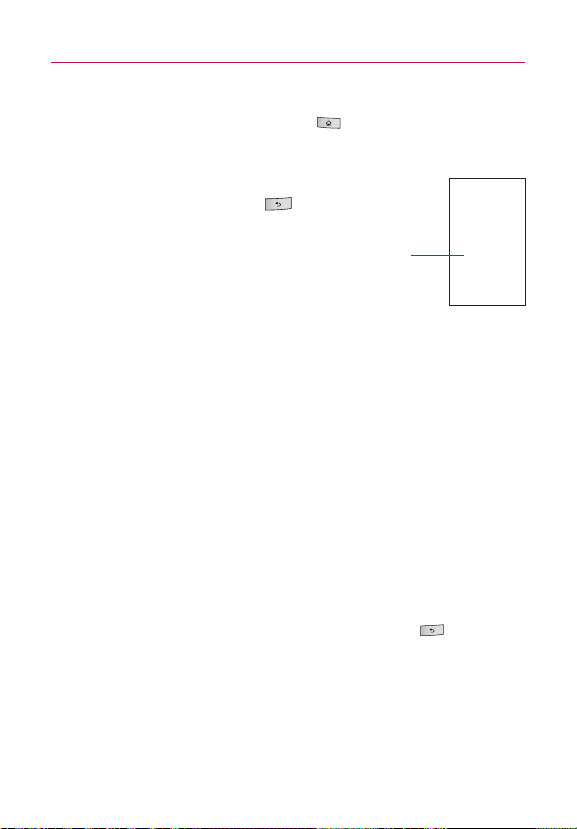
1. Press and hold the Home Key .
A small window opens with icons of applications that
you’ve used recently.
2. Touch the application icon you want to open.
Or touch the
Back Key to return to the
current application.
Touch an icon to open an application
've used recently.
you
Adding application icons to the Home screen
Customize your Home screen with the applications you use most
often.
1. Open the Launch screen.
2. Touch and hold the application icon you want to add to your
Home screen. Your Launch screen will be minimized so that
you can place the icon on a Home screen.
3. Lift your finger to place it, or drag the icon to where you
want it on the screen, then lift your finger.
Setting Keyboard Shortcuts to Applications
You can set certain keys to launch selected applications. This may
be helpful for multitasking when you are using the slideout
QWERTY keyboard.
©
From the Home screen, press the Menu Key > touch
Settings > touch Applications > touch Quick launch, then
select the keyboard shortcuts you want to set.
Page 29
The Basics
Working with Menus
There are two kinds of Android menus: Options menus and Context
menus.
Options menus
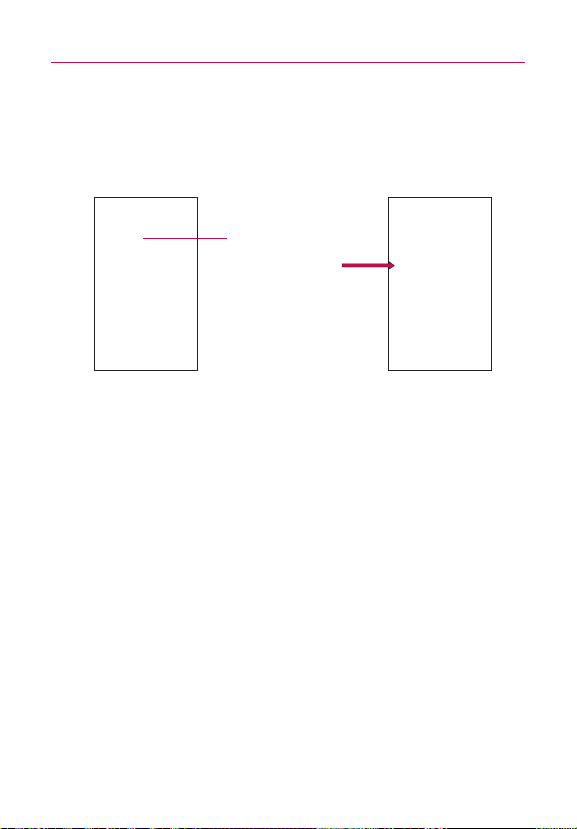
Options menus contain tools that apply to the activities of the
current screen or application, not to any specific item on the
screen. To open the available options menu, press the Menu Key
. Not all applications have Options menus; if you press the
Menu Key on a screen that has no Options menu, nothing will
happen.
Some applications have more Options menu items than can fit in
the options menu; touch
More to open the additional items.
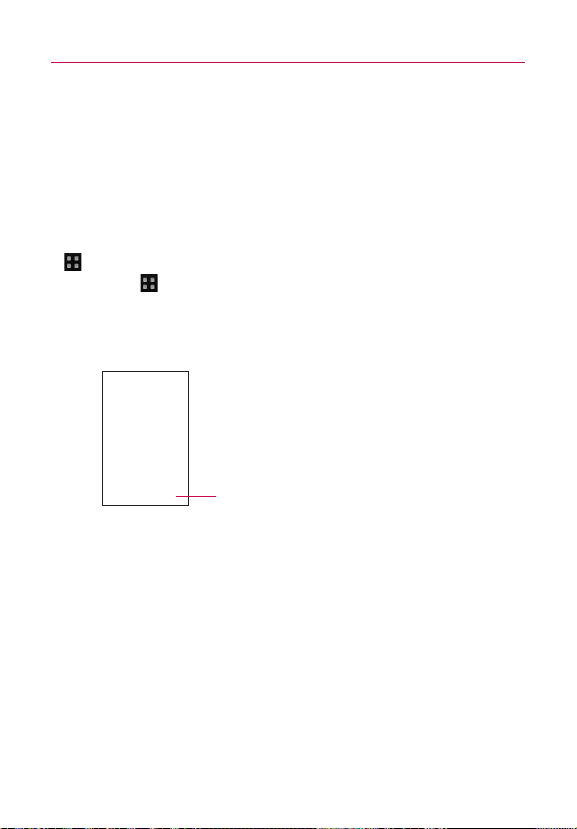
Options menus contain items that
apply to the current screen or
to the application as a whole.
Touch to open more menu items.
45
Page 30
The Basics
46
Context menus
Context menus contain options that apply to a specific item on
the screen. To open a Context menu, touch and hold an item on
the screen. Not all items have Context menus. If you touch and
hold an item that has no Context menu, nothing will happen.
When you touch and hold
certain items on a screen, a
Context menu opens.
Managing Notifications
Notification icons report the arrival of new messages, calendar
events, alarms, as well as ongoing events, such as when you are in
a call.
When you receive a notification, text appears briefly and the
notification icon will be displayed in the Status bar. For descriptions
of the various notification icons, see
You can open the Notifications panel to view a list of all recent
notifications. Depending on your settings, you may hear a
notification sound, the phone may vibrate, and the Status Light may
blink.
NOTE
Adjusting sound volume and other general notifications settings is described in
“Sound & display” on page 245.
Applications whose activities produce notifications, such as Gmail
and Google Talk, have their own settings, which you can use to
configure whether, and how, they send notifications. See the
sections on those applications for details.
“
Notification icons”on page 31.
TM
Page 31

The Basics
To open the Notifications panel
©
Touch and drag the Status bar to the bottom of the screen.
OR
©
From the Home screen, press the Menu Key
and touch Notifications.
The Notifications panel displays your wireless
provider and a list of your current notifications,
organized into ongoing and
event-based notifications.
Touch a notification to open it in
its application.
To respond to a notification
1. Open the Notifications panel. Your current notifications are
listed in the panel, each with a brief description.
2. Touch a notification to view it.
The Notification panel will close and the application that
corresponds to your response will open. For example, new
voicemail notifications dial your voicemail box, and network
disconnect notifications open the list of configured networks
so you can reconnect.
To clear all notifications
1. Open the Notifications panel.
2. Touch the
All event-based notifications will be cleared; ongoing
notifications will remain in the list.
Clear button at the top right of the panel.
47
To close the notifications panel
Touch and drag the tab at the bottom of the Notifications panel to
the top of the screen or just touch the Back Key .
The panel will also close when you touch a notification.
Page 32
The Basics
48
Searching Your Phone and the Web
You can search for information on your phone and on the web by
using the Quick Search BoxTMor Google searchTM.
Some applications, such as Contacts, GmailTM, and Google MapsTM,
have the ability to search contents within those specific
applications.
Along with being able to search by typing in search terms, you are
also able to search by voice.
NOTE
Using the Voice Search application, you can also use Voice Commands, such as
voice dialing, as described in “Dialing by Voice”on page 77.
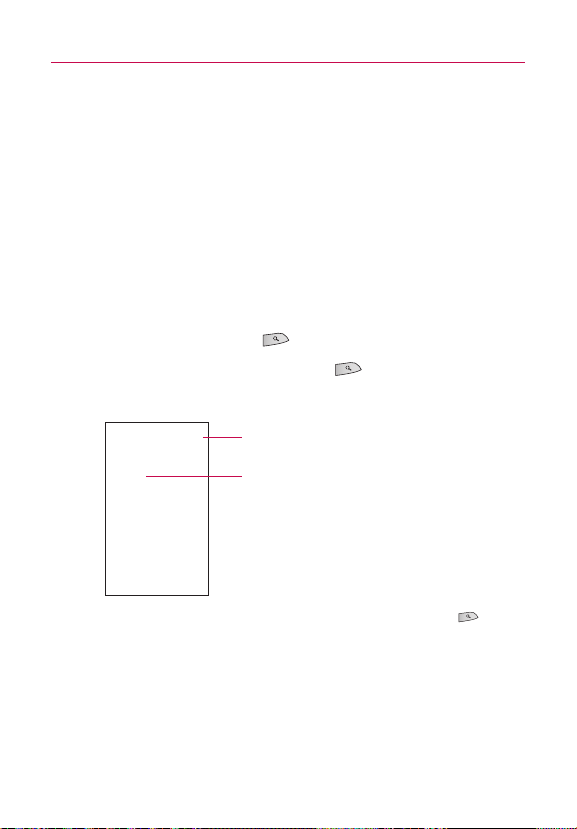
Phone and Web search using text entry
1. Touch the Search Key .
When you touch the
or in the other applications that support this, the Quick
Search Box will open automatically.
NOTE
If you're using the phone with the slide open, press the Search Key to open
the Quick Search Box to conduct a search.
Search Key on the Home screen
Voice Search
Touch to search by voice.
Recent search results
Provides one touch shortcut to
previously searched terms.
Page 33

The Basics
In some applications, such as Gmail, Contacts, and Browser,
the application's own search box opens when you touch the
Search Key . This is indicated by the application's icon
on the left side of the search box.
To change from the application's search feature, touch the
Search Key again, this will switch the search box to the
Quick Search Box. No matter what application you're
working in (except for Camera), touching the Search Key
twice will open the Quick Search Box.
2. Enter the text you're searching for in the Quick Search Box.
Touch to conduct the search.
As you type, search results from
your phone, previous search
terms, and web search
suggestions appear. Touch an
item to search that term.
You can use the Search preferences to configure some
aspects of Google web search (for example, whether it
makes suggestions below the Quick Search Box as you
type), and what phone features you want to include in
searches. See
3. Touch to search for the entered terms.
OR
If what you want to search for what appears in the
suggestions list, touch that item to conduct the search.
“
Search”on page 254.
49
Page 34

The Basics
50
Web search using voice command
©
Touch and hold the Search Key .
OR
©
Touch the Microphone icon from the Quick Search Box.
When you stop speaking, Google Search by Voice analyzes
your speech and displays the results of your search.
The available Voice Commands are:
●
Say “Call,”followed by a name from your contacts,
followed by the kind of phone number (“mobile,
and so on). For example, “Call Mike home.”If there is a
single match, the number is dialed automatically. See
“
Dialing by Voice”on page 77.
●
Say “Directions to,”followed by an address, name,
business name, type of business, or other destination, to
get directions to that location from Google MapsTM.
●
Say “Navigate to,”followed by an address, name,
business name, type of business, or other destination to
get spoken, turn-by-turn directions to that destination.
●
Say “Map of,”followed by an address, name, business
name, type of business, or other location, to view that
location on Google Maps.
” “
work,
”
Page 35

The Basics
Locking the Screen
You can lock your screen so that only you can unlock it to make
calls, access your data, buy applications, and so on. See “Location &
security”on page 247 for other ways to protect your phone and
privacy.
Setting a Lock Pattern
1. From the Home screen, press the Menu Key .
2. Touch
3. Touch
4. You're prompted to draw and redraw your own pattern.
From then on, any time you wish to turn the phone on or
unlock the screen, you will need to draw your unlock pattern to
unlock the screen.
Settings > Location & security.
Set unlock pattern (under the Screen unlock pattern
section of the settings). The first time you do this, you will
see a tutorial with instructions on how to create an unlock
pattern.
Draw your unlock pattern.
Touch Continue to draw your
pattern again to confirm it.
51
Page 36

The Basics
52
Customizing the Home Screen
You can personalize your Home screen by adding application icons,
shortcuts, widgets, and other items to any Home screen pane. You
can also change the wallpaper.
To add an item to the Home screen
1. Go to the Home screen pane where you want to add the
item. For an introduction to working with the Home screen,
see “Getting to Know the Home Screen”on page 32.
2. Press the
Or, just touch and hold an empty spot on the Home screen
pane.
NOTE
3. In the menu that opens, touch the type of item to add.
You can add the following types of items to the Home screen:
Shortcuts Add shortcuts to applications, a bookmarked webpage,
a favorite contact, a destination in Google Maps, a Gmail label, a
music playlist, and more. The shortcuts available depend on the
applications you have installed.
Widgets Add any of a variety of widget applications to your Home
screen, including a clock, a music player, a picture frame, Google
search bar, a power manager, a calendar of upcoming
appointments, a News and Weather widget, and more. Note that
more widgets can also be found on Android MarketTM.
Folders Add a folder where you can organize other Home screen
shortcuts and icons, or folders that contain all your contacts,
contacts with phone numbers, or starred contacts. Your folders'
contents are kept up to date automatically. For information on
how to rename a folder, go to page 54.
Menu Key and touch Add.
If there is no available space on a particular Home screen pane, Add will
not be available; you must delete or remove an item before you can add
another item. In this case, you have the option of switching to another
Home screen pane.
Page 37

The Basics
To move an item on the Home screen
1. Touch and hold the item.
2. Drag the item to a new location on the screen.
Pause at the left or right edge of the screen to drag the item
onto the next available Home screen pane.
3. When the item is where you want it, lift your finger.
To remove an item from the Home screen
1. Touch and hold the item, note that the Launch icon changes
to an icon of a trash can.
2. Drag the item to the Trash Can icon.
3. When the icon turns red, lift your finger.
To change the Home screen wallpaper
1. From the Home screen, press the Menu Key and touch
Wallpaper.
You can also touch and hold an empty spot on the Home
screen, then touch Wallpapers in the menu that opens.
2. Touch
3. Touch
Gallery, Live wallpapers, or Wallpapers.
Touch Gallery to use a picture on your phone as a
wallpaper. You can crop the picture before setting it as a
wallpaper.
Touch
Live wallpapers to open a list of animated wallpapers
installed on your phone. Live wallpapers can change
according to the time of day, respond to touching the
screen, tell the time, or offer other information.
Touch Wallpapers to open a screen of wallpaper images
that come with the phone. Slide the thumbnail images left
and right to view the available images.
Set wallpaper or Save.
53
Page 38

The Basics
54
To rename a folder
1. Touch the folder icon to open it.
2. Touch and hold the folder window's title bar.
3. Touch the current folder name in the text box that appears,
then enter the new folder name.
4. Touch
OK.
Connecting Quickly With Your Contacts
As you build up your list of contacts on your phone, you can use
Quick Contact for Android to quickly chat, email, text message,
place a call, or to locate your contacts. Quick Contact for Android is
a special set of icons that you can use to quickly and easily connect
to a contact.
©
Open your Contacts list and touch the contact icon to the
left of the contact's name. A bubble will open with the
available options, displayed as icons. This is the Quick
Contact bubble. Depending on the contact information
saved, the available actions will be displayed above the
name.
©
Touch a Quick Contact icon to communicate with the
contact.
Depending on the icon you've touched, a different
application will open. For example, the Google Maps icon
will be available if an address is saved in that contact entry.
By touching the Google Maps icon, the Google Maps
application will open and the address mapped in Google Maps.
Page 39

The Basics
If you add a shortcut for a contact to your Home screen, you will be
able to open Quick Contact for that contact.
Optimizing Battery Life
You can extend your battery's life between charges by turning off
features that run in the background. You can also monitor how
applications and system resources consume battery power.
Tips to extend the life of your battery
©
Turn off radio communications that you aren't using.
If you aren't using Wi-Fi, Bluetooth, or GPS, use the Settings
menu to turn them off. See “Wireless & networks”on page
241 and “Location & security”on page 247. (Note that the
GPS receiver is only turned on when you're using an
application that makes use of it.)
©
Turn down screen brightness and set a shorter screen timeout.
See “Sound & display settings screen”on page 245.
©
If you don't need them, turn off automatic syncing for Gmail,
Calendar, Contacts, and other applications.
See “Configuring Account Sync and Display Options”on page 99.
©
Use the Power Control widget (located on the fourth Home
screen pane) to control the wireless connections, GPS
connection, Bluetooth power, display brightness, and
syncing activity.
55
Page 40

The Basics
56
To check the battery charge level
©
From the Home screen, press the Menu Key and touch:
Settings > (scroll the screen up) > About phone > Status.
The battery status (charging, discharging) and level (as a
percentage of fully charged) will be displayed at the top of
the screen.
To monitor and control what uses the battery
The Battery Use screen allows you to see which applications are
consuming the most battery power. Information on this screen
allows you to identify downloaded applications you may want to
turn off when not being used, so you can get the most out of your
battery power.
©
From the Home screen, press the Menu Key and touch:
Settings > (scroll the screen up) > About phone > Battery use.
The screen will display battery usage time. Either how long
since last connected to a power source, if connected to a
power source, and how long you were last running on
battery power.
The list of applications or services using battery power are
displayed in order of energy used, from greatest amount to
least.
©
Touch an application in the Battery Use screen to see the
details about its power consumption.
Different applications offer different kinds of information, and
they may even include buttons that open settings you can
use to reduce power consumption by that application.
Page 41

Connecting to Networks and Devices
Connecting to Mobile Networks
When you buy your phone and sign up for service, your phone is
configured to use your provider's mobile networks for voice calls
and for transmitting data.
Different locations may have different mobile networks available.
Initially, your phone is configured to use the fastest mobile network
available for data. But you can configure your phone to use only a
slower 1X network for data, to extend the life of your battery,
between charges. You can also configure your phone to access a
different set of networks entirely, or to behave in specific ways
when roaming.
The icons in the Status bar indicate which kind of data network
you're connected to and the network signal strength.
Connected to the high-speed EVDO
Connected to the 1x data network
The more bars the stronger the wireless signal
Connected to another wireless service provider's network (roaming)
When connected to slower networks, you may want to postpone
using your phone for data-intensive tasks until you are connected to
a faster network again, or find a Wi-Fi network to connect to. See
“
Connecting to Wi-Fi Networks”on page 59.
57
Page 42

Connecting to Networks and Devices
58
To disable data when roaming
You can prevent your phone from transmitting data over other
carriers' mobile networks when you leave an area that is covered
by your carrier's networks. This is useful for controlling expenses
if your cell plan doesn't include data roaming.
1. From the Home screen, press the
2. Touch
3. Touch
Settings > Wireless & networks > Mobile networks.
Data roaming to remove the checkmark from the
Menu Key .
box.
With Data roaming unchecked, you can still transmit data
with a Wi-Fi connection. See “Connecting to Wi-Fi Networks
on page 59.
To limit your data connection to 2G networks
You can extend your battery life by limiting your data connections
to 2G networks. When you are connected to a 2G network, you
may want to postpone activities that transmit a lot of data, such
as sending, uploading, or downloading pictures or video, until you
are connected to a faster mobile or other wireless network.
1. From the Home screen, press the
eless & networks > Mobile networks >
2. Touch
Settings > W
Network mode
ir
.
3. Touch 1x only.
Menu Key .
”
Page 43

Connecting to Networks and Devices
Connecting to Wi-Fi Networks
Wi-Fi is a wireless networking technology that can provide Internet
access at distances of up to 100 meters, depending on the Wi-Fi
router and your surroundings.
To use Wi-Fi on your phone, you must connect to a wireless access
point, or “hotspot.”Some access points are open and you can
simply connect to them. Others are hidden or implement other
security features, so you must configure your phone so it can
connect to them.
Turn off Wi-Fi when you're not using it, to extend the life of your
battery.
The following Status bar icon indicates your Wi-Fi status.
Connected to the fastest networks
When you connect to a Wi-Fi network, the phone obtains a network
address and other information it needs from the network, using the
DHCP protocol. To configure the phone with a static IP address and
other advanced settings, press the
Advanced. See
“
Advanced Wi-Fi settings screen”on page 242.
To turn Wi-Fi on and connect to a Wi-Fi network
1. From the Home screen, press the Menu Key .
2. Touch
3. Touch
Settings > Wireless & networks > Wi-Fi settings.
Wi-Fi to turn Wi-Fi on and scan for available Wi-Fi
networks.
●
List of available Wi-Fi networks will be displayed. Secured
networks are indicated by a lock icon.
●
If the phone finds a network that you have connected to
previously, it automatically connects to it.
Menu Key and touch
59
Page 44

Connecting to Networks and Devices
60
4. Touch a network to connect to it.
●
If the network is open, you will be prompted to confirm
that you want to connect to that network by touching
Connect.
●
If the network is secured, you will be prompted to enter a
password. (Ask your network administrator for details.)
●
When you're connected to a network, you can touch the
network name in the Wi-Fi settings screen for details about
the speed, security, address, and related settings.
To receive notifications when open networks are in range
By default, when Wi-Fi is on, you receive notifications in the
Status bar when your phone detects an open Wi-Fi network.
1. Turn on Wi-Fi, if it's not already on.
2. From the Wi-Fi settings screen, touch
Network notification
to checkmark the box.
Touch again to remove the checkmark, and stop receiving
notifications.
To add a Wi-Fi network
You can add a Wi-Fi network so the phone will remember it, along
with any security credentials, and connect to it automatically when
it is in range. You can also add a Wi-Fi network manually if it does
not broadcast its name (SSID) or if you want to add a Wi-Fi
network when you are out of its range.
To add a secured network, you need to contact the network's
administrator to obtain the password or other required security
credentials.
1. Turn on Wi-Fi, if it's not already on.
2. From the Wi-Fi settings screen, touch
Add Wi-Fi network.
Page 45

Connecting to Networks and Devices
3. Enter the SSID (name) of the network. If the network is
secured, touch the Security drop-down menu and touch the
type of security deployed on the network.
4. Enter the required passwords and security credentials.
5. Touch
Save.
The phone will connect to the wireless network. Any
credentials that you entered are saved, so you are
connected automatically the next time you come within
range of this network.
To forget a Wi-Fi network
You can make the phone forget about the details of a Wi-Fi
network that you added. For example, if you don't want the phone
to connect to it automatically or if it is a network that you no
longer use.
1. Turn on Wi-Fi, if it's not already on.
2. In the Wi-Fi settings screen, touch and hold the name of the
network.
3. Touch
Forget network.
61
Page 46
Connecting to Networks and Devices
62
Connecting to Bluetooth Devices
Bluetooth is a short-range wireless communications technology that
devices can use to exchange information over a distance of about
30 feet. The most common Bluetooth devices are headphones for
making calls or listening to music, hands-free kits for cars, and other
portable devices, including laptops and cell phones.
There are several Bluetooth profiles that define the features and
communications standards for Bluetooth devices.
To connect to a Bluetooth device, you must turn on your phone's
Bluetooth. To use your phone's Bluetooth with another device, you
must first pair the two devices. Pairing creates a secure
connections between the two devices.
Turn off Bluetooth when you're not using it to extend the life of
your battery between charges. Bluetooth is one of the wireless
functions that is turned off when Airplane mode is set to On.
The Status bar displays icons that indicate Bluetooth status.
Bluetooth is on
Connected to a Bluetooth device
To turn Bluetooth on or off
1. From the Home screen, press the Menu Key .
2. Touch
3. Touch
The phone supports HFP, HSP, A2DP, AVRCP, OPP, PBAP, FTP.
Bluetooth®QD ID B016383
Settings > Wireless & networks.
Bluetooth to turn on or off.
Page 47

Connecting to Networks and Devices
To change your phone’s Bluetooth name
Your phone has a generic Bluetooth name by default, which is
visible to other devices when you set the phone as 'Discoverable'.
You can change the name to customize it to your preference.
1. From the Home screen, press the
2. Touch
Settings > Wireless & networks > Bluetooth settings.
●
If Bluetooth is off, touch Bluetooth to turn it on.
Menu Key .
3. Touch Device name, enter a new name then touch OK.
To pair your phone with a Bluetooth device
You must pair your phone with another device before you can
connect to it.
1. From the Home screen, press the
2. Touch
Settings > Wireless & networks > Bluetooth settings.
●
If Bluetooth is off, touch Bluetooth to turn it on.
●
Your phone will scan for and display the IDs of all available
Bluetooth in-range devices.
●
If the device you want to pair with isn't on the list, make
sure the target device is set to be discoverable, then touch
Scan for devices to scan again.
3. Touch the ID of the device you want to pair with your phone.
●
Often, the target device will be discovered and pairing will
occur automatically.
●
If you're prompted to enter a passcode, try entering 0000
or 1234 (the most common passcodes), or consult the
documentation that came with the target device to find its
passcode.
●
Once the pairing is successful, your phone will connect to
the device.
Menu Key .
63
Page 48

Connecting to Networks and Devices
64
To connect to a Bluetooth device
Once paired, you can connect to a Bluetooth device as needed.
1. From the Home screen, press the
2. Touch
Settings > Wireless & networks > Bluetooth settings.
●
If Bluetooth is off, touch Bluetooth to turn it on.
Menu Key .
3. In the list of Bluetooth devices, touch the name for the
paired device on the list.
To configure the Bluetooth features you want to use
Some Bluetooth devices have multiple profiles. Profiles can be the
ability to transmit your phone conversations, to play music with
Bluetooth stereo headphones, or to transfer files or other data.
1. Touch and hold the device listed in the Bluetooth settings
screen.
2. Touch
Options in the menu that opens.
A screen opens with a list of the available profiles.
3. Touch a profile to add or remove the checkmark (to enable
or disable the profile).
4. When you're finished, touch the
Back Key .
To disconnect from a Bluetooth device
1. Touch the device in the Bluetooth settings screen.
2. Touch OK to confirm that you want to disconnect.
Page 49

Connecting to Networks and Devices
To unpair a Bluetooth device
You can unpair a Bluetooth device and erase all pairing information
about it.
1. Touch and hold the device listed in the
Bluetooth settings
screen.
2. Touch
Disconnect or Disconnect and unpair in the menu
that opens.
Connecting to a Computer via USB
You can connect your phone to a computer with a USB cable to
transfer music, pictures, and other files between your phone's
microSD card and the computer.
WARNING!
When connecting your phone to a computer (and mounting its microSD
card), you must follow your computer's instructions for connecting and
disconnecting USB devices, to avoid damaging or corrupting the files on
your microSD card.
65
Page 50

Connecting to Networks and Devices
66
To connect your phone to a computer via USB
1. Use the USB cable that came with your phone to connect
the phone to a USB port on your computer.
2. Open the Notifications panel then touch
USB connected.
3. Touch Mount in the dialog box that opens to confirm that
you want to transfer files.
●
When the phone is connected as USB storage, you receive
a notification.
●
You phone's microSD card is mounted as a removable
drive on your computer. You can now copy files to and
from the microSD card. For more information, see the
documentation for your computer.
●
During this time, you will not be able to access the
microSD card in your phone, so you can't use applications
that rely on the microSD card, such as Camera, Gallery,
and Music.
To disconnect your phone from the computer
WARNING!
1. On your computer, complete the process to safely Stop, or
Remove, the USB device (in this case, the phone). For
example, use the Safely Remove Hardware option to Stop
the USB device, on Windows®XP.
2. Open the Notifications panel (on your phone) and touch
off USB storage
3. Touch
Carefully follow your computer's instructions to unmount, remove,
or disconnect any removable USB devices or disks, to avoid losing
information on the microSD card when disconnecting your phone
from your computer.
to unmount the microSD card.
Turn off on the dialog box that opens.
Turn
Page 51

Connecting to Networks and Devices
To safely remove the microSD card from your phone
You can safely remove the microSD card from your phone any
time the phone is turned off. If you need to remove the microSD
card while the phone is on, you must unmount the storage card
from the phone first, to prevent corrupting or damaging the
storage card.
1. From the Home screen, press the
2. Touch
3. Touch
Once the notification
Settings > (scroll the screen up) > SD card & phone
storage
.
Unmount SD card.
SD card safe to remove appears in the
Menu Key .
notification bar, you can safely remove the microSD card from the
phone.
To format a microSD card
If you purchase a new microSD card, you may need to format it
before you can use it with your phone. You can also format a
microSD card anytime to erase its contents.
1. From the Home screen, press the
2. Touch
Settings > SD card & phone storage.
NOTE
You can only format a microSD card only when it is unmounted. If
necessary, touch Unmount SD card before proceeding.
3. Touch Format SD card.
●
Touch Format SD card on the warning screen to format
the SD card.
OR
●
Touch the Back Key to exit without formatting.
Menu Key .
67
Page 52

Connecting to Networks and Devices
68
Connecting to Virtual Private Networks
Virtual private networks (VPNs) allow you to connect to resources
inside a secured local network, from outside that network. VPNs
are commonly deployed by corporations, schools, and other
institutions so that their users can access local network resources
when not on campus, or when connected to a wireless network.
There are numerous systems for securing VPN connections,
including some that rely on secure certificates or other methods to
ensure that only authorized users can connect. For information
about installing secure certificates, see
Certificates”on page 70.
To configure VPN access from your phone, you must obtain the
details from your network administrator.
To add a VPN
1. From the Home screen, press the Menu Key .
2. Touch
3. Touch Add VPN.
4. Touch the type of VPN to add.
5. In the screen that opens, follow the instructions from your
6. Press the
Settings > Wireless & networks > VPN settings.
network administrator to configure each component of the
VPN settings.
Menu Key and touch Save.
The VPN will be added to the list on the VPN settings
screen.
“
Working With Secure
Page 53

Connecting to Networks and Devices
To connect to a VPN
1. From the Home screen, press the Menu Key .
2. Touch
Settings > Wireless & networks > VPN settings.
The VPNs you've added are listed on the VPN settings
screen.
3. Touch the VPN to which you want to connect.
4. In the dialog box that opens, enter any requested credentials
then touch
●
When you're connected to a VPN, you will receive an
Connect.
ongoing notification in the Status bar.
●
If you are disconnected, you will receive a notification that
you can touch to return to the VPN settings screen.
To disconnect from a VPN
©
Open the Notifications panel then touch the ongoing
notification for the VPN connection, this will allow you to
disconnect.
69
Page 54

Connecting to Networks and Devices
70
Working With Secure Certificates
If your organization's VPN or Wi-Fi network relies on secure
certificates, you must obtain the certificates and store them in your
phone's secure credential storage before you can configure access
to that VPN or Wi-Fi network on your phone.
For specific instructions, contact your network administrator.
For more information about working with credential storage, see
“
Location & security”on page 247.
To install a secure certificate from the microSD card
1. Copy the certificate from your computer to the root (that is,
not in a folder) of the microSD card.
See “Connecting to a Computer via USB”on page 65 for
information about connecting your phone to a computer and
copying files to the microSD card.
2. From the Home screen, press the
3. Touch
4. Scroll the screen up, then touch
5. Touch the file name of the certificate to install.
6. If prompted, enter the certificate's password then touch
7. Enter a name for the certificate then touch OK.
Settings > Location & security.
Only the names of certificates that you have not already
installed on your phone are displayed.
If you have not already set a password for your phone's
credential storage, you will be prompted to enter a
password for it, twice, then touch OK. For more information
about credential storage, see “Location & security”on page
247.
You can now use the certificate that you installed when
connecting to a secure network. For security purposes, the
certificate will be deleted from the microSD card.
Menu Key .
Install from SD card.
OK.
Page 55
Placing and Receiving Calls
Placing and Ending Calls
You can place calls using the Phone application. You can dial calls
manually using the Phone tab. You can dial using your phone's
memory, using the Call log tab (see "Working with the Call Log" on
page 74); the Contacts tab (see "Communicating with Your
Contacts" on page 90); or the Favorites tab (see "Communicating
with Your Contacts" on page 90).
To open the Phone application
©
From the Home screen, or the Launch screen, touch the Phone
icon .
OR
©
Press the Send Key , then touch the Phone tab.
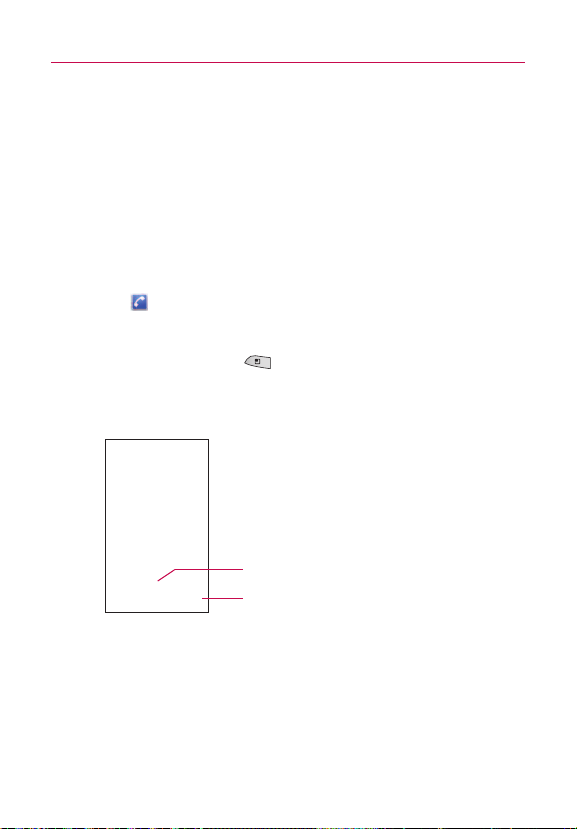
To place a call by dialing
1. Open the Phone application, Phone tab.
Touch and hold to enter +, for
international calls.
Touch to erase a digit. Touch and hold
to erase the entire number.
71
Page 56

X
X
Placing and Receiving Calls
72
2. Touch the keys on the Phone tab to enter the phone
number.
●
If you enter a wrong number, touch to erase digits one
by one.
●
To erase the entire number, touch and hold .
●
To dial an international number, touch and hold the 0 key
to enter the plus ( + ) symbol. Then, enter the international
prefix for the country; followed by the full phone number.
3. Touch the green phone button to dial the number that
you entered.
The duration of the call.
Information from Contacts about the
're calling.
person you
Touch to enter additional numbers
during your call.
●
You can open other applications during a call. For example,
to use another application. The green phone icon will
appear in the Status bar while the call is underway.
●
Press the Volume Up/Down keys to adjust the call volume.
●
Use the onscreen buttons to add another call on hold, to
use the speakerphone, and for other options, as described
in “Options During a Call”on page 77.
To end a call
©
Touch the End or press the End Key .
NOTE
If you opened other applications while on a call, press the Send Key
to redisplay the Phone keypad.
Page 57
Placing and Receiving Calls
Airplane mode (to disable wireless communication)
Some locations may require you to turn off your phone's wireless
connections by placing your phone in Airplane mode.
1. Press and hold the
2. Touch
Airplane mode.
Power/Lock Key .
You can set to Airplane mode with the Wireless & networks
menu. See “Wireless & networks”on page 241.
Answering or Rejecting Calls
When you receive a phone call, the Incoming Call screen opens
with the caller ID and any additional information about the caller that
you have saved in the Contacts list.
All incoming calls are recorded in the Call log. See
the Call log”on page 74.
To answer a call
©
Drag the green Answer button to the right.
If you were already on a call, the first call is placed on hold
while you answer the new call.
To silence the ringer of an incoming call, press the up/down
Volume Key.
“
Working with
73
Drag the green Answer button to the
right to answer the call.
Page 58

Placing and Receiving Calls
74
To decline a call and divert it to voicemail
©
Drag the red Reject call button to the left.
The caller is sent directly to your voicemail box to leave a
message.
Drag the red Reject call button to the
left to reject the call and send to
voicemail.
©
To silence the ringer, press the Volume Down Key.
Working with the Call Log
The Call log is a list of all the calls you’ve placed, received, or
missed. It offers a convenient way to redial a number, return a call,
or add a number to your Contacts.
To open the Call log
©
Press the Send Key .
Calls are listed in the Call log tab, the most recent calls are
located at the top of the list. Scroll down to see older
entries.
Received call
Dialed call
Missed call
Touch to call back
Touch and hold an entry for more options
Page 59

Placing and Receiving Calls
To dial a number in the Call log
©
From the Call log, touch the green Dial button at the right
of the entry.
You can also touch and hold the entry to open a menu with
more options, to communicate with that contact in other
ways.
To add an entry’s number to your Contacts
1. Touch and hold the entry.
2. Touch Add to contacts.
3. In the list of contacts that opens, touch
Create new contact
at the top, or touch an existing contact to add the new
number to that existing contact.
For more information about creating and editing contacts,
see “Contacts”on page 82.
To take other actions on a Call log entry
©
Touch a Call log entry to open a screen from where you can
call the contact, send the contact a message, add the
number to your Contacts list, and learn more about the
original call.
©
Touch and hold a Call log entry to open a menu where you
can call the contact, view contact information, edit the
number before you redial, and more.
To clear the Call log
©
Press the Send Key and press the Menu Key then
touch Delete Call Logs.
You can also touch and hold an entry in the log. In the menu
that opens, touch Remove from call log to remove just that
entry from the log.
75
Page 60

Placing and Receiving Calls
76
Calling Your Contacts
Instead of manually dialing phone numbers using the dialpad, you
can use your Contacts list to dial quickly and easily.
You can also quickly call a contact by using Quick Contact. See
“
Connecting Quickly With Your Contacts”on page 54.
Adding, editing, and performing other tasks with your contacts is
described in
web, they're synchronized with your phone when you first connect
to your GoogleTMAccount.
To call a contact
To call a favorite contact
“
Contacts”on page 82. If you have contacts on the
1. From the Home screen, touch the Contacts icon .
2. Touch the contact to call.
3. Touch the phone number to use to call the contact.
See
“
Communicating with your contacts”on page 90 for
more options.
1. From the Home screen, touch the Contacts icon then
touch the Favorites tab.
You can add and remove favorites by touching the star next
to their names (when you're viewing information about the
contact). See “Adding a Contact to Your Favorites”on page
87.
2. Touch the favorite to call.
3. Touch the phone number to use to call the contact.
Page 61

Mute
Placing and Receiving Calls
Dialing by Voice
You can search for and dial a contact by speaking, rather than by
using the Phone tab or touching a contact's number.
To place a call by speaking
You can call a contact by using Google search by voice.
1. Touch and hold the
prompt appears.
2. Say
“
Call”followed by the name of the contact to call.
If Google search by voice finds a match, it dials the
contact's default number.
For details about setting a contact's default number, see
“
Editing Contact Details”on page 88.
Search Key until the Speak now
Options During a Call
When a call is in progress, you have various convenient features at
your disposal, such as muting your microphone or using the
speakerphone. For information on how to initiate a conference call,
see “Managing Multiple Calls”on page 78.
To mute the microphone during a call
©
Touch the Mute button .
The Mute button lights up to indicate that the microphone is
muted. The Mute icon will appear in the Status bar to remind
you that the microphone is turned off.
When viewing the current call screen, you can unmute the
microphone by touching the Mute button again.
The microphone is unmuted automatically when the call
ends.
77
Page 62

Bluetooth
Speaker
Placing and Receiving Calls
78
To turn the speakerphone on or off
©
Touch the Speaker button .
The Speaker button lights up to indicate that the
speakerphone is on. The Speaker icon will appear in the
Status bar and the sound from your call is played through the
phone's speaker.
When viewing the current call screen, you can turn the
speakerphone off by touching the Speaker button icon again.
The speaker is turned off automatically when the call ends.
WARNING!
To avoid damage to your hearing, do not hold the phone against
your ear when the speakerphone is turned on.
To switch between a Bluetooth headset and the phone
When a Bluetooth headset is paired and connected to your phone,
you can conduct calls on the headset for hands-free conversation.
During a call, you can opt to use the Bluetooth headset or just the
phone.
For details about pairing the phone with a Bluetooth headset, see
“
Connecting to Bluetooth Devices”on page 62.
When using the Bluetooth headset during a call, the Ongoing Call
notification icon is blue in the Status bar.
©
Touch the Bluetooth button to switch the call from the
headset to the phone, or vice versa.
Managing Multiple Calls
If you accept a new call when you're already on a call, you can
switch between the two calls or merge the two calls into a single
conference call. You can also set up a conference call with multiple
callers.
To switch between current calls
©
Touch the Swap button .
The current call will be placed on hold and you will be
connected with the other call.
Page 63

Addcall
Placing and Receiving Calls
Touch to swap calls.
To set up a conference call
Contact your wireless service provider to learn whether they
support conference calls and how many participants you can
include.
1. Place a call to the first participant.
2. When you're connected, touch the
The first participant is put on hold and you're prompted to
dial the second caller.
3. Place the next call, using the
Favorites tab.
4. After you're connected, touch the
The participant is added to the conference call.
Add call button .
Phone, Call log, Contacts, or
Merge calls button .
79
Page 64

Placing and Receiving Calls
80
To end a conference call and disconnect all callers
©
Touch the End or press the End key .
NOTE
If you opened other applications while on a call, press the Send Key
to redisplay the Phone keypad, then touch the End button or press the
End key .
Listening to Your Voice mail
When you have a new Voice mail message, the Voice mail icon
appears in the Status bar. If you have not set up your Voice mail
number, or if you need to change it, you can do that with the Call
settings. See “Call settings”on page 244.
To listen to your Voice mail
©
Open the Notifications panel then touch New voicemail.
Responding to notifications is described in “Managing
Notifications”on page 46.
OR
©
From the Home screen, touch the phone icon then touch
the Voicemail button . Typically, your carrier's voicemail
system guides you through the process of listening to and
managing your voicemail. The first time you call your
voicemail, it also guides you through the process of
recording greetings, setting a password, and so on.
Page 65

Dialpad
Placing and Receiving Calls
To set up your voice mail
1. Touch the Phone button on the Home screen or in the
Launch screen.
2. Dial *86, then touch the green phone button .
3. Touch
Dialpad so you can enter numbers.
4. If you hear a system greeting, touch # to interrupt it, if
applicable.
5. Follow the setup tutorial.
6. Select a password.
7. Record a voice signature and greetings for your Voice
Mailbox.
To access your voice mail from your wireless device
1. Touch the Phone button on the Home screen or in the
Launch screen.
2. Dial *86, then touch the green phone button .If you hear a
system greeting or your own greeting, touch # immediately
to interrupt the system greeting and follow the prompts.
3. Follow the prompts to enter your password and retrieve
your messages.
81
Page 66

Contacts
82
Using Your Contacts
Use the Contacts application to add, view, and communicate with
your friends and acquaintances.
To open your Contacts application
©
Touch the Contacts icon on the Home screen or in the
Launch screen.
NOTE
You can also access your contacts by using Quick Contact. See
“Connecting Quickly With Your Contacts” on page 54.
All of your contacts are displayed alphabetically in a list. If you
have a new phone and haven't added any contacts yet, The
Contacts application will display hints on how to start adding
contacts to your phone.
Touch to view only your favorite contacts.
Touch a contact to view its details.
Touch icon to open Quick Contact for that contact.
To open a list of your favorite contacts
©
Open your Contacts application then touch the Favorites tab.
The Favorites tab lists the contacts you've added to the list
(see “Adding a Contact to Your Favorites”on page 87),
followed by a list of your most frequently called contacts.
Page 67

To view details about a contact
1. Open your Contacts application.
2. Touch the contact whose details you want to view.
Touch to open Quick Contact.
Touch a contact method to start
communicating with the contact.
Touch an address to view it on Google
TM
.
Maps
Touch the green phone icon to call the number or touch the
Text icon to start a text message.
Touch an address to view it on Google Maps.
“
Google Maps
See
You can also press the Menu Key and touch Edit
to edit the contact's information (see “Editing
contact
Contact Details”on page 88), or touch Delete contact to
delete the contact entry.
TM
”
on page 180.
Contacts
83
Page 68

Contacts
84
Adding Contacts
You can add contacts on your phone and synchronize them with the
contacts in your GoogleTMAccount, Microsoft Exchange ActiveSync
account, or other accounts that support syncing contacts.
The Contacts application tries to join new addresses with existing
contacts, to create a single entry. You can also manage that
process manually. See
“
Separating Contact Information”on page 95.
To add a new contact
1. From the Home screen, touch Contacts .
2. Press the
3. If you have more than one account with contacts, touch the
account to which you want to add the contact.
4. Enter the contact's name.
5. Touch a category of contact information, such as phone
numbers and email addresses, to enter that kind of
information about your contact.
6. Touch a category's plus button to add more than one
entry for that category. For example, in the phone number
category, add a work number and a home number. Touch
the label button to the left of the entry item information to
open a drop-down menu of preset labels. For example,
Mobile and Work for a phone number, or touch Custom in
the menu to create your own label.
7. Touch the Picture Frame button to select a picture to
display next to the name in your list of contacts and in other
applications.
8. When you're finished, touch the
“
Joining Contacts”on page 94 and
Menu Key and touch New contact.
Done button.
Page 69

Contacts
Importing, Exporting, and Sharing Contacts
If you have contacts stored in vCard format on a microSD card you
can import them into your Contacts application on your phone. You
can also export contacts in vCard format onto a microSD card.
Export to back them up to a computer or other device or so you can
send a contact via email.
To import contacts from your microSD card
You can copy contacts, in vCard format, onto your microSD card
then import them into your phone. See “Connecting to a
Computer via USB”on page 65 for details about copying files to a
microSD card from your computer.
1. Insert the memory card (that contains the vCard files) into
your phone.
2. From the Home screen, touch
3. Press the
4. Touch
5. If you have more than one account on your phone, touch the
account into which you want to import the contacts.
6. Touch the importing option and then touch
Menu Key and touch Import/Export.
Import from SD card.
Contacts .
OK.
85
Page 70
Contacts
86
To export contacts to your microSD card
You can export all of the contacts on your phone to your microSD
card, as a vCard files. You can then copy this file to a computer or
another device that is compatible with this format, such as an
address book application. See “Connecting to a Computer via
USB”on page 65.
1. From the Home screen, touch
2. Press the
3. Touch
4. Touch
the microSD card.
Menu Key and touch Import/Export.
Export to SD card.
OK to confirm your selection and to begin export to
Contacts .
To share a contact
You can share a contact with someone by sending it to them as a
vCard file.
1. From the Home screen, touch
2. Open the contact you want to share.
3. Press the
4. Choose the method for sending.
Menu Key and touch Share.
Contacts .
Page 71

Adding a Contact to Your Favorites
The Favorites tab contains a short list of the contacts you
communicate with most often.
To add a contact to your favorites
1. From the Home screen, touch Contacts .
2. Touch a contact to view its details.
3. Touch the star to the right of the contact's name.
When the contact is added to your favorites list, the star will
be gold-colored
To remove a contact from your favorites list
1. From the Home screen, touch Contacts then touch the
Favorites tab.
2. Touch a contact to view its details.
3. Touch the gold star to the right of the contact's name.
The removed star will indicate that the contact was removed
from your Favorites list.
Searching for a Contact
It is easy to search for a contact by name.
To search for a contact
1. From the Home screen, touch Contacts .
2. Touch the
3. Start entering the name of the contact you're searching for.
As you type, contacts with matching names will appear
below the search box.
4. Touch a matching contact in the list to open its entry. You
can also touch the
keyboard) to open a screen with a list of matching contacts.
Search Key .
Search button (on the touch
Contacts
87
Page 72

Contacts
88
Editing Contact Details
You can change or add details saved in your contact entries. You
can also set specific ringtones to specific contacts or determine
whether calls from specific contacts are diverted to your voicemail.
Some contact entries contain information from multiple sources:
information that you added manually, information that Contacts
joined from multiple accounts to consolidate duplicates, and so on.
If you find duplicate entries in Contacts, you can join them into a
single entry, as described in
that find information from unrelated contacts was joined in error,
you can separate them, as described in “Separating Contact
Information”on page 95.
Changes made to information from one source do not automatically
change the information on the other sources. For example, if you
have information about a contact from a Google Account and an
Exchange ActiveSync account and both are configured to sync
contacts, changes to the contact from the Google Account are
synced to that account on the web, but the information from the
Exchange ActiveSync account will remain unchanged.
For more information about working with multiple accounts, see
“
Accounts”on page 96.
To edit contact details
1. From the Home screen, touch Contacts .
2. Touch and hold the contact whose details you want to edit.
In the menu that opens, touch
3. Edit the contact information. For more information entering
contact information, see
4. Touch the
Done button.
“
Joining Contacts”on page 94. If you
Edit contact.
“
Adding Contacts”on page 84.
Page 73

Contacts
To change a contact’s default phone number
The default phone number is used when you initiate a call or send
a text message using the context menu (by touching and holding
a contact).
1. From the Home screen, touch
2. Touch the name of a contact in the list to view its details.
3. Touch and hold the phone number to use as the contact's
default phone number.
4. Touch
Make default number in the menu that opens.
The default phone number will be marked with a checkmark
.
Contacts .
To divert calls from a contact to your voicemail
1. From the Home screen, touch Contacts .
2. Touch the name of a contact in the list to view its details.
3. Press the
4. Touch
5. Touch the Back Key .
When this contact calls you, your phone will not ring and the
caller will be forwarded directly to your voicemail.
Menu Key and touch Options.
Incoming Calls to checkmark it.
To set a ringtone for a contact
1. From the Home screen, touch Contacts .
2. Touch the name of a contact in the list to view its details.
3. Press the
4. Touch
5. Touch the
Menu Key and touch Options.
Ringtone. and touch a ringtone to select it.
OK button.
89
Page 74

Contacts
90
To delete a contact
1. From the Home screen, touch Contacts .
2. Touch the name of a contact in the list to view its details.
3. Press the
Menu Key and touch Delete contact.
If the contact contains information from a read-only account,
you will not be able to delete it; you will only be able to
change the sync settings for that account or delete the
account itself.
If the contact contains information joined from a read-only
account, a dialog box will inform you that you must separate
the contact entry into individual contacts to delete the
contact.
4. Touch the
OK button to confirm that you want to delete the
contact.
Communicating with Your Contacts
From the Contacts or Favorites tab, you can quickly call or send a
text (SMS) or multimedia message (MMS) to a contact's default
phone number. You can also open a list of all the ways you can
communicate with that contact.
This section describes ways to initiate communication when
viewing your list of contacts. The Contacts application shares your
contacts with many other applications, such as GmailTM(see
TM
“
Gmail
”
158).
on page 102) and Messaging (see “Messaging”on page
Page 75
Contacts
91
To connect by using Quick Contact for Android
TM
1. Touch a contact's picture to open Quick Contact for Android.
Touch the icon for the
Touch a contact's
picture.
way you want to
connect.
2. Touch the icon corresponding to the type of communication
you want to start.
Depending on the contact information saved, the available
actions will be displayed above the name.
“
For more information, see
Connecting Quickly With Your
Contacts”on page 54.
To communicate with a contact
1. From the Home screen, touch Contacts .
2. Touch the contact with whom you want to communicate.
3. In the contact's details screen, touch the way to start
communicating with the contact.
●
Touch the green Dial button next to the number you
want to call to automatically.
●
Touch the Message button next to the number you
want to message.
●
Touch the Envelope button next to the email address
you want to email.
NOTE
Anytime you see the green Dial button next to a number, such as in
your Favorites or Call log, just touch it to call that number.
Page 76

Contacts
92
To call a contact’s default number
1. From the Home screen, touch Contacts .
2. Touch and hold the entry for the contact to call.
3. Touch
Call contact in the menu that opens.
For more information about placing phone calls, see “Placing
and Ending Calls”on page 71.
To send a text or multimedia message to a contact’s
default number
1. From the Home screen, touch Contacts .
2. Touch and hold the contact to call.
3. Touch
Text contact in the menu that opens.
For more information about sending text and multimedia
messages, see “Messaging”on page 158.
Page 77
Contacts
Selecting which Contacts are Displayed
You can hide contacts that don't have phone numbers. You can also
configure which groups of contacts you want to display in the
Contacts list.
To set whether contacts without phone numbers are
displayed
If you use your list of contacts only to call people, you can hide
any contacts that don't have phone numbers.
1. From the Home screen, touch
2. Press the
3. Touch
option. When selected, a gold checkmark will appear.
Menu Key and touch Display options.
Only contacts with phones to select or deselect this
To change which groups are displayed
1. Open your Contacts application.
2. Press the
3. Touch an account to open its list of available groups.
Menu Key and touch Display options.
Contacts .
93
Page 78

Contacts
94
4. Touch each group whose contacts you want to view in your
Contacts application, contact types with a gold checkmark
will appear in your contacts list.
This action affects only which contacts are displayed. Your
sync settings will not be affected.
5. Touch the
Done button. A message appears while your
changes are made. If your change affects a great many
contacts, this can take a short while.
Joining Contacts
When you add an account or add contacts in other ways, such as
by exchanging emails, the Contacts application attempts to avoid
duplication by joining contact information automatically. You can
also join contacts manually.
To join contacts
1. From the Home screen, touch Contacts .
2. Touch the contact entry to which you want to add
information.
The contact name for this entry will remain unchanged after
you join with another contact.
3. Press the
4. Press the
Full list of contacts are displayed at the top of the screen.
Menu Key and touch Edit contact.
Menu Key and touch Join.
Touch the contact whose information
you want to join.
Page 79

Contacts
5. Touch the contact whose information you want to join with the
first contact. The information from the two contacts will be
merged and displayed under the name from the first contact.
See “Separating Contact Information”on page 95 for
information about how to separate contacts that were
previously joined.
Separating Contact Information
Each contact entry on your phone may contain ‘joined’information
from a variety of sources.
If contact information from different sources was joined in error,
you can separate the information back into individual contact entries
on your phone.
To separate contact information
1. From the Home screen, touch Contacts .
2. Touch the contact entry whose information you want to
separate.
3. Press the
4. Press the
Touch the OK button to confirm you want to separate the
entries. The contact information will separated into individual
contact entries in the contacts list.
Menu Key and touch Edit contact.
Menu Key and touch Separate.
95
Page 80

Accounts
96
Adding and Removing Accounts
You can add multiple GoogleTMAccounts and Exchange ActiveSync
accounts. You may also be able to add other kinds of accounts,
depending on the applications downloaded and installed on your
phone.
When you add an account, the Contacts application compares any
new contacts with your existing contacts and will join contact
entries if matches are found. This does not join that data on the
accounts themselves; they are only displayed as a single contact on
your phone. See
about joining contacts manually.
See “Configuring Account Sync and Display Options”on page 99 to
learn how to separate contact information that was joined
incorrectly.
To add an account
To add some accounts, you will need to contact a network
administrator for account setup information. For example, you
may need to know the account's domain or server address.
1. From the Home screen, press the
Settings, and touch Accounts & sync.
The Accounts & sync settings screen displays your current
sync settings and accounts.
For more information, see “Configuring Account Sync and
Display Options”on page 99.
2. Touch the
“
Joining Contacts”on page 94 for information
Menu Key , touch
Add account button.
Add account
Page 81

Accounts
3. Touch the account you want to add.
List of available accounts
4. Follow the onscreen steps to enter the required (and
optional) account information.
Many accounts require only a username and password, but
some accounts will require more information. For details
about adding Microsoft Exchange ActiveSync accounts, see
“
Adding and Editing Email Accounts”on page 151 and the
detailed tables in “Changing Email Account Settings”on
page 154. These sections also describe how to add an email
account that uses IMAP, POP3, or SMTP.
5. Configure the account.
Depending on the kind of account, you may be asked to
configure what kinds of data you want to sync to the phone,
name of the account, and other details. When you're
finished, the account will be added to the list in the
Accounts & sync settings screen.
“
Configuring Account Sync and Display Options”on
See
page 99 for account configuration details.
97
Page 82

Accounts
98
To remove an account
You can remove an account to delete all information associated
with it from your phone, including email, contacts, settings, and
so on.
You can't remove some accounts, such the first Google Account
you set up on the phone. That account can only be removed by
resetting your phone entirely.
1. From the Home screen, press the
Settings, and touch Accounts & sync.
The Accounts & sync settings screen displays your current
sync settings and accounts.
For more information, see “Configuring Account Sync and
Display Options”on page 99.
2. Touch the account you want to delete.
3. Touch the
4. Touch the
Remove account button.
Remove account button again to confirm that you
want to remove the account.
Menu Key , touch
Page 83

Accounts
Configuring Account Sync and Display Options
You can configure background data and synchronization options for
the applications on your phone. You can also configure
synchronization options for each account. Some applications, such
as GmailTMand Calendar, have their own synchronization settings.
Some applications, such as Contacts and Gmail, can sync data for
multiple accounts. Others, such as Calendar, sync data only from
the first Google Account you set up with your phone, or from an
account associated specifically with that application.
For some accounts, syncing is two-directional; changes that you
make to the information on your phone are synchronized with the
accounts on the web or PC. Your Google Account synchronizes in a
two-directional manner. Other accounts support only one-way sync;
the information changed on your phone is only changed on your
phone.
To configure general sync settings
1. From the Home screen, press the Menu Key , touch
Settings, and touch Accounts & sync.
The Accounts & sync settings screen displays your current
sync settings and accounts.
For more information, see “Configuring Account Sync and
Display Options”on page 99.
The screen displays your current sync settings and a list of
your current accounts.
99
Touch the account to configure it.
Sync status
Page 84

Accounts
100
: indicates that some, or all, of an account's information
is configured to sync automatically with your phone.
: indicates that none of an account's information is
configured to sync automatically with your phone.
2. Touch
Background data to enable or disable whether
applications can use your data connection to synchronize
data while the applications run in the background.
If you disable this option, the Gmail and Calendar
applications will not automatically receive updates until they
are manually refreshed (using their respective options
menu).
3. Touch
Auto-sync to checkmark it (or uncheck it) to control
whether changes you make to information on the phone or
on the web are automatically synced with each other.
For example, when this option is enabled, changes that you
make in the Contacts application on your phone are
automatically made to your on-the-web Google ContactsTM.
If you uncheck this option, you may be able to use an
application's tools to sync data manually. See the following
section “To sync information manually”.
To sync information manually
1. From the Home screen, press the Menu Key , touch
Settings, and touch Accounts & sync.
The Accounts & sync settings screen displays your current
sync settings and accounts.
For more information, see “Configuring Account Sync and
Display Options”on page 99.
2. Touch the account whose data you want to sync.
3. Press the
Menu Key and touch Sync now.
Page 85

To change an account’s sync settings
1. From the Home screen, press the Menu Key , touch
Settings, and touch Accounts & sync.
The Accounts & sync settings screen displays your current
sync settings and accounts.
For more information, see “Configuring Account Sync and
Display Options”on page 99.
2. Touch the account whose sync settings you want to
change.
The Data and synchronization screen will open, displaying a
list of the kinds of information the account can sync.
3. Touch the items you want to sync, a green checkmark
indicates that synchronization has been enabled. By
disabling synchronization for an item, it will not remove the
previously synchronized data from your phone, it will simply
stop future syncs. To remove the information previously
synced for the account, you must remove the account.
Accounts
101
Page 86

TM
Gmail
102
Gmail is Different
Gmail is web-based: Your messages are stored on-line, on
GoogleTMservers; but you read, write, and organize messages by
using the Gmail application on your phone, or by using a web
browser on a computer. Because your mail is stored on Google
servers, you can search your entire message history, backed by
the speed and power of Google search.
Actions that you take in one place are reflected everywhere. For
example, if you read a message in Gmail on your phone, it will be
marked as read in a web browser. And a message that you send
using a browser, or even a draft of a message, is visible in Gmail
on the phone.
Gmail is conversation-based: Each message and all replies to it
are grouped in your Inbox as a single conversation. In other email
applications, replies to messages are spread across your Inbox,
typically by date received, so a message and the replies to it are
separated by other messages. Gmail makes it easy to follow the
thread of a conversation.
Gmail is organized by labels, not by folders: By tagging
messages with labels, you can organize your conversations in
many different ways. Whereas in other email applications, each
message can live in only one folder. For example, with Gmail you
can label a conversation with your mother about your brother's
birthday present with both
for the all messages containing either label. Using folders, you'd
have to store the message in the “Mom”folder or the “Dave
folder, not both.
Gmail for the phone is optimized for mobile: Some features are
only accessible on your computer browser The best place to
organize and learn about Gmail is the web. For example, you can't
use the Gmail application on the phone to create the labels and
filters that you use to organize your messages, but you can label a
message. Gmail on the web offers complete information about
the service, so it's the best place to learn about all of the features
of Gmail.
“
Mom”and “Dave.”Later, you can look
”
Page 87

Gmail
Gmail is for Gmail: Of course you can use Gmail to send email to
any email address, and anyone can send email to you at your
Gmail address. But if you want to read messages from another
email service provider (using your AOL, Yahoo!, or other email
account), you must use the
143.
Email application. See
“
Email”on page
Opening Gmail and Your Inbox
When you open the Gmail application, the most recent
conversations are displayed in your Inbox.
To open the Gmail application
©
Touch the Gmail icon on the Home screen or in the
Launch screen.
See “Opening and Switching Applications”on page 43 to
learn more about opening and switching applications.
All of your conversations are displayed in your Inbox unless you
delete, archive, or filter them.
The current Google Account is displayed at the top right of the
Inbox. If you have more than one account, you can switch
accounts to view the messages in each Inbox, as described in “To
switch accounts” on page 104. Adding accounts is described in
“Accounts” on page 96.
Conversations with new messages are displayed with bold
subject lines. To read a message in a conversation, touch its
subject line text. See “Reading Your Messages” on page 105.
103
Page 88

104
Gmail
The number of unread
messages in your Inbox.
Bold subject lines indicate
conversations with new
(unread) messages.
Touch a conversation to open
it and read its messages.
Recipient indicator (see below)
Your account.
The number in
parentheses indicates the
number of messages in
the conversation
: indicates that this message was sent directly to you.
: indicates that this message was that you were CC'd on.
(No indicator): indicates that this message was sent to a group
that includes you.
To open your Inbox when Gmail is running
©
Touch the Back Key until you return to your Inbox.
OR
©
When reading a message, press the Menu Key and
touch Back to Inbox.
OR
©
When viewing a list of labeled conversations, press the
Menu Key and touch More > Back to Inbox.
To switch accounts
Gmail displays conversations and messages from one Google
Account at a time. If you have more than one account, you can
open the Accounts screen to view how many unread messages
you have in each account and to switch accounts.
1. From your Inbox, press the
Accounts.
Menu Key and touch
Page 89

Gmail
2. Touch the account that contains the email you want to read.
Reading Your Messages
When viewing a list of conversations in your Inbox or in any list of
labeled conversations, you can open a conversation to read its
messages.
To read a message
©
Touch a conversation that contains the message you want to
read.
A conversation opens to the first new (unread) message, or
to the first starred message, if you've previously starred a
message in the conversation. See “Starring a Message”on
page 112.
This conversation has one label.
This conversation has one other message.
It has been minimized because the
message has already been read.
Touch a sender's Google Talk
Status icon to open the Quick
Contact menu.
TM
105
You can archive or delete the
entire conversation or read your
next, oldest, unread message.
Page 90

106
Gmail
The Google Talk online status will appear next to the name
of the sender of each message if the sender has a Google
account. Touch that status indicator to open Quick Contact.
See “Connecting Quickly With Your Contacts”on page 54.
When reading messages in a conversation, you can use the
buttons at the bottom of the screen to archive the entire
conversation (see “Archiving Conversations”on page 115) or
Delete to delete it. After you delete a conversation, you can
touch Undo in the yellow bar that appears at the top of the
screen to undelete it.
You can also touch Older to read the next, oldest, unread
message in a conversation in your Inbox (or the conversation
list you're working in).
You can scroll to the bottom of a message to access
buttons for replying to or forwarding the message, as
described in “Replying to or Forwarding a Message”on page
109.
Page 91
Gmail
To reread a message
When you open a conversation, messages that you've already
read are minimized into a tab that indicates the number of hidden
messages.
1. From the Home screen, touch
conversation you want to view, then touch the tab indicating
minimized messages.
Touch the tab that indicates
the number of read
messages to view their
summary tabs.
2. Touch the contact name to open that message.
Touch the contact name
of a message to open it,
so you can read it again.
Gmail , touch the
107
When reading a message or when its tab is selected, you can
press the
Menu Key and touch Mark Unread to return a read
message to the unread state. For example, to remind yourself to
read it again later.
Page 92

Gmail
108
Composing and Sending a Message
You can compose and send a message to people or groups with
Gmail addresses or other email addresses.
To compose and send a message
1. From the Home screen, touch Gmail , press the Menu
Key
and touch Compose.
2. Enter a recipient's address.
As you enter text, matching addresses are offered from your
Contacts list. You can touch a suggested address or
continue entering text to enter a new one.
3. Press the
recipients, if necessary.
4. Enter a subject for the message in the Subject field.
5. Continue into the next field to enter your email message.
6. Press the
attachment to the email.
7. Touch the
If you're not ready to send the message, touch the Save as
draft
messages with the Draft label. See “Viewing Conversations
by Label”on page 113.
Touch the Discard button to erase the message (including
any saved drafts).
If you aren't connected to a network - for example, if you're
working in Airplane mode - the messages that you send are
stored on your phone with the Outbox label until you
connect to a network again.
Menu Key and touch Add Cc/Bcc to Cc or Bcc
Menu Key and touch Attach to add an
Send button.
button instead. You can read your drafts by opening
Page 93

Gmail
Replying to or Forwarding a Message
You can continue an email conversation by replying to a message or
by forwarding it.
To reply to or forward a message
1. Scroll to the bottom of a message.
2. Touch
3. Touch the
Reply, Reply to all, or Forward.
Touch Reply to reply just to the sender of
the message. Touch Reply to all to
include all recipients of the message.
Touch Forward to send the conversation
to someone new.
Replying to or forwarding messages without changing the
subject adds your reply to the current conversation.
Changing the subject starts a new conversation.
The message will open in a new screen where you can add
or remove addresses, edit the subject, and add or remove
text or attachments, as described in
“
Composing and
Sending a Message”on page 108.
You can add one or more people to an ongoing conversation
by replying to all and then adding the new person's
address(es) to the reply.
Note that the conversation text and previous messages are
also included in your reply (or forward).
Send button.
109
Page 94

Gmail
110
Working with Conversations in Batches
You can archive, label, delete, or perform other actions on a batch
of conversations at once, in your Inbox or in another label views.
1. From the Inbox or messages with another label, touch the
checkmark for all the messages you want to include in the
batch.
When you checkmark a conversation, the
and Delete buttons appear at the bottom of the screen.
Touch to include the message in the batch.
Touch to select an action for the batch or press the
Menu Key for more options.
2. Touch the
Menu Key and touch Add star, Report spam, Mute,
Mark read/ Mark unread, or Deselect all.
Archive, Label, or Delete button. Or press the
You action affects the selected batch of messages.
If you accidentally delete a batch of conversations, you can
touch Undo in the yellow bar (that appears briefly after the
action) at the top of the screen to undelete them. You can
also use Undo after muting, archiving, and reporting spam.
If you never work with batches of messages, you can hide the
checkboxes to leave more room for the subjects of conversations.
See
“
Changing Gmail Settings”on page 118.
Archive, Label,
Page 95

Gmail
Labeling a Conversation
As mentioned previously, conversations are organized by labels.
Gmail has several default labels, but you can also add your own
through Gmail on the web. Viewing labeled conversations is
described, along with a list of standard labels, in “Viewing
Conversations by Label”on page 113.
To label a conversation
1. When reading a conversation's messages, press the Menu
Key
and touch Change labels.
2. In the dialog box that opens, check the labels you want to
assign to the conversation.
To label a batch of conversations at once
You can assign or change the labels of one or more conversations
at once.
1. From your Inbox or messages with another label, checkmark
the conversations to select a batch.
See
“
Working with Conversations in Batches”on page 110.
2. Touch the
3. In the dialog box that opens, check the labels you want to
assign to the conversation.
4. Touch the
To change a conversation’s labels
1. When reading a specific conversation, press the Menu Key
2. In the dialog box that opens, check the labels you want to
assign to the conversation.
3. Touch the
Labels button at the bottom of the screen.
OK button.
and touch Change labels.
OK button.
111
Page 96

Gmail
112
Starring a Message
You can star an important message or conversation to make it easy
to locate again. To view just conversations with starred messages,
see “Viewing Conversations by Label”on page 113 and view the
Starred-labeled messages and conversations.
To star a message
©
When reading a message, touch the star in its header.
OR
©
When viewing a conversation, touch its star to star the
newest message in the conversation.
To unstar a message
©
Touch its star again.
To star or unstar all messages in a conversation
©
Touch a star in a conversation list.
Page 97
Gmail
Viewing Conversations by Label
You can view a list of the conversations that have the same label,
including conversations with starred messages.
See “Labeling a Conversation”on page 111 or “Starring a Message
on page 112 for information about assigning labels and stars.
1. When viewing your Inbox or messages with another label,
press the
2. Touch a label to view a list of conversations with that label.
Note that the conversation list will resemble your Inbox.
Most of the options available while using your Inbox will
also be available while viewing these lists of labeled
messages.
Menu Key and touch Labels.
The number of conversations with this label that
have unread messages.
113
”
Page 98

Gmail
114
Reporting Spam
The Gmail webmail service is quite effective at preventing spam
(junk mail) from reaching your Inbox. But when spam does make it
through, you can help improve the Gmail service by reporting the
conversation as spam.
To report a conversation as spam
©
When reading the email, press the Menu Key and touch
More > Report spam.
OR
©
From the Inbox, touch the checkmark to select the
messages, press the Menu Key and touch Report spam.
When you report a conversation
as spam, the conversation (and all its messages) are
removed from your Inbox. You can view the messages
you've marked as spam by viewing messages with the
Spam label. See “Viewing Conversations by Label”on page
113.
Searching for Messages
With the Gmail application, it is very easy to search and find specific
emails. When you search for emails, all of the emails in your Google
account on the web are included in your search (except those
labeled Trash or Spam), not just those that you've synchronized
onto your phone.
You can also use the advanced search options as described on the
Gmail website.
1. From the Inbox, press the
Or from the Inbox, touch the Search Key .
Menu Key and touch Search.
Page 99

Gmail
2. Enter the word or words to search for then touch the
Search icon to the right of the text field.
A list of results will appear, displaying all of the
conversations with emails that contain the words you
searched for.
You can open these emails as you would any email in your
Inbox; you also have the same options available.
Archiving Conversations
You can archive conversations, to move them out of your Inbox
without deleting them. Archived conversations are assigned the All
Mail label, and also retain any other labels you've assigned to them.
See “Viewing Conversations by Label”on page 113. Archived
conversations are also included in search results. If someone replies
to a message that you've archived, its conversation will be restored
to your Inbox.
To Archive a conversation:
©
From your Inbox, touch and hold a conversation then touch
Archive in the menu that opens.
OR
©
Checkmark one or a batch of conversations in your Inbox
then touch the Archive button.
See “Working with Conversations in Batches”on page 110.
OR
©
When reading a message, touch the Archive button at the
bottom of the screen.
115
Page 100

Gmail
116
Synchronizing Your Messages
The Gmail webmail service has the resources to store all the
messages you've ever sent or received; your phone does not. To
save space, Gmail downloads only some of your messages to your
phone. Use the Settings application to control how and when
applications synchronize their data. See “Accounts & sync”on page
251.
To select which conversations to synchronize
1. From the Home screen, touch Gmail .
2. Press the
The Synchronization settings screen opens, displaying a list
of your Gmail labels. Below each label is its current
synchronization setting: Sync all, Sync 4 days, or with no
label. (Conversations with no label are not synchronized.)
3. Touch a conversation label whose synchronization settings
you want to change.
A dialog box for that conversation label opens, with three
options:
●
●
●
Menu Key and touch Settings > Labels.
Sync none Don't download any conversations that have
only this label.
Sync 4 days Download the previous 4 days (or number of
days you set) of conversations.
Sync all Download all conversations with this label.
 Loading...