


Part 15.21 statement
" Change or Modifications that are not expressly approved by the manufacturer could void
the user's authority to operate the equipment. “
Part 15.105 statement
This equipment has been tested and found to comply with the limits for a class B digital
device, pursuant to Part 15 of the FCC Rules.
These limits are designed to provide reasonable protection against harmful interference in
a residential installation. This equipment generates uses and can radiate radio frequency
energy and, if not installed and used in accordance with the instructions, may cause harmful
interference to radio communications. However, there is no guarantee that interference will
not occur in a particular installation. If this equipment does cause harmful interference or
television reception, which can be determined by turning the equipment off and on, the user
is encouraged to try to correct the interference by one or more of the following measures:
- Reorient or relocate the receiving antenna.
- Increase the separation between the equipment and receiver.
- Connect the equipment into an outlet on a circuit different from that to
which the receiver is connected.
- Consult the dealer or an experienced radio/TV technician for help.

Part 15 Class B Compliance
HAC statement
This phone has been tested and rated for use with hearing aids
for some of the wireless technologies that it uses.
However, there may be some newer wireless technologies used in this phone
that have not been tested yet for use with hearing aids.
It is important to try the different features of this phone thoroughly
and in different locations, using your hearing aid or cochlear implant,
to determine if you hear any interfering noise.
Consult your service provider or the manufacturer of this phone
for information on hearing aid compatibility.
If you have questions about return or exchange policies,
consult your service provider or phone retailer.
This device and its accessories comply with part15 of FCC rules.
Operation is subject to the following two conditions:
(1) This device & its accessories may not cause harmful interference.
(2) This device & its accessories must accept any interference received,
including interference that may cause undesired operation.
Body-worn Operation
This device has been tested for typical body-worn operations
with the distance of 0.39inches (1.0cm) from the user’s body.
To comply with FCC RF exposure requirements, a minimum separation distance
of 0.39inches(1.0cm) must be maintained from the user's body.
For example, this device must be maintained from the user's body with
an appropriatebelt-clip accessory.[More than 0.39inches(1.0cm)]
Additionally, Belt clips, holsters & other body-worn accessories may not contain
metallic components.
The Basics
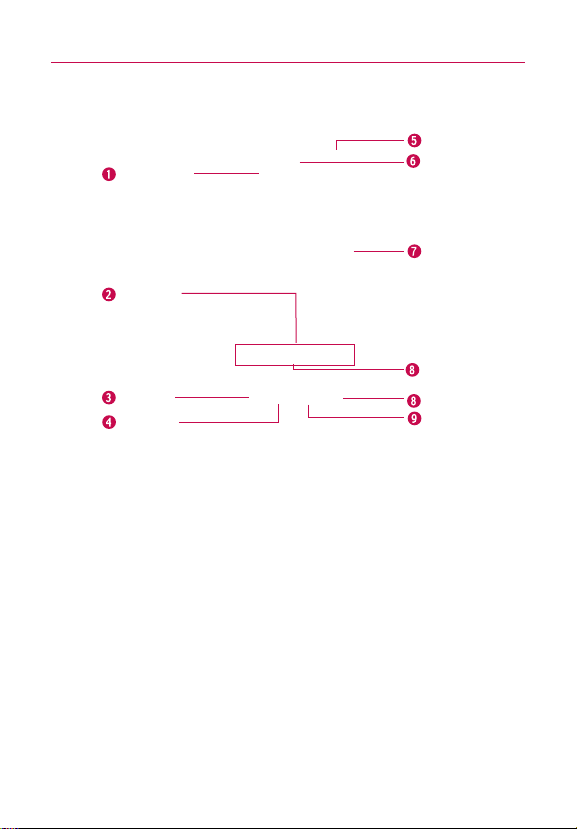
Phone Overview
Front View
Proximity
Sensors
Quick Keys
- Phone Key
- Contacts Key
- Messaging Key
- Browser Key
Menu Key
Home Key
1.
Proximity Sensors
touch commands are not accidentally activated during a call.
Note *Do not block the sensor or near sensor area with film cover or phone case.
* The use of a film cover produced by other manufacturers other than LG can
2.
Quick Keys
-
Phone Key opens the Phone Application for access to the dialpad, Call log, Contacts,
and Favorites.
-
Contacts Key opens the Contacts Application.
-
Messaging Key opens the Messaging Application.
-
Browser Key opens the Browser Application.
3.
Menu Key
application.
4.
Home Key
extension panes, it navigates you to the central Home screen pane. Press and hold to view
the most recently used applications.
5. Power/Lock
the following options): Silent mode, Airplane mode, and Power off.
6.
Earpiece
senses proximity towards other objects (such as your head) so that
cause a disturbance in touch operation, the display, etc.
Opens an options menu with options that affect the current screen or
returns to the Home screen. If you're already viewing one of the Home screen
Key
locks the screen. Press and hold to open the phone options menu (for
lets you hear callers and automated prompts.
Power/Lock Key
Earpiece
Touchscreen
Applications
Launcher Key
Search Key
Back Key
19
The Basics
20
7.
Touchscreen
applications, call status, date, time, signal status, and battery strength.
8.
Applications Launcher Key
applications.
9.
Search Key
the web. In many applications, you may touch this key to search within the application
itself. Touch and hold to open Bing search by voice.
10.
Back Key
and dialog boxes.
displays all the information needed to operate your phone, such as
opens the Launch screen, where you can view installed
opens Quick Search BoxTMfrom the Home screen to search the phone and
returns to the previous screen. Also closes pop-up display items such as menus
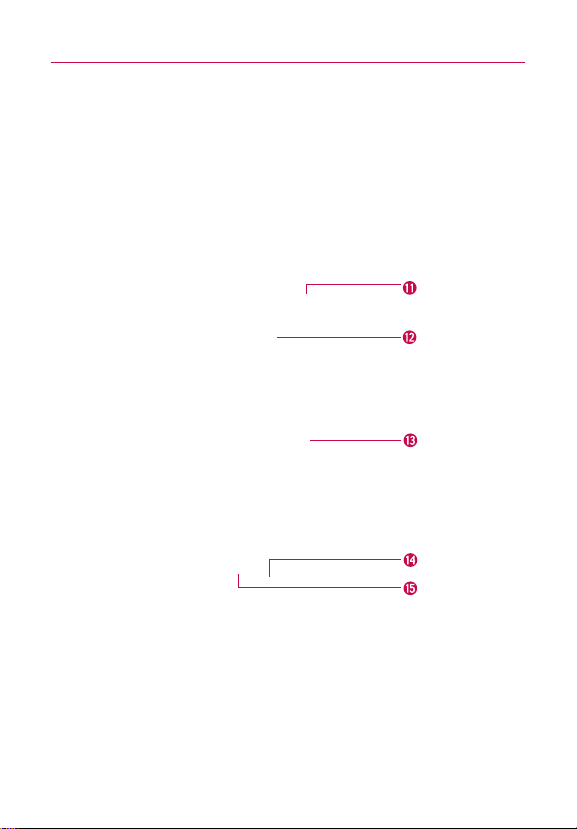
Rear View
11.
3.5mm Headset Jack
conversations. The 3.5mm jack also allows you to plug in headphones to listen to music.
12.
Camera Lens
performance.
13.
Back Cover
14.
Accessory/Charger Port
compatible accessories.
15.
Microphone
allows you to plug in an optional headset for convenient, hands-free
use for taking pictures and recording videos. Keep clean for optimal
encloses the battery compartment.
allows you to connect the phone charger, USB cable, or other
transmits your voice to the other caller and to Voice-activated functions.
3.5mm Headset
Jack
Camera Lens
Back Cover
Accessory/
Charger Port
Microphone

The Basics
Left Side Right Side
Volume Keys
microSD Slot
16.
Volume Keys
call.
17.
microSD Slot
16GB)
NOTE Insert a microSD card to use the camera and other multimedia features.
allow you to adjust the ringer, media volumes, or the in-call volume during a
accommodates the pre-installed 2GB microSDTMcard (expandable up to
Multimedia contents will be saved in the microSD card.
Your LG Gelato has a microSD
TM
card pre-installed.
21

The Basics
22
Installing the Battery and microSD Card
NOTE
It is important to fully charge the battery before initial use of the phone.
The phone comes with a rechargeable battery. Keep the battery
charged while not in use in order to maximize talk, use, and standby
time. The battery charge level is shown at the top right part of the
screen.
Installing the battery
1. Hold the phone
with both hands
and use the
fingertip cutout at
the top of the
phone to pull
open the battery
cover (as shown
above).
2. Align the battery
contacts with the
terminals near the
bottom of the
phone, then press
the battery into
place.
3. Replace the
battery cover over
the back of the
phone (as
demonstrated).
Apply a steady
downward
pressure until the
battery cover
clicks into place.
Removing the battery
Turn the power off. Remove the battery cover (as demonstrated in
the previous instructions). Then use the fingertip cutout to lift the
top edge of the battery out.
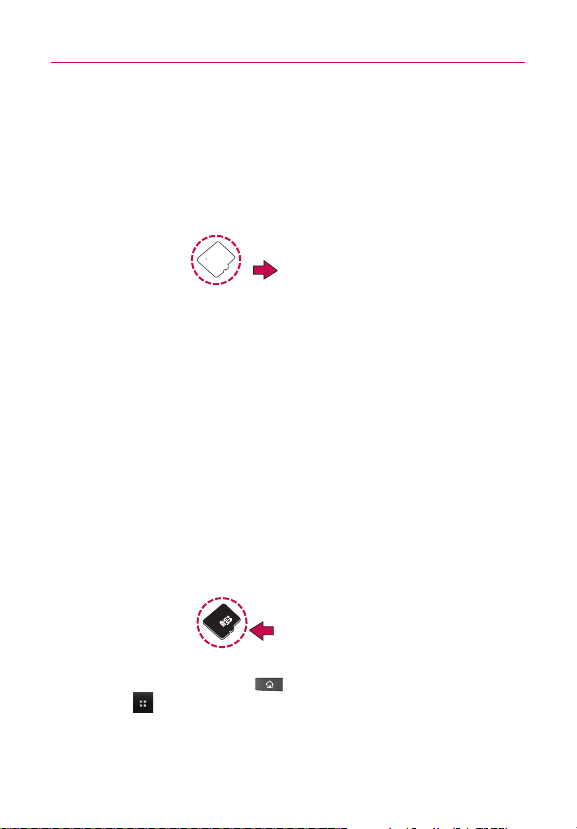
Inserting a microSD card
Gently uncover the microSD slot located on the left side of the
phone. Position the microSD card facing up and slide it into place
until it is fully inserted and locked in place.
NOTE
The microSD card can be easily damaged by improper operation. Please be
careful when inserting, removing or handling it.
To remove the microSD card
1. Unmount the microSD card (see steps below), then uncover
the microSD slot located on the left side of the phone.
2. Gently push the exposed edge of the microSD card in with
your fingertip to release it from the slot.
3. Carefully pull the microSD card out of the slot and replace
the cover to the slot.
NOTE
To safely remove the microSD card from your phone, unmount it from your
phone first, as described below.
23
To unmount the microSD card
1. Press the Home Key , press the Applications Launcher
2. Touch
3. Touch Unmount SD card.
.
Key
Settings > SD card & phone storage.

The Basics
24
Charging the Phone
Your LG GelatoTMdevice comes with a Wall/USB charger and a USB
data cable which connect together to charge your phone. To charge
your phone:
NOTICE
Please use only an approved charging accessory to charge your LG phone.
Improper handling of the charging port, as well as the use of an incompatible charger,
may cause damage to your phone and void the warranty.
1. Connect the USB cable into the Wall/USB charger. When
connecting, as shown below, the LG logo on the USB cable
should face toward you.
2. Plug the USB cable (as shown below) into the phone's
charger port.
Battery temperature protection
Though extremely rare, if the battery becomes overheated, the
phone will automatically turn off.
Battery charge level
You can find the battery charge level at the top right part of the
screen. When the battery level becomes low, the phone will notify
you. Once the battery level becomes exceedingly low, the phone
will shut off without notice. As a result, unsaved items may be lost.

The Basics
Charging with USB
You can use your computer to charge your phone. To be able to
charge with the USB cable, you need to have the necessary USB
drivers installed on your PC first. Connect one end of the USB
cable to the charger port on your phone and connect the other
end to a USB port on your PC. It is best to use the rear USB port
when connecting to a desktop PC. The USB hub should be
powered by an external power source.
NOTES
●
Low-power USB ports are not supported, such as the USB port on your
keyboard or bus-powered USB hub.
●
LG USB Driver is downloadable from the following site:
http://www.lgmobilephones.com > Click Mobile Support > Select the
Carrier(Verizon) > Select the Model > Click USB Cable Driver to download.
Using the phone without battery
It is possible to use the phone without the battery. Connect the
charger to the phone and plug the charger into a wall. After doing
this, you can turn the phone on and place calls.
NOTE
Using the phone without a battery may cause the phone to turn off
unexpectedly if the supply of power is interrupted.
Optimizing Battery Life
You can extend your battery's life between charges by turning off
features that run in the background. You can also monitor how
applications and system resources consume battery power.
To check the battery charge level
©
Press the Home Key , then touch the Applications
Launcher Key
The battery status (Charging and Discharging) and level (as a
percentage of fully charged) will be displayed at the top of
the screen.
> Settings > About phone > Status.
25

The Basics
26
To monitor and control what uses the battery
The Battery use screen allows you to see which applications are
consuming the most battery power. Information on this screen
allows you to identify downloaded applications you may want to
turn off when not being used, so you can get the most out of your
battery power.
©
Press the Home Key , then touch the Applications
Launcher Key
. The screen will display battery usage time.
use
©
Touch an application in the Battery Use screen to see the
> Settings > About phone > Battery
details about its power consumption.
Turning the Phone On and Off
Turning the phone on
©
Press and hold the Power/Lock Key for a couple of
seconds until the display lights up.
NOTE
When you turn on your phone for the first time, follow the instructions on
the screen to activate your device.
Turning the phone off
1. Press and hold the Power/Lock Key until the pop-up
menu appears.
2. Touch
3. Touch
Power Off in the pop-up menu.
OK to confirm that you want to turn off the phone.
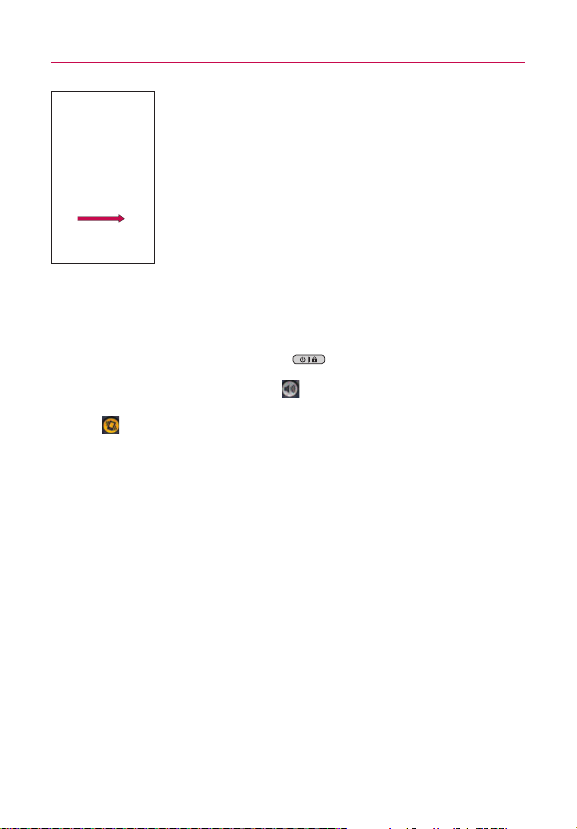
To unlock the phone
If you don’t use the phone for a while, the screen and backlight
will shut off to conserve battery power. To unlock the phone:
1. Press the
Your Lock Screen will appear.
2. Touch and drag the
The last screen you were working on opens.
Power/Lock Key .
Unlock icon to the right.
The Basics
NOTE
This is the default Lock Screen. If you have set up an Unlock
Pattern, use your fingertip to draw the pattern.
To turn the phone sounds off
If you're in a place where your phone sounds may disturb others,
you can quickly silence your phone from the Lock Screen.
1. Press the
2. Drag the
Power/Lock Key .
Sounds off icon to the left.
To turn the phone sounds back on, drag the Sounds on icon
to the left.
Setting up your device
When you turn on your wireless device for the first time, you have the
option to quickly set up various accounts. Simply follow the onscreen
instructions to complete the initial setup of your wireless device.
To set up your device, follow the steps below :
1. Select your language between English and Español.
2. If you see the ‘Welcome to the LG Gelato’ page, touch
Continue on the bottom.
3. Select whether to
4. Select whether to
With a Google Account, Google applications are
automatically synced between your phone and computer
regardless of where you make an update.
Skip or Start the Backup Assistant.
Skip or Start the Google account setup.
27

The Basics
28
5. Select the account you want to set up and enter your
information.
6. Select the Location Consent. (
Verizon Location Services/
Standalone GPS Services/ Google Location Services
7. Touch
Begin to start using the phone.
For more information on how to set up your email, visit
smartphones.verizonwireless. com/. Click on the Smartphone
Support tab
and select your phone.
Setting up your Google Account
1. At the setup screen, touch Create or Sign in.
2. Enter your username and password.
3. Touch
Now your Gmail, Google Contacts, and Google Calendar events
will all be loaded to your phone automatically.
Use the area below to record your Google account information for
future reference.
Username:___________________________@gmail.com
Password:________________________________________________
Your Google Account
You must sign into a Google Account to use Gmail, Google Talk,
Google Calendar, and other Google Apps; to download applications
from Android Market; to back up your settings to Google servers;
and to take advantage of other Google services on your phone.
Sign in.
IMPORTANT
●
If you want to restore your settings to this phone, from
another phone that was running Android release 2.0 or later,
you must sign into your Google Account now, during setup. If
you wait until after setup is complete, your settings are not
restored.
●
If you don’t have a Google Account, you’re prompted to
create one.
)

The Basics
●
If you have an enterprise account through your company or
other organization, your IT department may have special
instructions on how to sign into that account.
●
When you sign in, your contacts, Gmail messages, Calendar
events, and other information from these applications and
services on the web are synchronized with your phone.
●
If you don’t sign into a Google Account during setup, you are
prompted to sign in or to create a Google Account the first
time you start an application that requires one, such as Gmail
or Android Market.
●
When you sign in, you’re prompted to enter your username
and password, using the onscreen keyboard.
Touch to open the onscreen
keyboard to enter your Google
Account username.
Touch to enter your password.
When you’re finished, touch Done on the keyboard (or press
the phone
’s Back Key) to close the onscreen keyboard. Then
touch Sign in at the bottom of the screen.
If you have a Google Account but have forgotten your password,
you must reset it before you can sign in. Go to
http://www.google.com, click Sign In, click “Can’t access your
account?”
below the sign-in box, and then follow the instructions
for resetting your password.
Additional accounts
After setting up your Google Account, you can set up additional
accounts. These include, Google, Microsoft Exchange Server,
Facebook, Twitter, and other e-mail accounts. However, only the first
Google Account you sign into is backed up to Google servers. Some
applications that only work with a single account and display data
only from the first account that you sign into.
29
The Basics
30
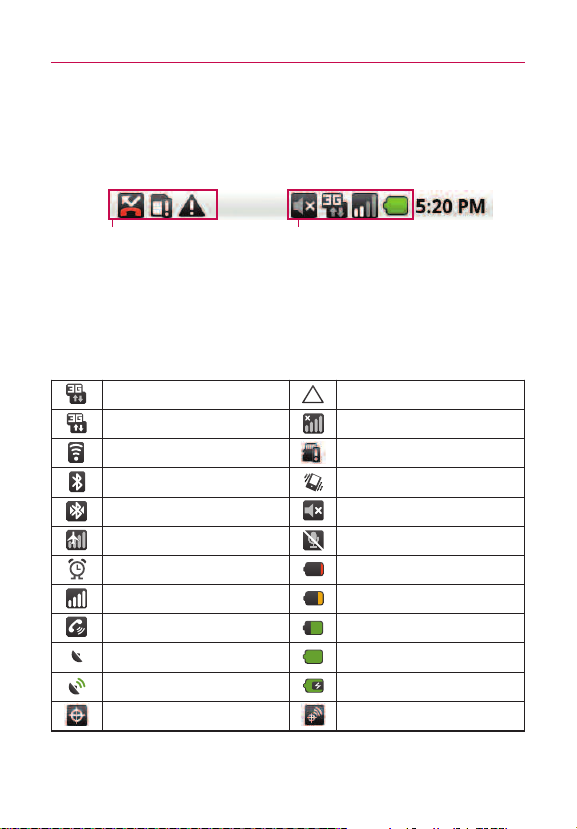
Phone’s Status Icons
The Status bar appears at the top of every screen. It displays icons
indicating that you’ve received notifications (on the left) and icons
indicating the phone’s status (on the right), along with the current time.
Notification icons
Status icons
If you have more notifications than can fit in the Status bar, a plus
icon prompts you to open the Notifications panel to view them all.
Status icons
The following icons indicate the status of your phone.
3G connected Roaming
3G in use No signal
Connected to a Wi-Fi network No microSD card installed
Bluetooth is on Vibrate mode
Connected to a Bluetooth device Ringer is silenced
Airplane mode is set Phone microphone is muted
Alarm is set Battery is very low
Signal strength Battery is low
Speakerphone is on Battery is partially drained
GPS is on Battery is full
Receiving location data from
Location Off Location On
GPS Battery is charging
The Basics
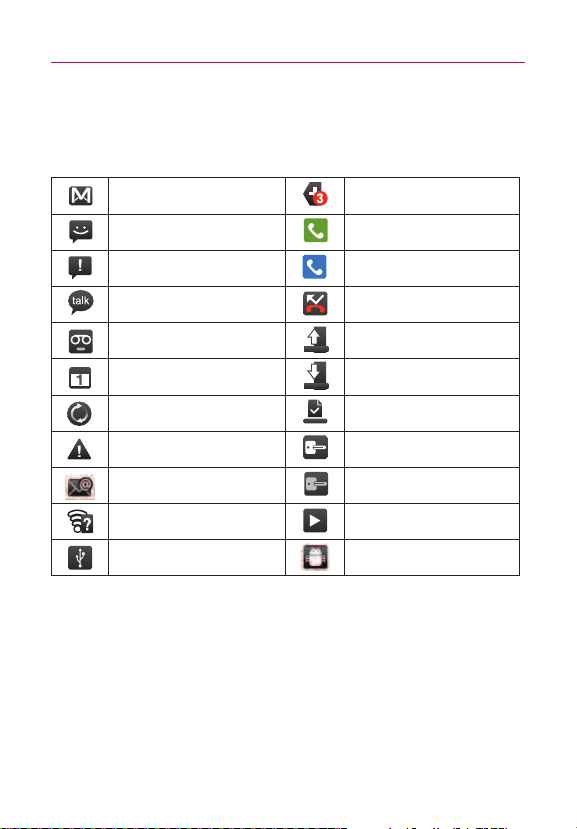
Notification icons
The following icons indicate that you've received a notification.
31
New Gmail message
New text or multimedia
message
Problem with text or
multimedia message delivery
New Google Talk message Missed call
New voicemail Uploading data
Upcoming event Downloading data
Data is syncing Download finished
Problem with sign-in or sync Connected to VPN
New email Disconnected from VPN
An open Wi-Fi network is
available
Phone is connected via USB
cable
3 more notifications not
displayed
Call in progress
Call in progress using
Bluetooth headset
Song is playing
USB debugging connected
The Basics
32
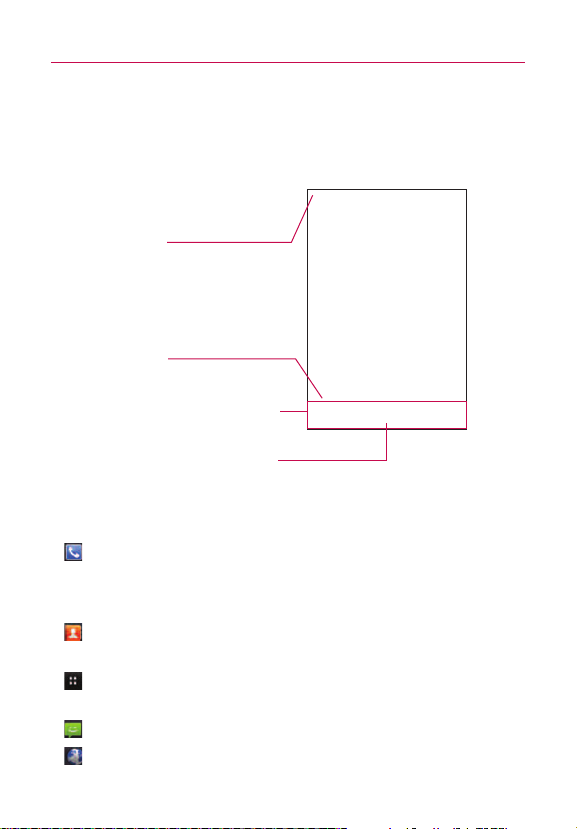
Getting to Know the Home Screen
The Home screen is your starting point to access all the features on
your phone. It displays application shortcuts, icons, widgets,
and other features.
Status Bar
Shows device status information
including the time, signal strength,
battery status, and notification
icons.
Application Icon
Touch an icon (application, folder,
etc.) to open an application and
use it.
Quick Keys
Provide easy, one-touch access to
the functions y
Applications Launcher Key
Touch to open the Launch screen
to view installed applications.
Quick Keys
On the home screen, the Quick Keys are located on a bar along the
bottom of the Home screen and the Launch screen.
: opens the
you can dial an unsaved number. You can also access the Call
log, Contacts and Favorites by touching the tabs across the
top.
: opens your Contacts list. You can also access access Phone,
Call log, and Favorites by touching the tabs across the top.
: opens the Launch screen, where you can view all of your
installed applications.
: opens the
: opens the
ou use the most.
Phone application, which displays the dialpad so
Messaging application.
Browser application.
The Basics
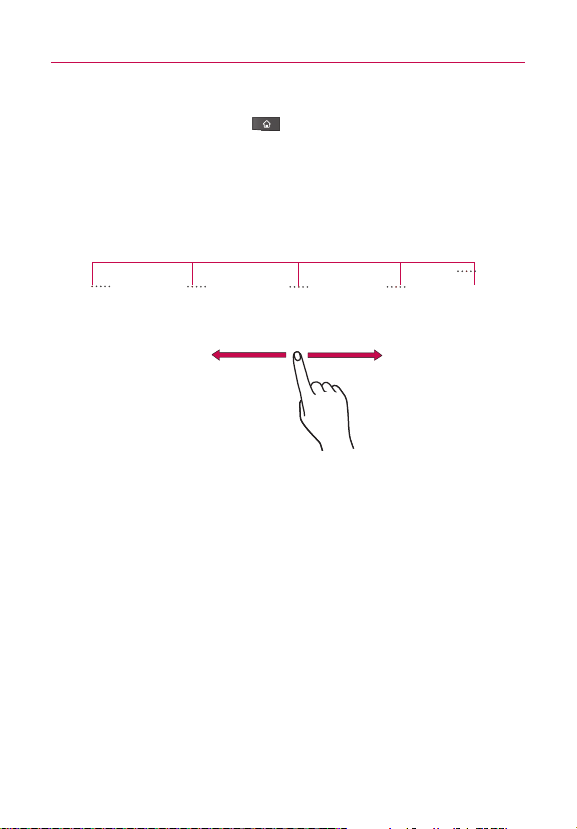
To return to the Home screen
©
Press the Home Key at any time, from any application.
To view other Home screen panes
©
Slide your finger left or right across the Home screen. The
Home screen spans five panels, allowing more space for
icons, widgets, shortcuts, etc.
The dots indicate which Home screen pane you are viewing.
Location Indicator
Touchscreen
Your touchscreen provides an excellent way to interact with and use
your Android phone. With the touch of your finger, you can
download and use available applications, make menu selections,
and access data saved to your phone.
The following terms are used for describing the different available
actions using the touchscreen:
Touch A single finger touch selects items. For example, touch an
icon (e.g., application or menu item), touch words (e.g., menu
selection or to answer onscreen question), or touch letters to type.
Touch and hold Touch and hold an item on the screen by
touching it and not lifting your finger until an action occurs. For
example, to open a pop-up menu for customizing the Home
screen, touch an empty area on the Home screen until the menu
pops up.
33
The Basics
34
Drag Touch and hold an item for a moment and then, without
lifting your finger, move your finger on the screen until you reach
the target position. You can drag items on the Home screen to
reposition them.
Swipe or slide To swipe or slide, quickly move your finger across
the surface of the screen, without pausing when you first touc
(so you don
’
t drag an item instead). For example, you can slide the
screen up or down to scroll a list, or browse through the different
Home screens by swiping from left to right (and vice versa).
Double-tap Double-tap to zoom a webpage or a map. For
example, quickly double-t
ap a section of a webpage to zoom that
section to fit the width of the screen. You can also double-tap to
control the Camera zoom, in Bing Maps, and in other applications.
Pinch-to-Zoom Use your index finger and thumb in a pinch or
spread motion to zoom in or out when using the browser, viewing
a map or pictures.
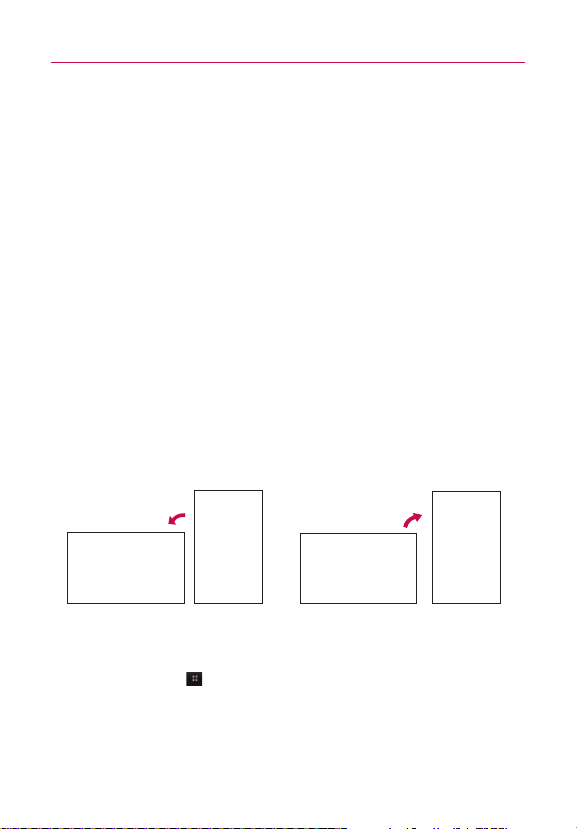
Rotate the scr
een From many applications, the orientation of the
screen rotates with the phone as you turn it from upright to
sidewa
ys and back again.
h it
Rotate the phone counter-clockwise for
landscape orientation.
NOTE
To turn this feature on and off, from the Home screen, touch the Applications
Launcher Key > Settings > Display. Then touch the Auto-rotate screen
checkbox.
Rotate the phone clockwise for portrait
orientation.
The Basics
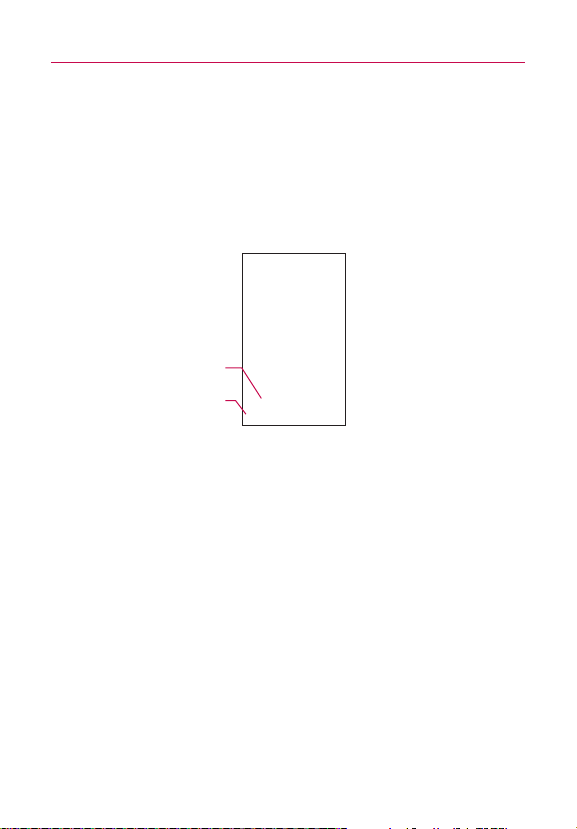
Text Input Methods
Swype (default): Swype
enter a word by sliding your finger from letter to letter, lifting your
finger between words.
Android keyboard: The Android keyboard can also be used to enter
text. To switch to the Android keyboard, touch and hold a text field,
then touch Input method > Android keyboard.
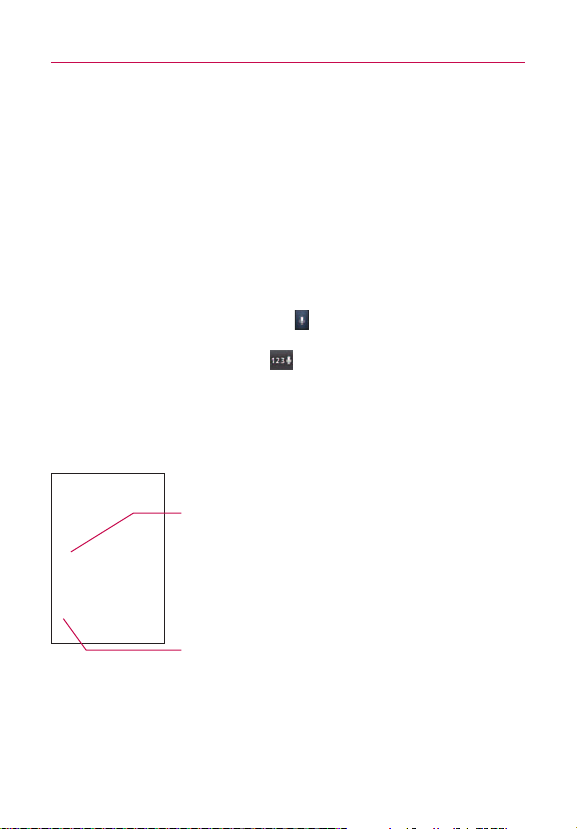
Toggles from 123/ABC
mode to SYM mode
Allows you to view Swype
Tips and Help.
™
is a text input method that allows you to
Using the Swype Keyboard
The default keyboard uses Swype™. Swype uses error correcting
algorithms and a language model to predict the next word. Swype
also includes a touch predictive text system.
Swype Tips
Access the Swype Tips to watch a video or tutorial on using Swype.
You can also use the following Swype text entry tips.
©
Create a squiggle (like an S shape) to create a double letter
(such as pp in apple).
©
Touch and hold a key to enter the alternate letter or symbol
located at the top right corner of the key.
©
Move your finger over the apostrophe to enter contractions.
35
The Basics
36
©
Double-touch on the word you want to change to correct a
misspelled word.
©
Touch the delete key to erase one character. Touch and hold
the delete key to erase an entire word.
Swype Settings
To configure Swype settings
1. From the Home screen, touch the Applications Launcher
2. Touch one of the following Swype settings to configure the
Preferences settings
Preferences settings provide access to Swype operation
preferences.
Language allows you to select the current text input language.
The default language depends on the language set when you first
activated the phone.
Word prediction allows you to use a built-in word database to
predict words while entering text in Swype.
Audio feedback allows you to turn on sounds generated by the
Swype application.
Vibrate on keypress allows you to activate a vibration sensation
as you enter text using the keypad.
Enable tip indicator allows you to turn on an on-screen flashing
indicator that provides helpful user information.
> Settings Language & keyboard > Swype.
Key
setting:

The Basics
Swype Advanced Settings
Swype Advanced Settings provide access to Swype advanced
operation settings.
Auto-spacing allows you to automatically insert a space between
words. When you finish a word, just lift your finger and start the
next word.
Auto-capitalization allows you to automatically capitalize the first
letter of a sentence.
Show complete trace allows you choose whether or not you
want the complete Swype path to display.
Word choice window sets the amount of times the word choice
selection window displays on screen. Move the slider between
Never or Always and touch OK.
Speed vs. accuracy sets how quickly Swype responds to on-
screen input. Move the slider between Fast Response (speed) or
Error Tolerance (accuracy) and touch OK.
Help
This menu provides help and a tutorial to guide you through the
process.
Swype help displays the Swype User Manual.
Tutorial provides an on-screen tutorial.
About
The about menu provides the current software version for the
Swype application.
37
The Basics
38
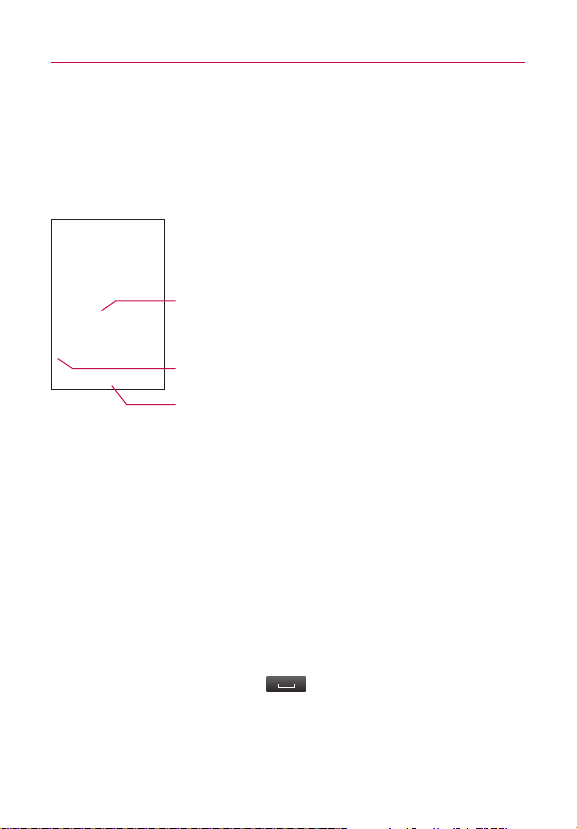
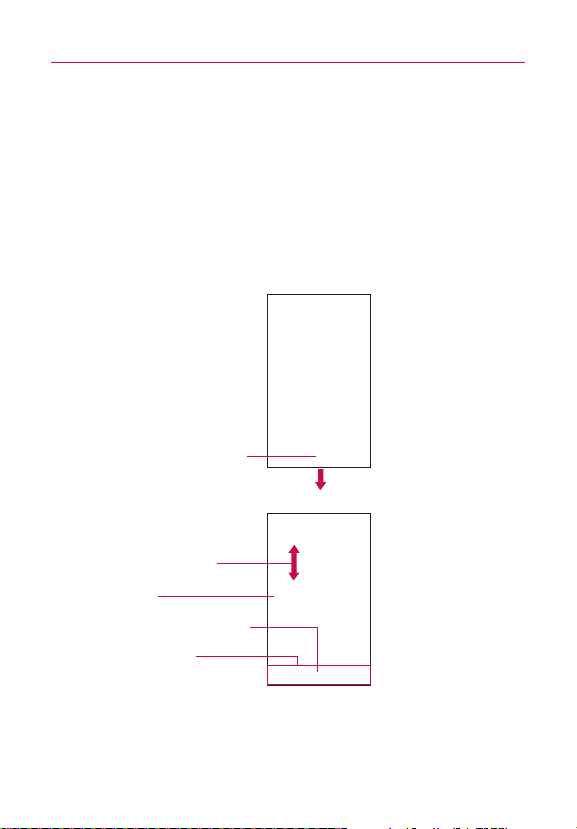
Using the Android keyboard
You enter text using the onscreen keyboard. Some applications
open the keyboard automatically. In others, you touch a text field
where you want to enter text to open the keyboard.
You can also enter text by speaking instead of by typing.
See 'Swype Advanced Settings' on p38 to know
how to set the suggestion function.
Touch once to capitalize the next letter you type.
Touch and hold for all caps.
Touch space or a punctuation
mark to enter the red
suggestion.
To enter text
1. Touch a text field.
The onscreen keyboard opens.
2. Touch the keys on the keyboard to type.
The characters you’ve entered appear in a predictive word
box above the keyboard, with suggestions for the word you
are typing. Touch the arrow to view more suggestions.
3. Enter text into the text field.
©
Touch the word you want as soon as it appears in the
predictive word box.
©
Touch the Space Key or a punctuation key to enter
the predicted word.
©
Touch another word in the predictive word box.
©
Continue touching letters until the word appears in the
predictive word box.
©
Touch the Delete Key to erase characters to the left of
the cursor.
NOTE
Words that do not appear in the predictive word box before you enter it
completely are automatically added to your dictionary for future use. To
manually add a word, touch and hold the word to open a dialog box, then
touch Add to dictionary.
4. When you're finished typing, press the Back Key to
close the keyboard.
To enter numbers, symbols, and other characters
©
Touch the Symbols Key to switch to the numbers and
symbols keyboard.
Touch the Alt Key on the symbols keyboard to access
additional symbols; touch it again to switch back.
©
Touch and hold any of the letter keys to access alternate
symbols. Initially, the symbol at the top of the key pops up.
When the menu pops up, touch any of the alternate
characters or symbols displayed.
©
Touch and hold the Period Key (.) from abc mode to open a
small window to choose from various symbols.
©
Touch and hold a number or symbol key to open a window of
additional symbols.
To change the keyboard orientation
©
Turn the phone sideways or upright.
You can control whether the screen
changes orientation automatically
when you turn the phone.
The Basics
39
The Basics
40
Entering text by speaking
You can use voice input to enter text by speaking. Voice input is an
experimental feature that uses Google’s speech-recognition service,
so you must have a data connection on a mobile or Wi-Fi network
to use it.
To enter text by speaking
You can enter text by speaking in most places where text is
allowed to be introduced.
1. Touch a text field.
2. Touch the
the Microphone Key to appear on the symbols keyboard,
touch the Symbols Key first).
3. When prompted to “Speak now,” speak what you want to
enter.
Say “comma,” “period,” “question mark,” “exclamation
mark,” or “exclamation point” to enter punctuation.
Microphone Key on the keyboard (if you set
Text that you enter by speaking is underlined. You can
delete it, or you can continue entering text to keep it.
Touch once to capitalize the next letter you type.
Touch and hold for all caps.
When you pause, what you spoke is transcribed by the speechrecognition service and entered in the text field, underlined. You can
touch the
Delete Key to erase the underlined text. If you start
typing or entering more text by speaking, the underline disappears.
You can edit the text that you enter by typing or speaking.

The Basics
Editing text
You can edit the text you enter in text fields and use menu
commands to cut, copy, and paste text, within or across
applications. Some applications don’t support editing some or all of
the text they display; others may offer their own way to select text
you want to work with.
To edit text
1. Touch and hold the text field that contains the text you want
to edit.
2. A context menu with editing options is displayed. Choose an
option to edit the text.
3. Once you are finished editing the text, press the
to close the keyboard.
To select text
You can select text to cut or copy. Selected text is highlighted in
orange.
1. Touch and hold the text field or other portion of the screen
that contains the text to select.
2. In the context menu that opens, touch
3. Select text by touching and dragging across the text you
want to select.
4. Touch and hold the text field again and touch
Select text.
Back Key
Cut or Copy.
41

The Basics
42
To cut or copy text
1. Select the text to cut or copy.
2. Touch and hold the text field, then touch
menu that opens.
Cut or Copy in the
To paste text
1. Copy (or Cut) the text to paste.
2. Touch the position on the text field where you want to paste
the text. This will set the cursor to the desired position.
You can paste text that you copied from one application into
a text field in another application.
3. Touch and hold the text field, then touch
that opens.
Paste in the menu
The Basics
Applications: How to View, Open and Switch
All of the applications on your phone, including any applications that
you downloaded and installed from Android MarketTMor other
sources, are grouped together on one Launch screen that you
access from your Home screen. You can slide the screen up or
down to view more applications.
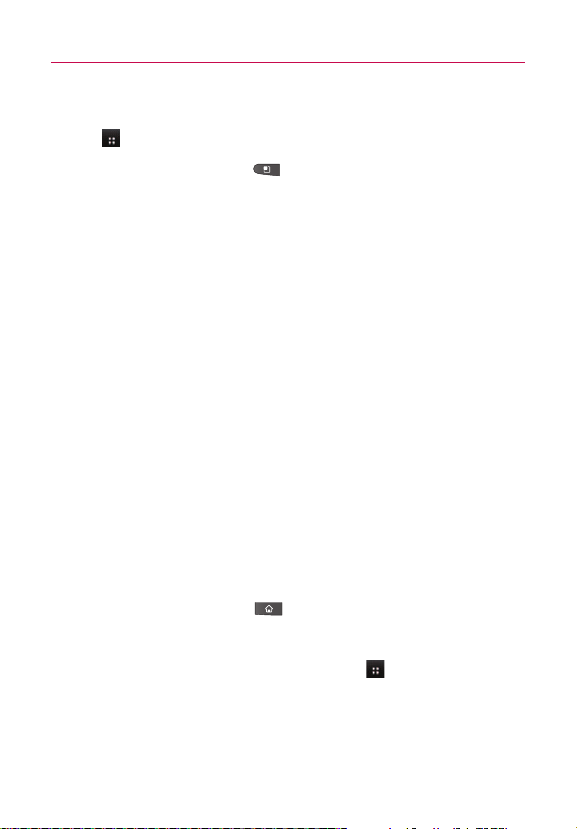
Overview
Home screen
Touch to open the Launch screen
Launch screen
Slide the screen up or down to
bring more icons into view
Touch an application icon to open
the application
Touch to close the Launch screen
Quick Keys
43

The Basics
44
Opening and Closing the Launch screen
Opening the Launch screen
With your LG Gelato, it's easy to access the Launch screen no
matter what feature you're currently using. Simply press the
Home Key , then touch the Applications Launcher Key .
Closing the Launch screen
To manually close the Launch screen, press the Home Key
, or touch Home .
NOTE
The Launch screen closes automatically when you touch an icon to
open its application. Dragging an icon onto your Home screen also
closes the Launch screen automatically.
Customizing the Launch screen
The items on the Launch screen are listed alphabetically. You can
customize the Launch screen by moving the position of
applications so that you don't have to scroll the screen up to
access the applications you use most often. You can also add
additional categories to the screen to organize your files.
Moving application positions
1. From the Home screen, touch the Applications Launcher
.
Key
2. Press the
Menu Key and touch Move Item.
3. Touch and drag the application icon to the position you want,
then lift your finger. Application icons to the right of the
position shift accordingly.
The Basics
Adding a category
1. From the Home screen, touch Applications Launcher Key
.
2. Press the
3. Enter the category name, then touch
Menu Key and touch Add category.
OK.
Opening and Switching Applications
Multi-tasking is easy with AndroidTMbecause open applications
keep running even when you open another application. There’s no
need to quit an application before opening another. You can use
and switch among several open applications. Android manages
each application, stopping and starting them as needed to ensure
that unused applications don’t waste your device's resources.
Opening an application
©
Open an application simply by touching its icon on the
screen.
TIP!
You can customize your Home screen with the application icons you use
most often. Applications are located on the Launch screen, but you can
copy any application icon to your Home screen for faster access. No
matter where the icon is, on the Launch screen or your Home screen,
just touch it to open and use it.
Opening multiple applications
1. Touch an application icon to open it.
2. Press the
NOTE
Home Key .
If the application icon you want is on your Home screen, simply touch
the icon to open and use it.
3. Touch the Applications Launcher Key .
4. Touch the icon for the other application you want to open.
45
The Basics
46
Switching between multiple applications
1. Press and hold the Home Key .
A window opens with icons of applications that you’ve used
recently.
2. Touch the application icon you want to open.
Or touch the
Back Key to return to the
current application.
Touch an icon to open an application
've used recently.
you
Adding application icons to the Home screen
Customize your Home screen with the applications you use most
often.
1. Open the Launch screen.
2. Touch and hold the application icon you want to add to your
Home screen.
3. Lift your finger to place it, or drag the icon to where you
want it on the screen, then lift your finger.
Working with Menus
There are two kinds of Android menus: Options menus and Context
menus.
Options menus
Options menus contain tools that apply to the activities of the
current screen or application, not to any specific item on the
screen. To open the available Options menu, press the
. Not all applications have Options menus; if you press the
Menu Key on a screen that has no Options menu, nothing
will happen.
Menu Key
 Loading...