

Page 1
Installation and Assembly - LG Set Top Box Attachment
Model: PWMT300-AC1
Accessory for PWMT300
IMPORTANT! Read instruction sheet before you st art installation and assembly .
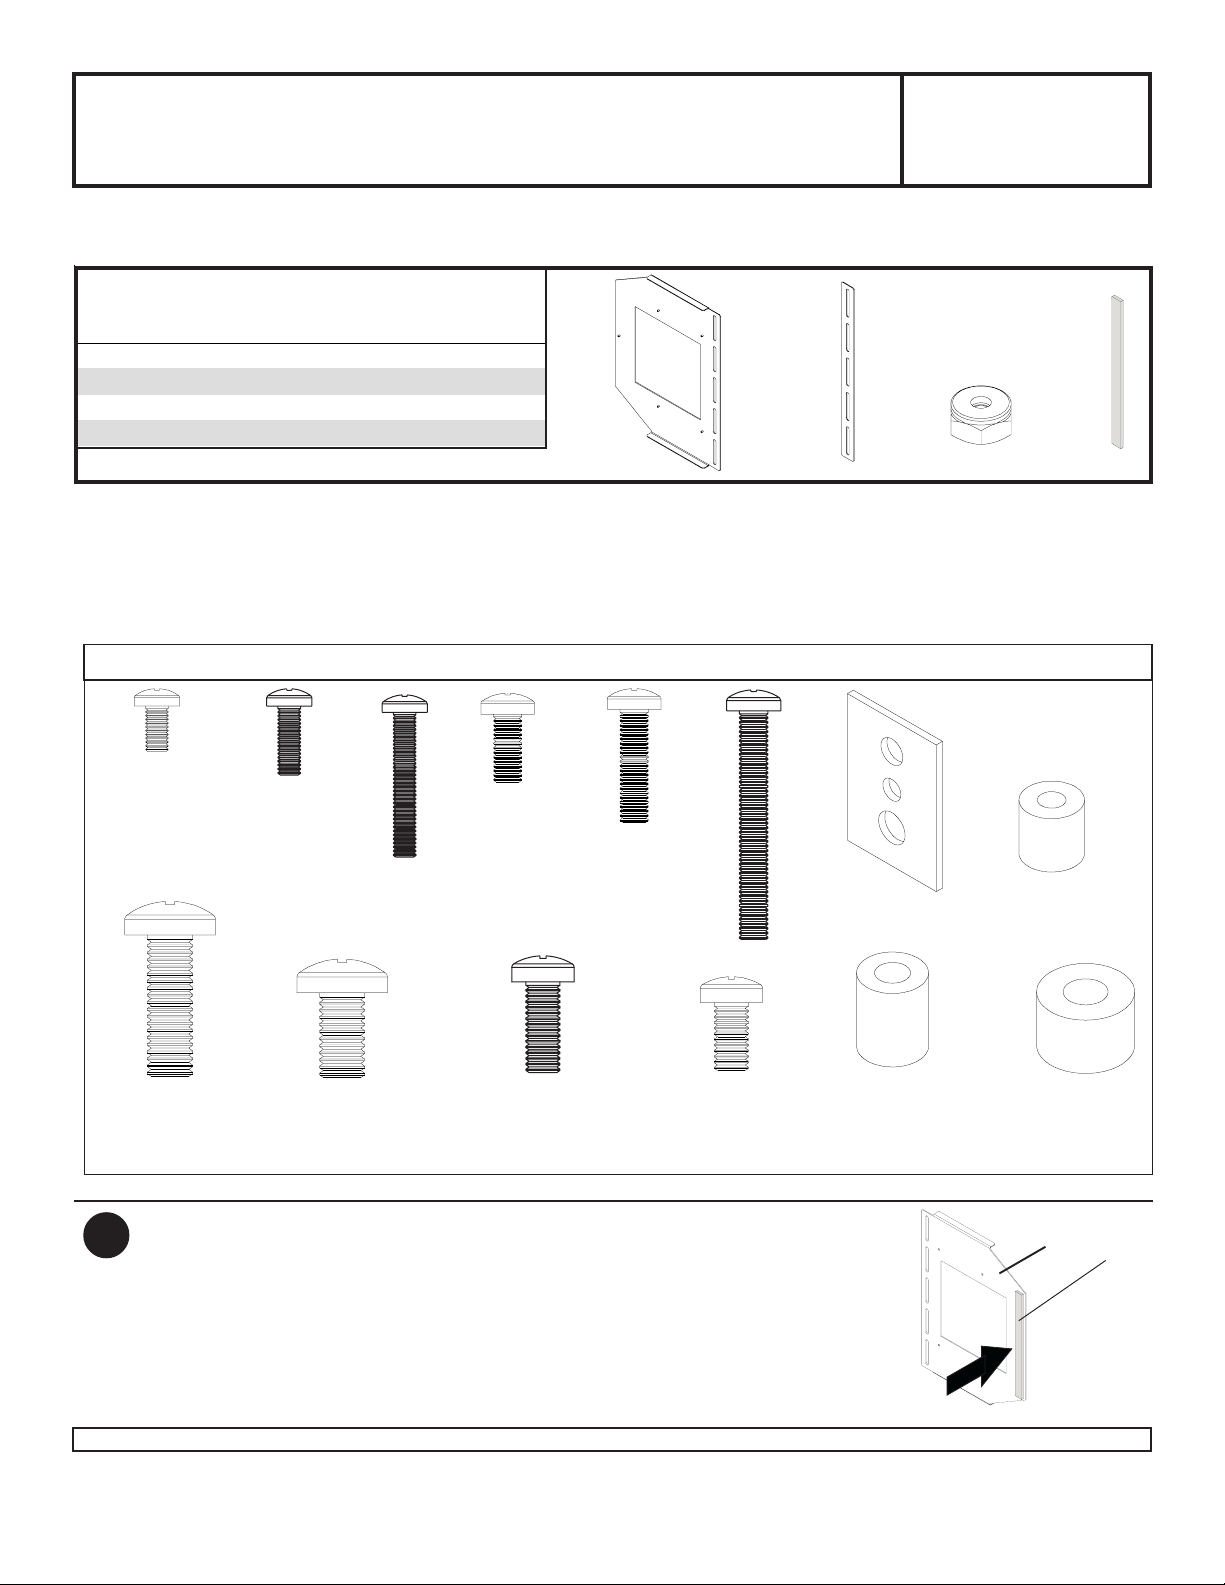
Before you start make sure all parts listed are included with your product.
Parts List
De scrip tion Qty. Part #
att achment pl at e 1 201-1375
A
spacer plate 1 201-1376
B
6-32 nylock nut 4 530-1006
C
sel f adhesi ve foam s t ri p 1 599-3802
D
Some parts may appear slightly different than illustrated.
Tools Needed for Assembly
•
5/16" socket wrench
Fasteners below are included with PWMT300 and not the PWMT300-AC1. These fasteners may be required for
assembly . Refer to comp atibility chart in PWMT300 instruction for proper fasteners to use with screen.
Adapter Bracket Fasteners
A
B
C
D
M4 x 8 mm (6)
(520-1237)
M8 x 25 mm (4)
(520-1031)
Parts may appear slightly different than illustrated.
Attach self adhesive foam strip (D) to the back of
1
attachment plate (A) as shown.
Note: Back of plate is installed against flat panel screen
so foam comes between the plate and the flat panel to
prevent rattling.
M4 x 12 mm (6)
(504-9013)
M4 x 25 mm (4)
M8 x 16 mm (6)
(520-9257)
M5 x 12 mm (4)
(520-1027)
(504-1015)
M6 x 16 mm (6)
(520-9274)
M5 x 25 mm (4)
(520-9543)
M5 x 40 mm (6)
(520-1 199)
M6 x 12 mm (4)
(520-1 128)
multi-washer (6)
(580-1036)
I.D. 6.4 mm (6)
(590-1106)
I.D. 5.6 mm (4)
(540-1057)
I.D. 8.7 mm (4)
(540-1059)
A
D
1 of 2
Visit the Peerless Web Site at www.peerlessmounts.com For customer care call 1-800-729-0307 or 708-865-8870.
ISSUED: 05-21-07 SHEET #: 124-9068-1
Page 2
WARNING
• When attaching the PWMT300-AC1 Accessory and PWMT300 Mount to the flat panel TV/Monitor , if the screws
included with the PWMT300 Mount don’t get 3 complete turns into the flat panel’s threaded inserts, or if the screws
bottom out and the PWMT300 Mount brackets are not tightly secured, damage may occur to the flat panel or the
product may fail.
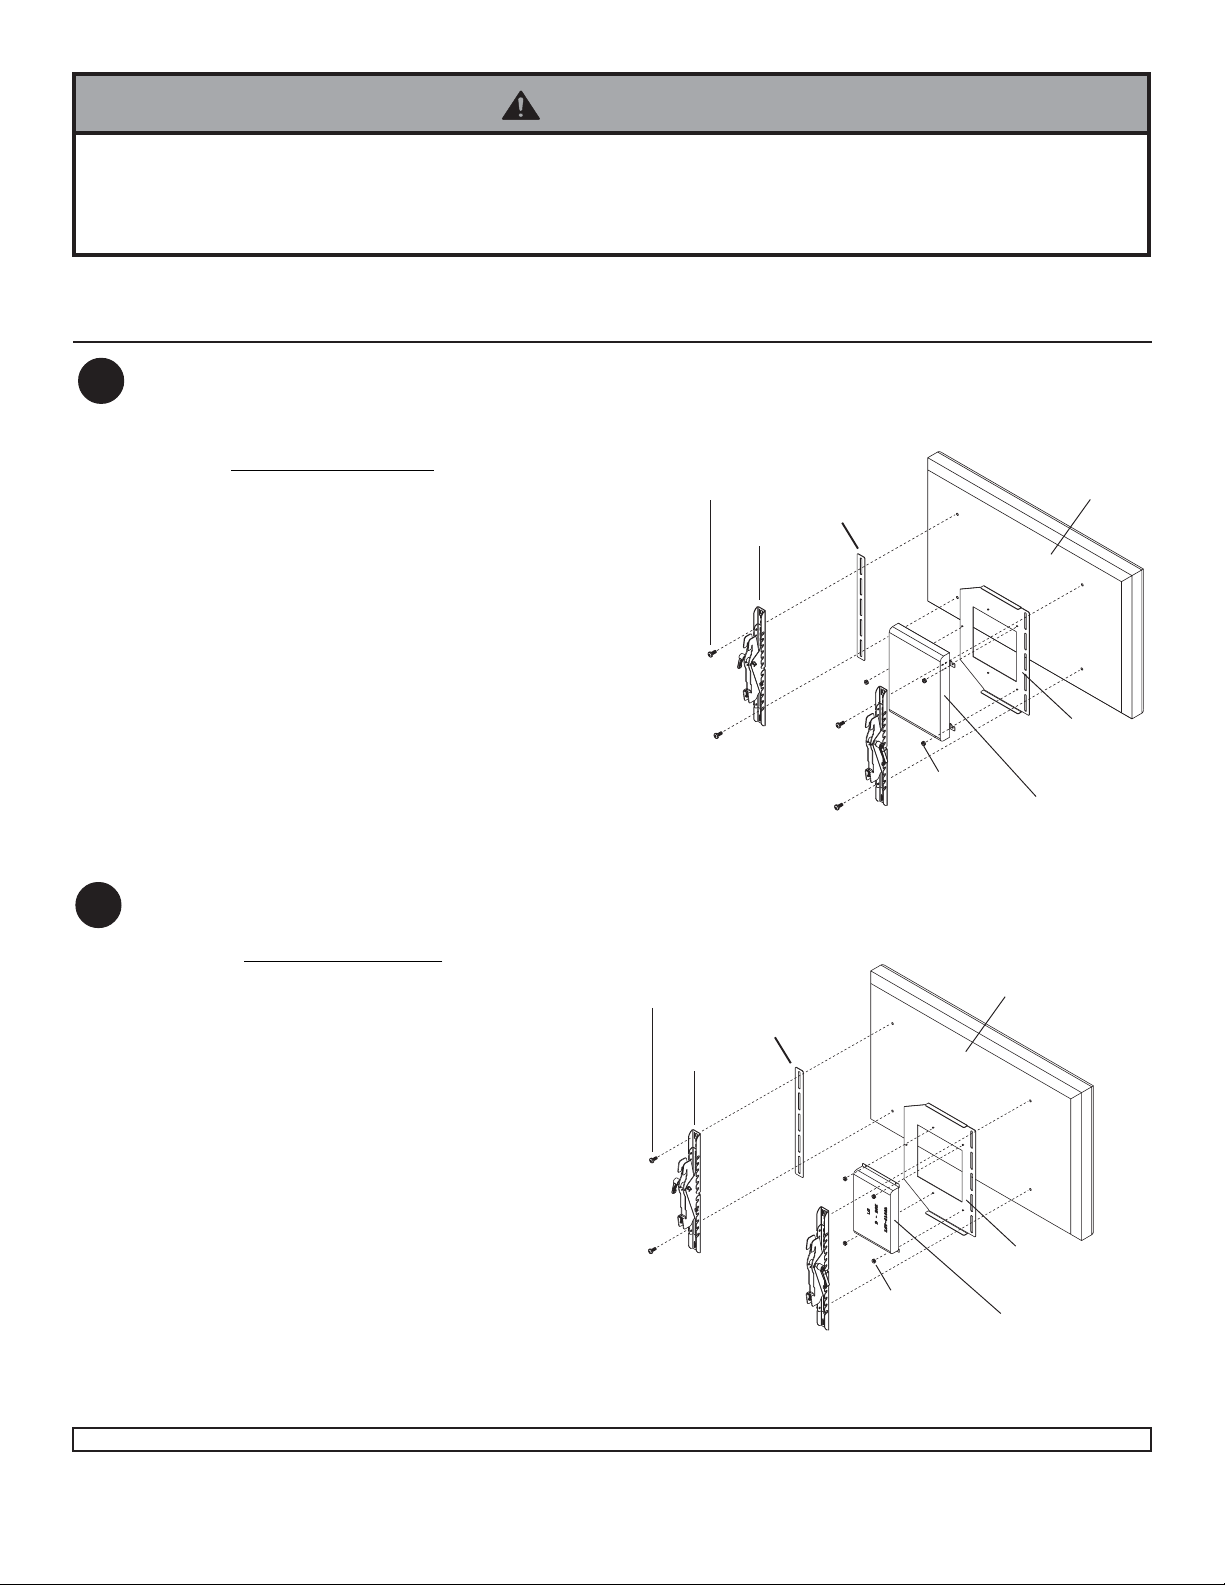
For installing HCS5610 Pay-Per-View Box, see step 2.
For installing LST -4100B IP Interface Module, see step 3.
Installing HCS5610 Pay-Per-View Interface Box with Integrated HD Tuner
2
to Attachment Plate
Note: Rubber grommets on the mounting tabs of
HCS5610 will have to be removed before installing.
Place HCS5610 onto the threaded studs on attachment
plate (A) and secure with 6-32 nylock nuts (C) using a
5/16" socket wrench.
Place one tilt bracket (from PWMT300 Mount) over
attachment plate (A) and one bracket over spacer plate
(B). Place the appropriate length screws (from PWMT300
Mount) through each bracket and plate combination and
securely fasten to the flat panel TV/Monitor .
Note: Due to the additional thickness of attachment plate
(A) and spacer plate (B), longer screws may be required
to securely fasten each bracket and plate combination to
the flat panel TV/Monitor . Refer to Warning! box above
regarding the need for 3 complete turns required. See
page 1 for additional length screws included in the
PWMT300 mount hardware kit.
SCREW
TILT
BRACKET
B
C
LG MODEL HCS5610
(WITH THREE MOUNTING
TABS ATTACHED)
SCREEN
A
Installing LST-4100B IP Interface Module to Attachment Plate
3
Note: Rubber grommets on the mounting tabs of
LST-4100B will have to be removed before
installing.
Place LST-4100B onto the threaded studs on
attachment plate (A) and secure with 6-32 nylock
nuts (C) using a 5/16" socket wrench.
Place one tilt bracket (from PWMT300 Mount)
over attachment plate (A) and one bracket over
spacer plate (B). Place the appropriate length
screws (from PWMT300 Mount) through each
bracket and plate combination and securely
fasten to the flat panel TV/Monitor .
Note: Due to the additional thickness of
attachment plate (A) and spacer plate (B), longer
screws may be required to securely fasten each
bracket and plate combination to the flat panel
TV/Monitor. Refer to W arning! box above
regarding the need for 3 complete turns required.
See page 1 for additional length screws included
in the PWMT300 mount hardware kit.
Visit the Peerless Web Site at www.peerlessmounts.com For customer care call 1-800-729-0307 or 708-865-8870.
SCREW
2 of 2
TILT
B
BRACKET
C
ISSUED: 05-21-07 SHEET #: 124-9068-1
SCREEN
A
LG MODEL LST-4100B
(WITH FOUR MOUNTING
TABS ATTACHED)
 Loading...