


1
MW560
Welcome . . . . . . . . . . . . . . . . . . . . . . . . .8
Check Accessories . . . . . . . . . . . . . . . . . . . . . . .9
Important Information . . . . . . . . . . . . . . . . . . .9
FCC Part 15 Class B Compliance . . . . . . . . .9
Technical Details . . . . . . . . . . . . . . . . . . . . . .10
FCC RF Exposure Information . . . . . . . . . . . . . .12
Phone Overview . . . . . . . . . . . . . . . . .14
Menus Overview . . . . . . . . . . . . . . . . .16
Getting Your Phone Started . . . . . . . .18
The Battery . . . . . . . . . . . . . . . . . . . . . . . . . . . .18
Installing the Battery . . . . . . . . . . . . . . . . . . .18
Removing the Battery . . . . . . . . . . . . . . . . . .18
Charging the Battery . . . . . . . . . . . . . . . . . . .18
Battery Level . . . . . . . . . . . . . . . . . . . . . . . . .19
Turning the Phone On and Off . . . . . . . . . . . . . .19
Turning the Phone On . . . . . . . . . . . . . . . . . .19
Turning the Phone Off . . . . . . . . . . . . . . . . . .19
Signal Strength . . . . . . . . . . . . . . . . . . . . . . .19
Installing/Removing the SIM . . . . . . . . . . . . . .20
Screen Icons . . . . . . . . . . . . . . . . . . . . . . . . .21
Making Calls . . . . . . . . . . . . . . . . . . . . . . . . . . .22
Correcting Dialing Mistakes . . . . . . . . . . . . .22
Redialing Calls . . . . . . . . . . . . . . . . . . . . . . .22
Receiving Calls . . . . . . . . . . . . . . . . . . . . . . . . .23
Quick Access to Convenient
Features . . . . . . . . . . . . . . . . . . . . . . . .24
MMaannnneerr MMooddee .. .. .. .. .. .. .. .. .. .. .. .. .. .. .. .. .. .. .. .. .. .. .. ..2244

2
MW560
LLoocckk MMooddee .. .. .. .. .. .. .. .. .. .. .. .. .. .. .. .. .. .. .. .. .. .. .. .. .. .. ..2244
SSppeeaakkeerr OOnn FFuunnccttiioonn .. .. .. .. .. ..
.. .. .. .. .. .. .. .. .. .. .. .. ..2255
QQuuiicckk AAddjjuusstt .. .. .. .. .. .. .. .. .. .. .. .. .. .. .. .. .. .. .. .. .. .. .. .. ..2255
CCaalllleerr
IIDD .. .. .. .. .. .. .. .. .. .. .. .. .. .. .. .. .. .. .. .. .. .. .. .. .. .. .. .. ..2266
SSppeeeedd DDiiaalliinngg .. .. .. .. .. .. .. .. .. ..
.. .. .. .. .. .. .. .. .. .. .. .. .. ..2277
Entering and Editing Information . . .28
TTeexxtt IInnppuutt .. .. .. .. .. .. .. .. .. .. .. .. .. .. .. .. .. .. .. .. .. .. .. .. .. .. .. ..2288
TTeexxtt IInnppuutt EExxaammpplleess .. .. .. .. ..
.. .. .. .. .. .. .. .. .. .. .. .. .. ..3300
Contacts in Your Phone’s Memory . . .32
TThhee BBaassiiccss ooff SSttoorriinngg CCoonnttaaccttss EEnnttrriieess .. .. .. .. ..3322
OOppttiioonnss ttoo CCuussttoommiizzee YYoouurr CCoonnttaaccttss .. .. .. .. .. ..3344
Adding or Changing the Group . . . . . . . . . . . . .34
Changing the Call Ringer . . . . . . . . . . . . . . . . .34
Adding or Changing the Memo . . . . . . . . . . . . .35
Adding or Changing the Picture ID . . . . . . . . . .35
Adding Speed Dial . . . . . . . . . . . . . . . . . . . . . .36
EEddiittiinngg CCoonnttaaccttss EEnnttrriieess .. .. .. .. .. .. .. .. .. .. .. .. .. .. .. ..3377
Adding Another Phone Number . . . . . . . . . . . .37
Default Numbers . . . . . . . . . . . . . . . . . . . . . . . .38
Editing Stored Phone Numbers . . . . . . . . . . . . .38
Editing Stored Names . . . . . . . . . . . . . . . . . . . .39
DDeelleettiinngg .. .. .. .. .. .. .. .. .. .. .. .. .. .. .. .. .. .. .. .. .. .. .. .. .. .. .. .. ..4400
Deleting a Contact Entry . . . . . . . . . . . . . . . . . .40
Deleting a Speed Dial . . . . . . . . . . . . . . . . . . . .40
PPhhoonnee NNuummbbeerrss WWiitthh PPaauusseess .. .. .. .. .. .. .. .. .. .. .. ..4411

3
MW560
Storing a Number With Pauses . . . . . . . . . . . . .41
Adding a Pause to an Existing Number . . . . . .42
SSeeaarrcchhiinngg YYoouurr PPhhoonnee’’ss MMeemmoorryy .. .. .. .. .. .. .. .. ..4433
Scrolling Through Your Contacts . . . . . . . . . . . .43
Searching by Letter . . . . . . . . . . . . . . . . . . . . . .43
Searching Options . . . . . . . . . . . . . . . . . . . . . . .44
MMaakkiinngg aa CCaallll FFrroomm YYoouurr PPhhoonnee''ss MMeemmoorryy .. ..4455
From Contacts . . . . . . . . . . . . . . . . . . . . . . . . . .45
From Recent Calls . . . . . . . . . . . . . . . . . . . . . . .45
Using Phone Menus . . . . . . . . . . . . . .46
MMeennuu AAcccceessss .. .. .. .. .. .. .. .. .. .. .. .. .. .. .. .. .. .. .. .. .. .. .. .. ..4466
Calls . . . . . . . . . . . . . . . . . . . . . . . . . . . .47
1. All Calls . . . . . . . . . . . . . . . . . . . . . . . . . . . . . .48
2. Missed Calls . . . . . . . . . . . . . . . . . . . . . . . . . .48
3. Received Calls . . . . . . . . . . . . . . . . . . . . . . . .48
4. Sent Calls . . . . . . . . . . . . . . . . . . . . . . . . . . . .49
5. Numeric Memos . . . . . . . . . . . . . . . . . . . . . . .49
6. Calls Settings . . . . . . . . . . . . . . . . . . . . . . . . .49
7. Calls Time . . . . . . . . . . . . . . . . . . . . . . . . . . . .52
Downloads . . . . . . . . . . . . . . . . . . . . . . .53
1. Downloads . . . . . . . . . . . . . . . . . . . . . . . . . . .54
My Vivo . . . . . . . . . . . . . . . . . . . . . . . . . .55
1. Main Keys . . . . . . . . . . . . . . . . . . . . . . . . . . . .55
2. Menu Style . . . . . . . . . . . . . . . . . . . . . . . . . . .55
3. Sounds . . . . . . . . . . . . . . . . . . . . . . . . . . . . . .56
4. Display . . . . . . . . . . . . . . . . . . . . . . . . . . . . . .59

4
MW560
5. Language . . . . . . . . . . . . . . . . . . . . . . . . . . . .61
6. SIM Service(Optional) . . . . . . . . . . . . . . . . . . .61
Tones and Images . . . . . . . . . . . . . . . . .62
1. Videos . . . . . . . . . . . . . . . . . . . . . . . . . . . . . .62
2. Images . . . . . . . . . . . . . . . . . . . . . . . . . . . . . .63
3. Tones . . . . . . . . . . . . . . . . . . . . . . . . . . . . . . .63
4. Memory . . . . . . . . . . . . . . . . . . . . . . . . . . . . . .64
Phonebook . . . . . . . . . . . . . . . . . . . . . . .65
1. Contact List . . . . . . . . . . . . . . . . . . . . . . . . . . .65
2. Voice Mail . . . . . . . . . . . . . . . . . . . . . . . . . . . .66
3. Vivo Agenda . . . . . . . . . . . . . . . . . . . . . . . . . .66
4. New Contact . . . . . . . . . . . . . . . . . . . . . . . . . .66
5. Speed Dial . . . . . . . . . . . . . . . . . . . . . . . . . . .67
6. Groups Manager . . . . . . . . . . . . . . . . . . . . . . .68
7. Own Number . . . . . . . . . . . . . . . . . . . . . . . . . .68
8. Copy and Move . . . . . . . . . . . . . . . . . . . . . . .68
9. Phonebook Settings . . . . . . . . . . . . . . . . . . . .68
Messages . . . . . . . . . . . . . . . . . . . . . . . .70
1. New Message . . . . . . . . . . . . . . . . . . . . . . . .71
2. Received Messages . . . . . . . . . . . . . . . . . . . .72
3. Sent Messages . . . . . . . . . . . . . . . . . . . . . . . .73
4. Voice Mail . . . . . . . . . . . . . . . . . . . . . . . . . . .74
5. Messenger . . . . . . . . . . . . . . . . . . . . . . . . . . .75
6. Vivo Chat . . . . . . . . . . . . . . . . . . . . . . . . . . . .75
7. E-mail . . . . . . . . . . . . . . . . . . . . . . . . . . . . . . .75
8. Templates . . . . . . . . . . . . . . . . . . . . . . . . . . . .75
9. Saved in SIM . . . . . . . . . . . . . . . . . . . . . . . . . .76
0. Drafts . . . . . . . . . . . . . . . . . . . . . . . . . . . . . . .76

5
MW560
*. Messages Settings . . . . . . . . . . . . . . . . . . . . .77
Entertainment . . . . . . . . . . . . . . . . . . . .78
1. Games . . . . . . . . . . . . . . . . . . . . . . . . . . . . . .78
2. Voice Portal . . . . . . . . . . . . . . . . . . . . . . . . . .78
3. Vivo Informa . . . . . . . . . . . . . . . . . . . . . . . . . .78
WAP . . . . . . . . . . . . . . . . . . . . . . . . . . . . .79
Tools . . . . . . . . . . . . . . . . . . . . . . . . . . . .83
1. Camera . . . . . . . . . . . . . . . . . . . . . . . . . . . . .84
2. Calendar . . . . . . . . . . . . . . . . . . . . . . . . . . . . .87
3. Alarm Clock . . . . . . . . . . . . . . . . . . . . . . . . . .88
4. Calculator . . . . . . . . . . . . . . . . . . . . . . . . . . . .89
5. Voice Note . . . . . . . . . . . . . . . . . . . . . . . . . . . .90
6. Chronometer . . . . . . . . . . . . . . . . . . . . . . . . . .90
7. Notepad . . . . . . . . . . . . . . . . . . . . . . . . . . . . .90
8. D-day Counter . . . . . . . . . . . . . . . . . . . . . . . .91
9. Unit Converter . . . . . . . . . . . . . . . . . . . . . . . . .91
0. World Time . . . . . . . . . . . . . . . . . . . . . . . . . . .92
Voice Mail . . . . . . . . . . . . . . . . . . . . . . . .93
1. Connect Voice Mail . . . . . . . . . . . . . . . . . . . .93
Settings . . . . . . . . . . . . . . . . . . . . . . . . .94
1. Memory Status . . . . . . . . . . . . . . . . . . . . . . . .95
2. Network . . . . . . . . . . . . . . . . . . . . . . . . . . . . . .95
2.1 Switch Network . . . . . . . . . . . . . . . . . . . . .95
2.2 Date and Time . . . . . . . . . . . . . . . . . . . . .95
2.3 Other Technologies . . . . . . . . . . . . . . . . .96
2.4 Select System . . . . . . . . . . . . . . . . . . . . . .96
2.5 Set NAM . . . . . . . . . . . . . . . . . . . . . . . . . .96
2.6 Auto NAM . . . . . . . . . . . . . . . . . . . . . . . . .97

6
MW560
2.7 Serving System . . . . . . . . . . . . . . . . . . . .97
2.8 Force Call . . . . . . . . . . . . . . . . . . . . . . . . .97
3. Security . . . . . . . . . . . . . . . . . . . . . . . . . . . . .98
3.1 PIN Request . . . . . . . . . . . . . . . . . . . . . . .98
3.2 Phone Lock . . . . . . . . . . . . . . . . . . . . . . .98
3.3 Application Lock . . . . . . . . . . . . . . . . . . .99
3.4 Emergency Number . . . . . . . . . . . . . . . . .99
3.5 Change Codes . . . . . . . . . . . . . . . . . . . .100
4. Calls Settings . . . . . . . . . . . . . . . . . . . . . . . .100
5. Messages Settings . . . . . . . . . . . . . . . . . . . .102
6. WAP Settings . . . . . . . . . . . . . . . . . . . . . . . .103
7. Data Settings . . . . . . . . . . . . . . . . . . . . . . . .103
8. Vivo Encontra . . . . . . . . . . . . . . . . . . . . . . . .104
9. Original Settings . . . . . . . . . . . . . . . . . . . . . .105
Help . . . . . . . . . . . . . . . . . . . . . . . . . . .106
1. Customer Care Center . . . . . . . . . . . . . . . . .106
2. International Roaming . . . . . . . . . . . . . . . . . .107
3. Phone Info . . . . . . . . . . . . . . . . . . . . . . . . . .107
3.1 My Phone Number . . . . . . . . . . . . . . . . .107
3.2 S/W Version . . . . . . . . . . . . . . . . . . . . . .107
4. Icons Glossary . . . . . . . . . . . . . . . . . . . . . . .107
Safety . . . . . . . . . . . . . . . . . . . . . . . . .108
TTIIAA SSaaffeettyy IInnffoorrmmaattiioonn .. .. .. .. .. .. .. .. .. .. .. .. .. .. .. .. ..110088
Exposure to Radio Frequency Signal . . . . .108
Antenna Care . . . . . . . . . . . . . . . . . . . . . . .109
Phone Operation . . . . . . . . . . . . . . . . . . . . .109
Tips on Efficient Operation . . . . . . . . . . . . .109
Driving . . . . . . . . . . . . . . . . . . . . . . . . . . . . .109
Electronic Devices . . . . . . . . . . . . . . . . . . .110
Pacemakers . . . . . . . . . . . . . . . . . . . . . . . .110

7
MW560
Persons with pacemakers: . . . . . . . . . . . . .110
Hearing Aids . . . . . . . . . . . . . . . . . . . . . . . .110
Other Medical Devices . . . . . . . . . . . . . . . .111
Health Care Facilities . . . . . . . . . . . . . . . . .111
Vehicles . . . . . . . . . . . . . . . . . . . . . . . . . . . .111
Other Facilities . . . . . . . . . . . . . . . . . . . . . .111
Aircraft . . . . . . . . . . . . . . . . . . . . . . . . . . . . .111
Blasting Areas . . . . . . . . . . . . . . . . . . . . . . .112
Potentially Explosive Atmosphere . . . . . . . .112
For Vehicles Equipped with an Air Bag . . .112
SSaaffeettyy IInnffoorrmmaattiioonn .. .. .. .. .. .. .. .. .. .. .. .. .. .. .. .. .. .. .. ..111133
Charger and Adapter Safety . . . . . . . . . . . .113
Battery Information and Care . . . . . . . . . . .113
Explosion, Shock, and Fire Hazards . . . . . .114
General Notice . . . . . . . . . . . . . . . . . . . . . .114
FFDDAA CCoonnssuummeerr UUppddaattee .. .. .. .. .. .. .. .. .. .. .. .. .. .. .. ..111166
Accessories . . . . . . . . . . . . . . . . . . . .124

elcome
WWelcome
Congratulations for choosing the advanced and compact
PW560 World mode cellular phone, designed to operate with
the latest digital mobile communication technology, Code
Division Multiple Access(CDMA) and Other Technologies
(GSM900/1800). Along with the many advanced features of the
CDMA system, such as greatly enhanced voice clarity, this
phone offers:
Large, easy-to-read, 9-line backlight LCD with status icons.
Paging, messaging, voice mail, and caller ID.
20 key and navigation key.
Extended battery life in talk and standby mode.
Menu-driven interface with prompts for easy operation and
configuration.
Any key answer, one-touch and speed dialing with 99
memory locations.
Trilingual(English, Português and Español) capabilities.
8
MW560

9
MW560
Check Accessories
Your mobile phone comes with a rechargeable battery and
adapter. Please verify that these accessories are included.
Important Information
This user’s guide provides important information on the use
and operation of your phone. Please read all the information
carefully prior to using the phone for the best performance and
to prevent any damage to or misuse of the phone. Any
unapproved changes or modifications will void your warranty.
FCC Part 15 Class B Compliance
This device and its accessories comply with part 15 of FCC
rules. Operation is subject to the following two conditions: (1)
This device and its accessories may not cause harmful
interference, and (2) this device and its accessories must accept
any interference received, including interference that causes
undesired operation.

Part 15.21 statement
" Change or Modifications that are not expressly approved by the manufacturer could void
the user's authority to operate the equipment. "
Part 15.105 statement
This equipment has been tested and found to comply with the limits for a class B digital device,
pursuant to Part 15 of the FCC Rules.
These limits are designed to provide reasonable protection against harmful interference in a
residential installation.
This equipment generates uses and can radiate radio frequency energy and, if not installed and used
in accordance with the instructions, may cause harmful interference to radio communications.
However, there is no guarantee that interference will not occur in a particular installation. if this
equipment does cause harmful interference or television reception, which can be determined by
turning the equipment off and on, the user is encouraged to try to correct the interference by one or
more of the following measures:
- Reorient or relocate the receiving antenna.
- Increase the separation between the equipment and receiver.
- Connect the equipment into an outlet on a circuit different from that to
which the receiver is connected
- Consult the dealer or an experienced radio/TV technician for help.

Technical Details
The PW560 is an all digital phone that operates on both Code
Division Multiple Access (CDMA) frequencies: CDMA 800Mhz
and 1900Mhz.
CDMA technology uses a feature called DSSS (Direct Sequence
Spread Spectrum) that enables the phone to keep
communication from being crossed and to use one frequency
channel by multiple users in the same specific area. This results
in a 10-fold capacity increase when compared with analog
mode. In addition, features such as soft / softer handoff, hard
Handoff, and dynamic RF power control technologies combine
to reduce call interruptions.
The Cellular networks consist of MSO (Mobile Switching
Office), BSC (Base Station Controller), BTS (Base station
Transmission System), and MS (Mobile Station). The following
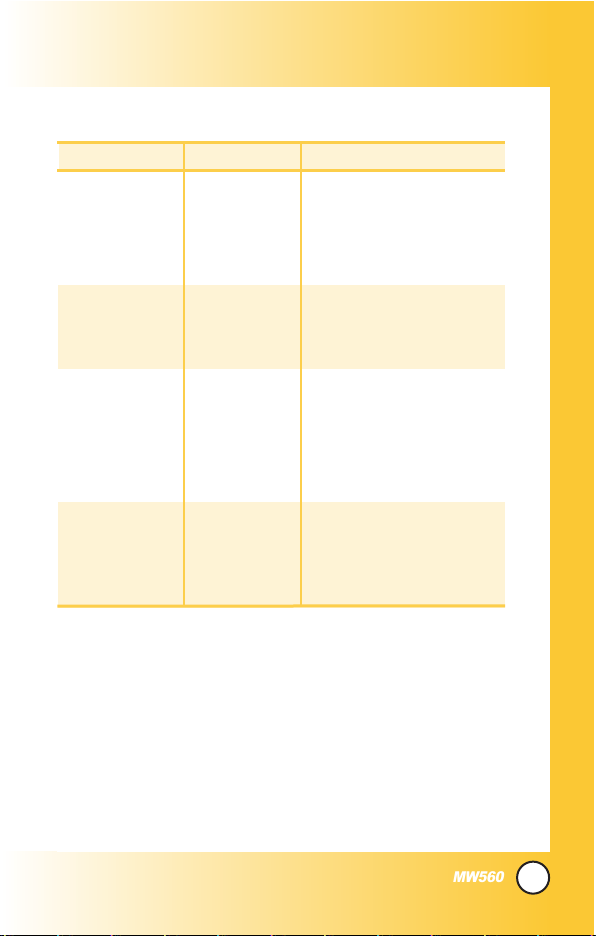
table lists some major CDMA standards.
* TSB -74: Protocol between an IS-95A system and ANSI J-STD-008
1xRTT system receives twice as many subscribers in the wireless
section as IS-95. Its battery life is twice as long as IS-95. High-speed
data transmission is also possible.
10
MW560
11
CDMA Standard
Basic Air Interface
TIA/EIA-95A
TSB-74
TIA/EIA-IS2000
CDMA Dual-Mode Air Interface
14.4kbps radio link protocol and
inter-band operations
cdma2000 1xRTT AirInterface
MAS-BS
Intersystem operations
Non-signaling data comm.
Speech CODEC
Async Data
Short message service
Packet Data
Position Determination
Service (gpsOne)
High Speed Packet Data
Cellular base station
Cellular mobile station
Speech CODEC
TIA/EIA/IS-634
TIA/EIA/IS-41-C
TIA/EIA/IS-124
TIA/EIA/IS-97
TIA/EIA/IS-98
TIA/EIA/IS-125
TIA/EIA/IS-96-B
TIA/EIA/IS-99
TIA/EIA/IS-637
TIA/EIA/IS-657
IS-801
TIA/EIA/IS-707-A
Network
Service
Performance
Designator Description
* PW560 also supports other technologies that meets 3GPP standards
(3GPP TS documents including GSM).
MW560

12
MW560
FCC RF Exposure Information
WARNING! Read this information before operating the phone.
In August 1996, the Federal Communications Commission
(FCC) of the United States, with its action in Report and Order
FCC 96-326, adopted an updated safety standard for human
exposure to radio frequency (RF) electromagnetic energy
emitted by FCC regulated transmitters. Those guidelines are
consistent with the safety standard previously set by both U.S.
and international standards bodies.
The design of this phone complies with the FCC guidelines and
these international standards.
Bodily Contact During Operation
This device was tested for typical use with the back of the
phone kept 3/4 inches (2 cm) from the body. To comply with
FCC RF exposure requirements, a minimum separation distance
of 3/4 inches (2 cm) must be maintained between the user’s
body and the back of the phone, including the antenna, whether
extended or retracted. Third-party belt-clips, holsters, and
similar accessories containing metallic components should not
be used. Avoid the use of accessories that cannot maintain 3/4
inches (2 cm) distance between the user’s body and the back of
the phone and have not been tested for compliance with FCC
RF exposure limits.

13
MW560
Vehicle-Mounted External Antenna
(Optional, if available.)
A minimum distance of 8 inches (20 cm) must be maintained
between the user / bystander and the vehicle-mounted external
antenna to satisfy FCC RF exposure requirements. For more
information about RF exposure, visit the FCC website at
www.fcc.gov.
Caution
Use only the supplied and approved antenna. Use of
unauthorized antennas or modifications could impair call
quality, damage the phone, void your warranty and/or result in
violation of FCC regulations.
Do not use the phone with a damaged antenna. If a damaged
antenna comes into contact with the skin a minor burn may
result. Contact your local dealer for a replacement of antenna.

14
MW560
Phone Over
Phone Over
view
view
8. Manner Mode Key
16. Microphone
14. Alphanumeric
Keypad
15. Plus Key
13. END/POWER Key
12. SIM Service Menu Key (Optional)
11. Phonebook Key
10. Right Soft Key
9. Navigation Key
7. Clear Key
6. SEND Key
5. MENU Key
4. Left Soft Key
3. Main LCD
1. Earpiece
2. Flip
20. Flash
21. Camera
22. Sub LCD
17. Headset Jack
18. Side Key
19. Camera Key
15
MW560
1. Earpiece
2. Flip
3. Main LCD Displays messages and indicator icons.
4. Left Soft Key Connect to Message menu.
5. MENU Key Use to display the function setting menu.
6. SEND Key Use to place or answer calls.
7. Clear Key Press to delete a single space or character. Press and
hold to delete entire words. Press this key once in a menu to go
back one level. Directly connect to My Menu. When pressed for 2
or 3 seconds, functions as flashlight.
8. Manner Mode Key
Use to set the Manner Mode (from standby mode press and hold
for about 3 seconds).
9. Navigation Key Use for quick access to New Message, Tones
and Images, Switch Network Key(CDMA/Other technologies) or
Download.
10. Right Soft Key Use to connect WAP directly.
11. Phonebook Key Use to select an action within a menu.
12. SIM Service Menu Key Use to enter SIM Service menu. (Only
available when there is application in SIM.)
13. END/PWR Key Use to turn the power on/off and to end a call. Also
return to the main menu display screen.
14. Alphanumeric Keypad Use to enter numbers and characters
and select menu items.
15. Plus Key When pressed long, + is displayed.(International
calling code)
16. Microphone
17. Headset Jack
18. Side Key
19. Camera Key
20. Flash
21. Camera
22. Sub LCD

16
MW560
Menus Over
Menus Over
view
view
Calls
1. All Calls
2. Missed Calls
3. Received Calls
4. Sent Calls
5. Numeric Memos
6. Calls Settings
7. Calls Time
Downloads
1. Connect Downloads
My Vivo
1. Main Keys
2. Menu Style
3. Sounds
4. Display
5. Language
6. SIM Service(Only for Other
Technologies, Optional)
Tones and Images
1. Videos
2. Images
3. Tones
4. Memory
Phonebook
1. Contact List
2. Voice Mail
3. Vivo Agenda
4. New Contact
5. Speed Dials
6. Group Manager
7. Own Number
8. Copy and Move
9. Phonebook Settings
Messages
1. New Message
2. Received Messages
3. Sent Messages
4. Voice Mail
5. Messenger
6. Vivo Chat
7. E-mail
8. Templates
9. Saved in SIM
0. Drafts
*. Messages Settings
Entertainment
1. Games
2. Voice Portal
3. Vivo Informa
Press AO VIVO. Press to scroll.

17
MW560
WAP
Start WAP / Favorites / Quiz /
Cupido / Tones and Images /
Guides and Leisure / Portals /
Sports / Games / Vivo em
Ação / Cabum / Banks / Vivo
Chat / Messenger / E-mail /
Go To.. / WAP Settings
Tools
1. Camera
2. Calendar
3. Alarm
4. Calculator
5. Voice Note
6. Chronometer
7. Notepad
8. D-day Counter
9. Unit Converter
0. World Time
Voice Mail
1. Connect Voice Mail
Settings
1. Memory Status
2. Network
1. Switch Network
2. Date and Time
3. Other Technologies Network
4. Select System
5. Set NAM
6. Auto NAM
7. Serving System
8. Force Call
3. Security
1. PIN Request
2. Phone Lock
3. Application Lock
4. Emergency Number
5. Change Codes
4. Calls Settings
5. Messages Settings
6. WAP Settings
7. Data Settings
8. Vivo Encontra
9. Orignal Settings
Help
1. Customer Care Center
2. International Roaming
3. Phone Info
1. My Phone Number
2. S/W Version
4. Icons Glossary
1. Main Menu Icons
2. Status Icons

Getting Y
Getting Y
our Phone Star
our Phone Star
ted
ted
The Battery
NOTE: It is important to fully charge the battery before initial use of
the phone.
The phone comes with a rechargeable battery. Keep the battery
charged while not in use in order to maximize talk and standby time.
The battery level is shown at the top of the LCD screen.
Installing the Battery
To install the battery, insert the battery into the opening on the
back of the phone. Put the battery cover on the battery and
push it slightly upwards.
Removing the Battery
Turn the power off. Pull the battery cover downwards and
remove it.
Charging the Battery
To use the charger provided with your phone:
Warning! Use only the charger provided with the phone.
Using any charger other than the one included with the PW560
may damage your phone or battery.
1. Plug the charger into a wall outlet. The phone must be
charged from a 120V AC power source.
2. Insert the phone with an installed battery, or the battery by
itself, into the charging slot.
The charge time varies depending upon the battery level.
The maximum charge time for a fully discharged battery is
3 hours.
18
MW560
19
MW560
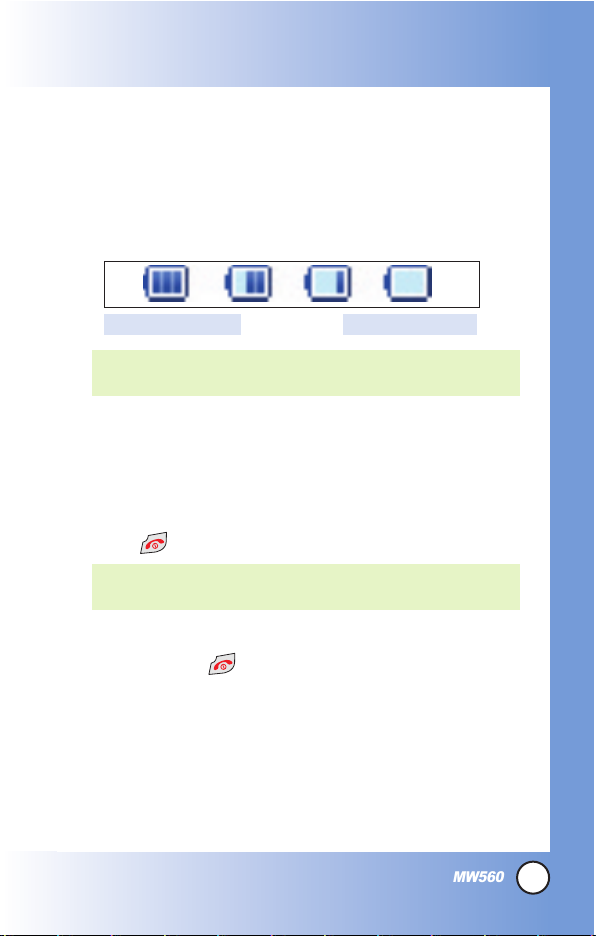
Battery Level
The battery level is shown at the top right of the LCD screen.
When the battery level becomes low, the low battery sensor
alerts you in three ways: sounding an audible tone, blinking the
battery icon, and displaying
LOW BATTERY WARNING!
If the
battery level becomes exceedingly low, the phone automatically
switches off and any function in progress is not saved.
Turning the Phone On and Off
Turning the Phone On
1. Install a charged battery or connect the phone to an
external power source such as a cigarette lighter charger
or hands-free car kit.
2. Press until the LCD screen lights up.
Turning the Phone Off
1. Press and hold until the display turns off.
Signal Strength
Call quality depends on the signal strength in your area. The signal
strength is indicated on the screen as the number of bars next to the
signal strength icon: The more bars, the better the signal strength. If
the signal quality is poor, move to an open area. If you are in a
building, the reception may be better near a window.
NOTE: Like any other radio device, avoid any unnecessary
contact with the antenna while your phone is on.
Fully DischargedFully Charged
NOTE: When charging the battery, battery icon changes from o
bar to 3 bars by fully being charged.
20
MW560
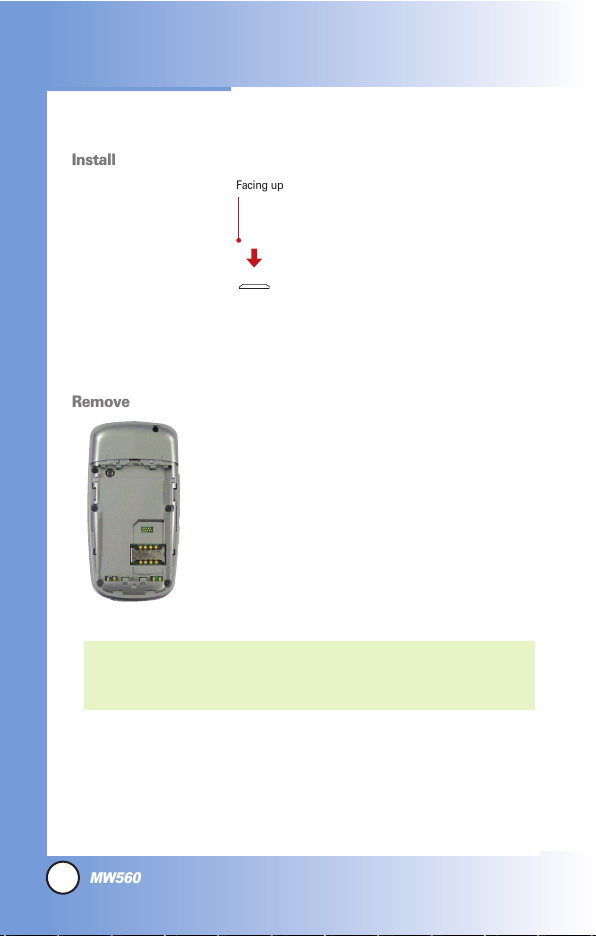
Installing/Removing the SIM
NOTE: The metal contact of the SIM can be easily damaged by
scratches. Pay special attention to the SIM while handling.
Follow the instructions supplied with the SIM.
Getting Y
Getting Y
our Phone Star
our Phone Star
ted
ted
To insert the SIM, slide it into
the SIM holder.
Make sure that the SIM is
inserted properly and that the
gold contact area on the SIM
is facing downwards.
To remove the SIM, press
down lightly and pull it in the
reverse direction.
Install
Remove
Facing up
21
MW560
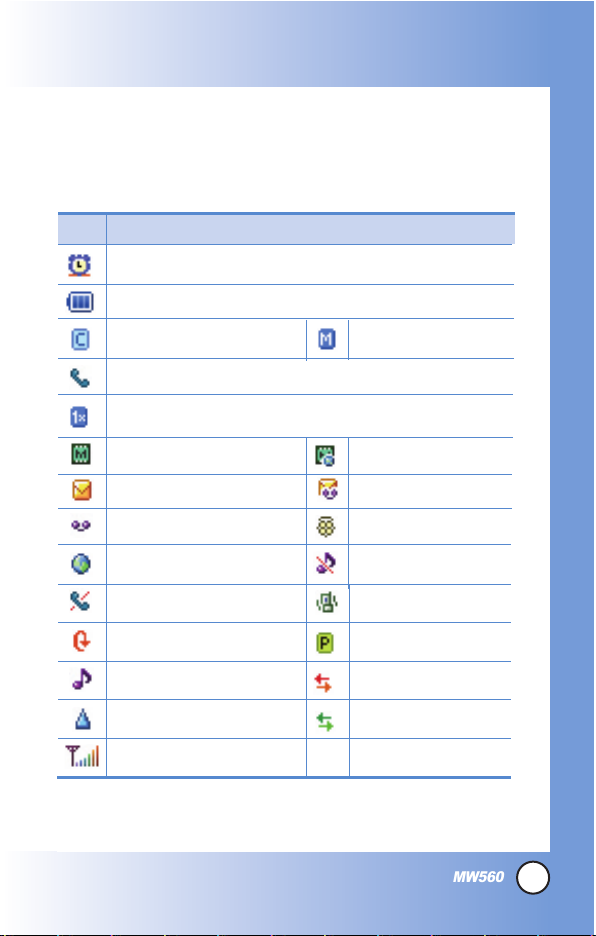
Screen Icons
When the phone is powered on, the top line of the LCD screen
displays icons indicating the status of the phone.
Description
Alarm
1x Data Active
New Voice mails
New MMS msgs
Roaming
New MMS&WAP
Battery Level
IS-2000
CDMA Service
In Call State
Icon
No Service
Signal Strength
New Text msgs
New WAP msgs
New Text&Voice
Vivo Encontra
Other Network
(Other technologies)
1x Data Dormant
QNC Data Active
Ringer Mode
Silence Mode
Vibrate Mode
Voice Privacy
22
MW560
Getting Y
Getting Y
our Phone Star
our Phone Star
ted
ted
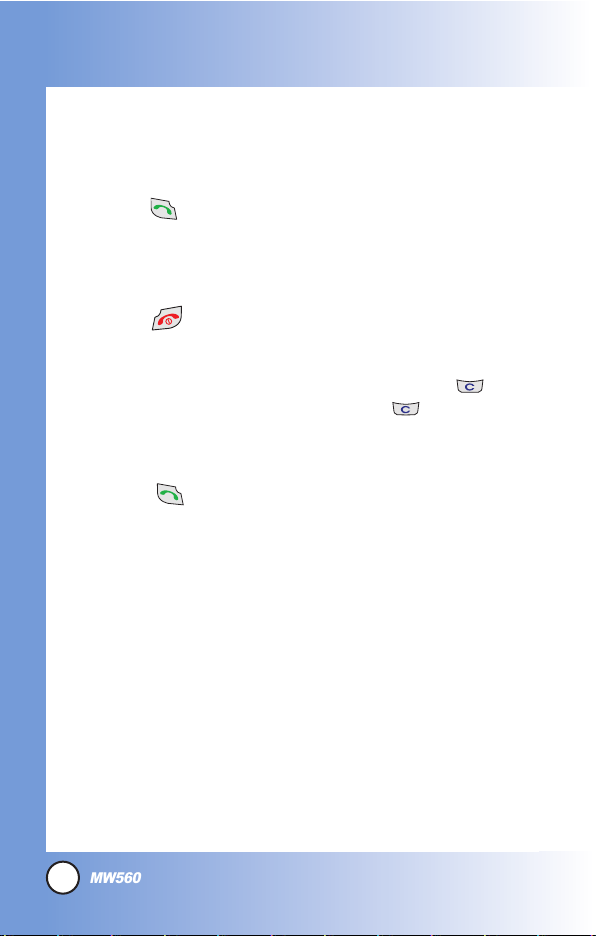
Making Calls
1. Make sure the phone is turned on.
2. Enter the phone number (include the area code if needed).
3. Press .
lf the phone is locked, enter the lock code.
Call Failed
- indicates the call did not go through.
Restricted
- indicates outgoing calls are in restricted mode.
4. Press to end the call.
Correcting Dialing Mistakes
If you make a mistake while dialing a number, press once
to erase the last digit entered or hold down for at least 2
seconds to delete all digits.
Redialing Calls
1. Press twice to redial the last number you dialed,
missed, received. The last 120 numbers are stored in the call
history list and you can also select one of these to redial.
23
MW560
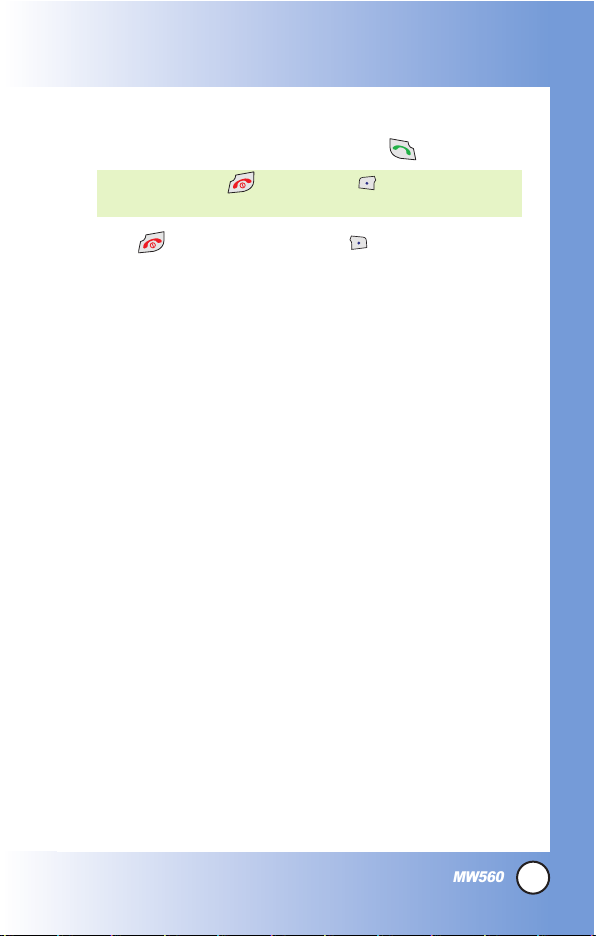
Receiving Calls
1. When the phone rings or vibrates press to answer.
2. Press twice or Right Soft Key to end the call.
NOTE: If you press or left soft key while the phone is
ringing, the ringing or vibration is muted for that call.
24
MW560
Quick Access to Convenient Featur
Quick Access to Convenient Featur
es
es
Manner Mode
Use Manner Mode in public places. When Manner Mode is set,
is displayed on the screen, the key tones are silent, and the
phone is set to vibrate.
Manner Mode Quick Activation
1. From standby mode press for 3 seconds.
Manner Mode Quick Cancellation
1. Press to switch to Normal Mode.
Lock Mode
Use Lock Mode to prevent others from using your phone.
When Lock Mode is set, your 4-digit password is required to
use the phone.
Lock Mode Quick Cancellation
1. Press Right Soft Key Unlock then enter your 4-digit
password.
NOTE: The default lock code/password is the last 4 digits of the
phone number.
25
MW560
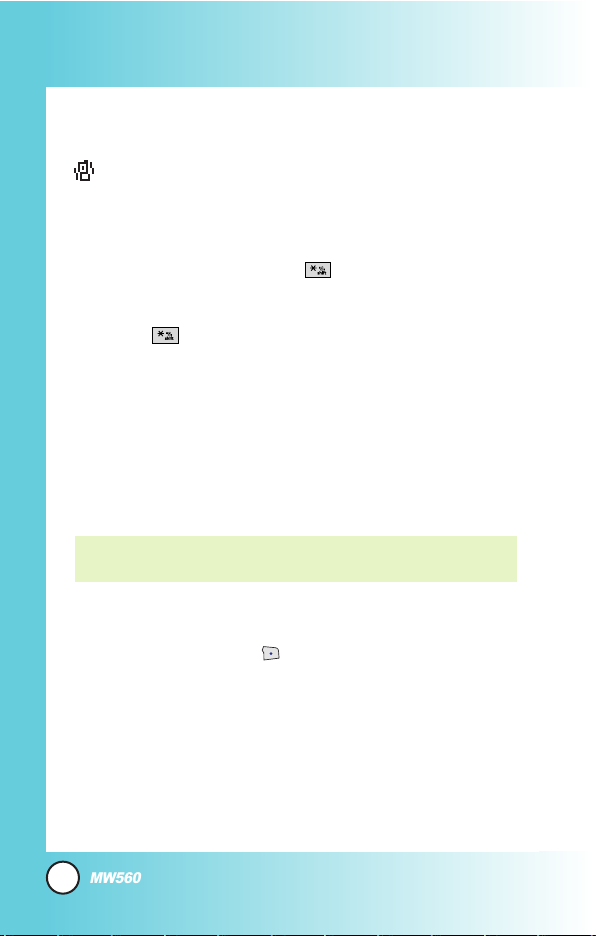
Speaker On Function
When during a call, active Speaker On press .
Speaker On Quick Activation
1. Press during a call.
Speaker On Quick Cancellation
1. Press again.
Quick Adjust
Adjusting Vibrate Mode
Use Vibrate mode in a public place.
1. In standby mode, activate vibrate mode quickly by pressing
the for 2 or 3 seconds instead of using the Menu
function. When vibrate mode is set, key tone does not sound.
To cancel vibrate mode, press for 2 or 3 seconds again.

26
MW560
Quick Access to Convenient Featur
Quick Access to Convenient Featur
es
es
Caller ID
Caller ID displays the number of the person calling when your
phone rings. If the caller’s identity is stored in Contacts, the name
appears with the number. Check with your service provider to
ensure they offer this feature.

27
MW560
Speed Dialing
Speed dialing is a convenient feature that allows you to make
phone calls quickly and easily with a few keystrokes. Your phone
recalls the number from your Contacts, displays it briefly, and
then dials it. Voice Mail is designated as speed dial 1 by default.
Dialing Speed Dials from 2 to 8
1. Press and hold the Speed Dial number.
EX) When making a call to speed dial # 2, just press
long.
Speed dial number 9 is basically allocated to emergency
number.
Dialing Speed Dials from 10 to 99
Press the first digit and then press and hold the key of the
last digit.
EX) When making a call to speed dial # 99, just press
and long.

28
MW560
Entering and Editing Infor
Entering and Editing Infor
mation
mation
Text Input
You can input and edit your Banner, Schedule, Contacts, and
messages.
Key Functions
Soft Key 1 : Select the desired input mode
among following:
T9Word / Abc / 123 / Symbols
Soft Key 2 : Set the message input option
among following:
Contacts / Recent Numbers / Add Field /
Send / Save to Draft / Priority Type / Exit
Shift: Press to change case.
T9 text
: T9Word -> T9WORD -> T9word
Abc text
: Abc -> ABC -> abc
Next: In T9 mode, press to display other
matching words.
Space: Press to complete a word and insert a
space.
Clear: Press to delete a single space or character.
Hold to delete words.
Punctuation: Press to insert punctuation in a
word and complete a sentence.
Text Input Modes
There are four modes as follows:
T9Word /Abc /123 /Symbols
In a text input mode, press Left Soft Key to display a pop-up
list of text modes.
29
MW560
T9Word (T9) Mode
Use to type text using one keystroke per letter. The phone
translates keystrokes into common words by using the letters on
each key and a compressed database.
Abc (Multi-tap) Mode
Use to add words to the T9 database.
123 (Numbers) Mode
Use to type numbers using one keystroke per number.
Symbols Mode
Use to insert special characters or punctuation. There are 33
special characters.
Changing Letter Case
Using T9 and Abc text input modes you can set the capitalization.
Press to cycle through the following:
Initial Cap (T9Word / Abc)
Only the first letter is capitalized. All subsequent letters are lower
case.
Caps Lock (T9WORD / ABC)
All letters are capitalized.
Lower Case (T9word / abc)
All letters are in lower case.

30
MW560
Entering and Editing Infor
Entering and Editing Infor
mation
mation
Text Input Examples
Display the text modes and select a text mode:
1. In a text entry field, press Left Soft Key to display text
modes.
2. Press to highlight the text input mode you want to use.
3. Press to select the highlighted text input mode.
Using Abc (Multi-tap) Text Input
1. Press Left Soft Key to change to Abc mode.
2. Press to change to ABC Caps Lock.
3. Press .
LG
is displayed.
Using T9 Mode Text Input
1. Press Left Soft Key to change to T9Word mode.
2. Press .
3. Press to complete the word and add a space.
4. Press .
Call the office
is displayed.

31
MW560
Using the NEXT Key
After you have finished entering a word, if the word displayed
is not the one you want, press to display additional
choices of words from the database.
1. Press .
Good
is displayed.
2. Press .
The display gives you additional choices such as:
Home
,
Gone, Hood
, etc.
Adding Words to the T9 Database
If a word is not in the T9 database, add it by using Abc (Multitap) mode text entry.
1. Press Left Soft Key to change to Abc (multi-tap) mode.
2. Press .
Bop
is displayed.
3. Press Left Soft Key to change to T9 mode to add the
word
Bop
to the T9 database.
4. Press to erase the existing word.
5. Press .
Cop
is displayed.
6. Press .
Bop
is displayed.

32
MW560
Contacts in Y
Contacts in Y
our Phone’
our Phone’
s Memor
s Memoryy
Contacts Entries
This allows you to have easy access to your most frequently
dialed phone numbers. You may store up to Max. 1000 entries
with up to 5 phone numbers and E-mail each.
The Basics of Storing Contacts Entries
1. From standby mode enter the phone number you want to
save (up to 32 digits).
2. Press Right Soft Key Option.
3. Use to select Save Number, then press .
4. Use to select
Create New
or
Update Existing
and
press .
5. Use to to select Phone, SIM, or Phone and SIM. And
then, press to edit the contact.
6. Set the number type.
7. Enter a name for the phone number (up to 16 characters),
then press .
8. Use to highlight the information you want to edit, then
press .
NOTE: When set as SIM in Phonebook Settings, number type
is not displayed.
NOTE: Use Update Existing to add another phone number to
a contact already stored in memory.

33
MW560
Name / Mobile Number / Home Number / Email(1) /
Group / Ring Type / Call Picture ID / Office Number /
Etc number / Fax/Email(2) / Web Address / Address /
Birthday Type / Birthday / Memo / Call ID Type / Lock
9. After entering new number, press Left Soft Key Speed
to set speed dial.
Enter the desired speed dial # to assign. And you can set Call
Ring/Picture ID with List..
10. To save the settings, press .
A confirmation message is displayed.

34
MW560
Contacts in Y
Contacts in Y
our Phone’
our Phone’
s Memor
s Memoryy
Options to Customize Your Contacts
Once basic phone number and name information is stored in
your Contacts, you can edit and/or customize the entries.
1. Press + Phonebook and select Contact List.
2. Press Right Soft Key Option.
Send Message
/
Send vCard /Add New /View /Edit
/
Mark /Mark All /Search by Group /Delete / Exit
Adding or Changing the Group
Allows you to manage your Contacts entries by organizing them
into groups.
1. Press + Phonebook and select Contact List.
2. Press Right Soft Key Option and select Add New to
add new contact list.
3. Select Phone to add new contact.
4. Select Phone, SIM and Phone & SIM in Memory in Use.
5. Use , input a new contact information.
6. After editing contact info, press to save settings.
Changing the Call Ringer
Allows you to identify who is calling by setting different ringers
for different phone numbers in your Contacts. It is automatically
set to the default ringer when tho Contact is saved.
1. Press + Phonebook and select Contact List.
NOTE: In Group Manager, you can change the name of the
group, add groups, and delete groups.

35
MW560
2. Select the desired contact list to change the call ringer and
press .
3. Press to edit ringer and highlight ring section.
4. With , press to save changes.
5. When more than two numbers, select default number and
press .
Adding or Changing the Memo
Allows you to enter up to 40 characters as a memo to the
Contact entry.
1. Press + Phonebook and select Contact List.
2. Select the desired contact list to add or change the memo
and press .
3. Press Right Soft Key Option and select Edit.
4. Use to highlight Memo and add memo or change the
memo.
5. Press to save editing the contact.
6. When more than two numbers, select default number and
press .
Adding or Changing the Picture ID
Allows the phone to display a picture to identify the caller.
1. Press + Phonebook and select Contact List.
2. Select the desired contact list to add or change the picture
id and press .

36
MW560
Contacts in Y
Contacts in Y
our Phone’
our Phone’
s Memor
s Memoryy
3. Press to edit and use to highlight Follow General.
4. Press Right Soft Key Option and select Set Image.
Follow General / Take a Picture / Use Existing Image
5. After selecting the desired image, press to save.
Adding Speed Dial
1. Press + Phonebook and select Contact List.
2. Select the desired contact list to add speed dial and press
.
3. Use to highlight the desired number and press to
enter editing mode. And press Right Soft Key Option.
4. Press to select
Set Set as Speed Dial
and press .
5. Highlight the desired speed dial number and press .
6. Press to save editing the contact entry.
NOTE: For the phonebook data saved in SIM, you can not set as
speed dial.
NOTE: Pressing to go back to idle mode makes Speed Dial not
be saved.

37
MW560
Editing Contacts Entries
Adding Another Phone Number
From the Main Menu Screen
1. From standby mode, enter the phone number you want to
save (up to 32 digits).
2. Press to save.
3. Use to highlight
Create New
and press .
4. Use to select type among Phone / SIM / Phone and
SIM and input the new contact information.
5. Set the number type with and press .
6. After inputting contact information, press to save.
A confirmation message is displayed.
Through Contacts
1. Press + Phonebook and select Contact List
2. Use to highlight the Contact entry you want to edit,
then press .
3. Press to edit contact information.
4. Use to highlight the information you want to
customize and edit contact information.
5. Press to save the editing information.

38
MW560
Contacts in Y
Contacts in Y
our Phone’
our Phone’
s Memor
s Memoryy
Default Numbers
The phone number saved when a Contact is created is the
Default Number. If more than one number is saved in a Contact
entry, another number can be saved as the Default Number.
Changing the Default Number
1. From standby mode, press + + in grid menu
style.
2. Use to highlight the Contact entry you want to edit,
then press .
3. Press to edit contact information.
4. Press Save and press .
5. Select the desired default number and press .
A confirmation message is displayed.
Editing Stored Phone Numbers
1. From standby mode, press + + in grid menu
style.
2. Use to highlight the Contact entry you want to edit, then
press .
3. Press to edit contact information.
4. Use to highlight the phone number to edit.
5.
Edit the phone number as necessary and press to save it.
6. Select the desired default number and press .
NOTE: The Default Number cannot be deleted by itself. The entire
Contact entry can be deleted or another number can be set
as the Default Number allowing you to delete the original
saved number and keep the Contact entry.

39
MW560
Editing Stored Names
1. From standby mode, press + + in grid menu
style.
2. Use to highlight the Contact entry you want to edit,
then press .
3. Press to edit contact information.
4. Use to highlight the name.
5. Edit the name as necessary and press to save it.
6. Select the desired default number and press .

40
MW560
Contacts in Y
Contacts in Y
our Phone’
our Phone’
s Memor
s Memoryy
Deleting
Deleting a Contact Entry
1. From standby mode, press + + in grid menu
style.
2. Use to highlight the Contact entry.
3. Press Right Soft Key Option.
4. Highlight Delete to delete the contact entry. Select Yes to
delete.
A confirmation message is displayed.
Editing a Speed Dial
1. From standby mode, press + + in grid menu
style.
2. Use to highlight the Contact entry, then press .
3. Press to edit contact information.
4. Use to highlight the number and press Right Soft Key
Option.
5. Select Set as Speed Dial and highlight the desired
number and press .
6. Press to save the editing contact.
7. Select the desired default number and press .
A confirmation message is displayed.
NOTE: For the phonebook data saved in SIM, you can not set as
speed dial.

41
MW560
Phone Numbers With Pauses
When you call automated systems such as voice mail or credit
billing numbers, you often have to enter a series of numbers.
Instead of entering these numbers by hand, you can store the
numbers in your Contacts separated by special pause
characters (P, T). There are two different types of pauses you
can use when storing a number:
Hard Pause (P)
The phone stops dialing until you press Left Soft Key Send to
advance to the next number.
2-sec Pause (T)
The phone waits 2 seconds before sending the next string of digits.
Storing a Number With Pauses
1. From standby mode, enter the number.
2. Press Right Soft Key Option.
3. Use key to select pause type and press .
Hard Pause / 2-sec Pause
4. Enter additional numbers. (e.g. pin number or credit card
number)
5. Press to save.
6. Use to select Create New or Update Existing and
press .
7. Select Phone, SIM or Phone & SIM in Memory in Use.
8. Select phone number type with and press .
9. After entering a name and contact information, press

42
MW560
Contacts in Y
Contacts in Y
our Phone’
our Phone’
s Memor
s Memoryy
to save changes.
A confirmation message is displayed.
Adding a Pause to an Existing Number
1. From standby mode, press + + in grid menu
style.
2. Use to highlight the Contact entry to edit, then press
.
3. Press to edit.
4. Use to highlight the number.
5. Press Right Soft Key Option.
6. Press Hard Pause or 2-sec Pause.
7. Enter additional number(s).
8. Press to save changes. And select default numbers and
press .
A confirmation message is displayed.
NOTE: If there are no contact lists, Hard or 2-sec Pause is not
displayed.

43
Searching Your Phone’s Memory
The PW560 phone is able to perform a dynamic search of the
contents in your phone’s memory. A dynamic search compares
entered letters or numbers against the entries in your Contacts.
A matching list is displayed in descending order. You can then
select a number from the list to call or edit. There are several
ways to search:
Scrolling Alphabetically
Searching by Options
- Search by All
- Search by Group
NOTE: When searching by letter or number, phone searches for
matching list among name, mobile/ home/office/fax
number or etc.
Scrolling Through Your Contacts
1. From standby mode, press + + in grid menu
style.
Contacts list is displayed alphabetically.
2. Use to scroll through the list.
Searching by Letter
1. From standby mode, press + + in grid menu
style.
Contacts list is displayed alphabetically.
2. Press (or press repeatedly) the key on the keypad that
corresponds with the search letter.
MW560

44
MW560
Contacts in Y
Contacts in Y
our Phone’
our Phone’
s Memor
s Memoryy
Searching Options
1. From standby mode, press + + in grid menu
style.
2. Press Right Soft Key
Option
.
3. Select the search criteria using (or press the
corresponding number on the keypad):
Search by Group
4. A list of matches is displayed.
Use to highlight a matched entry.
5.
Press to see more information or press to place a
call.

45
MW560
Making a Call From Your Phone’s Memory
Once you have stored phone numbers into your Contacts, you
can place calls to those numbers quickly and easily.
Pressing after you’ve searched for a phone number in
Contacts or Recent Calls.
Using Speed Dialing.
From Contacts
1. From standby mode, press + + in grid menu
style.
2. Use to select the Contact entry and press .
3. Use to select the phone number.
4. Press to place the call.
From Recent Calls
1. Press .
2. Use to select the type of recent call and press .
All Calls / Missed Calls / Received Calls / Sent Calls /
Numeric Memos / Calls Time / Calls Settings
3. Use to highlight the phone number.
4. Press to place the call.

46
MW560
Menu Access
Press to have access to 12 phone menus. There are two
methods to access menus and submenus:
Use the navigation key to highlight and select, or
Press the number key that corresponds to the menu or
submenu.
For example:
1. Press .
12 menu items are displayed.
Use to scroll through the list of menus.
2. Press the appropriate number key corresponding to the
menu item you want to select.
The sub-menu list will be displayed.
3. Press the appropriate number key corresponding to the submenu you want to access.
4. Use to highlight your preferred setting and press to
select it.
NOTE: Press to cancel without saving.
NOTE: Press to go back one step while accessing the menu
or selecting a setting.
Using Phone Menus
Using Phone Menus

47
MW560
Calls
Allows you to view a list of the last phone numbers or Phone
Book entries for calls you dialed, received or missed. It is
continually updated as new numbers are added to the
beginning of the list and the oldest entries are removed from
the bottom of the list.
indicates a dialed call.
indicates a received call.
indicates a missed call.
Access and Options
1. Press .
2. Press
Calls
.
3. Select a sub-menu.
All Calls
Missed Calls
Received Calls
Sent Calls
Numeric Memos
Calls Settings
Calls Time
NOTE: To view a quick list of all your recent calls, press from
the main menu.

48
MW560
1. All Calls
Allows you to view the list of all call histories in your phone.
1. Press , , .
2. Missed Calls
Allows you to view the list of missed calls.
1. Press , , .
2. Use to highlight an entry, then
Press to view the entry.
Press to place a call to the number.
Press Right Soft Key Option to select:
View/Save Number/Send Message/Call Reject
/
Sort by Frequency/Mark/Mark All/Delete
Press Left Soft Key Msg to select:
Send a SMS or MMS
3. Received Calls
Allows you to view the list of incoming calls.
1. Press , , .
2. Use to highlight an entry.

49
MW560
4. Sent Calls
Allows you to view the list of outgoing calls.
1. Press , , .
2. Use to highlight an entry.
5. Numeric Memos
During a call, you can memo other party numbers and numeric
memos.
1. Press , , .
6. Calls Settings
6.1 Answer Options
Allows you to determine when to answer the phone.
1. Press , , , .
2. Select an option and press .
Flip Open / Any Key / Only Send Key
6.2 Voice Privacy
Set the voice privacy feature for CDMA calls as Enhanced or
Standard. CDMA offers inherent voice privacy. Check with your
service provider for availability of the enhanced voice privacy
mode.
1. Press , , , .

2. Select Enhanced or Standard and press .
6.3 Preferred Carrier
CSP(Carrier Selection Provisioning) Makes easier for the user
choose any carrier whenever s/he wants and mobile phones
insert automatically the chosen carrier number when a long
distance call is made.
Ex) 01199803311
11 = area code
99803311 = calling number
When making a long distance call, user has to dial a CSP
number that corresponds to the carrier s/he wants to request
the service.
0XX1199803311, XX = CSP number, 11 = area code
99803311 = calling number
Select CSP Mode:
Manual/ Prompt/ Automatic
.
Manual Mode
: The mobile phone shall ask the CSP number
(two digits) before attempt to make a long distance call.
Prompt Mode
: The mobile phone shall display a list of carriers
that has been defined by the user before. Phone will add the
CSP number according to the chosen carrier.
Automatic Mode
: The mobile phone shall automatically insert
CSP numbers of carrier previously defined as default by the
user.
1. Press , , , .
2. Highlight the desired selection and press .
50
MW560
Using Phone Menus
Using Phone Menus

51
MW560
CSP
(Enable / Disable)
Select CSP Mode
(Manual / Prompt / Automatic)
Set Default Carrier
6.4 Call Reject
You can customize Call Reject settings.
1. Press , , , .
2. Press your security code(Default is your last four digit of your
phone number).
3. You can customize settings following:
Rejected Numbers :
- Left Soft Key Add: Register the desired number to
reject.
- Right Soft Key Option: Customize number.
Add New / Edit / Delete / Delete All
Rejected Groups :
- Left Soft Key Done: After selecting rejected group
and save groups.
- Right Soft Key Option: Customize number.
Reject Type : For rejected calls or groups, set the call drop
or mute.
- Drop Call: When receiving a call of rejected call or
groups, being disconnected is automatically activated.
- Silent: When receiving a call of rejected call or groups,
mute of ringer is activated.

52
MW560
7. Calls Time
Allows you to view the duration of calls.
1. Press , , .
2. Select from Last Call / Received Calls / Sent Calls /
All Calls, and press .

Downloads
Downloads allows you to do more than just talk on your
phone. Downloads is a technology and service that allows you
to download and use applications on your phone. With
Downloads, it is quick and easy to personalize your phone to
your lifestyle and tastes. Just download the applications that
appeal to you. With a wide range of software available, from
Ring Tones to games to productivity tools, you can be assured
that you can find something useful, practical, or down right
entertaining. There are constantly new applications being
created for your use.
Downloading Applications
You can download applications and use Downloads anywhere
on the Wireless network, as long as your handset has a digital
signal available. Most applications do not use a network
connection while in use.
Incoming Calls
While downloading an application, incoming calls will
automatically be sent to your voice mail, if available. If you do
not have voice mail, downloading will not be interrupted by an
incoming call, however the caller will receive a busy signal.
When using applications, an incoming call will automatically
pause the application and allow you to answer the call. When
you complete your call, you can resume using the application.
53
MW560

1. Downloads (Only for CDMA)
1. Press .
2. Press
Downloads
.
NOTE: When Select menu such as Downloads / WAP / Voice
Mail, it connect directly to the selected menu. To search
these sub-menu, use in other submenu screen.
NOTE: In Standby mode, press to start the Downloads.
54
MW560
Using Phone Menus
Using Phone Menus

My Vivo
The Setup menu has options to customize your phone.
Access and Options
1. Press .
2. Press
My Vivo
.
3. Select a sub-menu.
Main Keys
Menu Style
Sounds
Display
Language
SIM Service(Optional)
1. Main Keys
Allows you to set the Main Keys On or Off.
1. Press , .
2. Select Main Keys and press .
3. Set On or Off and press .
2. Menu Style
Allows you to choose how the menu appears on your display
screen. Select Grid to view the main menu as an animated icon
55
MW560

or List to view the main menu as a list.
1. Press , .
2. Select Menu Style and press .
3.Set Grid / List with , then press .
3. Sounds
Options to customize the phone's sounds.
3.1 Ringers
1. Press , .
2. Select Sounds and press .
3. Select Ringers.
Caller ID / No Caller ID / Alert Type
4. With , choose the desired ringtone and press Right Soft
Key Select to save the sound.
5. When receiving a call, you can costomize alert type.
Ring / Vibrate / Ring and Vibrate
NOTE: Caller ID lets you know who’s calling by displaying the
number of the person calling when your phone rings. If
the caller’s name and number are already stored in your
internal phonebook, the corresponding name appears
with the number.
You can set Ringers as Caller ID or No Caller ID.
Allows you to identify who is calling by setting different
ringers for different phone numbers in your contacts.
56
MW560
Using Phone Menus
Using Phone Menus

3.2 Volume
1. Press , .
2. Select Sounds and press .
3. Select Volume.
Master Volume / Ringer Volume / Key Tone Volume /
Earpiece Volume / Speaker Phone
4. With left/right navigation key, choose the desired volume of
Master/Ringer/Key Tone/Earpiece or Speaker Phone and
press to save the volume.
3.3 Message Alert
There are 2 ways your phone alerts you to inform new
message.
When receiving a new message, you can use types of Tone and
select Vibrate on/off for notification.
1. Press , .
2. Select Sounds and press .
3. Select Message Alert.
SMS Message : You can customize Tone or Vibrate.
MMS Message : You can customize Tone or Vibrate.
Voice Mail : You can customize Tone or Vibrate.
Message Reminder : You can customize Once or Every 2
minutes.
57
MW560

3.4 Service Alert
Any of the two Alert options can be turned on or off.
1. Press , .
2. Select Sounds and press .
3. Select Service Alert.
Minute Beep / Call Connect
Check each option and turn it off if not desired.
3.3.1 Minute Beep
Alerts you 10 seconds before the end of every minute
during a call.
3.3.2 Call Connect
Alerts you when the call is connected.
4. Select an option and press .
5. Set
On / Off
with and then press .
3.5 Power On/Off Tones
Allows you to set power on/off tone.
1. Press , .
2. Select Sounds and press .
3. Select Power On/Off Tones.
4. Set On / Off with and press .
58
MW560
Using Phone Menus
Using Phone Menus

3.6 DTMF Tone
Allows you to select DTMF tone.
1. Press , .
2. Select Sounds and press .
3. Select DTMF Tone.
4. Set Short / Long with and press .
4. Display
Allows you personalize your phone's display by selecting
different graphics.
4.1 Main Screen
Allows you to choose the kind of background to be displayed
on the phone.
1. Press , .
2. Select Display and press , then Main Screen.
3. Select
Wallpaper/ Incoming Call/ Power On/ Power Off
/
Clocks/ Standby Text
then press .
4.2 Front Screen
Allows you to choose the kind of background to be displayed
on the phone.
1. Press , .
2. Select Display and press Front Screen.
59
MW560

3. Select
Wallpaper/ Incoming Call/ Power On/ Power Off
/
Clocks
then press .
4.3 Backlight
Allows you to set the duration for leaving the backlight on.
1. Press , .
2. Select Display and press , then Backlight.
Main LCD / Front LCD / Keypad duration
3. Use to select Main LCD duration / Front LCD
duration / Keypad duration.
4. Use and set variable parameters and press to save
settings.
4.4 Brightness
Allows you to choose the kind of brightness to be displayed on
the phone.
1. Press , .
2. Select Display and press , then Brightness.
3. Set with then press .
4.5 Dialing Font
You can customize dialing fonts.
1. Press , .
2. Select Display and press , then Dialing Font.
3. Select
Font Size or Font Color.
60
MW560
Using Phone Menus
Using Phone Menus

Font Size (Lager / Samll)
Font Color (16 colors)
5. Language
Set the Trilingual feature according to your preference. Choose
between English, Portugues and Spanish.
1. Press , .
2. Select Language and press .
3. Set
English/ Português/ Español
with then press .
6. SIM Service (Only for Other Technologies, Optional)
This menu depends on SIM and the network services.
1. Press , .
2. Select application (Only for Other Technologies Mode:
Config. Roaming) and press .
3. Menu entrance is only available when there is application on
the SIM.
NOTE: Menu name may be different according to the SIM
application.
NOTE: When OK is pressed in idle mode, you can access to SIM
Service Menu(Optional). When there is no SIM, menu does
not appear on screen.
61
MW560

Tones and Images
Allows you to view file info & memory status, play for the
default image & sound,downloaded files and camera pictures.
Access and Options
1. Press .
2. Press
Tones and Images
.
3. Select a sub-menu.
Videos
Images
Tones
Memory
1. Videos
Allows you to play videos saved in the phone.
1. Press , , .
2. Use to highlight your selection.
You can customise Options;
Play / Send MMS / File(Rename, Protect, Info) / Mark /
Mark All / Delete / Set as Wallpaper / Sort(By Name, By
Date, By Type, By Size)/List View(Grid View)
62
MW560
Using Phone Menus
Using Phone Menus

2. Images
Allows you to view images and set as image of main screen,
front screen, incoming call, power on or off.
1. Press , , .
2. Use to highlight your selection then press to select.
3. Press Right Soft Key Option. (In case of camera, no DRM
file)
View / Send MMS / File(Rename, Protect, Info) / Mark /
Mark All / Delete / Set as(Main Screen, Front Screen,
Incoming Call, Power On, Power Off) / Sort(By Name, By
Date, By Type, By Size) / List View(Grid View)
4. To view the selected image, just press .
3. Tones
Allows you to choose the ring tones heard for incoming calls.
With Right Soft Key , you can set below items as Default;
Caller ID/ No Caller ID.
1. Press , , .
2. Use to highlight your selection and press Right Soft Key
Option to set the new tone.
In case of Built-in tones, you can set the selection as Play /
File Info / Set As(Caller ID, No Caller ID) / Sort(By Name/By
Date/By Type/By Size).
63
MW560

4. Memory
Allows you to check the memory status for the WAP, MMS,
Brew Downloaded files and Camera saved in the phone.
1. Press , , .
2. Press Right Soft Key Option.
Clear Videos / Clear Images / Clear Tones / Clear All
DRM(Digital Rights Management)
DRM contents can be downloaded from WAP. The downloaded
DRM contents can be searched below menu;
Menu -> Ton/Img Memory -> Videos/Images/Tones.
DRM contents can be differentiated as follows;
- DRM files have icon differentiation on the file such as DRM
locked file.
- Not support for sending. So Send menu is not displayed on the
menu.
- In GSM mode, DRM time-based contents can not be available.
64
MW560
Using Phone Menus
Using Phone Menus

Phonebook
Access and Options
1. Press .
2. Press
Phonebook
.
3. Select a sub-menu.
Contact List
Voice Mail
Vivo Agenda
New contact
Speed Dials
Groups Manager
Own Number
Copy and Move
Phonebook Settings
1. Contact List
Allows you to view your Contacts list.
1. Press , , .
2. Press Right Soft Key Option, and then press .
Send Message / Send vCard /Add New / View / Edit /
Mark / Mark All / Search by Group / Delete / Exit
65
MW560

2. Voice Mail (Only for CDMA)
Allows you to connect new voice messages recorded in the
voice mail box. Once you exceed the storage limit, old
messages are overwritten. When you have a new voice
message, your phone alerts you.
1. Press , , .
3. Vivo Agenda (Only for CDMA)
Allows you to manage phonebook and schedule with Brew.
Contact to service provider for more information.
1. Press , , .
4. New Contact
This allows you to have easy access to your most frequently
dialed phone numbers. You may store up to Max. 1000 entries
with up to 5 phone numbers and E-mail each.
1. From standby mode enter the phone number you want to
save (up to 32 digits).
2. Press Right Soft Key Option.
3. Use to select Save Number, then press .
4. Use to select
Create New
or
Update Existing
and
press .
5. Use to to select Phone, SIM, or Phone and SIM. And
NOTE: Use Update Existing to add another phone number to
a contact already stored in memory.
66
MW560
Using Phone Menus
Using Phone Menus

then, press to edit the contact.
6. Set the number type.
7. Enter a name for the phone number (up to 16 characters),
then press .
8. Use to highlight the information you want to edit, then
press .
Name / Mobile Number / Home Number / Email(1) /
Group / Ring Type / Call Picture ID / Office Number /
Etc number / Fax/Email(2) / Web Address / Address /
Birthday Type / Birthday / Memo / Call ID Type / Lock
9. After entering new number, press Left Soft Key Speed
to set speed dial.
Enter the desired speed dial # to assign. And you can set Call
Ring/Picture ID with List..
10. To save the settings, press .
A confirmation message is displayed.
5. Speed Dial
Allows you to view your list of Speed Dials or designate Speed
Dial for numbers entered in your Contacts.
1. Press , , .
2. Use to highlight the Speed Dial position.
NOTE: When set as SIM in Phonebook Settings, number type
is not displayed.
67
MW560

68
MW560
Using Phone Menus
Using Phone Menus
3. Use to highlight the Contact and press .
4. Use to highlight the number and press .
A confirmation message is displayed.
6. Groups Manager
Allows you to view your grouped Contacts, add group or change
the name of a group.
1. Press , , .
2. Highlight the Group you wish to view and then press .
3. To add a new group to the list, press Left Soft Key Add; to
erase a group or to edit the name, press Right Soft Key
Option.
7. Own Number
You can check your own number(Mobile and Home) and e-mail.
1. Press , , .
2. Check Mobile, Home number, and E-mail.
8. Copy and Move
You can copy and move your number saved in contact list into
SIM.
1. Press , , .

69
MW560
9. Phonebook Settings
You can customize phonebook settings such as Memory in Use
and Search Type.
1. Press , , .
2. Use to highlight Memory in Use or Search Type and
press .
3. In Memory in Use, you can customize followings:
Phone / SIM / Phone and SIM / Prompt Each Time

70
MW560
Using Phone Menus
Using Phone Menus
Messages
Access and Options
1. Press .
2. Press
Messages
.
3. Select a sub-menu.
New Message
Received Messages
Sent Messages
Voice Mail
Messenger
Vivo Chat
E-mail
Templates
Saved in SIM
Drafts
Messages Settings

71
MW560
1. New Message
You can conveniently send Text, Picture and Sound from one
phone to another or to an E-mail address.
1.1 SMS Message
Allow you to send a text message.
1. Press , , , .
After composing a text, send SMS using Option.
Insert(Template, Contacts)/Copy Text / Send / Save to
Draft / Priority Type / Exit
1.2 MMS Message (Only for CDMA)
Allow you to send MMS.
1. Press , , , .
After composing MMS, send MMS(Multimedia message)
using Option.
Preview / Add Templates / Save as Draft / Priority
Level(Low, Normal, High)/Remove(Image/Video, Sound,
vCard)/ Exit

72
MW560
Using Phone Menus
Using Phone Menus
2. Received Messages
Received text messages, WAP alert messages and
MMS(Multimedia message) may be searched, and the contents
may be viewed.
1. Press , , .
2. After selecting the desired message with , Right Soft Key
Option and select view.
Reply To answer message.
Forward Forwards a received message to others. After
recipients are entered, the messages can be forwarded.
View You can read the selected message.
Save Contact : Save the phone number of received message
into the phonebook.
Mark : Mark the selected message.
Mark all: Mark all messages.
To SIM (Only SMS): Save the selected message into SIM.
Delete Delete the selected message from the Inbox.
Receive Download MMS Message from server.
3. After viewing the message, press Right Soft Key Option.
In case SMS & MMS, Option;
Delete : Delete the selected message from Inbox.
Forward : Forwards a received message to others. After
recipients are entered, the messages can be forwarded.
Information(Only MMS) : Can check message information.
To SIM (Only for Other Technologies SMS) : Move the
selected message to SIM.

73
MW560
Copy / Move.(Note: Move is only for text message.)
Extract URL(Only SMS) : Excract URL lists included in
message.
Save Contact : Save the phone number of received message
into the phonebook
Save Media(Only MMS) : Customize media.
Image / Video / Sound / Attachments
When delivery is deferred, you can use below Options;
Download now : Download MMS.
Download later : Download MMS later.
Reject : Reject the MMS.
3. Sent Messages
Sent messages may be searched, and the contents may be
viewed.
1. Press , , .
2. When Sent is selected, highlight the desired message and
press Right Soft Key Option.
Forward: Forwards a sent message to others. After
recipients are entered, the messages can be forwarded.
View: View the selected message.
Save Contact: Save the selected message phone number as
contact. (Create New / Update Existing)
Mark: Mark the desired message and customize it to delete or
save it to SIM.
Mark all: Mark all message and customize it to delete or save

74
MW560
Using Phone Menus
Using Phone Menus
it to SIM.
Delete: Delete the selected message.
To SIM (Only for Other Technologies SMS): Save the selected
message to SIM.
3. After selecting the desired message, you can customize it(In
case text message):
: Delete
: Forward
: Option
After selecting the desired message, you can customize it(In
case MMS) :
: Resend
: Play/Pause (Only available for the video message.)
: Option
4. Voice Mail (Only for CDMA)
Allows you to check voice mail by connecting server or set the
voice mail alert when receiving voice mail.
1. Press , , .
2. After connected,
Left Soft Key : Rec
Right Soft Key : Option
End Call/Privacy Off/Record/Send My Number/Search/Add
New Contact/Memo/Mute/Speaker On/New Call

75
MW560
5. Messenger (Only for CDMA)
Allows you to add new applications, and send and receive an
instant message at any time.
1. Press , , .
Launch MiniBrowser.
6. Vivo Chat (Only for CDMA)
Allows you to chat with internet Messenger user.
1. Press , , .
Launch MiniBrowser.
7. E-mail (Only for CDMA)
Allows you send an Email.
1. Press , , .
Launch MiniBrowser.
8. Templates
When sending a message, you can use templates which are
preset messages and edit it for your message.
1. Press , , .
2. Select the desired templates when sending a message. With
Right Soft Key Option.
Edit / View / Forward

76
MW560
Using Phone Menus
Using Phone Menus
9. Saved in SIM (Only for Other Technologies)
You can check messages saved in SIM.
1. Press , , .
2. Use to highlight the desired message and press to
check.
0. Drafts
The text and MMS are saved in Drafts. When pressed Save as
Draft in Option, or If you press End key during writing
messages, pop-up message to save is displayed. Select Yes to
save message into Drafts.
1. Press , , .
2. After selecting the desired message with , you can
customize it:
- : Delete
- : Edit
- : Option (Edit / Mark / Mark all / Delete)
Templates
Adding templates is not possible. You can only edit it.

77
MW560
*. Messages Settings
1. Press , , .
2. Use to highlight a desired list and press .
Auto Save : With this feature on, messages are
automatically saved in the Sent when transmitted.
(Auto Save / Prompt / Do Not Save)
Auto Delete : With this feature on, read messages are
automatically deleted when you exceed the storage limit.
(On / Off)
MMS Auto Receive : Allows you to directly download the
content when receiving a Pix message.
(On / Off)
Signature : Allows you make/edit a signature to
automatically send with your messages. (Only for SMS)
(None / Custom)
Delivery Notice : (On / Off) (Only for SMS)
Entry Type : Allows you to select the default input method
including T9Word, Abc, 123.
(T9Word, Abc, 123)
Message Memory : Shows the memory information.
Delete All : Delete all messages saved in phone.
(Received / Sent / Saved in SIM / Drafts / All Messages)
NOTE: When Delete All is set, messages in SIM are not deleted.

78
MW560
Using Phone Menus
Using Phone Menus
Entertainment (Only for CDMA)
Allows you to use Game, Voice Portal and Vivo Informa.
Access and Options
1. Press .
2. Press
Entertainment
.
3. Select a sub-menu.
Games
Voice Portal
Vivo Informa
1. Games
By connecting to WAP, you can play various games and enjoy it
with fun.
1. Press , , .
2. Voice Portal
Voice Portal is control menu that allows some phone number to
be accessed to Voice SMS. Dials the Voice Portal number.
1. Press , , .
3. Vivo Informa
Automatically dials the information service number.
(When activated, call is connected to the number of *365.)
1. Press , , .

79
MW560
WAP (Only for CDMA)
The MiniBrowser feature allows you to view internet content,
especially designed for your mobile phone. Access and
selections within this feature are dependent upon your service
provider. For specific information on MiniBrowser access
through your phone, contact your service provider.
Access and Options
1. Press .
2. Press and move to WAP.
WAP includes various below options. Many sites are available
under more than one menu - choose the one that's most
convenient for you.
Start WAP / Favorites / Quiz / Cupido / Tones and Images /
Guides and Leisure / Portals / Sports / Games /
Vivo em Ação
/
Cabum / Banks / Vivo Chat / Messenger / E-mail / Go To.. / WAP
Settings
Ending a MiniBrowser Session
End a MiniBrowser session by pressing .
Navigating Through the Browser
On-screen items may be presented in one of the following ways:
Numbered options
You can use your numeric keypad or you can select the
items by moving the cursor and pressing the appropriate
Soft Keys.

80
MW560
Using Phone Menus
Using Phone Menus
Links embedded in content
You can act on the options or the links by using the Soft
Keys just below the display screen.
Text or numbers
You can select the items by moving the cursor and
pressing the appropriate Soft Keys.
Scrolling
Use to scroll through the content if the current page does
not fit on one screen. The currently selected item is indicated by
a cursor on the screen.
Scrolling by Page
Press hold or press side key.
Forward
Press Send key .
Home Page
To go to the Home Page, press and hold .
Soft Keys
To navigate to different screens or select special functions, use the Soft
Keys. The function associated with the Soft Keys can change for each
page and depends on each highlighted item.
Left Soft Key
Left Soft Key is used primarily for first options or selecting an item
but its function may change, depending on the content displayed.

81
MW560
Right Soft Key
Use to connect WAP directly.
Entering Text, Numbers, or Symbols
When prompted to enter text, the current text entry method appears
above the Right Soft Key as abc, word, Sym,
123, Emoticons
, or
WWW.
To change the input mode, press the Right Soft Key .
To create an upper case character, use .
The current text method appears above the Right Soft Key as ABC
or WORD and allows you to shift input case sensitivity.
Clearing Out Text/Number Entered
When entering text or numbers, press to clear the last
number, letter or symbol. Press and hold to clear the input
field completely.
Using Bookmarks
You can bookmark many individual pages for easy access at a
later time. Bookmarks save you time by reducing the number of
steps it takes to access a desired page.
Creating a Bookmark
1. Go to the page that you want to mark.
2. On the browser menu, select Mark Site or press and hold
. If the page has a title, it is automatically used for the
name of the bookmark.

82
MW560
Using Phone Menus
Using Phone Menus
3. Press Left Soft Key Save.
A message appears confirming that the bookmark is added
to the list. The bookmark name is saved and the page is
added to the bottom of your list of bookmarks.
When the bookmark is saved you can change the bookmark
name if you choose.
4. And then return to the page.
This function is dependent upon the html coding of the page
and determined by the website.
Finding a Bookmark
From the Home Page, press and hold the number associated
with the bookmark in your bookmark list.
Initiating a Phone Call From MiniBrowser
You can make a phone call from MiniBrowser if the site you are
using supports the feature (the phone number may be highlighted
and
Left Soft Key
appears as Call). The browser connection is
terminated when you initiate the call. After you end the call, your
phone returns to the screen from which you initiated the call.
WAP Settings
Configure setting when using WAP Service Load.
1. Press , key and move to WAP Settings.
Auto Connect
: Allow / Deny / Ask

83
MW560
Tools
Allows you to conveniently keep and access your agenda(s).
Simply store your appointments and your phone will alert you
with a reminder of your appointment.
Access and Options
1. Press .
2. Press
Tools
.
3. Select a sub-menu.
Camera
Calendar
Alarm
Calculator
Voice Note
Chronometer
Notepad
D-day Counter
Unit Converter
World Time

84
MW560
Using Phone Menus
Using Phone Menus
1. Camera
Your phone gives you the ability to take full-color digital
pictures, view your pictures using the phone's display, and
instantly share them with your family and friends. It's fun and
as easy to use as a traditional point-and-click camera: just take a
picture, view it on your phone's display, and send it from your
phone to up to ten people.
1.1 Take Photo
Take a picture with your camera.
1. Press , , , . or press left side camera key .
3. Set the brightness with , zoom with and press Right
Soft Key Option to change other settings.
Select the options to customize.
Flash / Multishot / Timer / Resolution / Filter / White
Balance / Quality / Illumination
NOTE: Use to adjust the zoom function at 320x240, 160x120
resolution except 640x480.
NOTE: Taking a picture with exterior side camera key. With folder
closed, you can take a photo by press side camera key .
Hold side key long and take a picture by pressing side
camera key. Without anykey touch, camera mode exits.

85
MW560
1.2 Take Video
Take a movie with your camera.
1. Press , , .
2. Press Take Video.
3. Set the brightness with press Right Soft Key Option
to change other settings.
Select the options to customize.
Flash / Filter / White Balance / Quality / Illumination /
Usage
1.3 Take Fun Photo
Allows you to view photos saved in the phone. And photos can
be displayed when set as Main Screen/Front Screen/Incoming
Call/Power On/Power Off.
1. Press , , .
2. Press Take Fun Photo and press .
3. Press Right Soft Key Option to customize photo.
Flash /Filter /White Balance /Illumination
4. With Left Soft Key , you can set 4 types of frame.
5. Press to take fun photo.

86
MW560
Using Phone Menus
Using Phone Menus
1.4 Photo Album
Allows you to view photo album saved in the phone.
1. Press , , .
2. Press Photo Album and press .
3. Press Right Soft Key Option.
View /Send MMS /File /Mark /Mark All /Delete /Set As
/
Sort /List View
1.5 Video Album
Allows you to view video album saved in the phone.
1. Press , , .
2. Press Video Album and press .
3. Press Right Soft Key Option.
Play /Send MMS /File / Mark /Mark All /Delete /Set as
Wallpaper /Sort /List View
1.6 Slide Show
Allows you to view photos consecutively saved in phone.
1. Press , , .
2. Press Slide Show and press Left Soft Key Add.
3. Press Right Soft Key Option.
4. Mark the desired photo and press Left Soft Key Done to
save.
5. Press to settings.

87
MW560
1.7 Camera Settings
Allows you to view photos cconsecutively saved in phone.
1. Press , , .
2. Press Camera Settings and press .
3. Use to select Auto save, Shutter tone or Reset settings
and press OK.
2. Calendar
Allows you to conveniently keep and access your agenda(s).
Simply store your appointments. Upto 200 schedule is available.
1. Press , , .
2. Use to highlight the scheduled day.
: Moves cursor to the left.
: Moves cursor to the right.
: Moves to the previous week.
: Moves to the next week.
: Move to last year.
: Move to next year.
: Move to last month.
: Move to next month.
3. Press Left Soft Key Add.
4. Enter your schedule information including:

88
MW560
Using Phone Menus
Using Phone Menus
Date/ Month/Year
Time
Alarm On/Off
Inupt Schedule information
5. Press to save..
When using Brew, WAP or Camera, scheduler will not alert you
also.
3. Alarm Clock
Allows you to set one of three alarms. The set alarm time is
displayed when you select an alarm to set. At the alarm time,
Alarm 1
(or 2 or 3, as applicable) will be displayed on the LCD
screen and the alarm will sound.
1. Press , , .
2. Select the alarm you want to edit.
Alarm 1 / Alarm 2 / Alarm 3
3. Press Left Soft Key Add to set alarm clock.
4. With , set alarm on/off, alarm period, and ring type.
5. Press to save the settings.
NOTE: Alarm will not alert you during a call or during SMS
transmitting. It will sound the reminder after you exit a call.
When using Brew, WAP or Camera, alarm will not alert
you also.

89
MW560
6. Press Right Soft Key Option.
Add New / View(Day List/Week List/Month List) / Search /
Set holiday / Go to(Today/Date) / Delete(Past Entries/Date
Entries/Month Entries/All Entries) / Reset holiday
4. Calculator
Calculate simple mathematical computations. (Can get result
upto second decimal place.)
1. Press , , .
2. Press 2 and 5 in order.
3. Select (multiplication) using .
4. Press 10 in order.
5. Press .
You will see the result of the calculation 250.
NOTE: Calculations can be made with up to 50 characters at one
time( EX, 73+11+32 would be 8 characters).
NOTE: Alarm will not alert you during a call or during SMS
transmitting. It will sound the reminder after you exit a call.
When using Brew, WAP or Camera, alarm will not alert
you also.

90
MW560
Using Phone Menus
Using Phone Menus
5. Voice Note
You can use your phone's Voice Services to record brief memos
to remind you of important events, phone numbers, or grocery
list items. Within a memory storage, you can add voice memo
and record voice memo up to 5 minutes within memory
storage.
1. Press Record New and press . During the record,
- Press Left Soft Key to pause.
- Press OK to stop recording.
6. Chronometer
Allows you to measure time and take intermediate times or lap
times using the stopwatch.
1.Press , , .
2. Press Start .
7. Notepad
Allows you to memo up to 100.
1. Press , , .
2. Press Left Soft Key Add .
After composing a memo, press press to save.

91
MW560
8. D-day Counter
Up to 10, can be saved.
1. Press , , .
2. Press Left Soft Key Add to write a new D-Day.
3. Edit contents.
4. After setting a date, then press to save.
9. Unit Converter
Allows you to change unit and check changed results such as
Currency, Length, Surface, Mass, Volume, Temperature and
Velocity.
1. Press , , .
9.9.1 Length
Allows you to change below unit into other unit.
centimeter/meter/inch/feet/yard/mile/milimeter/kilometer
NOTE: In case there is saved D-Day Counter, below Options are
available with Right Soft Key; Display at home, Add New,
View, Edit, Mark, Mark All, Delete.
NOTE: In case there is one saved Memo, you can see 2 Options;
View / Erase
In case there is more than 2 saved Memo, you can see 3
Options; View / Erase / Erase All

92
MW560
Using Phone Menus
Using Phone Menus
9.9.2 Surface
Allows you to change below unit into ohter unit.
meter2/inch2/feet2/yard2/acre/hectare
9.9.3 Weight
Allows you to change below unit into ohter unit.
gram/kilogram/Ounce/Pound/Ton/mg
9.9.4 Volume
Allows you to change below unit into ohter unit.
Centimeter3/Meter3/Liter3/Inch3/Feet3/Yard3/Gallon
9.9.5 Temperature
Allows you change Celsius into Fahrenheit.
9.9.6 Velocity
Allows you change below unit into other unit.
km/h, meter/sec, mile/h, feet/sec
0. World Time
Allows you to determine the current time in another time zone
or country.
1. Press , , .
2. Select the city you desire by using then press .

93
MW560
Voice Mail (Only for CDMA)
Allows you to connect new voice messages recorded in the
voice mail box. Once you exceed the storage limit, old
messages are overwritten. When you have a new voice
message, your phone alerts you.
Access and Options
1. Press .
2. From the other sub-menu, move to Voice Mail.
3. Select a sub-menu.
Connect Voice Mail
1. Connect Voice Mail
Allows you to connect the Voice MailBox.
1. From the other sub-menu, move to Voice Mail.
2. Select Connect Voice Mail.

94
MW560
Using Phone Menus
Using Phone Menus
Settings
The Setup menu has options to customize your phone.
Access and Options
1. Press .
2. Press
Settings
.
3. Select a sub-menu.
Memory Status
Network
Security
Calls Settings
Message Settings
WAP Settings
Data Settings
Vivo Encontra
Orignal Settings

95
MW560
1. Memory Status
1.1 Phone Memory
Allows you to check the memory of videos, musics, images and
tones saved in your phone.
1. Press , , , .
1.2 SIM Memory (Only for Other Technologies)
Allows you to check the memory of the SIM.
1. Press , , , .
2. Network
2.1 Switch Network
Allows you to switch network you are using.
1. Press , , , .
2.2 Date and Time (Only for Other Technologies)
Allows you to check date and time.
1. Press , , , .
NOTE: PIN Requested: You need to enter PIN code.
SIM Locked Unavailable: You can not use current SIM.
So replace other SIM.

96
MW560
2.3 Other Technologies Network
(Only for Other Technologies)
Allows you to choose the network selection mode of other
technologies.
1. Press , , , .
2.4 Select System (Only for CDMA)
Allows you to select system type.
1. Press , , , .
2. Select
Standard
/ A Only / B Only / Home Only and press
.
2.5 Set NAM (Only for CDMA)
Select the phone’s NAM (Number Assignment Module) if the
phone is registered with multiple service providers.
1. Press , , , .
2. Select
NAM1
or
NAM2
and press .
NOTE: You can select a network which will be registered either
automatically or manually. The first, the network selection
is set to Automatic.
Automatic: If you select Automatic mode, the phone will
automatically search for and select a network for you.
Once you have selected “Automatic”, the phone will be set
to “Automatic” even though the power is off and on.
Manual: The phone will find the list of available networks
and show you them. Then you can select the network
which you want to use.

97
MW560
3. After selecting NAM, phone is reset.
2.6 Auto NAM (Only for CDMA)
Allows the phone to automatically switch between
programmed telephone numbers corresponding to the service
provider area.
1. Press , , , .
2. Select
On
or
Off
and press .
2.7 Serving System (Only for CDMA)
You can identify the channel number of a system that is served
and a SID Number. This information is only for technical
support.
1. Press , , , .
2.8 Force Call (Only for CDMA)
Allows you to use the selected system
1. Press , , , .
2. Select
Automatic / PCS Only / DCN Only / 95A/B Only /
1X Only
and press .

98
MW560
3. Security
3.1 PIN Request (Only for Other Technologies)
Allows you to customize PIN code.
1. Press , , , .
3.2 Phone Lock
Keeps your phone from unauthorized use. Once the phone is
locked, it is in restricted mode until the lock code is entered.
This allows you to receive phone calls and still make
emergency calls. The lock code is common the last 4 digits of
your phone number.
You can modify the lock code using the New Lock code within
the Security menu.
1. Press , , .
2. Press Phone Lock.
3. Select
Power On/ Immediately / Off
and press .
NOTE: If you change it to On, you need to enter PIN code when
you switch on the phone. If you enter wrong PIN code
more than remaining times, the phone will lock out. If the
PIN is blocked, you will need to key in PUK code. You can
enter your PUK code up to 10 times. If you put wrong PUK
code more than 10 times, you can not unlock your phone.
You will need to contact your service provider.

99
MW560
3.3 Application Lock
You can customize application lock.
1. Press Application Lock.
2. Enter the four-digit Lock code. (The lock code is the last 4
digits of your phone number.)
3. Enter the four digit lock code. ( Default is the last 4 digits of
your phone number.)
4. Select the desired application and lock application.
Local Calls / International Calls / Call History /
Phonebook / Messages / Tones and Images / WAP /
Downloads / Calendar / Notepad
3.4 Emergency Number
You can call emergency numbers such as 190, 192 or 193, even
when the phone is locked or restricted. To enter 3 emergency
numbers:
1. Press , , .
2. Press Emergency Number.
3. Enter the four-digit Lock code. (The lock code is the last 4
digits of your phone number.)
4. Select emergency number using .
5. Press and edit.
 Loading...