How it Works
Log In / Sign Up
Buy Points
How it Works
FAQ
Contact Us
Questions and Suggestions
Users
LG
Loading...
P
PD251TW
PD251W
3
PD251Y
2
PD261
PD261P
PD261W
PD261Y
PD269
PD4225
PD81A
PD820
PD8380
PDA
PDA L05C BT
PDA L05C WL
PDA L11C
PDA L12C BT
PDA-L12C-WL
PDA-PE2030A
PDA PE2030B
pdp 2001
PDP 42PC1DVH
PDP42V5
PDP42V6
PDP42V6XXXX
PDP42V7
PDP60C2
PDP TV
PDRCUDB0
PDRCUDB0B
PDRCUDB0S
PDRCUSZ0
2
PDRYCB000
6
PDRYCB100
6
PDRYCB300
7
PDRYCB400
16
PDRYCB500
9
PE-43A82T
5
PE-48A82T
9
PE-53A82T
6
PED24WH
PE/PL-43
PE/PL-48
PE/PL-53A82T
PESC0RV0
4
PEXPMB000
6
PF1000U
16
PF1000UA
PF1000UG
5
PF1000UK
PF1000UT
3
PF1000UW
5
PF1500
3
PF1500G
18
PF1500W
2
PF351P
PF391
13
PF391P
3
PF391P-P
5
PF-43A10
3
PF-43A20
5
PF50KA
2
PF50KG
11
PF50KS
8
PF50KS.AEK
PF-52A70
PF-60A30
2
PF80A
PF80AJE
PF80G
8
PF80G-JE
2
PF85U
3
PF85UJE
PFM42V1
PFM42V1A
PFM-42V1E
2
PG10
PG20
2
PG30
PG60G
12
PG60GJE
PG65U
3
PG65UJE
PGNFP14A0
PH1
34
PH 150
PH150B
2
PH150G
21
PH150G.AEK
PH1R
9
PH2
16
PH2B
2
PH2R
5
PH3
9
PH-U289WT
2
PH-U450WN
4
PH-U451WN
4
PH-U459KN
PH-U459 Series
PH-U459WN
2
Loading...
Loading...
Nothing found
PF1000U
Product Sheet
1 pgs
197.63 Kb
0
product sheet
2 pgs
268.37 Kb
0
User Manual
143 pgs
12 Mb
0
Owner’s Manual
110 pgs
25.39 Mb
0
Owner’s Manual [ar]
110 pgs
25.22 Mb
0
Owner's Manual [bg]
110 pgs
25.43 Mb
0
OWNER’S MANUAL [de]
109 pgs
4.44 Mb
0
User Manual [es]
110 pgs
25.45 Mb
0
Owner’s Manual [fr]
110 pgs
25.44 Mb
0
User Guide [hr]
110 pgs
25.37 Mb
0
User manual [hu]
110 pgs
25.39 Mb
0
User manual [pl]
110 pgs
25.4 Mb
0
Owner's Manual [ro]
110 pgs
25.45 Mb
0
User Manual [ru]
110 pgs
27.62 Mb
0
Owner's Manual [sr]
110 pgs
25.41 Mb
0
Owner’s Manual [tr]
110 pgs
25.38 Mb
0
Table of contents
Loading...
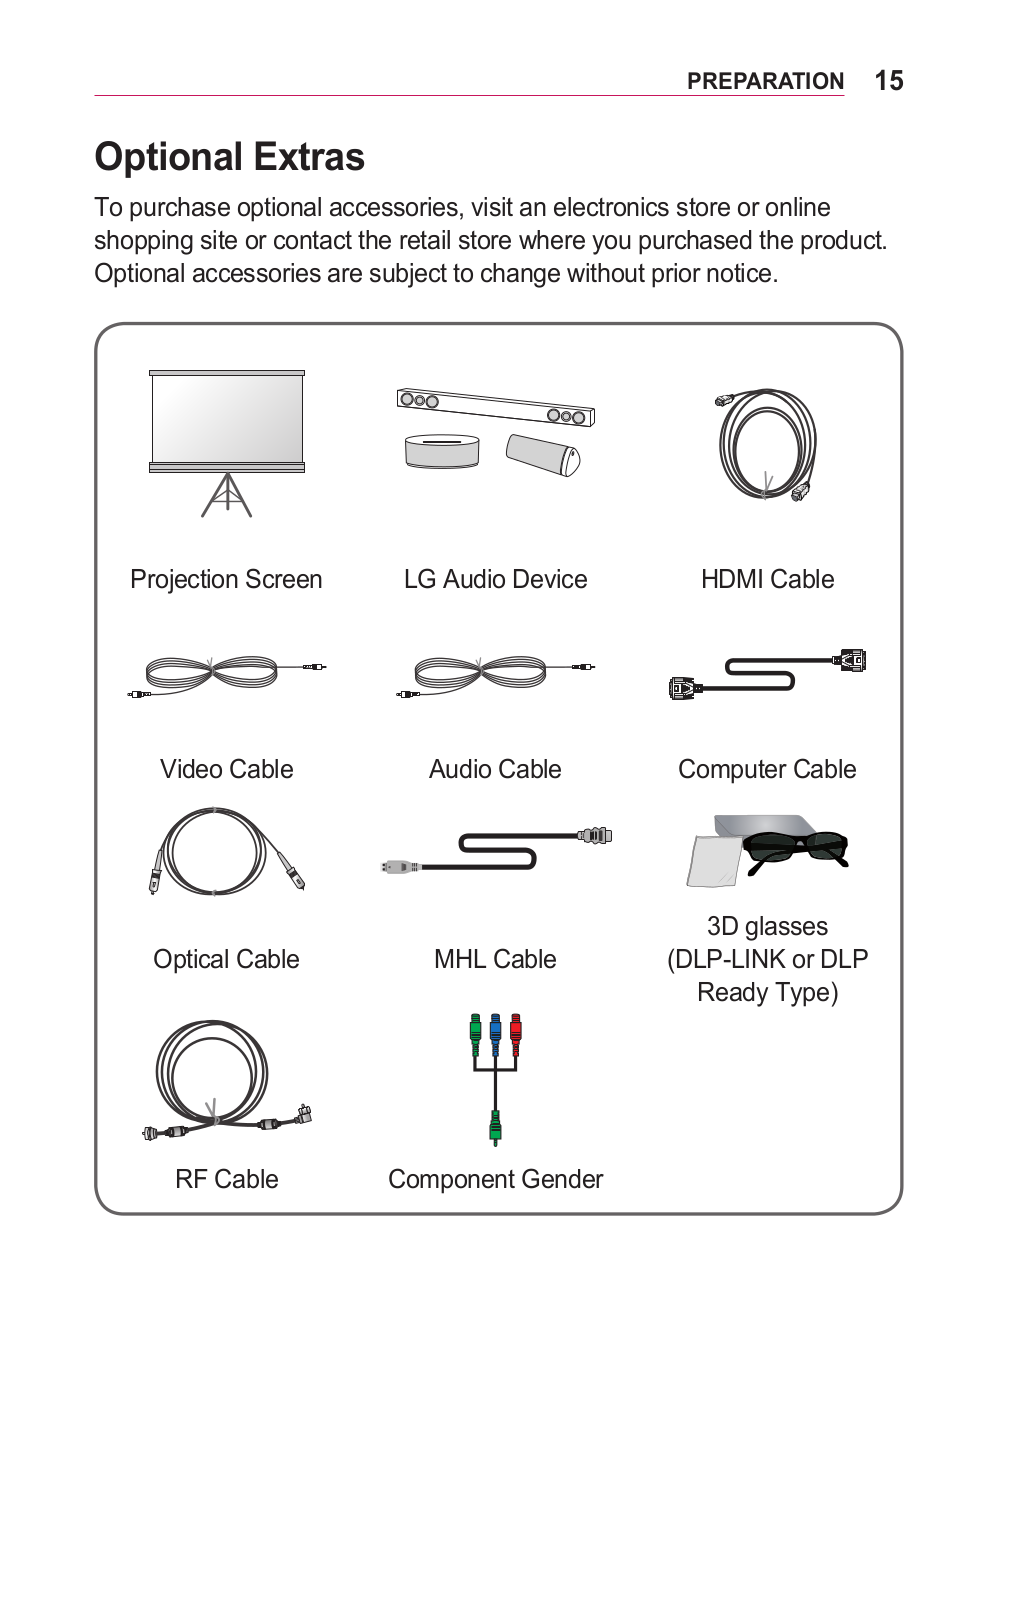
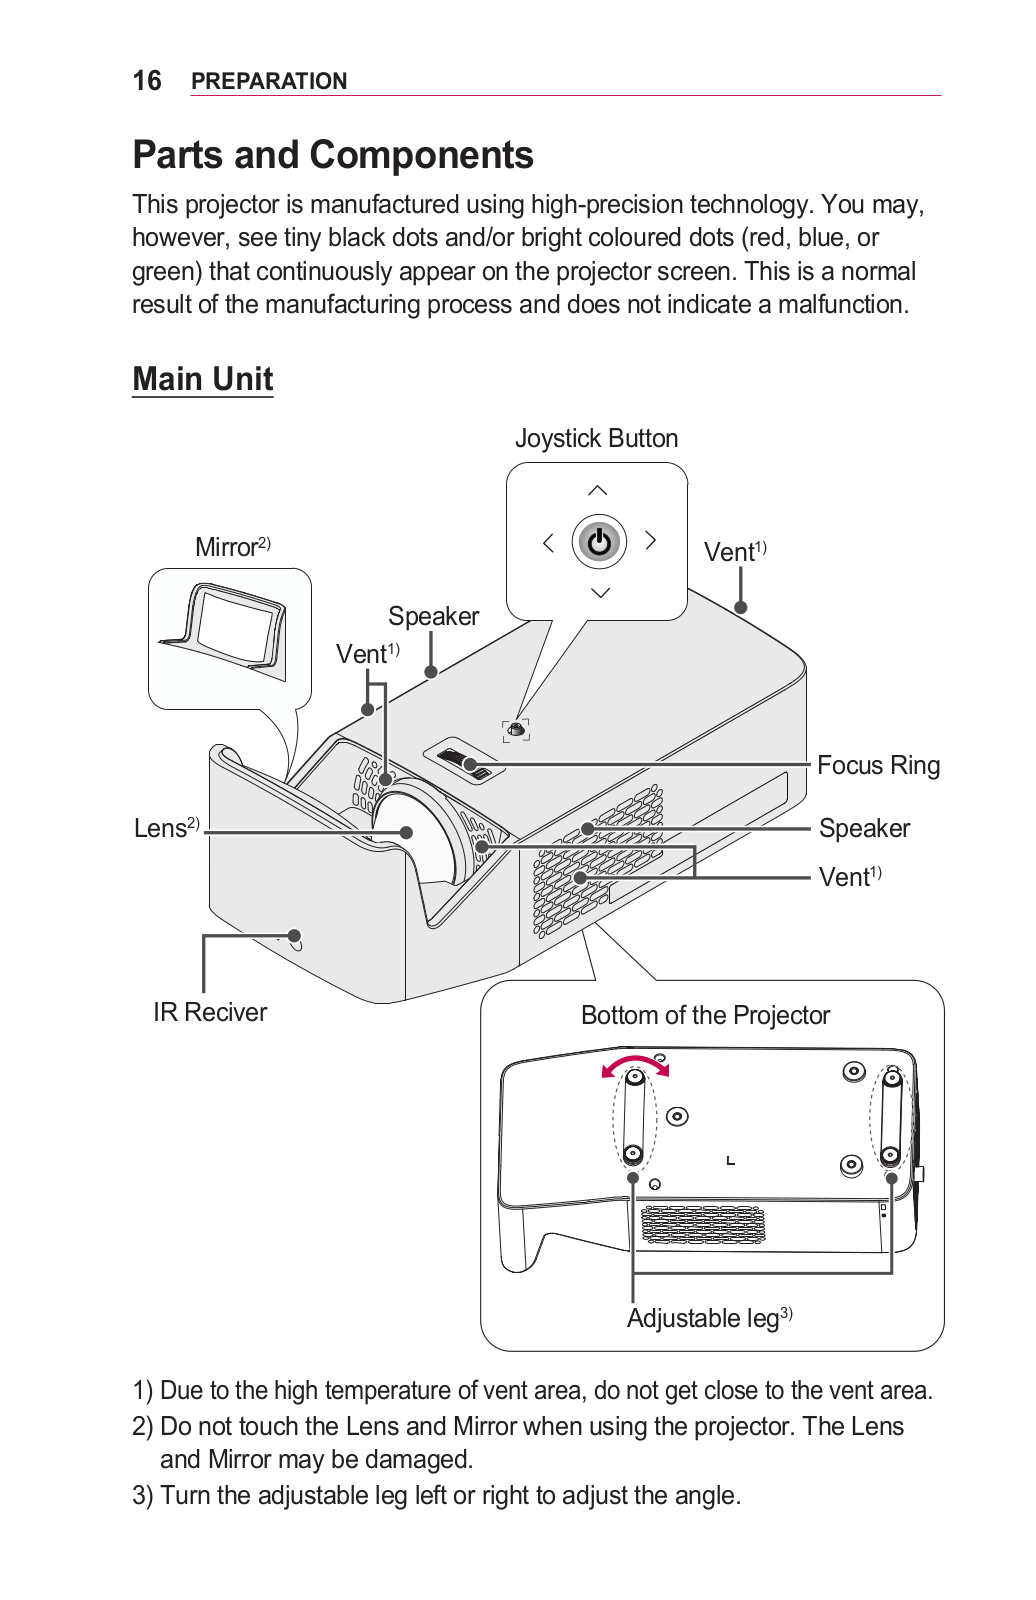
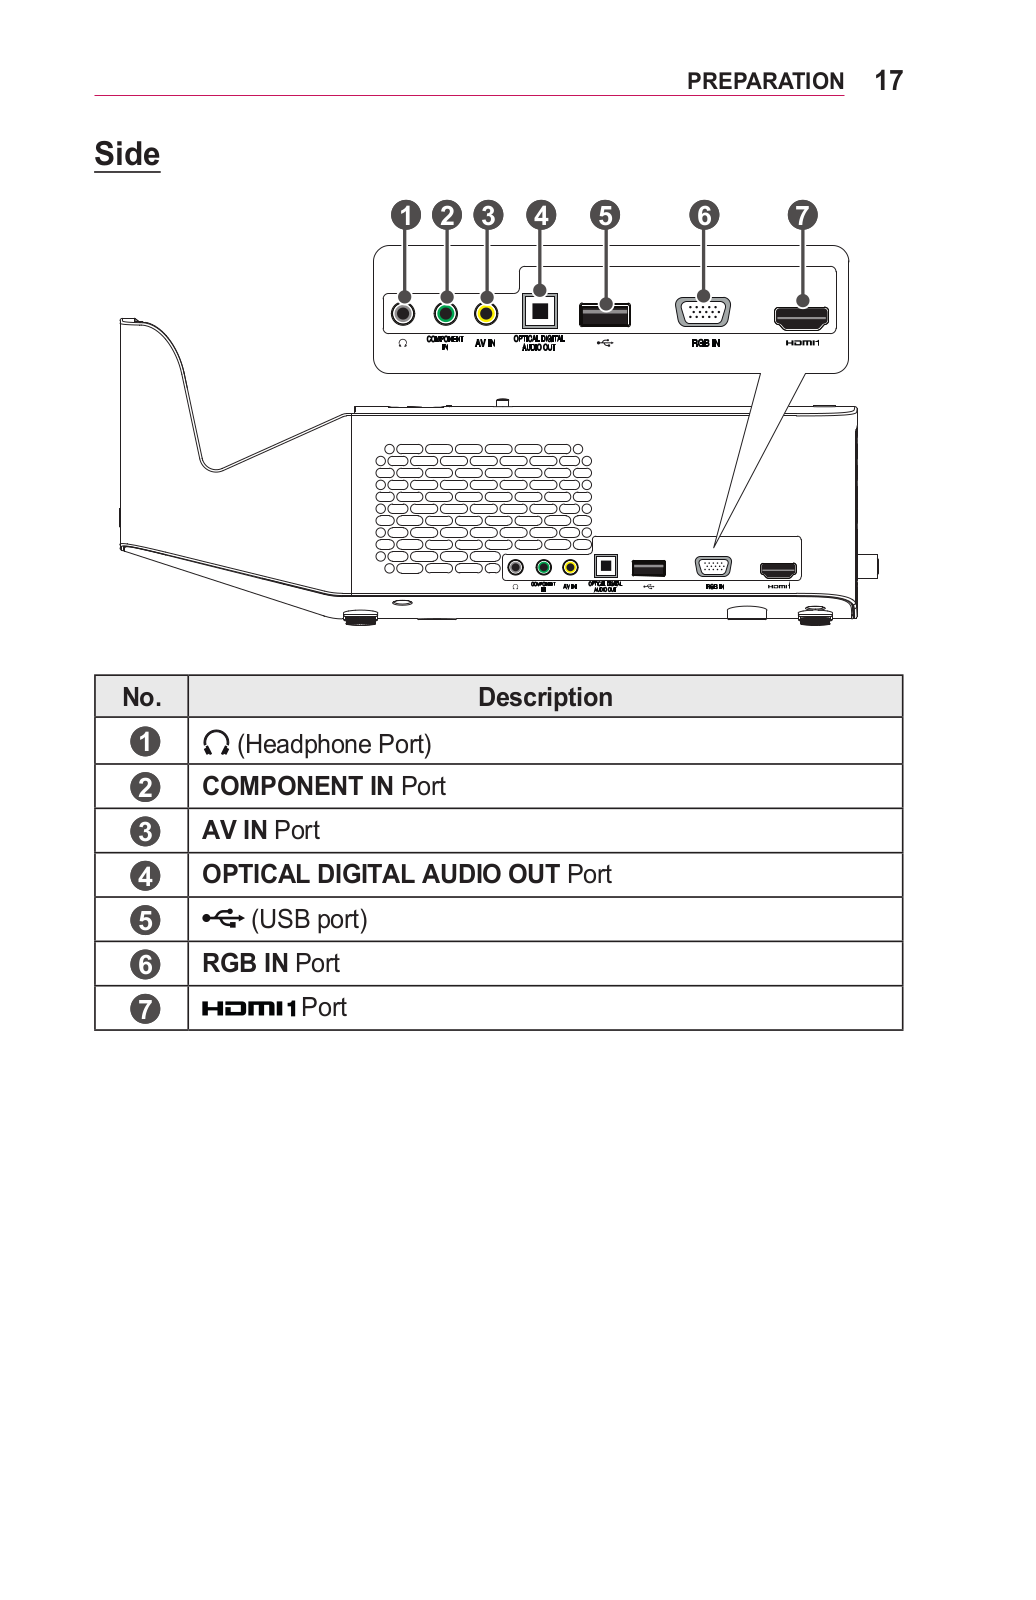
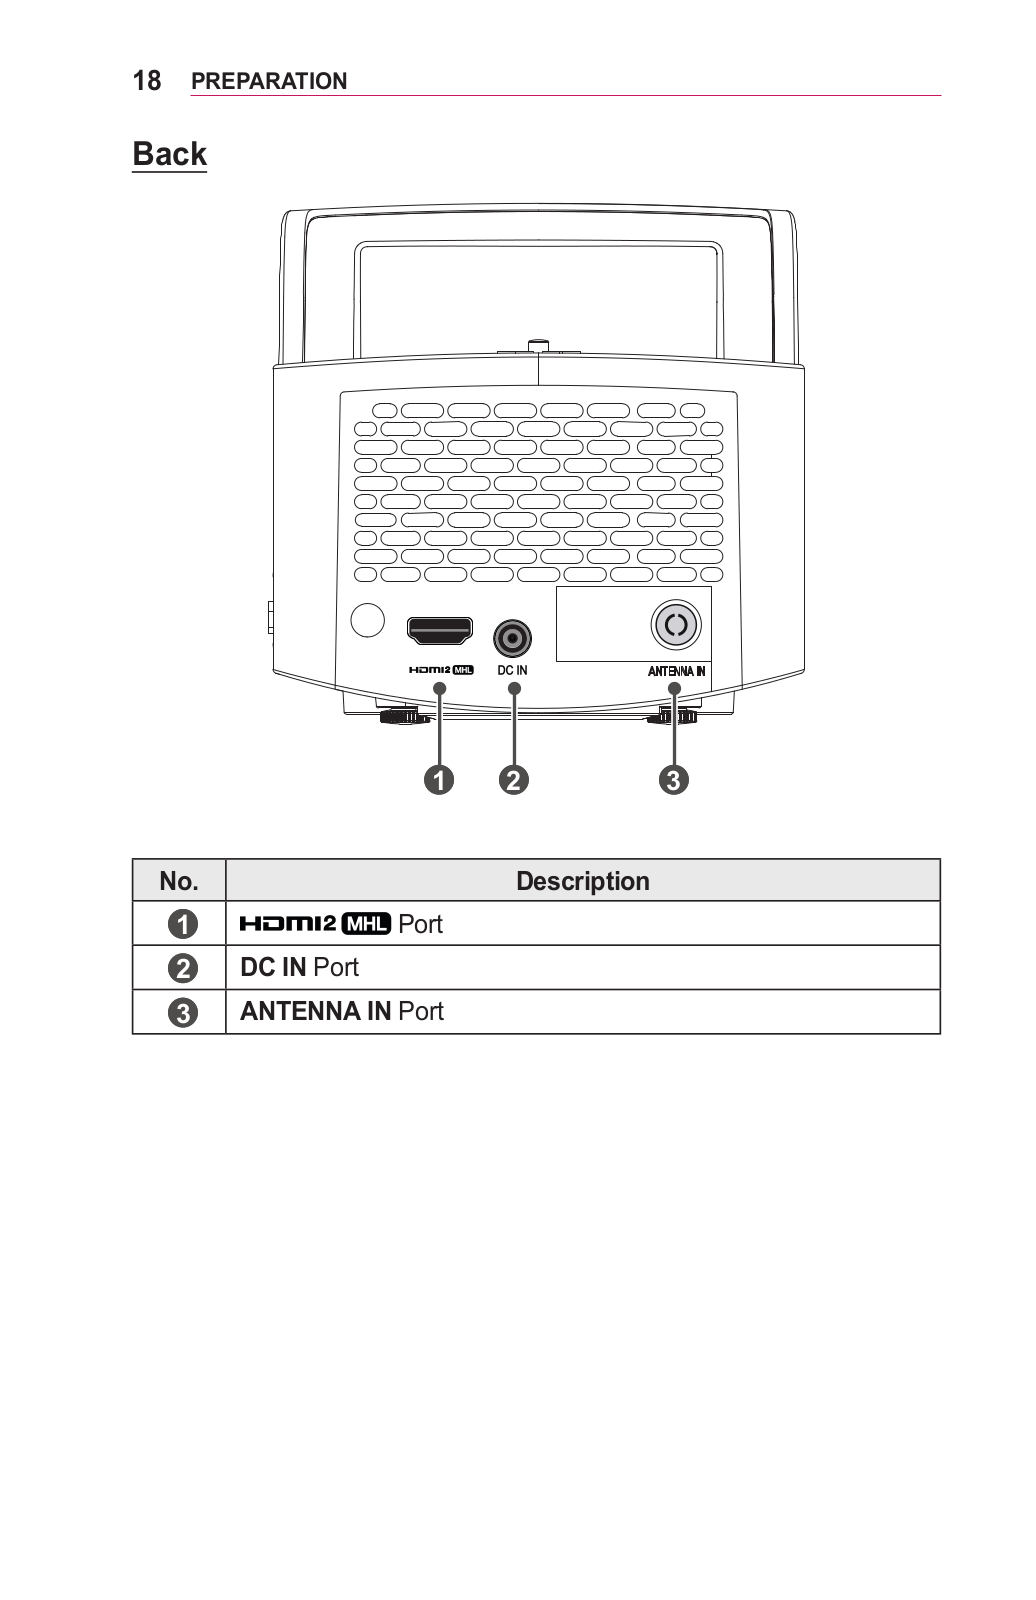
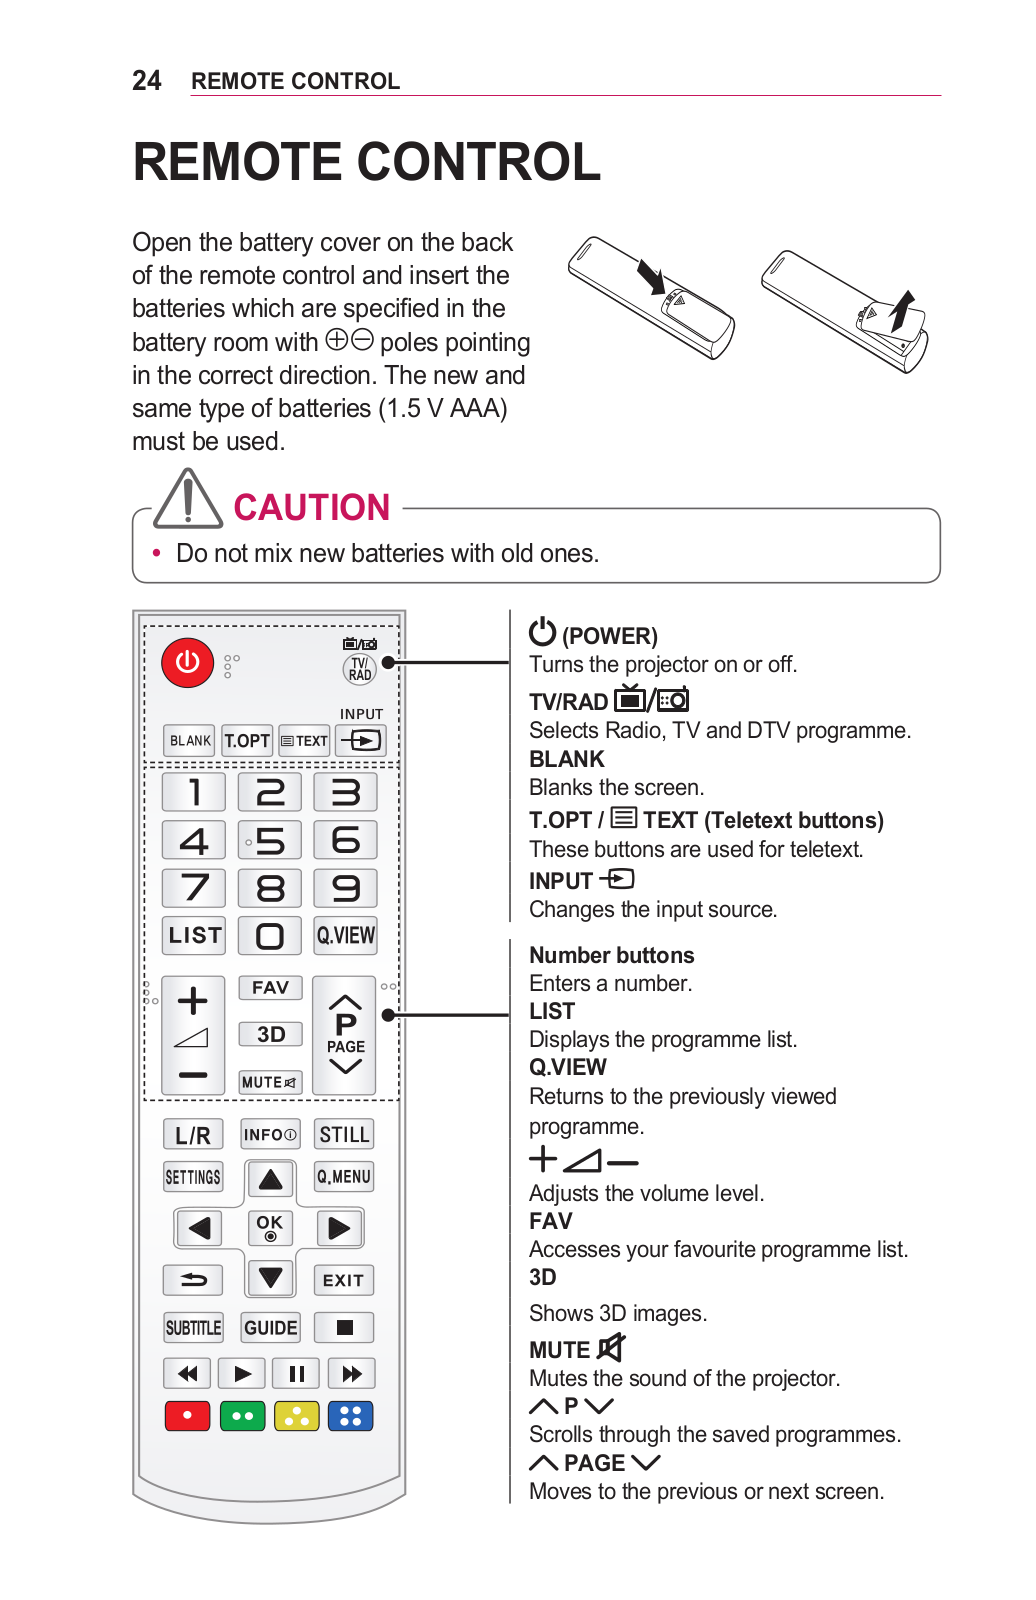
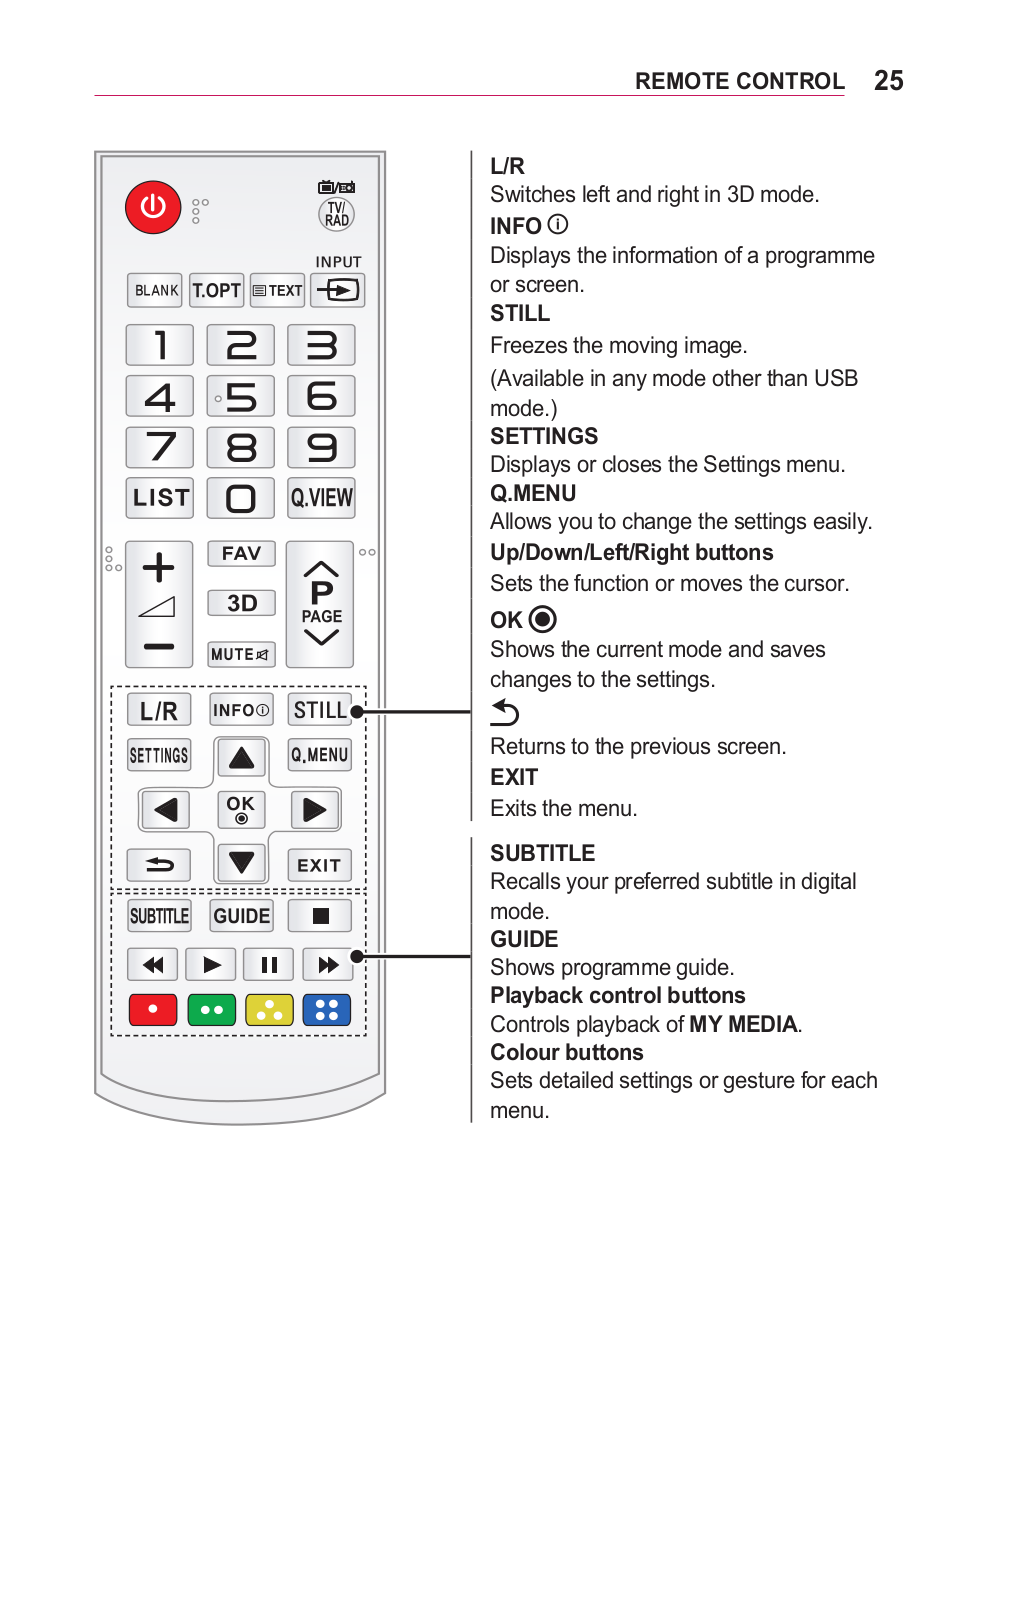
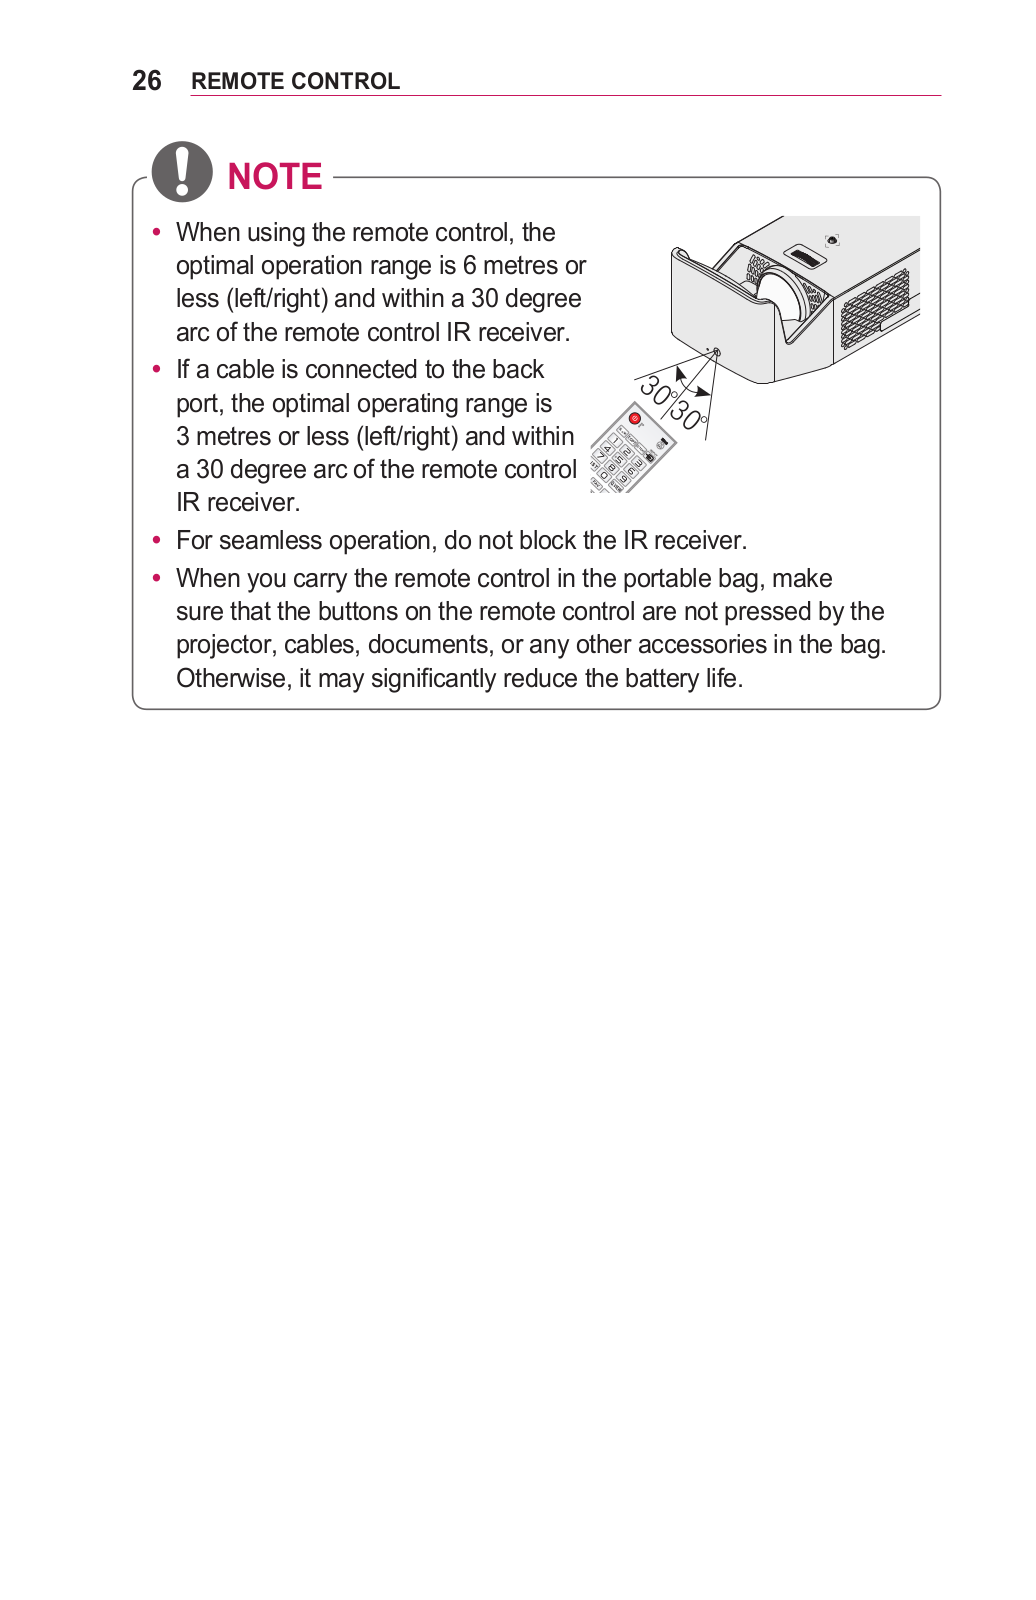
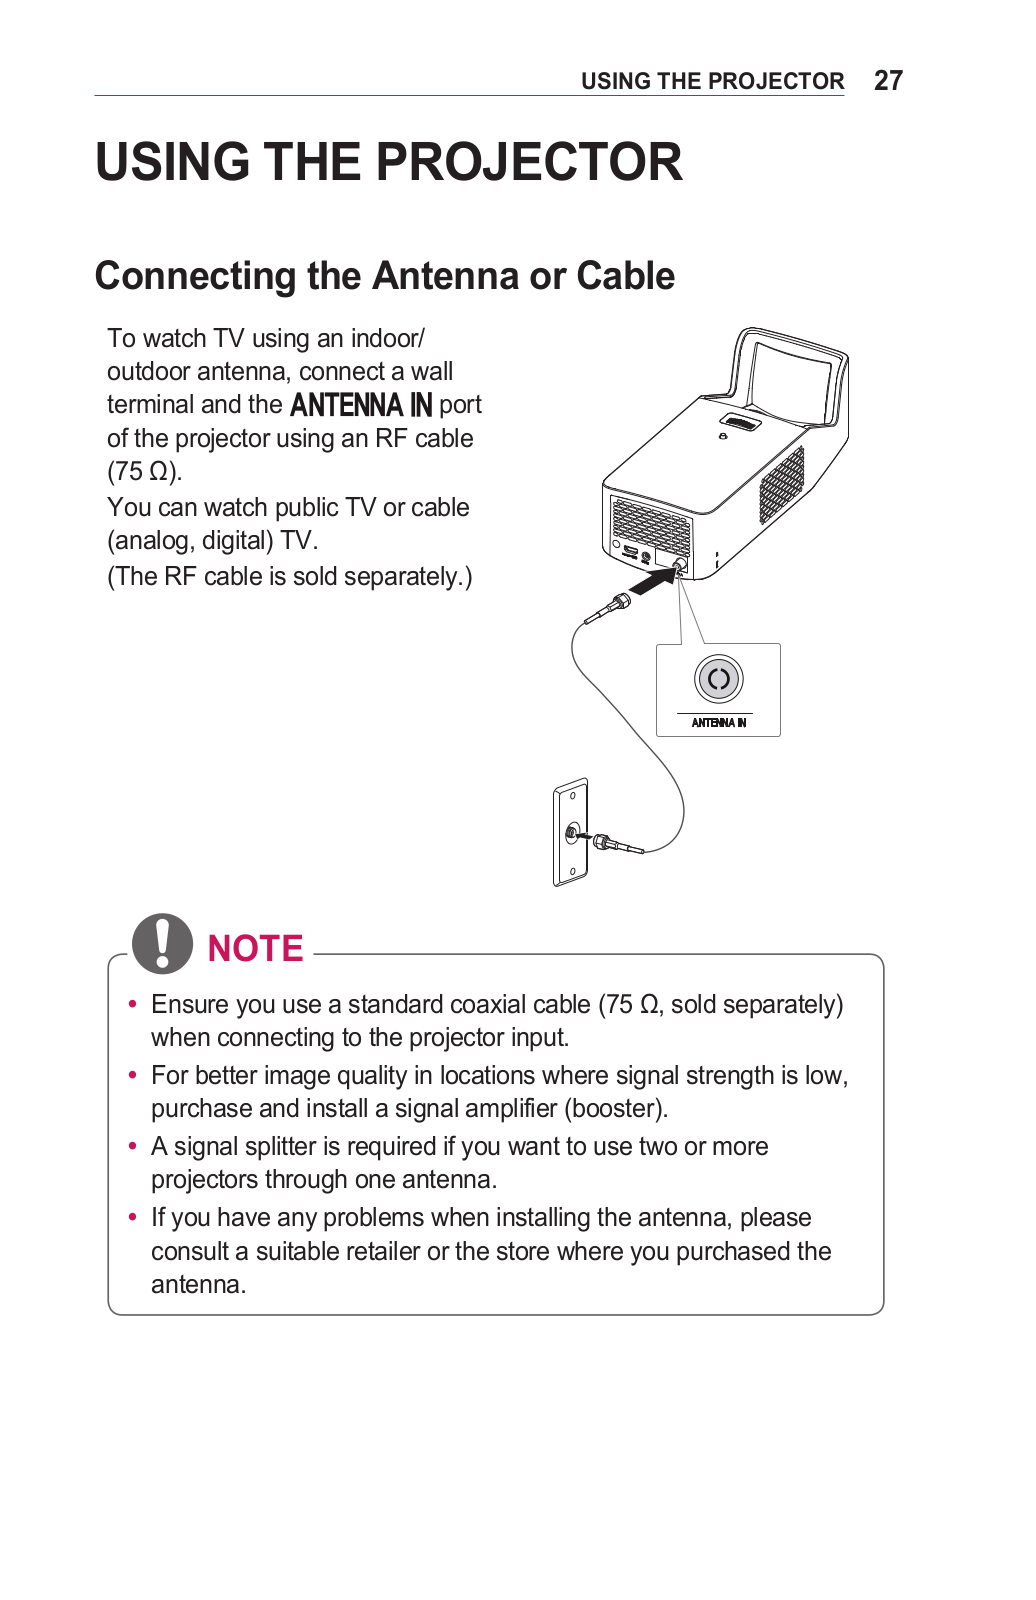
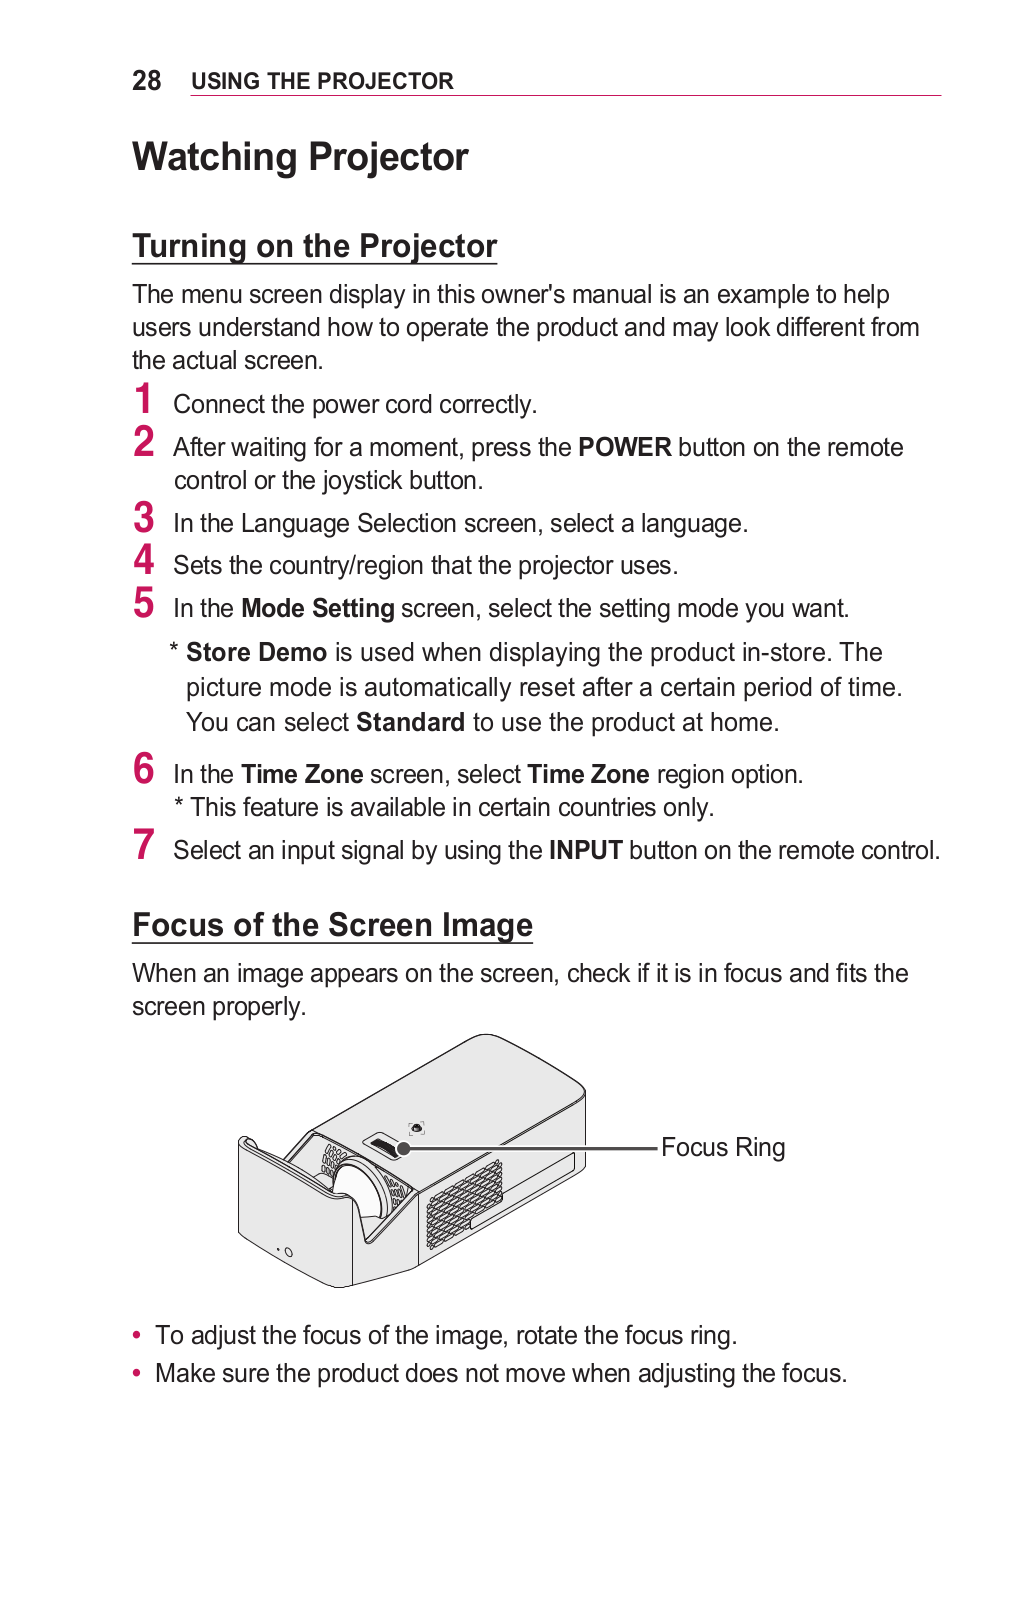
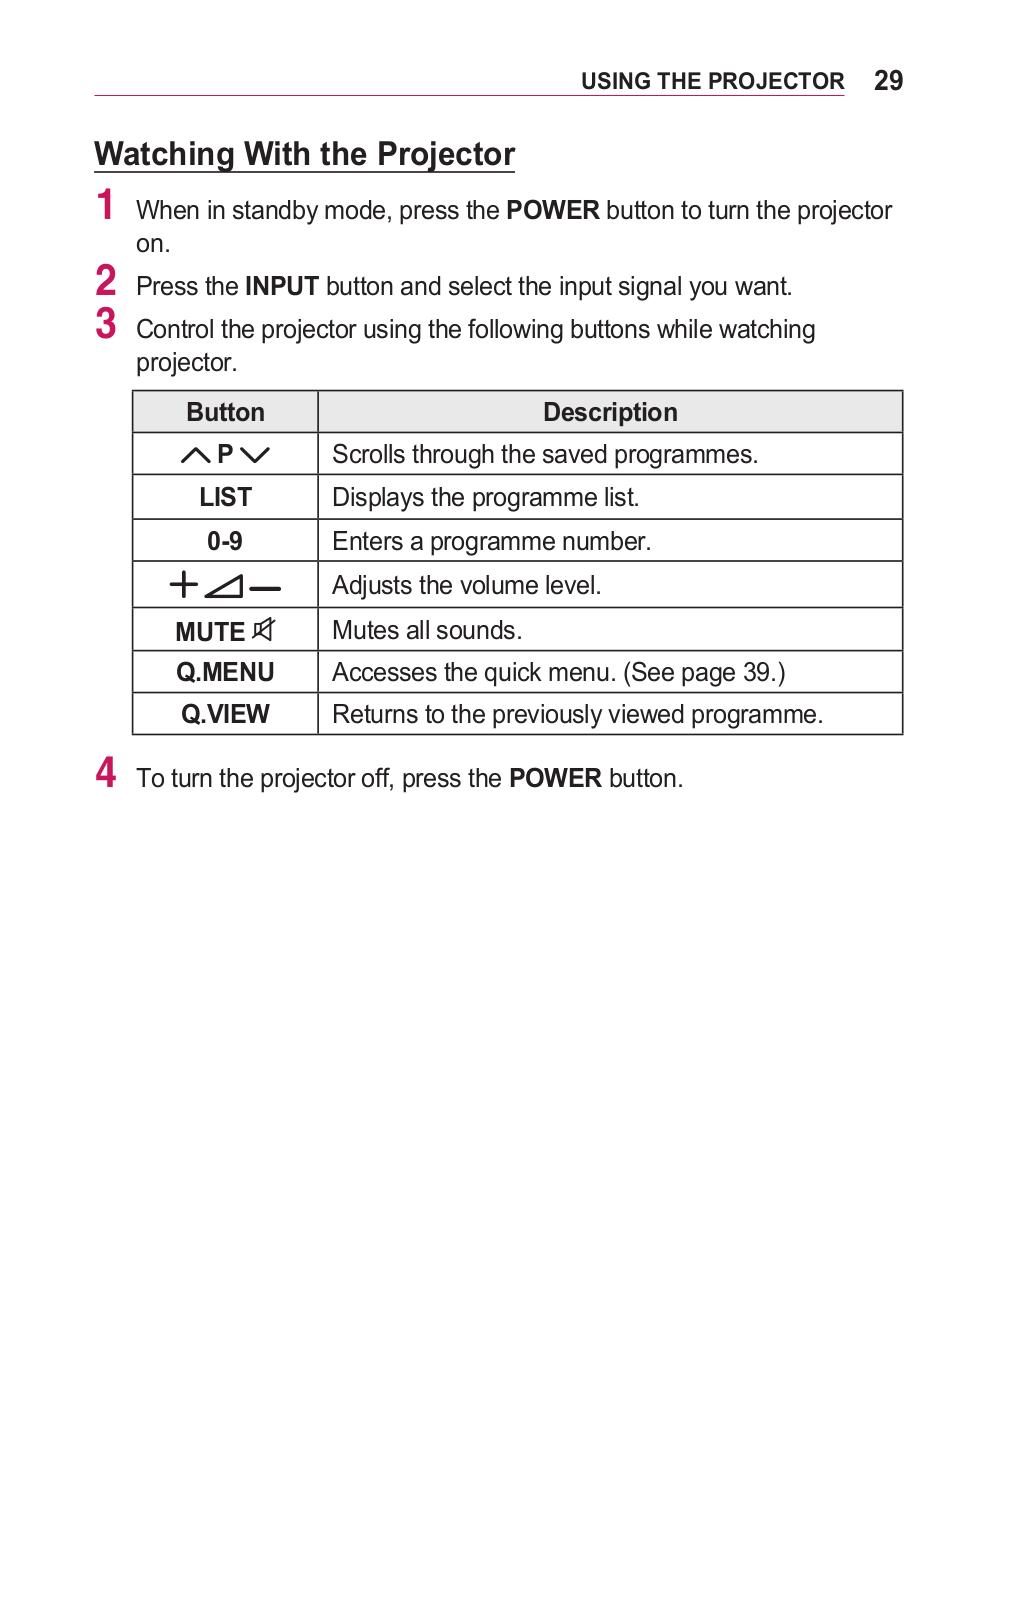
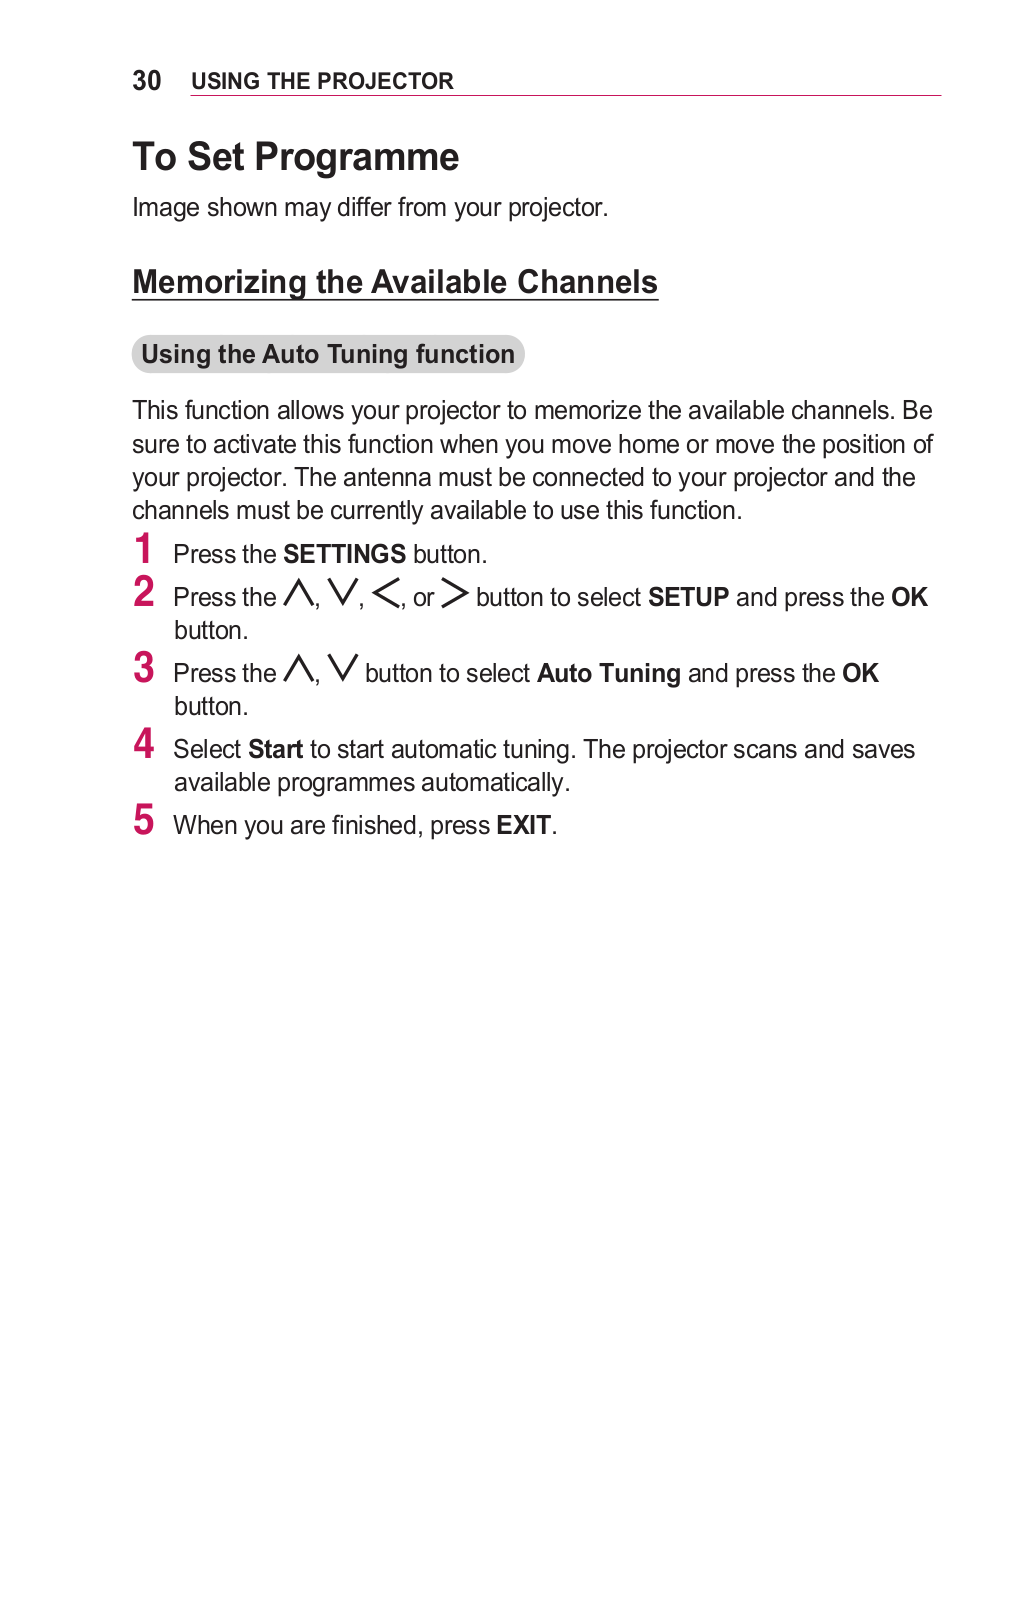
LG PF1000U Owner’s Manual
...
LG Owner’s Manual
Download
Specifications and Main Features
Frequently Asked Questions
User Manual
Download
Loading...
+
80
hidden pages
Unhide
You need points to download manuals.
1 point = 1 manual.
You can buy points or you can get point for every manual you upload.
Buy points
Upload your manuals
 Loading...