


Order Number
: GETEC-C1-12-146
FCC Part 15 subpart B
Test Report Number
: GETEC-E3-12-052 Page 1 / 1
APPENDIX G
: USER’S MANUAL
EUT Type: LED LCD TV/Monitor
FCC ID.: BEJM2252D

ENGLISH
OWNER’S MANUAL
CINEMA 3D TV /
LED LCD TV
Please read this manual carefully before operating the your TV
and retain it for future reference.
CINEMA 3D TV MODEL LED LCD TV MODEL
DM2352D
DM2752D
DM2352T
DM2752T
M2252D
M2352D
M2452D
M2752D
M2252T
M2352T
M2452T
M2752T
www.lg.com

TABLE OF CONTENTS
2
ENGLISH
TABLE OF CONTENTS
3 LICENSES
4 INSTALLATION PROCEDURE
5 ASSEMBLING AND PREPARING
5 Unpacking
8 - Separate purchase
9 Parts and buttons
10 Lifting and moving the TV
11 Setting up the TV
11 - Attaching the Stand
15 - Mounting on a table
16 - Tidying cables
17 - Detaching the Stand
19 - Mounting on a wall
36 REMOTE CONTROL
39 CUSTOMIZING SETTINGS
39 Accessing main menus
40 USING THE USER GUIDE
40 Accessing User Guide menu.
40 - Using the TV menu
40 - Using the Remote Control
41 3D IMAGING(ONLY CINEMA 3D
TV)
41 3D Technology
42 MAINTENANCE
21 WATCHING TV
21 Turning the TV on for the first time
23 MAKING CONNECTIONS
23 Connecting an antenna
24 Connecting to a HD receiver, DVD, VCR
player or Gaming device
24 - HDMI connection
25 - HDMI to DVI connection
26 - Component connection
27 - Composite connection
28 - Euro Scart connection
29 Connecting to an audio system
29 - Headphone connection
30 Connecting to a USB
30 Connecting to a CI Module
31 Connecting to a wired network
32 Connecting to a PC
33 - HDMI connection
34 - HDMI to DVI connection
35 - RGB connection
42 Cleaning Your TV
42 Screen and frame
42 Cabinet and stand
42 Power cord
43 Preventing “Image burn” or “Burn-in” on
your TV screen
44 TROUBLESHOOTING
44 General
44 Using 3D mode
45 SPECIFICATIONS

LICENSES
3
LICENSES
Supported licenses may differ by model. For more information of the licenses, visit www.lg.com.
Manufactured under license from Dolby Laboratories. “Dolby “and the
double-D symbol are trademarks of Dolby Laboratories.
HDMI, the HDMI logo and High-Definition Multimedia Interface are
trademarks or registered trademarks of HDMI Licensing LLC.
ABOUT DIVX VIDEO: DivX® is a digital video format created by DivX, LLC, a
subsidiary of Rovi Corporation. This is an official DivX Certified® device that
plays DivX video. Visit divx.com for more information and software tools to
convert your files into DivX videos.
ABOUT DIVX VIDEO-ON-DEMAND: This DivX Certified® device must be
registered in order to play purchased DivX Video-on-Demand (VOD) movies.
To obtain your registration code, locate the DivX VOD section in your device
setup menu. Go to vod.divx.com for more information on how to complete
your registration.
ENGLISH
DivX Certified® to play DivX® video up to HD 1080p, including premium
content.
DivX®, DivX Certified® and associated logos are trademarks of Rovi
Corporation or its subsidiaries and are used under license.
Covered by one or more of the following U.S. patents: 7,295,673; 7,460,668;
7,515,710; 7,519,274
INSTALLATION PROCEDURE
4
ENGLISH
INSTALLATION PROCEDURE
1
2
3
Open the package and make sure all the accessories are included.
Attach the stand to the TV.
Connect an external device to the TV.
NOTE
Image shown may differ from your TV.
y
Your TV’s OSD (On Screen Display) may differ slightly from that shown in this manual.
y
The available menus and options may differ from the input source or product model that you are
y
using.
New features may be added to this TV in the future.
y
ASSEMBLING AND PREPARING
5
ASSEMBLING AND PREPARING
Unpacking
Check your product box for the following items. If there are any missing accessories, contact the local
dealer where you purchased your product. The illustrations in this manual may differ from the actual
product and accessories.
NOTE
The accessories supplied with your product may vary depending on the model.
y
Product specifications or contents in this manual may be changed without prior notice due to
y
upgrade of product functions.
CAUTION
Do not use any pirated items to ensure the safety and product life span.
y
Any damages or injuries by using pirated items are not covered by the warranty.
y
ENGLISH
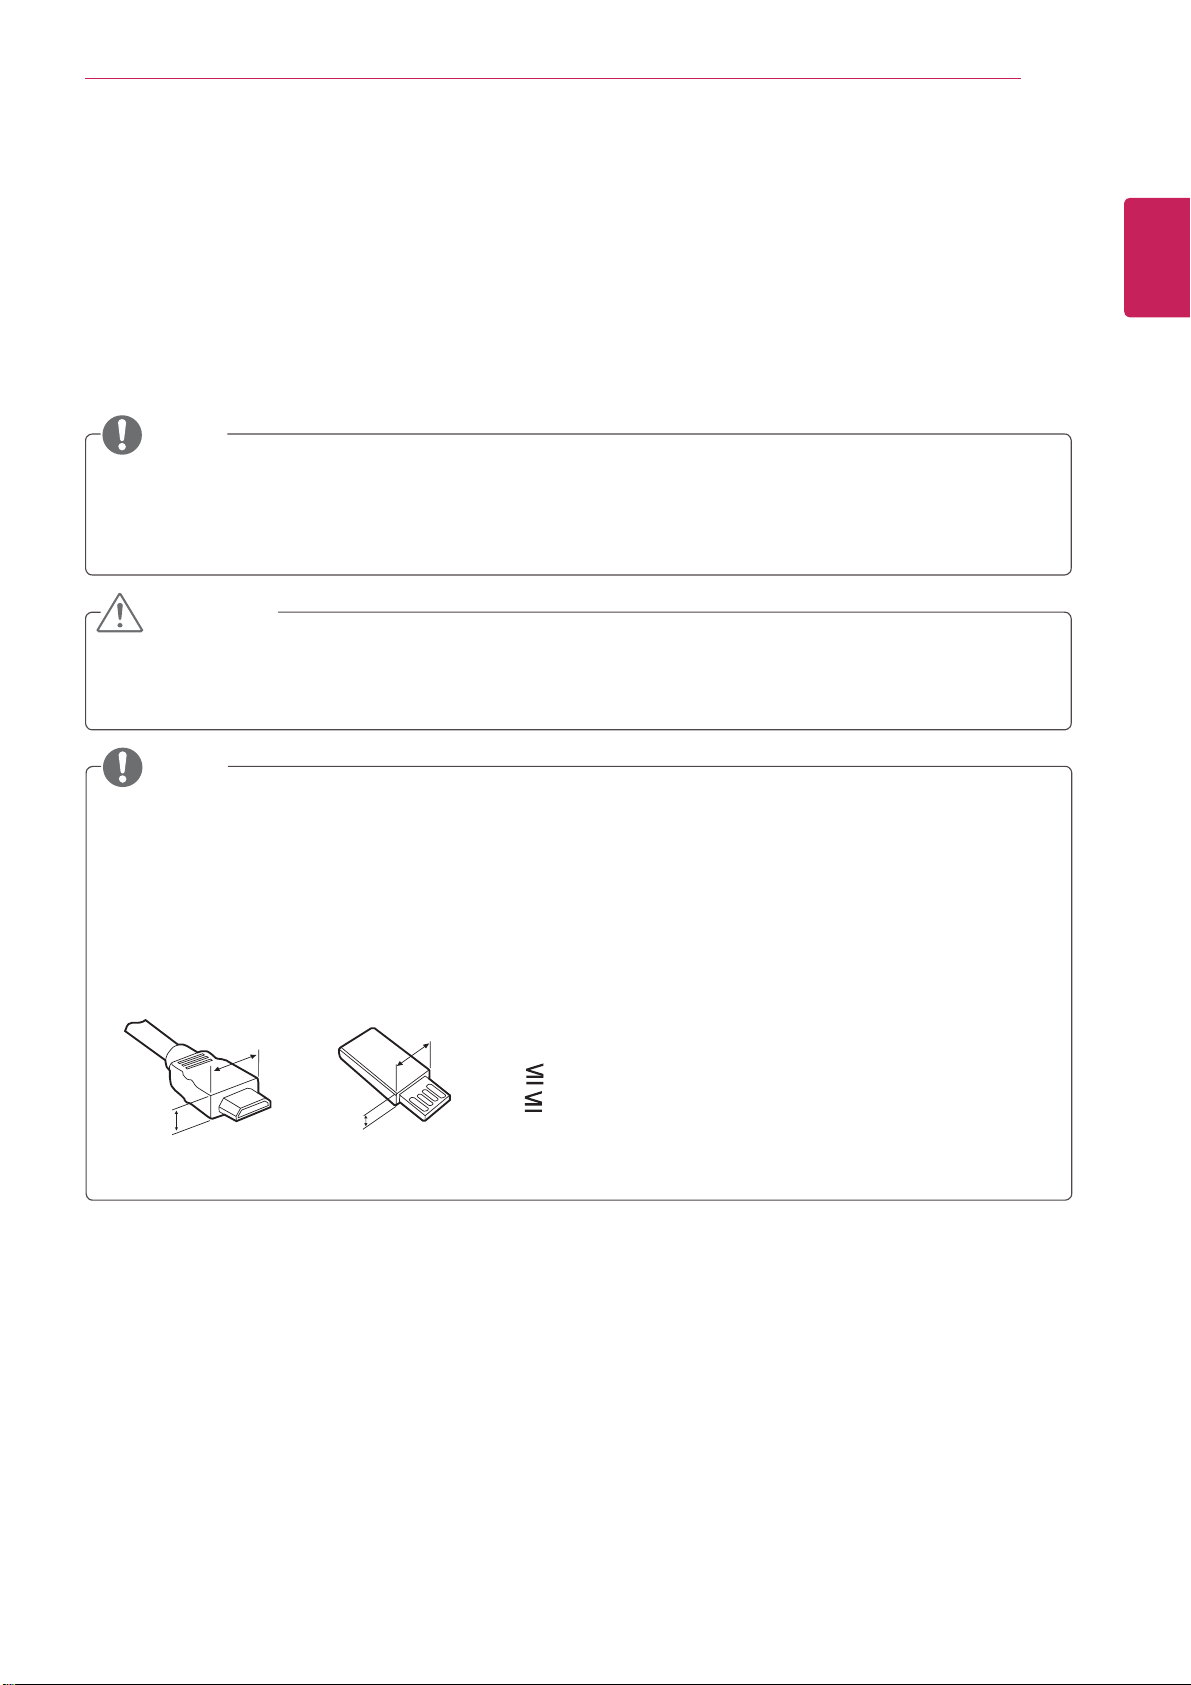
NOTE
The items supplied with your product may vary depending on the model.
y
Product specifications or contents of this manual may be changed without prior notice due to
y
upgrade of product functions.
For an optimal connection, HDMI cables and USB devices should have bezels less than 10 mm thick
y
and 18 mm width. Use an extension cable that supports USB 2.0 if the USB cable or USB memory
stick does not fit into your TV’s USB port.
B
A
B
*A 10 mm
*B
18 mm
A

ASSEMBLING AND PREPARING
6
ENGLISH
Remote control.
Batteries (AAA).
(See p.36, 38)
M2252D M2352D M2452D M2752D M2252T M2352T M2452T M2752T
CD (Owner's Manual).
Cards.
RGB Cable.
(See p.35)
Power Cord.
(See p.15) (See p.15)
Stand Base.
- M2252D, M2352D, M2452D,
M2252T, M2352T, M2452T:
See p.11, 17
- M2752D, M2752T:
See p.13, 18
AC-DC Adapter.
Stand Body. (Only M2252D /
M2352D / M2452D / M2252T
/ M2352T / M2452T model)
(See p.11, 17)
Cable Tie.
(See p.16)
Stand Body. (Only M2752D
/ M2752T model)
(See p.13, 18)
Screws for Assembly.
2 EA (Only M2752D /
M2752T model)
(See p.13, 18)

DM2352D DM2752D DM2352T DM2752T
ASSEMBLING AND PREPARING
7
ENGLISH
Remote control.
Batteries (AAA).
(See p.37, 38)
Power Cord.
(See p.15) (See p.15)
Stand Base.
- DM2352D, DM2352T:
See p.11, 17
- DM2752D, DM2752T:
See p.13, 18
CD (Owner's Manual).
Cards.
AC-DC Adapter.
Stand Body. (Only DM2352D /
DM2352T model)
(See p.11, 17)
RGB Cable.
(See p.35)
Cable Tie.
(See p.16)
Stand Body. (Only DM2752D
/ DM2752T model)
(See p.13, 18)
Screws for Assembly.
2 EA (Only DM2752D /
DM2752T model)
(See p.13, 18)
TriDef 3D Game Software CD /
Quick Installation Guide
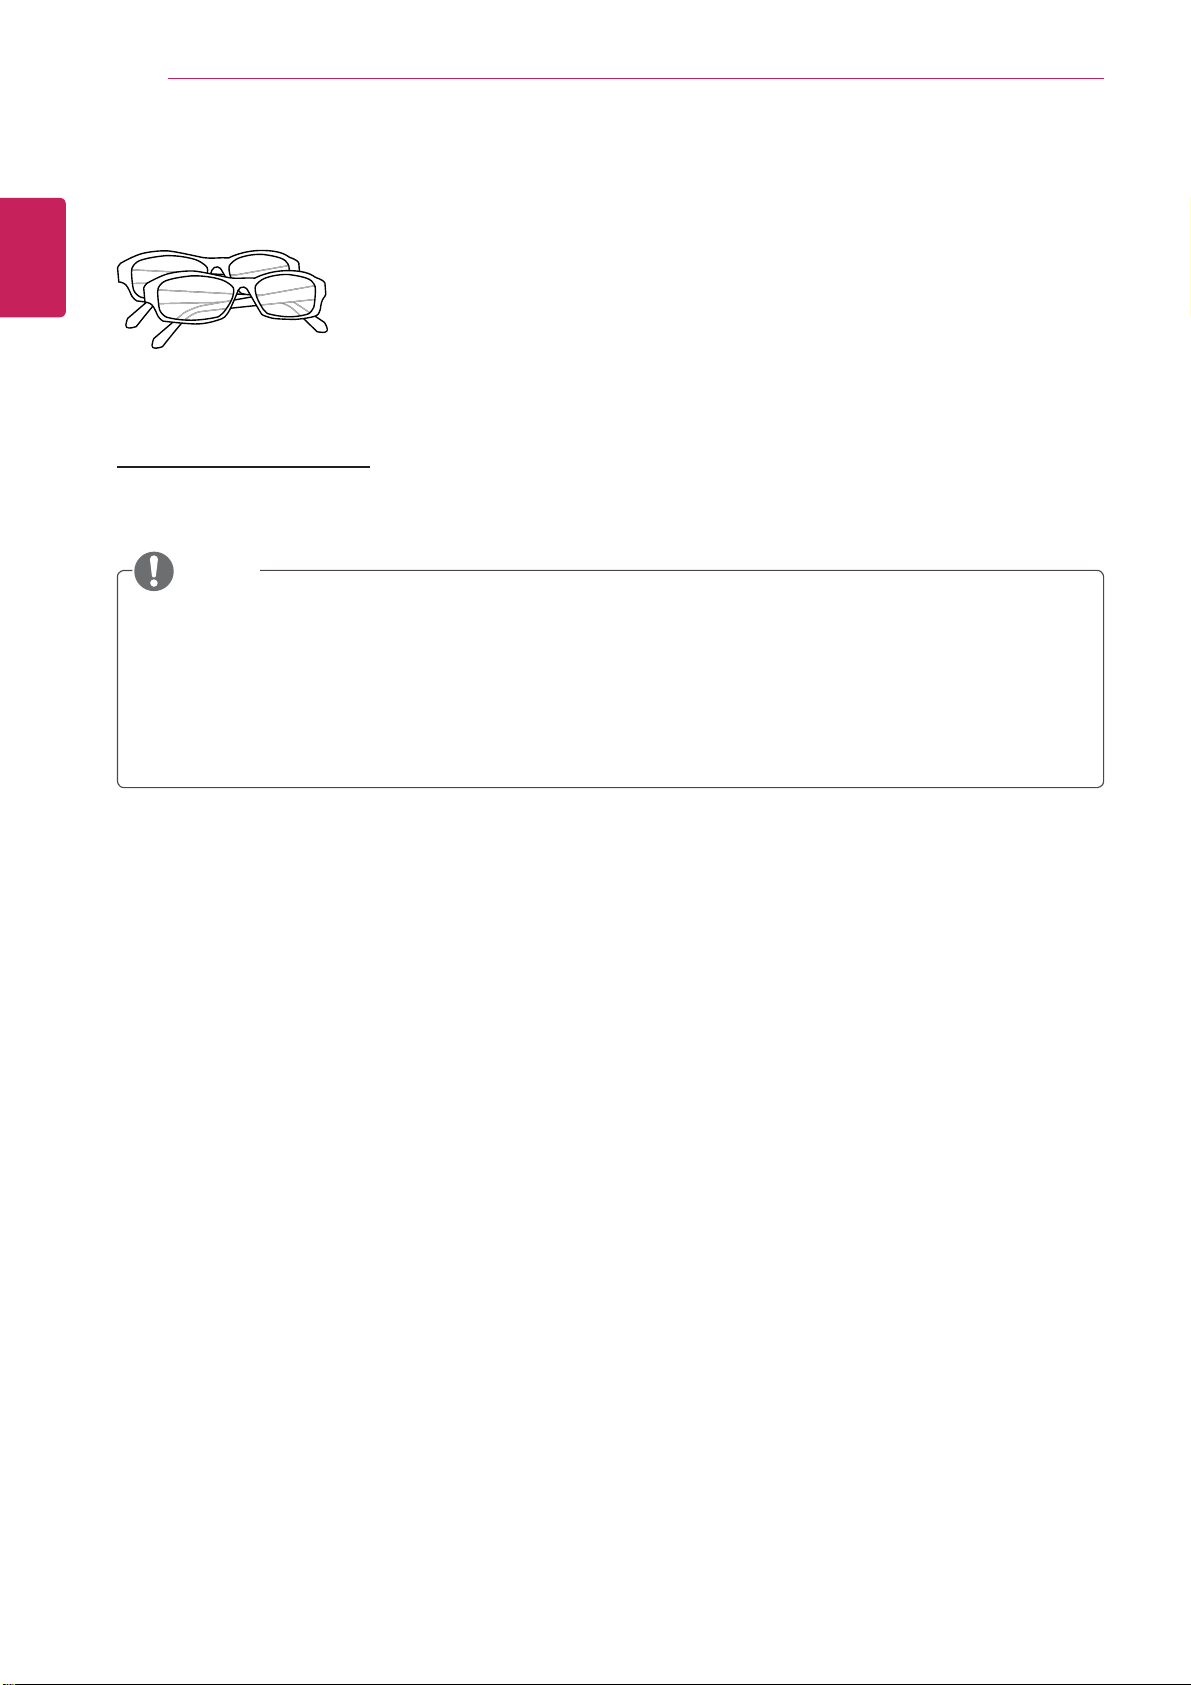
3D Glasses(Normal type / Clip type)
- The number of 3D glasses may
differ depending on the model or
country.
- Image shown may differ from your
TV.
8
Separate purchase
ENGLISH
Dual play glasses
AG-F2**DP, AG-F3**DP
ASSEMBLING AND PREPARING
NOTE
The illustrations in this manual may differ from the actual product and accessories.
y
Separate purchase items can be changed or modified for quality improvement without any
y
notification.
Contact your dealer to buying these items.
y
The model name or design may be changed depending on the upgrade of product
y
functions,manufacturer’s circumstances or policies.

Parts and buttons
ASSEMBLING AND PREPARING
Remote Control Sensor
Standby Light
Lighting On: Turned off
y
Lighting Off: Turned on
y
9
ENGLISH
Touch Buttons
M**52T models (Only UK)
Touch button Description
Scrolls through the saved programmes.
Adjusts the volume level.
OK Selects the highlighted menu option or confirms an input.
SETTINGS Accesses the main menus, or saves your input and exits the menus.
INPUT Changes the input source.
/ I
Turns the power on or off.
Connection panel (See p.23)
NOTE
All of the buttons are touch sensitive and can be operated through simple touch with your finger.
10
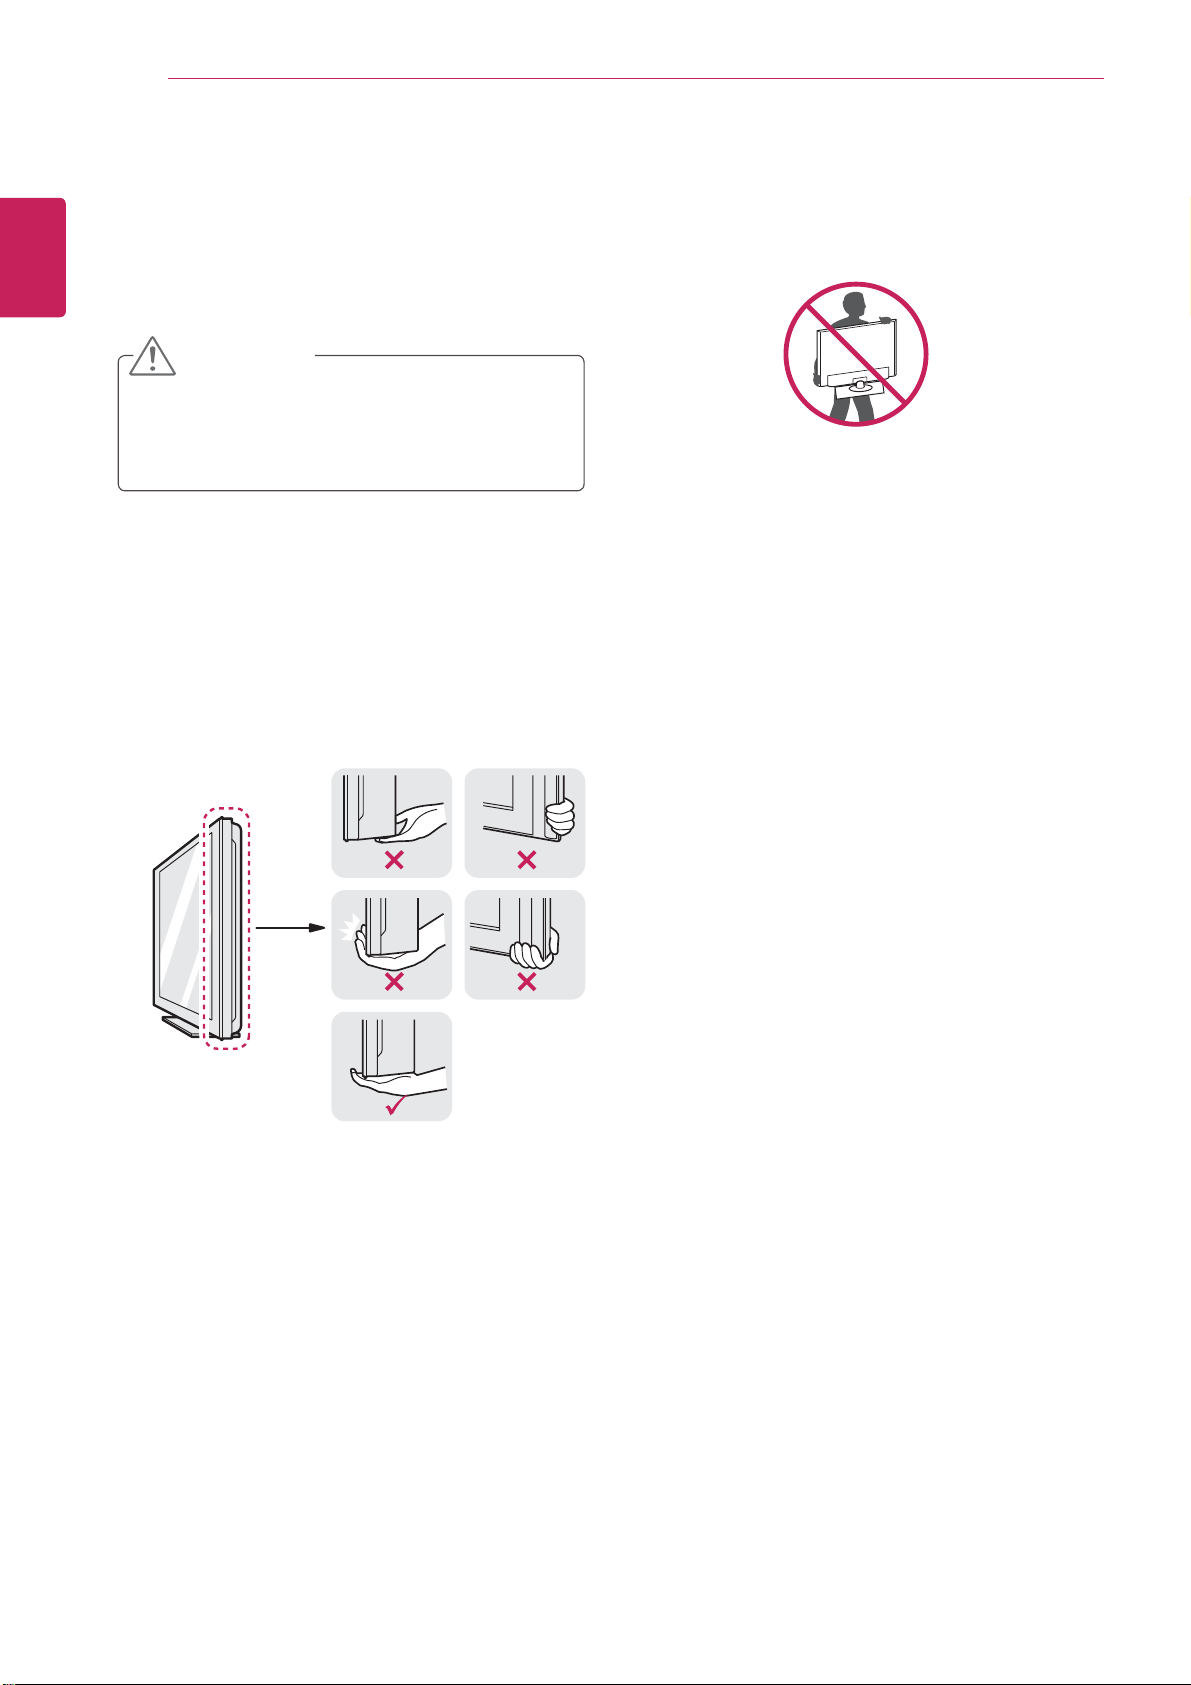
Lifting and moving the TV
ENGLISH
When moving or lifting the TV, read the following
to prevent the TV from being scratched or
damaged and for save transportation regardless of
its type and size.
ASSEMBLING AND PREPARING
CAUTION
Avoid touching the screen at all times, as
this may result in damage to the screen or
some of the pixels used to create images.
It is recommended to move the TV in the
y
box or packing material that the TV originally
came in.
Before moving or lifting the TV, disconnect
y
the power cord and all cables.
Hold the top and bottom of the TV frame
y
firmly. Make sure not to hold the transparent
part, speaker, or speaker grill area.
When holding the TV, the screen should face
y
away from you to prevent the screen from
scratches.
When transporting the TV, do not expose the
y
TV to jolts or excessive vibration.
When transporting the TV, keep the TV
y
upright, never turn the TV on its side, or tilt
towards the left or right.

Setting up the TV
ASSEMBLING AND PREPARING
Attach the Stand Base from the Stand Body by
3
turning the screw to the right with a Coin.
11
ENGLISH
M2252D M2352D M2452D M2252T
M2352T M2452T DM2352D DM2352T
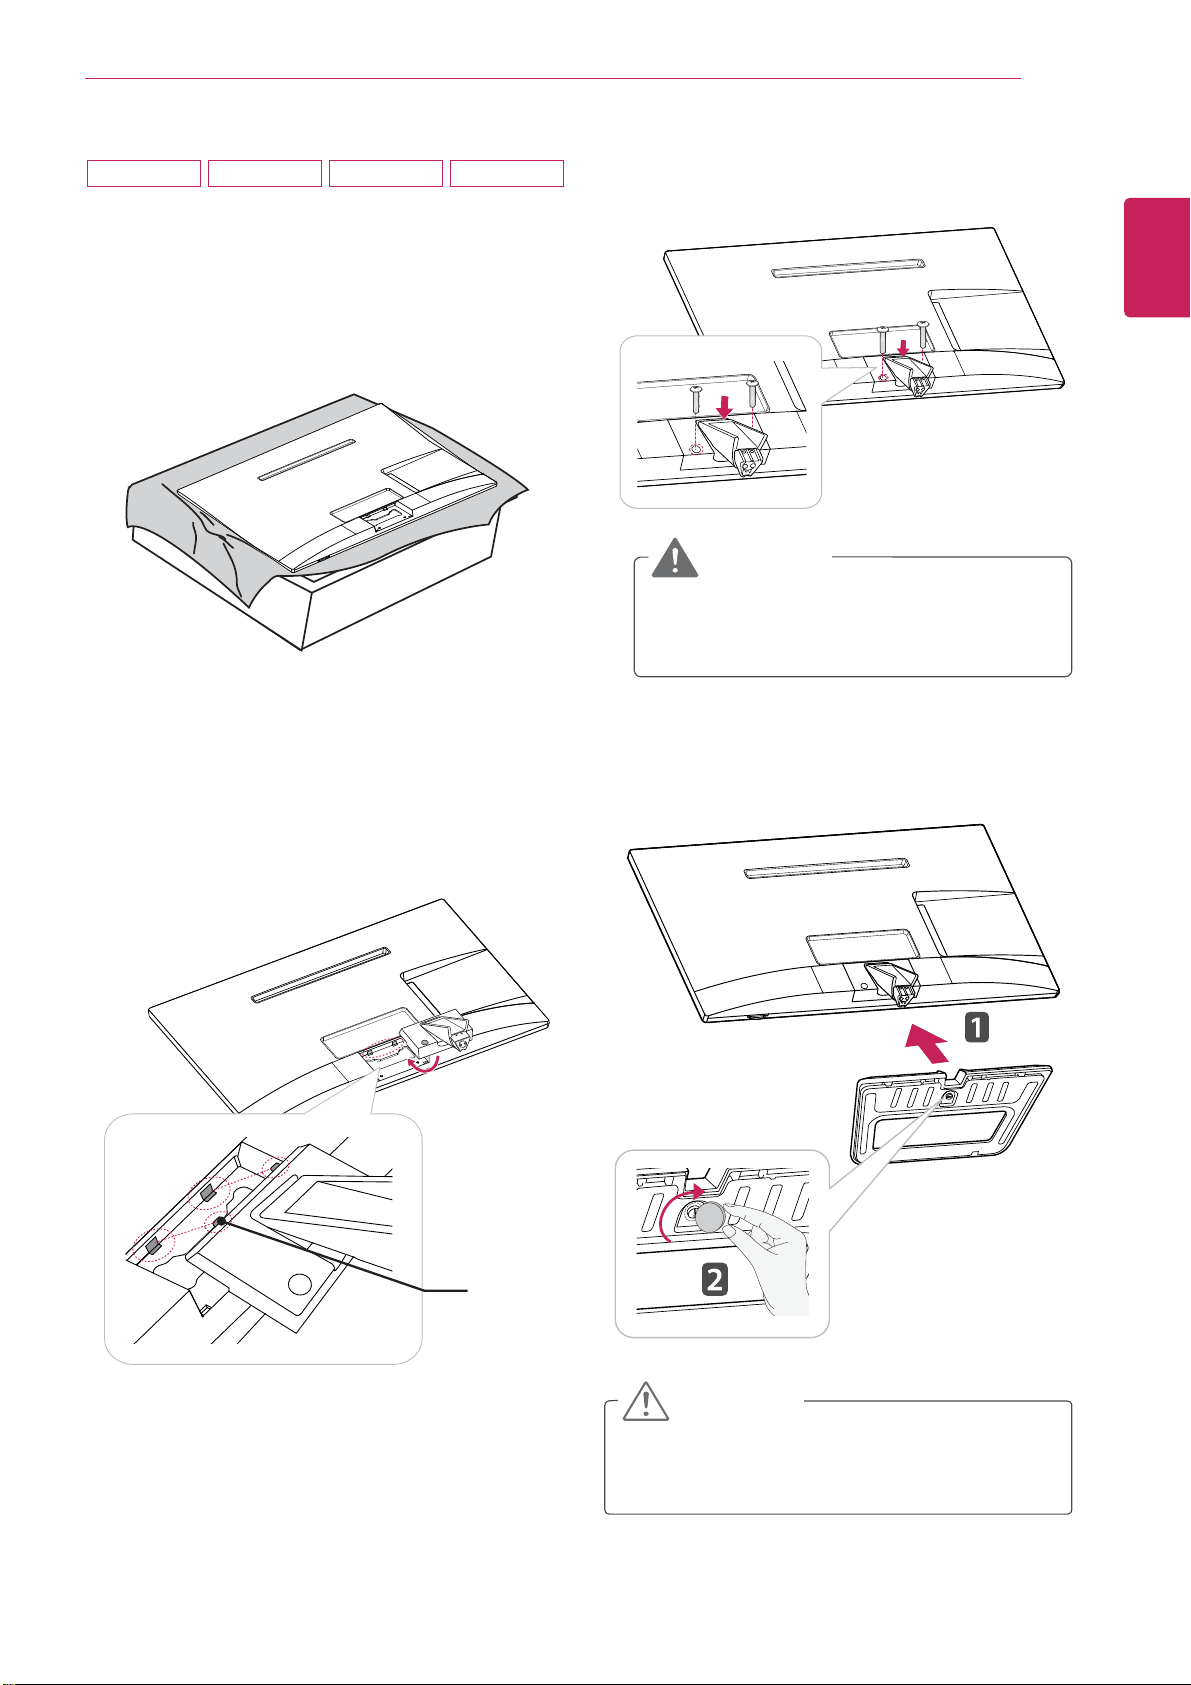
Attaching the Stand
If you are not mounting the TV to a wall, use the
following instructions to attach the stand.
Place the TV with the screen side down on a
1
flat and cushioned surface.
CAUTION
CAUTION
Lay a foam mat or soft protective cloth
y
on the surface to protect the screen from
damage.
When attaching the stand to the TV,
y
place the screen facing down on a
cushioned table or flat surface to protect
the screen from scratches.
Attach the Stand Body from the TV.
2
Tighten the screws firmly to prevent the TV
from tilting forward. Do not over tighten.

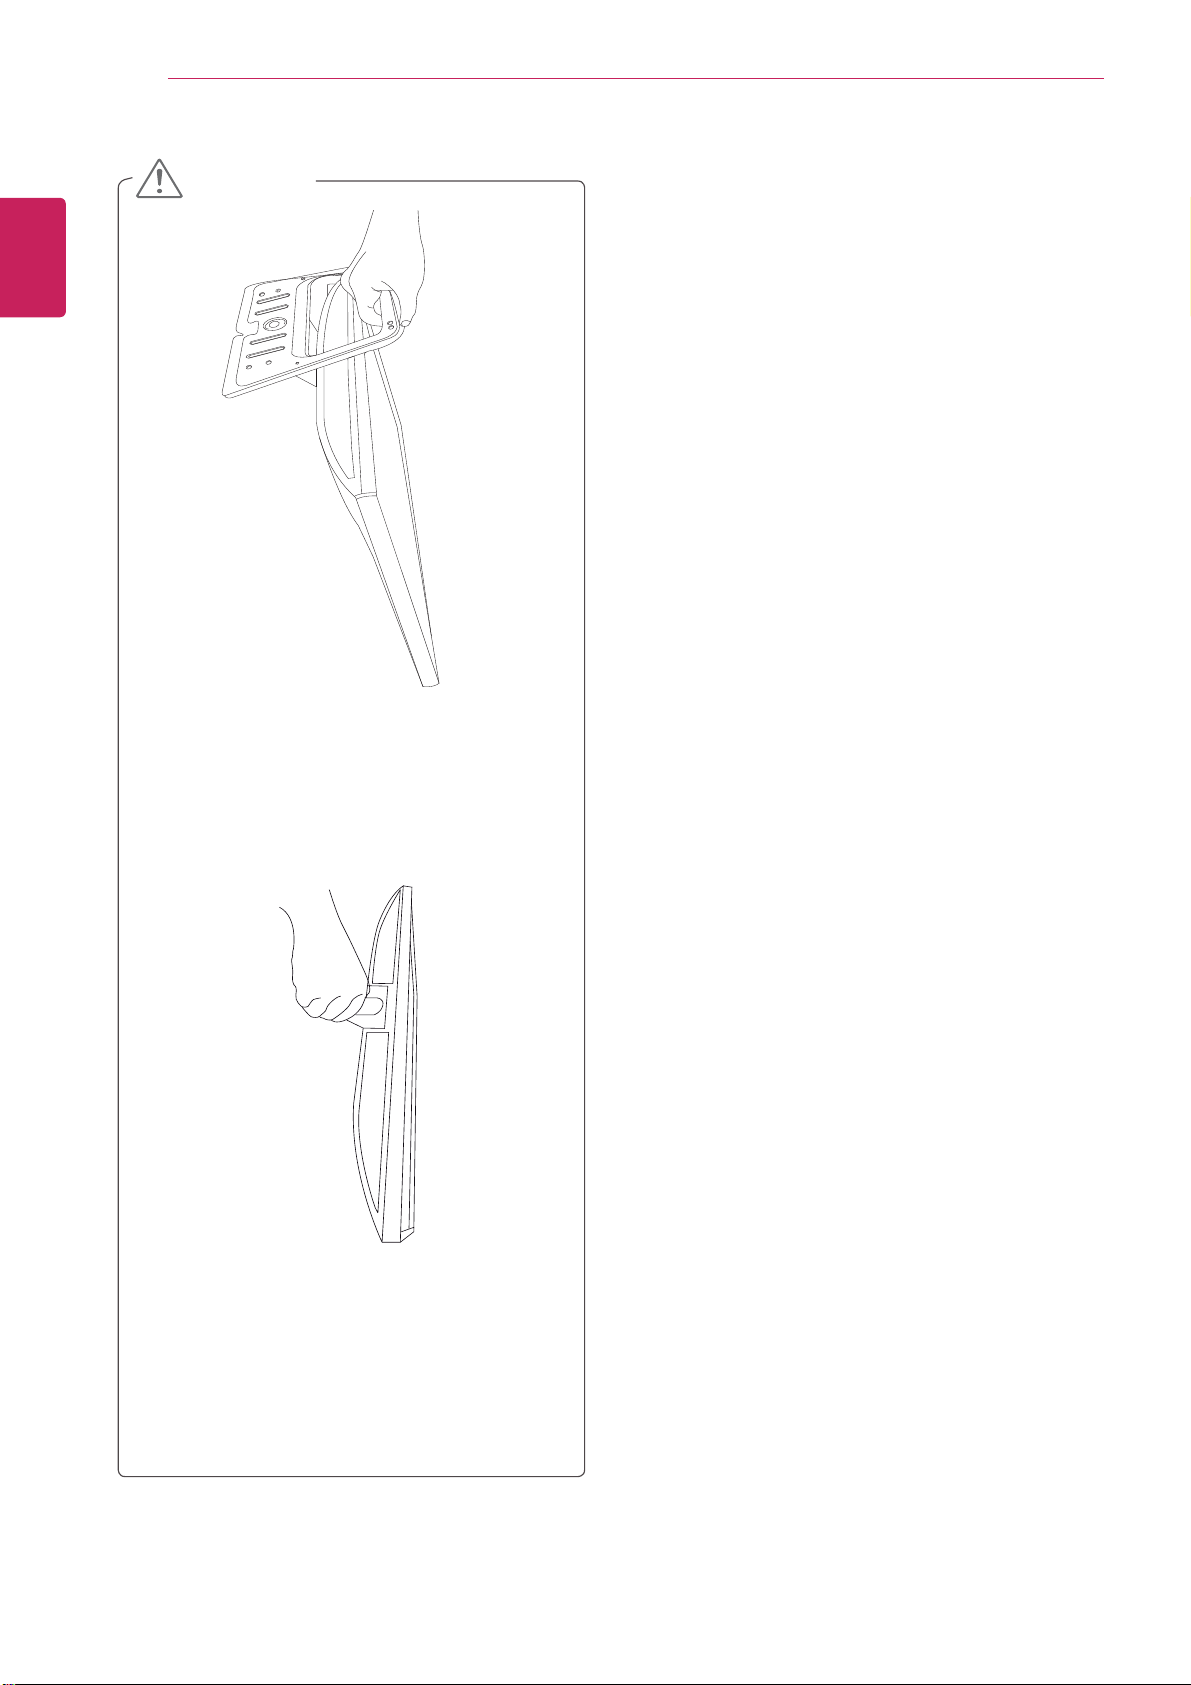
12
ENGLISH
ASSEMBLING AND PREPARING
CAUTION
Do not carry the monitor upside-down as this
y
may cause it to fall off its stand, resulting in
damage or injury.
The illustration shows a general example of
y
installation and may look different from the
actual product.
Do not carry the monitor upside-down by
y
holding the stand body as this may cause it
to fall off, resulting in damage or injury.
The illustration shows a general example of
y
installation and may look different from the
actual product.
M2752D M2752T DM2752D DM2752T
If you are not mounting the TV to a wall, use the
following instructions to attach the stand.
Place the TV with the screen side down on a
1
flat and cushioned surface.
ASSEMBLING AND PREPARING
Secure the TV and the Stand Body with the
3
2 screws.
WARNING
If you don`t fasten the screw tightly, TV will
fall down and get damaged.
13
ENGLISH
Attach the Stand Body from the TV.
2
Insert the two Lockers of the Stand Body right
into the groove of the TV head and secure
them by pressing the left and right bottom
sides.
Locker
Attach the Stand Base from the Stand Body by
4
turning the screw to the right with a Coin.
CAUTION
Tighten the screws firmly to prevent the TV
from tilting forward. Do not over tighten.
14
ENGLISH
ASSEMBLING AND PREPARING
CAUTION
Do not carry the monitor upside-down as this
y
may cause it to fall off its stand, resulting in
damage or injury.
The illustration shows a general example of
y
installation and may look different from the
actual product.
Do not carry the monitor upside-down by
y
holding the stand body as this may cause it
to fall off, resulting in damage or injury.
The illustration shows a general example of
y
installation and may look different from the
actual product.

ASSEMBLING AND PREPARING
15
Mounting on a table
Lift and tilt the TV into its upright position on a
1
table.
Leave a 10 cm (4 inches) (minimum) space
from the wall for proper ventilation.
10 cm
10 cm
10 cm
10 cm
WARNING
ENGLISH
When you adjust the angle, do not hold the
buttom of the TV frame as shown on the
following illustration, as may injure your fingers.
CAUTION
Connect the AC-DC Adapter and Power Cord
2
to a wall outlet.
Disconnect the power cord first, and then move
or install the TV. Otherwise electric shock may
occur.
CAUTION
Do not place the TV near or on sources of
heat, as this may result in fire or other damage.
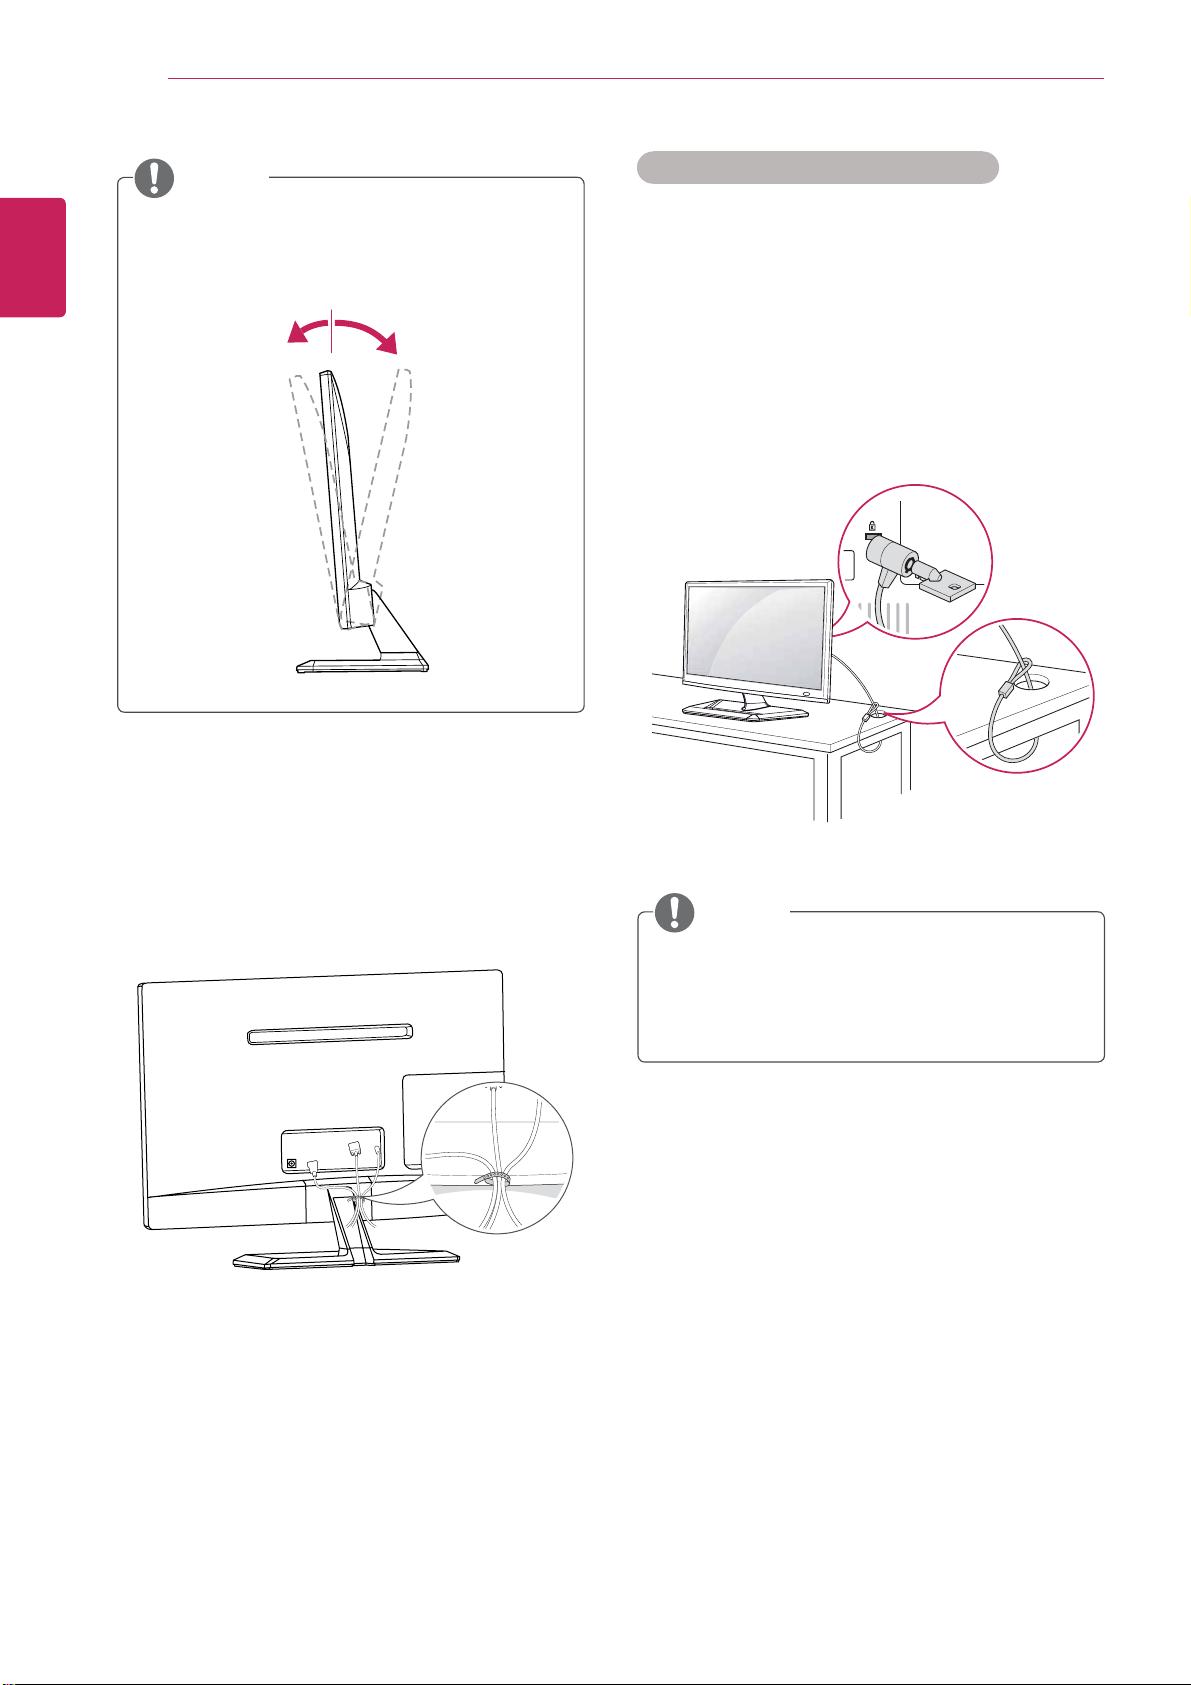
ASSEMBLING AND PREPARING
16
ENGLISH
NOTE
Tilt from +20 to -5 degrees up or down to
adjust the angle of the TV to suit your view.
+20-5
Front Rear
Using the Kensington security system
The Kensington security system connector is
located at the back of the TV. For more information
of installation and using, refer to the manual
supplied with the Kensington security system or
visit
http://www.kensington.com
Connect the Kensington security system cable
between the TV and a table.
.
Tidying cables
Gather and bind the cables with the supplied
cable tie.
NOTE
The Kensington security system is optional.
You can obtain additional accessories from
most electronics stores.
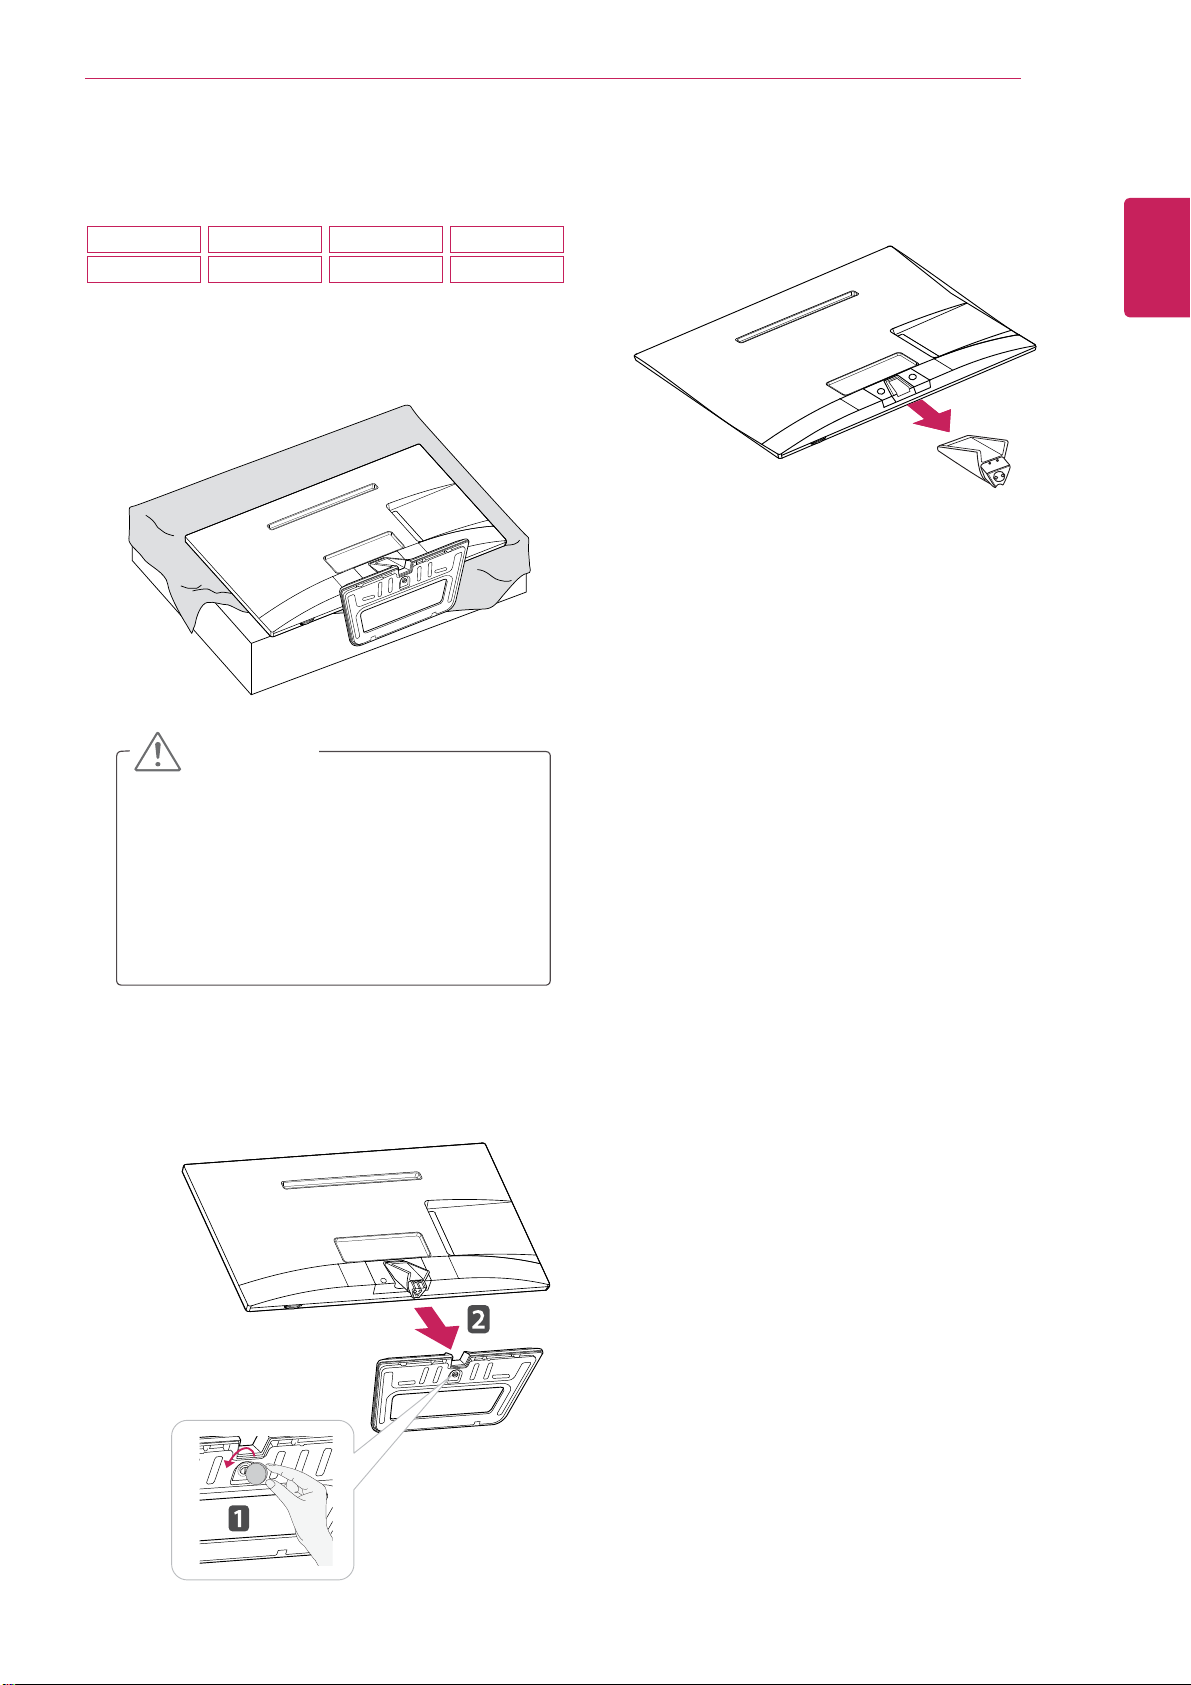
Detaching the Stand
ASSEMBLING AND PREPARING
Pull out the Stand Body from the TV.
3
17
ENGLISH
M2252D M2352D M2452D M2252T
M2352T M2452T DM2352D DM2352T
Place the TV with the screen side down on a
1
flat and cushioned surface.
CAUTION
Lay a foam mat or soft protective cloth
y
on the surface to protect the screen from
damage.
When detaching the stand to the TV,
y
place the screen facing down on a
cushioned table or flat surface to protect
the screen from scratches.
Turn the screw to the left, and then pull out the
2
Stand Base from the Stand Body.
18
ENGLISH
1
ASSEMBLING AND PREPARING
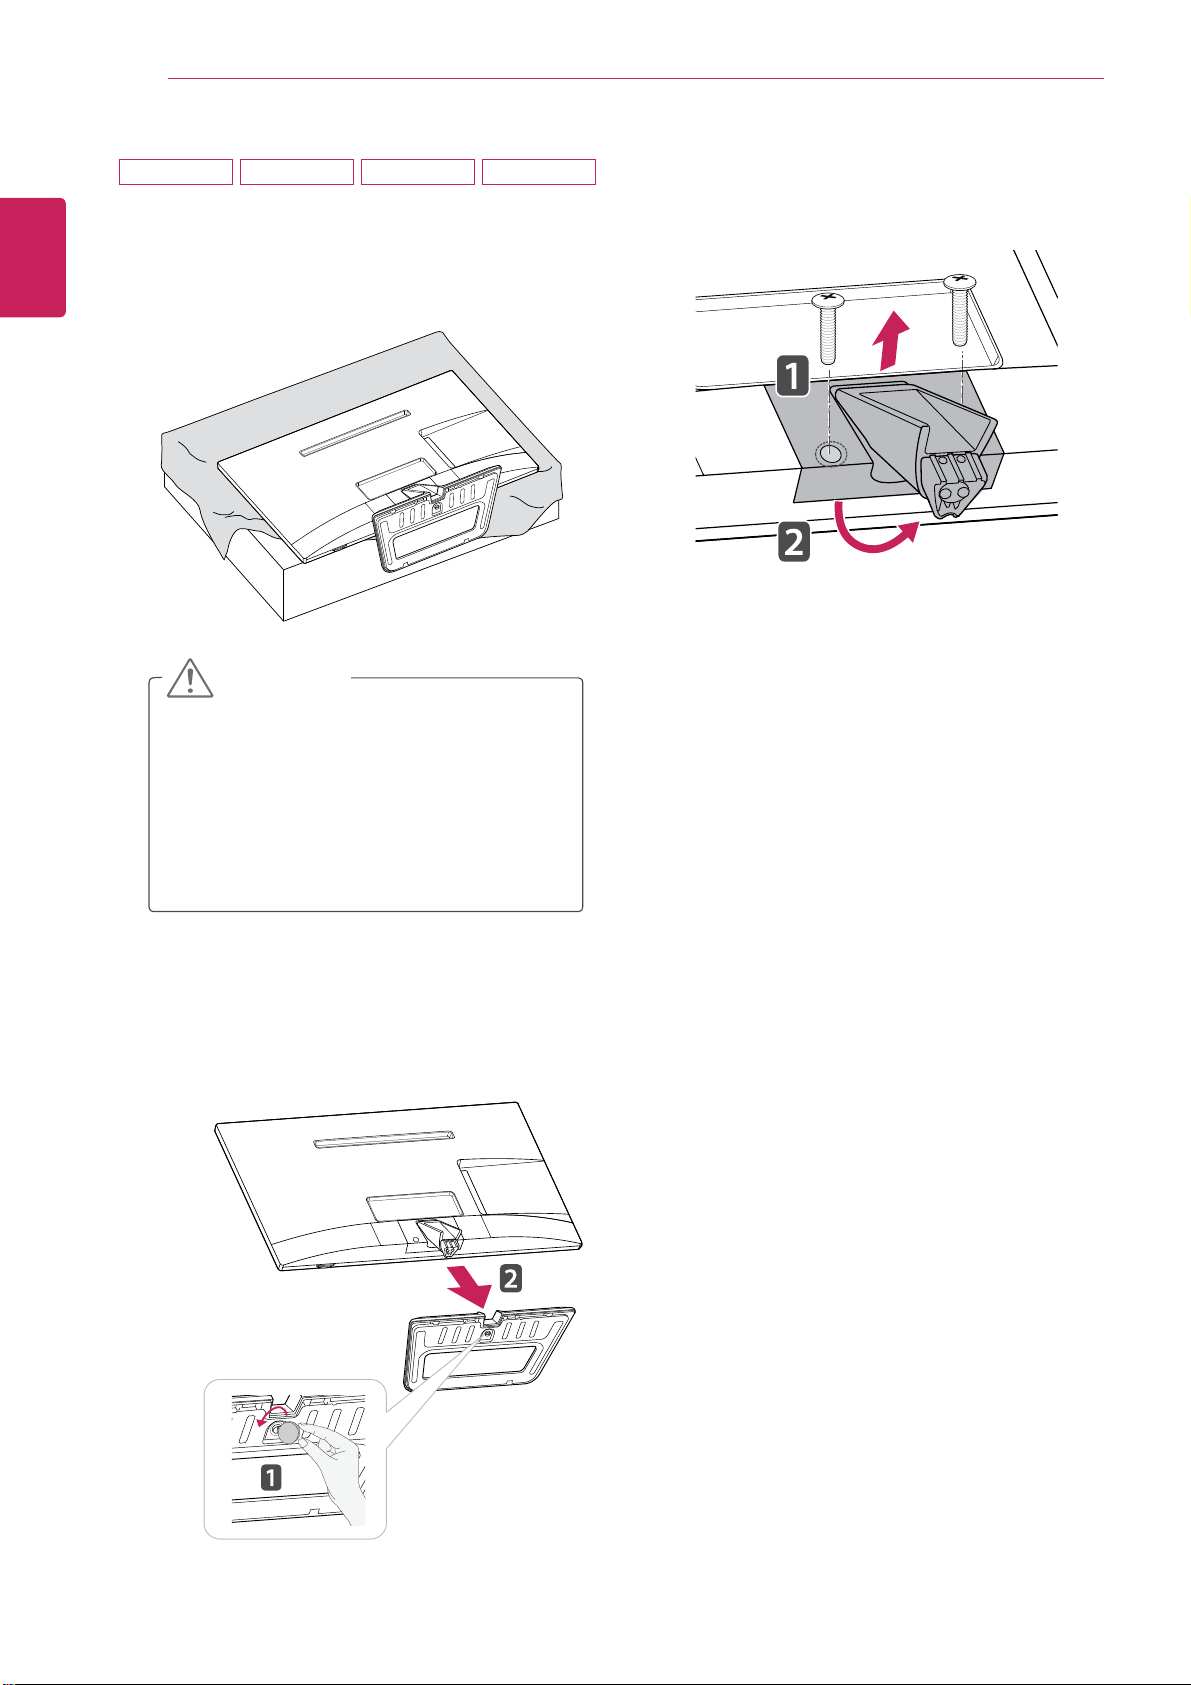
M2752D M2752T DM2752D DM2752T
Place the TV with the screen side down on a
flat and cushioned surface.
Remove 2 screws and pull out the Stand Body
3
from the TV.
CAUTION
Lay a foam mat or soft protective cloth
y
on the surface to protect the screen from
damage.
When detaching the stand to the TV,
y
place the screen facing down on a
cushioned table or flat surface to protect
the screen from scratches.
Turn the screw to the left, and then pull out the
2
Stand Base from the Stand Body.

Mounting on a wall
For proper ventilation, allow a clearance of 10
cm on each side and from the wall. Detailed
installation instructions are available from your
dealer, see the optional Tilt Wall Mounting Bracket
Installation and Setup Guide.
10 cm
10 cm
10 cm
10 cm
ASSEMBLING AND PREPARING
Please use VESA standard as below.
5
784.8 mm (30.9 inch) and under
y
* Wall Mount Pad Thickness : 2.6 mm
* Screw : 4.0 mm x Pitch 0.7 mm x
Length 10 mm
787.4 mm (31.0 inch) and above
y
* Please use VESA standard wall mount pad
and screws.
VESA (A x B) 100 x 100
Standard screw M4
Number of screws 4
Wall mount bracket
(optional)
RW120
19
ENGLISH
If you intend to mount the TV to a wall, attach Wall
mounting interface (optional parts) to the back of
the TV.
When you install the TV using the wall mounting
interface (optional parts), attach it carefully so it
will not drop.
Please, Use the screw and wall mount interface
1
in accordance with VESA Standards.
If you use screw longer than standard, the TV
2
might be damaged internally.
If you use improper screw, the product might
3
be damaged and drop from mounted position.
In this case, LG Electronics is not responsible
for it.
VESA (A x B)
y
A
B
VESA compatible only with respect to screw
4
mounting interface dimensions and mounting
screw specifications.
 Loading...