

Page 1

IS 250/350 BLUETOOTH® PHONE VEHICLE PAIRING
step
step
Press the “INFO” panel button
1
and touch the “Telephone” screen
icon to pair the Bluetooth devices.
Touch the “Register” screen icon
to pair the Bluetooth equipped
3
cell phone.
step
step
Touch the “Settings” screen icon
to begin the pairing process.
2
Perform the Bluetooth pairing
procedures found in the cell
4
phone manufacturer’s owner’s
manual. When prompted by your
cell phone, input the 4-digit
passkey shown on the vehicle’s
screen into the cell phone.
step
13
Upon connection, the system will
indicate that the pairing process
5
was successful.
Quick Tip - Verify the Bluetooth cell phone has been approved by visiting www.Lexus.com.
Quick Tip - Verify that the Bluetooth feature has been switched ON and visible to other Bluetooth devices.
step
The screen will automatically
transition to the main Telephone
6
screen after the pairing process
has been completed.
Page 2

Alphabetical index
Alphabetical index
A
A/C (Air conditioning system) ........162
ABS (Anti-lock brake system) .........139
Air conditioning filter ........................... 291
Air conditioning system (A/C)
Air conditioning filter .........................291
Automatic air conditioning
system....................................................162
Airbags
Airbag operating conditions...........59
Airbag precautions for your
child..........................................................63
Airbag warning light ........................330
Curtain shield airbag operating
conditions..............................................59
Curtain shield airbag
precautions ..........................................63
General airbag precautions ...........63
Locations of airbags............................ 57
Modification and disposal of
airbags.................................................... 67
Proper driving posture .............55, 63
Side airbag operating
conditions..............................................59
Side airbag precautions .................... 63
SRS airbags ............................................. 57
Alarm ............................................................52
Antenna ..................................................... 178
Anti-lock brake system (ABS) ......... 139
Armrest.....................................................224
Ashtrays......................................................217
Audio system
Antenna ............................................... 178
AUX adapter........................................ 198
CD player/changer ............................181
MP3/WMA disc.................................187
Optimal use........................................... 195
Radio ......................................................... 174
Steering wheel audio switch..........199
Automatic air conditioning
system ......................................................162
Automatic headlight leveling
system .......................................................115
Automatic light control system.......... 113
Automatic transmission
Automatic transmission .....................92
If the shift lever cannot be
shifted from P....................................357
S mode .......................................................94
AUX adapter .......................................... 198
B
BA (Brake assist)....................................139
Back-up lights
Wattage................................................. 383
Battery
Checking..................................................271
If the vehicle has discharged
battery ..................................................362
Preparing and checking
before winter........................................151
Bottle holders.........................................209
Brake
Fluid...........................................................270
Parking brake..........................................99
Brake assist (BA)....................................139
C
Care
Exterior....................................................244
Interior......................................................246
Seat belts ................................................247
Cargo capacity........................................ 147
Cargo hooks .......................................... 230
CD changer...............................................181
404
Page 3

Alphabetical index
CD player................................................... 181
Chains.........................................................153
Child restraint system (CRS)
Booster seats, definition.................... 68
Booster seats, installation..................72
Convertible seats, definition ........... 68
Convertible seats, installation .........72
Infant seats, definition .........................68
Infant seats, installation........................ 72
Installing CRS with lower
anchorages...........................................75
Installing CRS with seatbelts ...........72
Installing CRS with top straps.........76
Child safety
Airbag precautions ............................. 63
Battery precautions.............. 273, 364
Child restraint system ........................68
Child-protectors..................................... 16
How your child should wear
the seatbelt............................................33
Installing child restraints.......................71
Moon roof.................................................46
Power window lock switch ...............41
Power window precautions.............43
Removed electronic key battery
precautions....................................... 294
Seat belt comfort guide....................... 31
Seat belt extender precautions .....35
Seat belt precautions...........................34
Seat heater precautions........221, 223
Trunk..............................................................21
Child-protectors ....................................... 16
Cigarette lighter.....................................218
Cleaning
Exterior....................................................244
Interior .....................................................246
Seat belts................................................ 247
Clock .......................................................... 213
Coat hooks..............................................228
Compass ..................................................238
Condenser ..............................................270
Console box ...........................................206
Cooling system
Engine overheating.......................... 365
Cornering assist sensors ....................133
Cruise control
Cruise control......................................... 121
Dynamic radar cruise control........124
Cup holder ............................................. 208
Curtain shield airbags............................ 57
Customizable features .......................395
D
Daytime running light system .............114
Defogger
Rear window......................................... 170
Side mirror.............................................. 170
Dimension................................................370
Dinghy towing............................... 157, 158
Display
Dynamic radar cruise control........124
Satellite switch mode .........................214
Trip information .....................................110
Warning message.............................334
Do-it-yourself maintenance .............255
Door courtesy lights
Door courtesy lights..........................201
Wattage................................................. 383
Door pockets..........................................209
405
Page 4

Alphabetical index
Doors
Door glasses.............................................41
Door lock.................................................... 15
Side mirrors............................................. 39
Driver's seat belt reminder light ......331
Driving
Correct posture....................................55
Procedures.............................................. 82
Driving position memory...................... 24
E
Electric power steering (EPS)..........139
Electronic key
If your electronic key battery
is discharged....................................359
Emergency, in case of
If the engine will not start...............356
If the shift lever cannot be
shifted from P...................................357
If the vehicle has discharged
battery..................................................362
If the warning buzzer sounds......329
If the warning light turns on..........329
If the warning message is
displayed ............................................334
If you have a flat tire .........................348
If you lose your keys.........................358
If you think something is
wrong...................................................325
If your electronic key battery
is discharged....................................359
If your vehicle becomes stuck..... 367
If your vehicle needs to be
towed ....................................................318
If your vehicle overheats................365
Engine
Compartment .......................................261
Engine switch......................................... 89
Hood ....................................................... 258
How to start the engine ....................89
If the engine will not start............... 356
Overheating ........................................365
Engine compartment cover............. 263
Engine coolant
Capacity .................................................374
Checking............................................... 268
Preparing and checking
before winter........................................151
Engine coolant temperature
gauge ...................................................... 100
Engine immobilizer system .................50
Engine oil
Capacity .................................................373
Checking................................................264
Preparing and checking
before winter........................................151
Engine oil maintenance data ........... 267
EPS (Electric power steering) ..........139
Event data recorder ............................ 327
F
First-aid kit storage belt .....................230
Floor mat.................................................. 229
Fluid
Brake........................................................270
Washer.................................................... 274
Fog lights
Switch..........................................................116
Wattage................................................. 383
Foot well lighting.................................... 201
Front fog lights
Switch..........................................................116
Wattage................................................. 383
406
Page 5

Alphabetical index
Front passenger's seat belt
reminder light.......................................331
Front seats
Adjustment ...............................................22
Driving position memory ..................24
Seat position memory.........................27
Front turn signal lights
Wattage .................................................383
Fuel
Capacity..................................................372
Fuel gauge............................................. 100
Fuel pump shut off system ............ 326
Gas station information ...................415
Information............................................384
Refueling....................................................47
Fuel filler door............................................47
Fuel pump shut off system .................326
Fuses.......................................................... 295
G
Garage door opener.......................... 233
Gas station information.......................415
Gauges...................................................... 100
Glove box ............................................... 205
Glove box light...................................... 206
H
Head restraints
Adjusting ..................................................29
Headlight aim ........................................ 309
Headlight cleaner ..................................120
Headlights
Discharge headlights
precautions.........................................316
Replacing light bulbs .........................310
Switch..........................................................113
Wattage .................................................383
Heaters
Seat heaters ..............................220, 222
Side mirror.............................................. 170
Hill-start assist control ......................... 139
Hood..........................................................258
Hooks
Cargo ......................................................230
Coat..........................................................228
Shopping bag......................................230
I
I/M test......................................................254
Illuminated entry system ....................202
Indicator lights......................................... 106
Initialization
Items to initialize ................................ 399
Inside rear view mirror ..........................38
Interior lights
Interior lights..........................................201
Switch.......................................................203
Wattage................................................. 383
J
Jack
Positioning the jack...........................259
Replacing the wheel........................ 348
Jack handle..............................................348
K
Keys
Electronic key .............................................2
Engine switch..........................................89
If you lose your keys........................358
If your electronic key battery
is discharged.................................... 359
Key number .................................................2
Keys .................................................................2
Mechanical key..........................................2
Wireless remote control.....................12
407
Page 6

Alphabetical index
L
Light bulbs
Replacing................................................ 310
Wattage..................................................383
Lights
Door courtesy lights...........................201
Fog light switch...................................... 116
Headlights switch ..................................113
Interior light switch............................203
Outer foot lights...................................201
Overhead courtesy light..................201
Personal light switch ........................203
Replacing light bulbs......................... 310
Scuff lighting...........................................201
Shift lever lighting ................................201
Turn signal lever....................................98
Vanity lights............................................ 212
Wattage..................................................383
Limited slip differential (LSD) ...........139
Load capacity ..........................................150
LSD (Limited slip differential) ...........139
M
Maintenance
Do-it-yourself maintenance.........255
General maintenance.......................251
Maintenance data..............................370
Maintenance requirements.......... 249
Manual transmission............................... 96
Meter
Instrument panel light control ........101
Meters ......................................................100
Mirrors
Inside rear view mirror....................... 38
Side mirror heater...............................170
Side mirrors............................................. 39
Vanity mirrors........................................ 212
Moon roof................................................... 44
MP3 disc........................................................ 187
Multi-information display......................109
O
Odometer ................................................ 100
Oil
Engine oil................................................264
Opener
Fuel filler door.........................................47
Hood ....................................................... 258
Trunk............................................................. 19
Outer foot lights
Outer foot lights................................... 201
Wattage................................................. 383
Outside rear view mirrors
Adjusting and folding..........................39
Driving position memory ..................24
Outside temperature display .............110
Overhead console............................... 207
Overhead courtesy lights
Overhead courtesy lights...............201
Wattage................................................. 383
Overheating, Engine............................. 365
P
Parking assist sensors...........................133
Parking brake............................................99
Parking lights
Replacing light bulbs.........................310
Switch..........................................................113
Wattage................................................. 383
PCS (Pre-collision system) ................144
Personal lights
Switch...................................................... 203
Micro dust and pollen removal
mode ........................................................166
Power outlet .............................................219
Power windows..........................................41
408
Page 7

Alphabetical index
Pre-collision system (PCS)................144
R
Radar cruise control .............................124
Radiator.....................................................270
Radio ................................................................ 174
RDS (Radio date system).................... 175
Rear sunshade........................................225
Rear turn signal lights
Replacing light bulbs .........................310
Wattage .................................................383
Rear view mirror
Compass............................................... 238
Rear window defogger........................170
Replacing
Electronic key battery .....................293
Fuses........................................................ 295
Light bulbs ..............................................310
Reporting safety defects for
U.S.A. owners .................................... 402
S
Scuff lighting.............................................201
Seat belts
Adjusting the seat belt .........................31
Automatic Locking Retractor
(ALR) .......................................................32
Child restraint system
installation................................................71
Cleaning and maintaining
the seat belts......................................247
Emergency Locking Retractor
(ELR)........................................................32
How to wear your seat belt............. 30
How your child should wear
the seat belt...........................................33
Pregnant women,
proper seat belt use..........................32
Reminder light ...................................... 331
Seat belt extenders ..............................33
Seat belt pretensioners ........................31
Seat heaters .................................220, 222
Seat position memory............................ 27
Seat ventilators ...................................... 222
Seating capacity..................................... 150
Seats
Child seats/child restraint
system installation................................71
Cleaning.................................................246
Driving position memory.................. 24
Front passenger seat position
memory.................................................. 27
Head restraint.........................................29
Properly sitting in the seat ................55
Seat adjustment ..................................... 22
Seat adjustment precautions........... 23
Seat heaters ..............................220, 222
Ventilated seats ..................................222
Service reminder indicators ............. 106
Shift lever
Automatic transmission.....................92
If the shift lever cannot be
shifted from P ...................................357
Manual transmission ...........................96
Shift lever lighting .................................. 201
Shift lock system....................................357
Shopping bag hooks............................230
Side airbags................................................57
Side marker lights
Switch.......................................................... 113
Side mirror
Adjusting and folding..........................39
Driving position memory.................. 24
409
Page 8

Alphabetical index
Smart access system with
push-button start
Entry function..............................................4
Starting the engine...............................89
Spare tire
Inflation pressure................................285
Spare tire................................................348
Spark plug................................................374
Specifications .........................................370
Speedometer
Speed indicator ................................... 100
Speedometer........................................ 100
Steering wheel
Audio switches .....................................199
Driving position memory...................24
Manual adjustment .............................. 36
Power adjustment .................................37
Storage feature......................................205
Stuck
If your vehicle becomes stuck..... 367
Sun visors ....................................................211
Sunshade
Rear ..........................................................225
Roof............................................................. 45
Switch
ECT switch ..............................................93
Engine switch..........................................89
ETCS switch............................................ 96
Fog light switch...................................... 116
Light switches..........................................113
Power door lock switch......................15
Power window switch.......................... 41
Satellite switches..................................214
Transmission shift switches.............. 94
Window lock switch .............................41
Wipers and washer switch...............117
T
Tachometer
Tacho indicator ....................................100
Tachometer............................................100
Tail lights
Switch..........................................................113
Theft deterrent system
Alarm...........................................................52
Engine immobilizer system.............50
Theft prevention labels.......................... 54
Tire inflation pressure .........................285
Tire information
Glossary .................................................392
Size...........................................................389
Tire identification number.............388
Uniform tire quality grading.........390
Tires
Chains.......................................................153
Checking................................................275
If you have a flat tire .........................348
Inflation pressure............................... 285
Inflation pressure sensor ................276
Information ...........................................387
Replacing ..............................................348
Rotating tires.........................................275
Size........................................................... 378
Snow tires................................................ 154
Tools...........................................................348
Total load capacity................................ 150
Towing
Dinghy towing ...........................157, 158
Emergency towing.............................318
Trailer towing ........................................156
TRAC (Traction control).....................139
Traction control (TRAC).....................139
Transmission shift switches....................94
Trip meter ................................................. 100
410
Page 9

Alphabetical index
Trunk
Extending a space .............................227
Opener........................................................ 19
Trunk light
Trunk light ................................................ 20
Wattage .................................................383
Turn signal lights
Replacing light bulbs .........................310
Switch......................................................... 98
Wattage .................................................383
V
Vanity lights
Vanity lights............................................ 212
Wattage .................................................383
Vanity mirrors ............................................. 212
VDIM (Vehicle dynamics
integrated management).................139
Vehicle dynamics integrated
management (VDIM) .......................139
Vehicle identification number .......... 371
Vehicle stability control (VSC) ........139
Ventilators................................................222
VSC (Vehicle stability control) ........139
W
Warning buzzers
Brake system....................................... 329
Downshifting...........................................95
Open door ............................................331
Seat belt reminder ............................330
Warning lights
Anti-lock brake system (ABS) ...330
Brake assist system ..........................330
Brake system....................................... 329
Charging system...............................330
Electric power steering
warning light.....................................330
Electronic engine control
system .................................................330
Low fuel level ........................................331
Low tire pressure warning
light ......................................................... 331
Master warning light.......................... 331
Open door............................................. 331
Pre-collision system......................... 330
Pretensioners...................................... 330
Seat belt reminder light.................... 331
SRS airbags.......................................... 330
Warning messages
Anti-lock brake system (ABS)... 338
AWD system ...................................... 335
Brake assist (BA).............................. 338
Dynamic radar
cruise control...........335, 339, 339
Engine oil level ....................................339
Engine oil maintenance ..................339
Engine oil pressure ...........................334
Hill-start assist control.................... 338
Hood........................................................339
Lexus parking assist
sensor......................................335, 339
Moon roof .............................................339
Open door............................................339
Parking brake ......................................339
Pre-collision system............. 335, 339
Smart access system with
push-button start ............................345
Steering lock........................................ 335
Tire inflation pressure
warning system................... 335, 339
Traction control (TRC).................. 338
Trunk ........................................................339
Vehicle stability control
(VSC).................................................. 338
411
Page 10

Alphabetical index
Washer fluid.........................................339
Washer
Checking................................................274
Preparing and checking
before winter....................................... 151
Switch ..........................................................117
Washing and waxing...........................244
Weight
Cargo capacity..................................... 147
Load limits.............................................. 150
Weight ....................................................370
Wheels ......................................................289
Window glasses ....................................... 41
Window lock switch ................................ 41
Windows
Power windows....................................... 41
Rear window defogger ....................170
Washer.......................................................117
Windshield wipers ......................................117
Wireless remote control
Replacing the battery ......................293
WMA disc ................................................ 187
412
Page 11

3-1. Using the air conditioning system and defogger
Automatic air conditioning system (without navigation system)
Airflow and outlets are automatically adjusted according to the temperature setting.
Owners of models equipped with a navigation system should refer to the “Navigation System Owner's Manual”.
Fan speed
Fan speed display
Off
Driver’s side temperature
setting display
Automatic mode
Driver's side temperature
control
Dual operation switch
Air conditioning ON/OFF switch
Using the automatic mode
STEP 1
Press .
The air conditioning system will begin to operate. Air outlets and fan speed are automatically adjusted according to the temperature setting.
Airflow display
Changes the air outlets used
Passenger’s side temperature
setting display
Micro dust and
pollen removal mode
Passenger’s side
temperature control
Front windshield defogger
Outside air or recirculated mode
162
STEP 2
Press to switch to automatic mode. (IS350 only)
Automatically switches between outside air and recirculated air modes.
Page 12

3-1. Using the air conditioning system and defogger
STEP 3
Press ∧ to increase the temperature and ∨ to decrease the tem-
perature on the switch.
The temperature for the driver and passenger seats can be set separately.
Adjusting the settings
n Adjusting the temperature setting
Press ∧ to increase the temperature and ∨ to decrease the tempera-
ture on the switch.
Press ∧ (increase) or ∨ (decrease) on the switch to separately adjust
the temperature for the passenger and driver sides (dual mode). Press
to return the driver and passenger side temperatures to the same set-
ting (simultaneous mode).
The air conditioning system switches between individual and simultaneous modes each time is pressed.
n Adjusting the fan speed
3
Interior features
Press ∧ (increase) or ∨ (decrease) on the button.
Press to turn the fan off.
163
Page 13

3-1. Using the air conditioning system and defogger
n Changing the air outlets
Press .
*
*
*
*
The air outlets switch each time the
button is pressed.
Air flows to the upper body.
Air flows to the upper body and
feet.
Air flows to the feet.
Air flows to the feet and the
front windshield defogger operates.
164
*: Only in the automatic mode
Page 14

3-1. Using the air conditioning system and defogger
n Switching between outside air and recirculated air modes
IS250 Press .
The mode switches between (recycles air inside the vehicle) and
(introduces air from outside the vehicle) modes each time the but-
ton is pressed.
IS350 Press .
The mode switches between (recycles air inside the vehicle), AUTO and (introduces air from outside the vehicle) modes each time the button is pressed.
When the system is switched to automatic mode, the air conditioning system operates automatically.
Defogging the front windshield
3
Interior features
Defogging
The air conditioning system control
operates automatically.
Recirculated air mode may automatically switch to (outside
air) mode.
165
Page 15

3-1. Using the air conditioning system and defogger
Micro dust and pollen filter
Press .
Outside air mode switches to
(recirculated air) mode. Pollen is removed from the air and the
air flows to the upper part of the
body.
To stop the operation, press
again.
Adjusting the sensitivity of the air intake control in automatic mode (IS350 only)
STEP 1
STEP 2
Press for 2 or more seconds.
Press ∧ (increase) or ∨ (decrease)
on the switch.
From —3 (low) to 3 (high) can be
set.
166
Page 16

3-1. Using the air conditioning system and defogger
Adjusting the position of and opening and closing the air outlets
Center outlets
Direct air flow to the left or right,
up or down
Turn the knob up to open the
vent and down to close the vent
Right and left side outlets
Direct air flow to the left or right,
up or down
Turn the knob right to open the
vent and left to close the vent
3
Interior features
Rear seat outlets
Direct air flow to the left or right,
up or down
Turn the knob fully to the outside
of the vehicle to close the vent
167
Page 17

3-1. Using the air conditioning system and defogger
n Using the automatic mode
Fan speed is adjusted automatically in accordance with the temperature setting and ambient conditions. As a result, the following may occur.
l The system may switch automatically to recirculated mode when the coolest
temperature setting is selected in summer.
l Immediately after the switch is pressed, the fan may stop for a while until warm
or cool air is ready to flow.
l Cool air may flow to the area around the upper body when the heater is on.
n Using the system in recirculated air mode
The windows will fog up more easily if the recirculated air mode is used for an extended period.
n Window defogger feature
Recirculated air mode may automatically switch to (outside air) mode in situations where the windows need to be defogged.
n Outside air temperature approaches 32°F (0°C).
The air conditioning system may not operate even when is pressed.
n When the indicator light on flashes
Press and turn off the air conditioning system before turning it on once
more. There may be a problem in the air conditioning system if the indicator light
continues to flash. Turn the air conditioning system off and have it inspected by your
Lexus dealer.
n Automatic mode for air intake control
In automatic mode, the system detects exhaust gas and other pollutants and automatically switches between outside air and recirculated air modes.
n Micro dust and pollen removal mode
l When the outside air is cold, the following may occur.
• Outside air mode does not switch to .
• The air conditioning system operates automatically.
• The operation cancels after 1 minute.
l In rainy weather, the windows may fog up. Press .
168
Page 18

3-1. Using the air conditioning system and defogger
CAUTION
n To prevent the windshield from fogging up
Do not use during cool air operation in extremely humid weather. The difference between the temperature of the outside air and that of the windshield can
cause the outer surface of the windshield to fog up, blocking your vision.
NOTICE
n To prevent battery discharge
Do not leave the automatic air conditioning system on longer than necessary when the engine is stopped.
3
Interior features
169
Page 19

3-1. Using the air conditioning system and defogger
Rear window and outside rear view mirror defoggers
These features are used to defog the rear window, and to remove raindrops, dew and frost from the outside rear view mirrors.
ON/OFF
Press the button to turn on the
rear window and outside rear
view mirror defoggers. The
defoggers will automatically
turn off after approximately 15
minutes. Pressing the button
again also turns the defoggers
off.
CAUTION
n When the outside rear view mirror defoggers are on
Do not touch the outside surface of the rear view mirror, as it can become very hot and burn you.
170
Page 20

1-3. Adjustable components
Front seats
Manual seat
Seat position lever
Seatback angle lever
Vertical height adjustment lever
Seat cushion (front) angle knob
22
Page 21

Power seat
1-3. Adjustable components
1
Before driving
Seat position switch
Seatback angle switch
Seat cushion (front) angle switch
Vertical height adjustment switch
Lumbar support switch
CAUTION
n Seat adjustment
Do not recline the seat more than necessary when the vehicle is in motion to reduce
the risk of sliding under the lap belt.
If the seat is too reclined, the lap belt may slide past the hips and apply restraint
forces directly to the abdomen or your neck may contact the shoulder belt, increasing the risk of death or serious injury in the event of an accident.
23
Page 22

1-3. Adjustable components
Driving position memory (if equipped)
Your preferred driving position (the position of the driver's seat, steering
wheel and outside rear view mirrors) can be entered into the computer's
memory and recalled with the touch of a button. It is also possible to set this
function to activate automatically when the doors are unlocked.
Three different driving positions can be entered into memory.
n Entering a position to memory
Vehicles with an automatic transmission: Check that the shift lever is set in P. Vehicles with a manual transmission: Check that the parking brake is set.
STEP 1
STEP 2
STEP 3
Switch to IG-ON mode.
Adjust the driver’s seat, steering wheel, and outside rear view
mirrors to the desired positions.
While pushing the SET button,
push button 1, 2 or 3 until the
signal beeps.
If the selected button has
already been preset, the previously recorded position will be
overwritten.
24
Page 23

1-3. Adjustable components
n Recalling the memorized position
Vehicles with an automatic transmission: Check that the shift lever is set in P. Vehicles with a manual transmission: Check that the parking brake is set.
STEP 1
Switch to IG-ON mode.
1
Before driving
STEP 2
Push button 1, 2 or 3 to recall
the desired position.
Linking driving position memory with door unlock operation
Record your driving position to button 1, 2 or 3 before performing the following.
STEP 1
STEP 2
Turn the engine switch OFF and close the driver's door.
Press and hold the desired button
(1, 2 or 3) while pressing the
or button on the wireless
remote control until the signal
beeps.
The driving position is recalled
when the driver's door is unlocked
using the entry function or wireless
remote control and the driver’s
door is opened.
25
Page 24

1-3. Adjustable components
n Canceling the linked door unlock operation
STEP 1
STEP 2
Turn the engine switch OFF and close the driver's door.
While pushing the SET button, push the or button on the
wireless remote control until the signal beeps.
n Retained accessory power
Memorized positions (except for the steering wheel positions) can be activated up to 30 seconds after the driver's door is opened, even after turning the engine switch OFF.
n To cancel seat position recall
Perform any of the following operations.
l Push the SET button. l Push button 1, 2, or 3.
l Adjust the seat using the switches (only cancels seat position recall).
n If the battery is disconnected
The memorized positions must be reset because the computer's memory is erased when the battery is disconnected.
CAUTION
n Seat adjustment caution
Take care during seat adjustment that the seat does not strike the rear passenger or squeeze your body against the steering wheel.
26
Page 25

1-3. Adjustable components
Seat position memory (if equipped)
Your preferred front passenger seat position can be entered into the computer's memory and recalled with the touch of a button.
Three different seat positions can be entered into memory.
n Entering a position to memory
Vehicles with an automatic transmission: Check that the shift lever is set in P. Vehicles with a manual transmission: Check that the parking brake is set.
1
Before driving
STEP 1
STEP 2
STEP 3
Switch to IG-ON mode.
Adjust the front passenger seat to the desired position.
While pushing the SET button,
push button 1, 2 or 3 until the
signal beeps.
If the selected button has
already been preset, the previously recorded position will be
overwritten.
n Recalling the memorized position
Vehicles with an automatic transmission: Check that the shift lever is set in P. Vehicles with a manual transmission: Check that the parking brake is set.
Push button 1, 2 or 3 to recall
the desired position.
27
Page 26

1-3. Adjustable components
n Retained accessory power
Memorized position can be activated up to 30 seconds after the front passenger door is opened, even after turning the engine switch OFF.
n To cancel seat position recall
Perform any of the following operations.
l Push the SET button. l Push button 1, 2, or 3.
l Adjust the seat position using the switches.
n If the battery is disconnected
The memorized positions must be reset because the computer's memory is erased when the battery is disconnected.
CAUTION
n Seat adjustment caution
Take care during seat adjustment that the seat does not strike the rear passenger.
28
Page 27

1-3. Adjustable components
Head restraints
Vertical adjustment
Push and hold the lock release
button when lowering the head
restraint.
1
Lock
release
button
n Adjusting the height of the head restraints
Make sure that the head restraints are adjusted so that the center of the head restraint is closest to the top of your ears.
n Adjusting the rear seat head restraints
Always raise the head restraint one level from the stowed position when using.
n Head restraints of different seats
The head restraints are specially designed for the seats on which they are installed.
Removal
Pull the head restraint up while
pushing the lock release button.
CAUTION
Before driving
n Head restraint precautions
Observe the following precautions regarding the head restraints. Failure to do so may result in death or serious injury.
l Adjust the head restraints to the correct position at all times. l Do not drive with the head restraints removed.
29
Page 28

1-3. Adjustable components
Seat belts
Make sure that all occupants are wearing their seat belts before driving the vehicle.
n Correct use of the seat belts
l Extend the shoulder belt so
that it comes fully over the
shoulder, but does not come
into contact with the neck or
slide off the shoulder.
l Position the lap belt as low as
possible over the hips.
l Adjust the position of the
seatback. Sit up straight and
well back in the seat.
l Do not twist the seat belt.
n Fastening and releasing the seat belt
Release button
30
Fastening the belt
Push the tab into the buckle until
a clicking sound is heard.
Releasing the belt
Press the release button.
Page 29

n Adjusting the height of the belt (front seats)
Down
Up
Move the height adjuster up and
down as needed until you hear a
click.
Seat belt comfort guide (outside rear seats)
If the shoulder belt sits close to a
person’s neck, slide the seat belt
comfort guide forward.
1-3. Adjustable components
1
Before driving
Seat belt pretensioners (front and outside rear seats)
The pretensioner helps the seat
belt to quickly restrain the occupant by retracting the seat belt
when the vehicle is subjected to
certain types of severe frontal collision.
The pretensioner may not activate
in the event of a minor frontal
impact, a side impact or a rear
impact.
31
Page 30

1-3. Adjustable components
Pre-collision seat belts (front seats of vehicles with pre-collision system)
When the pre-collision sensor detects an obstacle and determines that a
collision is unavoidable, the seat belts lessen collision injury by retracting
the slack in the front seat belts before the collision, thus restraining the
driver and passenger at an earlier stage.
The seat belts will also operate in the event of sudden braking. (→P. 1 44)
n Emergency locking retractor (ELR)
The retractor will lock the belt during a sudden stop or on impact. It may also lock if you lean forward too quickly. A slow, easy motion will allow the belt to extend so that you can move around fully.
n Automatic locking retractor (ALR)
When a passenger's shoulder belt is completely extended and then retracted even
slightly, the belt is locked in that position and cannot be extended. This feature is
used to hold the CRS firmly. To free the belt again, fully retract the belt and then pull
the belt out once more. (→P. 7 1)
n Pregnant women
32
Obtain medical advice and wear the seat belt
in the proper way. (→P. 30 )
Women who are pregnant should position
the lap belt as low as possible over the hips in
the same manner as other occupants. Extend
the shoulder belt completely over the shoulder and position the belt across the chest.
Avoid belt contact over the rounding of the
abdominal area.
If the seat belt is not worn properly, not only a
pregnant woman, but also the fetus could suffer death or serious injury as a result of sudden braking or a collision.
Page 31

1-3. Adjustable components
n People suffering illness
Obtain medical advice and wear the seat belt in the proper way.
n Child seat belt usage
The seat belts of your vehicle were principally designed for persons of adult size.
l Use a child restraint system appropriate for the child, until the child become
large enough to properly wear the vehicle's seat belt. (→P. 6 8)
l When the child becomes large enough to properly wear the vehicle's seat belt,
follow the instructions on P. 30 regarding seat belt usage.
n Replacing the belt after the pretensioner has been activated
The seat belts cannot be used after a pretensioner has been activated. After an
accident, have your Lexus dealer inspect the pretensioners. Make sure the pretensioners are replaced if they have been activated.
n Seat belt extender
If your seat belts cannot be fastened securely
because they are not long enough, a personalized seat belt extender is available from
your Lexus dealer free of charge.
1
Before driving
33
Page 32

1-3. Adjustable components
CAUTION
n Wearing a seat belt
Observe the following precautions to reduce the risk of injury in the event of sudden braking or an accident.
Failing to do so may cause death or severe injury.
l Ensure that all passengers wear a seat belt.
l Always wear a seat belt properly. l Each seat belt should be used by one person only. Do not use a seat belt for more
than one person at once, including children.
l Lexus recommends that children be seated in the rear seat and always use a seat
belt and/or an appropriate child restraint system.
l Do not recline the seat any more than necessary to achieve a proper seating
position. The seat belt is most effective when the occupants are sitting up straight
and well back in the seats.
l Do not wear the shoulder belt under your arm.
l Always wear your seat belt low and snug across your hips.
n Seat belt damage and wear
l Do not to damage the seat belts by allowing the belt, plate, or buckle to be
jammed in the door.
l Inspect the seat belt system periodically. Check for cuts, fraying, and loose parts.
Do not use a damaged seat belt until it is replaced. Damaged seat belts cannot
protect an occupant from injury.
l Ensure that the belt and tab are locked and the belt is not twisted.
If the seat belt does not function correctly, immediately contact your Lexus
dealer.
l Replace the seat assembly, including the belts, if your vehicle has been involved in
a serious accident, even if there's no obvious damage.
l Do not attempt to install, remove, modify, disassemble or dispose of the seat belts.
Have any necessary repairs carried out by your Lexus dealer. Inappropriate handling of the pretensioner may prevent it from operating properly resulting in
death or serious injury.
34
Page 33

1-3. Adjustable components
CAUTION
n Using a seat belt extender
l Do not wear the seat belt extender if you can fasten the seat belt without the
extender.
l Do not use the seat belt extender when installing a child restraint system because
the belt will not securely hold the child restraint system, increasing the risk of
death or injury in the event of a collision.
l The personalized extender may not be safe on another vehicle, when used by
another person, or at a different seating position other than the one originally
intended.
NOTICE
n When using a seat belt extender
When releasing the seat belt, press on the buckle release button on the extender, not on the seat belt. This helps prevent damage to the vehicle interior and the extender itself.
1
Before driving
35
Page 34

1-3. Adjustable components
Steering wheel (manually adjustable type)
The steering wheel can be adjusted to a comfortable position.
STEP 1
Hold the steering wheel
and press the lever
down.
STEP 2
Adjust to the ideal posi-
tion by moving the
steering wheel horizon-
tally and vertically.
STEP 3
CAUTION
n Caution while driving
Do not adjust the steering wheel while driving. Doing so may cause the driver to mishandle the vehicle and an accident, resulting in death or serious injury.
n After adjusting the steering wheel
Make sure that the steering wheel is securely locked. Otherwise, the steering wheel may move suddenly, possibly causing an accident.
Pull the lever up.
36
Page 35

1-3. Adjustable components
Steering wheel (power-adjustable type)
The steering wheel can be adjusted to a comfortable position while the engine switch is in ACC or IG-ON mode.
Auto tilt away
Up
Down
Away from the driver
Toward the driver
When the engine switch is turned
OFF, the steering wheel returns to
its stowed position by moving up
and away to enable easier driver
entry and exit.
Switching to ACC or IG-ON
mode will return the steering wheel
to the original position.
1
Before driving
CAUTION
n Caution while driving
Do not adjust the steering wheel while driving. Doing so may cause the driver to mishandle the vehicle and an accident, resulting in death or serious injury.
37
Page 36

1-3. Adjustable components
Anti-glare inside rear view mirror
In the AUTO mode, sensors are used to detect the headlights of vehicles behind and automatically reduces the reflected light.
Turns AUTO mode ON/OFF
The indicator comes on when
AUTO mode is turned ON.
The anti-glare mirror default
mode is AUTO. The anti-glare
mirror is automatically set to
AUTO whenever the engine
switch is turned on.
n To prevent sensor error
To ensure that the sensors operate properly, do not touch or cover it.
CAUTION
n Caution while driving
Do not adjust the position of the mirror while driving. Doing so may lead to mishandling of the vehicle and an accident, resulting in death or serious injury.
38
Page 37
1-3. Adjustable components
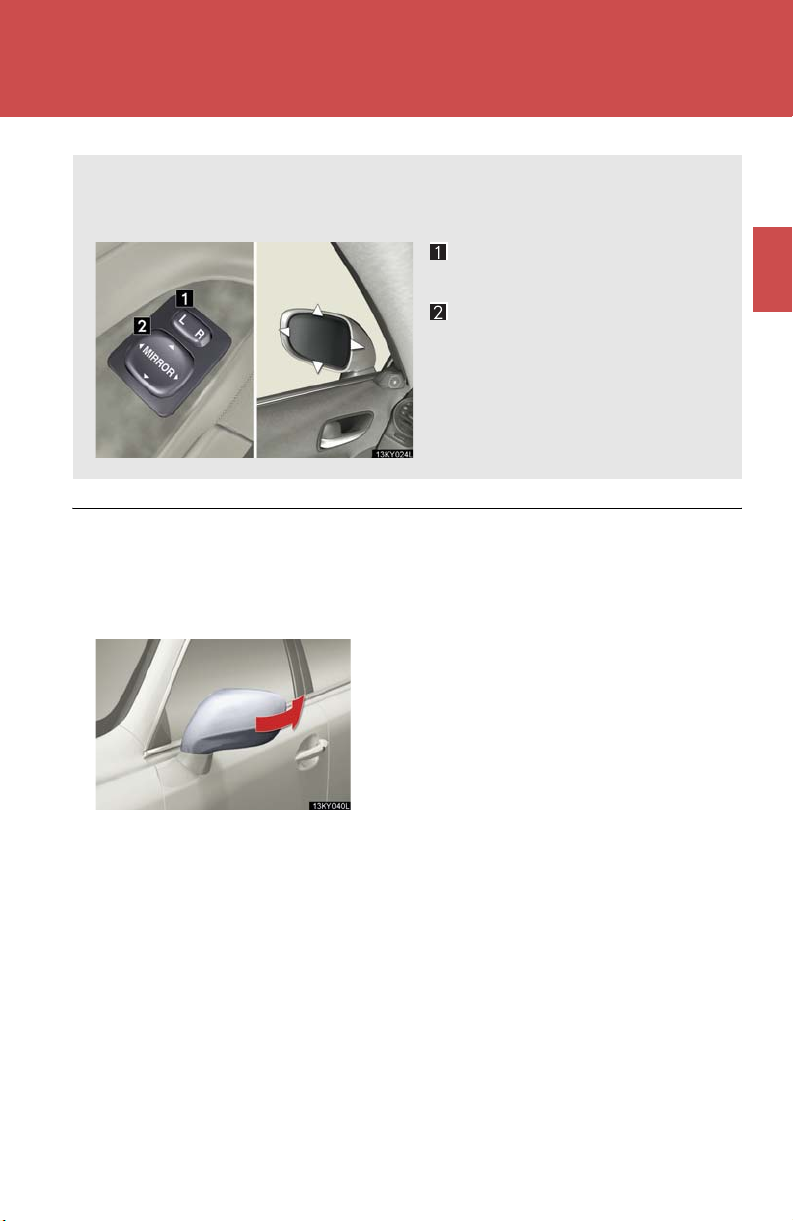
Outside rear view mirrors
Mirror angle can be adjusted using the switch when the engine switch is in ACC o r IG-ON mode .
Select a mirror to adjust
(L: left or R: right)
Adjust the mirror up, down,
in, or out using the switch
n When the mirrors are fogged up
Turn on the mirror heaters to defog the mirrors. (→P. 1 70 )
n Folding back the mirrors
Push back in the direction of the vehicle's rear.
1
Before driving
n One-touch adjustment of the mirror angle
(vehicles with driving position memory)
A desired mirror face angle can be entered to memory and adjusted with the touch
of a button. (→P. 24)
39
Page 38

1-3. Adjustable components
n Linked mirror function when reversing (vehicles with driving position memory)
The outside rear view mirrors will automatically angle downwards when the vehicle
is reversing in order to give a better view of the ground. However, this function will
not operate when the mirror select switch is in the neutral position (between L and
R).
n Auto anti-glare function (vehicles with sports or luxury package)
When the anti-glare inside rear view mirror is set to AUTO mode, the outside rear
view mirrors will activate in conjunction with the anti-glare inside rear view mirror to
reduce reflected light. (→P. 3 8)
CAUTION
n When driving the vehicle
Observe the following precautions while driving. Failing to do so may result in loss of control of the vehicle and cause an accident, resulting in death or serious injury.
l Do not adjust the mirrors while driving. l Do not drive with the mirrors folded back.
l Both the driver and passenger side mirrors must be extended and properly
adjusted before driving.
n When the mirror heaters are operating
Do not touch the surface of the mirror, as it may be hot.
40
Page 39

1-6. Anti-theft system
Engine immobilizer system
The vehicle's keys have built-in transponder chips that prevent the engine from starting if the key has not been previously registered in the vehicle's on-board computer.
The indicator light flashes after
the engine switch has been
turned OFF to indicate that the
system is operating.
n Conditions that may cause the system to malfunction
l If the grip portion of the key is in contact with a metallic object
l If the key is in close proximity to or touching a key to the security system (key
with a built-in transponder chip) of another vehicle
n Certifications for the engine immobilizer system
For vehicles sold in the U.S.A.
FCC ID: NI4TMIMB-1
This device complies with Part 15 of the FCC Rules. Operation is subject to the fol-
lowing two conditions: (1) this device may not cause harmful interference, and (2)
this device must accept any interference received, including interference that may
cause undesired operation.
For vehicles sold in Canada
Operation is subject to the following two conditions: (1) this device may not cause
interference, and (2) this device must accept any interference, including interference that may cause undesired operation of the device.
50
Page 40

1-6. Anti-theft system
CAUTION
Changes or modifications not expressly approved by the party responsible for compliance could void the user’s authority to operate the equipment.
1
NOTICE
n To prevent damage to the key
Do not modify, remove or disable the engine immobilizer system. If any unauthorized changes or modifications are made, the proper operation of the system cannot be guaranteed.
Before driving
51
Page 41

1-6. Anti-theft system
Alarm
The alarm is triggered if forcible entry is detected (horn, head lights, tail lights, interior lights and emergency flashers).
To arm the alarm, exit the vehicle, make sure that the doors,
trunk and hood are closed, and
lock all the doors.
The changes will begin operating automatically after 30 seconds.
The indicator changes from
being on to a flashing pattern
when the system begins to operate.
Deactivating or stopping the alarm
Do one of the following:
l Unlock the doors or trunk using the entry function or the wireless
remote door lock function.
l Start the engine. (The alarm will be deactivated or stopped after a few
seconds.)
n Items to check before locking the vehicle
To prevent unintended triggering of the alarm, check that there is no one in the vehicle, and that all windows and moon roof are closed before locking the vehicle.
52
Page 42

1-6. Anti-theft system
n Alarm operation
The alarm is triggered in the following situations
l A locked door or trunk is opened in any way other than using a wireless remote
control, such as someone exiting the vehicle after the alarm is activated.
l The hood is opened while the vehicle is locked.
l The battery is reconnected.
n When the battery is disconnected
Be sure to cancel the alarm system. If the battery is discharged before canceling the alarm, the system may be triggered when the battery is reconnected.
n Pa nic m ode
When is pushed for longer than about
one second, the headlights/tail lights/emergency flashers will flash, the front and rear
interior lights will come on, and an alarm will
sound for about 60 seconds to deter any
person from trying to break into or damage
your vehicle.
To stop the alarm, push any button on the wireless remote control.
1
Before driving
53
Page 43

1-6. Anti-theft system
Theft prevention labels (U.S.A.)
These labels are attached to the
vehicle to reduce vehicle theft
by facilitating the tracing and
recovery of parts from stolen
vehicles. Do not remove under
penalty of law.
54
Page 44

Topic 2
Before Driving
Seats (Manual)
n Adjusting seat position
n Adjusting seatback angle
With the lever raised, slide the seat forward or
backward.
With the lever raised, tilt the seatback forward or
backward.
n Adjusting seat height
n Adjusting the front of the seat cushion
11
Raises the seat
1
Lowers the seat
2
Raises the front of the seat cushion
1
Lowers the front of the seat cushion
2
Page 45

Seats (Power)
Topic 2
Before Driving
Entering and Exiting
n Adjusting seat position
n Adjusting seatback angle
n Adjusting the seat cushion
Moves the seat forward
1
Moves the seat backward
2
Tilts the seatback forward
1
Reclines the seatback
2
Raises and lowers the front of the cushion
1
Raises and lowers the entire seat
2
Before Driving When Driving
Night Driving
Rain and
Driving Comfort
Opening and Closing
n Adjusting the lumbar support
1
2
Firmer
Softer
What to do if ...
Customizing
Yo u r L e x u s
12
Page 46

Topic 2
Before Driving
Driving and Seat Position Memory System (If Equipped)
The seats can be returned to a previously set position by simply pressing a button.
The position of the steering wheel and the outside rear view mirrors is adjusted along with the
driver's seat.
Positions can be conveniently recorded for the vehicle's primary drivers and passengers.
n Setting memory positions
While holding down the SET button, press and
hold one of the memory buttons (1, 2, or 3) until
you hear a beep.
The current position of the seat, as well as the
position of the steering wheel and the outside
rear view mirrors (for the driver's seat only) is
recorded.
n Recalling memory positions
Press one of the memory buttons (1, 2, or 3).
n Linking driving position memory with door unlock operation (driver's seat only)
While holding down the desired memory button,
press and hold either the or button on
the wireless remote control until you hear a beep.
Linking driving position memory to the door unlock operation allows the memory position
to be recalled automatically when the driver's door is opened. (The linked function does not
operate if the driver's door is unlocked using the mechanical key or manually from inside
the vehicle.)
13
Page 47

Head Restraints
n Height adjustment
To ra is e: pull the head restraint upward.
To l o w er : push the head restraint down while
pressing the lock release button.
Lock
release
button
Seatbelts
n Adjusting shoulder belt height (front seats only)
To ra is e: pull the anchor upward.
To lo we r : depress the button and push the anchor
down.
Topic 2
Before Driving
Entering and Exiting
Before Driving When Driving
Night Driving
Driving Comfort
Rain and
n Seatbelt comfort guides (outside rear seats only)
If the shoulder belt sits close to the neck, slide the
comfort guide forward.
Outside Rear View Mirrors
To select the mirror you wish to adjust (L or R),
use the master switch.
To adjust mirror angle, use the control switch.
On some models, the mirrors will automatically
angle downwards when the vehicle is reversing.
To disable this function, set the select switch in the
neutral position (between L and R).
Opening and Closing
What to do if ...
Customizing
Yo u r L e x u s
14
Page 48

Topic 2
Before Driving
Anti-glare Inside Rear View Mirror
The anti-glare mirror uses a sensor to detect light from vehicles behind and automatically
reduces glare.
To turn AUTO mode ON/OFF, press the AUTO
button.
The indicator comes on when AUTO mode is
turned ON.
Steering Wheel
n Manually adjustable type
To adjust the steering wheel, press the lever down
and move the steering wheel to the desired position. Lock the steering wheel in place by pulling
the lever up.
n Power-adjustable type
Up
1
Down
2
Awa y from the dr ive r
3
Toward the driver
4
The power-adjustable type steering wheel retracts automatically when the engine switch is
turned OFF to allow for easy exit and entry. The steering wheel returns automatically to its
previously set position when the engine switch is switched to ACC or IG-ON mode.
15
Page 49
Topic 5
Driving Comfort
Audio System (without navigation system)
Owners of models equipped with a navigation system should refer to the “Navigation System Owner's Manual”.
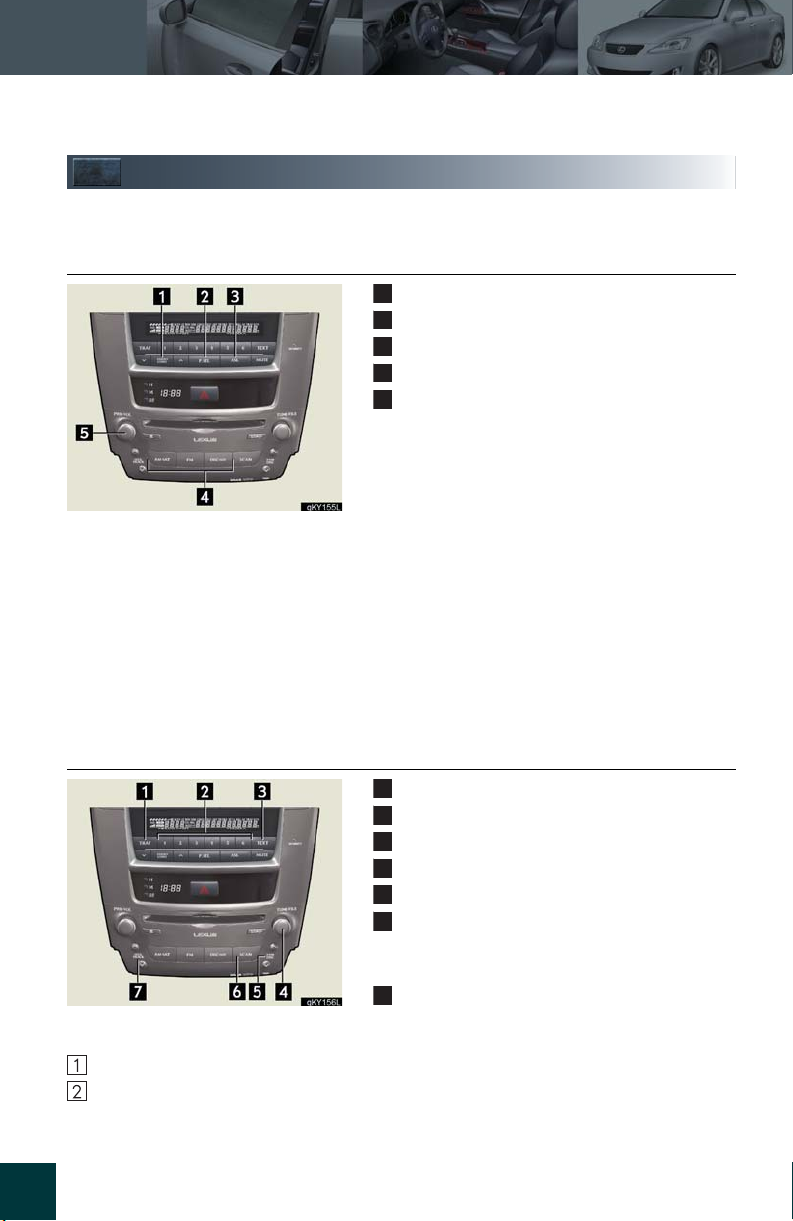
n Basic operation
Sound quality modes
1
Listening position (if equipped)
2
ASL (Automatic Sound Levelizer)
3
Audio sources
4
Pow e r/Vo lu m e
5
n Audio sources
AM⋅SAT: AM radio/Satellite radio*
FM: FM radio
⋅AUX: CD player/Auxiliary audio device
DISC
*:
The optional Lexus genuine satellite tuner and antenna allows you to receive and play
XM satellite radio broadcasts. (Subscription is required. For detailed information, see
the Owner’s Manual.)
n Radio
Traffic information
1
Station presets
2
Tex t m e ss ag es
3
Radio tuner
4
RDS genre select
5
Scan
6
All radio stations: press
Preset radio stations: press and hold
Seek
7
n Entering station presets
Select the desired station by using the tune, the seek or the scan function.
Press and hold one of the preset buttons (1~6) until you hear a beep, indicating that the station is set.
31
Page 50

n CD player
Playing an audio CD
n
n Playing a CD with MP3/WMA files
Random playback
1
Current disc: press
All discs: press and hold
Repeat
2
Current track: press
Current disc: press and hold
Text information
3
Disc select
4
Disc load
5
Scan
6
All tracks: press
First track of each CD: press and hold
Eject
7
Track select/reverse/fast-forward
8
Random playback
1
Current folder: press
All folders: press and hold
Repeat
2
Current folder: press
All folders: press and hold
Folder select
3
Text information
4
File select
5
Disc select
6
Disc load
7
Scan (Using the first file of each folder)
8
Eject
9
Topic 5
Driving Comfort
Entering and Exiting
Before Driving
When Driving
Night Driving
Driving ComfortDriving Comfort
Opening and Closing
What to do if ...
Yo u r L e x u s
Rain and
Customizing
32
Page 51

Topic 5
Driving Comfort
n Loading a CD
Press the LOAD button.
WAIT is shown on the display.
Insert a CD when the indicator on the slot turns from amber to green.
The display changes from WAIT to LOAD.
n Loading multiple CDs
Press and hold the LOAD button until you hear a beep.
WAIT is shown on the display.
Insert a CD when the indicator on the slot turns from amber to green.
The display changes from WAIT to LOAD.
The indicator on the slot turns to amber when the CD is inserted.
Insert the next CD when the indicator on the slot turns from amber to green again.
Repeat the procedure for the remaining CDs.
To stop the operation, press the DISC-AUX button.
n Remote control (steering wheel switches)
The audio system can be operated using the remote control located on the steering wheel.
Power o n/chang e mode
1
Vo l u m e
2
Audio source
3
Radio: radio tuner
CD: disc/track select
file select (MP3/WMA)
33
Page 52

Driving Comfort
Air Conditioning System (without navigation system)
Owners of models equipped with a navigation system should refer to the “Navigation System Owner's Manual”.
Driver side temperature control
1
Switch to automatic mode
2
Driver side temperature display
3
OFF button
4
Fan speed controls
5
Air flow controls
6
Passenger side temperature display
7
Micro dust and pollen filter
8
Passenger side temperature control
9
Windshield defog/defrost
10
Outside air/recirculated air mode switch
11
A/C switch
12
Dual mode switch
13
Topic 5
Entering and Exiting
Before Driving
When Driving
Night Driving
Driving ComfortDriving Comfort
Rain and
n Using the automatic mode
Press the AUTO button.
Adjust the temperature using the TEMP but-
tons.
n Adjusting the temperature in DUAL mode
In DUAL mode, driver and passenger side temperature settings can be adjusted separately.
Press the DUAL button.
Adjust the driver side temperature using the
TEMP buttons, and the passenger side temperature using the PASSENGER TEMP buttons.
Opening and Closing
What to do if ...
Yo u r L e x u s
34
Customizing
Page 53
Topic 5
Driving Comfort
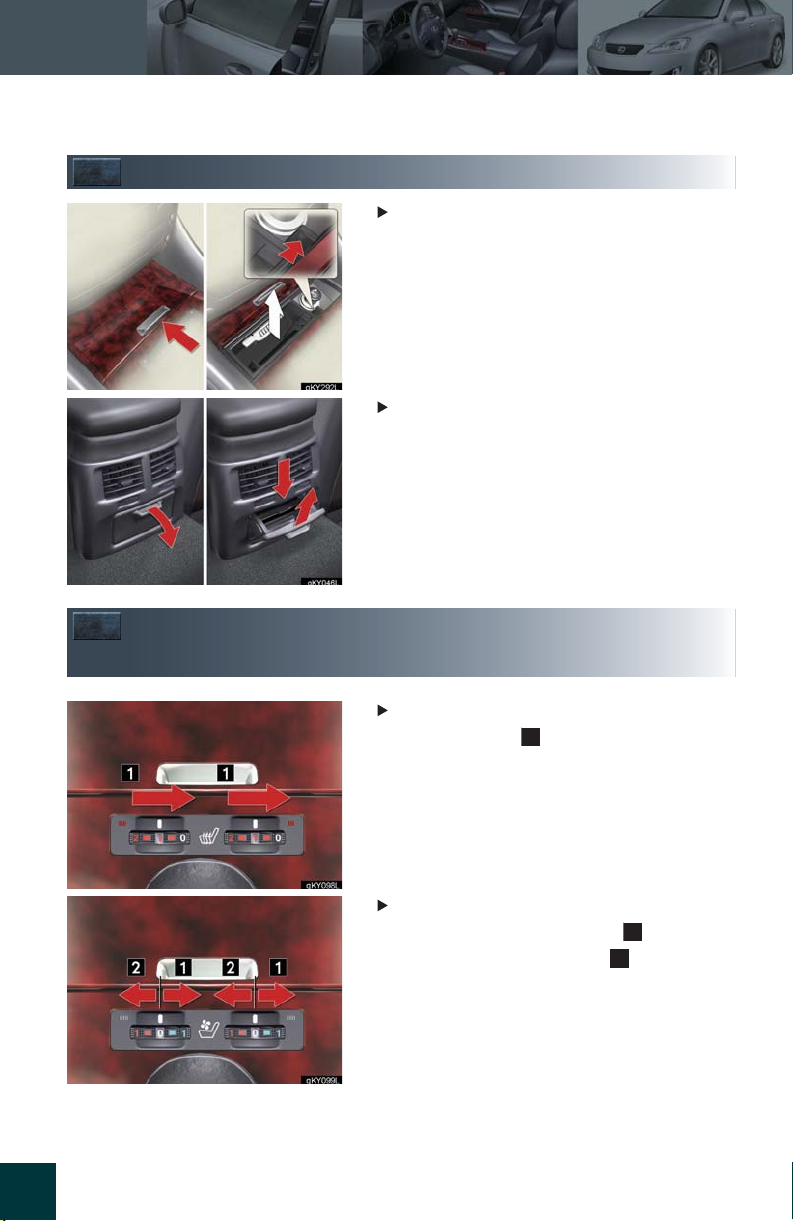
Ashtrays
Fron t
To remove the ashtray, push the release lever.
Rear
To remove the ashtray, press down on the plate
and lift the ashtray out.
35
Seat Heaters / Seat Heaters and Ventilators (If Equipped)
Seat heaters
Tu rn t he di al t owa rd .
Seat heaters and ventilators
Seat heaters: turn the dial toward .
Ve n t i la t o r s : turn the dial toward .
1
1
2
Page 54

Console Boxes
Topic 5
Driving Comfort
Entering and Exiting
Front
To open, slide and lift the armrest with the knob
pulled up.
Rear (if equipped)
To open, press the lock release button and lift the
armrest.
Overhead console box
To open, press the lid.
Before Driving
When Driving
Night Driving
Rain and
Driving ComfortDriving Comfort
Opening and Closing
There is a power outlet located in the front console box.
What to do if ...
Yo u r L e x u s
36
Customizing
Page 55

Topic 5
Driving Comfort
Glove Box
Cup Holders
Open: press the button.
1
Lock
2
Unlock
3
The glove box can be locked and unlocked using
the mechanical key.
Front (ty pe A)
To open, press down on the front of the lid.
37
Front (ty pe B)
To open, pull and hold the knob and slide the armrest.
Rear
To open, press in and release.
Page 56

Interior Lights
Topic 5
Driving Comfort
Entering and Exiting
Without moon roof
Door position ON/OFF
1
ON/OFF
2
With moon roof
Door position ON/OFF
1
ON/OFF
2
Rear Sunshade (If Equipped)
To raise the rear sunshade, press the switch.
Press the switch again to lower it.
The sunshade automatically lowers to ensure visibility when reversing.
Before Driving
When Driving
Night Driving
Rain and
Driving ComfortDriving Comfort
Opening and Closing
Compass
To display the compass, press and hold the AUTO
button for 3 or more seconds.
To cancel the display, press and hold the AUTO
button again for 3 or more seconds.
What to do if ...
Yo u r L e x u s
38
Customizing
Page 57

Topic 5
Driving Comfort
Extended Trunk
Longer items can be loaded in the vehicle by utilizing the trunk space and rear seat area.
Pull down the rear armrest.
Open the inside trunk door from the trunk and load baggage or other items.
39
Luggage Mat
Pull the lever upwards when lifting the luggage
mat up.
The lever can be hooked on the edge of the trunk.
Page 58

6-2. Customization
Customizable features
Your vehicle includes a variety of electronic features that can be personalized to your preferences. Programming these preferences requires specialized equipment and may be performed by an authorized Lexus
dealership.
Some function settings are changed simultaneously with other functions being customized. Contact your Lexus dealer for further details.
Item Function Default setting
Smart access system with
Smart access
system with
push-button
start
(
→P. 4 )
push-button start
Operation signal
(Emergency flashers)
Operation signal
(Buzzer)
Wireless remote control ON OFF
Driver's door
locked in one
Unlocking operation
step, all doors
locked in two
steps
Wir eless
remote control
(
→P. 1 2)
Time elapsed before automatic door lock function is
activated if door is not
opened after being
30 seconds 60 seconds
unlocked
Customized
setting
ON OFF
ON OFF
ON OFF
All doors locked
in one step.
6
Vehicle specifications
Operation signal
(Emergency flashers)
Operation signal
(Buzzer)
ON OFF
ON OFF
395
Page 59

6-2. Customization
Item Function Default setting
Wir eless
remote control
(
→P. 1 2)
Trunk unlocking function ON OFF
Trunk unlocking operation Push and hold
Panic function ON OFF
Driver's door
locked in one
Unlocking using a key
step, all doors
locked in two
steps
Speed-detecting automatic door lock function
(Manual transmissions)
Speed-detecting automatic door lock function
Door lock
→P. 15 )
(
(Automatic transmissions)
Opening driver's door
unlocks all doors (Manual
transmissions)
Customized
setting
Push twice
One short push
All doors locked
in one step.
ON OFF
OFF ON
ON OFF
396
Opening driver's door
unlocks all doors (Automatic transmissions)
Shifting gears to P
unlocks all doors.
Shifting gears to position
other than P locks all
doors.
OFF ON
ON OFF
ON OFF
Page 60

6-2. Customization
Item Function Default setting
Linked door lock opera-
tion
Power windows
(
→P. 4 1)
Linked door key opera-
tion
Open and close
Wireless remote control
linked operation
Linked door lock opera-
tion
Linked door key opera-
tion
Open and close
Linked operation of comMoon roof
(
→P. 4 4)
ponents when door key is
used
Slide only Tilt only
Wireless remote control
linked operation
Linked operation of com-
ponents when wireless
Slide only Tilt only
remote control used
Light sensor sensitivity Level 3 Levels 1 to 5
Automatic
light control
system
(
→P. 1 13 )
Time el apsed be fore
headlights automatically
turn off after doors are
30 seconds
closed
Customized
setting
ON OFF
Open only
Close only
ON OFF
ON OFF
Open only
Close only
ON OFF
0 seconds
60 seconds
90 seconds
6
Vehicle specifications
397
Page 61

6-2. Customization
Item Function Default setting
Switching operation when
the vehicle is stationary
Windshield
wipers and
washer
(
→P. 1 17 )
Lexus parking
assist-sensor
(
→P. 1 33 )
Drip prevention function ON OFF
Time elapsed before the
drip prevention function
operates
Va r i a b l e
depending on
the vehicle
speed
Back sensor operation
display and buzzer
Buzzer volume Level 3 Level 1 to 5
Time elapsed before lights
turn off
15 seconds
Operation when the
doors are unlocked
Illumination
(
→P. 2 01)
Operation after the
engine switch turned OFF
Customized
setting
ON OFF
3 seconds
ON OFF
7.5 s ec onds
30 seconds
ON OFF
ON OFF
398
Front foot well lighting ON OFF
Shift lever lighting ON OFF
Outer foot light ON OFF
Page 62

4-3. Do-it-yourself maintenance
Do-it-yourself service precautions
If you perform maintenance yourself, be sure to follow the correct procedure given in these sections.
Items Part s and tools
•Warm water
• Baking soda
Battery condition (→P. 27 1)
Brake fluid level (→P. 27 0)
•Grease
• Conventional wrench
(for terminal clamp bolts)
• FMVSS No.116 DOT 3 or SAE
J1703 brake fluid
•Rag or paper towel
• Funnel (used only for adding brake
fluid)
Engine coolant level (→P. 26 8)
• “Toyota Super Long Life Coolant”
or similar high quality ethylene glycol based non-silicate, non-amine,
non-nitrate and non-borate coolant
with long-life hybrid organic acid
technology.
For the U.S.A.:
“Toyota Super Long Life Coolant”
is pre-mixed with 50% coolant and
50% deionized water.
For Canada:
“Toyota Super Long Life Coolant”
is pre-mixed with 55% coolant and
45% deionized water.
• Funnel (used only for adding
engine coolant)
4
Maintenance and care
255
Page 63

4-3. Do-it-yourself maintenance
Items Part s and tools
Engine oil level (→P. 26 4)
• “Toyota Genuine Motor Oil” or
equivalent
• Rag or paper towel, funnel (used
only for adding engine oil)
Fuses (→P. 29 5)
Tire inflation pressure (→P. 2 85 )
• Fuse with same amperage rating as
original
• Tire pressure gauge
• Compressed air source
Headlight aim (→P. 309 ) • Phillips-head screwdriver
Radiator and condenser (→P. 270 )
⎯
• Water washer fluid containing anti-
Washer fl ui d (→P. 274 )
freeze (for winter use)
•Funnel
CAUTION
The engine compartment contains many mechanisms and fluids that may move suddenly, become hot, or become electrically energized. To avoid death or serious injury.
n When working on the engine compartment:
l Keep hands, clothing, and tools away from the moving fan and engine drive belt.
l Be careful not to touch the engine, radiator, exhaust manifold, etc. right after driv-
ing as they may be hot. Oil and other fluids may also be hot.
l Do not leave anything that may burn easily, such as paper or rags, in the engine
compartment.
l Do not smoke, cause sparks or expose an open flame to fuel or the battery. Fuel
and battery fumes are flammable.
l Be extremely cautious when working on the battery. It contains poisonous and
corrosive sulfuric acid.
256
Page 64

4-3. Do-it-yourself maintenance
CAUTION
n When working near the electric cooling fan or radiator grille:
Be sure the engine switch is OFF.
With the engine switch in IG-ON mode, the electric cooling fan may automatically
start to run if the air conditioning is on and/or the coolant temperature is high.
(→P. 270)
n Safety glasses
Wear safety glasses to prevent flying or falling material, fluid spray, etc. from getting in the eyes.
NOTICE
n If you remove the air cleaner:
Driving with the air filter removed may cause excessive engine wear due to dirt in the air. Also a backfire could cause a fire in the engine compartment.
4
257
Maintenance and care
Page 65

4-3. Do-it-yourself maintenance
Hood
Release the lock from the inside of the vehicle to open the hood.
STEP 1
Pull the hood release lever.
The hood will pop up slightly.
STEP 2
Lift the hood catch and lift the
hood.
CAUTION
n Pre-driving check
Check that the hood is fully closed and locked. If the hood is not locked properly it may open while the vehicle is in motion and cause an accident, which may result in death or serious injury.
258
Page 66

4-3. Do-it-yourself maintenance
Positioning the jack
When raising your vehicle with the jack, position the jack correctly. Improper placement may damage your vehicle or cause injury.
n Fron t
2WD
AWD
4
n Rear
Maintenance and care
259
Page 67

4-3. Do-it-yourself maintenance
CAUTION
n When raising your vehicle:
Make sure to observe the following to reduce the possibility of death or serious injury.
l Do not put any part of your body or get underneath the vehicle supported only by
the jack.
Always use automotive jack stands or a solid, level, surface.
l Do not start the engine while the vehicle is supported by the jack. l Stop the vehicle on level firm ground, firmly set the parking brake and put the shift
lever in P (automatic) or R (manual).
l Make sure to set the jack properly at the jack point.
Raising the vehicle with an improperly positioned jack will damage the vehicle
and may cause the vehicle to fall off the jack.
l Do not raise the vehicle while someone is in the vehicle. l When raising the vehicle, do not place any objects on top of or underneath the
jack.
260
Page 68
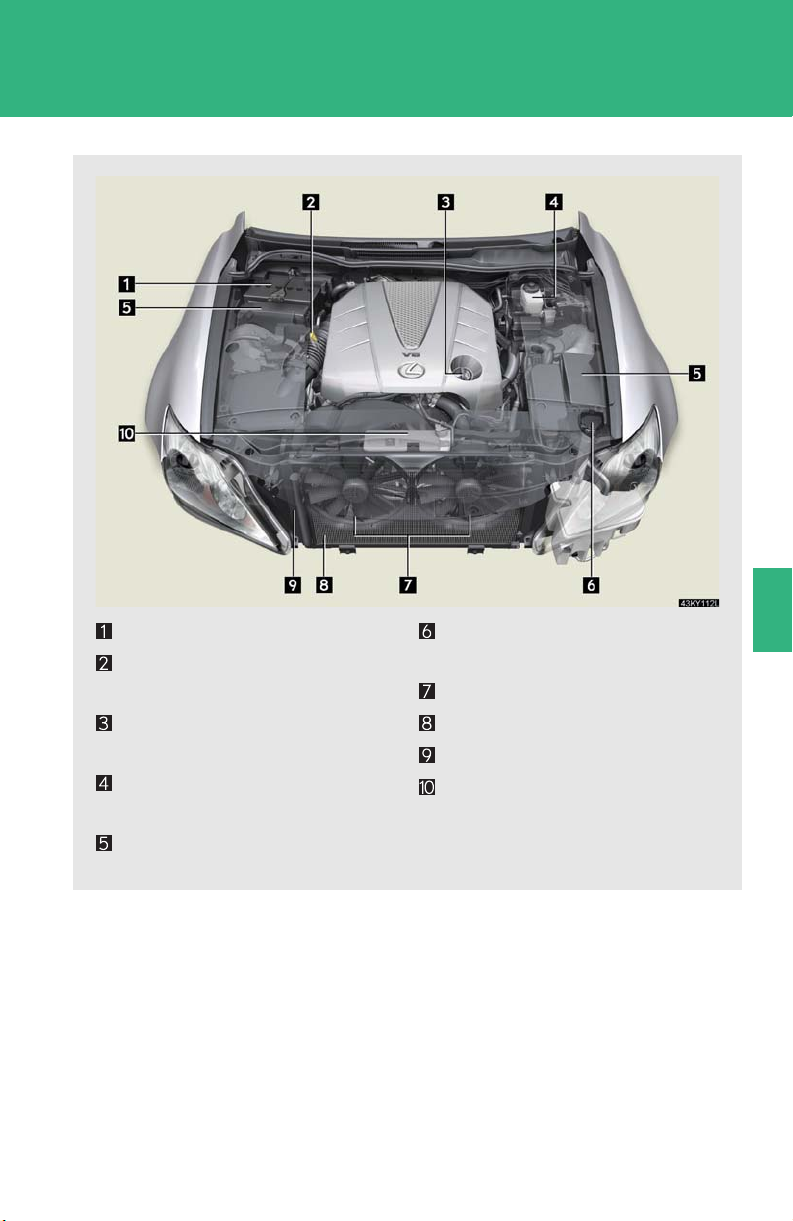
4-3. Do-it-yourself maintenance
Engine compartment
IS350
Battery (→P. 271)
Engine oil level dipstick
(→P. 2 6 4)
Engine oil filler cap
(→P. 2 6 4)
Brake fluid reservoir
(→P. 270)
Fuse boxes (→P. 295)
Washer fluid tank
(→P. 274 )
Electric cooling fans
Condenser (→P. 2 70 )
Radiator (→P. 270)
Engine coolant reservoir
(→P. 2 68)
4
Maintenance and care
261
Page 69

4-3. Do-it-yourself maintenance
IS250
Battery (→P. 271)
Engine oil level dipstick
Engine oil filler cap
Brake fluid reservoir
Fuse boxes (→P. 295)
262
(→P. 2 6 4)
(→P. 2 6 4)
(→P. 2 70 )
Washer fluid tank
(→P. 274 )
Electric cooling fans
Condenser (→P. 2 70 )
Radiator (→P. 270)
Engine coolant reservoir
(→P. 2 68)
Page 70

Engine compartment cover
n Removing the engine compartment cover
Front
Right-hand side
4-3. Do-it-yourself maintenance
4
Left-hand side
Maintenance and care
263
Page 71

4-3. Do-it-yourself maintenance
n Installing the clips
Open
Insert
Press
Engine oil
With the engine at operating temperature and turned off, check the oil level on the dipstick.
n Checking the engine oil
STEP 1
Park the vehicle on level ground. After turning off the engine, wait a few minutes for the oil to drain back into the bottom of the engine.
264
STEP 2
STEP 3
STEP 4
STEP 5
Hold a rag under the end and pull
the dipstick out.
Wipe the dipstick clean.
Reinsert the dipstick fully.
Holding a rag under the end, pull the dipstick out and check the
oil level.
Page 72

4-3. Do-it-yourself maintenance
STEP 6
Wipe the dipstick and reinsert it fully.
Low
Full
n Adding engine oil
If the oil level is below or near the
low level mark, add engine oil of
the same type as already in the
engine.
Make sure to check the oil type and prepare the items needed before adding oil.
4
Maintenance and care
Oil grade ILSAC multi-grade engine oil
Oil capacity
(when adding)
Items Clean funnel
STEP 1
STEP 2
STEP 3
Remove the oil filler cap.
Add engine oil slowly, checking the dipstick.
Install the filler cap, turning it clockwise.
1.6 qt. (1.5 L, 1.3 Imp. qt.)
265
Page 73
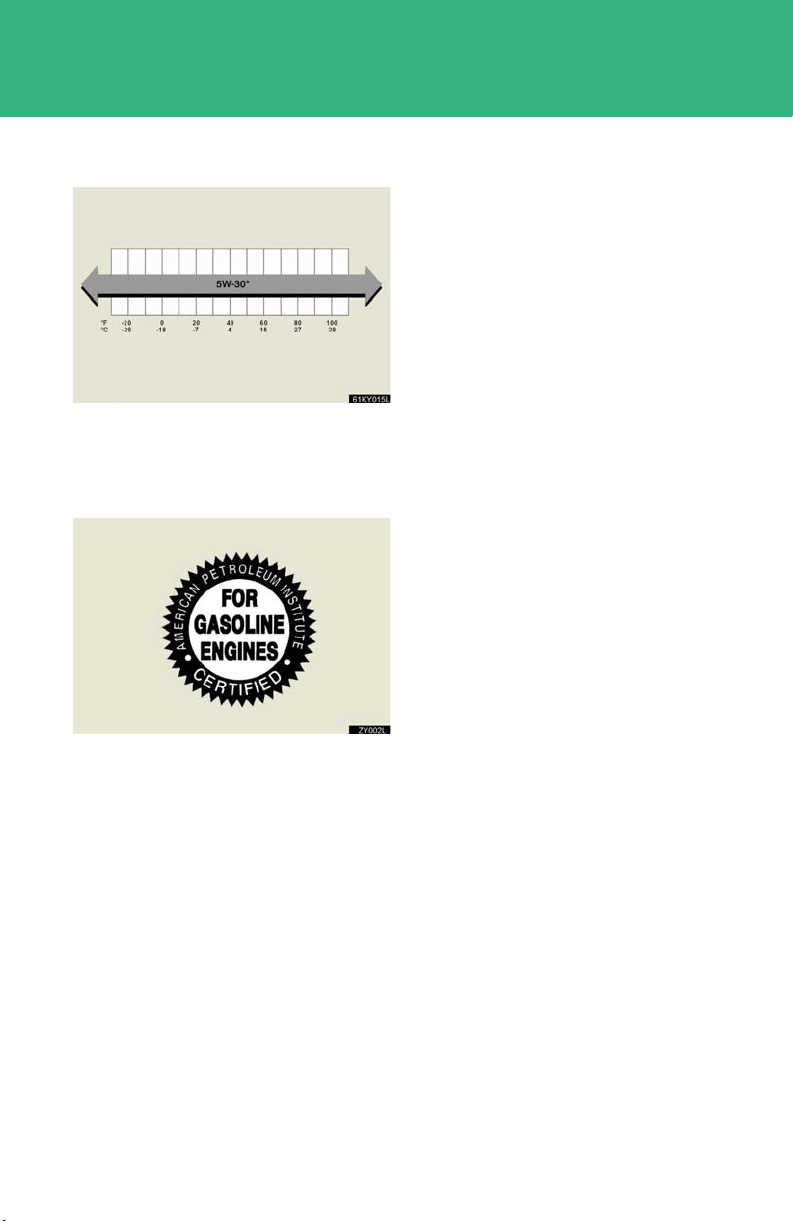
4-3. Do-it-yourself maintenance
n Recommended viscosity
SAE 5W-30 is the best choice for
good fuel economy and good
starting in cold weather.
If SAE 5W-30 is not available, SAE
10W-30 may be used. However, it
should be replaced with SAE 5W-
Temperature range anticipated before
next oil change.
30 at the next oil change.
n How to read oil container labels
Some oil containers are labeled with ILSAC certification marks that help you to select the proper oil.
266
Page 74

4-3. Do-it-yourself maintenance
n Engine oil consumption
l The amount of engine oil consumed depends on the oil viscosity, the quality of
the oil and the way the vehicle is driven.
l More oil is consumed under driving conditions such as high speeds and fre-
quent acceleration and deceleration.
l A new engine consumes more oil.
l When judging the amount of oil consumption, keep in mind that the oil may
have become diluted, making it difficult to judge the true level accurately.
l Oil consumption: Max. 1.1 qt./600 miles, 0.9 lmp.qt./600 miles (1.0 L per 1000
km)
l If you consume more than 1.1 qt. (1.0 L, 0.9 lmp.qt.) every 600 miles (1000 km),
contact your Lexus dealer.
n Changing the engine oil (U.S.A. only)
To reset the oil change system, follow the procedure below:
1. Turn the engine switch OFF.
2. While pressing the trip meter reset knob (→P. 100), set the engine switch to the
IG-ON mode. Continue to press and hold the knob until the trip meter displays
000000.
4
Maintenance and care
CAUTION
n Used engine oil
l Used engine oil contains potentially harmful contaminants which may cause skin
disorders such as inflammation or skin cancer, so care should be taken to avoid
prolonged and repeated contact. To remove used engine oil from your skin, wash
thoroughly with soap and water.
l Dispose of used oil and filters only in a safe and acceptable manner. Do not dis-
pose of used oil and filters in household trash, in sewers or onto the ground.
Call your Lexus dealer, service station or auto parts store for information concerning recycling or disposal.
l Do not leave used engine oil within the reach of children.
267
Page 75
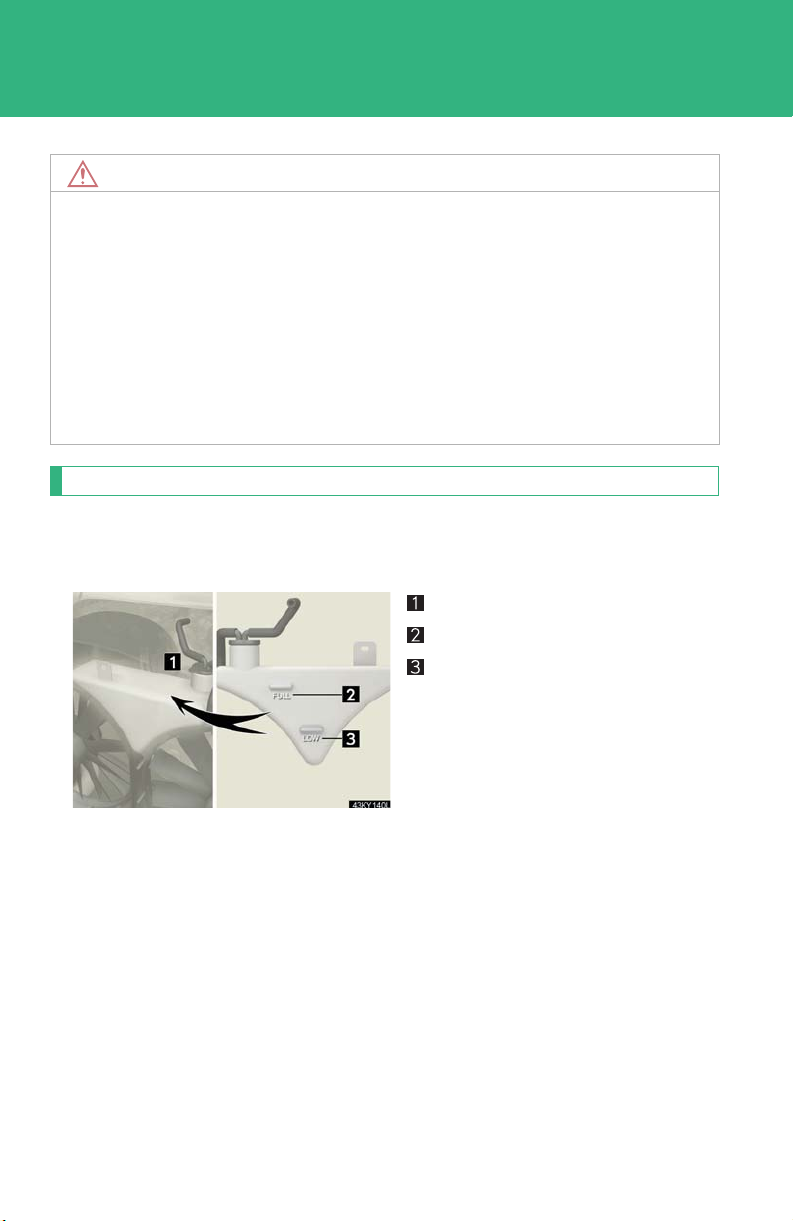
4-3. Do-it-yourself maintenance
NOTICE
n To prevent serious engine damage:
Check the oil level on regular basis.
n When replacing the engine oil
l Be careful not to spill engine oil on the vehicle components. l Avoid overfilling, or the engine could be damaged.
l Check the oil level on the dipstick every time you refill the vehicle.
l Be sure the engine oil filler cap is properly retightened.
Engine coolant
The coolant level is satisfactory if it is between the FULL and LOW lines on the reservoir when the engine is cold.
Reservoir cap
Full
Low
268
If the level is on or below the LOW
line, add coolant up to the FULL
line.
Page 76

4-3. Do-it-yourself maintenance
n If the coolant level drops within a short time after replenishing
Visually check the radiator, hoses, engine coolant filler cap, radiator cap, drain cock and water pump. If you cannot find a leak, have your Lexus dealer pressure test the cap and check for leaks in the cooling system.
n Coolant selection
Only use Toyota Super Long Life Coolant or similar high quality ethylene glycol based non-silicate, non-amine, non-nitrite, and non-borate coolant with long-life hybrid organic acid technology.
U.S.A.: Toyota Super Long Life Coolant is a mixture of 50% coolant and 50%
deionized water. (Enabled: -31°F [-35°C])
Canada: Toyota Super Long Life Coolant is a mixture of 55% coolant and 45%
deionized water. (Enabled: -44°F [-42°C])
For more details about engine coolant, contact your Lexus dealer.
CAUTION
n When the engine is hot
Do not remove the radiator cap. The cooling system may be under pressure and may spray hot coolant if the cap is removed, causing burns or other injuries.
NOTICE
n When adding engine coolant
Coolant is neither plain water not straight antifreeze. The correct mixture of water and anti freeze must be used to provide proper lubrication, corrosion protection and cooling. Be sure to read the antifreeze or coolant label.
n If you spill coolant
Be sure to wash it off with water to prevent it damaging parts or paint.
4
Maintenance and care
269
Page 77

4-3. Do-it-yourself maintenance
Radiator and condenser
Check the radiator and condenser and clear any foreign objects. If either of the above parts are extremely dirty or you are not sure of their condition, have your vehicle checked by your Lexus dealer.
CAUTION
n When the engine is hot
Do not touch the radiator or condenser, as they may be hot and you may be burned.
Brake fluid
n Checking fluid level
The brake fluid level should be
between the MAX and MIN lines
on the tank.
Make sure to check the fluid type and prepare the necessary items.
n Adding fluid
Fluid type FMVSS No.116 DOT 3 or SAE J1703 brake fluid
Items Clean funnel
n Brake fluid can absorb moisture from the air
Excess moisture in the fluid can cause a dangerous loss of braking efficiency. Use only newly opened brake fluid.
270
Page 78
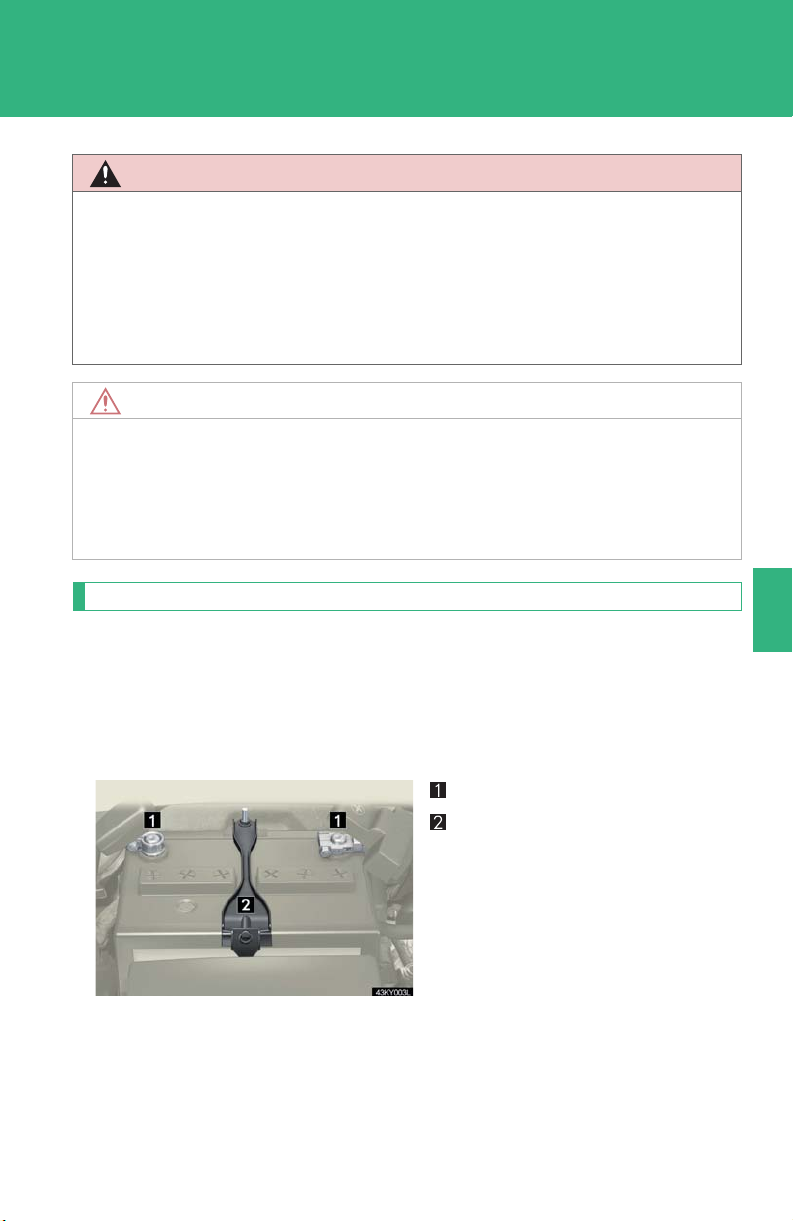
4-3. Do-it-yourself maintenance
CAUTION
n When filling the reservoir
Take care because brake fluid can harm your hands or eyes and damage painted surfaces. If fluid gets in your eyes, flush your eyes with clean water immediately.
If you still experience discomfort, see a doctor.
NOTICE
n If the fluid level is low or high
It is normal for the brake fluid level to go down slightly as the brake pads wear or when the fluid level in the accumulator is high. If the reservoir needs frequent refilling, it may indicate a serious problem.
Battery
Check the battery as follows.
n Battery exterior
Make sure that the battery terminals are not corroded and that there are no loose connections, cracks, or loose clamps.
Terminals
Hold-down clamp
4
Maintenance and care
271
Page 79

4-3. Do-it-yourself maintenance
n Checking battery condition
Check the battery condition using the indicator color.
Blue: Good condition
White: Charging is necessary.
Have the vehicle inspected by
your Lexus dealer.
Red: Not working properly,
have the battery checked by
your Lexus dealer.
n Before recharging
When recharging, the battery produces hydrogen gas which is flammable and explosive. Therefore, before recharging:
l If recharging with the battery installed on the vehicle, be sure to disconnect the
ground cable.
l Make sure the power switch on the charger is off when connecting and discon-
necting the charger cables to the battery.
n After recharging the battery
The engine may not start. Follow the procedure below to initialize the system.
1. Shift the shift lever to P (automatic) or depress the brake pedal with the shift lever in N (manual).
2. Open and close any of the doors.
3. Restart the engine.
272
Page 80

4-3. Do-it-yourself maintenance
CAUTION
n Chemicals in the battery:
A battery contains poisonous and corrosive sulfuric acid and may produce hydrogen gas which is flammable and explosive. To reduce the risk of death or serious
injury, take the following precautions while working on or near battery:
l Do not cause sparks by touching the battery terminals with tools.
l Do not smoke or light a match near the battery. l Avoid contact with eyes, skin and clothes.
l Never inhale or swallow electrolyte.
l Wear protective safety glasses when working near the battery. l Keep children away from the battery.
n Where to safety charge the battery
Always charge the battery in an open area. Do not charge the battery in a garage or closed room where there is not sufficient ventilation.
n How to recharge the battery
Only perform a slow charge (5 A or less). The battery may explode if charged at a quicker rate.
n Emergency measures regarding electrolyte
l If electrolyte gets in your eyes
Flush your eyes with clean water for at least 15 minutes and get immediate medical attention. If possible, continue to apply water with a sponge or cloth while
traveling to the nearest medical facility.
l If electrolyte gets on your skin
Wash the affected area thoroughly. If you feel pain or burning, get medical attention immediately.
l If electrolyte gets on your clothes
It can seak through clothing on to your skin. Immediately take off the clothing and
follow the procedure above if necessary.
l If you accidentally swallow electrolyte
Drink a large quantity of water or milk. Follow with milk of magnesia, beaten raw
egg or vegetable oil. Get emergency medical attention immediately.
4
Maintenance and care
273
Page 81
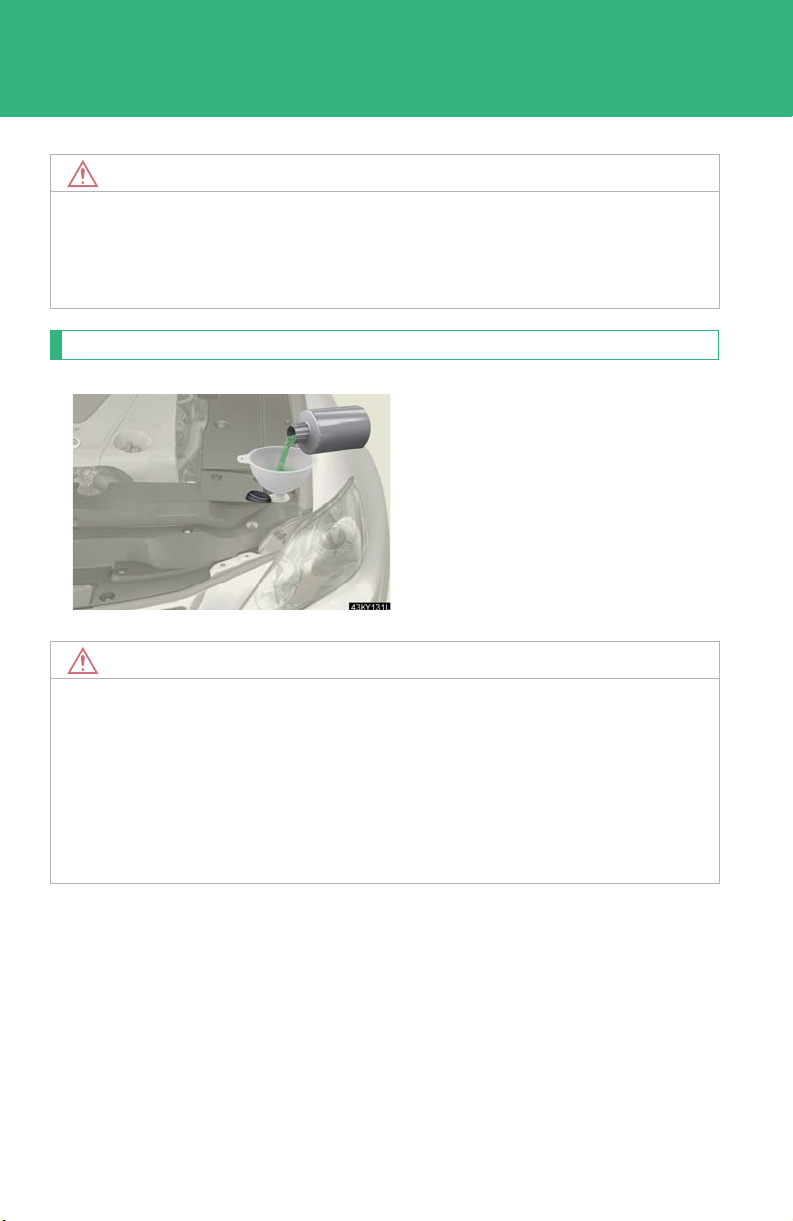
4-3. Do-it-yourself maintenance
NOTICE
n When recharging the battery
Never recharge the battery while the engine is running. Also, be sure all accessories are turned off.
Washer fluid
If any washer does not work or the
warning message appears on the
multi-information display, the
washer tank may be empty. Add
washer fluid.
NOTICE
n Do not use any fluid other than washer fluid
Do not use soapy water or engine antifreeze instead of washer fluid. Doing so may cause streaking on the vehicle’s painted surfaces.
n Diluting washer fluid
Dilute washer fluid with water as necessary. Refer to the freezing temperatures listed on the washer fluid tank.
274
Page 82

4-3. Do-it-yourself maintenance
Tires
Replace or rotate tires in accordance with maintenance schedules and tread wear.
n Checking tires
New tread
Tread wear indicator
Worn tread
The location of tread wear indicators is shown by the TWI or ∆
marks, etc., molded on the sidewall of each tire.
Check spare tire condition and
pressure if not rotated.
n Tire rotation
2WD models with 16-inch tires and AWD models
Rotate the tires in the order
shown.
Lexus recommends tire rotation
in accordance with the mainte-
Front
nance schedule to equalize tire
wear and extend tire life.
4
Maintenance and care
Do not fail to initialize the tire
inflation warning system after
tire rotation.
2WD models with 17-inch tires or 18-inch tires Tires cannot be rotated.
275
Page 83

4-3. Do-it-yourself maintenance
n The tire pressure warning system
Your Lexus is equipped with a tire pressure warning system that uses
tire pressure sensors to detect low tire pressure before serious
problems arise. (→P. 331, 335)
Before removing the tire from the wheel, remove the system’s tire
inflation pressure sensor. Be careful not to damage the sensor when
removing and installing the tires.
Turning directional tires
Tire direction marks
The tires listed below are directional. The tire sidewalls are
marked with arrows indicating the
rolling direction of the tire. If
mounted on the wrong side of the
vehicle, directional tires will perform poorly.
Tire s iz e
Front Rear
225/45R17 90W 245/45R17 95W
225/40R18 88Y 255/40R18 95Y
Installing tire inflation pressure sensors
When replacing tires or wheels, new tire pressure sensors must also be installed. Tire pressure sensors can be installed in any of the following three ways:
l Sensors can be removed from the old wheels and installed on the new
wheels.
276
Page 84

4-3. Do-it-yourself maintenance
l When replacing only the tire, the sensor already installed on the wheel
does not need to be replaced.
l Replacing both a wheel and its sensor.
When new tire pressure sensors are installed, new sensor ID codes must be
registered in the ECU and tire inflation pressure sensor must be initialized.
(→P. 277, 278)
Initializing the tire pressure warning system
n The tire pressure warning system must be initialized in the following
circumstances:
l When the standard tire pressure changes by replacing tires or
wheels
l When tires are rotated.
l When tire pressure sensors are replaced.
l When driving with the tires inflated to a higher than standard tire
pressure.
When the tire pressure warning system is initialized, the current tire pressure is set as the pressure benchmark.
4
Maintenance and care
n How to initialize the tire pressure warning system
To initialize the system, use the satellite switch. (→P. 214)
STEP 1
STEP 2
STEP 3
Park the vehicle in safe place and turn off the engine.
Adjust the tire pressure to the specified pressure (→P. 378 )
Turn the engine switch to IG-ON mode.
Make sure to adjust the tire pressure to the specified level. The tire inflation pressure warning system will operate based on this pressure level.
277
Page 85

4-3. Do-it-yourself maintenance
STEP 4
The tire pressure initialization
setting display
Continue to press the < or >
switch until the initialization setting
display appears.
It may take several minutes to complete the setting. Wait for several
minutes before turning the engine
switch OFF if necessary.
Recording tire pressure settings
Press the ON/OFF button for
more than 3 seconds. At this time,
the tire inflation pressure warning
indicator flashes 3 times and the
message showing that the initial
setting is complete is displayed on
the multi-information display.
Registering and selecting tire inflation pressure sensor ID codes
The tire inflation pressure sensor is equipped with a unique ID code.
To select tire inflation pressure sensor ID codes, use the satellite switch.
(→P. 214)
n Registering ID codes
Two separate sets of ID codes can be registered for each vehicle. This allows 2 separate sets of settings to be conveniently recorded for all season and winter tires.
MAIN: The MAIN ID code is used for the factory installed tire pres-
sure sensors.
2nd: The 2nd ID code is used for tire inflation pressure sensors associ-
ated with a secondary set of tires.
Make sure to have all tire inflation pressure warning system ID codes registered by your Lexus dealer. ID codes must be reset when tires or wheels are
replaced.
278
Page 86
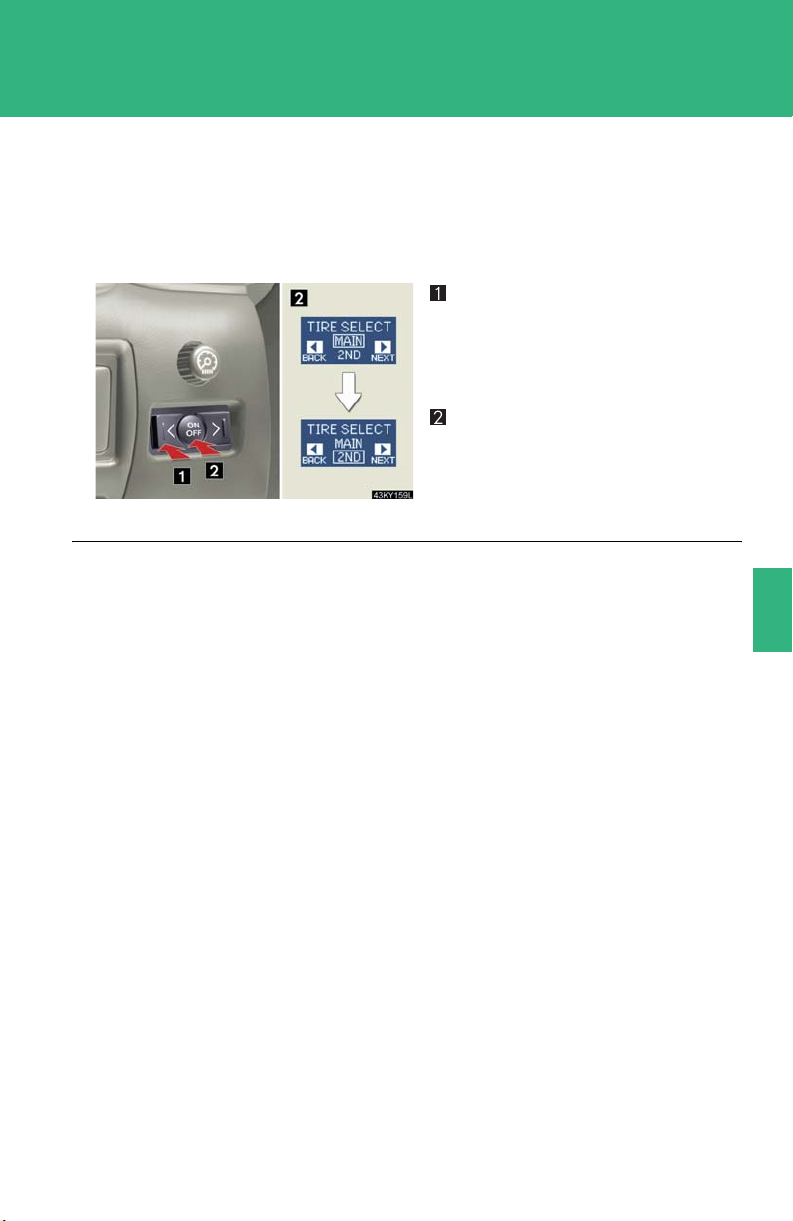
4-3. Do-it-yourself maintenance
n Selecting ID codes
When replacing tires, make sure to select the ID code set that matches the new tire set. If the incorrect ID code is selected, the tire pressure warning system will not operate properly.
Tire pressure ID code settings
display
Press < or > repeatedly until the
setting display appears.
Switching ID codes
Press the ON/OFF button to
switch between MAIN and 2nd ID
codes.
n When to replace your vehicle’s tires
Tires should be replaced if:
l You have tire damage such as cuts, splits, cracks deep enough to expose the
fabric or bulges indicating internal damage
l A tire goes flat repeatedly or cannot be properly repaired due to the size or
location of a cut or other damage
If you are not sure, consult with your Lexus dealer.
n Tire life
Any tire over 6 years old must be checked by a qualified technician even if they have seldom or never been used or damage is not obvious.
n If the tread wears down below 0.16 in. (4 mm) on snow tires
The effectiveness of snow tires is lost.
n Low profile tires (vehicles not equipped with 205/55R16 tires)
Generally, low profile tires will wear more rapidly and tire grip performance will be
reduced on snowy and/or icy roads when compared to standard tires. Be sure to
use snow tires or tire chains
speed appropriate for road and weather conditions.
* on snowy and/or icy roads and drive carefully at a
*: Tire chains cannot be mounted on 18-inch tires.
4
Maintenance and care
279
Page 87

4-3. Do-it-yourself maintenance
n Maximum load of tire
Check that the maximum load of the replaced tire is greater than 1/2 of the Gross
Axle Weight Ratings (GAWR) of either the front axle of the rear axle, whichever is
greater.
As for the maximum load of the tire, see the load limit at maximum cold tire inflation
pressure mentioned on the sidewall of the tire, and as for the Gross Axle Weight
Ratings (GAWR), see the Certification Label. (
n Tire t ypes
→P. 285, 387).
1 Summer tires
Summer tires are high-speed performance tires best suited to highway driving
under dry conditions. Since summer tires do not have the same traction performance as snow tires, summer tires are inadequate for driving on snow-covered
or icy roads. For driving on snow-covered roads or icy roads, the use of snow tires
is recommended. When installing snow tires, be sure to replace all four tires.
2 All season tires
All season tires are designed to provide better traction in snow and to be adequate for driving in most winter conditions, as well as for use year round. All season tires, however, do not have adequate traction performance compared with
snow tires in heavy or loose snow. Also, all season tires fall short in acceleration
and handling performance compared with summer tires in highway driving.
3Snow tires
For driving on snow-covered roads or icy roads, we recommend using snow tires.
If you need snow tires, select tires of the same size, construction and load capacity as the originally installed tires. Since your vehicle has radial tires as original
equipment, make sure your snow tires also have radial construction. Do not install
studded tires without first checking local regulations for possible restriction.
Snow tires should be installed on all wheels. (→P. 1 51 )
n Initializing the tire inflation pressure warning system
Initialize the tires with the tire inflation pressure adjusted to the specified level.
280
Page 88

4-3. Do-it-yourself maintenance
n When the initialization of the tire inflation pressure warning system has failed
Initialization can be completed in a few minutes. However, in the following cases,
the settings have not been recorded and the system will not operate properly. If
repeated attempts to record tire inflation pressure settings are unsuccessful, have
the vehicle inspected by your Lexus dealer.
l When operating the satellite switch, the warning light does not flash and the set-
ting message does not appear on the multi-information display. (The tires cannot be initialized while the vehicle is running.)
l After driving for approximately 20 minutes since the initialization has been
completed, the warning light flashes.
n Routine tire inflation pressure checks
The tire inflation pressure warning system does not replace routine tire inflation pressure checks. Make sure to check tire inflation pressure as part of your routine of daily vehicle checks.
4
281
Maintenance and care
Page 89

4-3. Do-it-yourself maintenance
n Tire inflation pressure warning system certification
For vehicles sold in the U.S.A.
NOTE:
This device complies with Part 15 of the FCC Rules. Operation is subject to the following two conditions: (1) This device may not cause harmful interference, and (2)
this device must accept any interference received, including interference that may
cause undesired operation.
NOTICE:
This equipment has been tested and found to comply with the limits for a Class B
digital device, pursuant to Part 15 of the FCC Rules. These limits are designed to
provide reasonable protection against harmful interference in a residential installation. This equipment generates, uses and can radiate radio frequency energy and, if
not installed and used in accordance with the instructions, may cause harmful interference to radio communications. However, there is no guarantee that interference
will not occur in a particular installation. If this equipment does cause harmful interference to radio or television reception, which can be determined by turning the
equipment off and on, the user is encouraged to try to correct the interference by
one or more of the following measures:
l Reorient or relocate the receiving antenna.
l Increase the separation between the equipment and receiver. l Connect the equipment into an outlet on a circuit different from that to which
the receiver is connected.
l Consult the dealer or an experienced radio/TV technician for help.
FCC WARNING: Changes or modifications not expressly approved by the party responsible for compliance could void the user's authority to operate the equipment.
For vehicles sold in Canada
NOTE:
Operation is subject to the following two conditions: (1) this device may not cause
interference, and (2) this device must accept any interference, including interference that may cause undesired operation of the device.
282
Page 90
4-3. Do-it-yourself maintenance
CAUTION
n When inspecting or replacing tires
Observe the following precautions to prevent accidents. Failure to do so may cause damage to parts of the drive train, as well as dangerous handling characteristics, which may lead to fatal or injury accidents.
l Do not mix tires of different makes, models, tread patterns or tread wear.
l Do not use tire sizes other than those recommended by Lexus. l Do not mix radial, bias-belted, or bias-ply tires.
l Do not mix summer, all season and winter tires.
NOTICE
n Repairing or replacing tires, wheels and sensors
l When removing the tires from the wheels, be careful not to damage the system’s
tire inflation warning sensors. Contact your Lexus dealer for details regarding the
removal and installation procedures.
l When replacing tires, make sure also to replace the tire inflation pressure sensor
grommets.
n Do not use puncture sealant sprays to repair flats
Puncture sealant sprays may damage tire inflation pressure sensors.
4
Maintenance and care
283
Page 91

4-3. Do-it-yourself maintenance
NOTICE
n Driving on rough roads
Take particular care when driving on roads with loose surfaces or potholes.
These conditions may cause losses in tire air pressure, reducing the cushioning ability of the tires. In addition driving on rough roads may cause damage to the tires
themselves, as well as the vehicle’s wheels and body.
n Low profile tires and wheels
Wheels with profile tires like 17- and 18-inch tires may cause greater damage than usual to the tire wheel when receiving impact from the road surface. Therefore pay attention to the following:
l Be sure to use proper tire inflation pressure. If tires are under-inflated, they may
be damaged more severely.
l Avoid hot holes, uneven pavement, curbs and other road hazards.
Failure to do so can lead to severe tire and wheel damage.
n If tire inflation pressures become low while driving
Do not continue driving, or your tires and/or wheels may be ruined.
284
Page 92
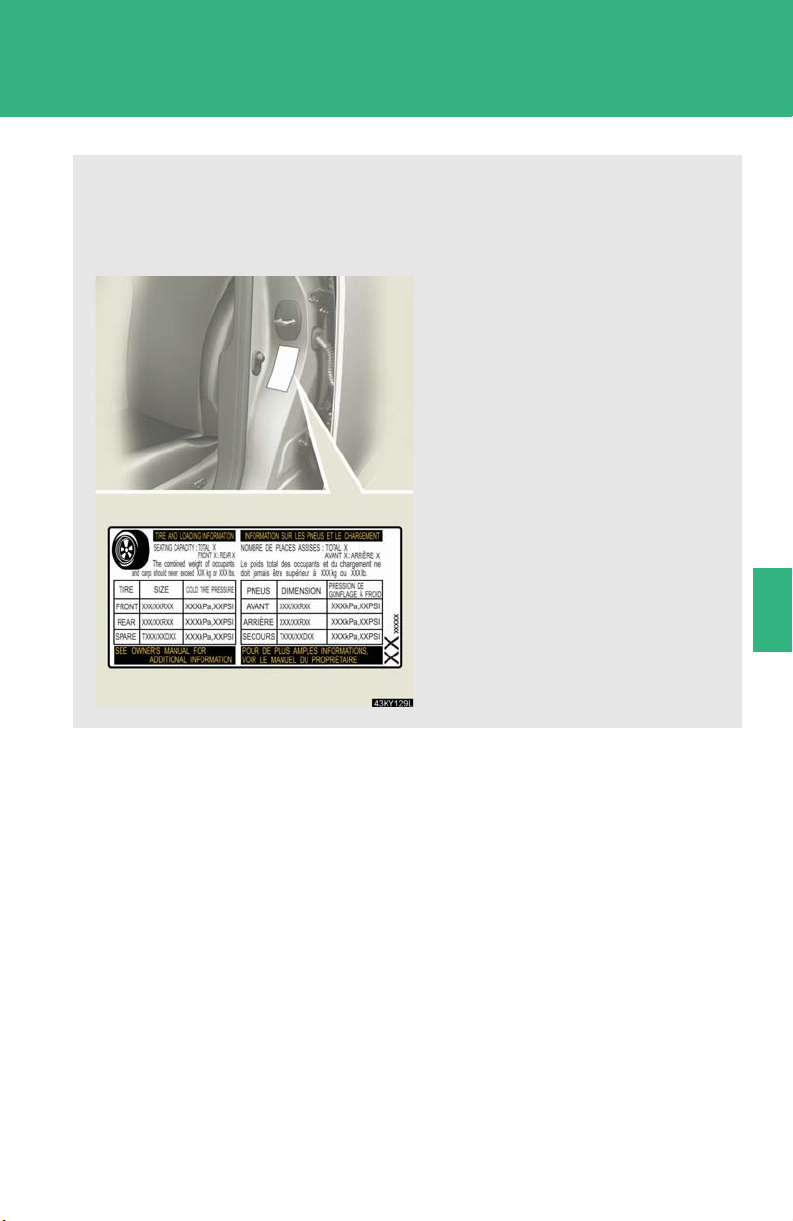
4-3. Do-it-yourself maintenance
Tire inflation pressure
n Tire inflation pressure
The recommended cold tire inflation pressure and tire size is displayed on the tire and loading information label. (→P. 378)
4
285
Maintenance and care
Page 93

4-3. Do-it-yourself maintenance
n Inspection and adjustment procedure
Tire va lve
Tire pressure gauge
STEP 1
STEP 2
STEP 3
STEP 4
Remove the tire valve cap.
Press the tip of the tire pressure gauge onto the tire valve.
Read the pressure using the graduations of the gauge.
If the tire inflation pressure is not within the recommended lev-
els, adjust inflate the tire.
If you add too much air, press the center of the valve to lower.
STEP 5
After completing the tire inflation pressure measurement and
adjustment, apply soapy water to the valve and check for leakage.
STEP 6
.
n Tire inflation pressure check interval
You should check tire pressure every two weeks, or at least once a month. Do not forget to check the spare.
Reinstall the tire valve cap.
286
Page 94

4-3. Do-it-yourself maintenance
n Effects of incorrect tire inflation pressure
Driving with incorrect tire pressure may result in the following:
l Reduced fuel efficiency
l Reduced driving comfort and tire life
l Reduced safety l Damage to the drive train
If a tire needs frequent refilling, have it checked by your Lexus dealer.
n Instructions for checking tire pressure
When checking tire inflation pressure, observe the following:
l Check only when the tires are cold.
If your vehicle has been parked for at least 3 hours and has not been driven for
more than 1 mile or 1.5 km, you will get an accurate cold tire inflation pressure
reading.
l Always use a tire pressure gauge.
The appearance of the tire can be misleading. In addition, tire inflation pressures
that are even just a few pounds off can degrade ride and handling.
l Do not bleed or reduce tire inflation pressure after driving. It is normal for the
tire inflation pressure to be higher after driving.
l Never exceed the vehicle capacity weight.
Passengers and luggage weight should be placed so that the vehicle is balanced.
4
Maintenance and care
287
Page 95
4-3. Do-it-yourself maintenance
CAUTION
n Proper inflation is critical to save tire performance
Keep your tires properly inflated. Otherwise, the following conditions may occur and result in an accident causing death or serious injury.
l Excessive wear
l Uneven wear l Poor handling
l Possibility of blowouts resulting from overheated tires
l Poor sealing of the tire bead l Wheel deformation and/or tire separation
l A greater possibility of tire damage from road hazards
NOTICE
n When inspecting and adjusting tire pressure
Be sure to reinstall the tire valve caps.
Without the valve caps, dirt or moisture could get into the valve and cause air leakage, which could result in an accident. If the caps have been lost, replace them as
soon as possible.
288
Page 96

4-3. Do-it-yourself maintenance
Wheels
If a wheel is bent, cracked or heavily corroded, it should be replaced. Otherwise, the tire may separate from the wheel or cause loss of handling control.
n Wheel selection
When replacing wheels, care should be taken to ensure that they are equivalent to those removed in load capacity, diameter, rim width, and offset. Replacement wheels are available at your Lexus dealer.
Lexus does not recommend using:
• Wheels of different sizes or types
• Used wheels
• Bent wheels that have been straightened
n Aluminum wheel precautions
l Use only Lexus wheel nuts and wrenches designed for use with
your aluminum wheels.
4
l When rotating, repairing or changing your tires, check that the
wheel nuts are still tight after driving 1000 miles (1600 km).
l Be careful not to damage the aluminum wheels when using tire
chains.
l Use only Lexus genuine balance weights or equivalent and a
plastic or rubber hammer when balancing your wheels.
n When replacing wheels
The wheels of your Lexus are equipped with sensors that allow the tire pressure
warning system sensors to provide advanced warning in the event of a loss in tire
pressure. Whenever wheels are replaced, the tire inflation pressure sensors must
be switched over from the old wheels. (→P. 277)
Maintenance and care
289
Page 97

4-3. Do-it-yourself maintenance
CAUTION
n When replacing wheels
l Do not use wheels that are a different size from those recommended in the
Owner’s Manual, as this may result in loss of handling control.
l Never use an inner tube in a leaking wheel which is designed for a tubeless tire.
Doing so may result in an accident, causing serious injury or death.
NOTICE
n Replacing tire inflation pressure sensors
l Because tire repair or replacement may affect the tire pressure sensors, make
sure to have tires serviced by your Lexus dealer or other qualified service shop. In
addition, make sure to purchase your tire pressure sensors at your Lexus dealer.
l Ensure that only Genuine Lexus wheels are used on your vehicle.
Tire pressure sensors may not work properly with non-genuine wheels.
290
Page 98

4-3. Do-it-yourself maintenance
Air conditioning filter
The air conditioning filter must be changed regularly to maintain air conditioning efficiency.
STEP 1
STEP 2
STEP 3
STEP 4
Set the air conditioning system to recirculated mode.
The air conditioning filter case cannot be removed with the system in the outside air mode.
Turn the engine switch OFF.
Open the glove box. Lift and
remove the partition.
Remove the filter cover.
4
Maintenance and care
STEP 5
Remove the filter case.
291
Page 99
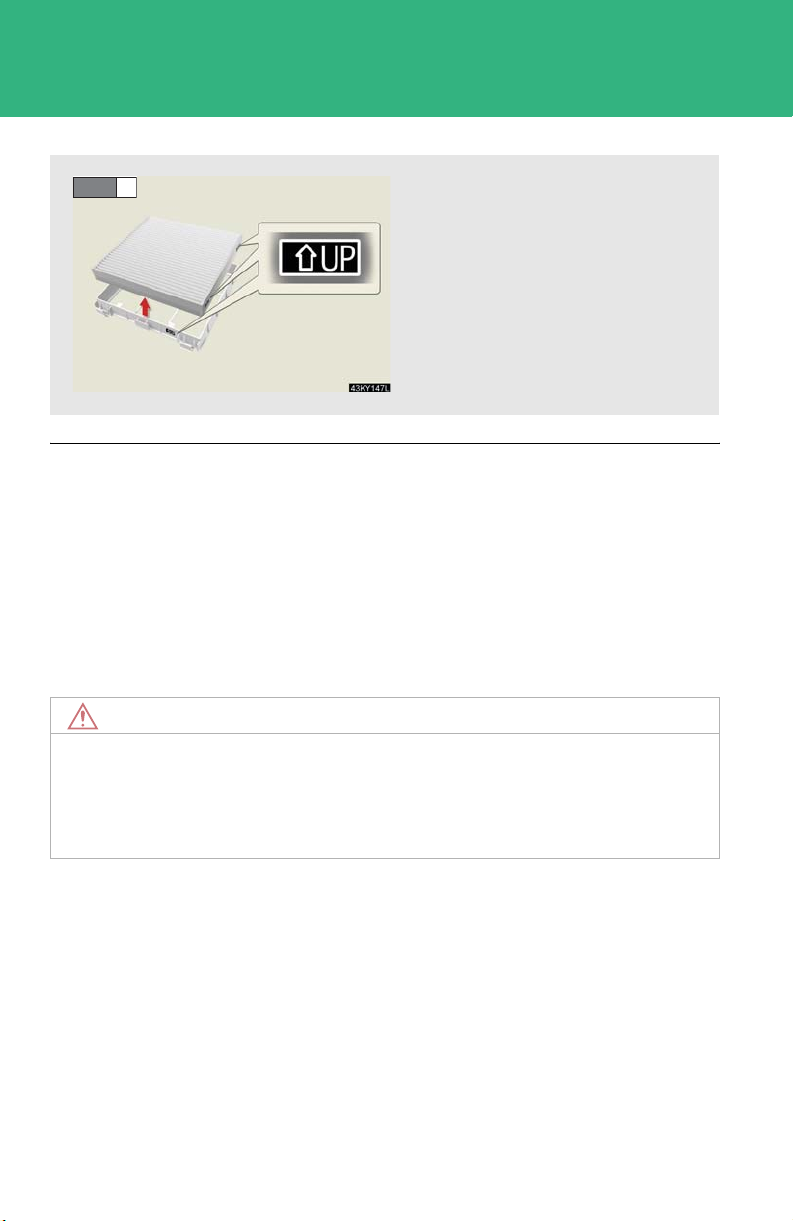
4-3. Do-it-yourself maintenance
STEP 6
Remove the air conditioning filter from the filter case and
replace it with a new one.
The ↑UP marks shown on the
filter and the filter case should
be pointing up.
n Changing interval
Inspect and replace the air conditioning filter according to the maintenance schedule. In dusty areas or areas with heavy traffic flow, early replacement may be
required. (For scheduled maintenance information, please refer to the "Owner's
Manual Supplement/Scheduled Maintenance".)
n If air flow from the vents decreases dramatically
The filter may be clogged. Check the filter and replace if necessary.
NOTICE
n When using the air conditioning system
Make sure that a filter is always installed.
Using the air conditioning system without a filter may cause damage to the system.
292
Page 100

4-3. Do-it-yourself maintenance
Electronic key battery
Replace the battery with a new one if it is discharged.
n You will need the following items:
l Flathead screwdriver
l Small Phillips-head screwdriver
l Lithium battery (CR1632)
n Replacing the battery
STEP 1
STEP 2
STEP 3
Take out the mechanical key.
Remove the cover.
Remove the depleted battery.
Insert a new battery with the +
terminal facing up.
4
Maintenance and care
293
 Loading...