

Page 1

CT MoveOn NAVI
Owner's manual
Page 2

Page 3

MoveOn Navi 1
Read this manual thoroughly before using the MoveOn Navi.
Always keep this owner’s manual in the vehicle.
OPERATING INSTRUCTIONS ..................................................................Page 3
Page 4

2 MoveOn Navi
Page 5

MoveOn Navi 3
Table of contents
Recommendation .............................................................................................................. 7
1. Precautions during use ........................................................................................ 9
2. Read me first ....................................................................................................... 11
2.1 Switching on ........................................................................................................11
2.2 Setting up ............................................................................................................ 11
2.3 Sharing information with TomTom .......................................................................11
2.4 Switching off........................................................................................................13
2.5 Hiding the map ....................................................................................................13
2.6 Resetting the system ............................................................................................ 13
2.7 Safety settings ......................................................................................................13
2.8 GPS reception ......................................................................................................14
2.9 Take care of your navigation device .....................................................................14
3. The Navigation Control ....................................................................................... 15
3.1 Using the Navigation Control ...............................................................................15
3.2 Special features of the Navigation Control ...........................................................17
4. The memory card ................................................................................................ 18
4.1 About your memory card ..................................................................................... 18
4.2 Inserting your memory card ................................................................................. 18
4.3 Removing your memory card ............................................................................... 18
4.4 About TomTom HOME .........................................................................................19
4.5 Installing TomTom HOME .................................................................................... 19
4.6 Initialising your memory card ............................................................................... 20
4.7 Updating your device ...........................................................................................20
4.8 Backing up your navigation device ....................................................................... 21
5. Guided tours ........................................................................................................ 22
5.1 About guided tours .............................................................................................. 22
6. Planning a route .................................................................................................. 23
6.1 Planning a route ..................................................................................................23
6.2 Route summary ....................................................................................................27
6.3 LIVE summary ...................................................................................................... 28
6.4 Frequent destinations ...........................................................................................29
6.5 Show my frequent destinations ............................................................................ 29
6.6 Using arrival times ................................................................................................30
6.7 Navigation menu options.....................................................................................31
6.8 Planning a route in advance ................................................................................. 32
6.9 Viewing route information ...................................................................................33
7. The Driving View ................................................................................................. 34
7.1 About the Driving View ........................................................................................ 34
7.2 The Driving View..................................................................................................34
Page 6

4 MoveOn Navi
7.3 Driving View Symbols ..........................................................................................35
8. Advanced Lane Guidance ..................................................................................... 36
8.1 About Lane Guidance...........................................................................................36
8.2 Using lane guidance .............................................................................................36
9. Changing your route ........................................................................................... 38
9.1 Making changes to your route .............................................................................38
9.2 Find alternative route menu ................................................................................. 38
9.3 Cancelling a route ................................................................................................39
10. Browse Map ......................................................................................................... 40
10.1 About the map browser ....................................................................................... 40
10.2 Browse map ......................................................................................................... 40
10.3 Cursor menu ........................................................................................................ 41
10.4 Options................................................................................................................42
11. Map Corrections .................................................................................................. 43
11.1 About Map Share ................................................................................................. 43
11.2 Correcting a map error ........................................................................................43
11.3 Types of map correction.......................................................................................44
11.4 Other types of correction ..................................................................................... 47
12. Sounds and voices ............................................................................................... 48
12.1 About sounds and voices .....................................................................................48
12.2 Selecting a voice .................................................................................................. 48
12.3 Changing the volume level ..................................................................................48
12.4 Switching off the sound ....................................................................................... 48
12.5 Switching off the voice .........................................................................................48
13. Preferences .......................................................................................................... 49
13.1 About Preferences ................................................................................................49
13.2 Use night colours / Use day colours ......................................................................49
13.3 Show POI on map ................................................................................................49
13.4 Safety preferences ................................................................................................ 50
13.5 Voice preferences ................................................................................................. 50
13.6 Turn off sound / Turn on sound ............................................................................50
13.7 Hide map ............................................................................................................. 51
13.8 Home location ..................................................................................................... 51
13.9 Switch map ..........................................................................................................51
13.10 Manage Favourites ............................................................................................... 51
13.11 Manage POIs .......................................................................................................52
13.12 Car symbol ..........................................................................................................52
13.13 2D map preferences .............................................................................................52
13.14 Change language.................................................................................................53
13.15 Change map colours ............................................................................................ 53
13.16 Brightness ............................................................................................................53
Page 7

MoveOn Navi 5
13.17 Status bar preferences .......................................................................................... 54
13.18 Automatic zooming ............................................................................................. 54
13.19 Street name preferences.......................................................................................54
13.20 Set units ...............................................................................................................54
13.21 Planning preferences ............................................................................................55
13.22 Show lane images ................................................................................................55
13.23 Start up ................................................................................................................56
13.24 Show compass .....................................................................................................56
13.25 Set clock .............................................................................................................. 56
13.26 Show tips ............................................................................................................. 56
13.27 Show fewer menu options ...................................................................................57
13.28 Reset factory settings ...........................................................................................57
14. Points of Interest ................................................................................................ 58
14.1 About Points of Interest ........................................................................................58
14.2 Creating POIs .......................................................................................................58
14.3 Using POIs to plan a route ...................................................................................60
14.4 Showing POIs on the map ...................................................................................60
14.5 Setting warnings for POIs ..................................................................................... 61
14.6 Manage POIs .......................................................................................................61
15. Itinerary planning ............................................................................................... 62
15.1 About Itineraries...................................................................................................62
15.2 Creating an Itinerary ............................................................................................ 62
15.3 Organising an Itinerary ........................................................................................63
15.4 Following an Itinerary ..........................................................................................64
15.5 Start using an Itinerary .........................................................................................64
16. Help ..................................................................................................................... 65
16.1 About getting help...............................................................................................65
16.2 Using Help to phone a local service ...................................................................... 65
16.3 Help menu options ..............................................................................................66
17. Favourites ............................................................................................................ 67
17.1 About Favourites ..................................................................................................67
17.2 Creating a Favourite .............................................................................................67
17.3 Using a Favourite .................................................................................................69
17.4 Changing the name of a Favourite ....................................................................... 69
17.5 Deleting a Favourite ............................................................................................. 69
18. Photo Gallery ...................................................................................................... 70
18.1 About using media ...............................................................................................70
18.2 Looking at photos ................................................................................................70
19. Services ................................................................................................................ 71
19.1 About LIVE Services .............................................................................................. 71
19.2 Safety Notice .......................................................................................................71
Page 8

6 MoveOn Navi
19.3 LIVE Services subscriptions ...................................................................................71
19.4 About TomTom HD Trafc ....................................................................................72
19.5 About Local Search ..............................................................................................72
19.6 Using local search ................................................................................................72
19.7 About Safety Alerts ...............................................................................................73
19.8 Other services ...................................................................................................... 73
20. Traffic .................................................................................................................. 74
20.1 About TomTom HD Trafc ....................................................................................74
20.2 Safety Notice .......................................................................................................74
20.3 Using trafc information ......................................................................................74
20.4 Taking the fastest route ........................................................................................75
20.5 Show trafc on route ........................................................................................... 75
20.6 Checking trafc incidents in your area ..................................................................76
20.7 Changing trafc preferences ................................................................................ 76
20.8 Trafc incidents .................................................................................................... 77
20.9 Trafc menu .........................................................................................................78
21. Safety Alerts ........................................................................................................ 79
21.1 About Safety Alerts ...............................................................................................79
21.2 Safety camera warnings .......................................................................................79
21.3 Changing the way you are warned ......................................................................80
21.4 Reporting a new safety camera while on the move ...............................................80
21.5 Reporting a new safety camera while at home .....................................................81
21.6 Reporting incorrect camera alerts .........................................................................81
21.7 Types of xed speed camera you can report .........................................................81
21.8 Average speed check camera warnings ................................................................83
21.9 Safety Cameras menu .......................................................................................... 84
22. Weather ............................................................................................................... 85
22.1 About Weather .....................................................................................................85
22.2 Requesting a weather report ................................................................................ 85
22.3 Types of location .................................................................................................. 86
23. Customer support ............................................................................................... 88
23.1 Getting help to use your navigation device .......................................................... 88
24. TomTom HOME .................................................................................................... 89
24.1 About TomTom HOME ......................................................................................... 89
24.2 Installing TomTom HOME .................................................................................... 89
24.3 MyTomTom account ............................................................................................90
24.4 Updating your device ........................................................................................... 90
24.5 Introducing HOME help ....................................................................................... 91
24.6 Backing up your navigation device ....................................................................... 91
25. Addendum and Copyright .................................................................................. 92
26. Copyright notices ................................................................................................ 94
Page 9

MoveOn Navi 7
Recommendation
Please read this manual to get the full benet of the system.
We suggest to keep this manual in the car. It will be easier for you to nd the information in
case of an emergency.
Your local authorised retailer will be pleased to clarify any queries you may have with the system
or its operation if you cannot nd the information you need in this manual.
Lexus recommends that only parts and accessories that have been tested and approved by
Lexus in terms of safety, function and suitability should be used.
These operating instructions are designed to ensure that you can operate the MoveOn Navi
system safely and easily.
These operating instructions describe the functions of the MoveOn Navi system.
Page 10

8 MoveOn Navi
Page 11

MoveOn Navi 9
1. Precautions during use
m
Caution
• Exercise extreme caution if operating the navigation system while driving.
Insufcient attention to the road, trafc or weather conditions may cause an
accident.
• While driving, be sure to obey the trafc regulations and maintain awareness
of the road conditions. If a trafc sign on the road has been changed, route
guidance may not have the updated information such as the direction of a one
way street.
To use this system in the safest possible manner, follow all the safety tips shown below.
This system is intended to assist in reaching the destination and, if used properly, can do so.
The driver is solely responsible for the safe operation of your vehicle and the safety of your
passengers.
Do not use any feature of this system to the extent that it becomes a distraction and
prevents safe driving. The rst priority while driving should always be the safe operation of
the vehicle. While driving, be sure to observe all trafc regulations.
Prior to the actual use of this system, learn how to use it and become thoroughly familiar
with it. Read the entire Navigation System Owner’s Manual to make sure you understand
the system. Do not allow other people to use this system until they have read and
understood the instructions in this manual.
For your safety, some functions may become inoperable when driving. Unavailable buttons
are dimmed.
While driving, listen to the voice instructions as much as possible and glance at the screen
briey and only when it is safe. However do not totally rely on voice guidance. Use it just for
reference. If the system cannot determine the current vehicle position correctly, there is the
possibility of incorrect, late or no voice guidance.
The data in the system may occasionally be incomplete. Road conditions, including
driving restrictions (no left turns, street closures, etc.) frequently change. Therefore, before
following any instruction from the system, look to see whether the instruction can be done
safely and legally.
This system cannot warn about such things as the safety of an area, condition of streets, and
availability of emergency services. If unsure about the safety of an area, do not drive into it.
Page 12

10 MoveOn Navi
Under no circumstances is this system a substitute for the driver’s personal
judgement.
Use this system only in locations where it is legal to do so. Some countries/provinces may
have laws prohibiting the use of video and navigation screens next to the driver.
Page 13

MoveOn Navi 11
2. Read me rst
2.1 Switching on
Your Lexus CT MoveOn Navi switches on automatically when you switch on your car ignition.
The Navigation Control is connected to your MoveOn using Bluetooth and must connect to the
device every time your car starts.
A few seconds after your car starts you see a message conrming that the Navigation Control and
device are now connected.
2.2 Setting up
Important:
Take care to select the correct language as the language you choose will be used for
all text on the screen.
When you rst switch on your device, you have to answer a few questions to set up the device.
Answer the questions by using the Navigation Control in the console to select your answers on the
screen.
2.3 Sharing information with TomTom
When you rst start navigating or perform a reset, your device asks for permission to collect some
information about your use of the navigation device. The information is stored on the device
until we retrieve it. We use it anonymously to improve our products and services. If you use LIVE
services, we will also use your location information to deliver the services to you.
You can change whether you share this information with us at any time by doing the following:
1. In the Main Menu, select ”LIVE Services”.
2. Select ”Congure”.
3. Select ”Yes” to start sharing or ”No” to stop sharing.
Note:
If you choose not to share this information, you will no longer receive LIVE services. This
is because LIVE services need to send the location of your device to TomTom in order to
receive the trafc information related to where you are. The end date of your subscription
remains the same, even if you do not share this information with us.
Page 14

12 MoveOn Navi
Additional information
Only if you give us your permission, your navigation device will continuously collect information
and send it to TomTom at regular intervals. The information is also stored on your device until you
connect it to your PC, then the information is sent to TomTom and deleted from your device. The
information includes details that identify the navigation device, details about routes and locations,
your MyTomTom account name and information entered while you were using the navigation
device.
TomTom uses this information to be able to deliver LIVE services to you and to improve the HD
Trafc service.
Within twenty minutes of switching off your navigation device, TomTom automatically and
irreversibly destroys any information that allows identication of you or your device. This, now
anonymous, information is used to improve TomTom’s products and services, such as maps,
reports on Points of Interest and average speeds driven. These products and services are also used
by government agencies and businesses.
Using your navigation device, you can join the MapShare Community or report speed cameras. If
you choose to use either of these services, your reports, that include location information and your
MyTomTom account name, are sent to TomTom and kept together with your MyTomTom account.
TomTom then uses your information to improve its maps and speed cameras.
If you no longer allow sharing of information, none of the above information is sent to TomTom
and information previously stored on your device is deleted. You won’t be able to receive HD
Trafc or mobile speed camera locations, or use any other LIVE services.
TomTom will not give anyone else access to the information collected from your navigation device.
In choosing to provide TomTom with information you are helping to make driving better,
specically by improving maps, trafc ows and reducing congestion. We appreciate your help.
Note:
The length or end date of your service subscription does not change if you do not allow
sharing of information.
This navigation device uses a GSM network that contains location information about your
navigation device. By law, the network operator may be required to retain this location and other
information for law enforcement purposes and TomTom has no inuence over this. If you disable
information sharing the mobile network connection is not active and the network operator cannot
store location information.
If you think that your information is not being used for the purpose for which you have provided it
to TomTom, contact us at tomtom.com/support.
See our privacy policy at tomtom.com/privacy.
Page 15

MoveOn Navi 13
2.4 Switching off
When you switch off your car ignition and open your car door, the MoveOn switches off
automatically.
2.5 Hiding the map
Select the ”Hide map” button in the Quick menu to switch off the display screen so that the map
and the instructions are hidden.
You can also select the ”Hide map” button in the Preferences menu.
When the map is switched off, you still hear warnings for cameras and the voice guidance
instructions remain active. You also still hear the audio information from the radio.
2.6 Resetting the system
In rare cases, your MoveOn may not start correctly or may stop responding to your Navigation
Control. If this happens, switch off your car ignition, wait a minute or two and then turn the car
ignition back on again.
If this does not solve the problem, you can reset the navigation device. To do this, do the
following:
1. Press the [MENU] button to access the Main Menu
2. Select ”Change preferences”.
3. Select ”Reset factory settings”.
4. Follow the instructions on the screen using the Navigation Control where necessary.
Important: This feature deletes all your personal settings!
If you want to keep your personal information and settings, you should perform a
full backup of your device before you reset the device. You can then restore all your
personal information and settings after you reset the device.
This includes items such as your Home and Favourite locations, your personal menu
and your POI categories and POI locations.
2.7 Safety settings
We recommend using the safety settings to make your driving as safe as possible.
These are some of the options included in the safety settings:
• Show essential menu buttons while driving
• Show safety reminders
• Warn when driving faster than allowed
Page 16

14 MoveOn Navi
2.8 GPS reception
Your MoveOn uses GPS satellites (Global Positioning System) orbiting around the Earth to locate
the position of the vehicle.
When you rst start your Lexus CT MoveOn Navi, the device may need a few minutes to determine
your GPS position and show your current position on the map. In future, your position will be
found much faster, usually within a few seconds.
In areas where GPS reception is not possible, such as tunnels, your location may not be accurate.
The accuracy of the navigation device increases during the rst journeys. The accuracy is not
affected if the device is reset or the software is updated.
Note:
After moving a long distance without driving, such as by ferry, the system may take several
minutes to locate your current position.
2.9 Take care of your navigation device
It is important to take care of your device:
• Do not open the casing of your device under any circumstances. Doing so may be dangerous
and will invalidate the warranty.
• Wipe or dry the screen of your device using a soft cloth. Do not use any liquid cleaners.
Page 17

MoveOn Navi 15
3. The Navigation Control
3.1 Using the Navigation Control
The Navigation Control is connected to your MoveOn using Bluetooth and must connect to the
device every time your car starts.
A few seconds after your car starts you see a message conrming that the Navigation Control and
device are now connected.
Note:
Do not attempt to pair or connect other Bluetooth devices with either your navigation
device or the navigation control.
BACK
MAP
2D / 3D
MENU
A
B
C
D
E
F G
H
I
J
K
L
Page 18

16 MoveOn Navi
Function
1. Shift up Move the cursor up in the map browser.
Move vertically through the menu.
Used to zoom in in the Driving View.
2. Shift down Move the cursor down in the map browser.
Move vertically through the menu.
Used to zoom out in the Driving View.
3. Shift left Move the cursor left in the map browser.
Move horizontally through the menu.
Changes the volume.
4. Shift right Move the cursor right in the map browser.
Move horizontally through the menu.
5. Centre button Conrms a selection.
When in the Driving View, shows the Quick menu.
6. Left soft button Select or conrm.
When in the Driving View, changes the volume.
7. Right soft button Select or conrm.
8. MAP 2D / 3D When in a menu, shows the Driving View.
When in the Driving View, switches the map between 2D
and 3D view.
9. MENU Shows the navigation Main Menu.
10. BACK Back to previous screen.
11. LED light The LED light ashes when connecting to your MoveOn.
Once connected, the LED light remains on all the time.
12. Light ring The light ring helps you to locate the navigation control in
the dark.
To use the keyboard, do the following:
• Press the shift buttons (1), (2), (3) and (4) to navigate move around the keyboard.
• Press the centre button (5) to select a key.
• Press the left soft button(6) to delete the last keystroke.
• Press the right soft button (7) to go to the next step.
• Press the back button (10) to go back to the previous step.
Page 19

MoveOn Navi 17
3.2 Special features of the Navigation
Control
Confirming a selection
To conrm a selection, press the centre button (5).
Back
To return to the previous menu, press [BACK] (10).
Soft buttons
Soft buttons (6) and (7) are used to select or conrm an action.
Driving View
When using the Driving View, the following buttons have some special features as follows:
• Left soft button (6) - repeats the last voice instruction and changes the volume.
• Right soft button (7) - shows the route summary.
• Shift Up (1) or Shift Down (2) - zoom.
• Shift Right (4) - HD Trafc info menu.
• Centre button (5) - shows the Quick menu.
Page 20

18 MoveOn Navi
4. The memory card
4.1 About your memory card
A memory card is supplied with your navigation system. It includes a map of your group of
countries.
Updates are regularly produced by TomTom, particularly for maps and services like speed cameras.
These updates are only available for download by inserting your navigation system’s memory card
into a computer that is connected to the internet.
Once your new vehicle has been delivered, if a newer version of your map is available within 60
days of rst using your navigation device, you can download this map for free.
Important:
In order to qualify for the latest map guarantee you need to check if a new map
is available within the 60 day period, and you are only entitled to one free map
download.
4.2 Inserting your memory card
To insert your memory card into your MoveOn in your car, do the following:
1. Switch off the ignition in the car so that the navigation system is switched off.
2. Insert the memory card, taking care to handle it carefully and that it is the right way round.
Note:
Only use your memory card for operating and updating your navigation system. Do not
insert the memory card into another vehicle or into any other device such as a camera.
4.3 Removing your memory card
There are two different ways to remove your memory card depending on whether your car ignition
is switched on or not.
Car ignition off
1. Push gently on the memory card.
2. Remove the memory card, taking care to handle it carefully.
Car ignition on
1. From the main menu, select ”Remove SD card”.
2. Conrm using the right soft button.
A message tells you when you can remove the memory card.
Page 21

MoveOn Navi 19
4.4 About TomTom HOME
Using TomTom HOME you can register and manage your MoveOn to receive free updates and buy
new services. It’s a good idea to connect frequently to HOME so you can do the following:
• Download for free the most recent map available for your device, if you connect to TomTom
HOME within 60 days of buying your device.
• Download for free updates for your device, including Map Share updates and other services
included with your product.
• Add new items to your device, like maps, voices and POIs, as well as buy TomTom services and
manage your subscriptions.
• Share your map corrections and other content with the TomTom community.
• Make and restore backups of your device.
When using HOME, you can get help with what you are doing from the HOME Help. You can also
read about all the other things that HOME can do for you.
Tip:
We recommend using a broadband internet connection whenever you connect to HOME.
4.5 Installing TomTom HOME
The steps below refer to Internet Explorer on Windows XP. If you’re using another browser or
operating system, visit tomtom.com/support for more information.
To install TomTom HOME on your computer, do the following:
1. Connect your computer to the internet.
2. Click the link below to download the latest version of TomTom HOME:
tomtom.com/home
3. We recommend downloading the le to your computer by clicking
Save
.
4. Once the download is complete, click
Open
.
If you accidentally closed the Download complete window, locate the le
TomTomHOME2winlatest.exe
on your computer and double-click it.
5. If you get a security warning click
Run
.
6. Click
Next
, then click
Install
.
The installation starts.
7. Once the installation is complete click
Finish
.
Page 22

20 MoveOn Navi
4.6 Initialising your memory card
To use a new or empty memory card with TomTom HOME, it needs to be initialised so that HOME
can detect it. To initialise your card, do the following:
1. Start the car and switch on your MoveOn.
2. Insert the new memory card into your MoveOn.
3. Wait for a few seconds so that the card can be initialised by your MoveOn.
4. From the Main Menu, select ”Remove SD card”.
5. Conrm using the right soft button.
A message tells you when you can remove the memory card.
6. Insert the memory card into the card reader connected to your computer.
Your new card is now ready for use with TomTom HOME.
4.7 Updating your device
Before you start, make sure you have a backup of your device or memory card. For more
information, see Backing up your navigation device’ on page 10.
You can check for updates for your maps, services and for a whole range of other free items or
items for purchase. The instructions below describe how to update the TomTom application on
your device.
Note:
LIVE Services are not available in all countries or regions, and not all LIVE Services are
available in all countries or regions. You may be able to use LIVE Services when travelling
abroad. For more information on available services, go to tomtom.com/services.
To check for an updated application version do the following:
1. Insert your memory card into the card reader connected to your computer.
2. Wait for TomTom HOME to start.
3. If HOME does not automatically check for updates, click
Update my device
in the HOME
menu.
Note:
if you would like to install an application you downloaded previously, click
Add Traffic,
Voices, Safety Cameras etc.
and then click
Items on my computer
.
4. If a new application is available, it is listed on the next screen.
5. Make sure the new application is selected, then click
Download updates
.
HOME downloads the selected items.
6. HOME then installs the selected items on your memory card.
7. Click
Done
.
8. Click
Device
>
Disconnect Device
. You can then disconnect your card from your computer.
Page 23

MoveOn Navi 21
4.8 Backing up your navigation device
The easiest way to make a backup of all the contents of your TomTom navigation device is by using
TomTom HOME. You can make one backup for your device and store it on your computer. When
you make a new backup, the old backup for that device is overwritten.
1. Insert your memory card into the card reader connected to your computer.
TomTom HOME starts automatically.
Tip:
If TomTom HOME does not start, do one of the following:
Windows:
Click on the
Start
menu and go to
All Programs
>
TomTom
and then click on
TomTom HOME
Mac:
Click Go in the Finder menu and choose
Applications
, then double-click
TomTom
HOME
.
2. Click
Back up and restore
.
3. Click
Back up my device
.
4. Click
Back up now
.
HOME backs up your device by backing up the contents of your memory card.
5. Wait until HOME has nished creating the backup, then click
Done
.
To see where HOME saves your backups do one of the following:
Windows:
Click
Tools
>
TomTom HOME Preferences
and then select the
Folder Preferences
tab.
Mac:
Click
TomTom HOME
>
Preferences
... and then select the
Folder Preferences
tab.
To restore a backup, click
Back up and restore
in the HOME menu and then click
Restore my
device
.
Page 24

22 MoveOn Navi
5. Guided tours
5.1 About guided tours
Your MoveOn has the following tutorials to help you become familiar with all the features:
• The Navigation Control
• Driving View
• Menu options
• Browse map
• Planning preferences
• Itinerary planning
• Trafc information
• Warnings and notications
• Quick menu
• TomTom HOME
• LIVE Services
To use a guided tour, select ”Help me” from the Main Menu. Select ”Guided tours” and then
choose a tour.
Page 25

MoveOn Navi 23
6. Planning a route
6.1 Planning a route
Important:
In the interest of safety and to reduce distractions while you are driving, you should
always plan a route before you start driving.
To plan a route on your MoveOn, do the following:
1. Press [MENU] to open the Main Menu.
Note:
The buttons on your navigation device are shown in full colour unless a button is
currently unavailable. For example, the button named Find alternative in the Main Menu is not
available until you have planned a route.
2. Select ”Navigate to”.
Page 26

24 MoveOn Navi
3. Select ”Address”.
When you enter an address, you can choose from the following options:
• ”City and street” - select this button to set an exact address as your destination.
• ”Postcode” - select this button to enter a postcode as your destination.
• ”City centre” - select this button to set your destination as the centre of a city or town.
Note:
You can enter a postcode for any country. In some countries, postcodes are detailed
enough to identify a house on their own. In other countries, you can enter a postcode to
identify a town or area. You will then have to enter a street and house number.
• ”Crossing or intersection” - select this button to your destination as the point where two
streets meet.
In this example, we will enter an address.
Page 27

MoveOn Navi 25
4. Select ”City and street”.
Note:
When planning a trip for rst time, your navigation device asks you to choose a state or
country. Your choice is saved and used for all routes you plan. You can change this setting
at any time by selecting the ag.
5. Start to type the name of the town where you want to go.
Page 28

26 MoveOn Navi
To use the keyboard, do the following:
• Press the shift buttons (1), (2), (3) and (4) to move around the keyboard.
• Press the centre button (5) to select a key.
• Press the left soft button(6) to delete the last keystroke.
• Press the right soft button (7) to go to the next step.
• Press the back button (10) to go back to the previous step.
As you type, the names of the towns that match what you have typed are shown. When your
destination appears in the list, select the name of the town to set the destination.
6. Start to type the street name. Select the name when it is shown in the list.
As with the name of the town, the names of the streets that match what have typed are
shown. When your destination appears in the list, select the name of the street to set the
destination.
7. Enter the house number, then select ”Done”.
8. You are asked if you need to arrive at a particular time. For this example, select ”No”.
The route is calculated by your device using IQ Routes. IQ Routes is used to plan the best
possible route using information about the average speeds measured on the roads.
Page 29

MoveOn Navi 27
9. When the new route is shown, select ”Done”.
Your device starts to guide you to your destination, using spoken instructions and on-screen
directions. For more information about the route, select ”Details”.
6.2 Route summary
After a route has been calculated, the route summary shows an overview of your route, the
remaining distance to your destination and the remaining estimated journey time.
To view the route summary at any other time, press the right soft button (7) on the Navigation
Control.
The route summary screen also shows trafc information about delays on your route.
Page 30

28 MoveOn Navi
6.3 LIVE summary
LIVE summary shows LIVE Services information on your route.
To view LIVE summary information, select the ”LIVE” tab on the route summary screen by using
shift left (3) and shift right (4) on the Navigation Control. Select any of the panels for more
detailed information.
The LIVE tab panels show the following information:
• ”Trafc on route” - select this panel to view detailed information about trafc delays and other
incidents on your route.
• ”Speed cameras” - select this panel to open the Safety Cameras menu. You can then report a
safety camera or change your settings for safety camera warnings.
• ”Weather” - select this panel to view the latest weather reports.
Page 31
MoveOn Navi 29
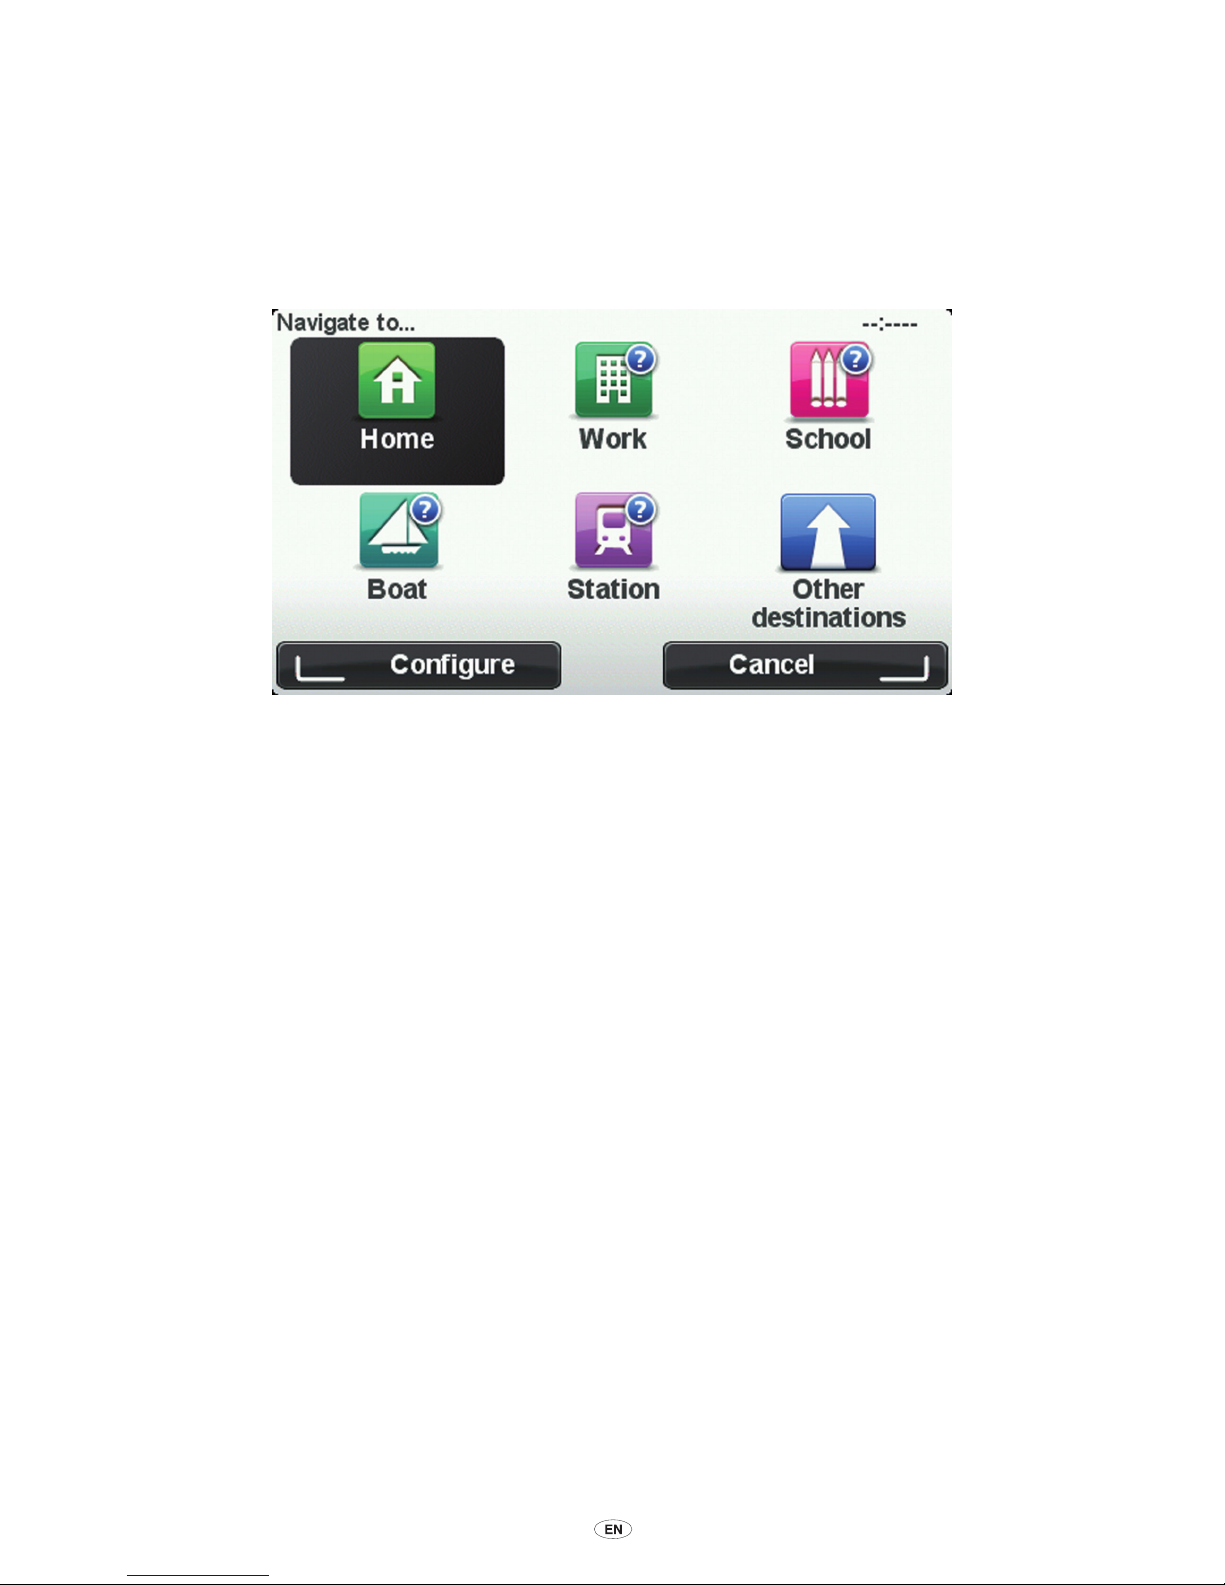
6.4 Frequent destinations
If you often make trips to the same destinations, you can set your Lexus CT MoveOn Navi device to
ask if you want to plan a route to one of these locations every time the device starts. This is faster
than planning a route in the normal way.
6.5 Show my frequent destinations
You can set your MoveOn device to ask if you want to plan a route to one of your frequently visited
destinations every time the device starts.
To change this setting, do the following:
1. Select ”Start-up preferences” in the Preferences menu and then select ”Ask for a destination”.
2. Select ”Yes”, then select ”Yes” again to begin entering information about the destination.
3. Select a symbol for the destination and select ”Done” to set the symbol, then select ”Yes”.
Tip:
To add new destinations, select one of the numbered symbols and enter a name for the
new destination button.
4. Select ”Yes” and if required enter a new name, then select ”Done”.
5. Enter the address details in the same way you enter an address when planning a route, then
select ”Done”.
6. If you want to set more destinations, repeat the steps above. Otherwise, select ”Done”.
7. You are asked if you want to change the start-up image.
8. If you want to change the image, select ”Yes” then follow the instructions shown on the
screen. Otherwise, select ”No”.
Every time your device starts, you are asked if you want to plan a route. If you select ”Cancel”, the
Driving View opens.
Page 32
30 MoveOn Navi
6.6 Using arrival times
You can set your MoveOn device to ask you if you need to arrive at a particular time when you
plan a route.
Status bar
Select ”Status bar” in the Preferences menu, to enable or disable arrival time
notications.
Select the required options on the rst menu screen and then select ”Done”.
To enable arrival time notications, select ”Leeway”.
After planning a route, select ”YES” to enter a preferred arrival time.
Your device calculates your arrival time and shows you whether you will arrive on time.
You can also use this information to work out when you need to leave. If your device shows that
you will arrive 30 minutes early, you can wait and leave in 30 minutes time, rather than arrive early.
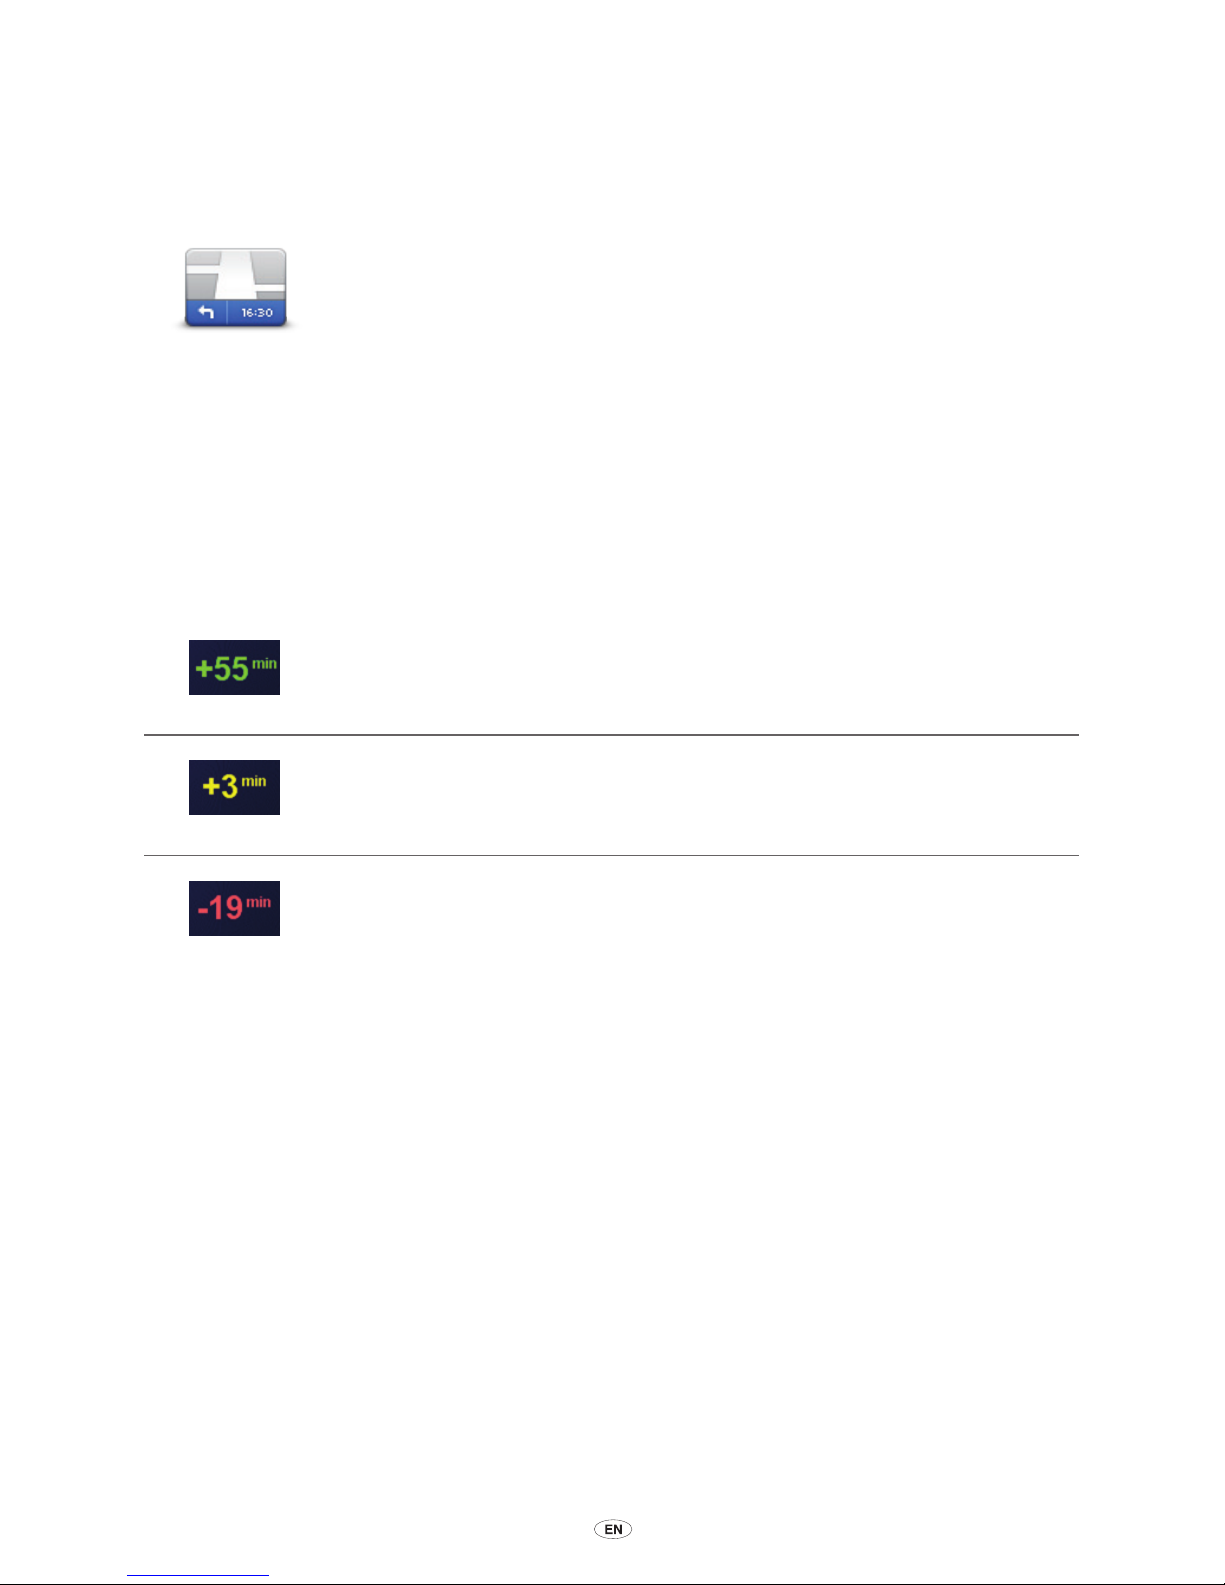
Your arrival time is constantly recalculated during your journey. The status bar shows whether you
will arrive on time or if you are going to be late, as shown below:
You will arrive 55 minutes before the arrival time you entered.
If the estimated arrival time is more than ve minutes before the time you
entered, it is shown in green.
You will arrive 3 minutes before the arrival time you entered.
If the estimated arrival time is less than 5 minutes before the time you
entered, it is shown in yellow.
You will arrive 19 minutes late.
If the estimated arrival time is later than the time you entered, it is shown in
red.
Page 33
MoveOn Navi 31
6.7 Navigation menu options
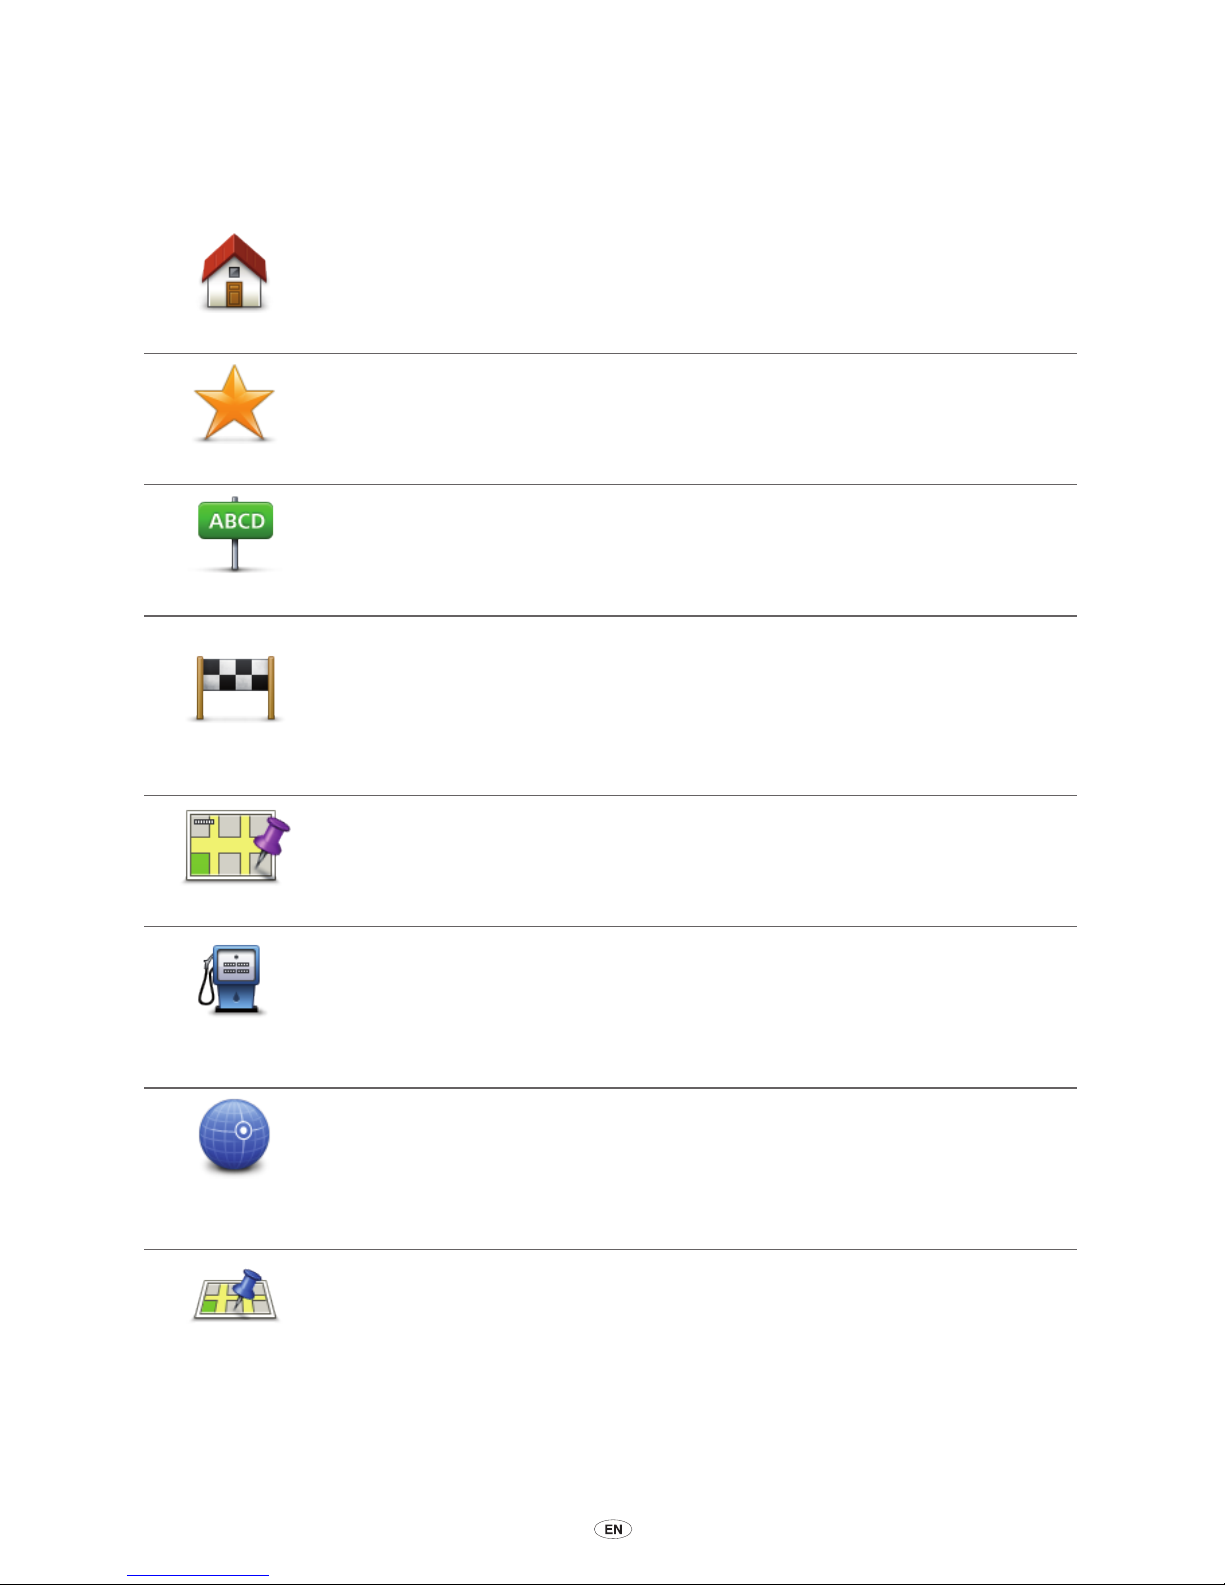
When you select ”Navigate to” by pressing the [MENU] button, you can set your destination in
many ways, not just by entering the address. The other options are listed below:
Home
Select this button to navigate to your Home location.
Favourite
Select this button to choose a Favourite as your destination.
Address
Select this button to enter an address as your destination.
Recent
destination
Select this button to choose your destination from a list of places that you
have recently used as destinations.
Point on map
Select this button to select a point on the map as your destination using the
map browser.
Point of
Interest
Select this button to navigate to a Point of Interest (POI).
Latitude
Longitude
Select this button to enter a destination using latitude and longitude values.
Local Search
Select this button to use Local Search to help you nd shops and businesses
in and around your current location. You can then navigate to this search
result as a destination.
You can choose to search for shops and businesses near you, near your
destination, near any other destination or in a city.
Note:
Only available on LIVE devices.
Page 34

32 MoveOn Navi
6.8 Planning a route in advance
You can use your MoveOn to plan a route in advance, selecting your starting point and your
destination.
Here are some more reasons to plan a route in advance:
• Find out how long a journey is going to take before you start.
• You can also compare journey times for the same route at different times of the day or on
different days of the week. Your device uses IQ Routes when planning a route. IQ Routes
calculates routes based on the real average speeds measured on roads.
• Study the route of a journey you are planning.
• Check a route for someone who is coming to visit you and then explain the route to them in
detail.
To plan a route in advance, follow these steps:
1. Press [MENU] to bring up the Main menu.
2. Select the shift right button (4) until you see
Prepare route
.
This button is shown while there is no planned route on your MoveOn device. Select this
button.
3. Select the starting point for your journey in the same way that you would select your
destination.
4. Set the destination for your journey.
5. If Route planning settings are set to
Ask me every time I plan
, select the type of route you
want to plan:
• ”Fastest route” - the route which takes the least time.
• ”Eco route” - the most fuel-efcient route for your journey.
• ”Shortest route” - the shortest distance between the locations you set. This may not be
the quickest route, especially if the shortest route is through a town or city.
• ”Avoid motorways” - a route which avoids motorways.
• ”Limited speed” - a route for a vehicle which can only be driven at a limited speed. You
have to specify the maximum speed.
6. Choose the date and time that you will make the journey you are planning.
Your device uses IQ Routes to work out the best possible route at that time. This is useful to see
how long a journey takes at different times of the day or on different days of the week.
Your navigation device plans the route between the two locations you selected.
Page 35
MoveOn Navi 33
6.9 Viewing route information
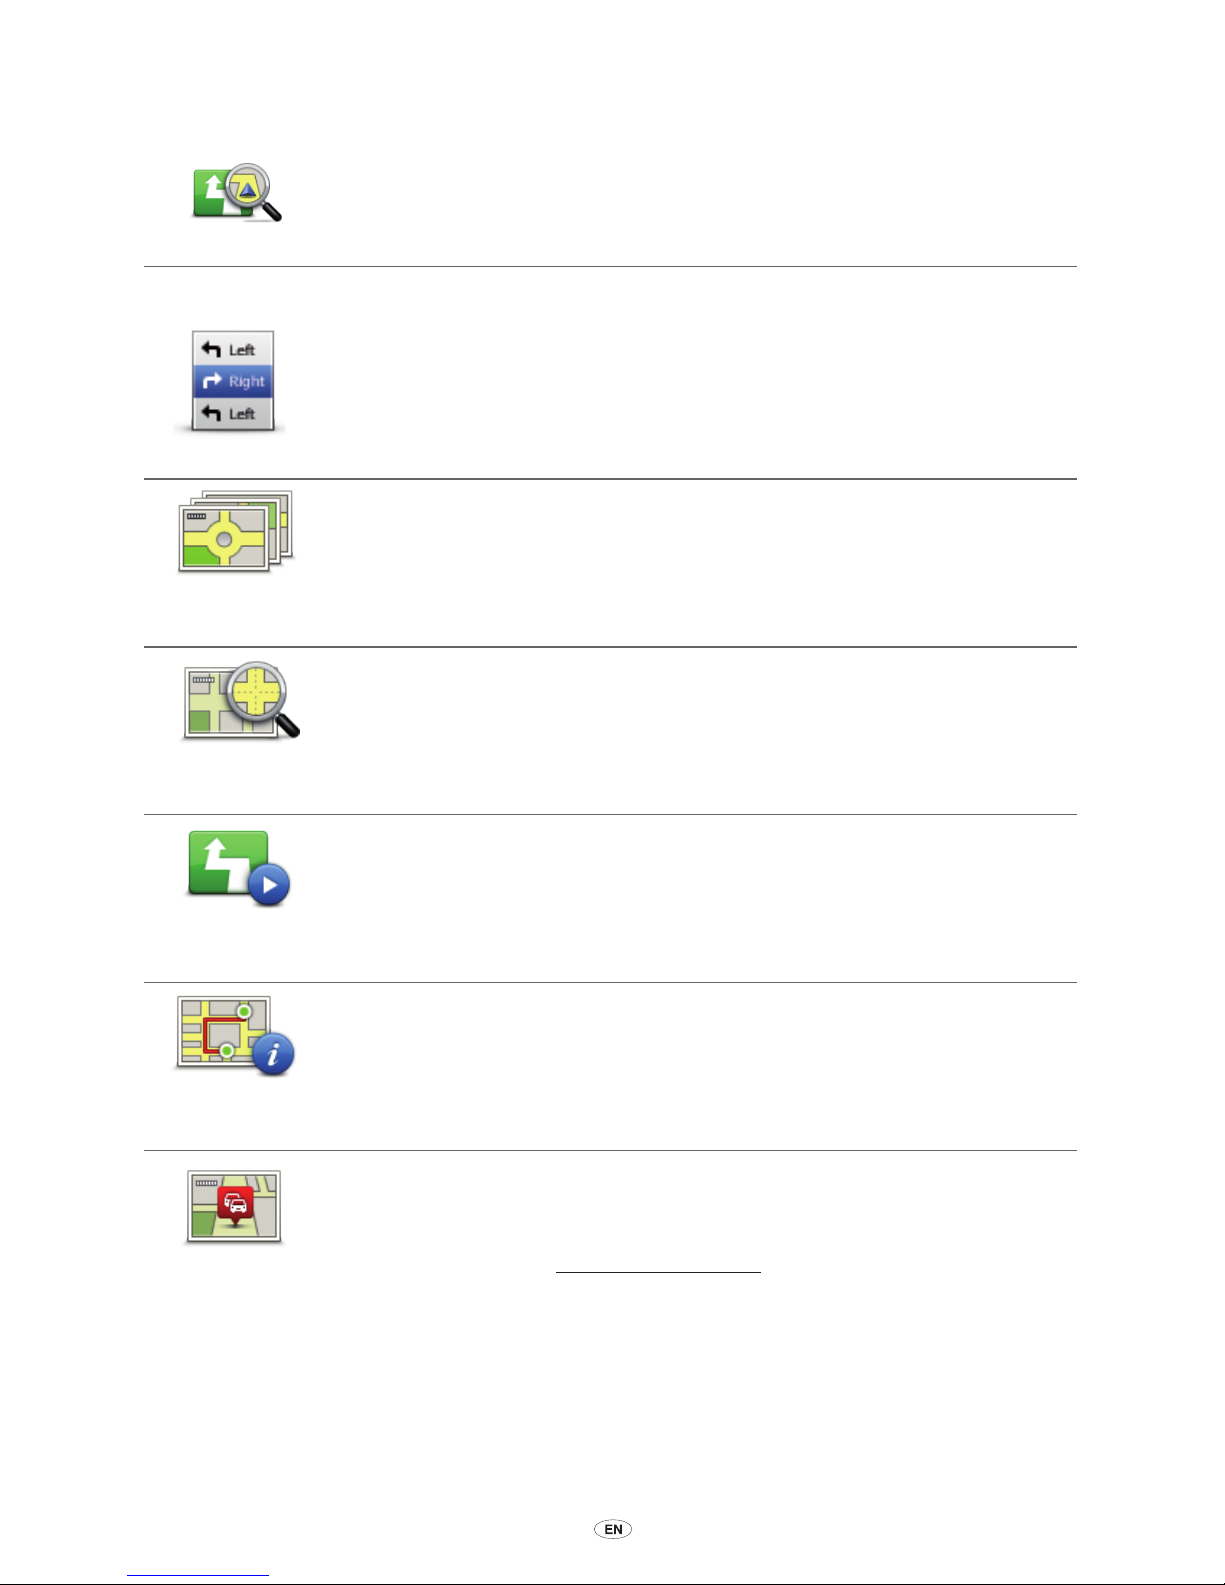
View route
You can access the options described below for the route you last planned
by selecting ”View route” in the Main Menu or the ”Details” button on the
route summary screen.
You can then select the following options:
Browse as text
Select this button for a list of all the turn instructions on the route.
This is very useful if you need to explain a route to someone else.
Browse as
images
Select this button to see each turn in the journey. Select the left and right
arrows to move forwards and backwards through the journey.
Select the screen itself to turn off the 3D display and view the map from
above.
Browse map of
route
Select this button to see an overview of the route using the map browser.
Show route
demo
Select this button to watch a demo of the journey. You can interrupt the
demo by pressing any button on the Navigation Control.
Show route
summary
Select this button to open the route summary screen.
Show traffic on
route
Select this button to see all the trafc incidents on your route.
Note:
To use a TomTom trafc information service, you may need a
subscription. Trafc services are not supported in all countries or regions. For
more information, visit tomtom.com/services.
Page 36
34 MoveOn Navi
7. The Driving View
7.1 About the Driving View
When your MoveOn navigation device starts for the rst time, you are shown the Driving View
along with detailed information about your current position.
Press the [MENU] button on your Navigation Control at any time to open the Main Menu.
Note:
The Driving View is shown in black and white until your device locates your current
position.
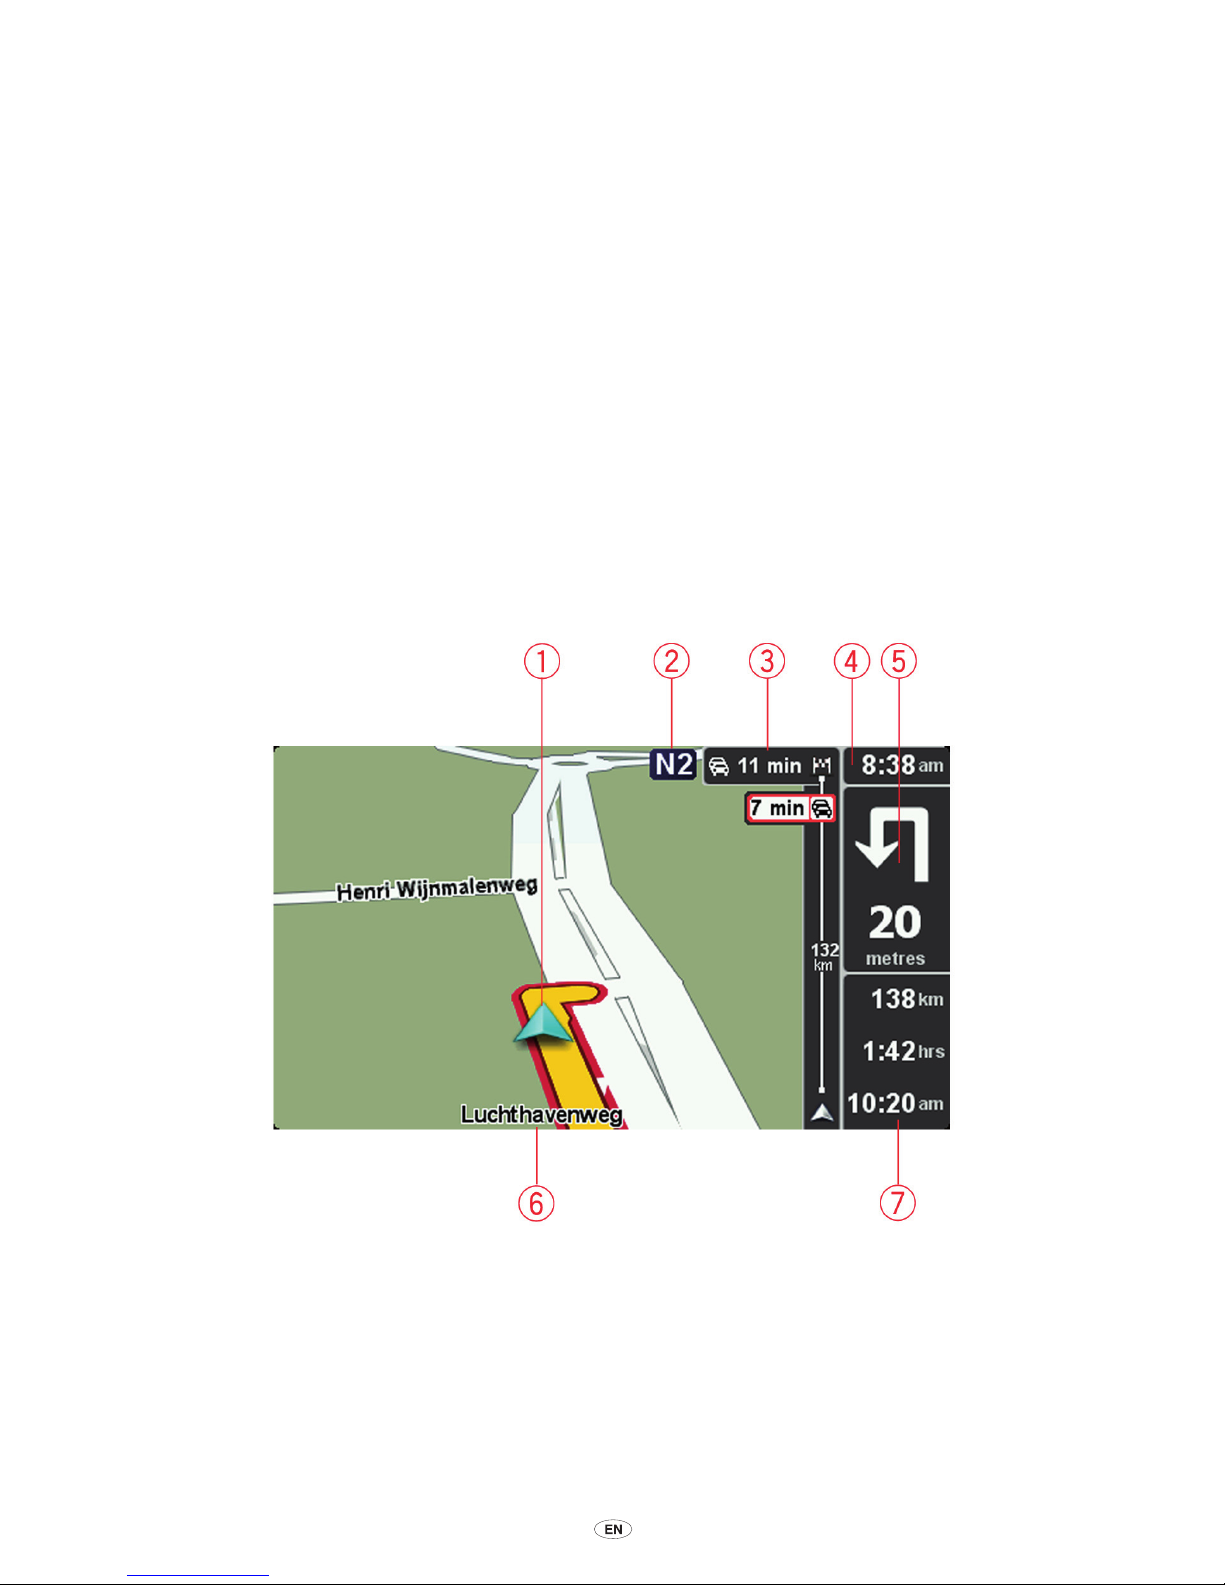
7.2 The Driving View
1. Your current position.
2. Road sign information or the next street name.
3. Trafc sidebar. Select the sidebar using the shift right (4) button on the Navigation Control to
see details of trafc incidents on your route.
4. The time, your current speed and the speed limit, if known.
Select this part of the status bar to change the volume and hear the next spoken instruction.
Page 37
MoveOn Navi 35
5. Navigation instruction for the road ahead.
Select this part of the status bar to change between 2D and 3D views of the Driving View.
6. The name of the street you are on.
7. The remaining journey time, the remaining distance and your estimated arrival time.
Select this part of the status bar to open the Route Summary screen.
To change the information shown in the status bar, select ”Status bar preferences” in the
Preferences menu.
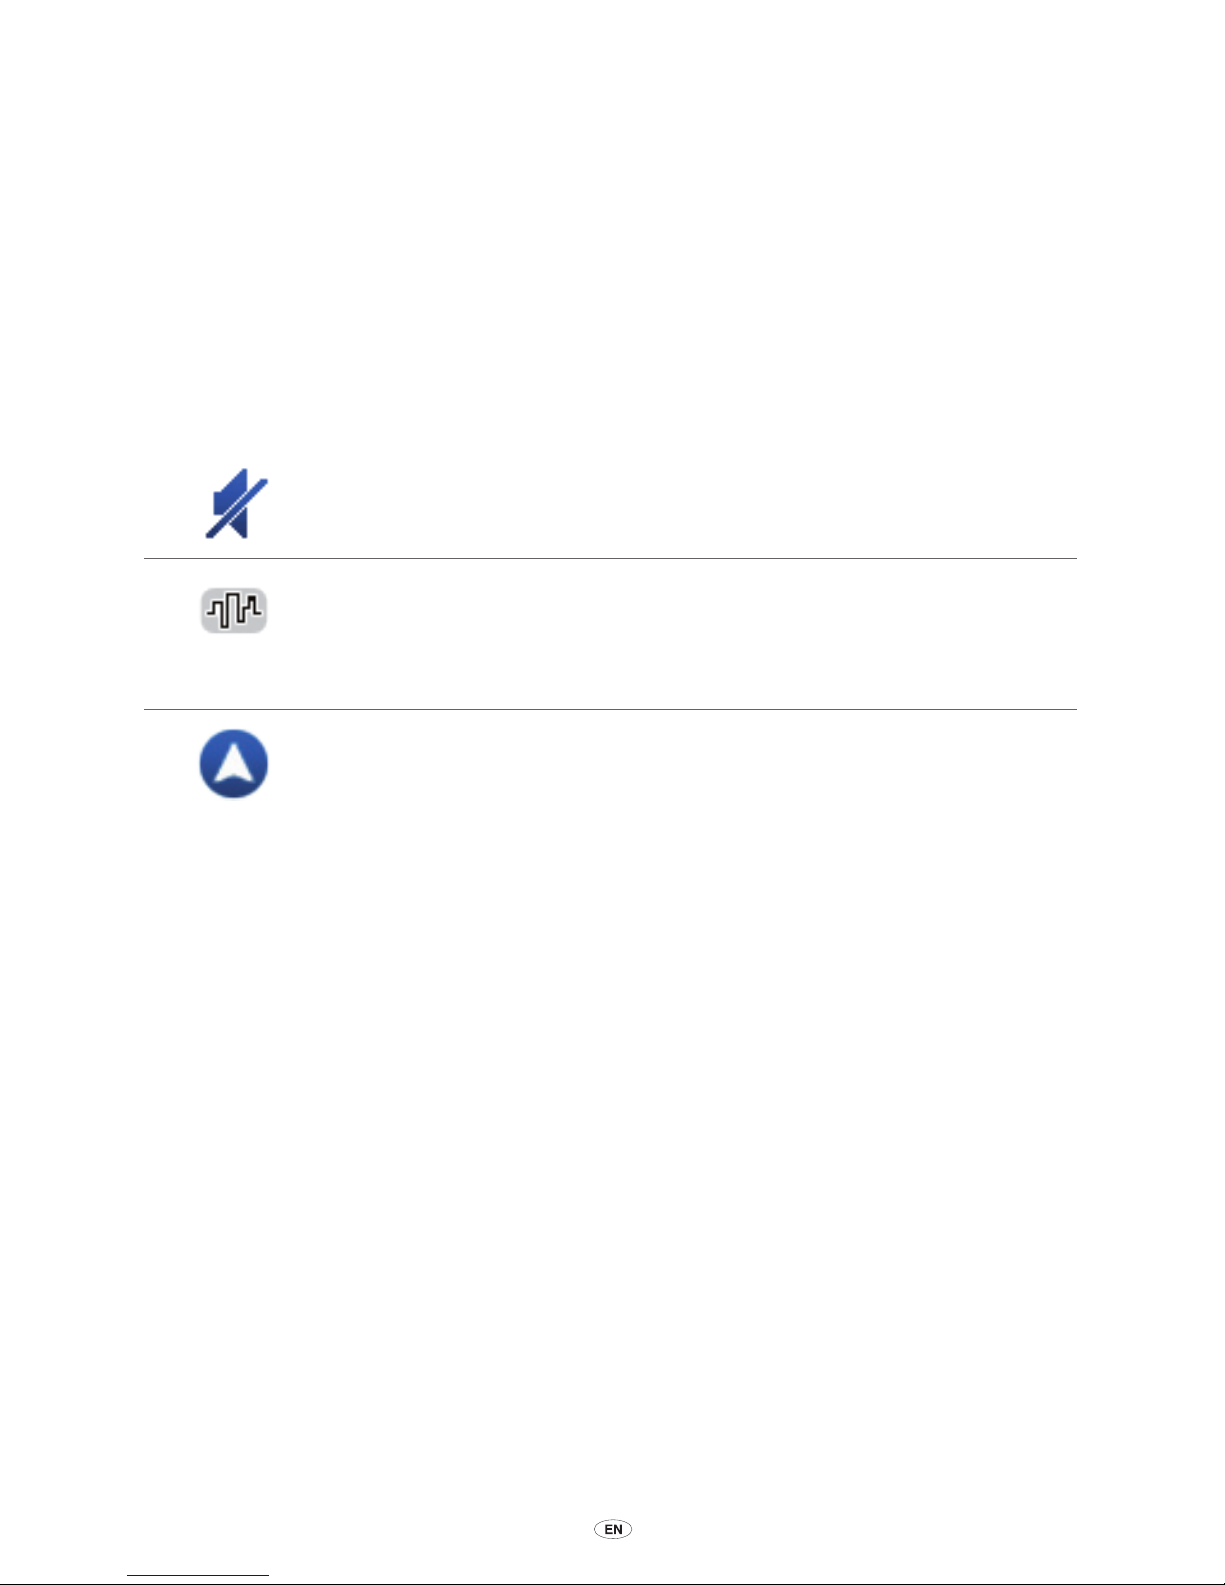
7.3 Driving View Symbols
Sound muted - this symbol is shown when the sound has been muted.
To turn the sound back on, open the Preferences menu and select ”Turn on
sound”.
Enhanced Positioning Technology (EPT) - this symbol is shown when your
device is using EPT to estimate your current location.
EPT automatically estimates your position when the GPS signal is lost while
you are driving, such as when you are in a tunnel.
Compass - the compass is shown when the compass is enabled.
You can switch the compass on or off in the Preferences menu.
Page 38
36 MoveOn Navi
8. Advanced Lane Guidance
8.1 About Lane Guidance
Note:
Lane guidance is not available for all junctions or in all countries.
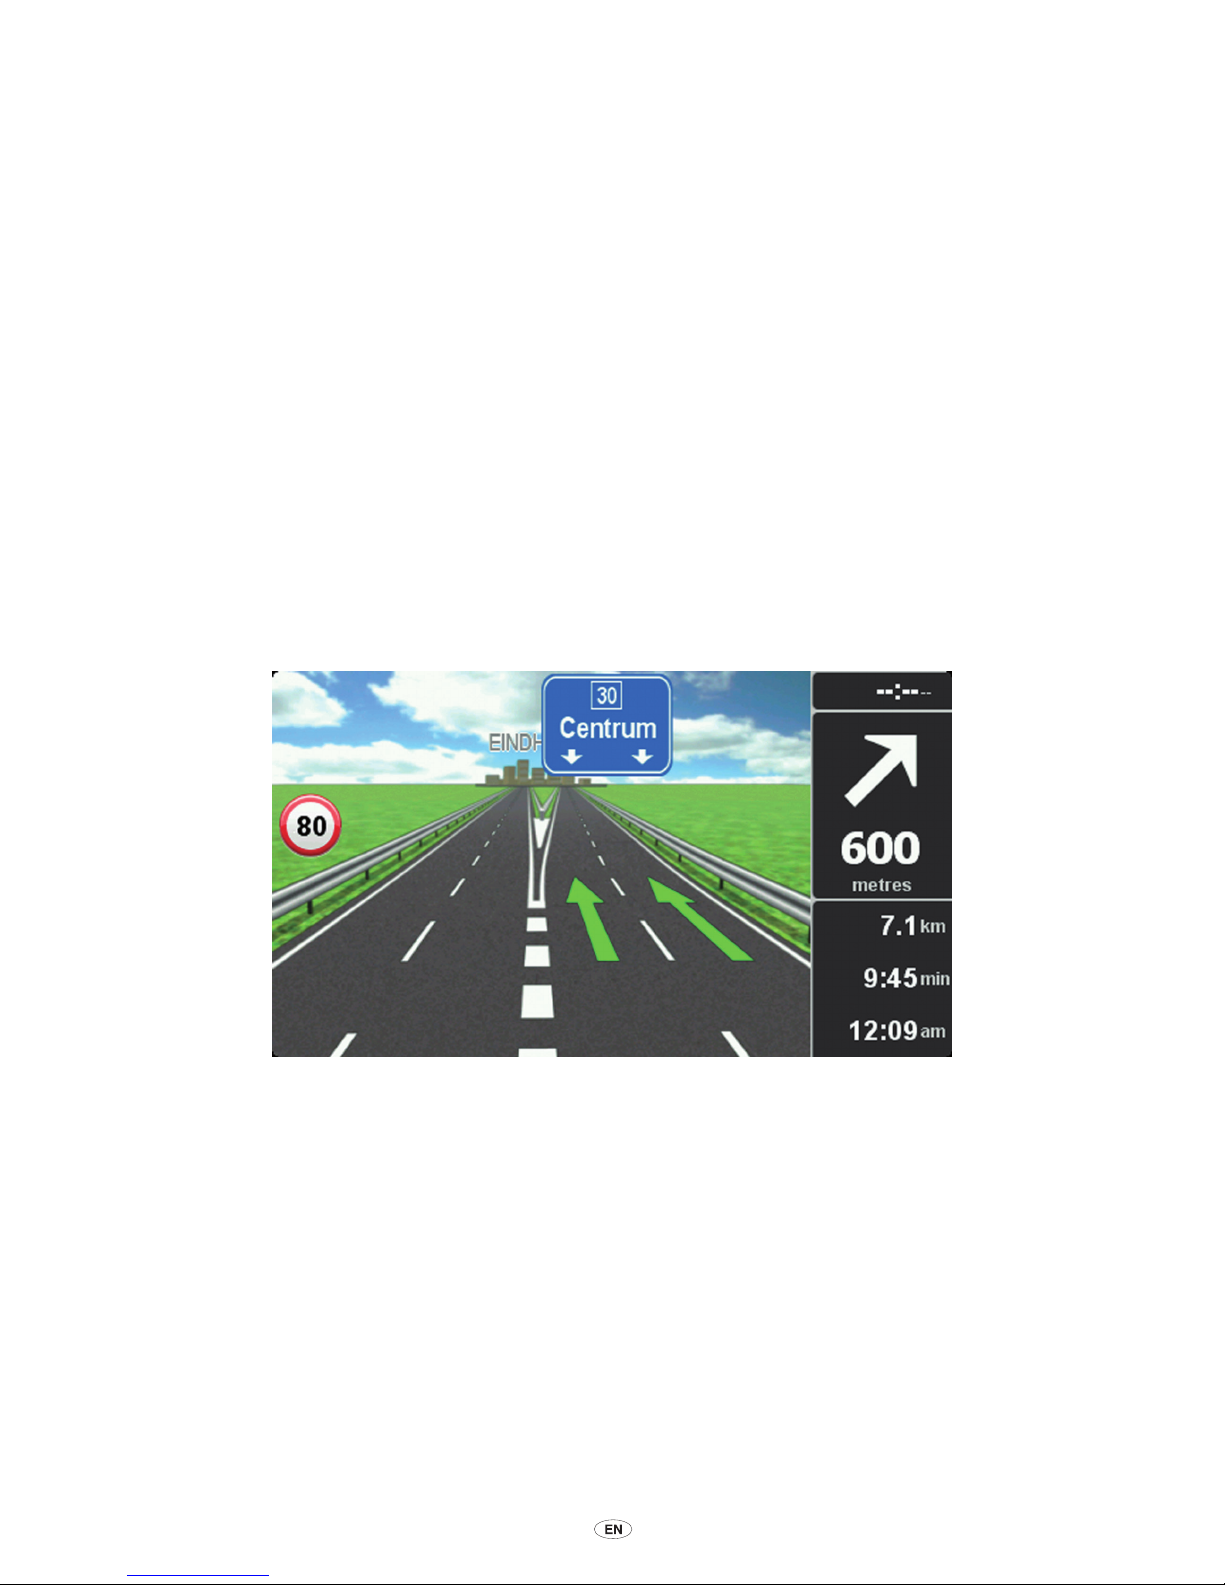
Your MoveOn navigation device helps you prepare for motorway exits and junctions by showing
the correct driving lane for your planned route.
As you approach an exit or junction, the lane you need is shown on the screen.
8.2 Using lane guidance
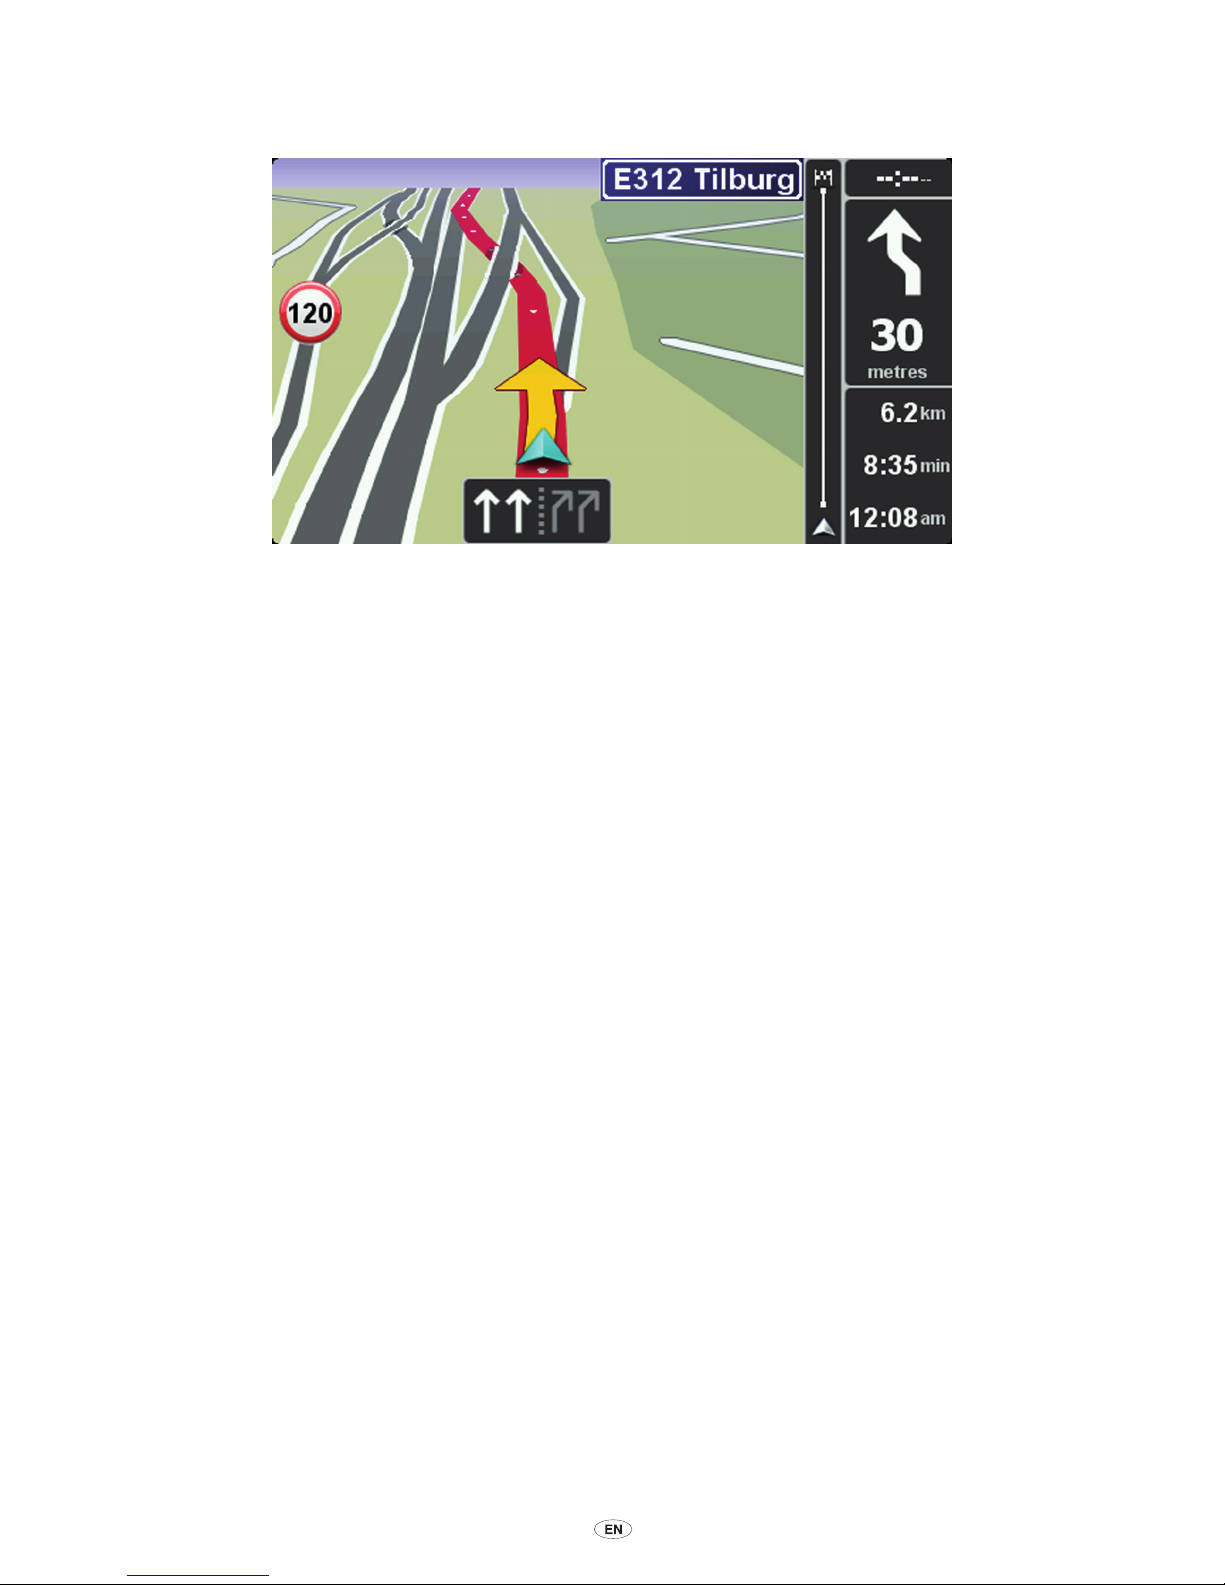
There are two types of lane guidance:
• Lane images
To turn lane images off, select ”Change preferences” in the Main menu. Select ”Status bar
preferences” and then select the check box for ”Show lane guidance”.
Tip:
Press any button on the Navigation Control to return to the Driving View.
Page 39
MoveOn Navi 37
• Instructions in the status bar
Tip:
If no lane guidance is shown in the status bar and all lanes are highlighted, you can use any
lane.
Page 40
38 MoveOn Navi
9. Changing your route
9.1 Making changes to your route
After you plan a route, you may want to change the route or even the destination. There are
various ways to change your route without the need to completely replan the entire journey.
To change the current route, select ”Find alternative” in the Main menu:
Find alternative
Select this button to change the current route.
This button is only shown while there is a planned route on your device.
The ”Find alternative...” button is also shown in the route summary screen
after you plan a route.
9.2 Find alternative route menu
To change the current route or your destination, select one of the following buttons:
Calculate
alternative
Select this button to nd an alternative to the current route.
This button is only shown while there is a planned route on your MoveOn
device.
This is a simple way to search for a different route to your current destination.
Your device calculates a new route from your current location, to reach your
destination using completely different roads.
The new route is shown next to the original route so that you can select the
route you want to use.
Avoid
roadblock
Select this button while driving on a planned route, to avoid a roadblock or
trafc congestion on the road ahead.
Your device will suggest a new route which avoids the roads on your current
route for the selected distance.
If the roadblock or trafc congestion suddenly clears, select ”Recalculate
route” to replan your original route.
Important:
Be aware that when a new route is calculated, you might
immediately be asked to turn off the current road.
Minimise delays
Select this button to avoid trafc delays on a planned route.
It is not always possible to avoid all trafc delays. Though your device
continuously checks for delays on your route, you can select this button to
manually start a check. Your device then calculates the best route to avoid all
or most of the delays.
Page 41
MoveOn Navi 39
Recalculate
route
Select this button to return to the original route without deviations to avoid
roadblocks or travelling through particular locations.
Avoid part of
route
Select this button to avoid part of the current route. Use this button if you
see that your route includes a road or junction you don’t like, or which is well
known for trafc problems.
You then choose the road you want to avoid from a list of the roads on your
route.
Travel via...
Select this button to change your route so that it passes a particular location,
perhaps to pick someone up on the way. When you do this, a marker is
shown on the map for the location you want to travel through.
You choose the location you want to pass in the same way as you choose
a destination. So you can select from all the same options: for example,
Address, Favourite, Point of Interest and Point on map.
Your MoveOn calculates a new route to your destination that passes the
location you chose. Unlike your nal destination, you are not informed when
you when you pass by this location.
Using this button, you can only travel via one location. If you want to pass
more than one, use an Itinerary.
9.3 Cancelling a route
To stop navigation when in progress, select ”Cancel route” in the Quick menu.
You can also press [MENU] to bring up the Main Menu. Select ”Cancel route” and then ”Done”.
To resume navigation, select ”Navigate to...” and then ”Recent destination”.
Page 42
40 MoveOn Navi
10. Browse Map
10.1 About the map browser
To look at the map in the same way as you might look at a traditional paper map, press [MENU]
and then select ”Browse map” in the Main Menu.
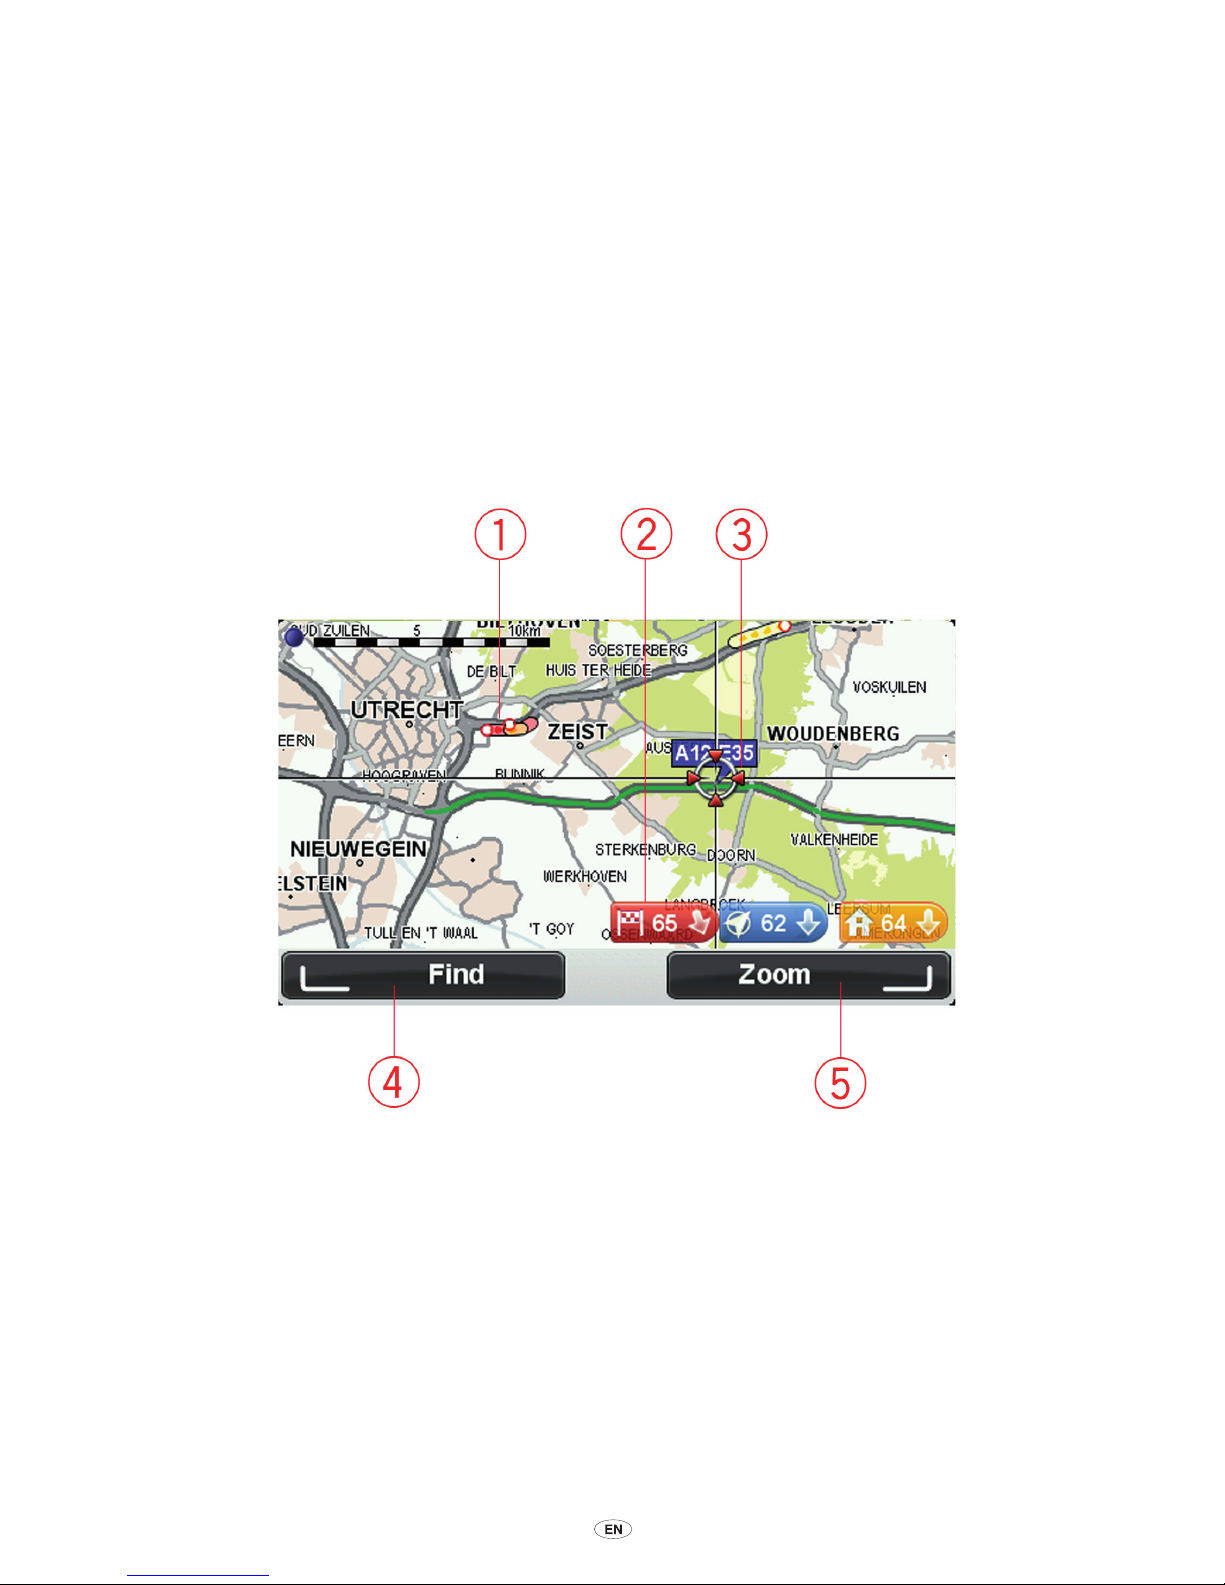
10.2 Browse map
1. Trafc - current trafc incidents.
Select the ”Options” button on the Cursor menu to select whether trafc information is shown
on the map. When trafc information is shown on the map, POIs and Favourites are not
shown.
2. Marker.
A marker shows the distance to a location.
Select a marker to centre the map on the location pointed to by the marker.
3. The cursor.
4. The Find button.
Select this button to nd specic addresses.
5. The zoom button.
Page 43
MoveOn Navi 41
Using the Navigation Control, press the right soft button and then you see Zoom in and Zoom
out buttons. Press [BACK] to return to Find and Zoom buttons.
Tip:
To change the POIs visible on the map, select ”Change preferences” and then ”Show POI on
map”.
10.3 Cursor menu
The cursor can be used to do more than highlight a location on the map.
Position the cursor on a location on the map, then press the centre button on the Navigation
Control. Select from the following buttons:
Centre on map
Select this button to centre the map on the location of your car.
Navigate there
Select this button to plan a route to the cursor position on the map.
Find
...
Press the left soft button on the Navigation Control to centre your map on a
specic location.
You can choose from your Home location, a Favourite, an address, a recent
destination, a destination found using Local Search or a Point of Interest.
Add as
Favourite
Select this button to create a Favourite at the cursor position on the map.
Add as POI
Select this button to create a POI at the cursor position on the map.
Correct
location
Select this button to make a map correction to correct the location of your
car on the map.
You can make the correction only on your own map or you can share the
correction with the TomTom Map Share community.
Page 44

42 MoveOn Navi
10.4 Options
Select the ”Options” button on the Cursor menu to set the information shown on the map. You
can choose to show the following information:
•
”
Trafc information” - when trafc information is shown on the map, POIs and Favourites are
not shown.
•
”
Points of interest” - press the left soft button on the Navigation Control to select which POIs
are shown. Select the right soft button for ”Done”.
•
”
Images” - select this option to show satellite images of the area being viewed. Satellite
images are not available for every location on the map.
•
”
Favourites”
Select ”Advanced” to show or hide the following information:
•
”
Names”
•
”
Markers” - markers point to your current location, your home location and your destination.
The marker shows the distance to the location. Markers are shown when the location they
point to are off the screen.
Select a marker to centre the map on the location pointed to by the marker.
•
”
Coordinates”
Page 45

MoveOn Navi 43
11. Map Corrections
11.1 About Map Share
Map Share helps you correct map errors. You can correct several types of map error.
To make corrections to your own map, select ”Map corrections” in the Main menu.
Note:
Map Share is not available in all regions. For more information, go to tomtom.com/
mapshare.
11.2 Correcting a map error
Important:
For safety reasons, do not enter the full details of a map correction while you are
driving. Mark the location of the map error instead and enter the full details later.
To correct a map error, do the following:
1. Select ”Map corrections” in the Main menu.
2. Select ”Correct a map error”.
3. Select the type of map correction you want to report.
4. Select how you want to select the location.
5. Select the location. Then select ”Done”.
6. Enter the details of the correction. Then select ”Done”.
7. Select ”Send”.
The correction is saved.
Page 46
44 MoveOn Navi
11.3 Types of map correction
To make a correction to your map, select ”Map corrections” in the Main menu, then select
”Correct a map error”. There are several types of map correction available.
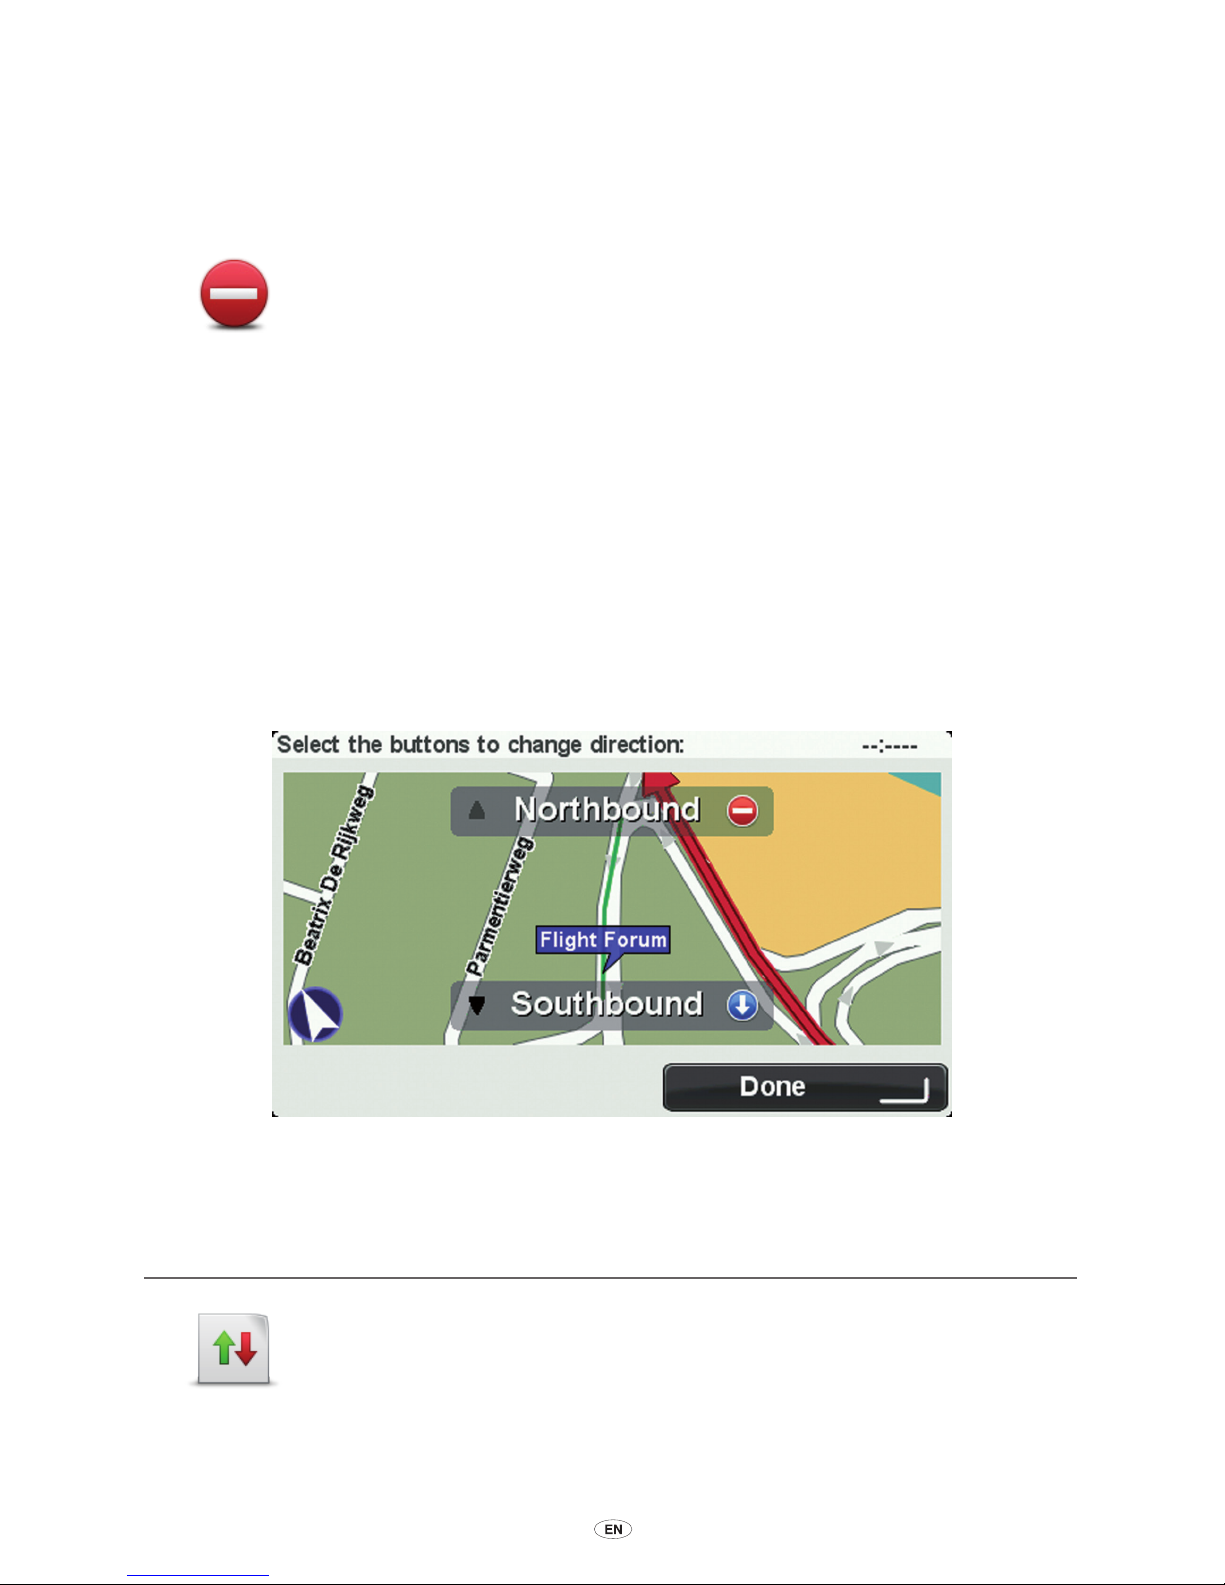
(Un)block
street
Select this button to block or unblock a street. You can block or unblock the
street in one or both directions.
For example, to correct a street near to your current location, do the
following:
1. Select ”(Un)block street”.
2. Select ”Near you” to select a street near your current location. You can
select a street by name, a street near your Home location or a street on
the map.
3. Select the street or section of a street you want to correct by selecting
it on the map. The street you select is highlighted and the cursor shows
the name of the street.
4. Select ”Done”.
Your device shows the street and whether the trafc is blocked or allowed
in each direction.
5. Select one of the direction buttons to block or unblock the ow of trafc
in that direction.
6. Select ”Done”.
Reverse traffic
direction
Select this button to correct the trafc direction of a one-way street, where
the direction of trafc is different from the direction shown on your map.
Note:
Reverse trafc direction only works for one-way streets. If you select
a two-way street you will be given the chance to block/unblock the street
rather than changing the direction.
Page 47
MoveOn Navi 45
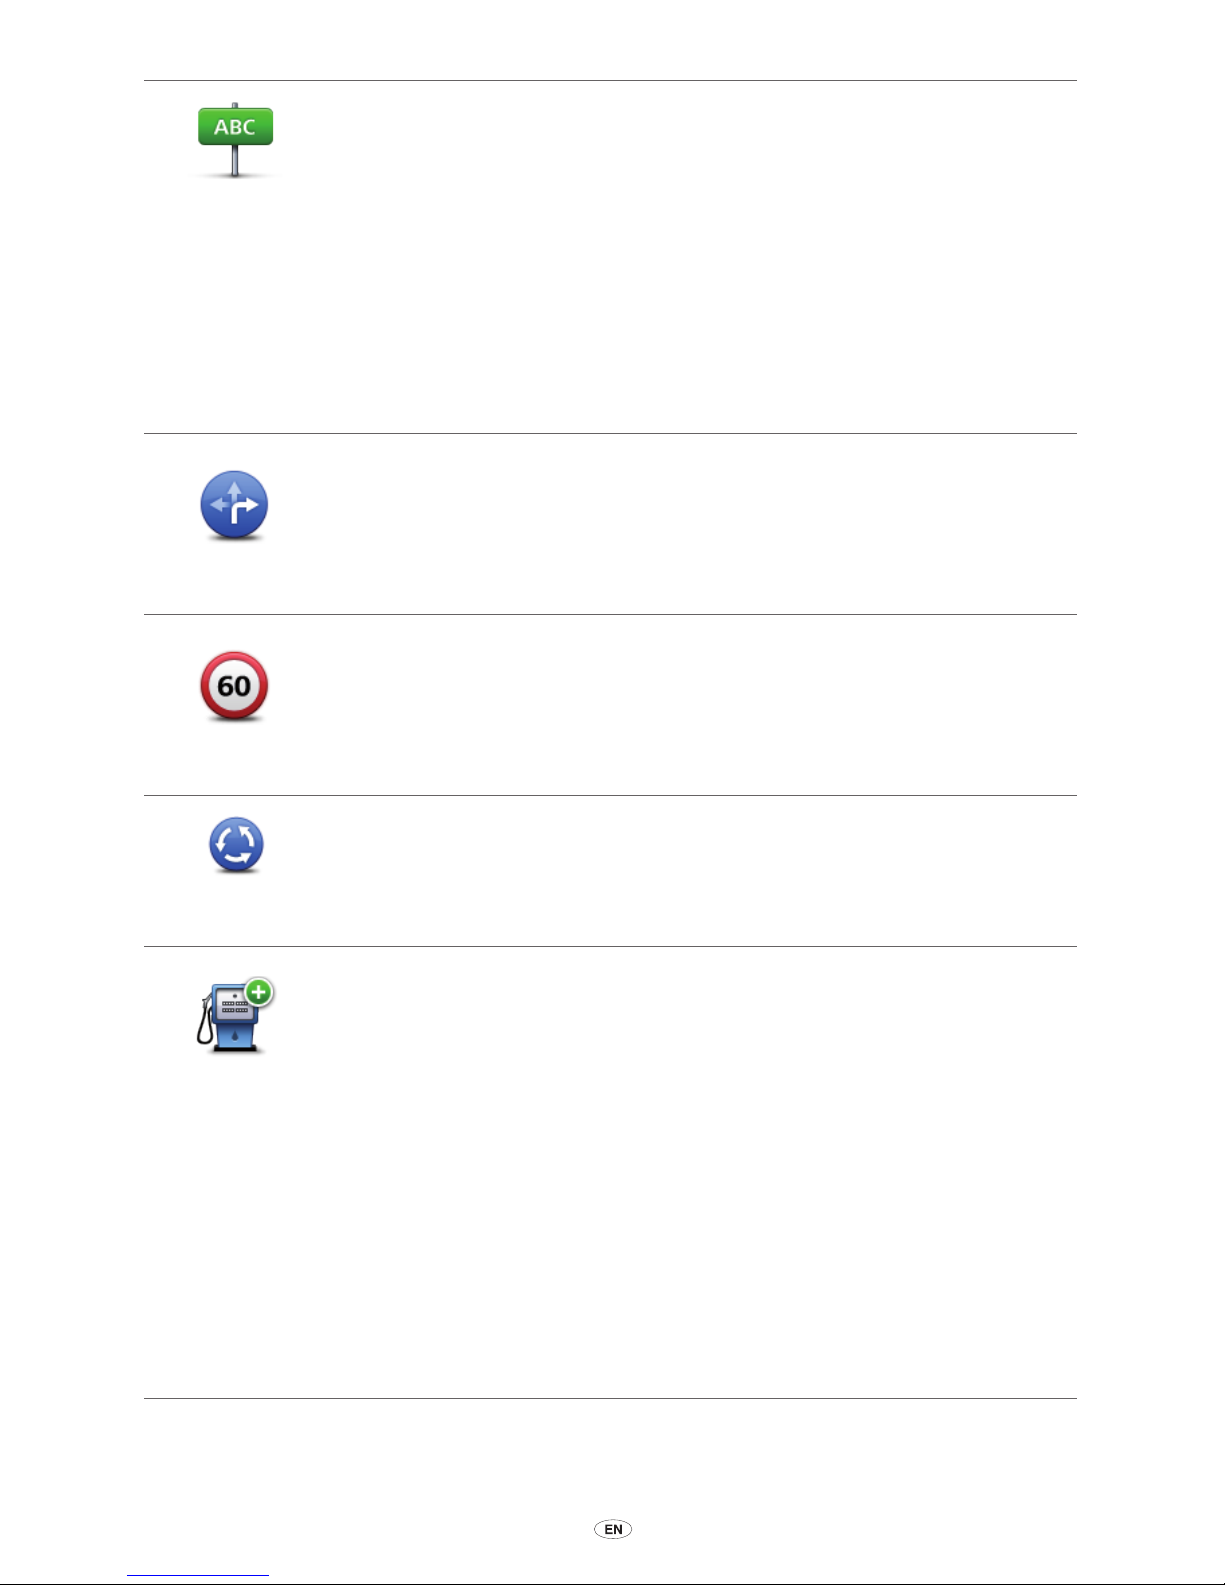
Edit street
name
Select this button to change the name of a street on your map.
For example, to rename a street near to your current location:
1. Select ”Edit street name”.
2. Select ”Near you”.
3. Select the street or section of a street you want to correct by selecting it
on the map.
The street you select is highlighted and the cursor shows the name of the
street.
4. Select ”Done”.
5. Type the correct street name.
6. Select ”Done”.
Change turn
restrictions
Select this button to change and report incorrect road turn restrictions.
Change road
speed
Select this button to change and report the road speed limit.
Add or remove
roundabout
Select this button to add or remove a roundabout.
Add missing
POI
Select this button to add a new Point of Interest (POI).
For example to add a new restaurant near to your current location:
1. Select ”Add missing POI”.
2. Select ”Restaurant” in the list of POI categories.
3. Select ”Near you”.
4. Select the location of the missing restaurant.
You can select the location by entering the address or by selecting the
location on the map. Select ”Near you” or ”Near home” to open the map at
your current location or at your Home location.
5. Select ”Done”.
6. Type the name of the restaurant then select ”OK”.
7. If you know the telephone number of the restaurant you can type it, then
select ”OK”.
If you don’t know the number, just select ”OK” without typing a number.
Page 48
46 MoveOn Navi
Edit POI
Select this button to edit an existing POI.
You can use this button to make the following changes to a POI:
• Delete the POI.
• Rename the POI.
• Change the telephone number of the POI.
• Change the category that a POI belongs to.
• Move the POI on the map.
Comment on
POI
Select this button to enter a comment about a POI. Use this button if you
cannot edit the error with the POI using the ”Edit POI” button.
Page 49
MoveOn Navi 47
11.4 Other types of correction
Other
Select this button to report other types of corrections that are described
below.
These corrections are not immediately applied to your map but are saved in
a special report.
You can report errors for existing streets, missing streets, errors in motorway
entrances and exits and missing roundabouts. If the correction you want to
report is not covered by any of these report types, enter a general description
then select ”Other”.
Missing street
Select this button to report a missing street. You have to select the start and
end points of the missing street.
City
Select this button to report an error about a city, town or village. You can
report the following types of error:
• City is missing
• Wrong city name
• Alternative city name
• Other
Motorway
entrance/exit
Select this button to report an error about a motorway entrance or exit.
Postcode
Select this button to report an error about a postcode.
Page 50

48 MoveOn Navi
12. Sounds and voices
12.1 About sounds and voices
Your MoveOn device uses sound for some or all of the following:
• Driving directions and other route instructions
• Trafc information
• Warnings that you set
There are two types of voice available for your device:
• Computer voices
Computer voices are generated by your device. They provide route instructions and read
aloud city and street names, trafc and other useful information.
• Human voices
These are recorded by an actor and only provide route instructions.
12.2 Selecting a voice
To select a different voice on your Lexus CT MoveOn Navi device, do the following:
• In the
Change preferences
menu, select ”Voice preferences” and then ”Change voice”.
12.3 Changing the volume level
You can change the volume on your Lexus CT MoveOn Navi device by press the left soft button (6)
when in the Driving View.
12.4 Switching off the sound
To turn off the sound, select ”Change preferences” in the Main menu, then select ”Turn off
sound”.
You can also press the centre button on the Navigation Control, then select ”Disable voice”.
To turn the sound back on, select ”Turn on sound”.
12.5 Switching off the voice
To switch off voice guidance instructions, select ”Change preferences”, then select ”Turn off
sound”.
Page 51
MoveOn Navi 49
13. Preferences
13.1 About Preferences
You can change the way your MoveOn device looks and behaves. To change the settings on your
device, press the [MENU] button and then select ”Change preferences” in the Main menu.
13.2 Use night colours / Use day colours
Use night
colours
Select this button to reduce the brightness of the screen and display the map
in darker colours.
When driving at night or when driving through a dark tunnel, it is easier
to view the screen and less distracting for the driver if the brightness of the
screen is dimmed.
Tip:
Your device can alter brightness levels automatically when the car
headlights are switched on. To automatically control brightness, select
Brightness in the Preferences menu and select ”Automatically switch day/
night mode”.
This button can also be found in the Quick menu.
Use day
colours
Select this button to increase the brightness of the screen and display the
map in brighter colours.
This button can also be found in the Quick menu.
13.3 Show POI on map
Show POI on
map
Select this button to choose the types of Point of Interest (POI) you want to
see on the map.
1. Select ”Show POI on map” in the
Change preferences
menu.
2. Select the POI categories you want to be shown on the map.
Select ”Find” to search for a category name.
3. Select whether you want POIs to be shown in 2D or 3D views of the
map.
4. Select ”Done”.
Point of Interest locations are shown on the map as symbols.
Page 52
50 MoveOn Navi
13.4 Safety preferences
Safety
preferences
Select this button to select the safety features you want to use on your
device. To set the options, check them, then press the centre button on the
Navigation Control.
13.5 Voice preferences
Change voice
Tap this button to change the voice that gives spoken directions and other
route instructions.
A wide range of voices are available. There are computer voices which can
read street names and other information directly from the map and there are
human voices which have been recorded by actors.
Disable voice
Tap this button to disable voice guidance. This button can also be found in
the Quick menu.
Voice
preferences
Tap this button to choose the situations when your MoveOn reads
instructions or warnings aloud.
13.6 Turn off sound / Turn on sound
Turn off sound
Select this button to switch off the sound on your MoveOn.
When you switch off the sound, voice guidance is also switched off which
means you will not hear directions and other route instructions.
Turn on sound
Select this button to switch on the sound for your MoveOn.
When you switch on the sound, voice guidance will remain switched off
unless you change the setting. To turn on voice guidance, select ”Turn on
voice guidance” in the Preferences menu.
Tip:
To change the volume while you are driving, select the left soft button
(6) while viewing the Driving View.
To change the voice that gives spoken directions on your MoveOn, select
”Change voice” in the Preferences menu.
Page 53
MoveOn Navi 51
13.7 Hide map
Hide map
Select this button to switch off the display screen.
Only the map and the instructions are hidden. The audible warnings for
cameras and the voice guidance instructions remain active, as does the audio
information from the radio.
Pressing any of the Navigation Control buttons will switch the screen back
on.
This button can also be found in the Quick menu.
13.8 Home location
Change Home
location
Select this button to set or change your Home location. You enter the
address in the same way as you do when you plan a route.
Your Home location provides an easy way to plan a route to an important
location.
For most people, your Home location will be your home address. However,
you might prefer to set the location to another regular destination, such as
your workplace.
13.9 Switch map
Switch maps
If you have more than one map on your memory card, use this button to
select the map you want to use for route planning and navigation.
Although you can store more than one map on the device, you can only use
one map at a time for planning and navigation.
Use TomTom HOME to make backups, download, add and delete maps from
your navigation device.
Note:
Don’t delete a map unless you have already made a backup of the
map. If you delete a map before you make a backup, you will no longer be
able to load the map on your device.
13.10 Manage Favourites
Manage
Favourites
Select this button to add, rename or delete Favourites.
Favourites provide an easy way to select a location without the need to enter
the address. They do not need to be favourite places, they can simply be
seen as a collection of useful addresses.
Page 54
52 MoveOn Navi
13.11 Manage POIs
Manage POIs
Select this button to manage your own Point of Interest (POI) categories and
locations.
You can set your MoveOn device to let you know when you are near to
selected POI locations.
You can create your own POI categories and add your own POI locations to
these categories.
Select the following buttons to create and maintain your own POIs:
• ”Add POI” - use this button to add a location to one of your own POI
categories.
• ”Warn when near POI” - use this button to set your device to warn you
when you are near selected POIs.
• ”Delete POI” - use this button to delete one of your own POI categories.
• ”Edit POI” - use this button to edit one of your own POIs.
• ”Add POI category” - use this button to create a new POI category.
• ”Delete POI category” - use this button to delete one of your own POI
categories.
13.12 Car symbol
Change car
symbol
Select this button to select the car symbol that shows your current location in
the Driving view.
13.13 2D map preferences
2D map
preferences
Select this button to set the default view of the map. To switch between 2D
and 3D views while driving, select the centre part of the status bar in Driving
View.
The 2D view shows a two dimensional view of the map as though viewed
from above.
The 3D view shows a three dimensional view of the map as though you are
driving through the landscape.
Page 55

MoveOn Navi 53
13.14 Change language
Change
language
Select this button to change the language used for all the buttons and
messages you see on your device.
You can choose from a wide range of languages. When you change the
language, you are also given the opportunity to change the voice.
To conrm, press the centre button on the Navigation Control.
13.15 Change map colours
Change map
colours
Select this button to select the colour schemes for day and night map
colours.
You can download new colours using TomTom HOME. To select a
downloaded colour, select an additional colour scheme, then the colour
required.
13.16 Brightness
Brightness
preferences
Select this button to set the brightness of the screen.
You can also set these options:
• ”Day colour brightness” - if this option is selected, your device increases
the brightness of the screen.
• ”Night colour brightness” - if this option is selected, your device reduces
the brightness of the night colours so they are not distracting.
• ”Automatically switch day/night brightness” - select this option to
automatically alter the brightness based on the car’s illumination level.
To view the map and menus in day or night colours, select ”Use day colours”
or ”Use night colours” in the Preferences menu.
This button can also be found in the Quick menu.
Page 56
54 MoveOn Navi
13.17 Status bar preferences
Status bar
preferences
Select this button to select the information you want to see on the status bar:
• ”Arrival time” - the time you are due to arrive at your destination.
• ”Remaining time” - the time to your destination.
• ”Remaining distance” - the distance to your destination.
• ”Show leeway to arrival time” - your device shows how late or early you
will arrive, compared with your preferred arrival time that was set when
you planned the route.
• ”Direction” - a compass bearing in degrees.
• ”Show lane guidance” - switches status bar lane guidance on or off.
13.18 Automatic zooming
Automatic
zooming
During navigation, before each change of direction, the map gradually
zooms into the junction.
Select this button to switch zooming on or off.
13.19 Street name preferences
Street name
preferences
Select this button to set the information that is shown on the map in the
Driving View. The following options are available:
• ”Show house number before street name ”
• ”Show street names”
• ”Show next street name”
• ”Show current street name on map”
13.20 Set units
Set units
Select this button to set the units used on your device for features such as
route planning.
Page 57

MoveOn Navi 55
13.21 Planning preferences
Planning
preferences
Select this button to set the way your MoveOn calculates the routes that you
plan. The settings for planning consist of several options that are spread over
several screens. Each setting is described below.
Route planning
Set the type of route you want your MoveOn to calculate.
Select ”IQ Routes” to set if you want the device to use IQ Routes information to help nd the best
route. If IQ Routes are used, this allows routes to be calculated according to the average level of
trafc for the given day and time and the best route to be planned according to actual speeds
measured on the roads.
Fastest route
Choose whether you want to avoid motorways.
Toll road, ferry, carpool lanes and unpaved road settings
Set how your MoveOn should manage each of these four road features when the device calculates
a route.
Carpool lanes are sometimes known as High Occupancy Vehicle Lanes and are not present in every
country. To travel on these lanes, you may need to have more than one person in the car, for
example, or the car may need to use environmentally-friendly fuel.
Replanning settings
• Select whether or not you want your device to replan your route when a faster route is found
while you drive. This might occur due to changes in the trafc situation.
13.22 Show lane images
Show lane
images
At some exits and road junctions, a 3D close-up view with arrows shows you
which lane you should be in.
Select this button to switch lane images on or off.
Page 58
56 MoveOn Navi
13.23 Start up
Start-up
preferences
Select this button to set what happens when your device starts.
You can change the start-up screen by using a photo or image of your
choice.
You can also change other preferences such as whether you want to be asked
about sharing your information with TomTom each time the device starts.
13.24 Show compass
Show compass
Select this button to show or hide the compass.
The arrow always points towards north and the direction you are moving is
shown at the top of the compass.
13.25 Set clock
Set clock
Select this button to select the time format.
As soon as you have a GPS x, the time will be set automatically. If you don’t
have a GPS x, you can choose to set the time manually.
13.26 Show tips
Show tips
When using your navigation device, the system displays tips to help you to
get the best use of the functions.
You can switch tips off by selecting ”Hide tips”, and switch them on again by
selecting ”Show tips”.
Page 59
MoveOn Navi 57
13.27 Show fewer menu options
Show fewer
menu options
Select this button to reduce the number of available menu buttons while
driving.
Select the button again for switch all menu buttons back on.
13.28 Reset factory settings
Reset factory
settings
Select this button to delete all your personal settings and restore the standard
factory settings to your MoveOn device.
This is not a software update and will not affect the version of the software
application installed on your device.
Important: This feature deletes all your personal settings!
If you want to keep your personal information and settings, you should
perform a full backup of your device before you reset the device. You can
then restore all your personal information and settings after you reset the
device.
This includes items such as your Home and Favourite locations, your personal
menu and your POI categories and POI locations.
Page 60

58 MoveOn Navi
14. Points of Interest
14.1 About Points of Interest
Points of Interest or POIs are useful places on the map.
Here are some examples:
• Restaurants
• Hotels
• Museums
• Parking garages
• Petrol stations
14.2 Creating POIs
Tip:
For help on managing third party POIs, search for ”Third party POIs” at: tomtom.com/
support.
1. Select ”MENU” screen to open the Main menu.
2. Select ”Change preferences”.
3. Select ”Manage POIs”.
4. If there are no POI categories or the one you want to use does not exist, select ”Add POI
category” and create a new category.
Every POI must be assigned to a POI category. This means you need to have created at least
one POI category before you can create your rst POI.
You can only add POIs to POI categories you have created.
For more information on creating POI categories, read
Managing POIs
.
5. Select ”Add POI”.
6. Select the POI category you want to use for the new POI.
7. Select a button to enter the POI address in the same way that you plan a route.
The POI is created and saved in the selected category.
Page 61
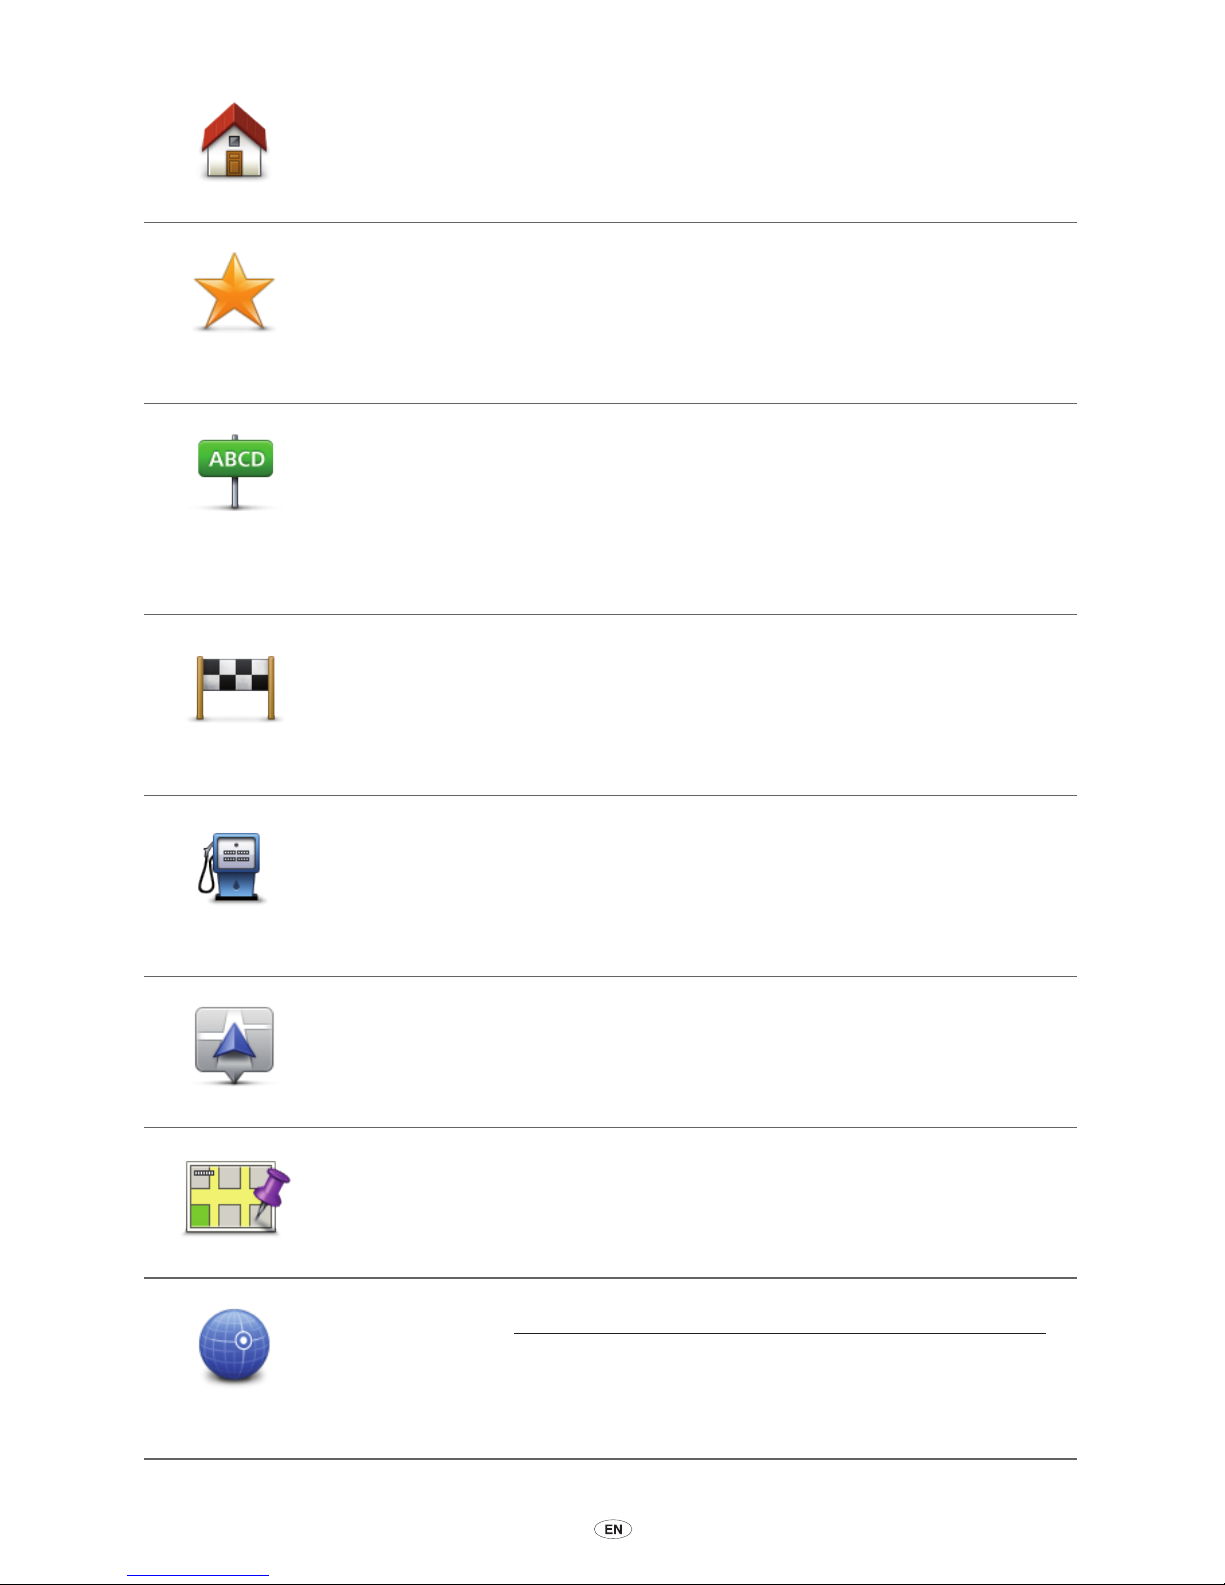
MoveOn Navi 59
Home
Select this button to set your Home location as a POI.
This is useful if you decide to change your Home location, but rst want to
create a POI using the current Home location.
Favourite
Select this button to create a POI from a Favourite.
You might want to create a POI from a Favourite because you can only create
a limited number of Favourites. If you want to create more Favourites you
need to delete some Favourites. To avoid losing a Favourite, save the location
as a POI before you delete the Favourite.
Address
Select this button to enter an address as a new POI.
When you enter an address, you can choose from four options.
• City centre
• Street and house number
• Postcode
• Crossing or intersection
Recent
destination
Select this button to select a POI location from a list of places you have
recently used as destinations.
Point of
Interest
Select this button to add a Point of Interest (POI) as a POI.
For example, if you are creating a category of POIs for your favourite
restaurants, use this option instead of entering the addresses of the
restaurants.
My location
Select this button to add your current location as a POI.
For example, if you stop somewhere interesting, you can use this button to
create a new POI at the current location.
Point on map
Select this button to create a POI using the map browser.
Use the cursor to select the location of the POI, then select ”Done”.
Latitude
Longitude
Select this button to create a POI by entering latitude and longitude values.
Page 62

60 MoveOn Navi
Local Search
Select this button to use Local Search to search for shops and businesses in
and around your current location.
You can choose to search for shops and businesses near you, near your
destination, near any other destination or in a city.
For example, if you are looking for a swimming pool near your current
location, enter ’swimming pool’ and choose the best search result.
Note:
Only available on LIVE devices.
14.3 Using POIs to plan a route
When you plan a route, you can use a POI for the destination.
The following example shows how to plan a route to a car park in a city:
1. Select ”Navigate to” in the Main menu.
2. Select ”Point of Interest”.
3. Select ”POI in city”.
Tip:
The last POI you viewed on your MoveOn device is also shown in the menu.
4. Enter the name of the town or city and select it when it is shown in the list.
5. Select the arrow button to expand the list of POI categories.
Tip:
If you already know the name of the POI you want to use, you can select ”Search by
name” to enter the name and select this location.
6. Scroll down the list and select ”Car park”.
7. The car park closest to your destination is shown at the top of the list.
8. The following list explains the distances shown next to each POI. How the distance is measured
varies depending on how you initially searched for the POI:
• POI near you - distance from your current location
• POI in city - distance from the city centre
• POI near Home - distance from your Home location
• POI along route - distance from your current location
• POI near destination - distance from your destination
9. Select the name of the car park you want to use and select ”Done” when the route has been
calculated.
Your device starts to guide you to the car park.
Tip:
You can also use Local Search to nd useful locations. For more information about Local
Search and other LIVE Services, go to tomtom.com/services.
14.4 Showing POIs on the map
You can select the types of POI locations you want to see on your maps.
1. Select ”Show POI on map” in the Change preferences menu.
2. Select the categories you want to be shown on the map.
3. Select ”Done”.
4. Select whether you want to see POI locations in 2D and 3D views of the map.
5. Select ”Done”.
The types of POI you have selected are shown as symbols on the map.
Page 63

MoveOn Navi 61
14.5 Setting warnings for POIs
You can set a warning sound or message to be played or displayed when you approach a selected
type of POI, such as a petrol station.
The following example will show how to set a warning sound to be played when you are 250
metres from a petrol station.
1. Select ”Manage POIs” in the Change preferences menu.
2. Scroll down the list and select ”Petrol station”.
Tip:
To remove a warning, select the category name and then select ”Yes”. POI categories
which have been set with a warning have a sound symbol next to the category name.
3. Set the distance as 250 metres and select ”OK”.
4. Select ”Sound effect” and then select ”Next”.
5. Select the warning sound for the POI and then select Next.
6. If you only want to hear the warning when the POI is directly on a planned route, select ”Warn
only if POI is on route”. Then select ”Done”.
The warning is set for the selected POI category. You will hear a warning sound when you are
250 metres from a petrol station on your route.
14.6 Manage POIs
Select ”Manage POIs” to manage your POI categories and locations.
You can set your MoveOn to let you know when you are near to selected POI locations. In this way
you could, for example, set the device to let you know you when you are approaching a petrol
station.
You can create your own POI categories and add your own POI locations to these categories.
This means you can, for example, create a new POI category called Friends. You could then add all
your friends’ addresses as POIs in this new category.
Select the following buttons to create and maintain your own POIs:
• ”Add POI” - select this button to add a location to one of your own POI categories.
• ”Warn when near POI” - select this button to set your device to warn you when you are near
selected POIs.
• ”Delete POI” - select this button to delete one of your own POI categories.
• ”Edit POI” - select this button to edit one of your own POIs.
• ”Add POI category” - select this button to create a new POI category.
• ”Delete POI category” - select this button to delete one of your own POI categories.
Page 64
62 MoveOn Navi
15. Itinerary planning
15.1 About Itineraries
An Itinerary is a plan for a journey including more locations than your nal destination.
You could use an Itinerary for trips such as:
• A driving holiday through a country with lots of stops.
• A two day car journey with an overnight stop.
• A short drive which passes by Points of Interest.
In all these examples you could select ”Navigate to...” for each place. However, if you use an
Itinerary, you can save time by planning everything in advance.
An Itinerary can include the following items:
• Destination - a location on your journey where you want to stop.
• Waypoint - a location on your journey where you want to travel through without stopping.
Destinations are shown using this symbol.
Waypoints are shown using this symbol.
15.2 Creating an Itinerary
1. Select ”MENU” to bring up the Main Menu.
2. Select ”Itinerary” planning.
The Itinerary planning screen opens. At rst, there are no items in the Itinerary.
3. Select ”Add” and select a location.
Tip:
You can add items to your Itinerary in any order and rearrange the order later.
Page 65
MoveOn Navi 63
15.3 Organising an Itinerary
Select an item on your Itinerary by pressing the Centre button on the Navigation Control (5). You
then see a range of Itinerary editing features as shown below:
Mark as
waypoint
You can change a destination into a waypoint using this button.
Remember that waypoints are points on your journey to your destination
that you want to pass and destinations are places where you want to stop.
This button is only shown if the item you selected is a destination.
Mark as
destination
You can change a waypoint into a destination using this button.
Remember that destinations are places where you want to stop, and
waypoints are points on your journey to your destination that you want to
pass.
This button is only shown if the item you selected is a waypoint.
Mark ”visited”
Select this button to miss out part of your Itinerary. Your MoveOn will ignore
this item and all the items before it in the Itinerary.
It will navigate you to the next item in the Itinerary.
This button is only shown if you are still due to visit this item.
Mark ” to visit”
Select this button to repeat part of your Itinerary. Your device will navigate
you to this item followed by the rest of the items in the Itinerary.
This button is only shown if you have already visited this item.
Move item up
Select this button to move the item up the Itinerary.
This button is unavailable if the item is at the top of the Itinerary.
Move item
down
Select this button to move the item down the Itinerary.
This button is unavailable if the item is at the bottom of the Itinerary.
Show on map
Select this button to see the location of the item on the map.
Page 66

64 MoveOn Navi
Delete item
Select this button to delete the item from the Itinerary.
15.4 Following an Itinerary
When you use an Itinerary to navigate, the route will be calculated to the rst destination on the
Itinerary. Your MoveOn calculates the remaining distance and time to the rst destination and not
for the whole Itinerary.
As soon as you start to use an Itinerary, the route is calculated from your current position. You do
not need to set a departure point.
When you have passed a waypoint or reached a destination, it is marked as visited.
Waypoints are shown on the map. Your device will not warn you when you are approaching a
waypoint or when you arrive at a waypoint.
15.5 Start using an Itinerary
Select ”Options”, then select ”Start navigation”.
To save an Itinerary, select ”Save Itinerary”.
To load a saved Itinerary, select ”Load Itinerary”.
To create a new Itinerary, select ”New Itinerary” and to delete one, select ”Delete Itinerary”.
Page 67

MoveOn Navi 65
16. Help
16.1 About getting help
Select ”Help me” in the Main menu to navigate to emergency services centres and other specialist
services.
For example, if you are involved in a car accident, you could use the Help menu to nd the contact
details for the nearest hospital, call them using a phone and tell them your exact location.
Tip:
If you do not see the Help button in the Main menu, select ”Change preferences” and then
”Safety preferences”. Clear the checkbox for
Show only essential menu options while
driving
.
16.2 Using Help to phone a local service
To use Help to locate a service centre, contact the centre by phone and navigate from your current
location to the centre, do the following:
1. Select the screen to show the Main Menu.
2. Select ”Help me”.
3. Select ”Emergency phone numbers”.
4. Select the type of service you require, for example, ”Nearest hospital”.
5 Select a centre from the list, the nearest is shown at the top of the list.
Your device shows your position on the map along with a description of the location. This
helps you explain where you are while making a call.
The phone number is displayed for you to call using a phone.
6. To navigate your way to the centre by car, select ”Navigate there”.
Your MoveOn starts guiding you to your destination.
Page 68
66 MoveOn Navi
16.3 Help menu options
Note:
In some countries, information may not be available for all services.
Emergency
phone numbers
Select this button to nd the contact details and location of a service centre.
Drive to help
Select this button to navigate your way by car to a service centre.
Where am I?
Select this button to see your current location on the map.
Guided tours
Select this button to read a selection of guides relating to your navigation
device.
Page 69
MoveOn Navi 67
17. Favourites
17.1 About Favourites
Favourites provide an easy way to select a location without the need to enter the address. They do
not need to be favourite places, they can simply be seen as a collection of useful addresses.
17.2 Creating a Favourite
To create a Favourite, do the following:
1. Select the screen to bring up the Main menu.
2. Select ”Add favourite”.
Tip:
You can also create a favourite by selecting ”Change preferences”, then ”Manage favourites”
and then ”Add”.
Select the type of Favourite by selecting one of the buttons described below:
Home
You can set your Home location as a Favourite.
Favourite
You cannot create a Favourite from another Favourite. This option will always
be unavailable in this menu. To rename a Favourite, select ”Favourites” in the
Settings menu.
Address
You can enter an address as a Favourite.
Recent
destination
Create a new Favourite by selecting a location from a list of your recent
destinations.
Page 70
68 MoveOn Navi
Point of
Interest
If you visit a POI you particularly like, for example a restaurant, you can add it
as a Favourite.
My location
Select this button to add your current location as a Favourite.
For example, if you stop somewhere interesting, while you are there you can
select this button to create the Favourite.
Point on map
Select this button to create a Favourite using the Map Browser.
Select the location of the Favourite using the cursor, then select Done.
Latitude
Longitude
Select this button to create a Favourite by entering latitude and longitude
values.
Your device suggests a name for your new Favourite. To enter a new name, there is no need to
delete the suggested name, you just start typing.
Tip:
It is a good idea to give your Favourite a name that is easy to remember.
Select ”OK”.
Your new favourite appears in the list.
After you have added two or more Favourites, you are asked whether you make regular trips to the
same locations. If you select YES, you can enter these destinations as your favourite destinations.
Every time you switch on your device, you can immediately select one of these locations as your
destination. To change these destinations or select a new destination, select Start-up in the Settings
menu, then select ”Ask for a destination”.
Page 71

MoveOn Navi 69
17.3 Using a Favourite
You can use a Favourite as a way of navigating to a place without having to enter the address.
To navigate to a Favourite, do the following:
1. Select the screen to bring up the Main menu.
2. Select ”Navigate to”.
3. Select ”Favourite”.
4. Select a Favourite from the list.
Your MoveOn device calculates the route for you.
5. When the route is calculated, select ”Done”.
Your device will immediately start guiding you to your destination with spoken instructions and
visual instructions on the screen.
17.4 Changing the name of a Favourite
To change the name of a Favourite, do the following:
1. Select ”MENU” to bring up the Main menu.
2. Select ”Change preferences” to open the Preferences menu.
3. Select ”Manage favourites”.
4. Select the Favourite you want to rename.
Tip:
Use the left and right arrows to choose another Favourite from your list.
5. Type in the new name and then select ”OK”.
6. Select ”Done”.
17.5 Deleting a Favourite
To delete a Favourite, do the following:
1. Select ”MENU” to bring up the Main menu.
2. Select ”Change preferences” to open the Preferences menu.
3. Select ”Manage Favourites”.
4. Select the Favourite you want to delete.
Tip:
Use the left and right arrows to choose another Favourite from your list.
5. Select ”Yes” to conrm the deletion.
6. Select ”Done”.
Page 72
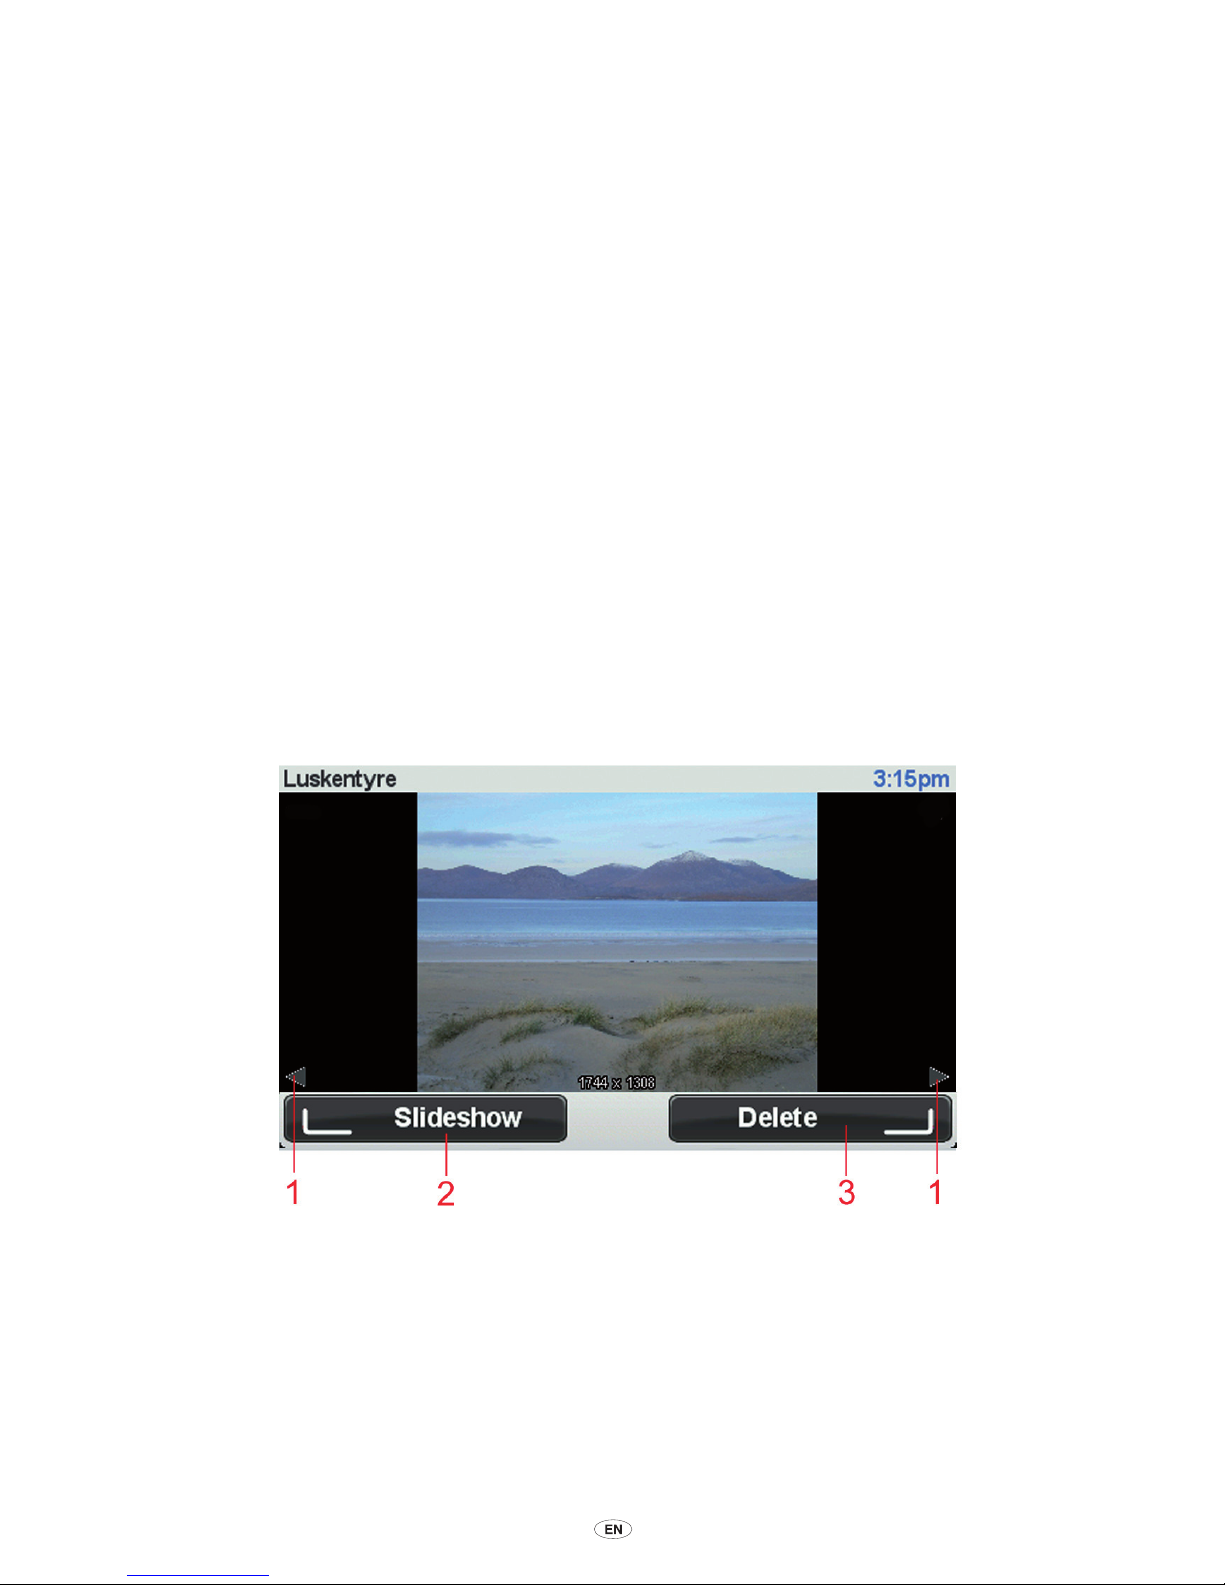
70 MoveOn Navi
18. Photo Gallery
18.1 About using media
Important:
Only use the Photo Gallery while you are stationary. It is dangerous to change
settings or view photos while you are driving.
On your MoveOn you can store and view photos. Photos must be saved as .jpg or .bmp format.
Transfer photos from your computer to your MoveOn using TomTom HOME.
18.2 Looking at photos
To look at photos on your MoveOn, do the following:
• Select ”Photo Gallery” in the Main Menu.
• The Photo Gallery starts, showing small versions (thumbnails) of all the photos on your device.
• Select the thumbnail of a photo to view a large version of that photo.
1. Use shift left and shift right buttons to move to the next and the previous photo.
2. Select ”Slideshow” using the left soft button to start a slideshow.
3. Select ”Delete” using the right soft button to delete a photo.
Page 73

MoveOn Navi 71
19. Services
19.1 About LIVE Services
Note:
LIVE Services are not available in all countries or regions, and not all LIVE Services are
available in all countries or regions. You may be able to use LIVE Services when travelling
abroad. For more information on available services, go to tomtom.com/services.
The following LIVE Services may be available for your device. LIVE Services are subscription-based.
• HD Trafc
• Speed Cameras
• Weather
• Local Search
• QuickGPSxTM
19.2 Safety Notice
Some navigation devices contain a GSM/GPRS module which can interfere with electrical devices
such as cardiac pacemakers, hearing aids and aviation equipment.
Interference with these devices may endanger the health or life of you or others.
If your device includes a GSM/GPRS module, do not use it near unprotected electrical units or in
areas where the use of mobile telephones is prohibited, such as hospitals and aircraft.
19.3 LIVE Services subscriptions
Checking your LIVE Services subscription
You can check the status of your subscriptions at any time. In the Main Menu, select ”LIVE
Services” and then select ”My Services”.
Your MoveOn also warns you when your LIVE Services subscription is approaching the renewal
date.
For more information about LIVE Services subscription and payment terms, go to tomtom.com/
services.
Renewing your LIVE Services subscription using your device
1. In the Main Menu, select ”LIVE Services” and then select ”My Services”.
The current status of your LIVE Services is shown.
2. Select on the service you want to renew.
Your MoveOn conrms that you want to renew your subscription.
3. Select ”Yes”.
The renewal request is sent to TomTom. You should complete payment online, on or before
the date shown on your MoveOn.
Page 74

72 MoveOn Navi
Renewing your LIVE Services subscription using TomTom HOME
You can buy LIVE services as a pre-paid subscription using TomTom HOME as follows:
1. Start TomTom HOME on your computer.
2. Insert your memory card into your card reader.
3. In TomTom HOME, click
Add Traffic, Voices, Safety Cameras etc
.
4. Click
LIVE Services
.
You can then choose from LIVE Service bundles available via subscription in the online shop.
Follow the onscreen instructions or use the HOME Help to get more information.
19.4 About TomTom HD Trafc
TomTom HD Trafc is a unique TomTom service providing real-time trafc information. For more
information about TomTom services, go to tomtom.com/services.
In combination with IQ Routes, HD Trafc helps you plan the optimum route to your destination
taking into account the current local trafc conditions.
Your Lexus CT MoveOn Navi device regularly receives information about the changing trafc
conditions. If trafc jams or other incidents are found on your current route, your device will offer
to replan your route to try and avoid any delays.
19.5 About Local Search
Using Local Search, you can search for shops and businesses and then plan a route to the
destination you choose.
19.6 Using local search
To nd a location using local search and plan a route there, follow the steps below. In this example,
you search for a supermarket near to your current position.
1. Select ”MENU” to bring up the Main Menu, then select ”Navigate to”.
2. Select the ”Local Search” button.
3. Select ”Search near you”.
4. Type ’supermarket’ then select ”OK”.
The locations that match your search are shown in a list with their distance from your current
location and rating.
5. Select one of the locations in the list.
The location is shown on the map.
Select ”Show info” to see more information about this location.
6. Select ”Select”.
Choose whether you want to navigate there, show the location on a map, travel via that
location or add it as a favourite.
Page 75

MoveOn Navi 73
19.7 About Safety Alerts
Note:
LIVE Services are not available in all countries or regions, and not all LIVE Services are
available in all countries or regions. You may be able to use LIVE Services when travelling
abroad. For more information on available services, go to tomtom.com/services.
The Safety Alerts service warns you about the following roadside camera locations:
• Safety camera locations.
• Accident blackspot locations.
• Mobile safety camera locations.
• Average speed camera locations.
• Toll road camera locations.
• Trafc light camera locations.
Important:
Regularly connect your memory card to TomTom HOME, using your computer,
to update the list of locations for all types of safety alerts. The locations of mobile
cameras are sent directly to your device.
19.8 Other services
The following services are also available on your MoveOn device:
Weather
The Weather service gives you ve-day weather reports for any location on your map.
QuickGPSfix
QuickGPSx contains information about GPS satellite positions which helps your navigation device
nd your position faster.
My Services
To check your subscription, select ”Services” in the Main Menu and then select ”My Services”.
Your MoveOn tells you when your LIVE Services subscriptions are due for renewal. You can use
your device to tell TomTom that you wish to renew your current subscription.
For more information about LIVE Services subscription and payment terms, go to tomtom.com/
services.
Page 76
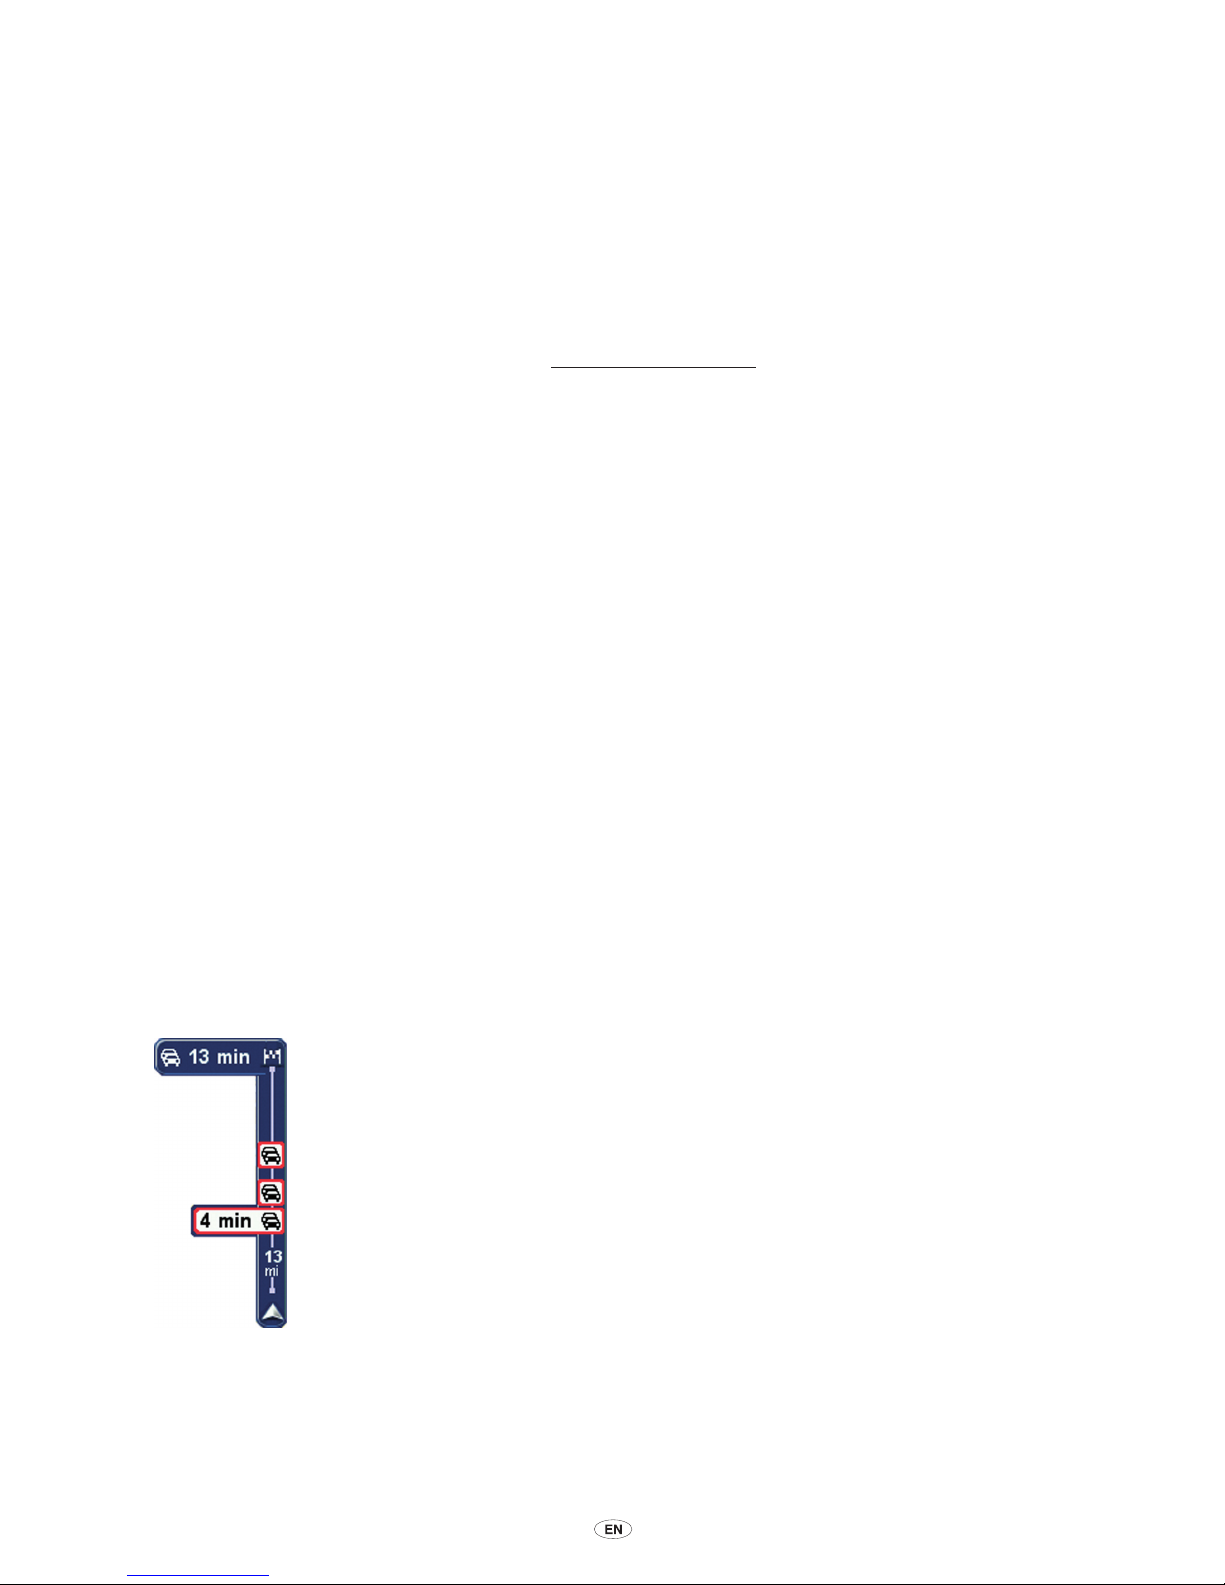
74 MoveOn Navi
20. Trafc
20.1 About TomTom HD Trafc
TomTom HD Trafc is a unique TomTom service providing real-time trafc information. For more
information about TomTom services, go to tomtom.com/services.
In combination with IQ Routes, HD Trafc helps you plan the optimum route to your destination
taking into account the current local trafc conditions.
Your Lexus CT MoveOn Navi device regularly receives information about the changing trafc
conditions. If trafc jams or other incidents are found on your current route, your device will offer
to replan your route to try and avoid any delays.
20.2 Safety Notice
Some navigation devices contain a GSM/GPRS module which can interfere with electrical devices
such as cardiac pacemakers, hearing aids and aviation equipment.
Interference with these devices may endanger the health or life of you or others.
If your device includes a GSM/GPRS module, do not use it near unprotected electrical units or in
areas where the use of mobile telephones is prohibited, such as hospitals and aircraft.
20.3 Using trafc information
The trafc sidebar is shown on the right side of the Driving View. It warns you about trafc
incidents on your planned route.
The top of the trafc sidebar represents your destination and shows the total
delay time for any incidents and busy roads on your route.
The central section of the trafc sidebar shows individual trafc incidents in
the order they occur on your route.
The bottom of the trafc sidebar represents your current position and shows
the distance to the next incident.
To make the trafc sidebar more readable some incidents may not be shown.
These incidents will always be of minor importance and only cause short
delays.
Page 77
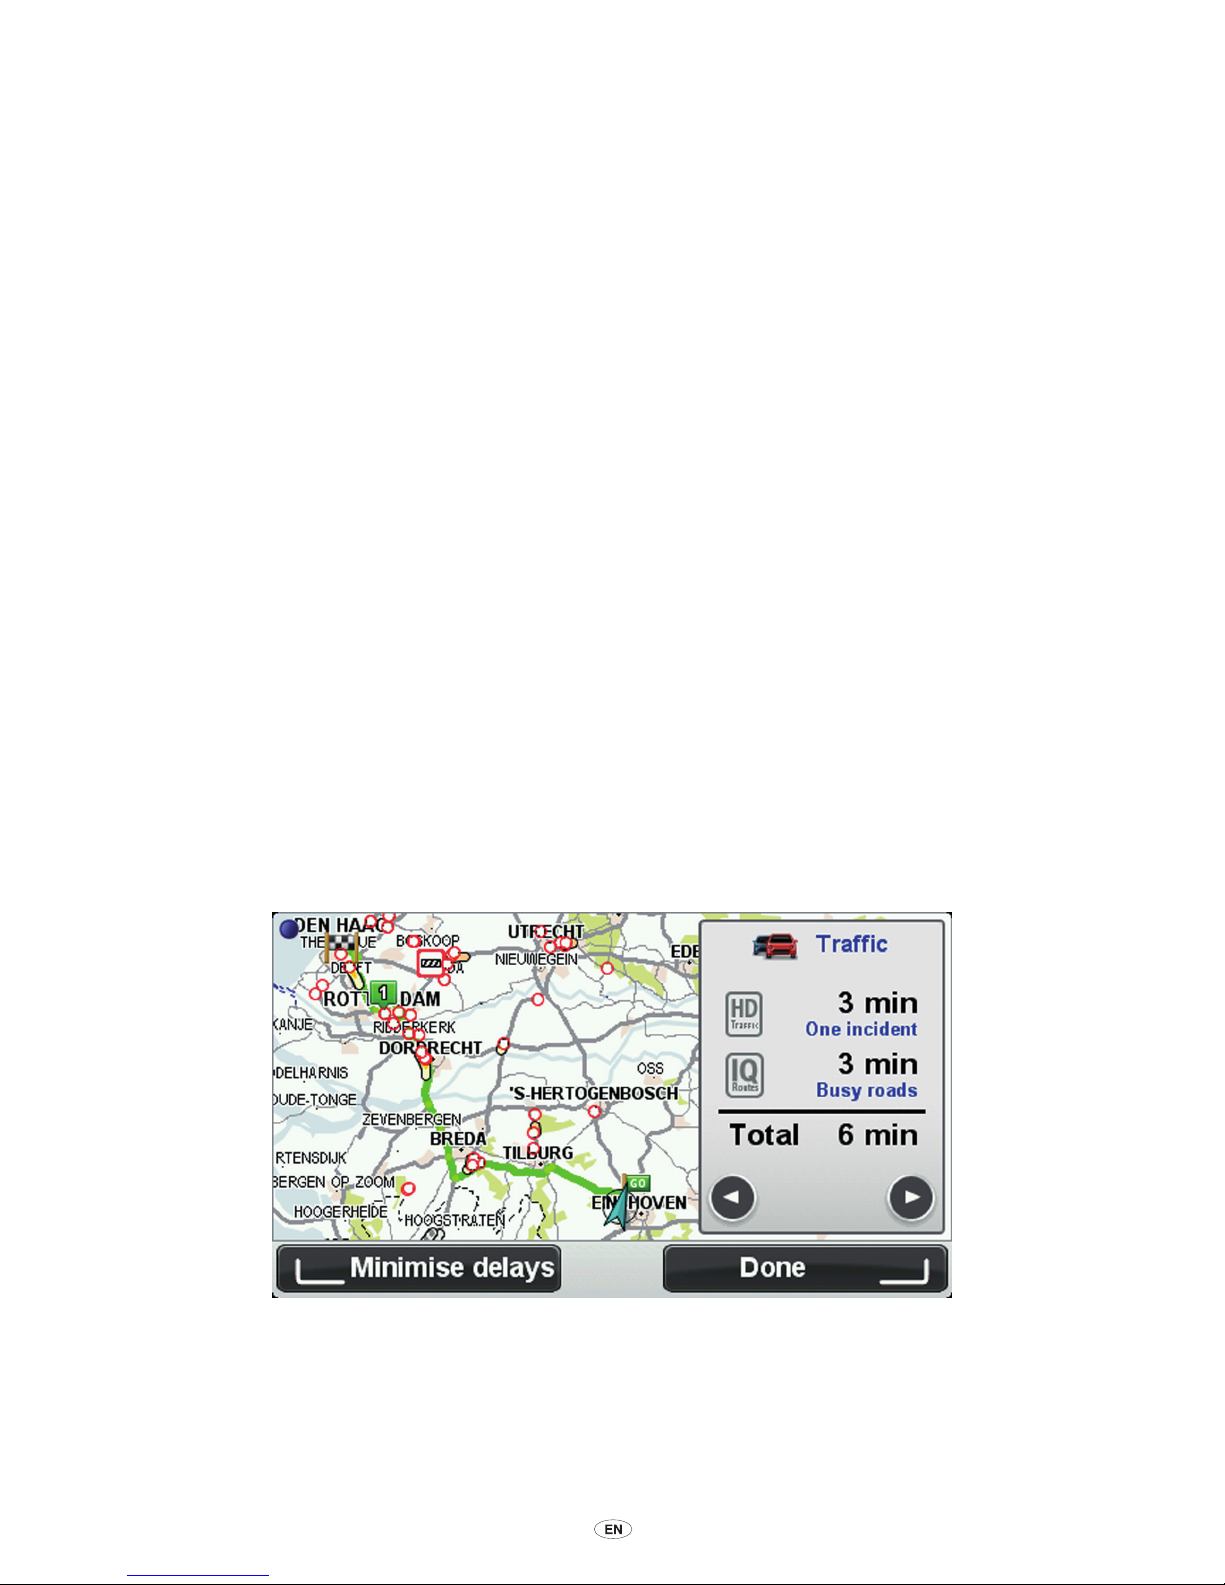
MoveOn Navi 75
20.4 Taking the fastest route
Your MoveOn device regularly looks for a faster route to your destination. If the trafc situation
changes and a faster route is found, your device offers to replan your journey so you can use the
faster route.
You can also set your device to automatically replan your journey whenever a faster route is found.
To apply this setting, select ”Trafc preferences” in the Trafc menu. Open the Trafc menu by
selecting the trafc sidebar.
To manually nd and replan the fastest route to your destination, do the following:
1. Press shift right (4) on the Navigation Control to select the trafc sidebar.
A summary of trafc on your route is shown.
2. Select ”Minimise delays”.
Your device searches for the fastest route to your destination.
The new route may include trafc delays. You can replan the route to avoid all trafc delays,
but a route which avoids all delays will usually take longer than the fastest route.
3. Select ”Done”.
20.5 Show trafc on route
To check for delays on your route, select ”Show trafc on route” in the Trafc menu. Your
navigation device shows a summary of the trafc delays on your route.
The total includes any delays due to trafc incidents and those due to busy roads, with information
provided by IQ Routes.
Select ”Minimise delays” to check if you can reduce the delay.
Note:
You can also access the Show trafc on route screen by selecting the trafc area of the LIVE
summary tab.
Page 78
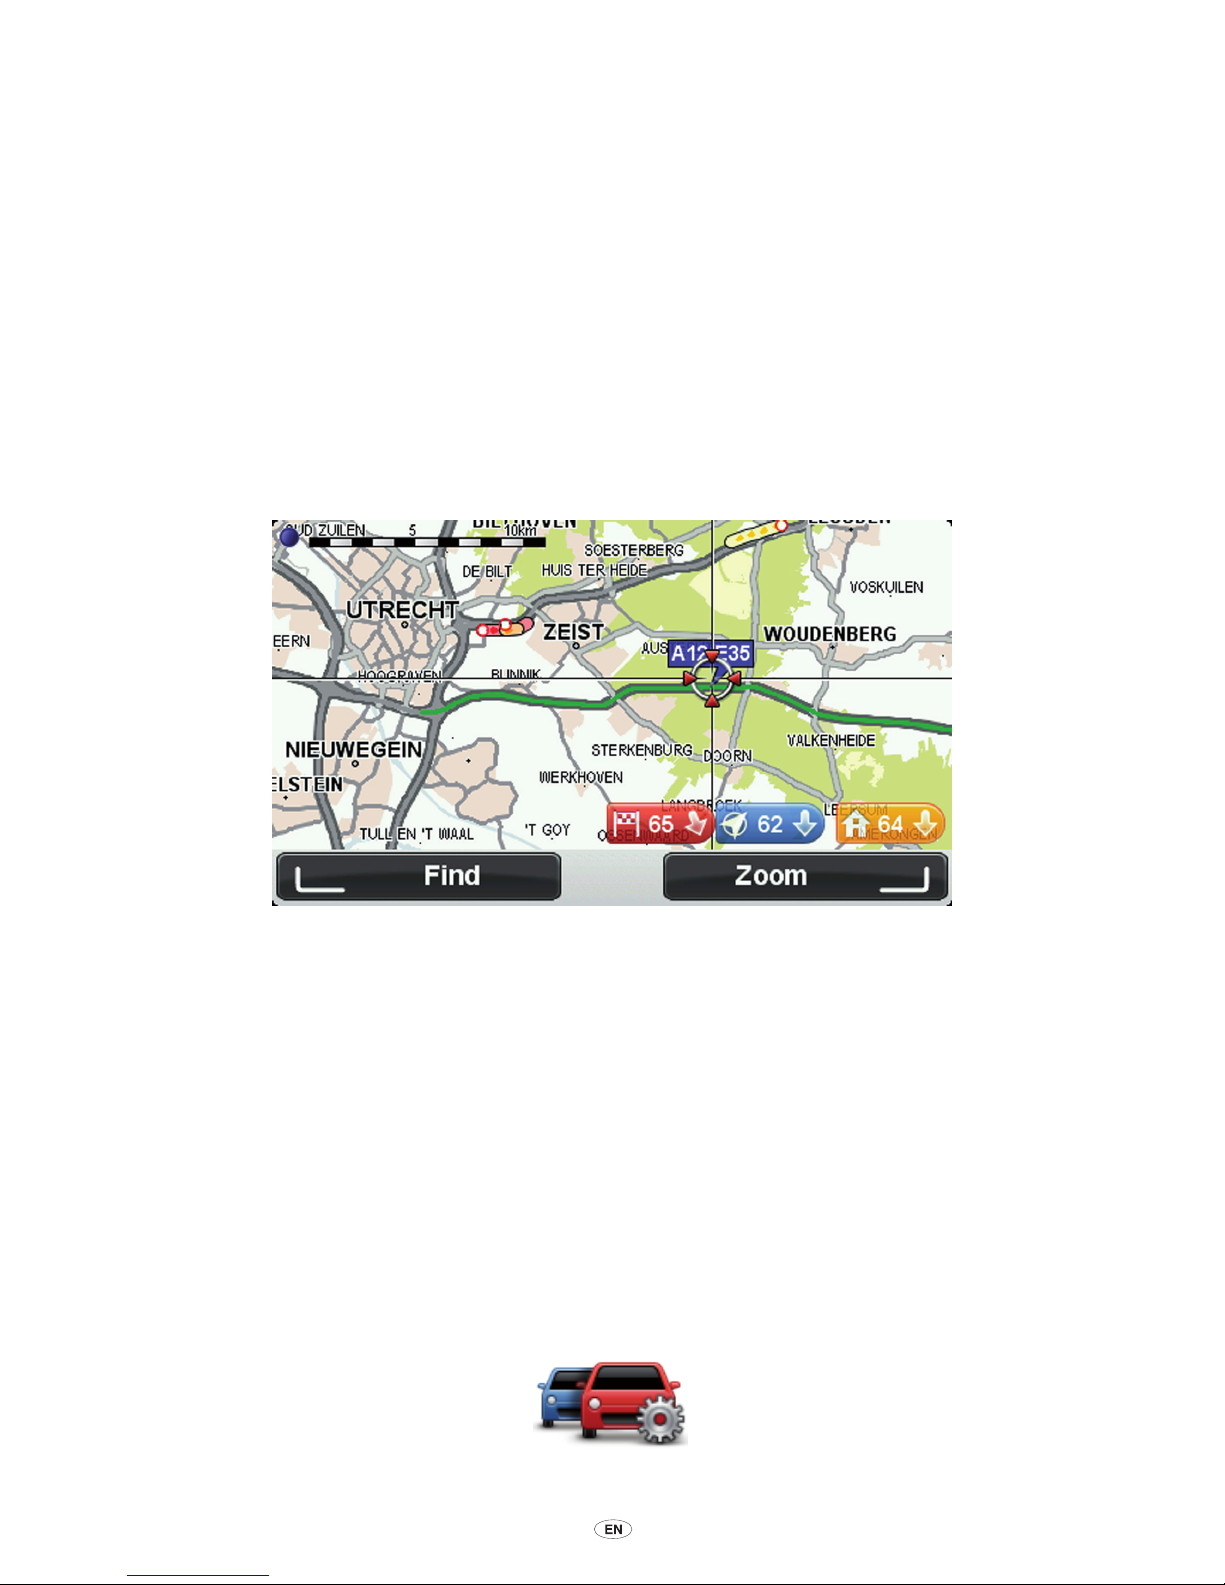
76 MoveOn Navi
20.6 Checking trafc incidents in your
area
Get an overview of the trafc situation in your area, using the map. To nd local incidents and their
details, do the following:
1. Select ”Trafc” in the Main menu.
2. Select ”Browse map”.
The map browser screen is shown.
3. If the map does not show your location, select the marker to centre the map on your current
location.
The map shows trafc incidents in the area.
4. Select any trafc incident to get more information.
A screen is shown that gives you detailed information about the incident you chose. To display
information about surrounding incidents use the left and right arrows at the bottom of this
screen.
20.7 Changing trafc preferences
Use the ”Trafc preferences” button to choose how trafc information works on your navigation
device.
1. Select ”Trafc” in the Main menu.
2. Select ”Trafc preferences”.
Page 79
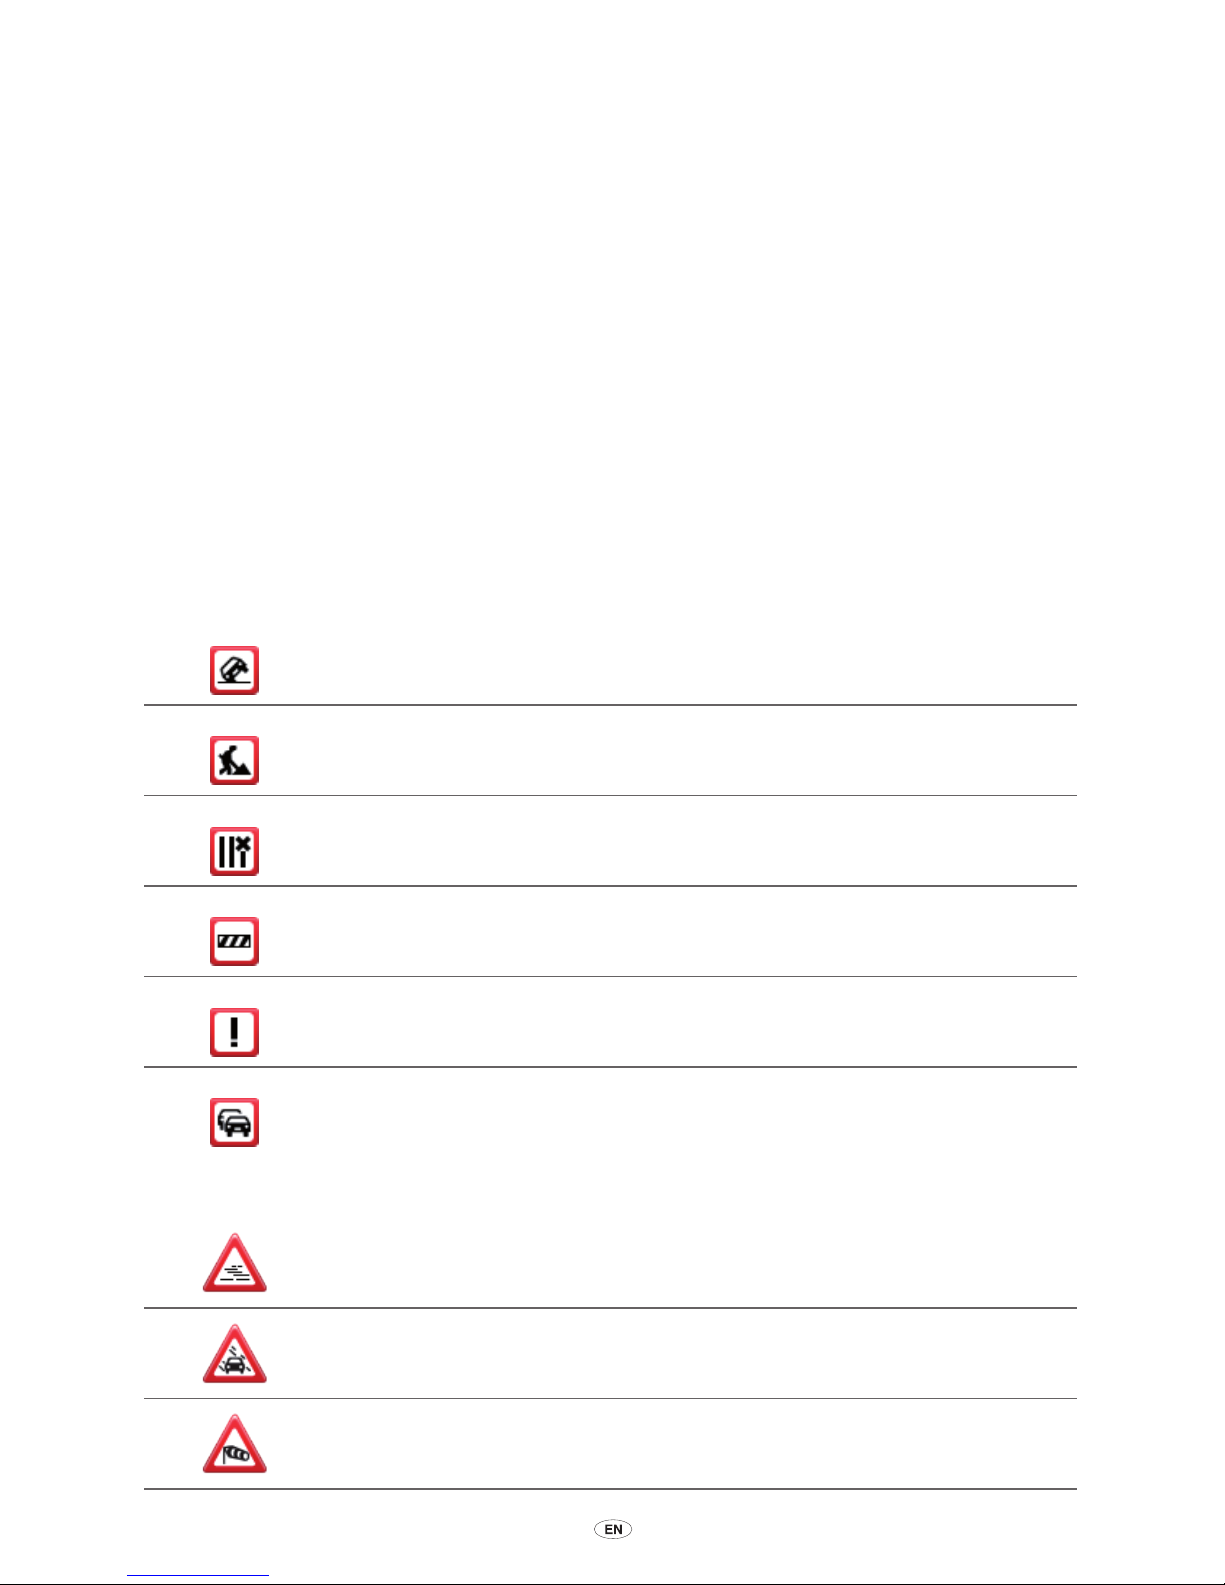
MoveOn Navi 77
3. If a faster route is found while you are driving, Trafc can replan your journey to use the faster
route. If you want to be asked about taking the faster route, select the following option and
then select ”Done”.
•
Report traffic changes on route
20.8 Trafc incidents
Trafc incidents and warnings are shown on the map, in the Driving View and on the Trafc
sidebar.
There are two types of symbols:
• Symbols shown in a red square are trafc incidents. Your MoveOn can replan to avoid them.
• Symbols shown in a red triangle are weather-related. Your MoveOn does not replan to avoid
these warnings.
Trafc incident symbols:
Accident
Road works
One or more lanes closed
Road closed
Traffic incident
Traffic jam
Weather related symbols:
Fog
Rain
Wind
Page 80
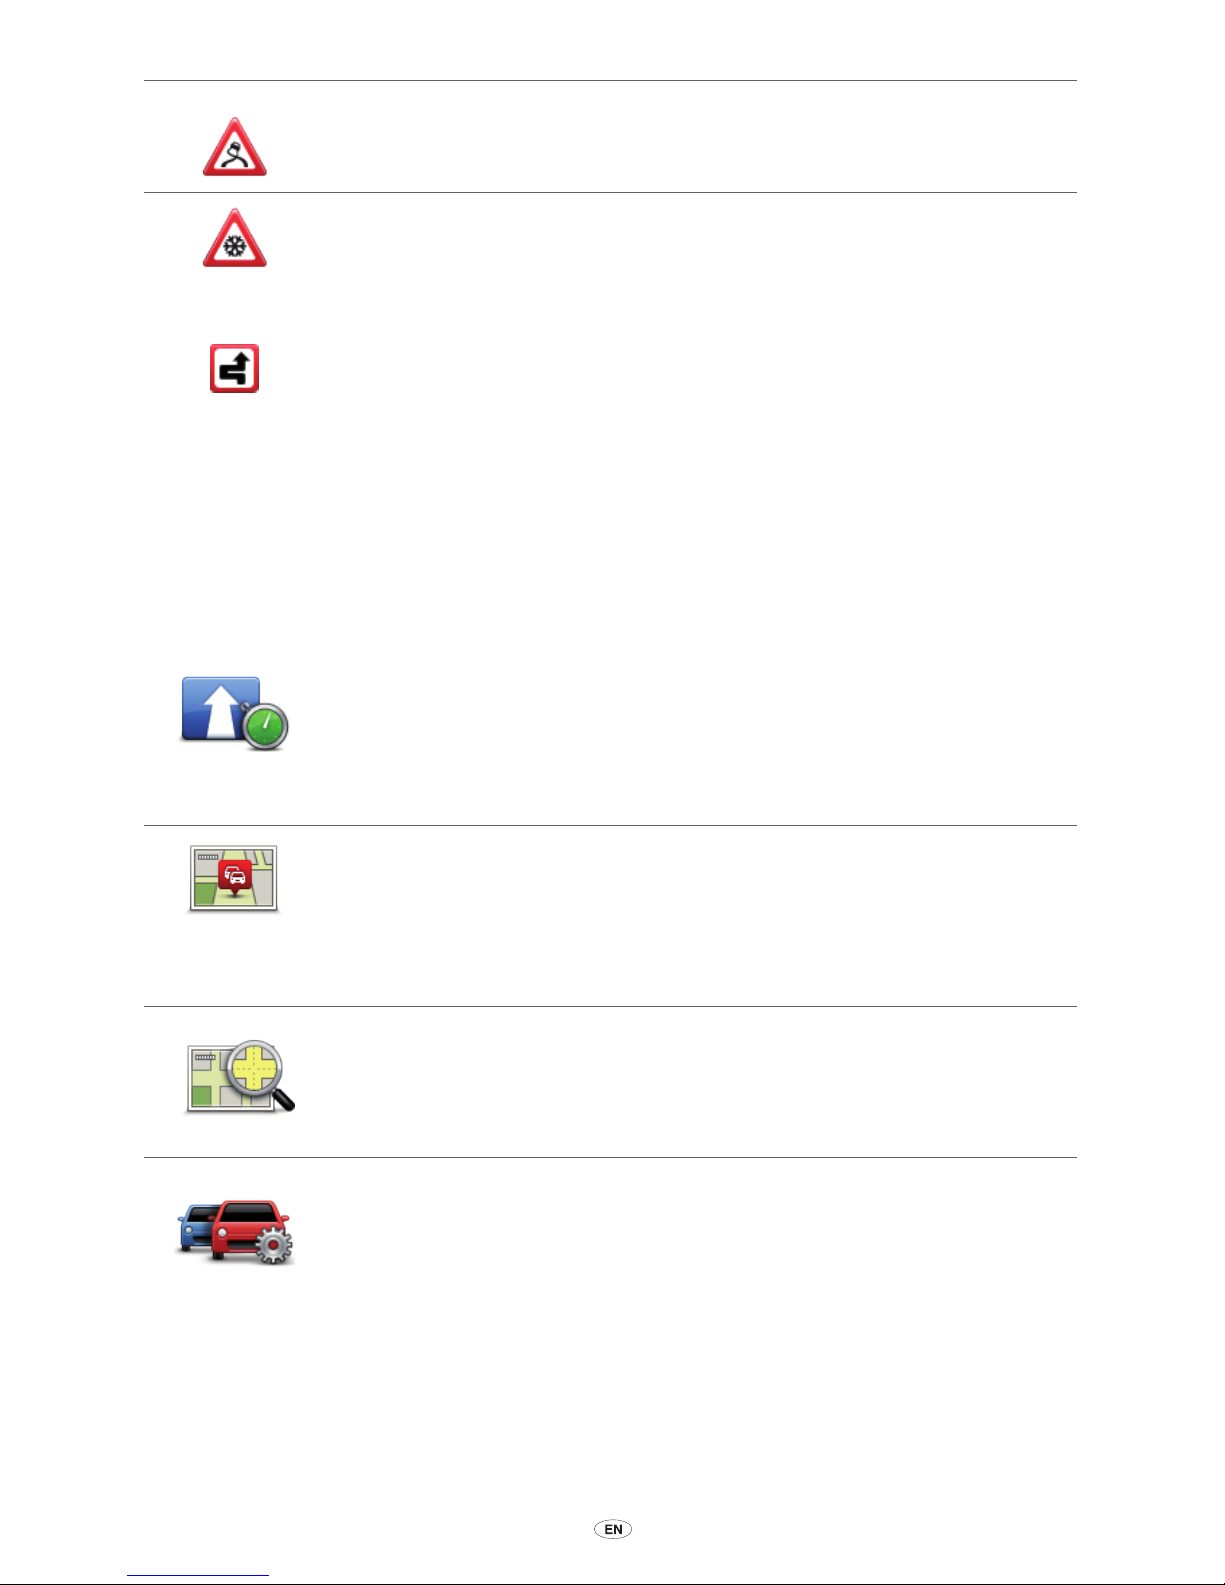
78 MoveOn Navi
Ice
Snow
Note:
The incident avoided symbol is shown for any trafc incident that you
avoid using the trafc service.
20.9 Trafc menu
To open the Trafc menu, select Trafc in the Main menu. The following buttons are available:
Minimise traffic
delays
Select this button to re-plan your route based on the latest trafc
information.
Show traffic on
route
Select this button for an overview of trafc incidents along your route.
Use the left and right buttons for more detailed information about each
incident.
Select ”Replan” to replan your route and avoid the trafc incidents that are
shown on the map.
Browse map
Select this button to browse the map and see the trafc incidents shown on
the map.
Traffic
preferences
Select this button to change your settings for how the Trafc service works
on your device.
Page 81

MoveOn Navi 79
21. Safety Alerts
21.1 About Safety Alerts
Note:
LIVE Services are not available in all countries or regions, and not all LIVE Services are
available in all countries or regions. You may be able to use LIVE Services when travelling
abroad. For more information on available services, go to tomtom.com/services.
The Safety Alerts service warns you about the following roadside camera locations:
• Safety camera locations.
• Accident blackspot locations.
• Mobile safety camera locations.
• Average speed camera locations.
• Toll road camera locations.
• Trafc light camera locations.
Important:
Regularly connect your memory card to TomTom HOME, using your computer,
to update the list of locations for all types of safety alerts. The locations of mobile
cameras are sent directly to your device.
21.2 Safety camera warnings
By default, warnings are given 15 seconds before you reach a speed camera location. To change
the number of seconds or warning sound, select ”Alert settings” in the Safety Alerts menu.
You are warned in three ways:
• Your device plays a warning sound.
• The type of speed camera and your distance from the camera location is shown in the Driving
View. If a speed restriction has been reported for the camera, the speed is also shown in the
Driving View.
• The location of the speed camera is shown on the map.
Note:
For average speed cameras, you are warned by a combination of icons and sounds at the
start, middle and end of the average speed check zone.
Page 82

80 MoveOn Navi
21.3 Changing the way you are warned
Change
warning
preferences
To change the way your Lexus CT MoveOn Navi warns you about speed
cameras, select the ”Change warning preferences” button.
You can then set how close you want to be to a safety camera before you are
warned and what type of sound will be played.
For example, to change the sound that is played when you approach a xed
safety camera, do the following:
1. Select ”Safety Alerts” in the Main Menu.
2. Select ”Change warning preferences”.
A list of safety camera types is displayed. A speaker is shown next to the
safety camera types that have been set for an alert.
3. Select ”Fixed cameras”.
4. Select ”NO” to keep the xed safety camera alerts.
5. Enter the time in seconds for when a warning is given before you reach a
camera. Then select ”Next”.
6. Select the sound you want to be used for the warning.
Tips:
To switch off warning sounds for a camera type, select ”Silence” in
step 6 above. You still see a warning in the Driving View if you switch off
the warning sound.
7. Select ”Done” to save your changes.
21.4 Reporting a new safety camera while
on the move
To report a safety camera on the move, do the following:
1. Select ”Report safety camera” in the Quick menu to record the location of the camera.
If you select the report button within 20 seconds of receiving a safety camera warning, you get
the option to add a camera or remove a camera. Select ”Add camera”.
2. Select ”Fixed camera” or ”Mobile camera”, depending on the type of camera you are
reporting.
3. Select the camera location on the map and conrm that it is correct.
4. Select the type of xed camera you want to report, for example, a trafc light camera.
Note:
If the type of camera you choose has a speed restriction, you can also enter the speed.
You see a message conrming that a report has been created.
Page 83

MoveOn Navi 81
21.5 Reporting a new safety camera while
at home
You do not need to be at the location of a safety camera to report the new location. To report a
new safety camera location while you are at home, do the following:
1. Select ”Safety Alerts” in the Main Menu on your navigation device.
2. Select ”Report safety camera”.
3. Select ”Fixed camera” or ”Mobile camera” depending upon the type of camera.
4. Use the cursor to mark the exact location of the camera on the map, then select ”Done”.
5. Select Yes to conrm the location of the camera.
6. Select the type of camera you want to report and if necessary, choose the speed restriction for
the camera.
You see a message conrming that a report has been created.
21.6 Reporting incorrect camera alerts
You may receive an alert for a camera that is no longer there. To report an incorrect camera alert,
do the following:
Note:
You can only report an incorrect camera alert while you are at the location.
1. While you are at the location of the missing camera, select ”Report safety camera” in the Quick
menu.
Note:
This must be done within 20 seconds of receiving the camera alert.
2. Select ”Remove”.
21.7 Types of xed speed camera you can
report
When you report a xed safety camera, you can select the type of xed camera you are reporting.
These are the different types of xed safety camera:
Safety camera
This type of safety camera checks the speed of passing vehicles.
Page 84
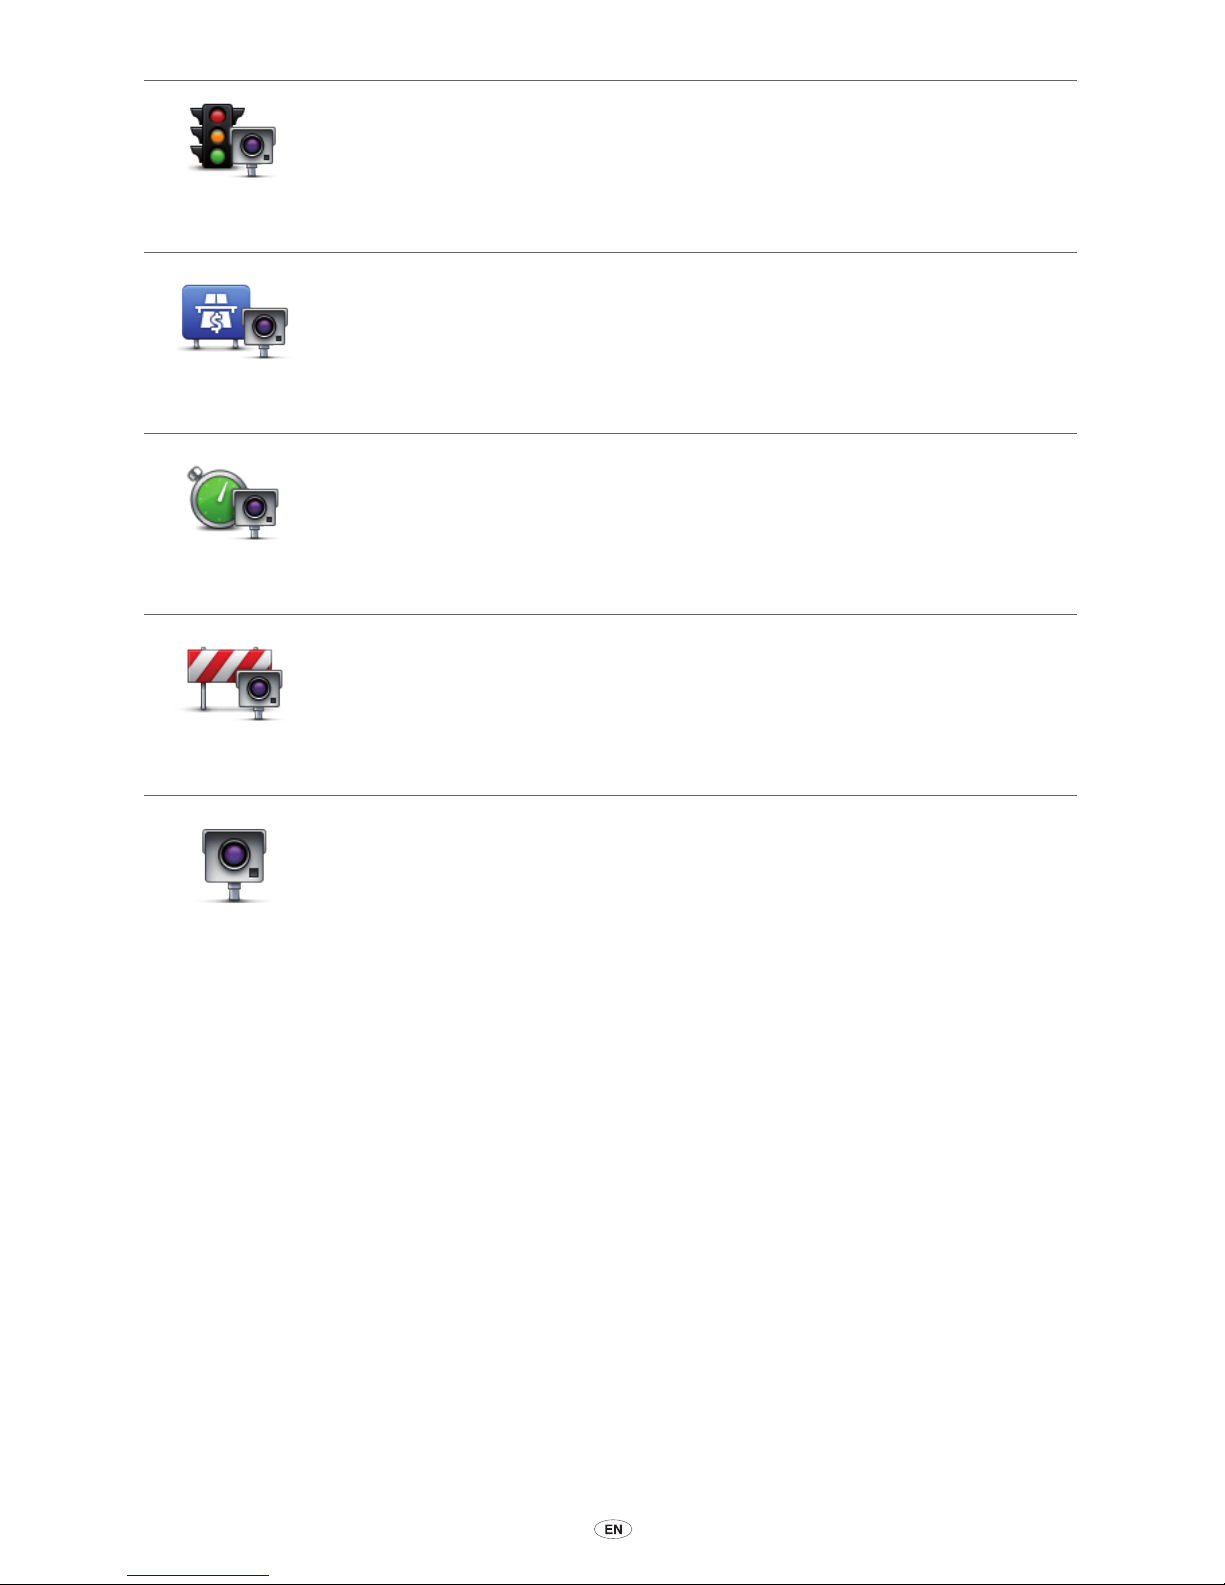
82 MoveOn Navi
Traffic light
camera
This type of camera checks for vehicles breaking trafc rules at trafc lights.
Toll road
camera
This type of camera monitors trafc at toll road barriers.
Average speed
check
This type of camera checks the average speed of vehicles between two xed
points.
Vehicle
restriction
This type of camera checks trafc on roads where access is restricted.
Other camera
All other types of camera that do not fall into any of the above categories.
Page 85
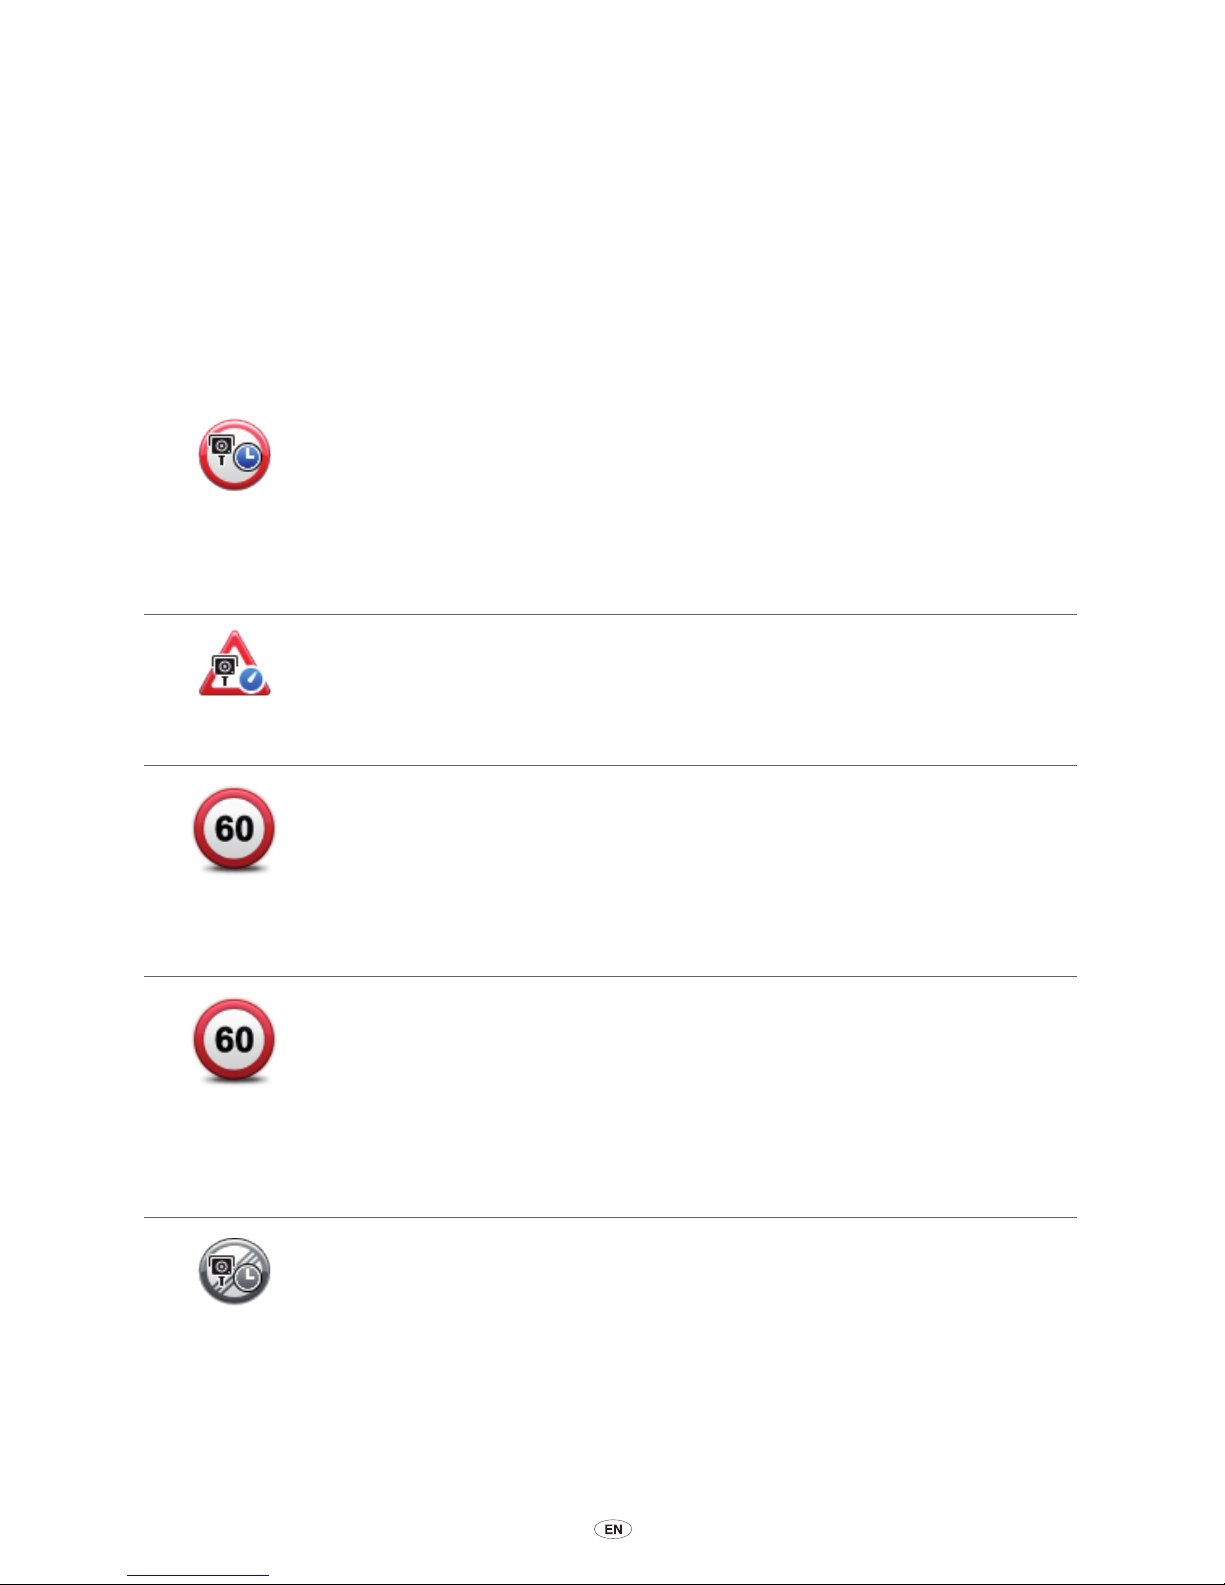
MoveOn Navi 83
21.8 Average speed check camera
warnings
There are several types of visual and audible warnings that you may see and hear when you meet
an average speed check camera.
You always receive a start and end zone warning regardless of the speed you are travelling at.
Intermediate warnings, if given, occur every 200 meters.
All the warnings are described below:
Start of zone warning
As you approach the start of an average speed check zone, you see a visual
warning in the top left hand corner of the Driving View with a distance to the
camera underneath it. You hear an audible warning.
You also see a small icon on the road showing the position of the average
speed check camera at the start of the zone.
Intermediate warning - type 1
Once in the speed check zone, if you are not speeding and have already
received a start of zone warning, you see a visual warning in the Driving
View. This reminds you that you are still in the speed check zone.
Intermediate warning - type 2
Once in the speed check zone, if you are driving faster than the permitted
speed and have already received a start of zone warning, you see a visual
warning in the Driving View indicating the maximum permitted speed. You
also hear a quiet audible warning. These warnings are there to remind you to
slow down...
Intermediate warning - type 3
Once in the speed check zone, if you are driving faster than the permitted
speed and have not received a start of zone warning, you see a visual
warning in the Driving View indicating the maximum permitted speed. You
also hear a loud audible warning.
These warnings occur at the FIRST intermediate point only and are there to
remind you to slow down...
End of zone warning
As you approach the end of an average speed check zone, you see a
visual warning in the Driving View with a distance to the camera shown
underneath it. You hear an audible warning.
You also see a small icon on the road showing the position of the average
speed check camera at the end of the zone.
Page 86
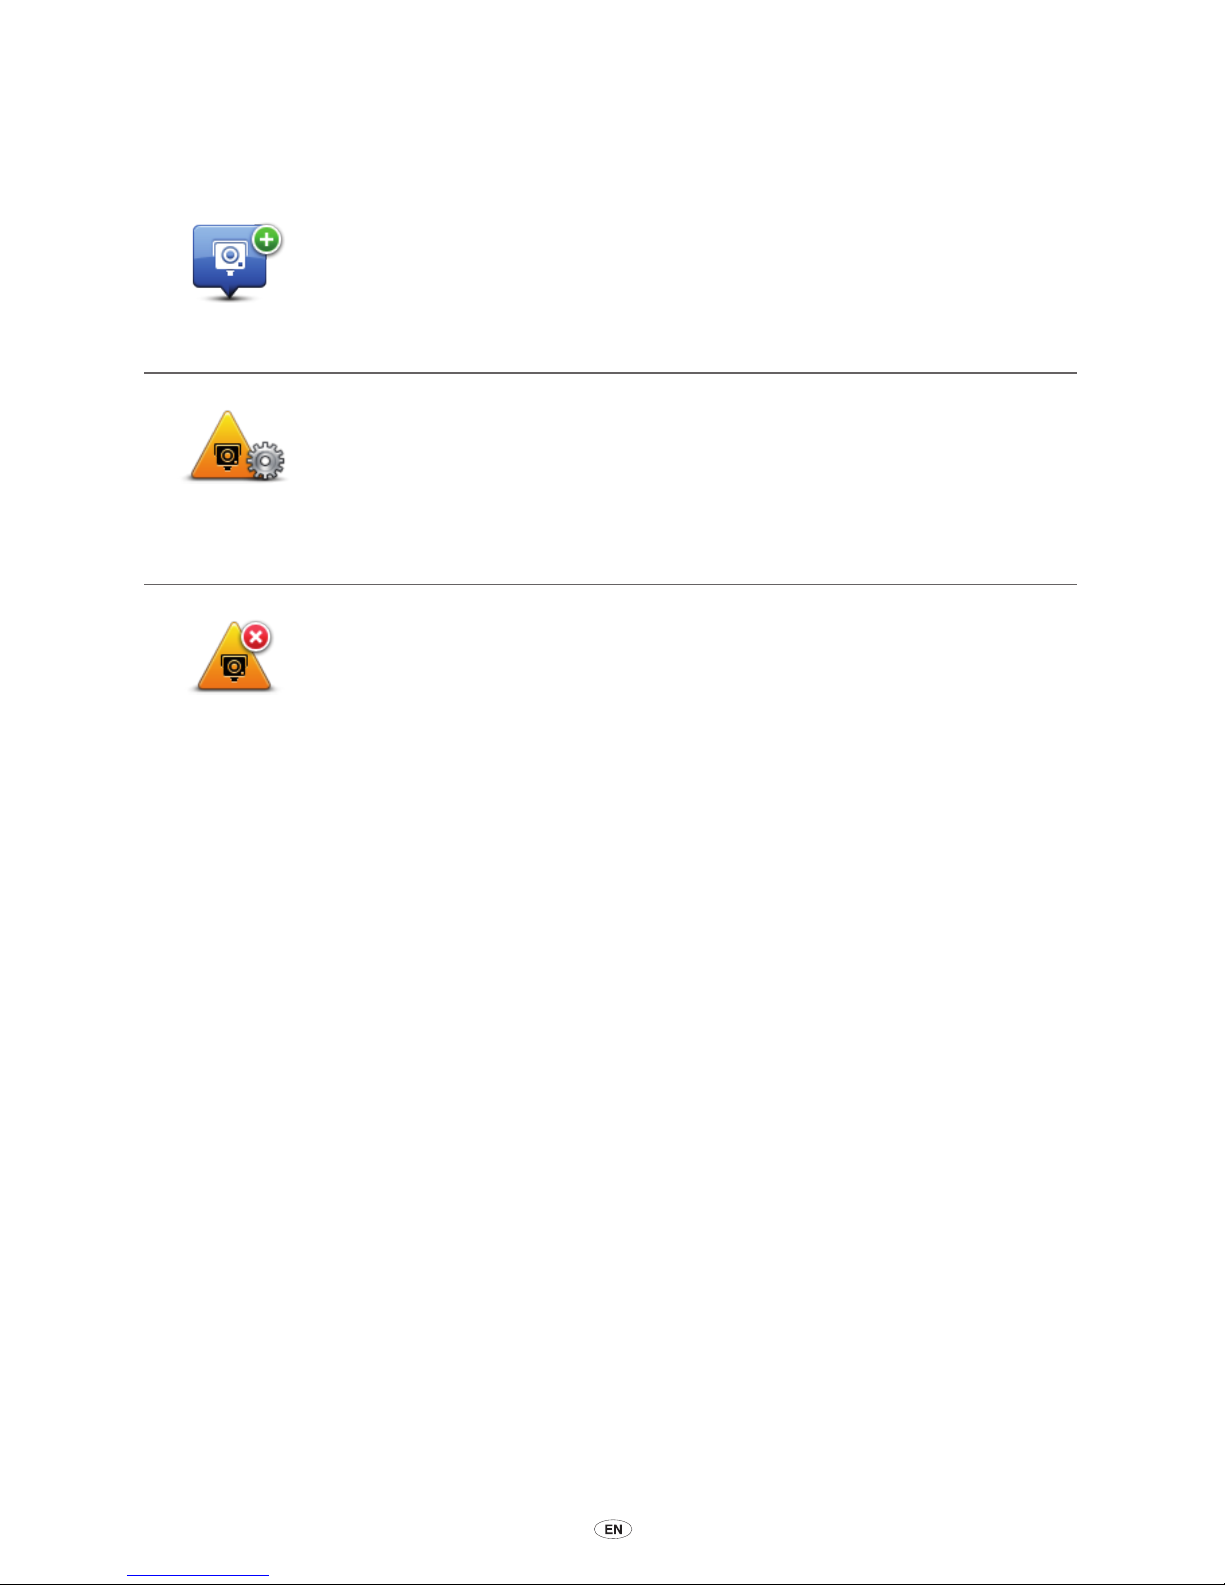
84 MoveOn Navi
21.9 Safety Cameras menu
To open the Safety Alerts menu, select ”Safety Alerts” in the Main Menu.
Report safety
camera
Select this button to report a new safety camera location.
Change
warning
preferences
Select this button to set the alerts you will receive and the sounds used for
each alert.
Disable alerts
Select this button to disable alerts.
Page 87
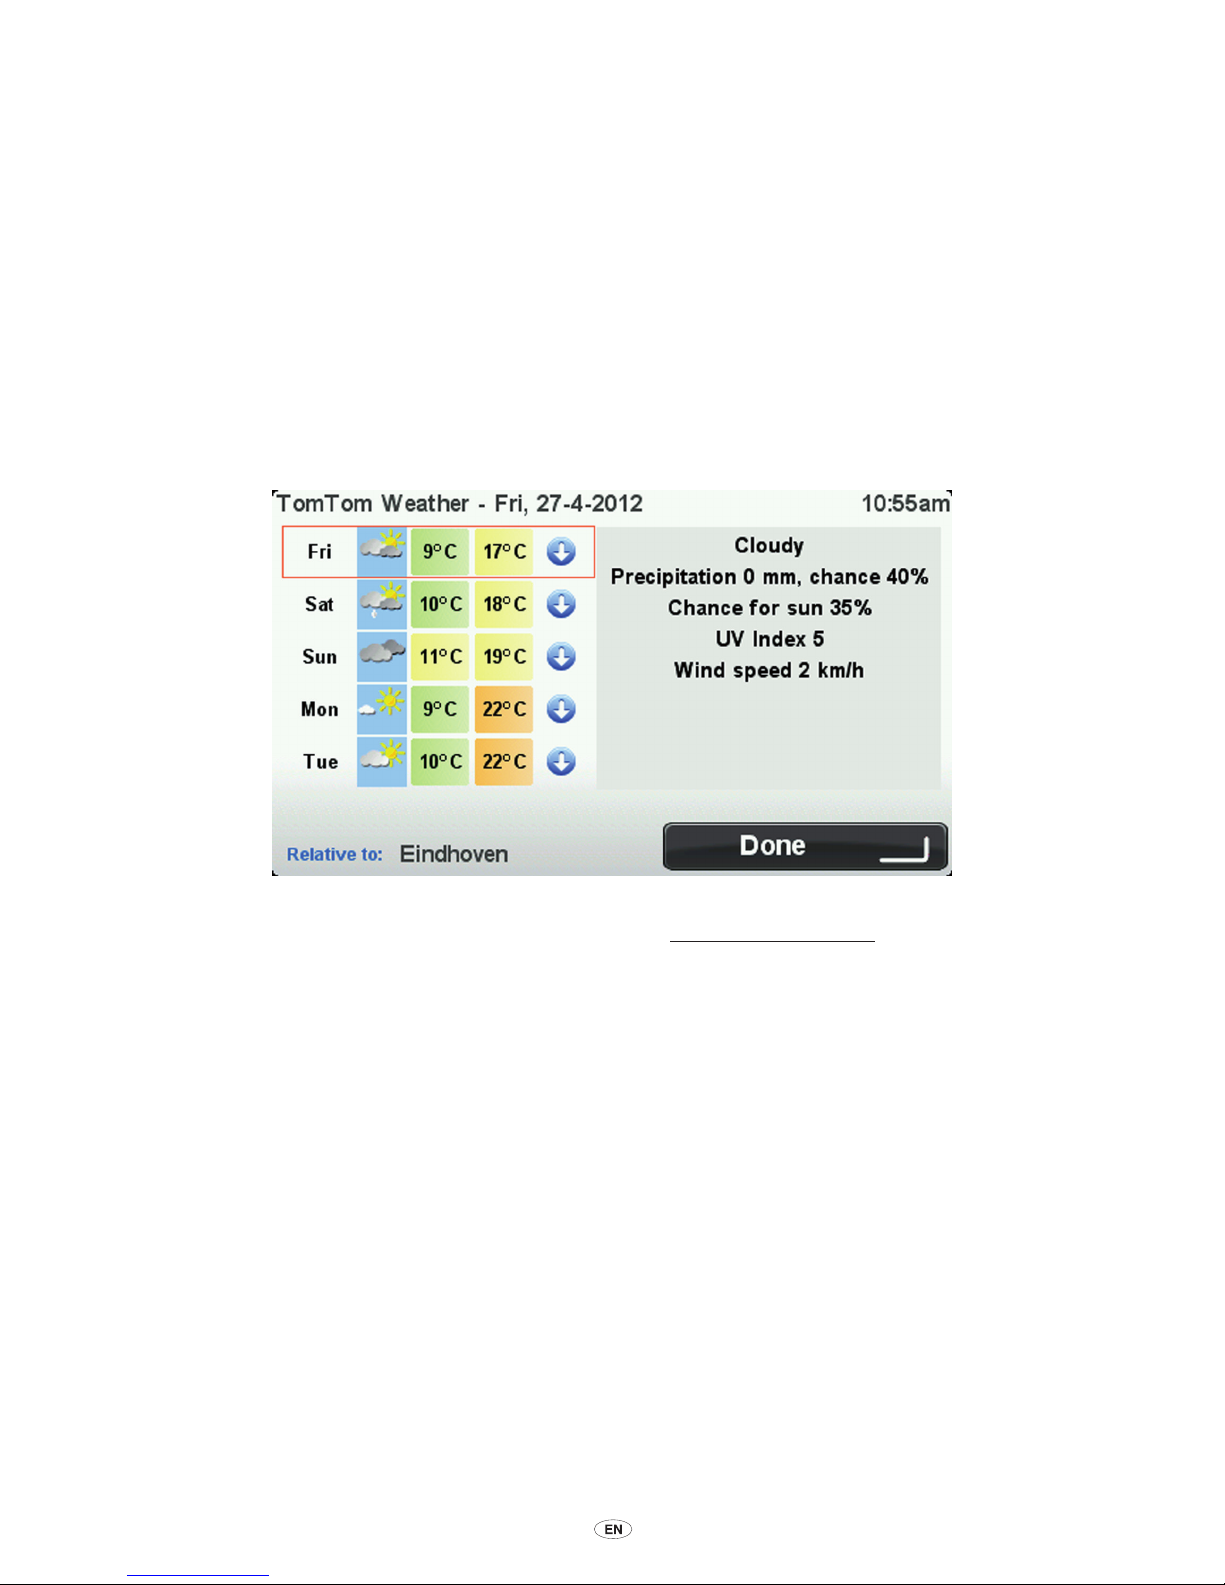
MoveOn Navi 85
22. Weather
22.1 About Weather
Note:
Only available on LIVE devices.
The TomTom Weather service provides detailed weather reports and 5-day weather forecasts for
towns and cities. The information is provided by local weather stations and is updated hourly.
Note:
For more information on available services, go to tomtom.com/services.
22.2 Requesting a weather report
To request a weather report for a specic location, such as the town or city for your nal
destination, do the following:
1. Select ”LIVE Services” in the Main Menu.
2. Select ”Weather”.
3. Select ”My Location” or choose from the other options available.
A summary weather report for that location is shown. Select any day of the week for a detailed
weather report.
Page 88
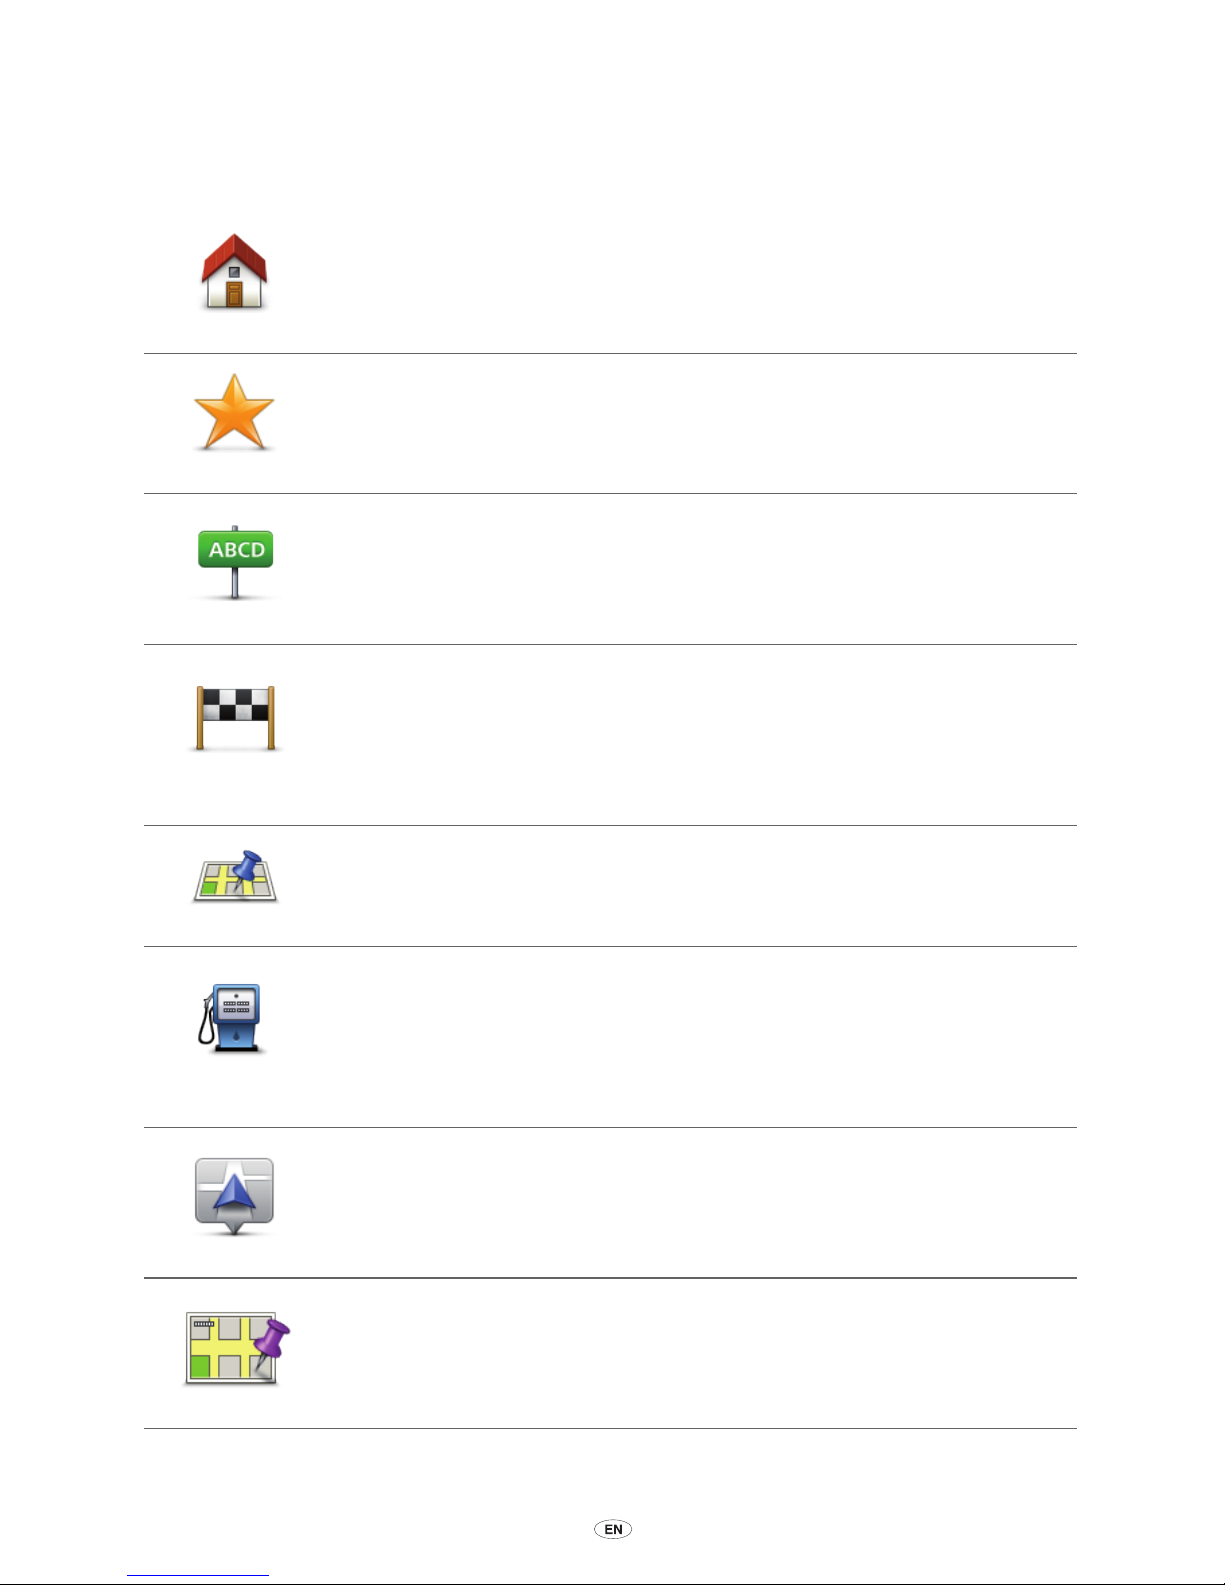
86 MoveOn Navi
22.3 Types of location
You can request a weather forecast for different types of location. The following types of location
are available:
Home
Select this button to select your Home location.
Favourite
Select this button to select a Favourite location.
Address
Select this button to enter an address.
Recent
destination
Select this button to select a location in a list of recently used destinations.
Local Search
Select this button to select a location using Local Search.
Point of
Interest
Select this button to select a Point of Interest (POI).
My Location
Select this button to select your current location.
Point on map
Select this button to select a point on the map.
Page 89

MoveOn Navi 87
Latitude
Longitude
Select this button to enter a latitude and longitude map reference.
Page 90

88 MoveOn Navi
23. Customer support
23.1 Getting help to use your navigation
device
You can get further help by going to tomtom.com/support.
For warranty information, go to tomtom.com/legal.
Page 91

MoveOn Navi 89
24. TomTom HOME
24.1 About TomTom HOME
Using TomTom HOME you can register and manage your MoveOn to receive free updates and buy
new services. It’s a good idea to connect frequently to HOME so you can do the following:
• Download for free the most recent map available for your device, if you connect to TomTom
HOME within 60 days of buying your device.
• Download for free updates for your device, including Map Share updates and other services
included with your product.
• Add new items to your device, like maps, voices and POIs, as well as buy TomTom services
and manage your subscriptions.
• Share your map corrections and other content with the TomTom community.
• Make and restore backups of your device.
When using HOME, you can get help with what you are doing from the HOME Help. You can also
read about all the other things that HOME can do for you.
Tip:
We recommend using a broadband internet connection whenever you connect to HOME.
24.2 Installing TomTom HOME
The steps below refer to Internet Explorer on Windows XP. If you’re using another browser or
operating system, visit tomtom.com/support for more information.
To install TomTom HOME on your computer, do the following:
1. Connect your computer to the internet.
2. Click the link below to download the latest version of TomTom HOME:
tomtom.com/home
3. We recommend downloading the le to your computer by clicking
Save
.
4. Once the download is complete, click
Open
.
If you accidentally closed the Download complete window, locate the le
TomTomHOME2winlatest.exe
on your computer and double-click it.
5. If you get a security warning click
Run
.
6. Click
Next
, then click
Install
.
The installation starts.
7. Once the installation is complete click
Finish
.
Page 92

90 MoveOn Navi
24.3 MyTomTom account
To download content and services using TomTom HOME, you need a MyTomTom account. You
can create an account when you start using TomTom HOME.
Note:
If you have more than one TomTom device, you need a separate MyTomTom account for
each device.
If you have a MyTomTom account, you can access the following benets online using HOME or by
using the MyTomTom section of tomtom.com:
• Services - click Services on the TomTom website to subscribe to services such as real-time
trafc and safety camera information.
• Newsletters - click
MyTomTom
followed by
Account details
on the TomTom website to
manage newsletter subscriptions and language preferences for product news
• Support - click
My Questions
on the TomTom website to track and view your case history and
all email conversations you have with TomTom about technical support issues via the website.
You can also update cases with new information.
• Orders - click
My Orders
on the TomTom website to view items you ordered from the
TomTom website and your order history.
• TomTom Map Share - report and download map corrections by joining the Map Share
community using HOME. You can then benet from shared reporting of map issues such as
missing streets and wrong driving instructions.
• Downloads - download free items using TomTom HOME.
24.4 Updating your device
Before you start, make sure you have a backup of your device or memory card. For more
information, see Backing up your navigation device’ on page 10.
You can check for updates for your maps, services and for a whole range of other free items or
items for purchase. The instructions below describe how to update the TomTom application on
your device.
Note:
LIVE Services are not available in all countries or regions, and not all LIVE Services are
available in all countries or regions. You may be able to use LIVE Services when travelling abroad.
For more information on available services, go to tomtom.com/services.
To check for an updated application version do the following:
1. Insert your memory card into the card reader connected to your computer.
2. Wait for TomTom HOME to start.
3. If HOME does not automatically check for updates, click
Update my device
in the HOME
menu.
Note:
if you would like to install an application you downloaded previously, click
Add Traffic,
Voices, Safety Cameras etc.
and then click
Items on my computer
.
4. If a new application is available, it is listed on the next screen.
5. Make sure the new application is selected, then click
Download updates
.
Page 93

MoveOn Navi 91
HOME downloads the selected items.
6. HOME then installs the selected items on your memory card.
7. Click
Done
.
8. Click
Device > Disconnect Device
. You can then disconnect your card from your computer.
24.5 Introducing HOME help
In the TomTom HOME Help topics you can nd a lot more information about how HOME can help
you to manage contents and services on your navigation device.
• You can also get help on the following:
• Initialising a memory card
• Using a card reader
• Updating your device-account combination
• The TomTom Route Planner
• Downloading free or shared sounds, images and symbols
• Installing themes and extensions
For information on how to create your own POIs, themes, voices, routes, colour schemes, symbols
and sounds, see create.tomtom.com.
24.6 Backing up your navigation device
The easiest way to make a backup of all the contents of your TomTom navigation device is by using
TomTom HOME. You can make one backup per device and store it on your computer. When you
make a new backup, the old backup for that device is overwritten.
1. Insert your memory card into the card reader connected to your computer.
TomTom HOME starts automatically.
Tip:
If TomTom HOME does not start, do one of the following:
Windows:
Click on the
Start
menu and go to
All Programs
>
TomTom
and then click on
TomTom HOME
.
Mac:
Click Go in the Finder menu and choose
Applications
, then double-click
TomTom
HOME
.
2. Click
Back up and restore
in the HOME menu.
3. Click
Back up my device
.
4. Click
Back up now
.
HOME backs up your device.
5. Wait until HOME has nished creating the backup, then click Done.
To see where HOME saves your backups do one of the following:
Windows:
Click
Tools
>
TomTom HOME Preferences
and then select the
Folder Preferences
tab.
Mac:
Click
TomTom HOME
>
Preferences
... and then select the
Folder Preferences
tab.
To restore a backup, click
Back up and restore
in the HOME menu and then click
Restore my
device
.
Page 94

92 MoveOn Navi
25. Addendum and Copyright
Important Safety Notices and Warnings
Global Positioning System
The Global Positioning System (GPS) is a satellite-based system that provides location and timing
information around the globe. GPS is operated and controlled under the sole responsibility of the
Government of the United States of America which is responsible for its availability and accuracy.
Any changes in GPS availability and accuracy, or in environmental conditions, may impact the
operation of this device. TomTom does not accept any liability for the availability and accuracy of
GPS.
Use with care
Use of TomTom products while driving still means that you need to drive with due care and
attention.
How TomTom uses your information
In order to deliver products and services to you, TomTom needs to use personal information about
you. Products and services include downloadable maps, LIVE Services and technical support.
TomTom adheres to European Union and other local privacy laws. Based on this, TomTom will
only use your information for the purpose and duration for which it was obtained. TomTom will
protect your information against misuse. If TomTom needs to know your location, we will ask you
beforehand for permission and allow you to withdraw your permission at any time. As our user
documentation can only provide information that is accurate at the time of publishing, you can
nd current and more detailed information on tomtom.com/privacy.
CE marking
This equipment complies with the requirements for CE marking when used in a residential,
commercial, vehicular or light industrial environment, achieving all the appropriate provisions of
the relevant legislation in the EU.
R&TTE directive
Hereby, TomTom declares that TomTom personal navigation devices and accessories are in
compliance with the essential requirements and other relevant provisions of the EU Directive
1999/5/EC. The declaration of conformity can be found here: tomtom.com/legal.
Specific Absorption Rate (SAR) compliance
This GPS Navigation System is a radio transmitter and receiver. It is designed and manufactured
not to exceed the emission limits for exposure to radio frequency (RF) energy set by the Federal
Communications Commission of the U.S. Government.
Page 95

MoveOn Navi 93
The guidelines are based on standards that were developed by independent scientic organisations
through periodic and thorough evaluation of scientic studies. The standards include a substantial
safety margin designed to assure the safety of all persons, regardless of age and health. The
exposure standard for wireless handsets employs a unit of measurement known as the Specic
Absorption Rate, or SAR. The tests are performed in positions and locations (e.g., worn on the
body) as required by the FCC for each model of usage.
Connected networks
Devices that contain a GSM module are intended for connection to the following networks:
GSM/GPRS 900/1800
Exposure limits
This device complies with radiation exposure limits set forth for an uncontrolled environment. In
order to avoid the possibility of exceeding the radio frequency exposure limits, human proximity to
the antenna shall not be less than 20cm (8 inches) during normal operation.
This document
Great care was taken in preparing this document. Constant product development may mean that
some information is not entirely up to date. The information in this document is subject to change
without notice.
TomTom and Lexus shall not be liable for technical or editorial errors or omissions contained
herein, nor for incidental or consequential damages resulting from the performance or use of this
document. This document contains information protected by copyright. No part of this document
may be photocopied or reproduced in any form without prior written consent from TomTom N.V.
and Toyota Motor Europe n.v./s.a.
Model names
1ME06
Page 96

94 MoveOn Navi
26. Copyright notices
©
2012 TomTom. All rights reserved. TomTom and the TomTom logo are registered trademarks
of TomTom N.V. Please see tomtom.com/legal for warranties and end user licence agreements
applying to this product.
©
2012 TomTom. All rights reserved. This material is proprietary and the subject of copyright
protection and/or database rights protection and/or other intellectual property rights owned by
TomTom or its suppliers. The use of this material is subject to the terms of a licence agreement.
Any unauthorised copying or disclosure of this material will lead to criminal and civil liabilities.
Ordnance Survey
©
Crown Copyright Licence number 100026920.
Data Source
©
2012 TomTom
All rights reserved.
SoundClear™ acoustic echo cancellation software
©
Acoustic Technologies Inc.
Nuance
®
is a registered trademark of Nuance Communications, Inc. and is used here under
licence.
Some images are taken from NASA’s Earth Observatory.
The purpose of NASA’s Earth Observatory is to provide a freely-accessible publication on the
Internet where the public can obtain new satellite imagery and scientic information about our
home planet.
The focus is on Earth’s climate and environmental change: earthobservatory.nasa.gov
The software included in this product contains copyrighted software that is licenced under the
GPL. A copy of that licence can be viewed in the Licence section. You can obtain the complete
corresponding source code from us for a period of three years after our last shipment of this
product. For more information, visit tomtom.com/gpl or contact your local TomTom customer
support team via tomtom.com/support. Upon request, we will send you a CD with the
corresponding source code.
Linotype, Frutiger and Univers are trademarks of Linotype GmbH registered in the U.S. Patent and
Trademark Ofce and may be registered in certain other jurisdictions.
MHei is a trademark of The Monotype Corporation and may be registered in certain jurisdictions.
Page 97

Page 98

Publication no. AOM 001 509-0
P/N n° PZ49X-Z0330-EN
Printed in Belgium (July 2012)
PZ49X-Z0330-EN
 Loading...