

Lexmark c4150, cs720, cs725 Quick Setup Guide
Quick Reference
Loading paper
Linking trays
1
Open a Web browser, and then type the printer IP address in
the address field.
Notes:
•
View the printer IP address on the printer home screen.
The IP address appears as four sets of numbers
separated by periods, such as 123.123.123.123.
•
If you are using a proxy server, then temporarily disable
it to load the Web page correctly.
2
Click Settings > Paper.
3
Match the paper size and type for the trays you are linking.
Note: To unlink trays, make sure that no trays have the same
paper size or type.
4
Save the settings.
Note: You can also change the paper size and type settings
from the printer control panel.
Warning—Potential Damage: The temperature of the fuser
varies according to the specified paper type. To avoid printing
issues, match the paper type settings in the printer with the
paper loaded in the tray.
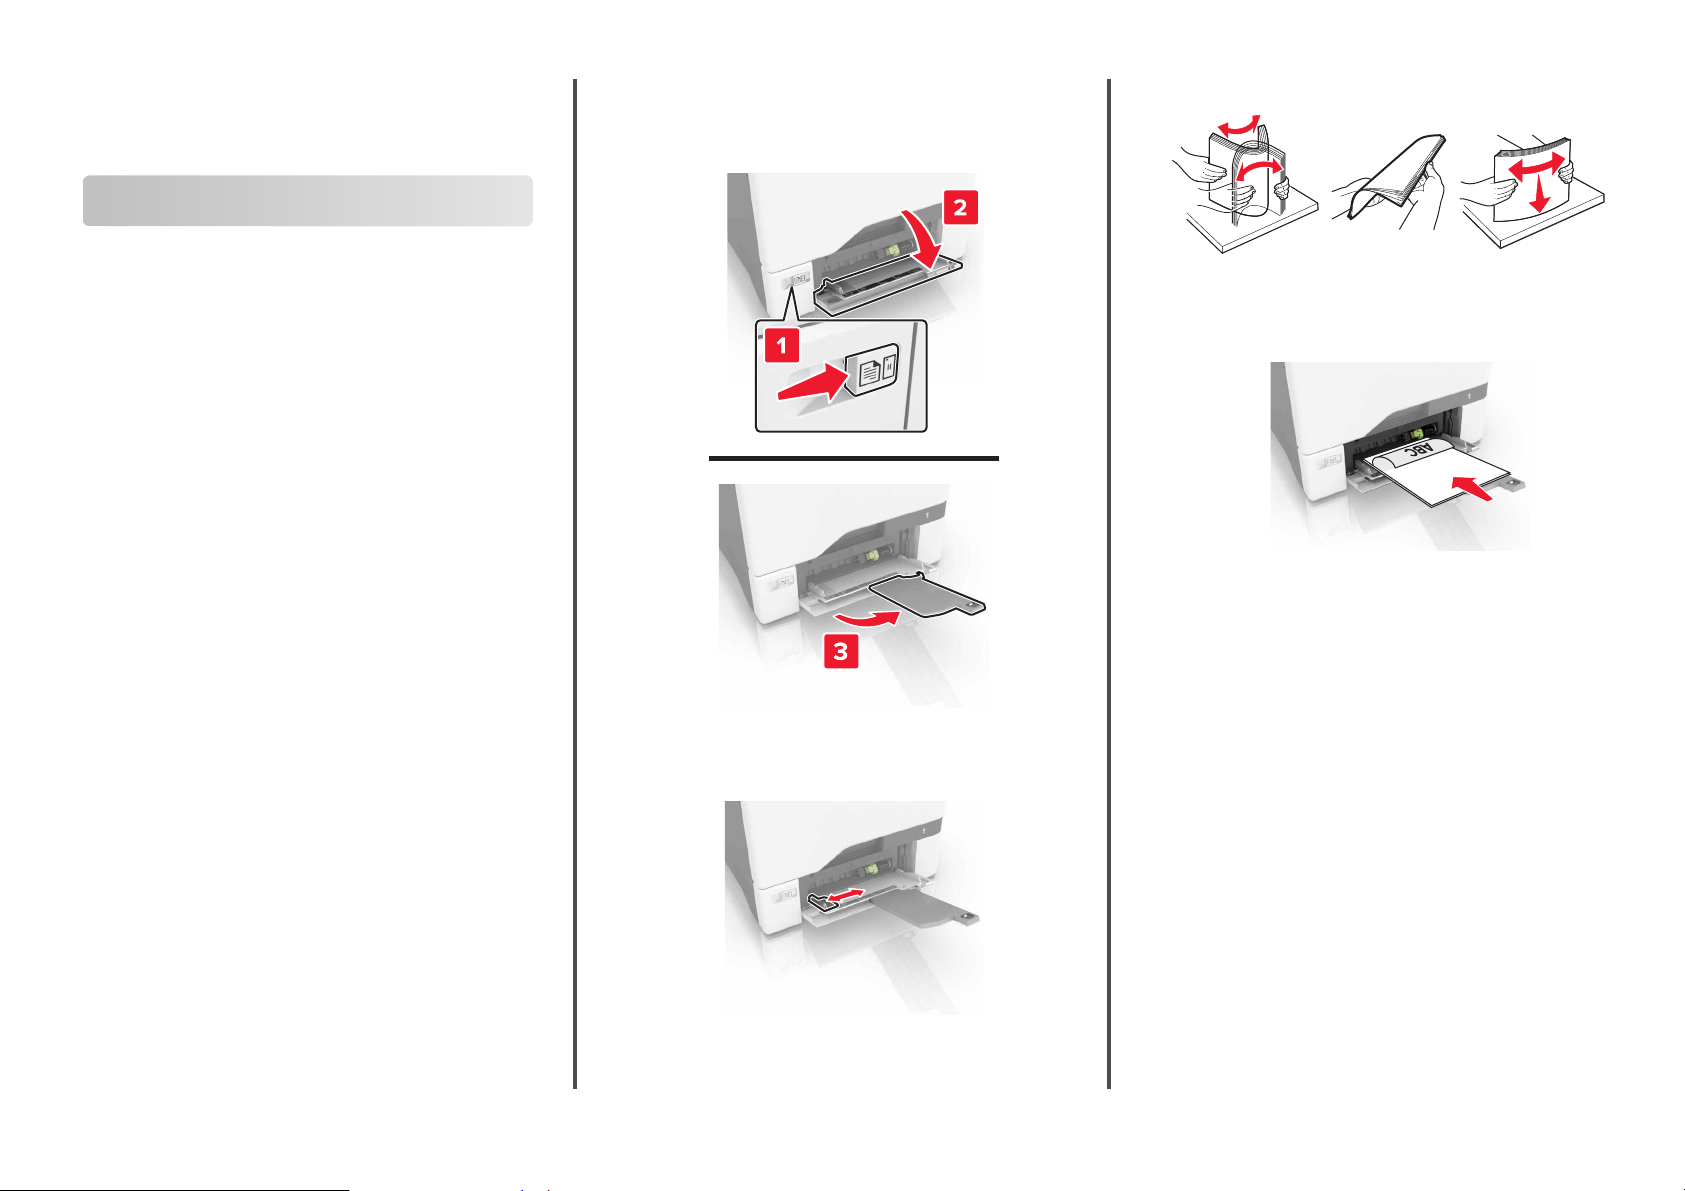
Loading the multipurpose feeder
1
Open the multipurpose feeder.
2
Adjust the guide to match the size of the paper you are loading.
3
Flex, fan, and align the paper edges before loading.
4
Load the paper.
•
Load paper and card stock with the printable side
facedown and the top edge entering the printer first.
1
•
Load envelopes with the flap side up and against the right
side of the paper guide. Load European envelopes with the
entering the printer
flap
Warning—Potential Damage: Do not use envelopes with
stamps, clasps, snaps, windows, coated linings, or
self
‑
stick adhesives.
5
From the Paper Menu in the control panel, set the paper size
and type to match the paper loaded in the tray.
first.
Printing
Printing from a computer
Note: For specialty media such as labels, card stock, and
envelopes, set the paper size and type in the printer before
sending the print job.
1
With a document open, click File > Print.
2
If necessary, adjust the settings.
3
Send the print job.
Printing held jobs
1
With a document open, select File > Print.
2
Select the printer, and then do the following:
•
For Windows users, click Properties or Preferences, and
then click Print and Hold.
•
For Macintosh users, select Print and Hold.
3
Select the print job type.
4
If necessary, assign a user name.
5
Send the print job.
6
From the printer home screen, touch Held Jobs.
7
Send the print job.
Canceling a print job
2
Select the job to cancel.
Maintaining the printer
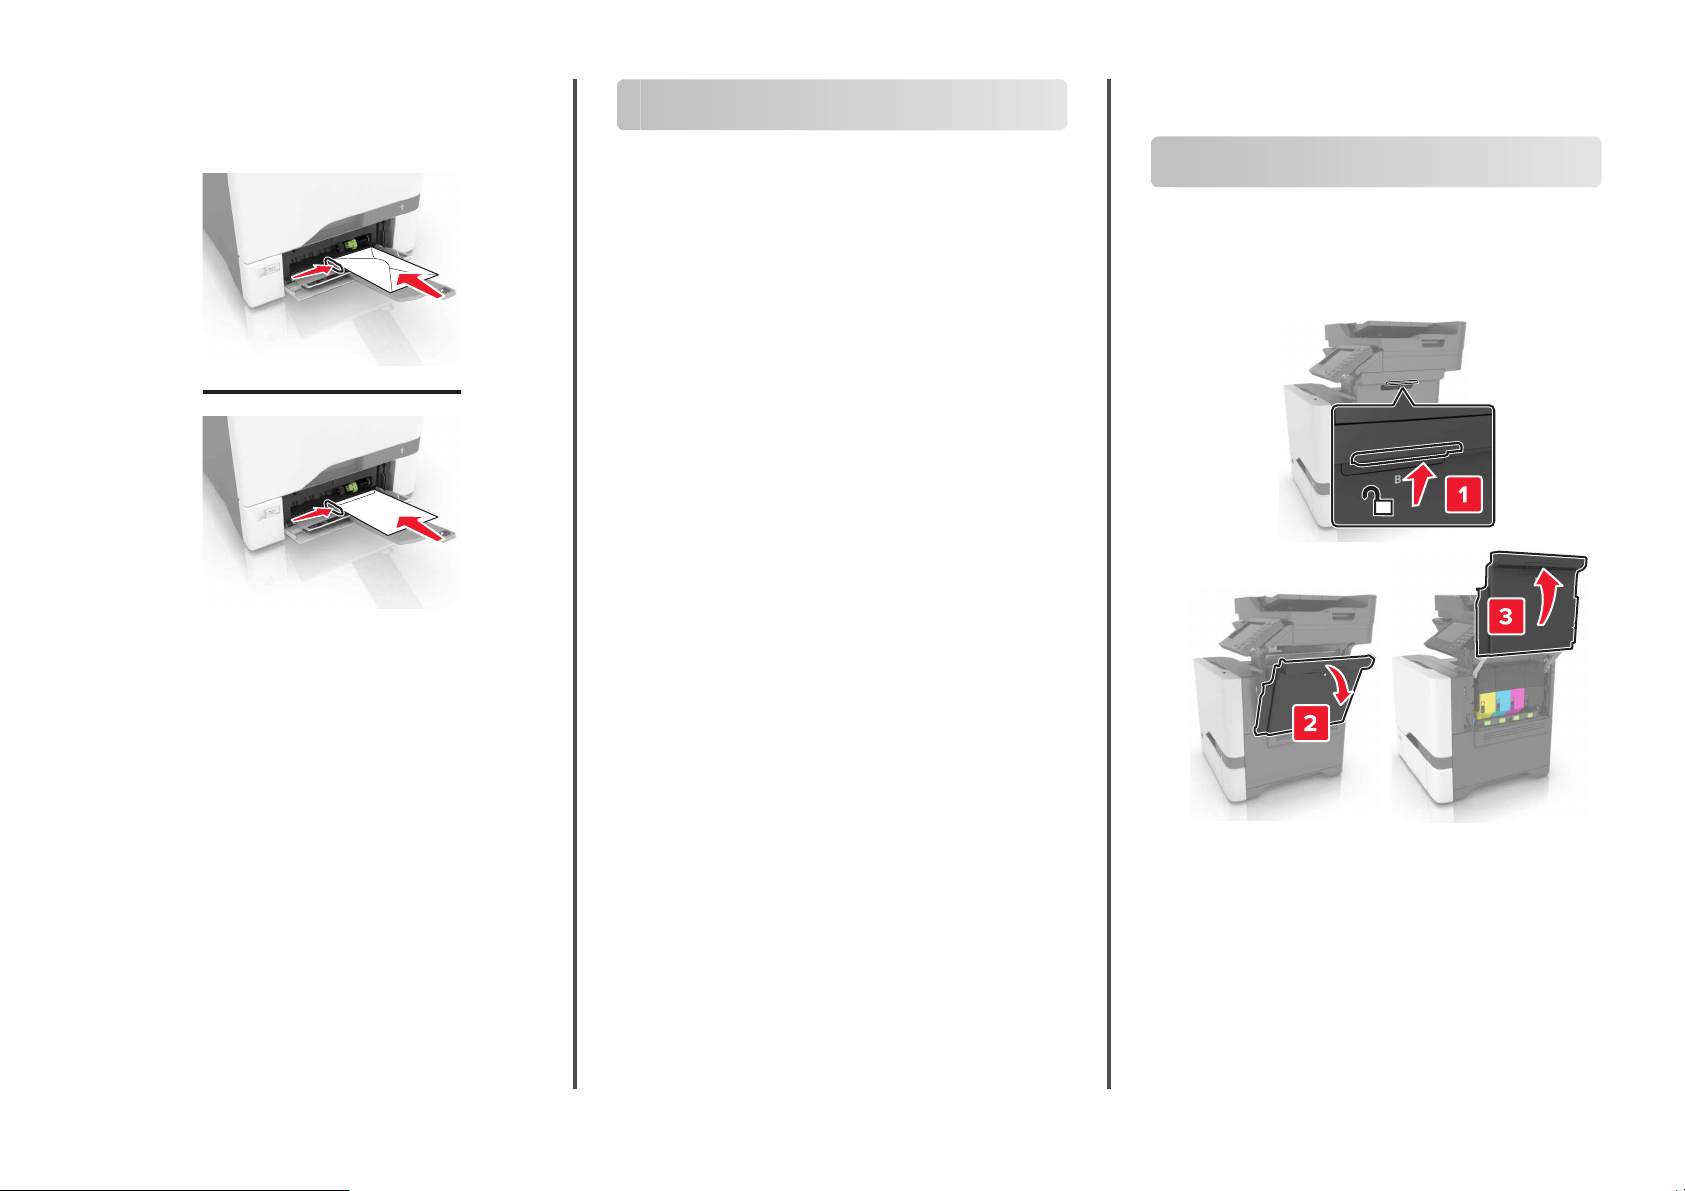
Replacing a toner cartridge
1
Open door B.
Setting the size and type of the specialty media
The trays automatically detect the size of plain paper. For specialty
media like labels, card stock, or envelopes, do the following:
1
From the home screen, navigate to:
Settings > Paper > Tray Configuration > select a tray
2
Configure the size and type of the specialty media.
From the printer control panel
1
From the home screen, touch Job Queue.
Note: You can also access this setting by touching the top
section of the home screen.
2
Select the job to cancel.
From the computer
1
Depending on the operating system, do either of the following:
•
Open the printers folder, and then select your printer.
•
From the System Preferences in the Apple menu, navigate
to your printer.
2
 Loading...