

Say it with Noddy -
O meu 1° tradutor Noddy
IT1010i2
M
o
d
o
d
e
u
t
i
l
i
z
a
ç
ã
o
w
w
w
.
l
e
x
i
b
o
o
k
j
u
n
i
o
r
.
c
o
m
I
N
S
T
R
U
C
T
I
O
N
M
A
N
U
A
L
IT1010i2IM0177.indd 1 5/10/07 5:45:45 PM
...........
...........
GUIA DE INÍCIO RÁPIDO / START-UP GUIDE
Aprende as tuas primeiras palavras em inglês com o Noddy e os amigos! Este brinquedo
inclui 3 cenários atractivos do Noddy para alimentar a curiosidade da criança e para estimular
à descoberta. Criado para os mais pequenos, Say it with Noddy - O meu 1° tradutor Noddy
funciona através dos sons e imagens. Deste modo, as crianças podem criar o seu vocabulário
sem que sejam necessárias capacidades de leitura.
Learn your rst Portuguese words with Noddy & friends! This toy features 3 engaging Noddy
scenes to nurture the child’s curiosity and stimulate discovery. Designed for little ones, Say it with
Noddy - O meu 1° tradutor Noddy works by means of sounds and images. Hence, children can
build their vocabulary without reading skills.
1
1
1
2
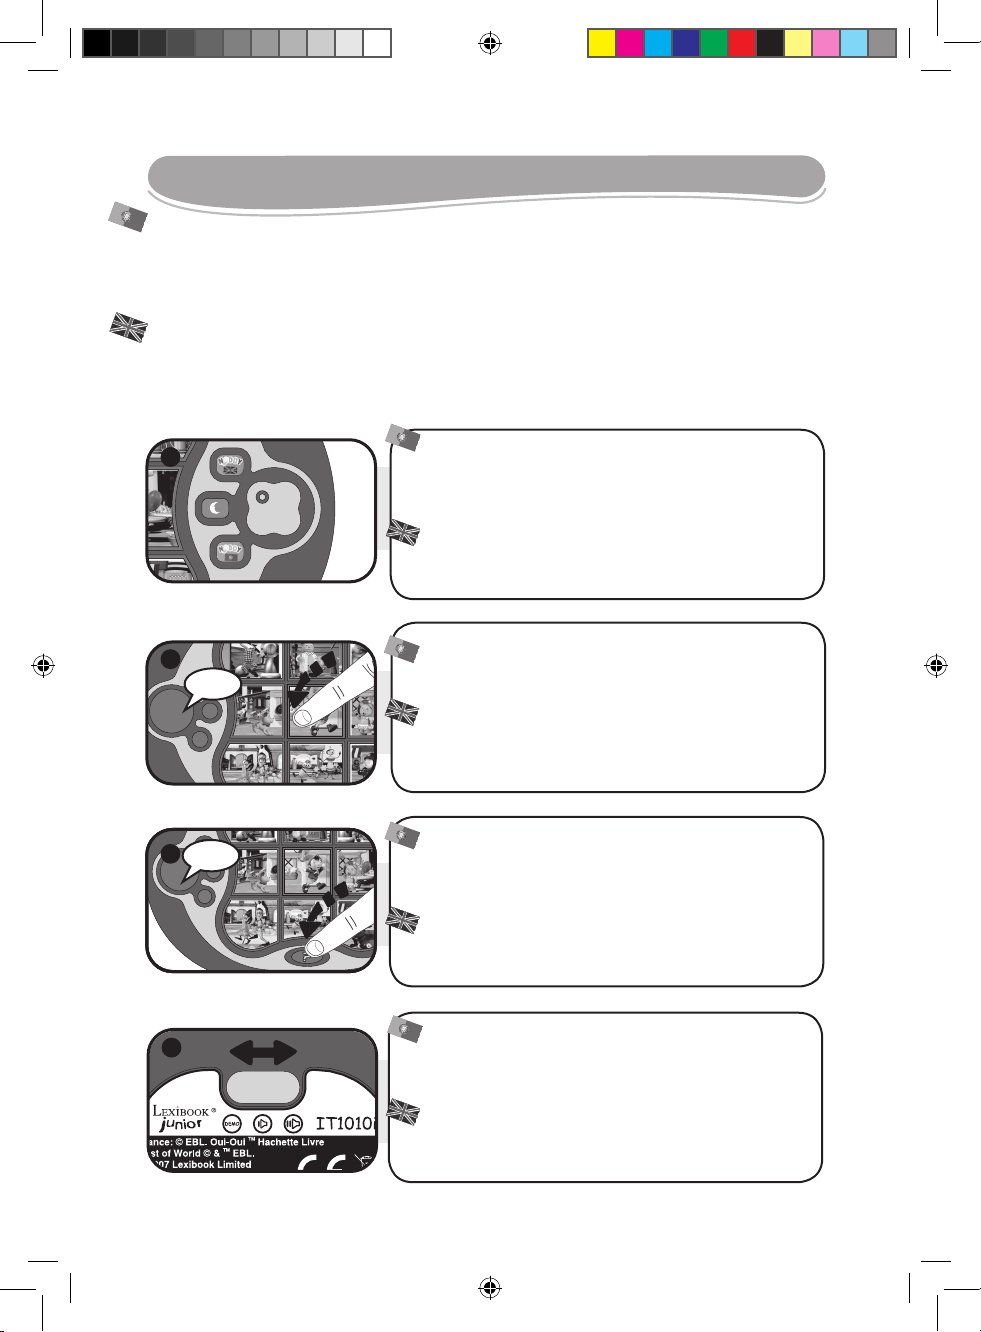
Roda o botão da posição “off” (modo de hibernar) para
português para brincares em português, para inglês para
brincares em inglês. Nota: Se não premires qualquer tecla
durante mais de 3 minutos, a unidade desliga-se
automaticamente.
Turn the knob from the off (sleep) position to the Portuguese ag
to play in Portuguese or to the English ag to play in English. Note:
If no key is pressed for more than 3 minutes, the unit will turn off
automatically.
...........
...........
1
3
1
4
No modo de descoberta, prime uma tecla para ouvires o nome,
efeitos sonoros e frases correspondentes à personagem. Nota: O
modo por defeito é o modo de descoberta.
In discovery mode, press a key to hear the name, sound effect
and sentence corresponding to the character. Note: discovery is
the default mode.
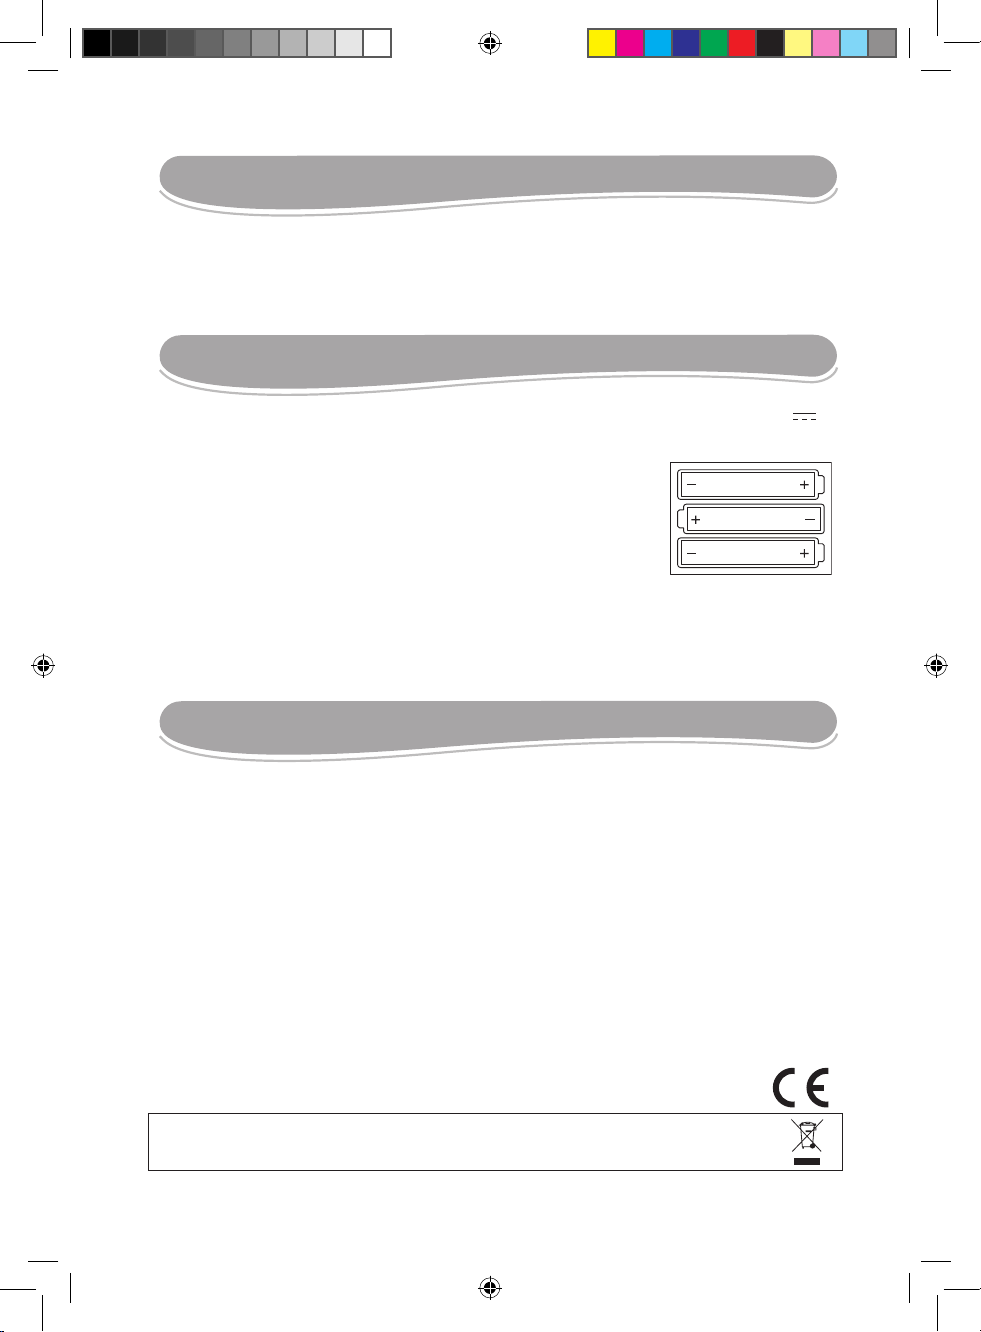
Para brincares no modo de perguntas, prime a tecla marcada com
um “?”. Tens 2 tentativas para descobrir a personagem relativa
à descrição apresentada. Podes sair do modo de perguntas a
qualquer altura, premindo “?” mais uma vez.
To play in quiz mode, press the key marked by a ‘ ? ’. You get 2
tries to nd the character matching the description given. You can
exit quiz mode at anytime by pressing the ‘ ? ’ key once more.
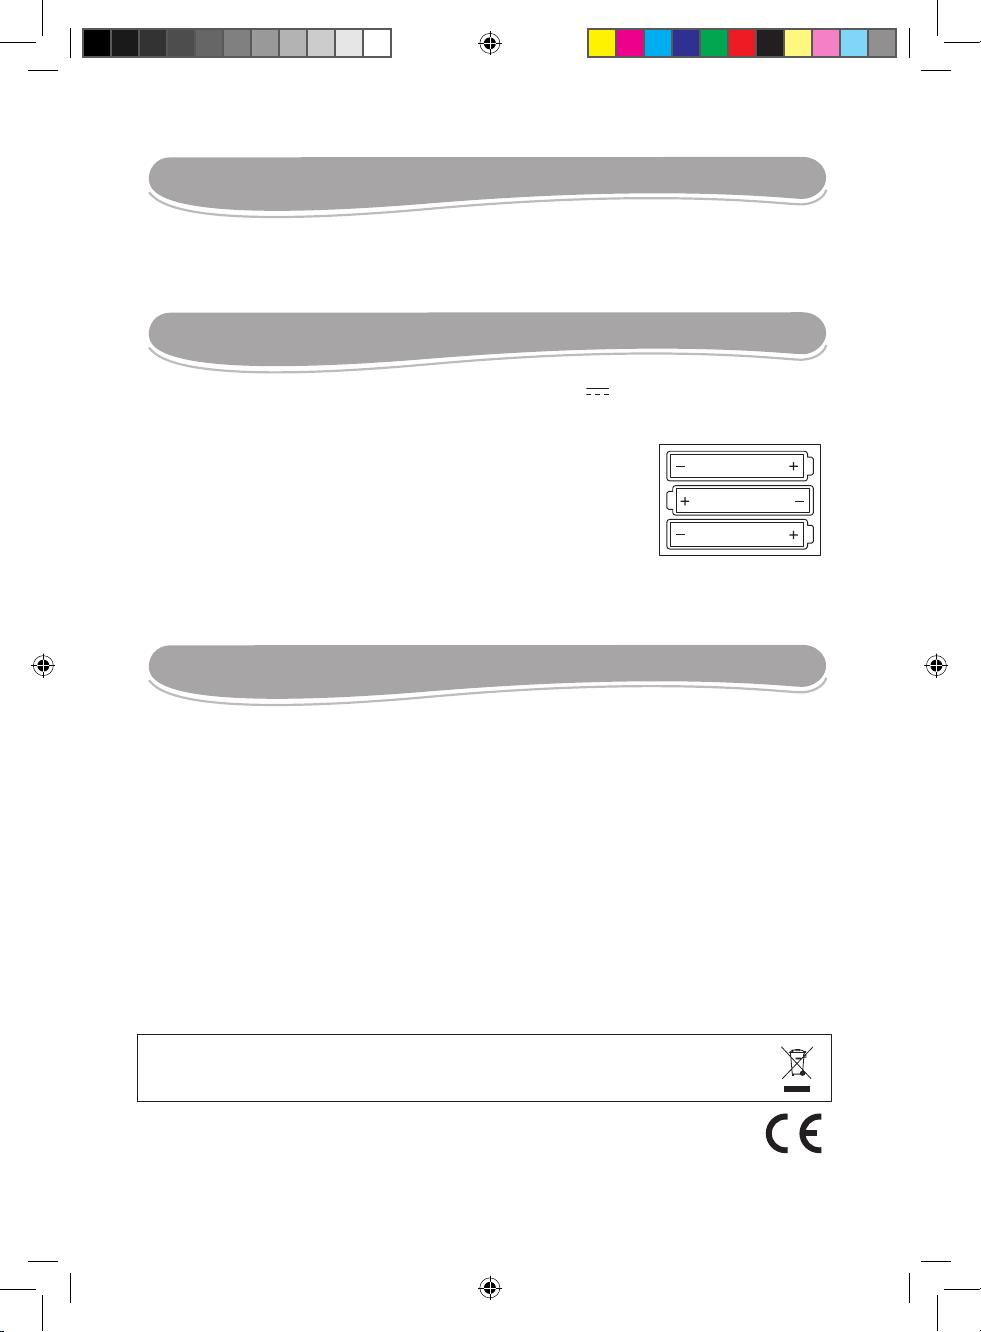
Usa o botão que se encontra na parte traseira da unidade
para aumentares (para a esquerda) ou diminuíres (para o
meio) o volume do som. Para escutares a demonstração do
produto, coloca o botão na direita.
Use the knob located at the back of the unit to set the sound
volume on high (left position) or low (middle position). To listen to
the product demo, set the knob to the right position.
IT1010i2IM0177.indd 2 5/10/07 5:45:49 PM
Indicações para a protecção do meio ambiente Aparelhos eléctricos antigos são materiais que não
pertencem ao lixo doméstico! Por isso pedimos para que nos apoie, contribuindo activamente na poupança
de recursos e na protecção do ambiente ao entregar este aparelho nos pontos de recolha, caso existam.
CONTEÚDO DA EMBALAGEM
1 consola ‘Say it with Noddy - O meu 1° tradutor Noddy’
Um manual do utilizador
ATENÇÃO: As peças da embalagem, como os revestimentos de plástico, elásticos, etiquetas
e os de xação de metal não fazem parte do brinquedo e devem ser deitados fora, por razões
de segurança, antes de entregar o brinquedo a uma criança.
INSTALAÇÃO DAS PILHAS
‘Say it with Noddy - O meu 1° tradutor Noddy’ funciona com 3 pilhas alcalinas AA/LR6 de 1,5V .
1. Com uma chave de fendas, abra a tampa do compartimento das pilhas, que se encontra na
parte inferior da unidade.
2. Coloque as 3 pilhas alcalinas AA/LR6, tendo em conta a polaridade
indicada na parte inferior do compartimento das pilhas, conforme a
imagem apresentada ao lado.
3. Feche a tampa do compartimento das pilhas e aperte o parafuso.
Não utilize pilhas não recarregáveis. As pilhas não recarregáveis não deverão ser recarregadas.
As pilhas recarregáveis deverão ser retiradas do brinquedo antes de serem recarregadas e só
deverão ser recarregadas sob a supervisão de um adulto. Não misture diferentes tipos de pilhas ou pilhas novas com pilhas
usadas. Só deverá utilizar pilhas do mesmo tipo ou de um tipo equivalente às recomendadas. As pilhas deverão ser colocadas
com a polaridade correcta. Deverá retirar as pilhas gastas do brinquedo. Não coloque os terminais em curto-circuito. Não atire
as pilhas para o fogo. Retire as pilhas caso não utilize a unidade durante um longo período de tempo. Quando o som car fraco
ou o jogo não responder, pense em substituir as pilhas.
AVISO: se o aparelho não funcionar ou receber qualquer choque electrostático, desligue o aparelho e ligue-o de novo
utilizando o botão ON/OFF. Se isto não resultar, retire as baterias e faça Reset.
AA/ LR6 DC 1.5V
AA/ LR6 D C 1.5 V
AA/ LR6 D C 1.5 V
MANUTENÇÃO / GARANTIA
Para limpar o jogo, utilize apenas um pano suave ligeiramente húmido e sem qualquer tipo de
detergente. Não exponha o jogo à luz directa do sol nem a qualquer outra fonte de calor. Não
molhe a unidade. Não desmonte nem deixe cair a unidade. Retire as pilhas caso o produto não
seja utilizado durante um longo período de tempo.
NOTA: Por favor guarde este manual, pois contém informações importantes. Este produto está
coberto pela nossa garantia de 2 anos. Para a utilização da garantia ou do serviço pós-venda,
deverá dirigir-se ao seu revendedor, levando consigo o talão da compra. A nossa garantia
cobre defeitos de material ou de montagem da responsabilidade do fabricante, excluindo
qualquer deterioração proveniente do não cumprimento do modo de utilização ou de qualquer
intervenção inoportuna sobre a unidade (como a desmontagem, exposição ao calor ou à
humidade…). Recomenda-se que guarde a caixa para uma futura referência. Na procura
de uma constante melhoria, poderemos modicar as cores ou características do produto
apresentadas na caixa.
Referência: IT1010i2 © 2007 LEXIBOOK® Concebido na Europa - Fabricado na China
LEXIBOOK Electrónica Lda. Quinta dos Loios Praceta José Domingos dos Santos, 6B-8A
2835-343 Lavradio - Barreiro PORTUGAL - Apoio técnico: 21 206 13 48 - www.lexibookjunior.com
IT1010i2IM0177.indd 3 5/10/07 5:45:50 PM
Environmental Protection:
Unwanted electrical appliances can be recycled and should not be discarded along with regular household
waste! Please actively support the conservation of resources and help protect the environment by returning
this appliance
INSIDE THE PACKAGING
1 console ‘Say it with Noddy - O meu 1° tradutor Noddy’
An Instruction Manual
WARNING: All packaging materials, such as tape, plastic sheets, wire ties and tags are not part
of this toy and should be discarded for your child’s safety.
INSTALLATION BATTERY
Say it with Noddy - O meu 1° tradutor Noddy works with 3 x 1,5V AA/LR6 alkaline batteries.
1. Using a screwdriver, open the battery compartment cover located underneath the unit.
2. Install the 3 x AA/LR6 alkaline type batteries observing the polarity indicated at the bottom of
the battery compartment, and as per the diagram shown opposite.
3. Close the battery compartment and tighten the screw.
Do not use rechargeable batteries. Non-rechargeable batteries are not to be recharged.
Rechargeable batteries are to be removed from the toy before being charged. Rechargeable
batteries are only to be charged under adult supervision. Different types of batteries or new
and used batteries are not to be mixed. Only batteries of the same or equivalent type as
recommended are to be used. Batteries are to be inserted with the correct polarity. Exhausted
batteries are to be removed from the toy. The supply terminals are not to be short circuited. Do not throw batteries into a re.
Remove the batteries if you are not going to use the game for a long period of time.
WARNING: If the unit malfunctions or receives an electrostatic shock, turn the unit off and on again. remove the batteries and
insert them again. If this proves to be ineffective, use a blunt object (the tip of a paper clip for example) to press the RESET key
located at the back of the unit.
AA/ LR6 DC 1.5V
AA/ LR6 D C 1.5 V
AA/ LR6 D C 1.5 V
MAINTENANCE / WARRANTY
Only use a soft, slightly damp cloth to clean the unit. Do not use detergent. Do not to expose
the unit to direct sunlight or any other heat source. Do not immerse the unit in water. Do not
dismantle or drop the unit. Do not try to twist or bend the unit. If the unit malfunctions, try to
change the batteries rst. If this proves to be ineffective, read the instruction manual again.
NOTE: please keep this instruction manual, it contains important information. This product
is covered by our 2-year warranty. For any claim under the warranty or after sale service,
please contact your distributor and present a valid proof of purchase. Our warranty covers any
manufacturing material and workmanship defect, with the exception of any deterioration arising
from the non-observance of the instruction manual or from any careless action implemented
on this item (such as dismantling, exposition to heat and humidity, etc.). It is recommended to
keep the packaging for any further reference. In a bid to keep improving our services, we could
implement modication on the colours and the details of the product shown on the packaging.
Reference: IT1010i2 Designed and developed in Europe – Made in China
LEXIBOOK UK ltd, Unit 10 Peterseld Industrial Estate, Bedford Road, Peterseld, Hampshire, GU32 3QA,
United Kingdom, Freephone helpline: 0808 100 3015 www.lexibookjunior.com
IT1010i2IM0177
IT1010i2IM0177.indd 4 5/10/07 5:45:51 PM
 Loading...