

Lenovo ThinkStation P920, ThinkStation P720, ThinkStation P520, ThinkStation P520C Windows 10 Installation Guide [en, ar, bg, cs, da, de, el, es, es, fi, fr, he, hr, hu, id, it, ja, ko, nb, nl, pl, pt, pt, ro, ru, sh, sk, sl, sv, th, tr, uk, zc, zh]
Page 1

LENOVO T HINKSTATION P5 2 0 C, P 5 2 0, P 7 2 0 , & P920
WINDOWS 10 INSTALLATION
Page 2

Contents
OVERVIEW
SECTION 1 – BIOS & PRE-INSTALLATION STEPS
SECTION 2 – WINDOWS 10 INSTALLATION
SECTION 3 – WINDOWS 10 UPGRADE USING MEDIA CREATION TOOL
SECTION 4 – DOCUMENT REVISION HISTORY
Page 3
Overview
The purpose of this document is to provide guidance for users on how to install a
Windows 10 retail operating system on their ThinkStation P520c, P520, P720, and
P920 systems.
Section 1 – BIOS & Pre-Installation Steps
The first step before installing Windows is to make sure BIOS is setup correctly. It
is important to note which type of partitioning method (GPT or MBR) before
attempting to install any operating system on their system.
For UEFI/GPT installations (recommended):
o Boot into BIOS by pressing the F1 key at the “Lenovo” splash
screen.
Page 4
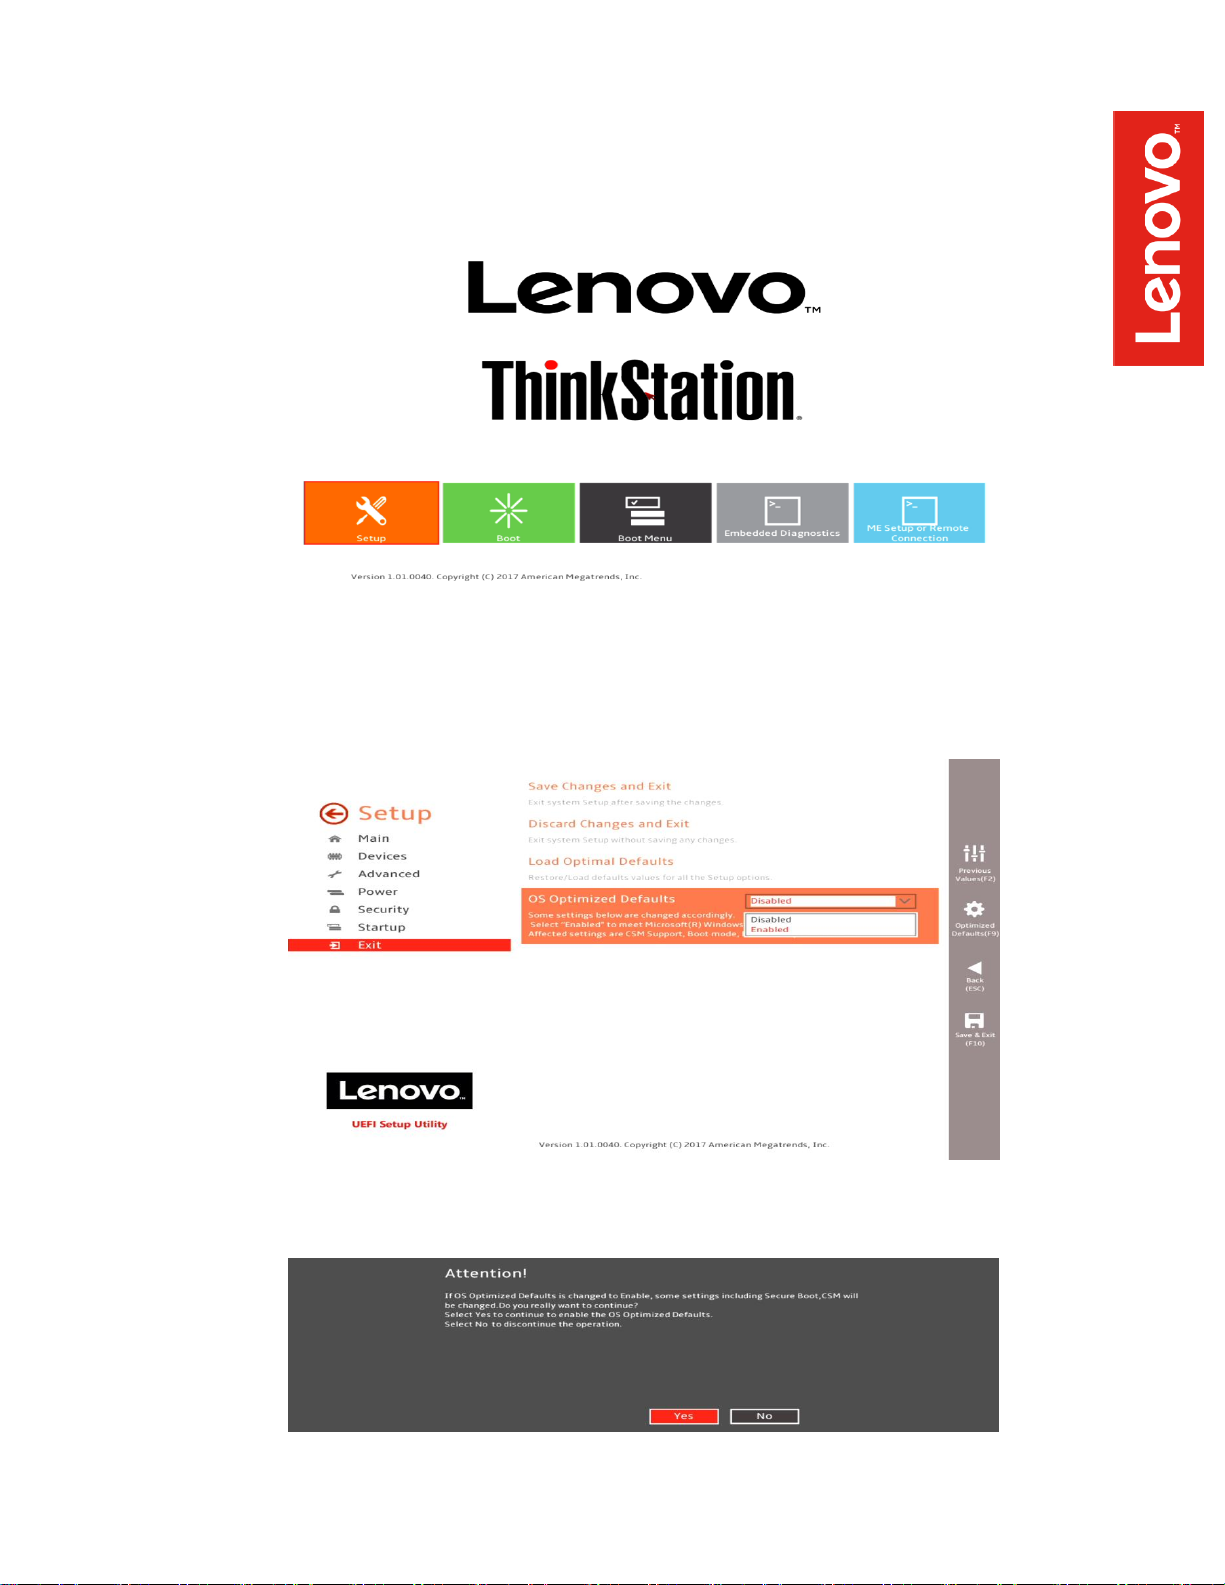
o Select “Setup” from the screen indicated below.
o Select the “Exit” menu option along the left column and set “OS
Optimized Defaults” along the right column to “Enabled”.
o Select “Yes” at the confirmation screen indicated below.
Page 5
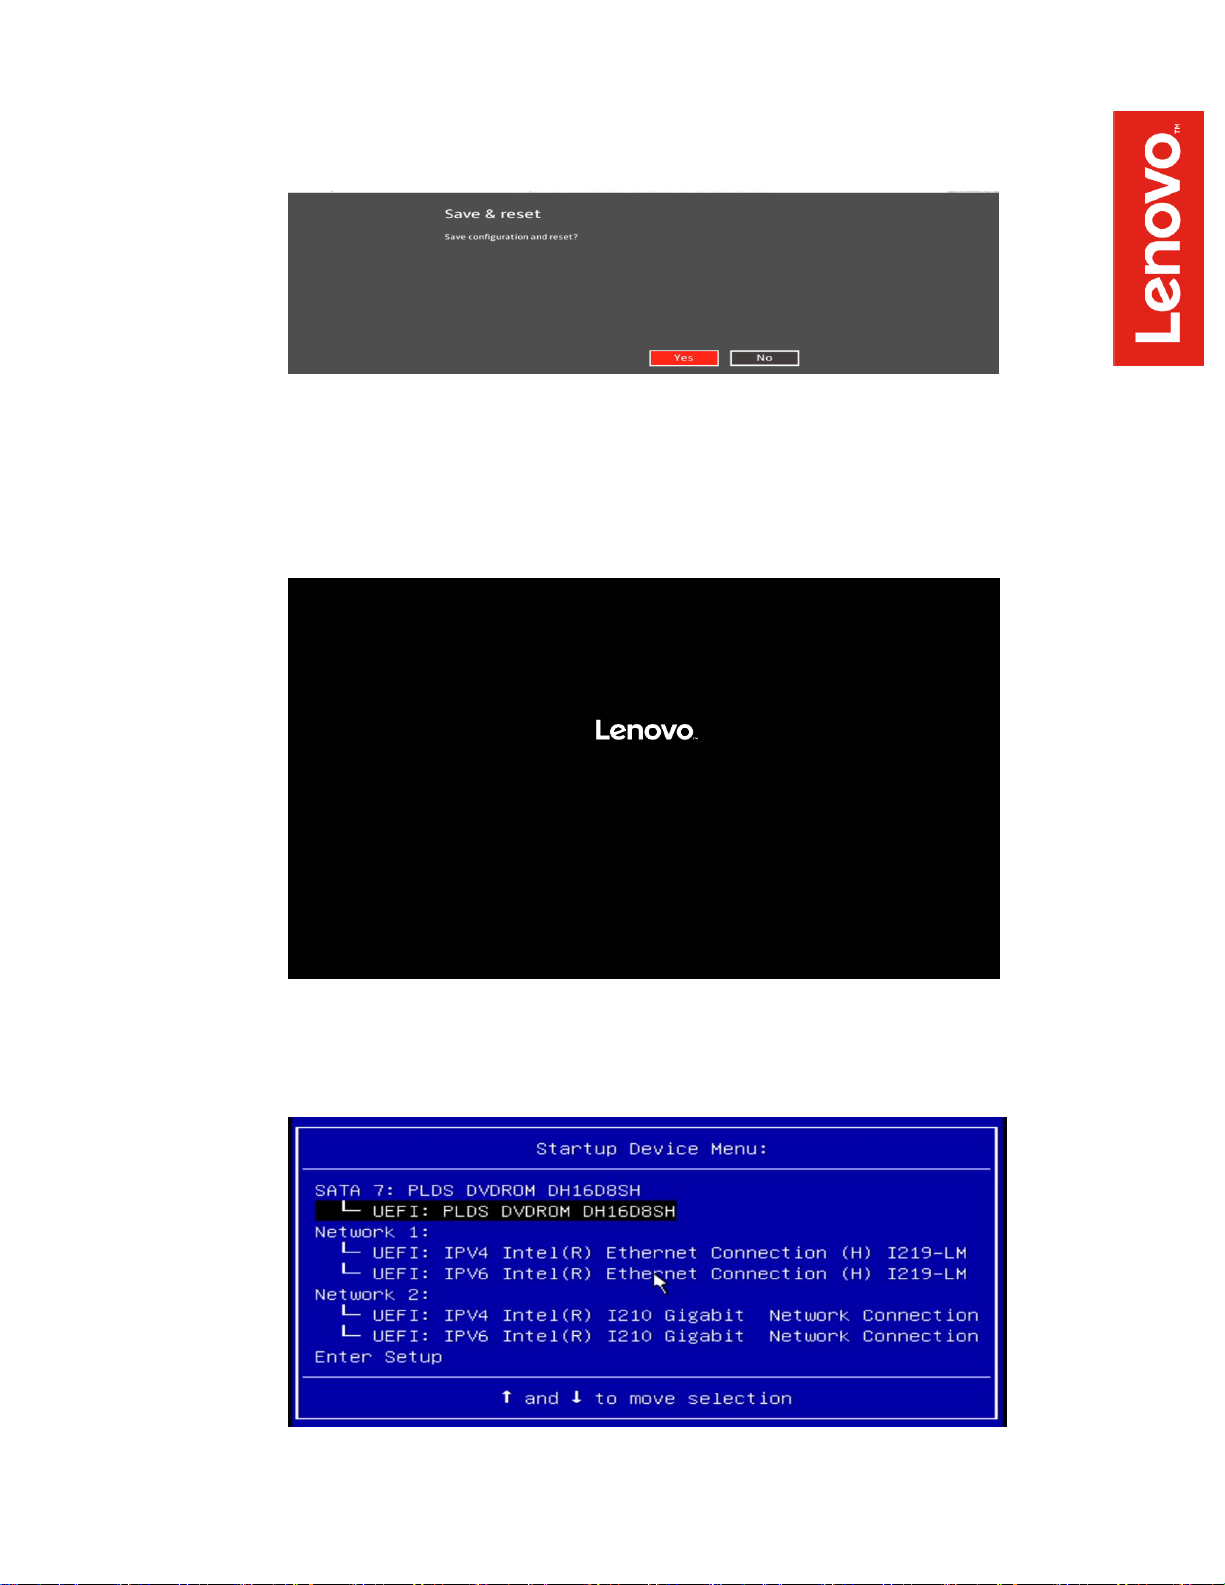
o Select F10 to “Save and Exit” BIOS.
o Insert the Windows 10 install media (either through USB or
CD/DVD).
o Power on the system and press the F12 key whenever the following
Lenovo splash screen appears.
o Select the Windows bootable installation media “UEFI” option from
the F12 boot menu.
Page 6
For Legacy/MBR installations:
o Boot into BIOS by pressing the F1 key at the “Lenovo” splash
screen.
o Select “Setup” from the screen indicated below.
Page 7
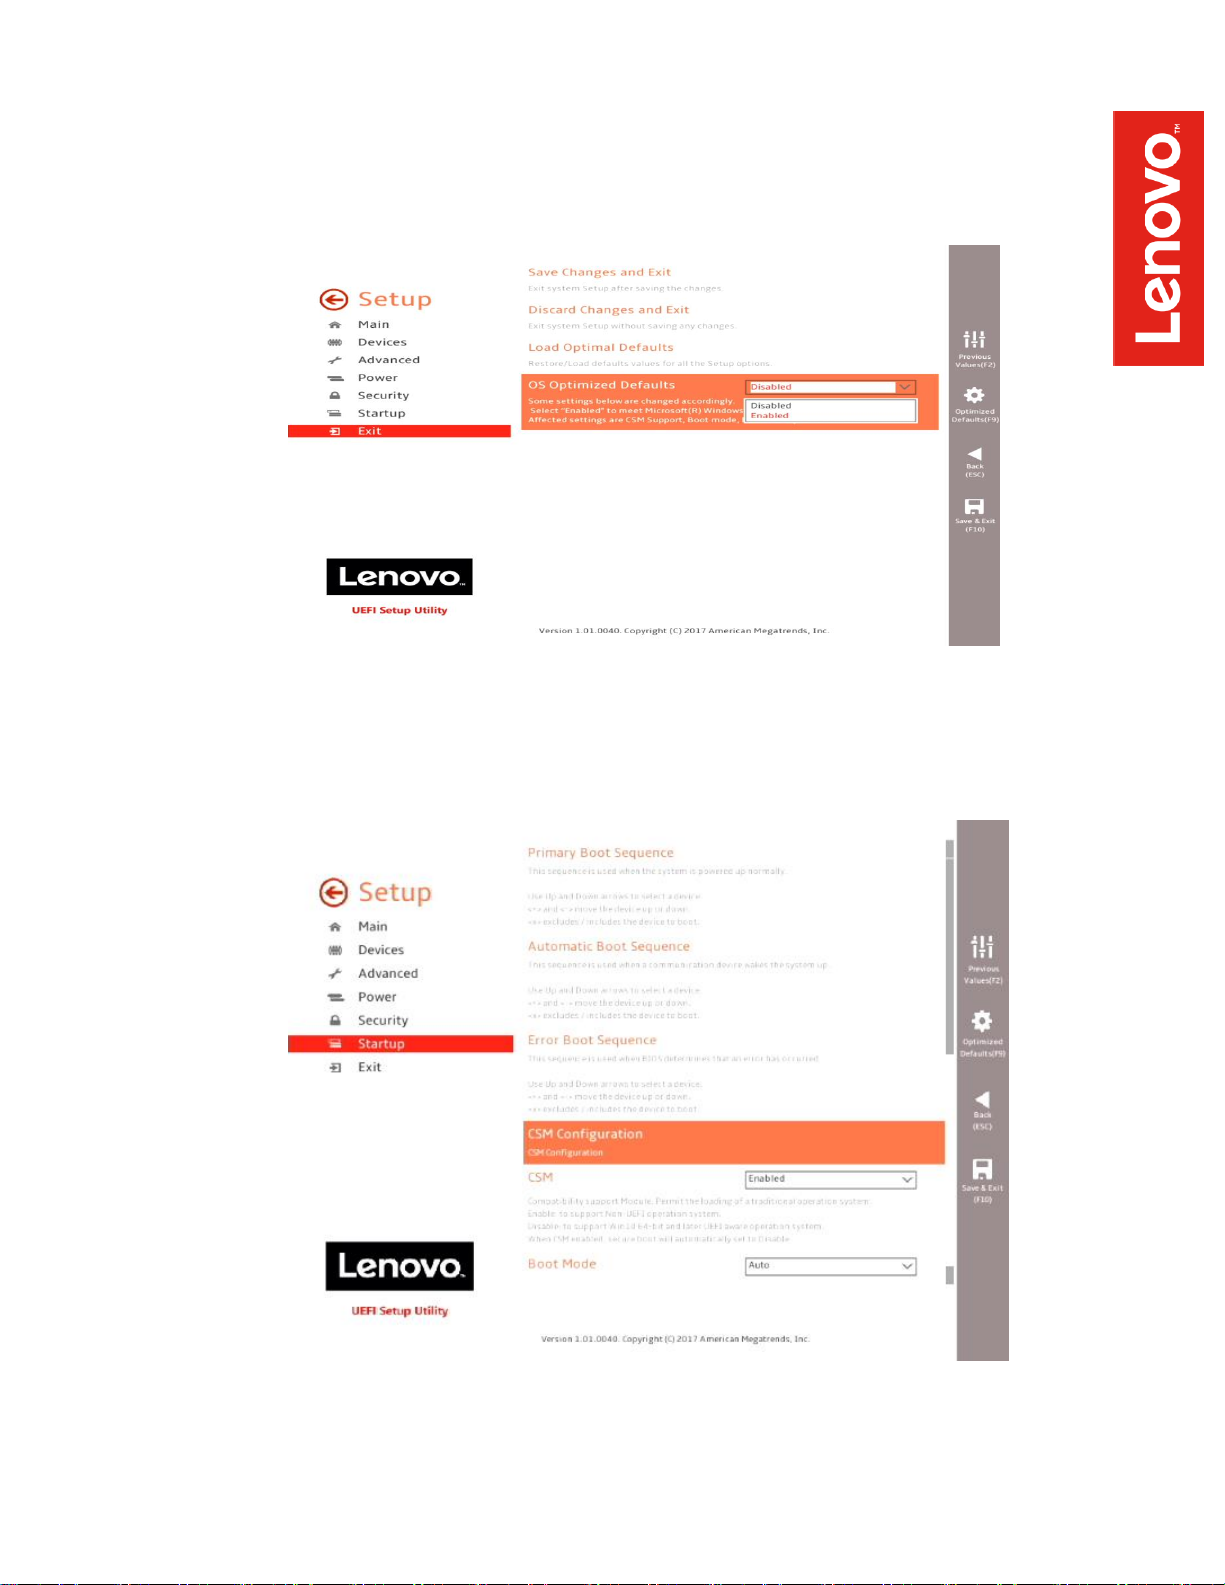
o Select the “Exit” menu option along the left column and set “OS
Optimized Defaults” along the right column to “Disabled”.
o Select “Startup” menu option along the left column and select the
“CSM Configuration” option along the right column.
Page 8

o Select the “Storage” option ROM and set the pull-down menu to
“Legacy”.
o Select F10 to “Save and Exit” BIOS.
o Insert the Windows 10 install media (either through USB or
CD/DVD).
o Power on the system and press the F12 key whenever the following
Lenovo splash screen appears.
Page 9

o Select the Windows bootable installation media “Legacy” option from
the F12 boot menu.
Page 10

Section 2 – Windows 10 Installation
Follow the steps below to proceed with the Windows 10 installation.
1. Select the following Language, Time, and Keyboard Layout and select
“Next”.
2. Select “Install now” option.
Page 11

3. Enter the product key to activate Windows and press “Next”, or press
“Skip” to enter a valid product key later.
4. Check the box next to “I accept the license terms” and select “Next”.
Page 12

5. Choose the type of installation to perform.
- To upgrade to Windows 10 from an earlier version of Windows, select the “Upgrade”
option below.
- To perform a clean OS installation, select “Custom: Install Windows only (advanced)”
option below. For instructional purposes, this option was selected below.
6. Select the “Load driver” option to load the appropriate driver for the storage
device.
Page 13

7. Make sure to load the appropriate storage device driver onto a CD, DVD,
or USB flash drive before completing the next step. The storage device
drivers can be found on the Lenovo Support website here.
- For storages devices attached to the Intel storage controller, load the Intel Rapid
Storage Technology enterprise (RSTe) driver.
o Select “Browse”, and browse to the CD, DVD, or USB flash drive to where the
storage device driver is located and select “OK”.
Page 14

- For storages devices attached to the Broadcom controller, load the Broadcom storage
driver.
o Select “Browse”, browse to the CD, DVD, or USB flash drive to where the
storage device driver is located and select “OK”.
Page 15

8. Select the driver to install.
9. Select the drive to install Windows and select “Next” at the bottom.
Page 16

10. Installing Windows screen.
11. After the installation completes, the system will automatically reboot. If no
product key was entered above, then it’ll prompt to enter a product key
again. Either enter the product key here and select “Next” or select “Do
this later” at the bottom left.
Page 17

12. Select “Use Express Settings” at the bottom right to use the default settings
or select “Customize settings” at the bottom left. For instructional
purposes, “Use Express settings” was selected.
13. Create an account by typing a “User name”. Optionally, type a password to
make it secure.
Page 18

14. Windows 10 desktop screen.
15. At this point, download and install the appropriate device drivers, i.e. Intel
Chipset, Intel AMT, Ethernet, Graphics, etc. The device drivers can be
found on the Lenovo Support website here.
Page 19

Section 3 – Upgrading to Windows 10 using
Media Creation Tool
Follow the steps below for instructions on how to upgrade to Windows 10 using
Microsoft ‘media creation tool’ from Microsoft’s website linked below. It is
important to note that to use Microsoft’s media creation tool, a genuine Microsoft
license key is necessary.
http://windows.microsoft.com/en-us/windows-10/media-creation-tool-install
1. Once the user downloads the appropriate ‘media creation tool’ from
Microsoft’s website (linked above), double-click the icon to launch the
executable.
2. Select “Upgrade this PC now” and select “Next”.
Page 20

3. Accept the License terms.
4. Select “Install” to start the installation. It’s important to note, by default,
Windows will keep any existing settings, personal files, and apps.
Page 21

Version
Date
Author
Changes/Updates
1.0
11/8/2017
Jason Moebs
Initial launch release
Section 4 – Revision History
 Loading...