

Lenovo ThinkStation P330 Ubuntu 18.04 LTS Linux Setup Guide [en, ar, bg, cs, da, de, el, es, es, fi, fr, he, hr, hu, it, ja, ko, nb, nl, pl, pt, pt, ro, ru, sh, sk, sl, sv, th, tr, uk, zc, zh]
Ubuntu 18.04 LTS Linux Setup Guide
For ThinkStation P330
Section 1 - BIOS Setup and Preinstallation Steps
The first step before installing Linux is to make sure BIOS is setup correctly.
For UEFI/GPT installations (recommended):
o Boot into BIOS by pressing the function F1 key at the “Lenovo” splash screen.
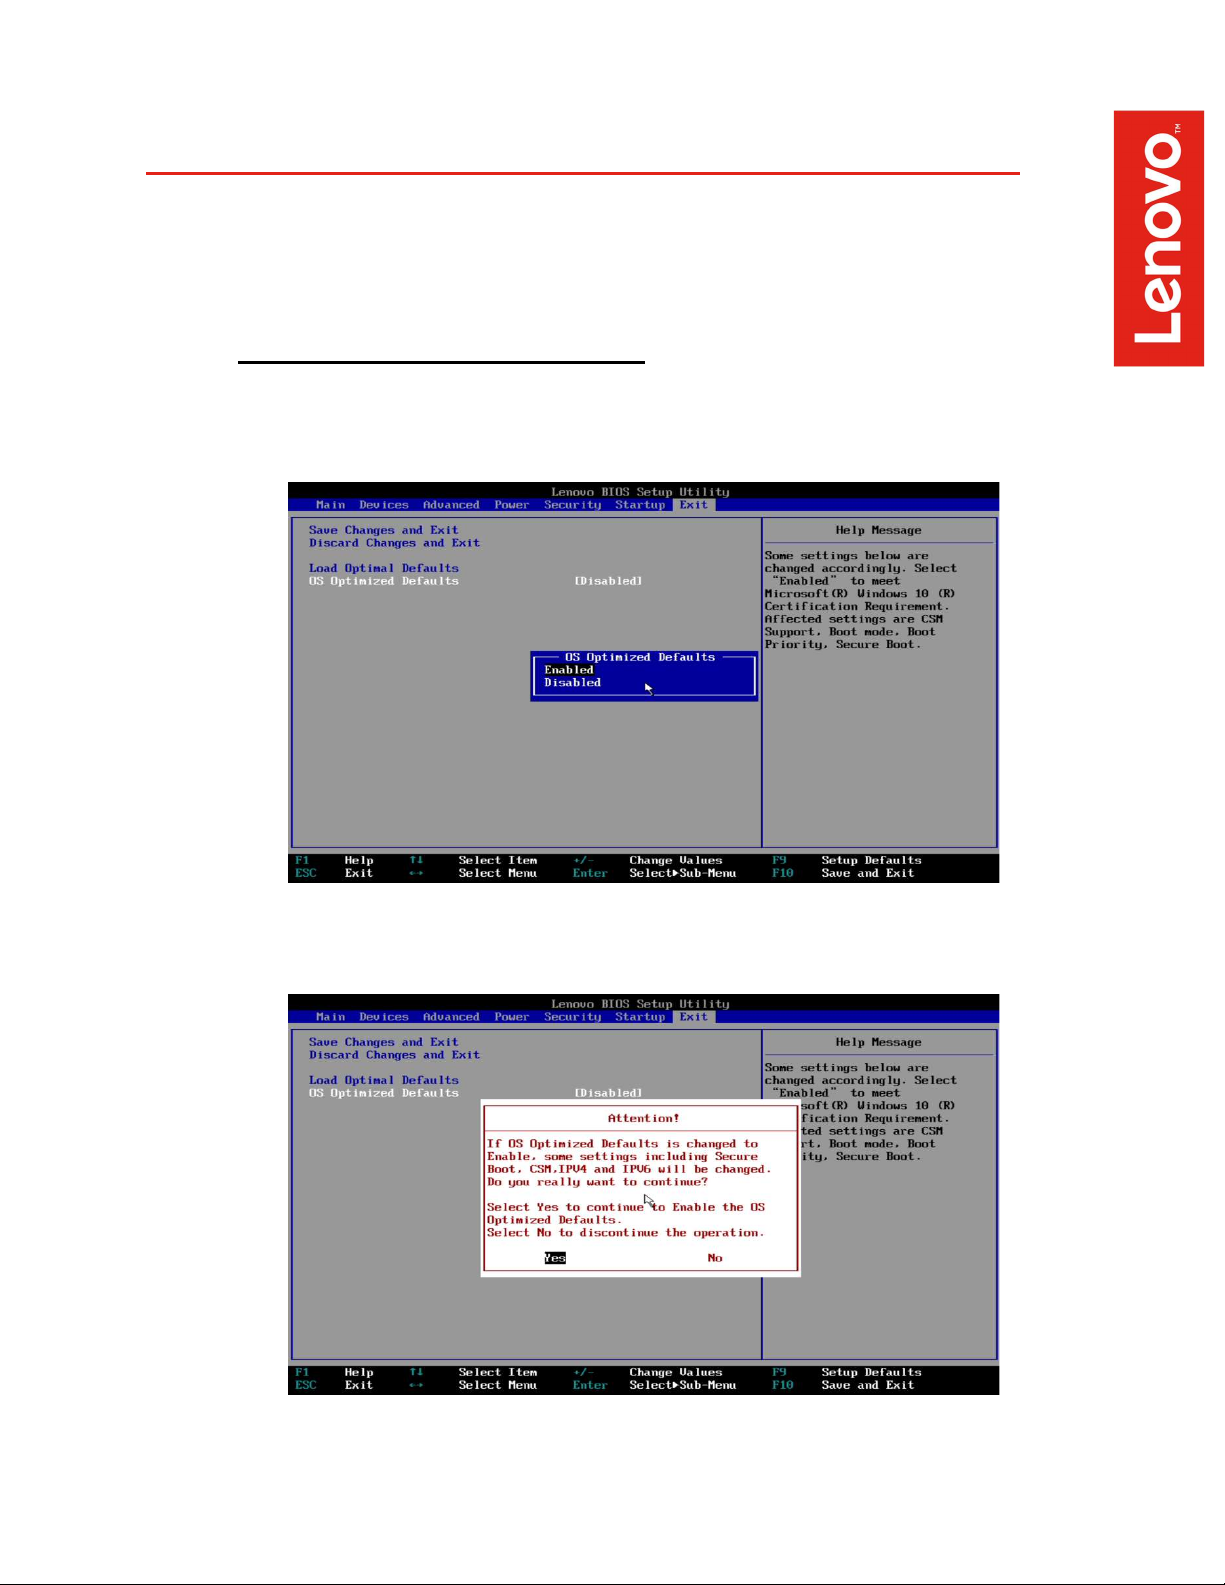
o Tab over to the “Exit” menu tab and set “OS “Optimized Defaults” to “Enabled”.
o Select “Yes” at the confirmation screen indicated below.
2
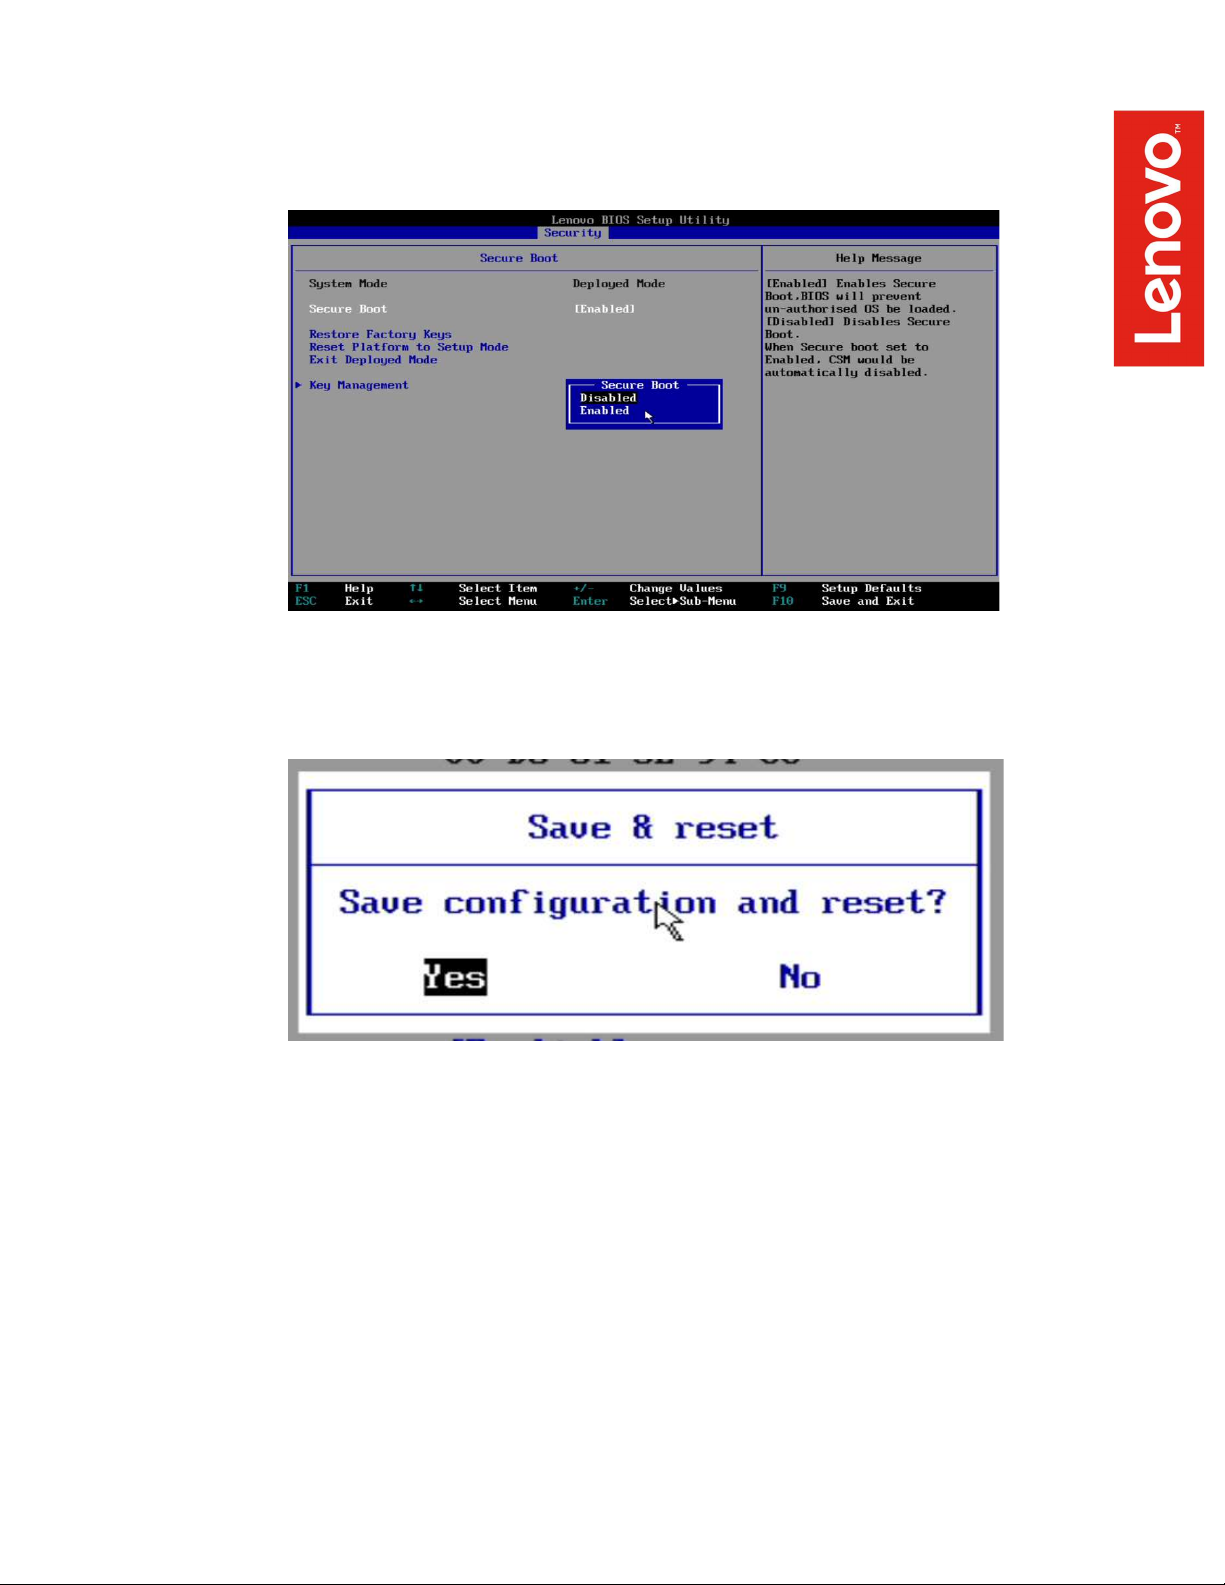
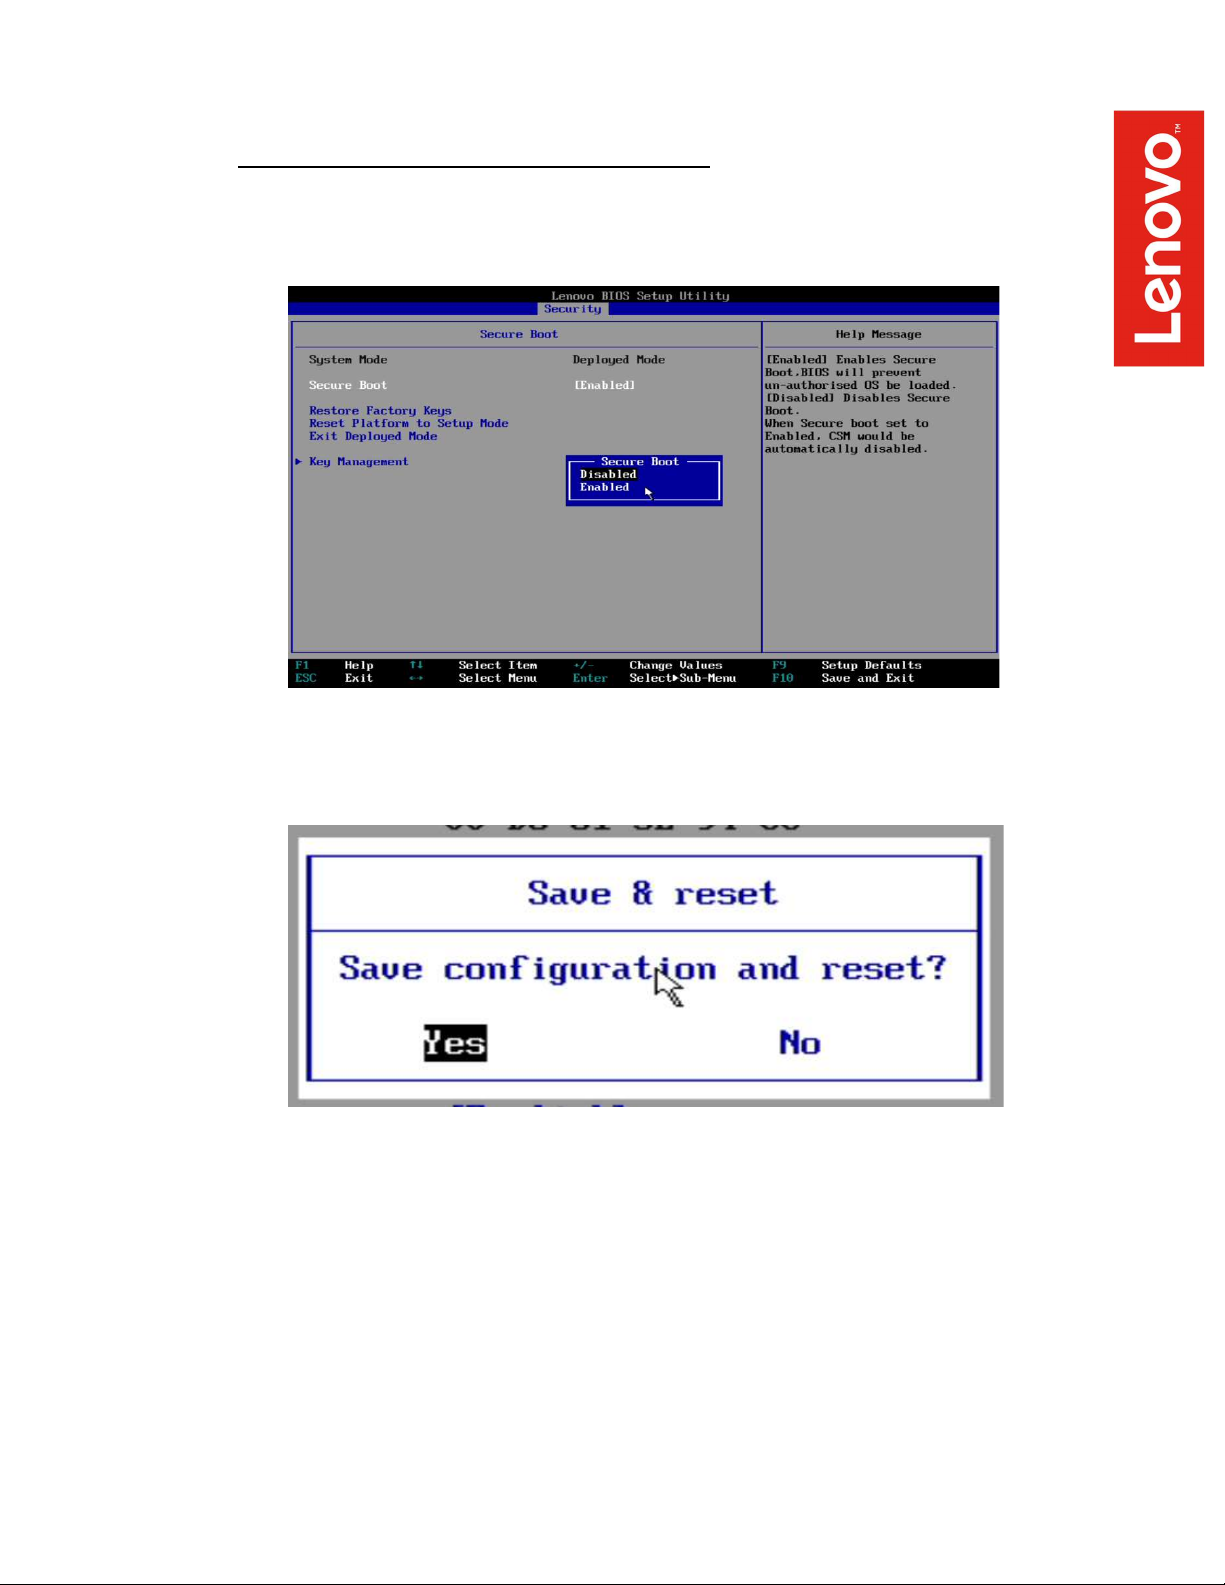
o Tab over to the “Security” menu tab, select “Secure Boot”, and set the option to
“Disabled”.
o Press F10 to “Save and Exit” the BIOS setup menu.
o Insert the Ubuntu install media (either through USB or CD/DVD).
3
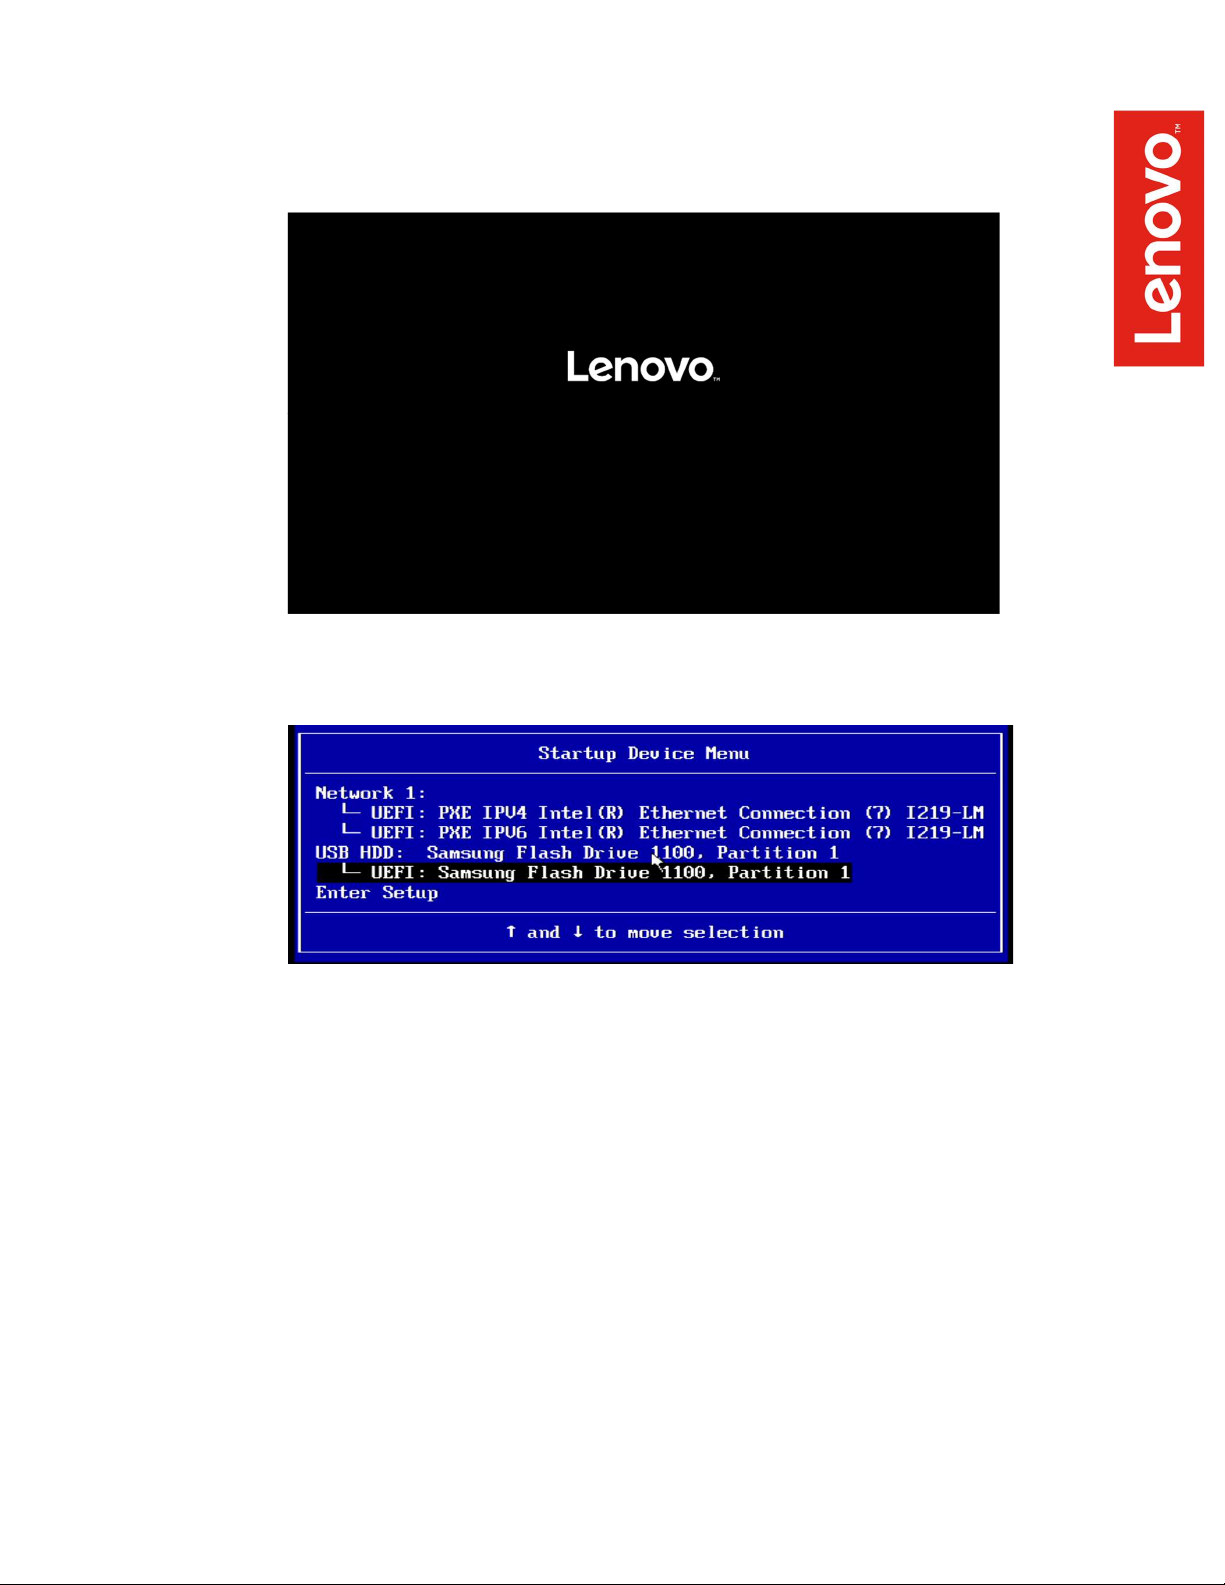
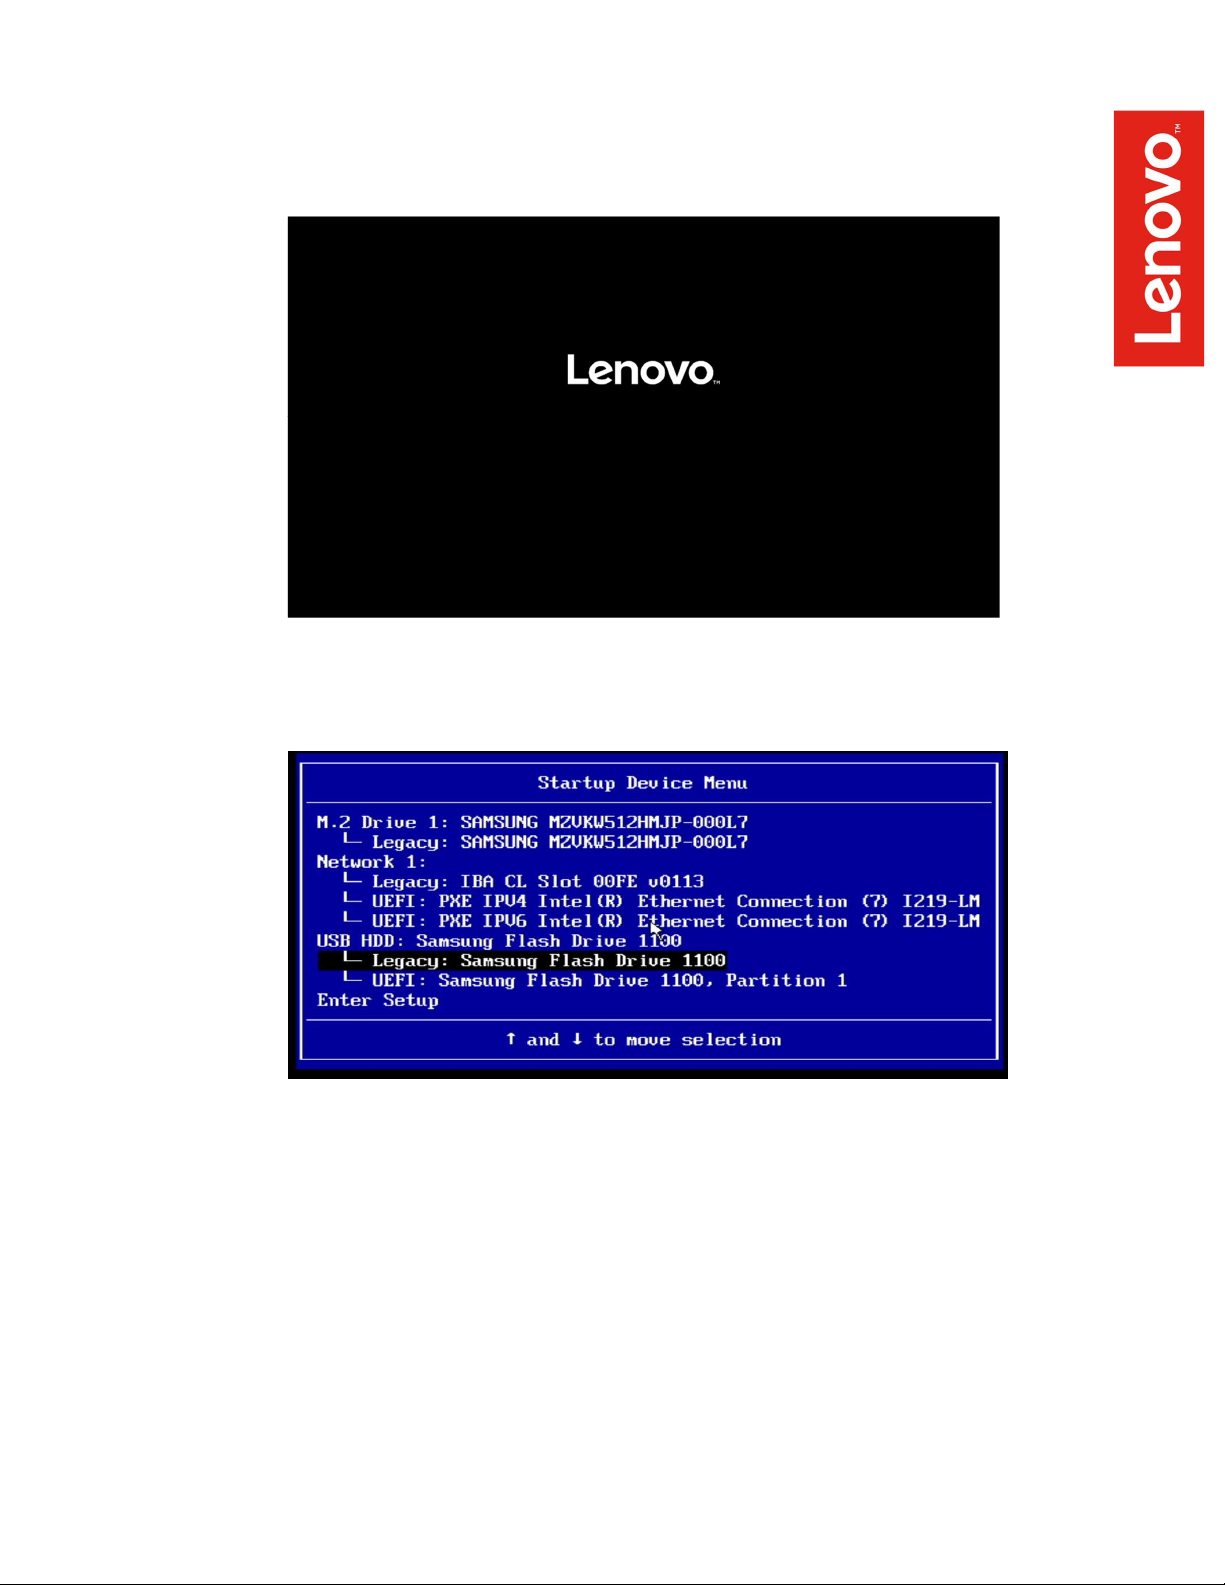
o Power on the system and press the F12 function key whenever the following
Lenovo splash screen appears.
o Select the Linux bootable installation media “UEFI” option from the F12 boot
menu.
4
For Legacy/MBR installations (not recommended):
o Boot into BIOS by pressing the function F1 key at the “Lenovo” splash screen.
o Tab over to the “Exit” menu tab and set “OS “Optimized Defaults” to “Disabled”.
o Select F10 to “Save and Exit” BIOS.
o Insert the Ubuntu install media (either through USB or CD/DVD).
5
o Power on the system and press the F12 function key whenever the following
Lenovo splash screen appears.
o Select the Linux bootable installation media “Legacy” option from the F12 boot
menu.
6
Section 2 – Installing Ubuntu 18.04 LTS
Please refer to the following instructions and screenshots on how to install Ubuntu 18.04 LTS on
the ThinkStation P330 workstations.
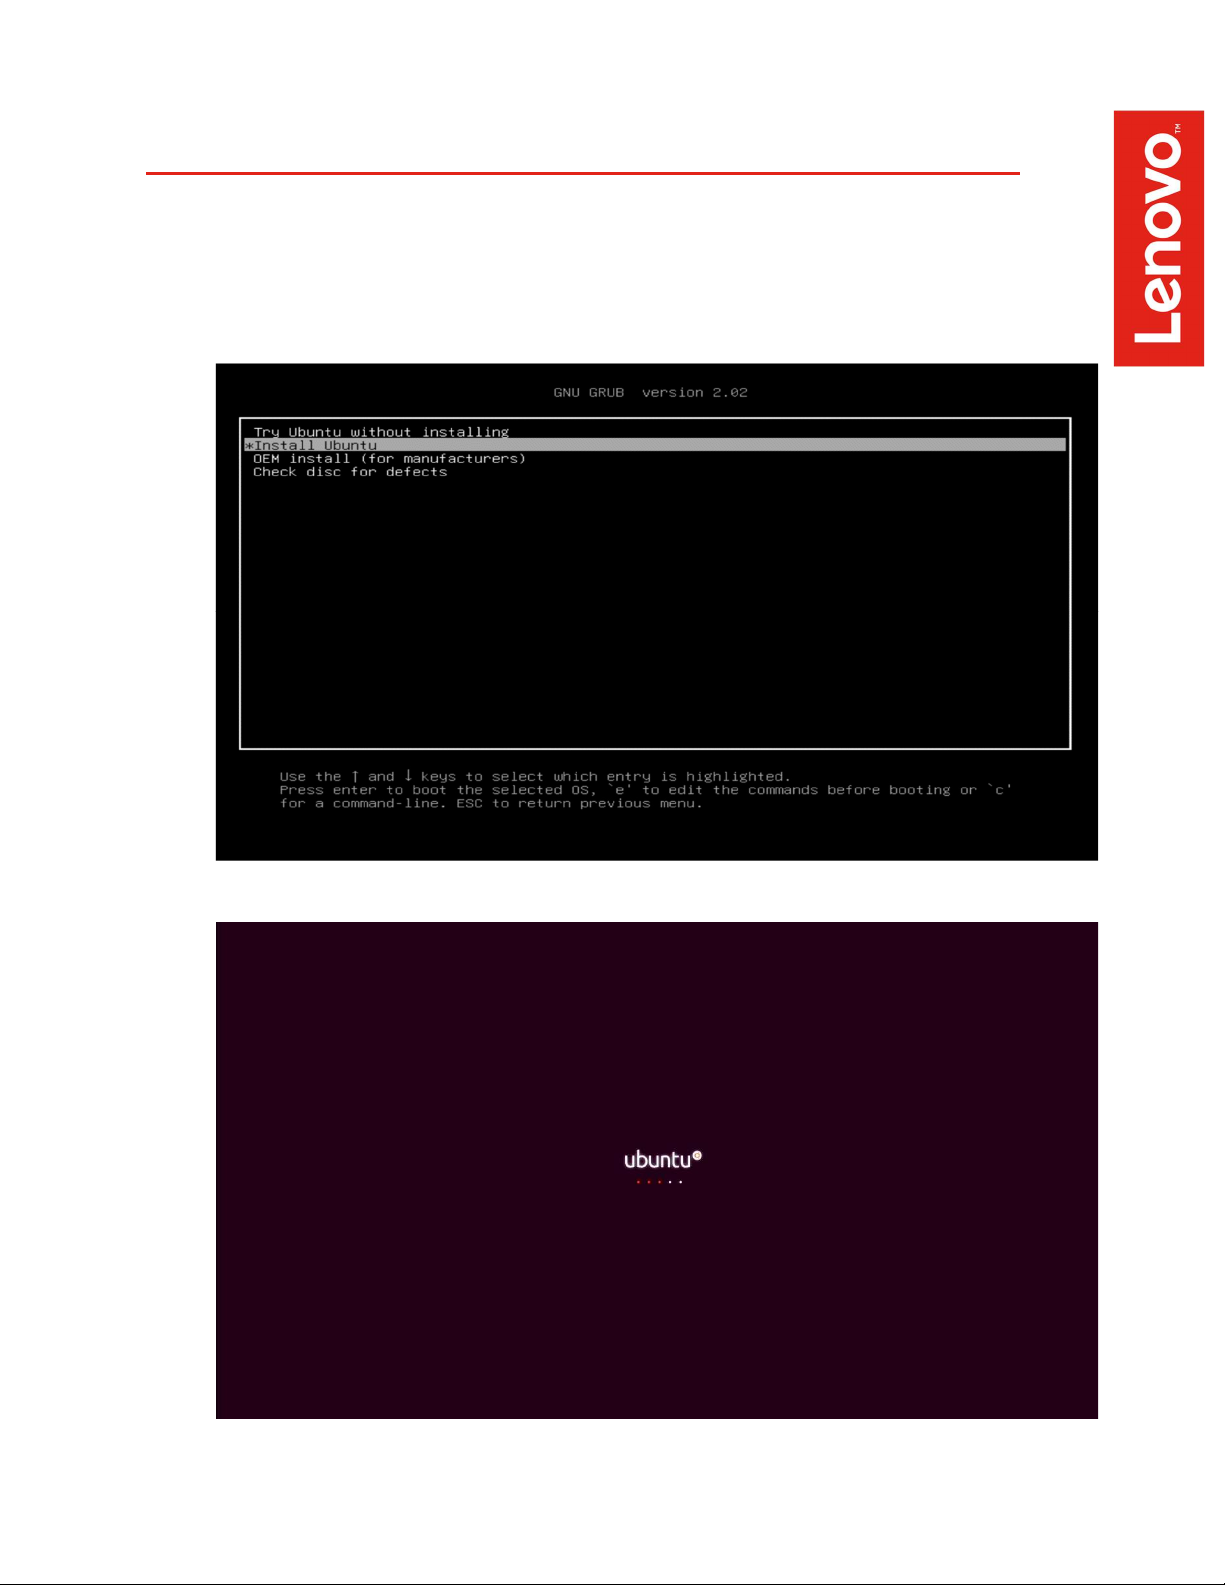
Highlight the “Install Ubuntu” from the Installer menu and press Enter.
7

Select the language to use during the installation process and “Continue”.
Select your keyboard layout and “Continue”.
8

Select “Normal Installation” and “Continue”.
Select “Erase disk and install Ubuntu” option and “Install Now”.
9

Select “Continue” to confirm making changes to the disk.
Select your location from the map and “Continue”.
10

Enter a Username and Password and select “Continue”.
Installing Ubuntu.
11

Installation Complete. Select “Restart Now”.
Ubuntu desktop screen.
12

Section 3 – Installing the Nvidia Graphics Driver
In order to get optimal performance out of the Nvidia GPU, it’s a good idea to install the Nvidia
graphics driver.
To install the latest Nvidia graphics driver, follow the steps below:
Step 1:
o Download the Nvidia graphics driver from the Lenovo Support Website.
https://download.lenovo.com/pccbbs/thinkcentre_drivers/l3vdo66ws14.zip
Step 2:
o As superuser (root), blacklist the Linux Nouveau driver.
Edit /etc/modprobe.d/blacklist.conf and add the line “blacklist nouveau”.
# sudo nano /etc/modprobe.d/blacklist.conf
Run the command from a terminal window:
# sudo update-initramfs –u
Reboot the system.
Step 3:
o During a system reboot, press the “ESC” button on the keyboard to enter the
Ubuntu grub boot menu.
13

o Press ‘e’ to edit the kernel boot parameter and add “nomodeset” to the Linux boot
command line.
o Press CTRL-X or F10 to boot the system.
Step 4:
o At the Ubuntu desktop screen, open a terminal window and stop X-windows by
using the following command:
# init 3
14

Step 5:
o Log in as superuser (root) using the credentials created above.
Step 6:
o Connect the system to the internet and install the “Development Tools” libraries.
# sudo apt-get update
# sudo apt-get install build-essential
15

Step 7:
Step 8:
o Browse to the directory location to where the Nvidia driver was downloaded and
run the following commands to unzip and install the driver.
# unzip l3vdo66ws14.zip
# sudo sh NVIDIA-Linux-x86_64-410.104.run
o Select “Continue Installation” at the pre-install script failed message.
16

Step 9:
o Select “OK” at the warning message where the installer couldn’t find 32-bit
compatible libraries.
Step 10:
o Select “Install and overwrite” for the libglvnd libraries.
17

Step 11:
o Select “Yes” to update the X-configuration file to use the Nvidia X driver.
Step 12:
o Select “OK” at the completion of the driver installation process.
18

Step 13:
o Verify the Nvidia driver has been installed successfully and is loaded properly by
running the following command:
# nvidia-smi
Step 13:
o Reboot the system.
19

Section 4 – Installing the Network Wireless Driver
The wireless network device offered for the P330 is native to Ubuntu 18.04 LTS; therefore, you will
not need to install any additional drivers separately.
Section 5 – Installing the Network LAN Driver
The network LAN device is native to Ubuntu 18.04 LTS; therefore, you will not need to install any
additional drivers separately.
20

Version
Date
Author
Changes/Updates
1.0 10/21/2019
Jason Moebs
Initial launch release
Section 6 – Revision History
21
 Loading...