

Page 1
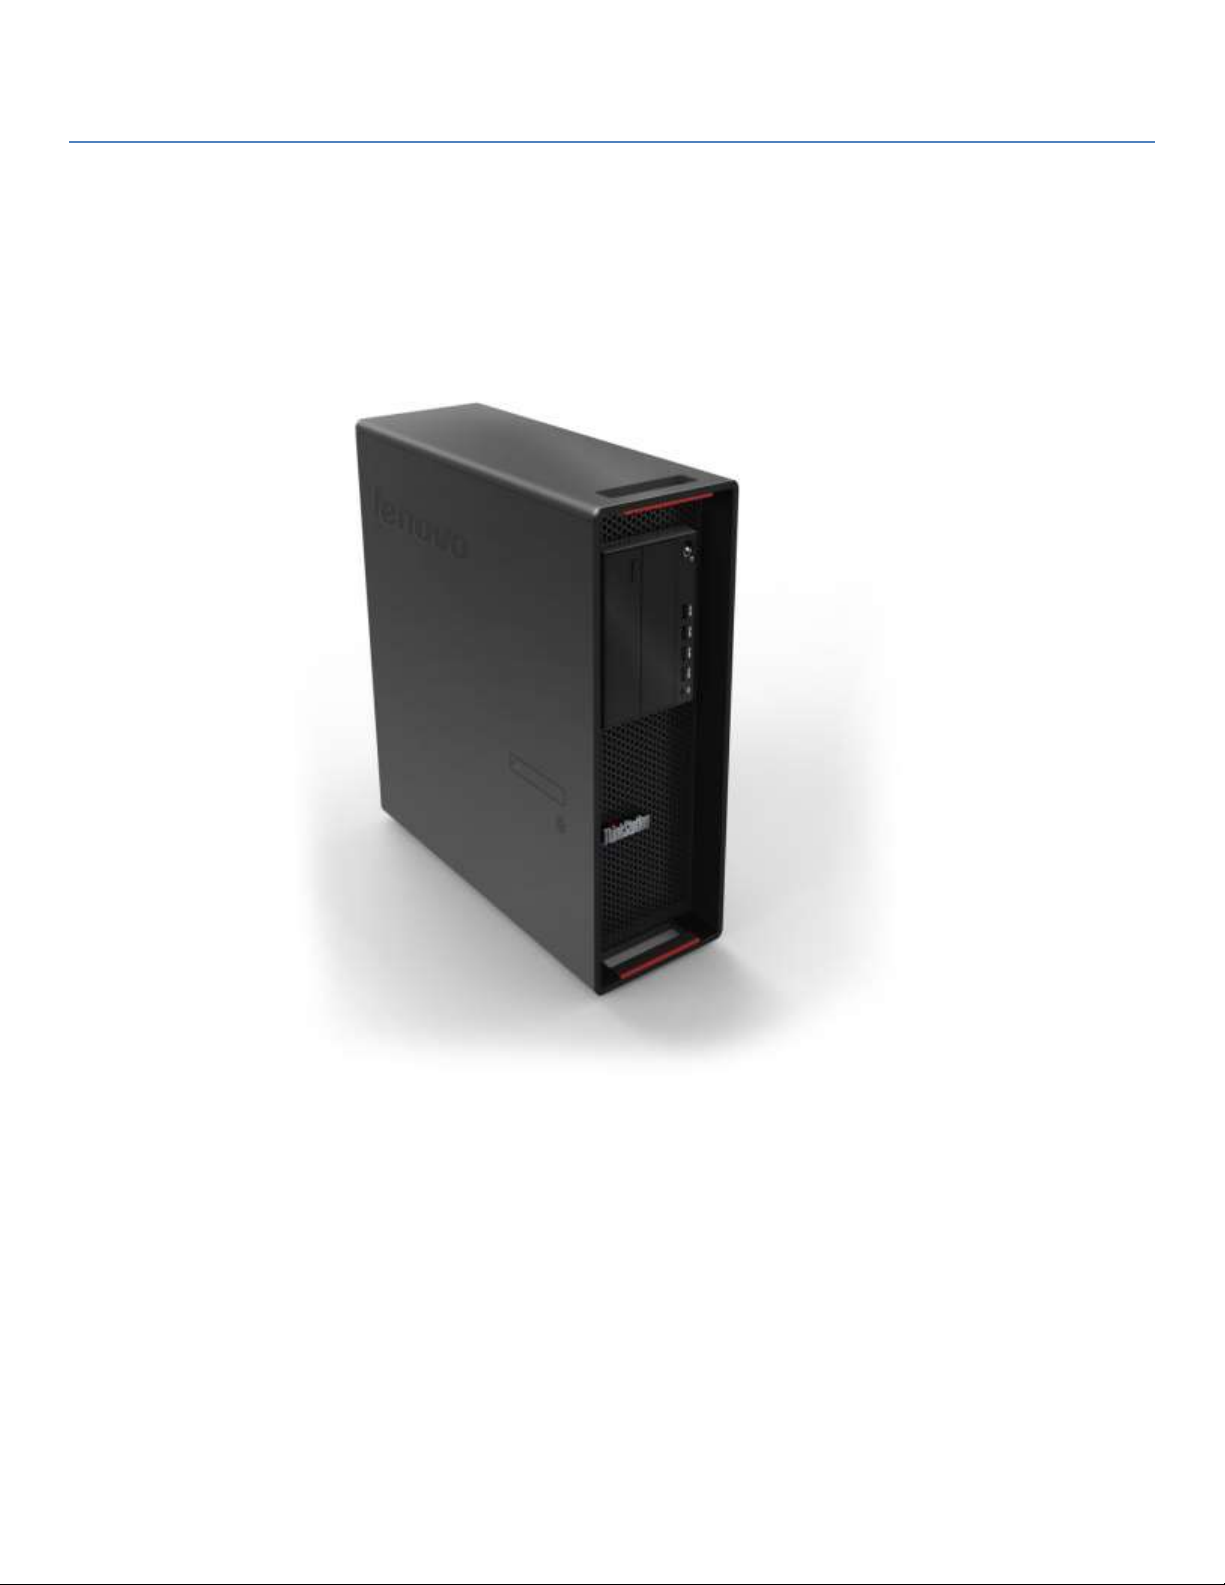
ThinkStation SSD Secure Erase
Version 1 . 0
Page 2
1. Introduction
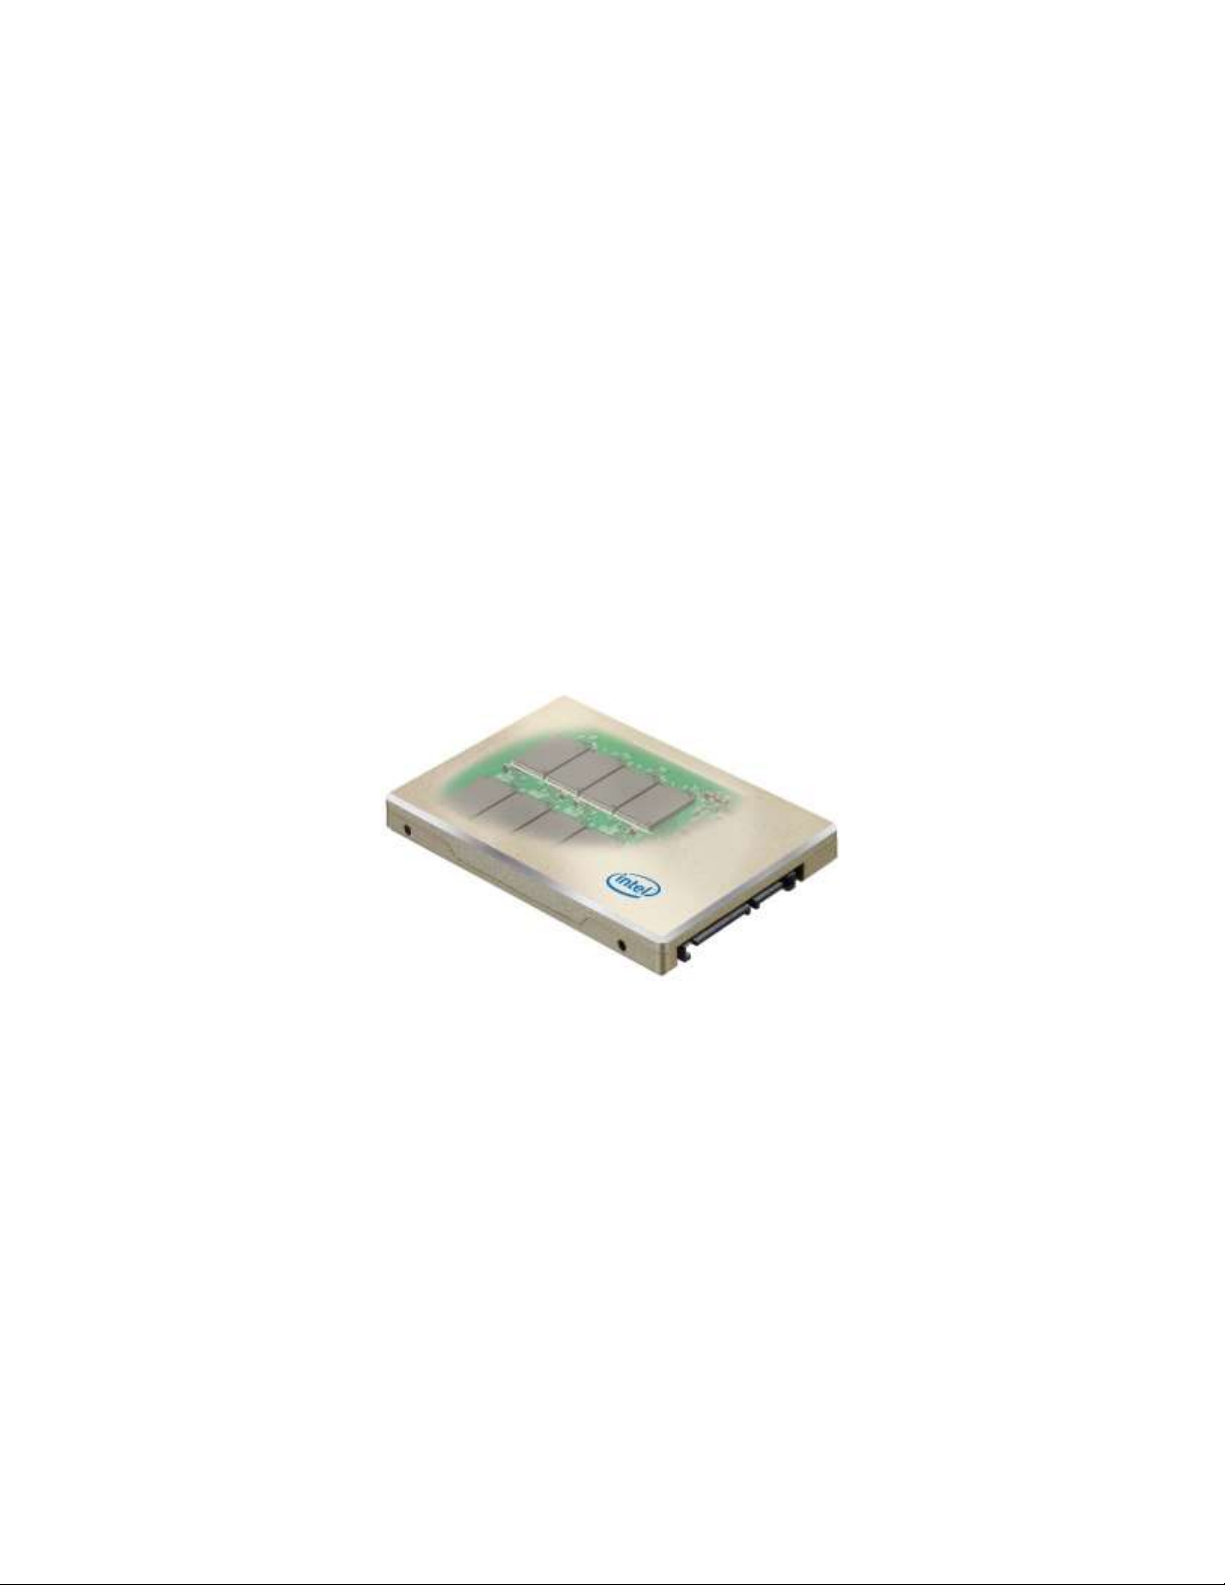
There is no doubt that solid state drive (SSD) technology has exploded in popularity in the computing world. SSDs offer a
lot of significant benefits over traditional spinning hard drives such as increased bandwidth, smaller physical footprint,
and lower power consumption. Couple that with increasing capacity points, and the ability to support SSDs in traditional
RAID arrays, and it’s clear that SSD technology is becoming a dominant force in the PC market.
With all of the benefits of SSDs, one area that requires additional attention is that of data security. Because of the way
SSDs actually store data on the drive, data is constantly moved and written to different blocks to achieve certain levels
of robustness and wear leveling. This creates the need for a way for users to securely erase data from their SSD, and do
so without causing unnecessary wasted writes to blocks that didn’t actually contain data (which would theoretically
shorten the life of the drive).
Fortunately, ThinkStation BIOS comes with a built in secure erase feature to serve just this purpose. This document will
instruct users on how to take advantage of this BIOS feature to securely erase all data on a SSD.
Page 3
2. How to Securely Erase SSDs Using ThinkStation BIOS
The following instructions will cover the steps required to use ThinkStation BIOS to securely erase a SSD.
IMPORTANT NOTES:
In order for the integrated secure erase feature to function correctly, any SSD to be erased MUST be
attached to one of the system’s onboard Intel SATA ports. The controller must be set to “ACHI” mode
(controller cannot be set to “RAID” mode).
SAS SSDs cannot be secure erased using this method. It is recommended to remove any drives not to be
securely erased from the system for this method.
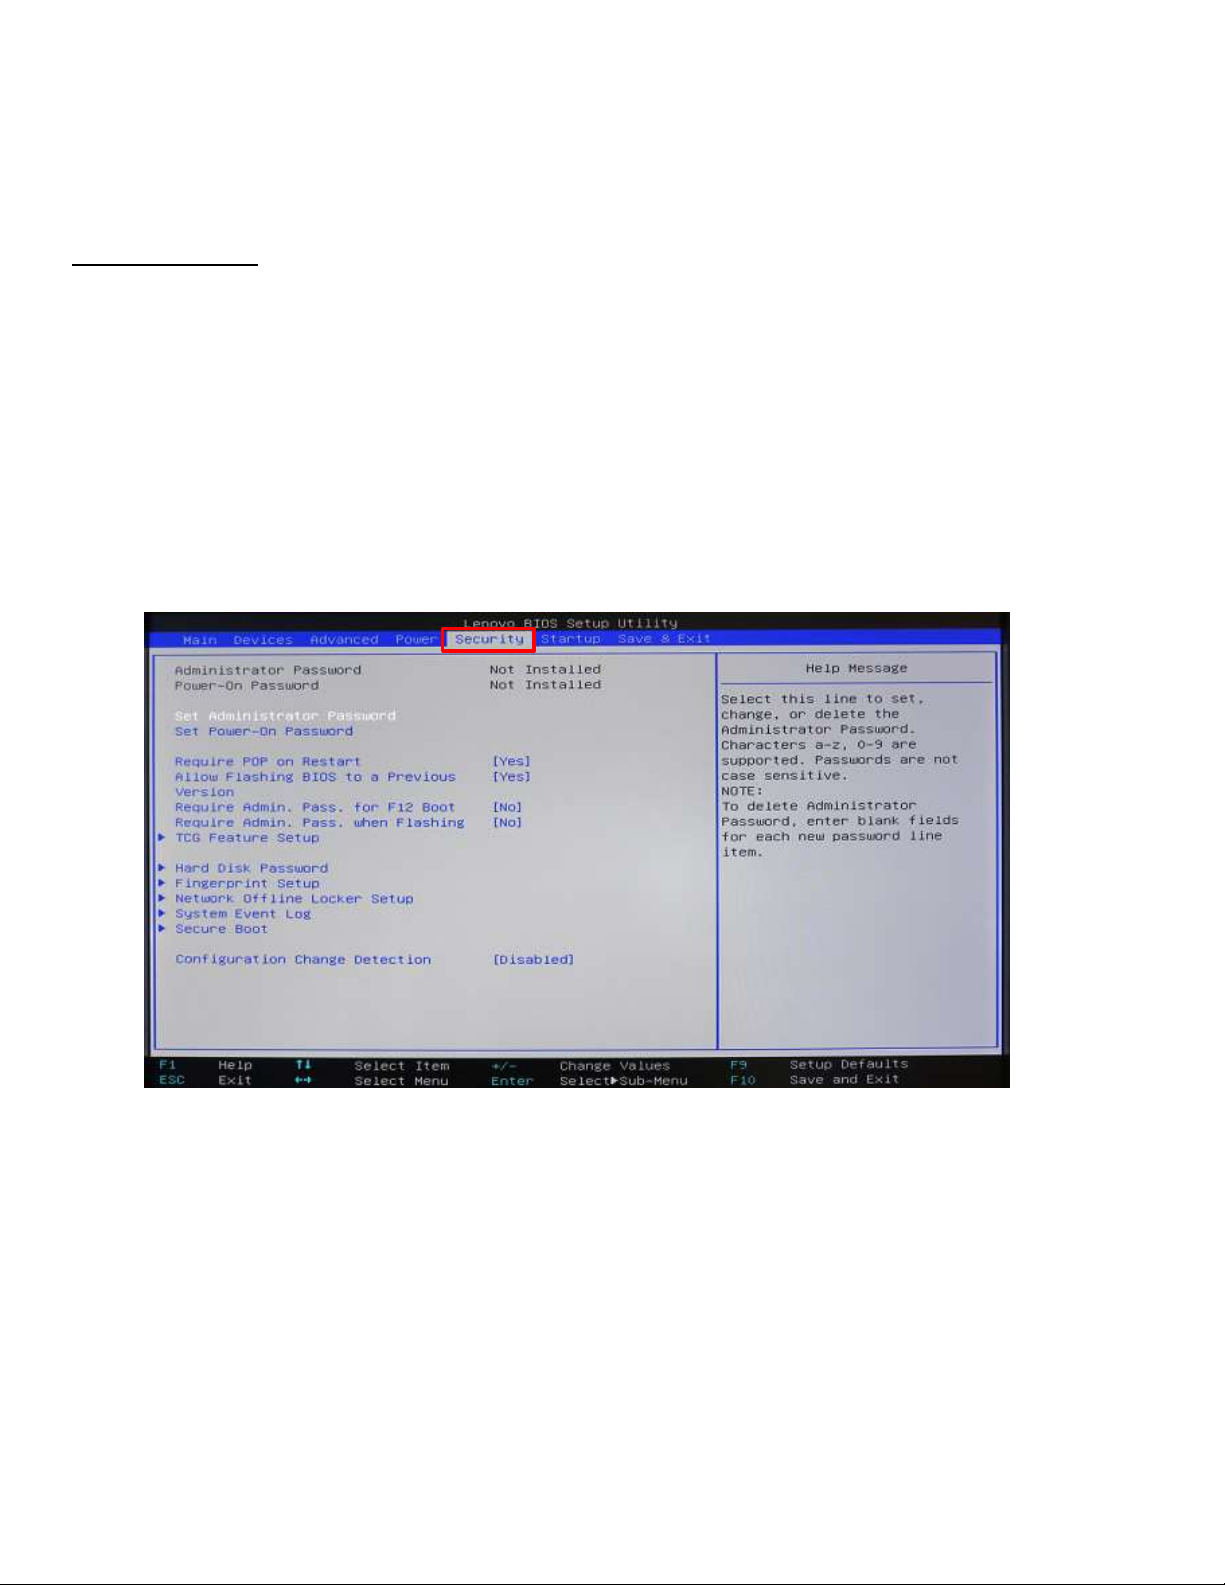
1. With the target drive connected to the system correctly, power on the system and press “F1” to enter BIOS
setup.
2. Use the arrow key to highlight the “Security” tab.
Page 4
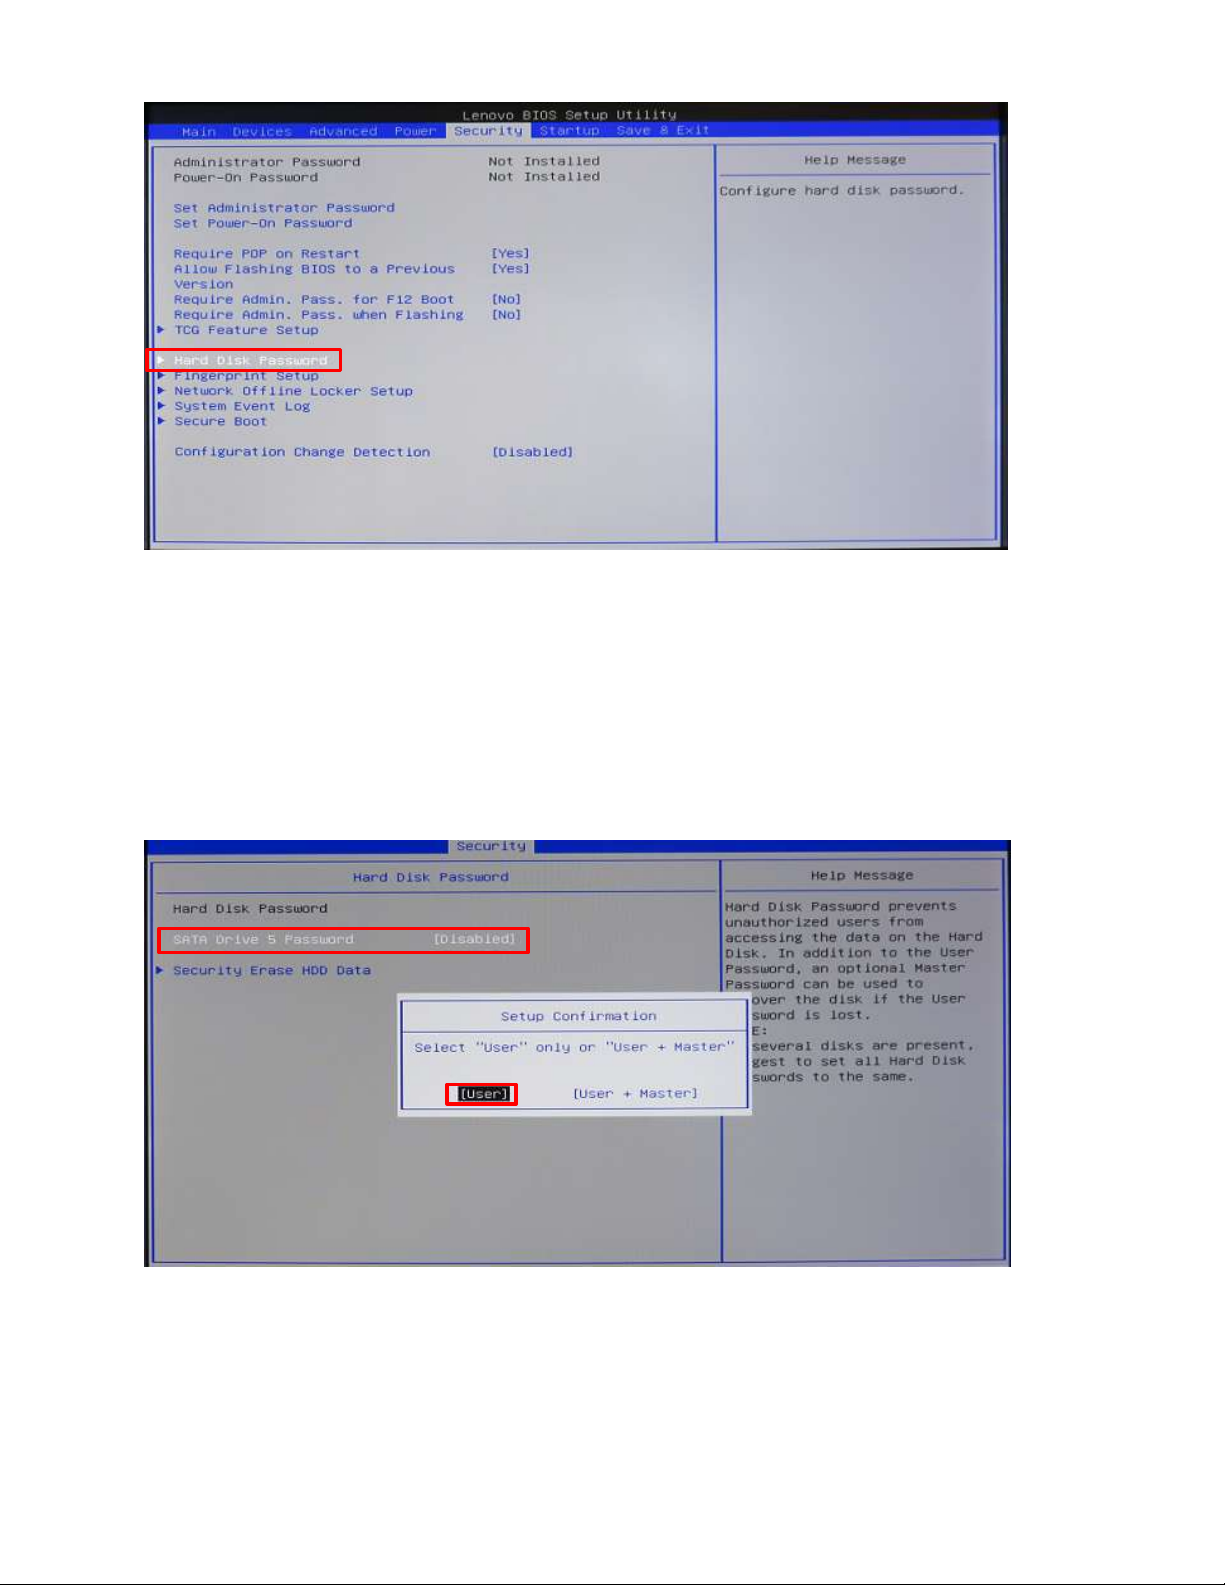
3. Use the down arrow to select the “Hard Disk Password” option, then press Enter.
4. In order for BIOS to be able to securely erase the SSD, a password must be assigned to the drive if one doesn’t
already exist. If a password is already assigned to the drive, skip to STEP #9. Otherwise, highlight “SATA Drive X
Password” (where X is the drive number to be erased) and press Enter.
5. A “Setup Confirmation” box will appear. Select “User” and press Enter.
Note: Selecting the User + Master password option is also acceptable. At minimum, a user password is required for
the secure erase feature to work.
Page 5
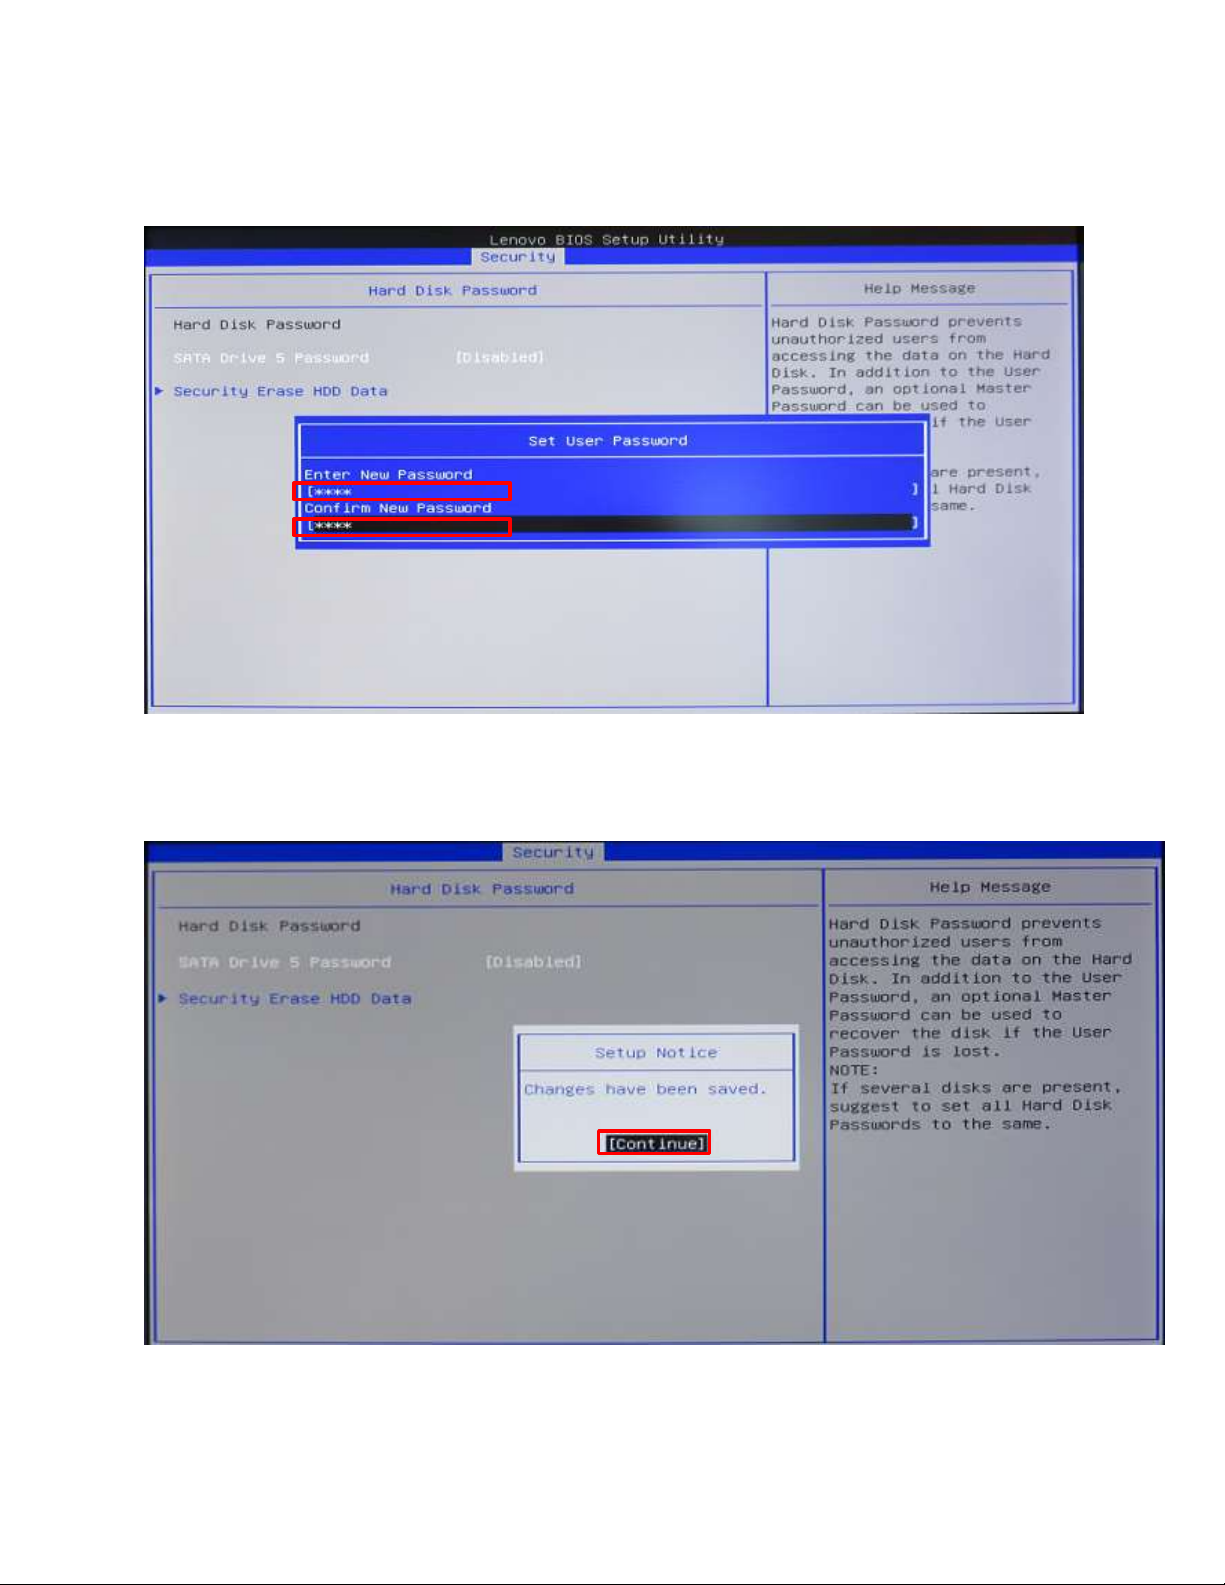
6. A “Set up User Password” box will appear. Choose a temporary password and enter it on the first line, then
press Enter. Re-enter the same password on the second line, and press Enter again.
7. The user password should now be set, and a “Setup Notice” box will appear informing the user that the changes
have been saved. Press Enter to continue.
8. At this point, the system needs to be rebooted for the changes to take effect. Press F10 to save and exit setup.
The system will reboot. During the reboot, press F1 to enter BIOS setup again. Use the arrow keys to select the
“Security” tab. Then use the arrow keys to select “Hard Disk Password” and press Enter.
Page 6
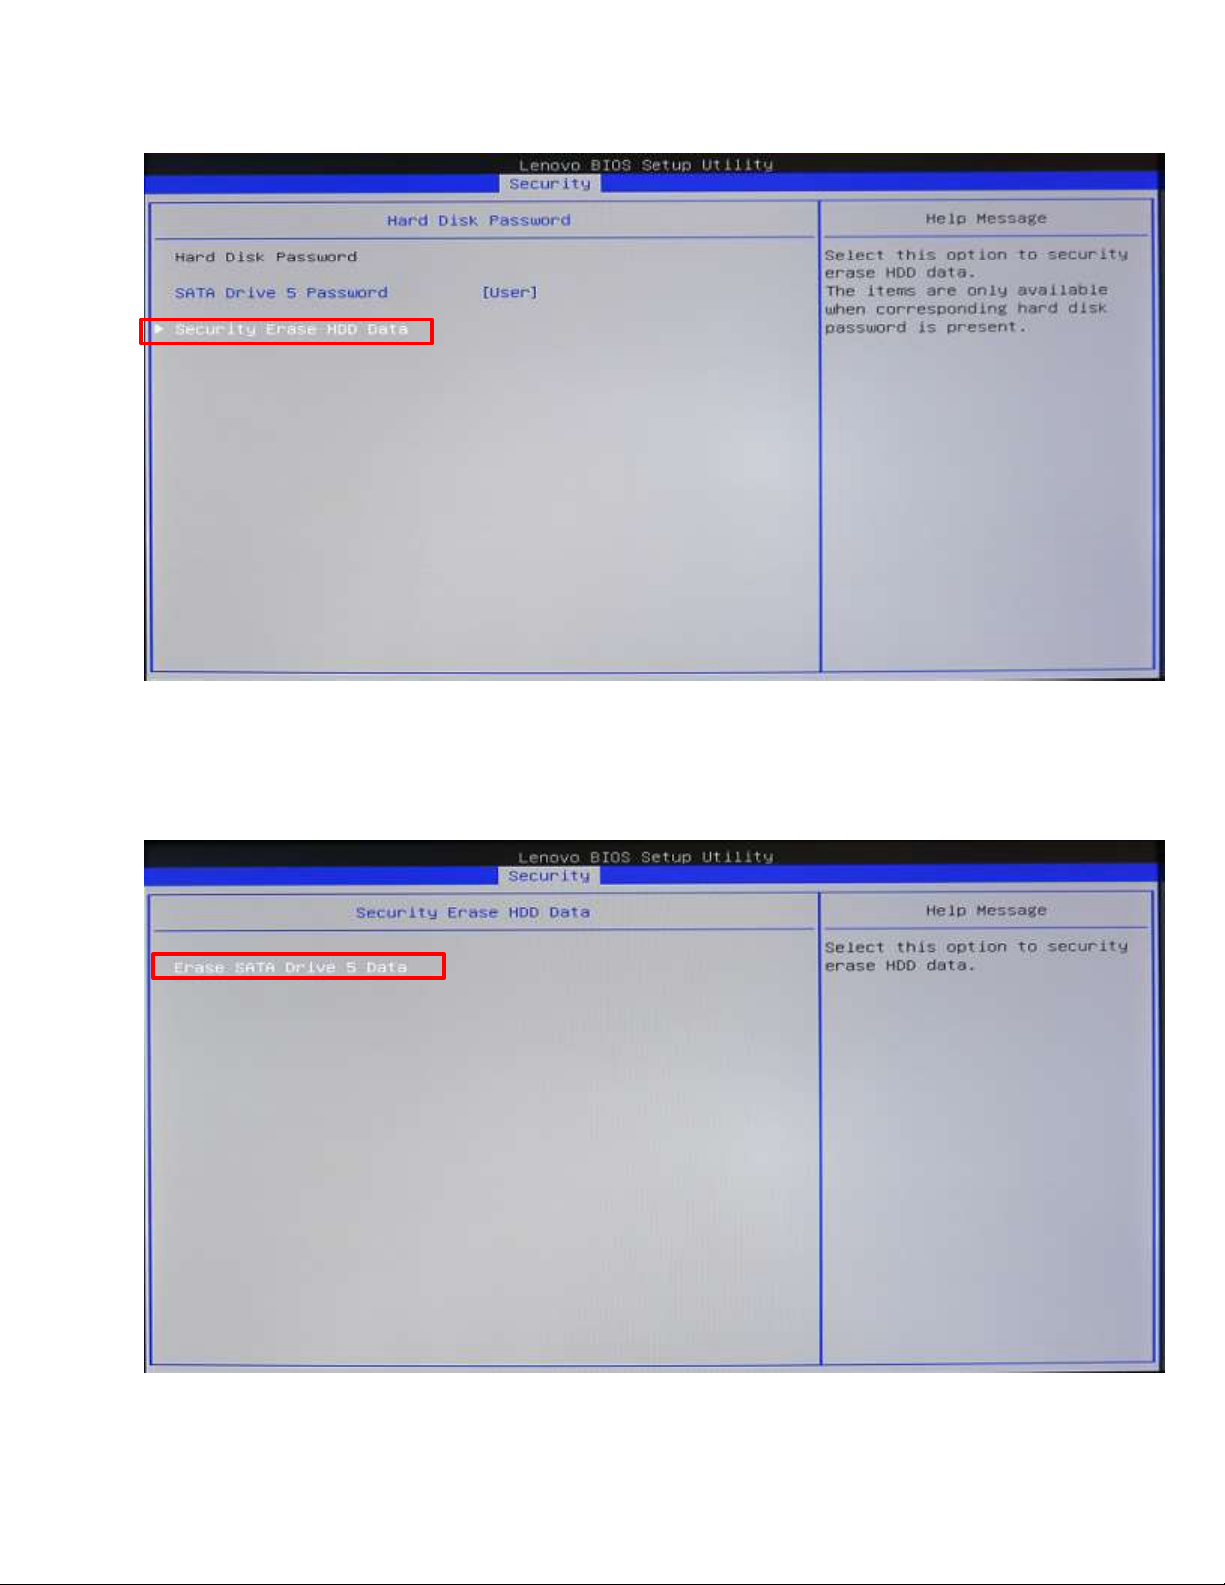
9. Use the arrow keys to select “Security Erase HDD Data”, then press Enter.
10. Use the arrow keys to highlight “Erase SATA Drive X Data” (where X is the drive to be erased), then press Enter.
Page 7
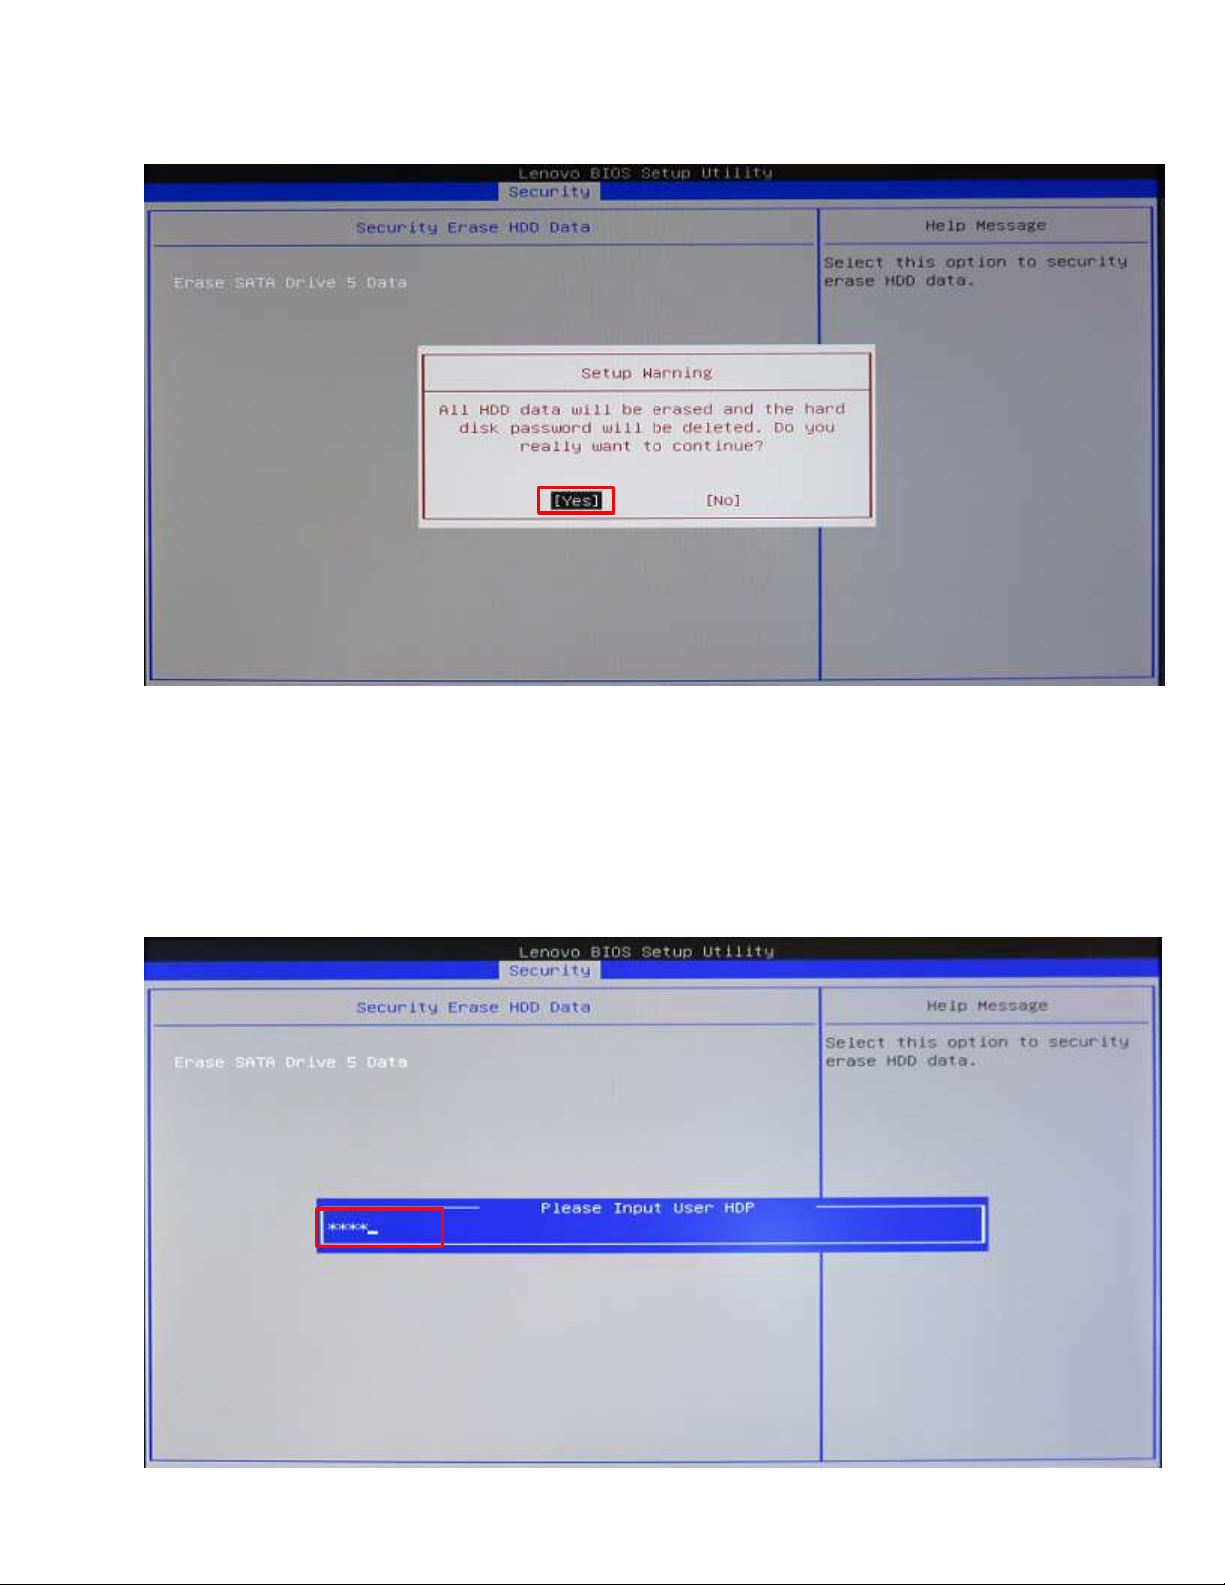
11. A “Setup Warning” box will appear warning the user that all HDD data will be erased and the hard disk password
will be reset. Ensure “Yes” is highlighted, then press Enter to continue.
12. A message box will appear prompting for the user password. Enter the existing user password (or the one
created earlier in this procedure) and press Enter
***WARNING – Proceeding with this step will erase all HDD data and cannot be undone.***
Page 8
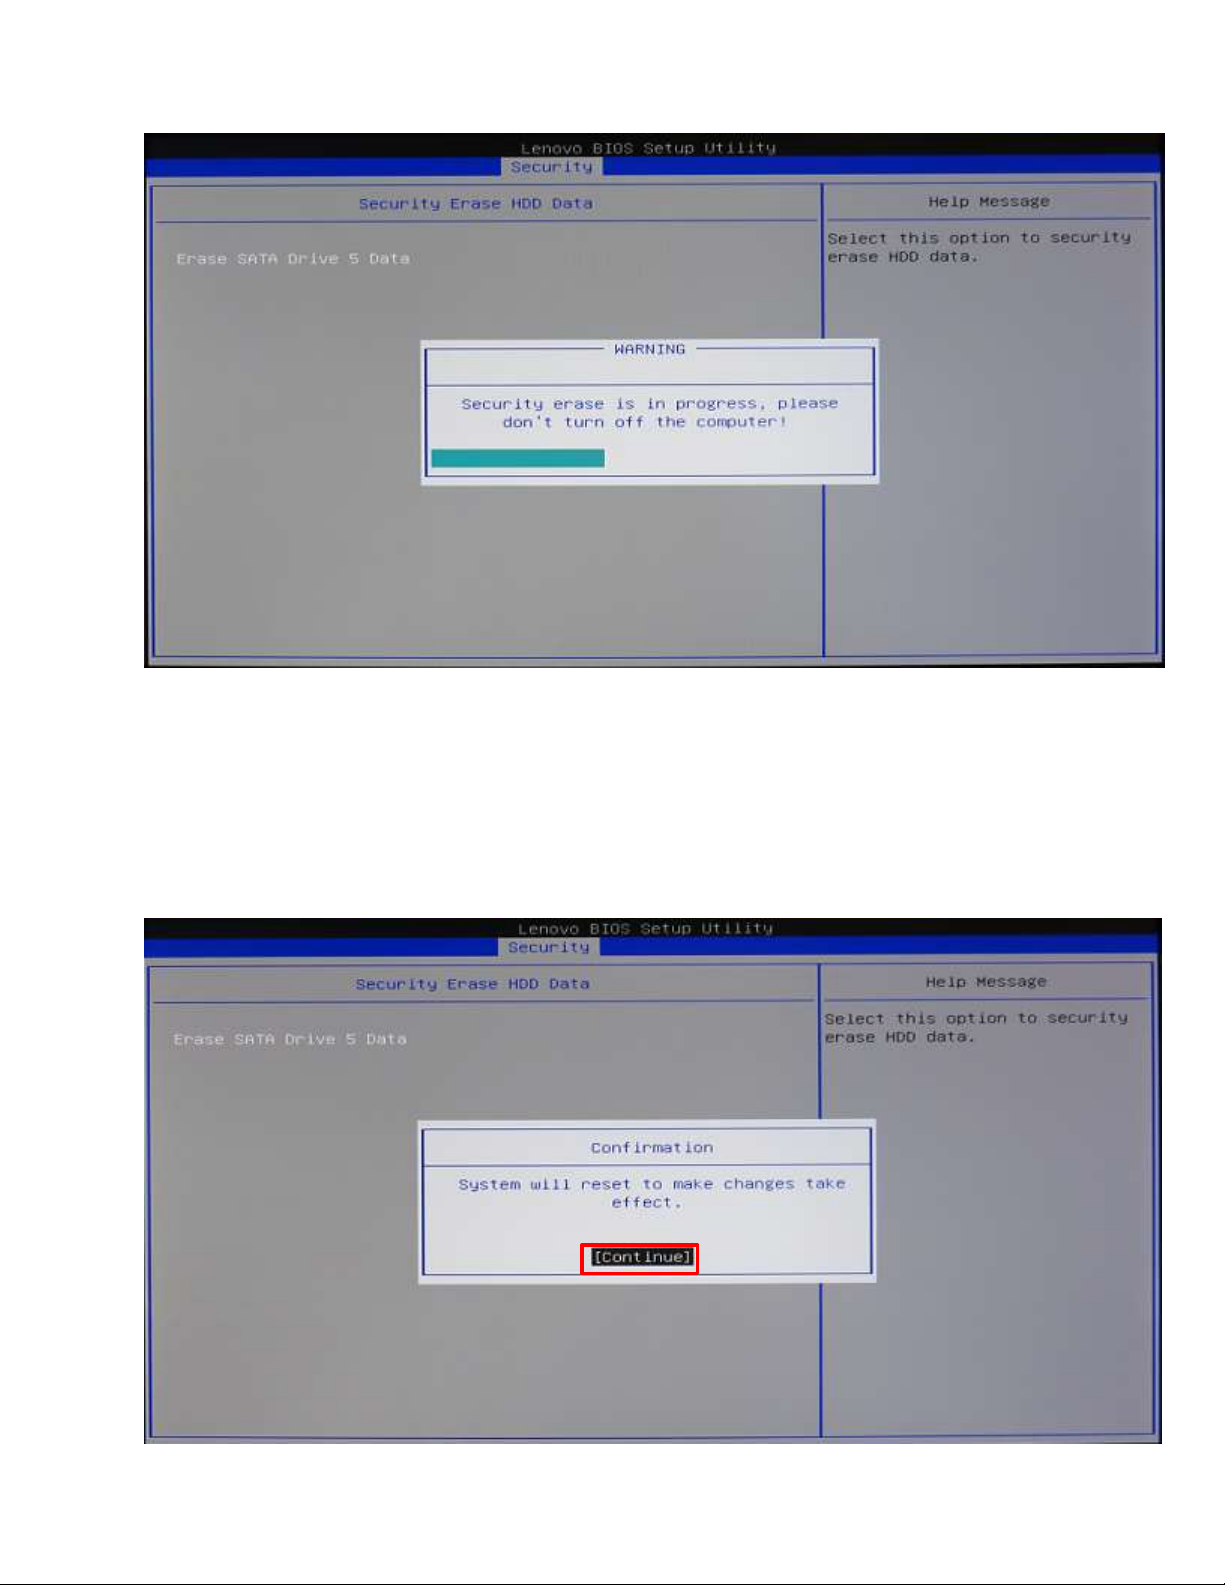
13. After entering the user password, a box will open that will show the progress of the secure erase process. Do
not unplug the system during this procedure.
14. Once the secure erase process completes, a new confirmation box will appear stating “System will reset to make
changes take effect”. Press Enter, and the system will reboot.
Page 9

15. At this point, the secure erase procedure is complete. The system can be powered down, and the SSD can
safely be removed from the system. Repeat the process for any additional SSDs that might need to be securely
erased.
 Loading...