

Lenovo ThinkStation P330 Ubuntu Linux Setup Guide [en, ar, bg, cs, da, de, el, es, es, fi, fr, he, hr, hu, it, ja, ko, nb, nl, pl, pt, pt, ro, ru, sh, sk, sl, sr, sv, th, tr, uk, zc, zh]

Ubuntu Linux Setup Guide
For ThinkStation P330
Official Support of Ubuntu 16.04.5 and later
Section 1 - BIOS Setup and Pre-Installation Steps
The first step before installing Linux is to make sure BIOS is setup correctly
• For UEFI/GPT Installations (Recommended):
o Boot into BIOS by pressing the F1 function key at the “Lenovo” splash screen
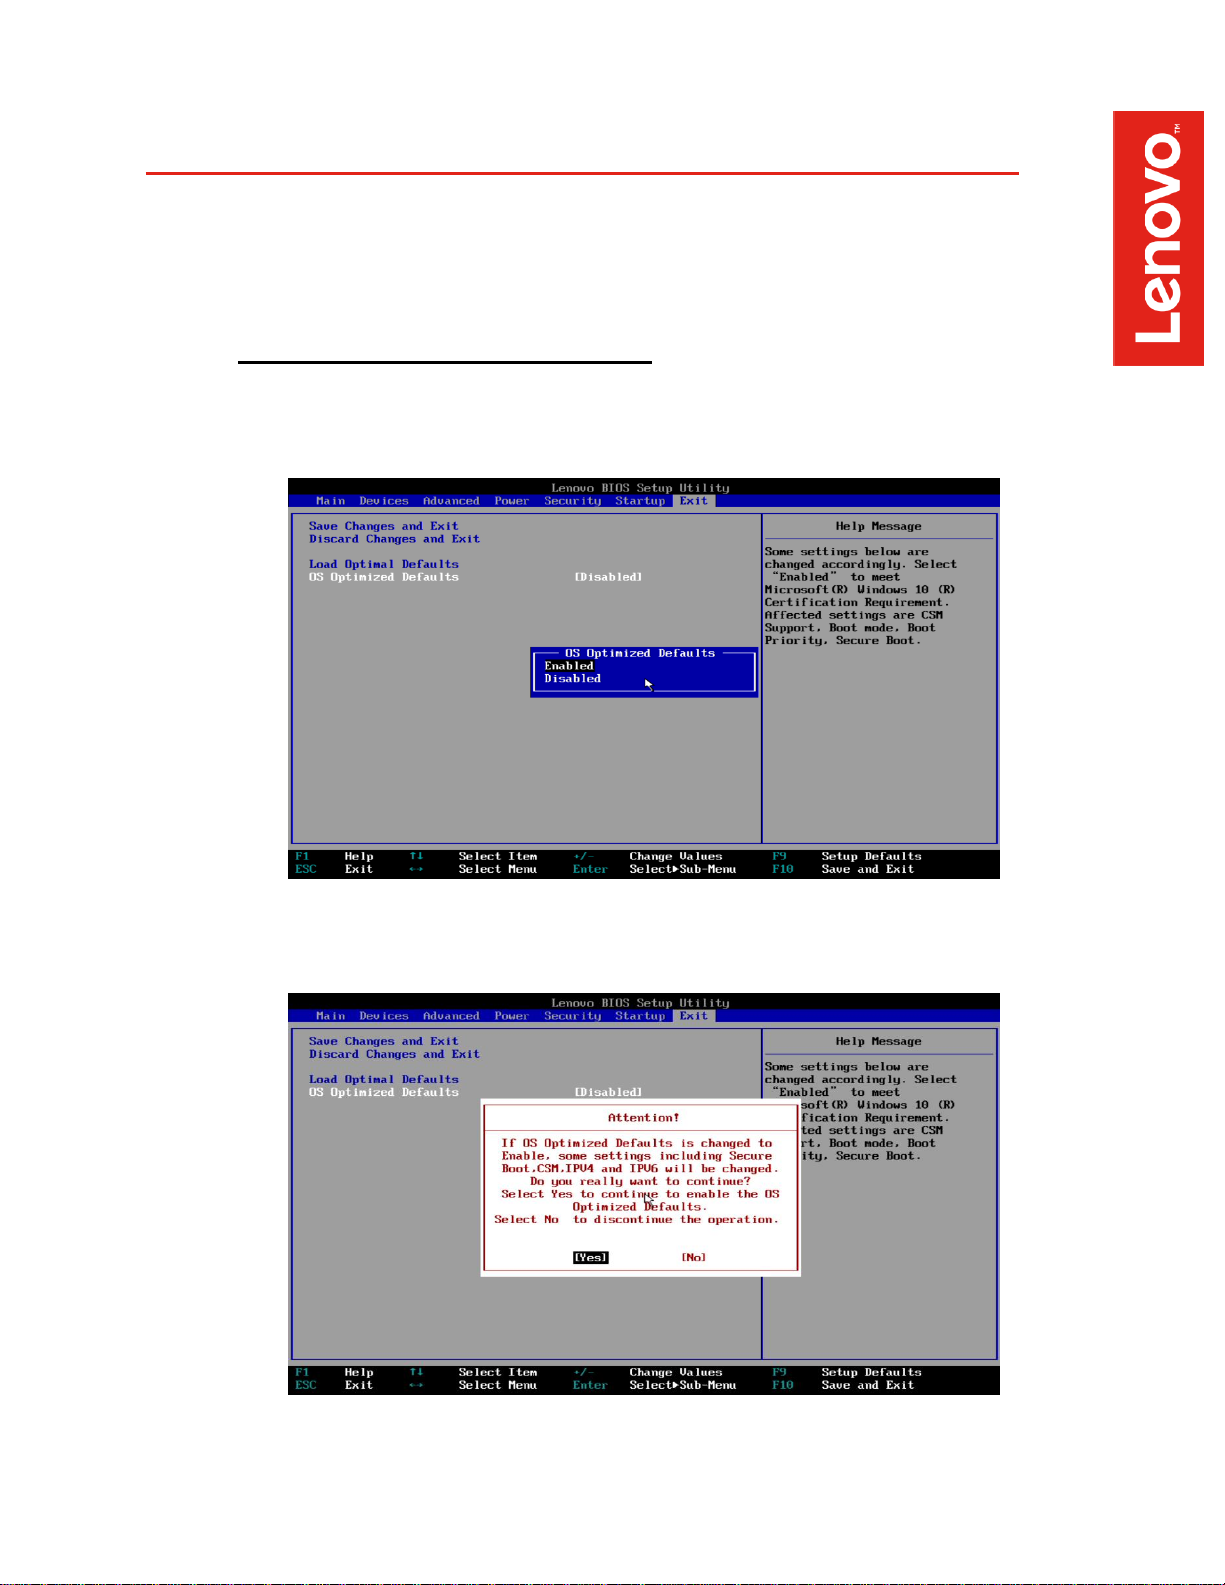
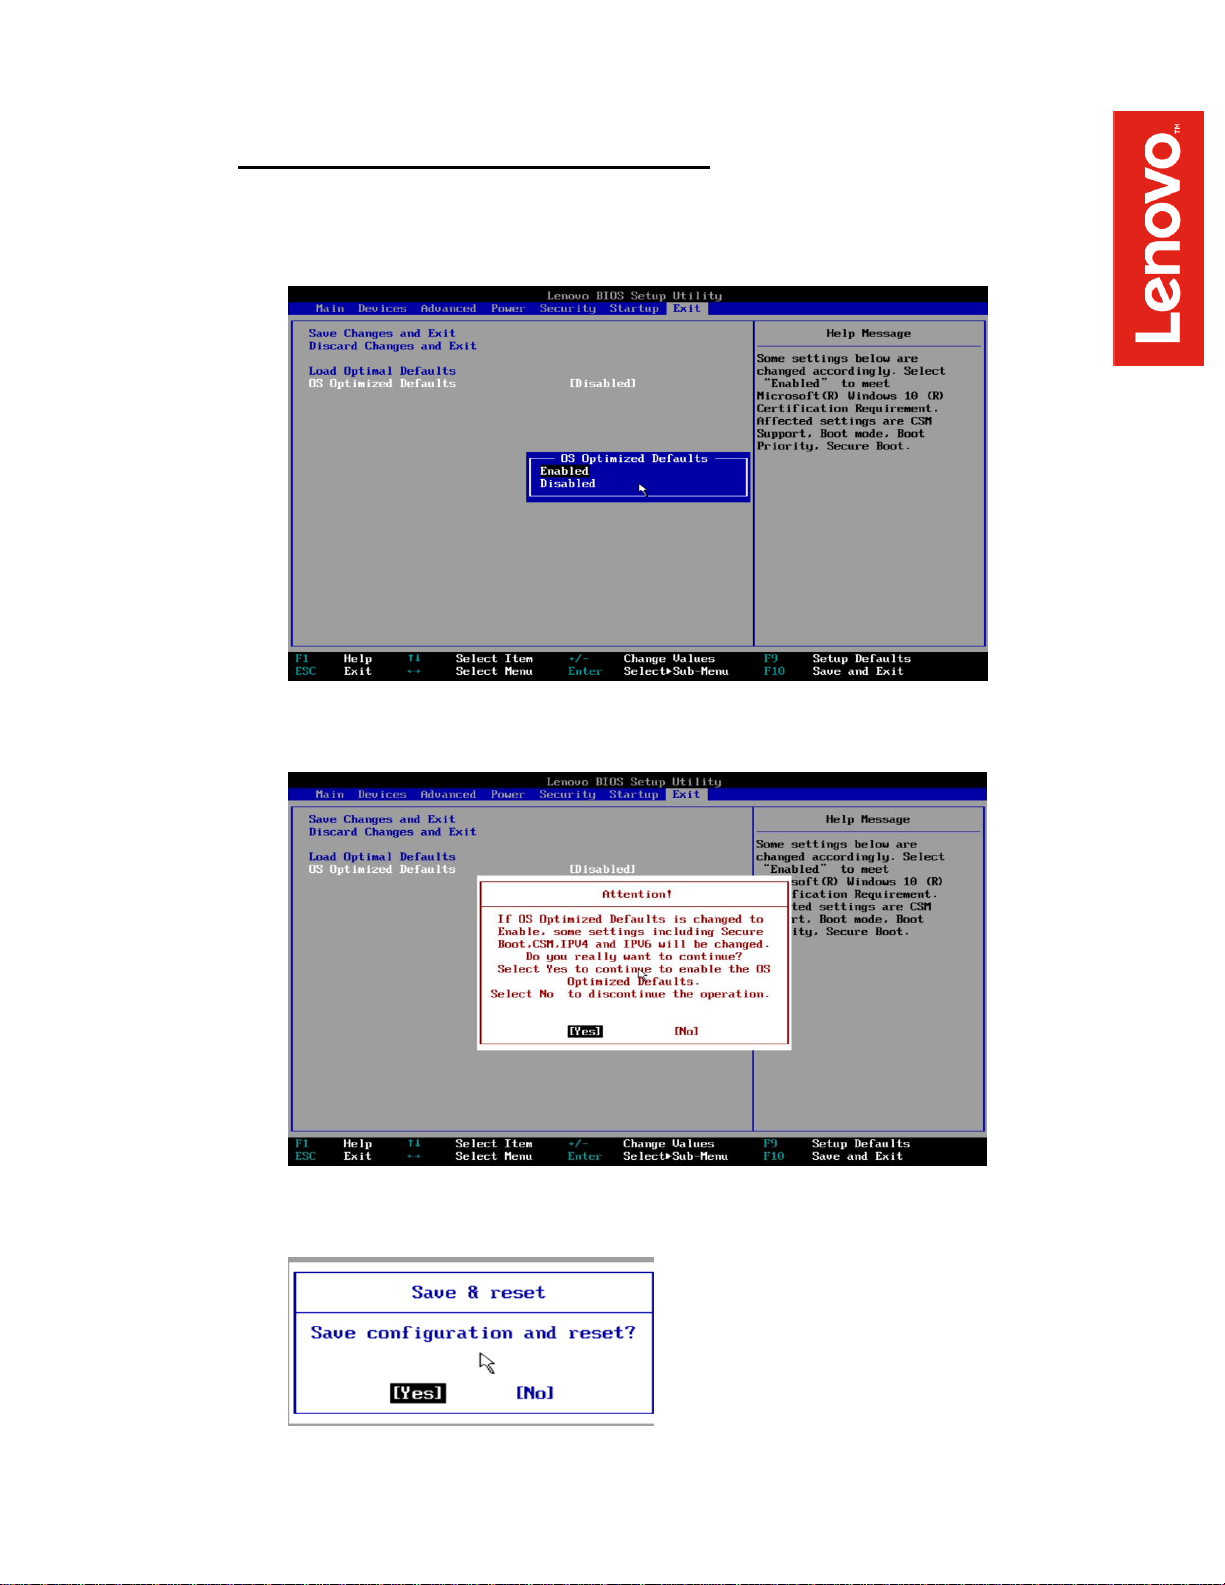
o Tab over to the Exit menu tab, and set OS Optimized Defaults to Enabled
o Select “Yes” at the confirmation screen indicated below
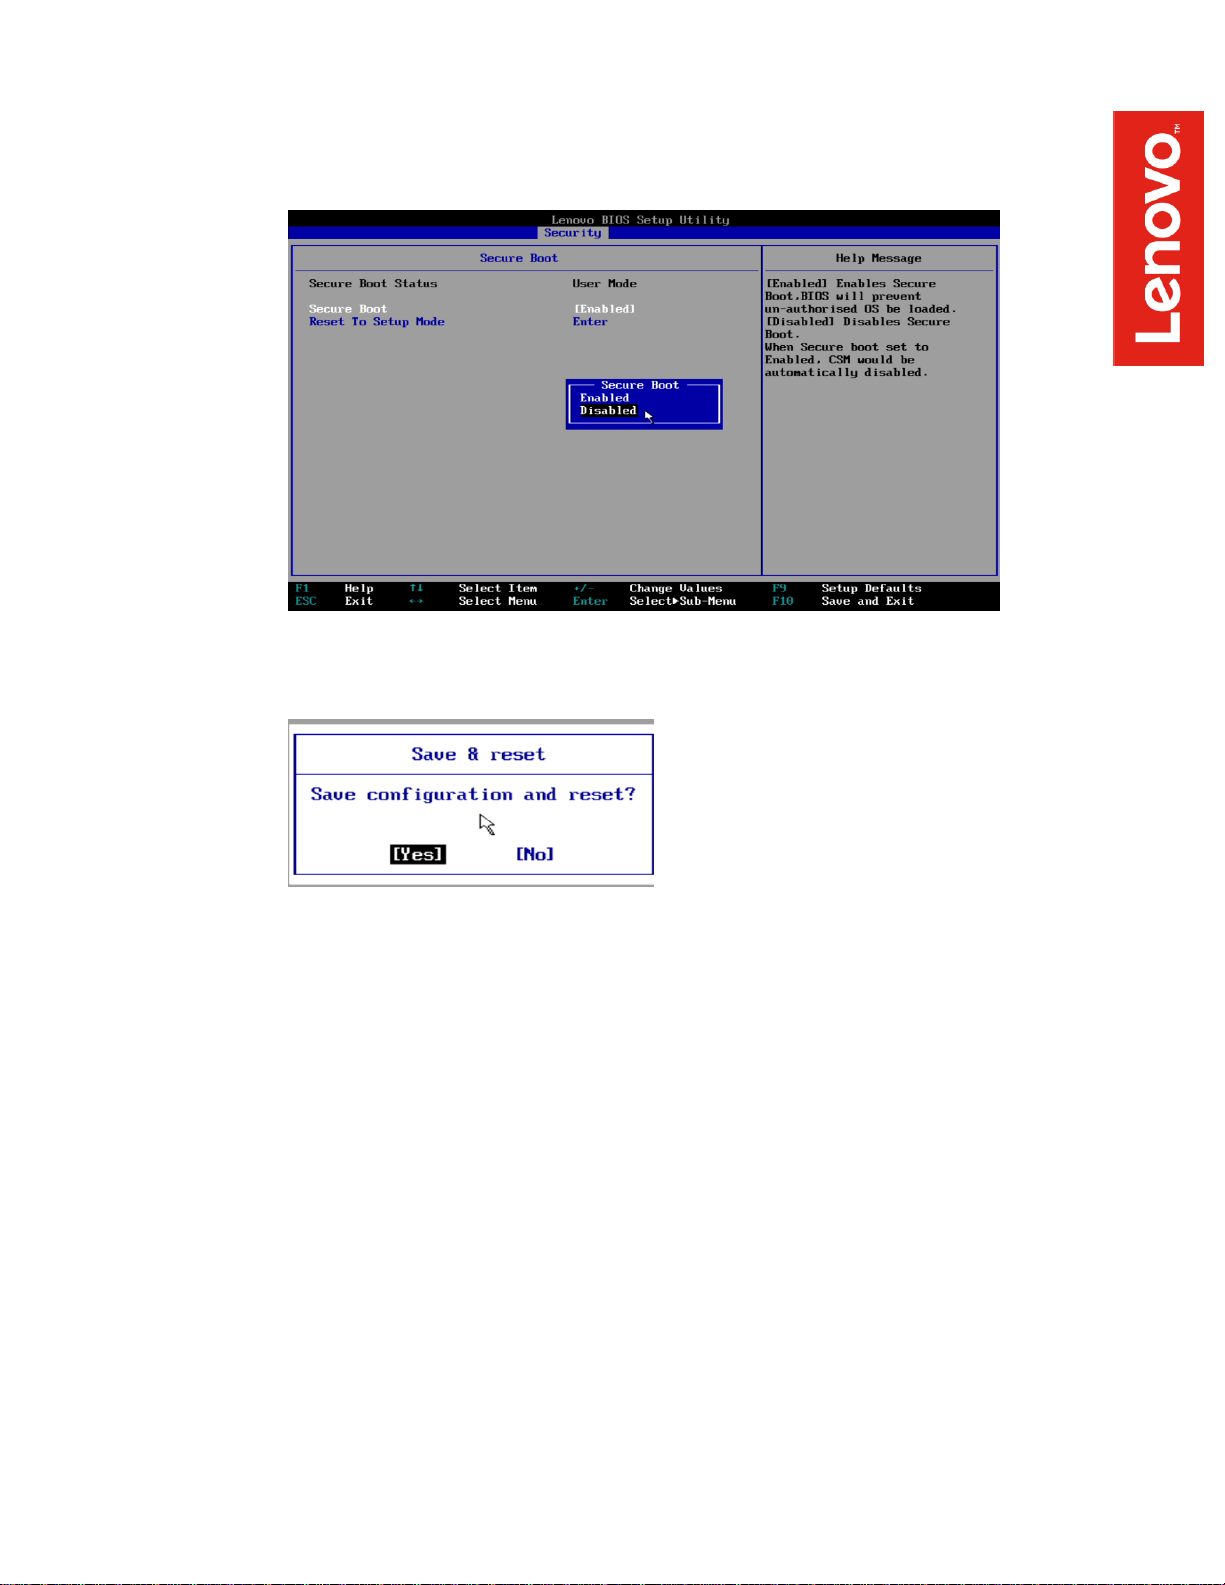
o Tab over to the Security menu tab, select Secure Boot, and set the option to
Disabled
o Press F10 to “Save and Exit” the BIOS setup menu
o Insert the Ubuntu install media (either through USB or CD/DVD)
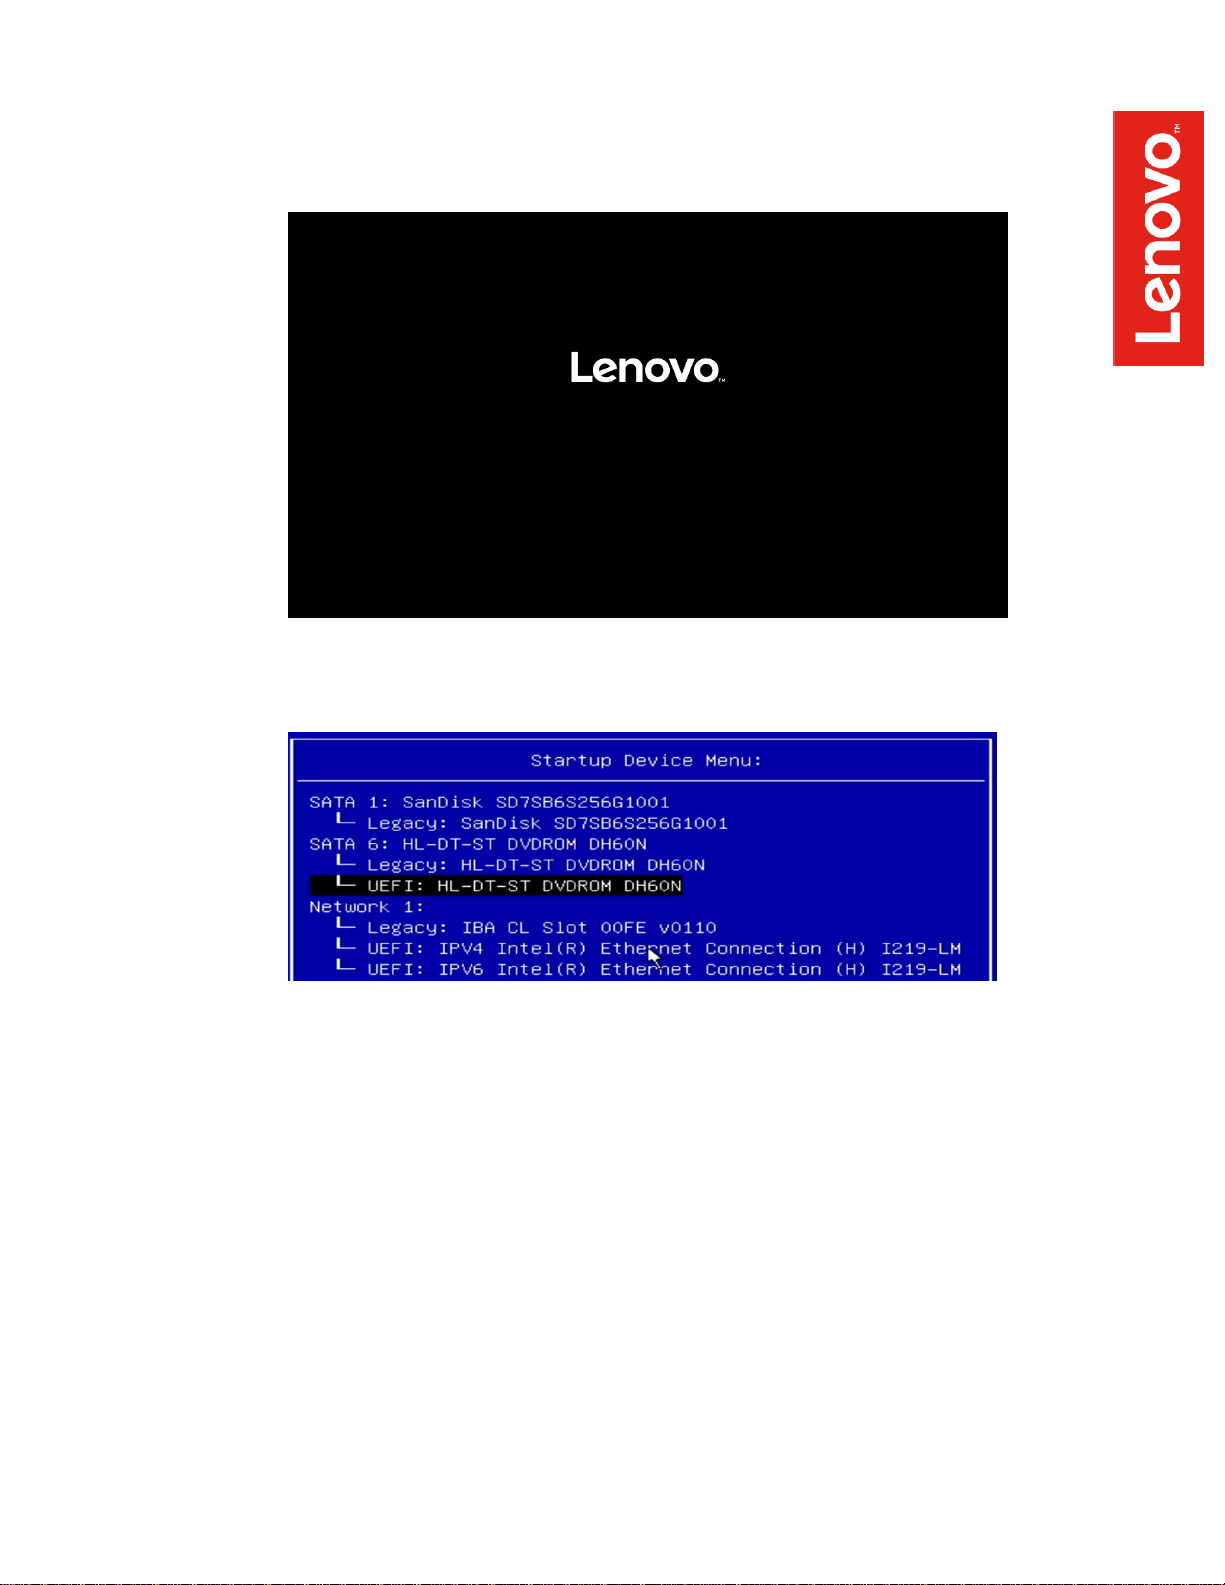
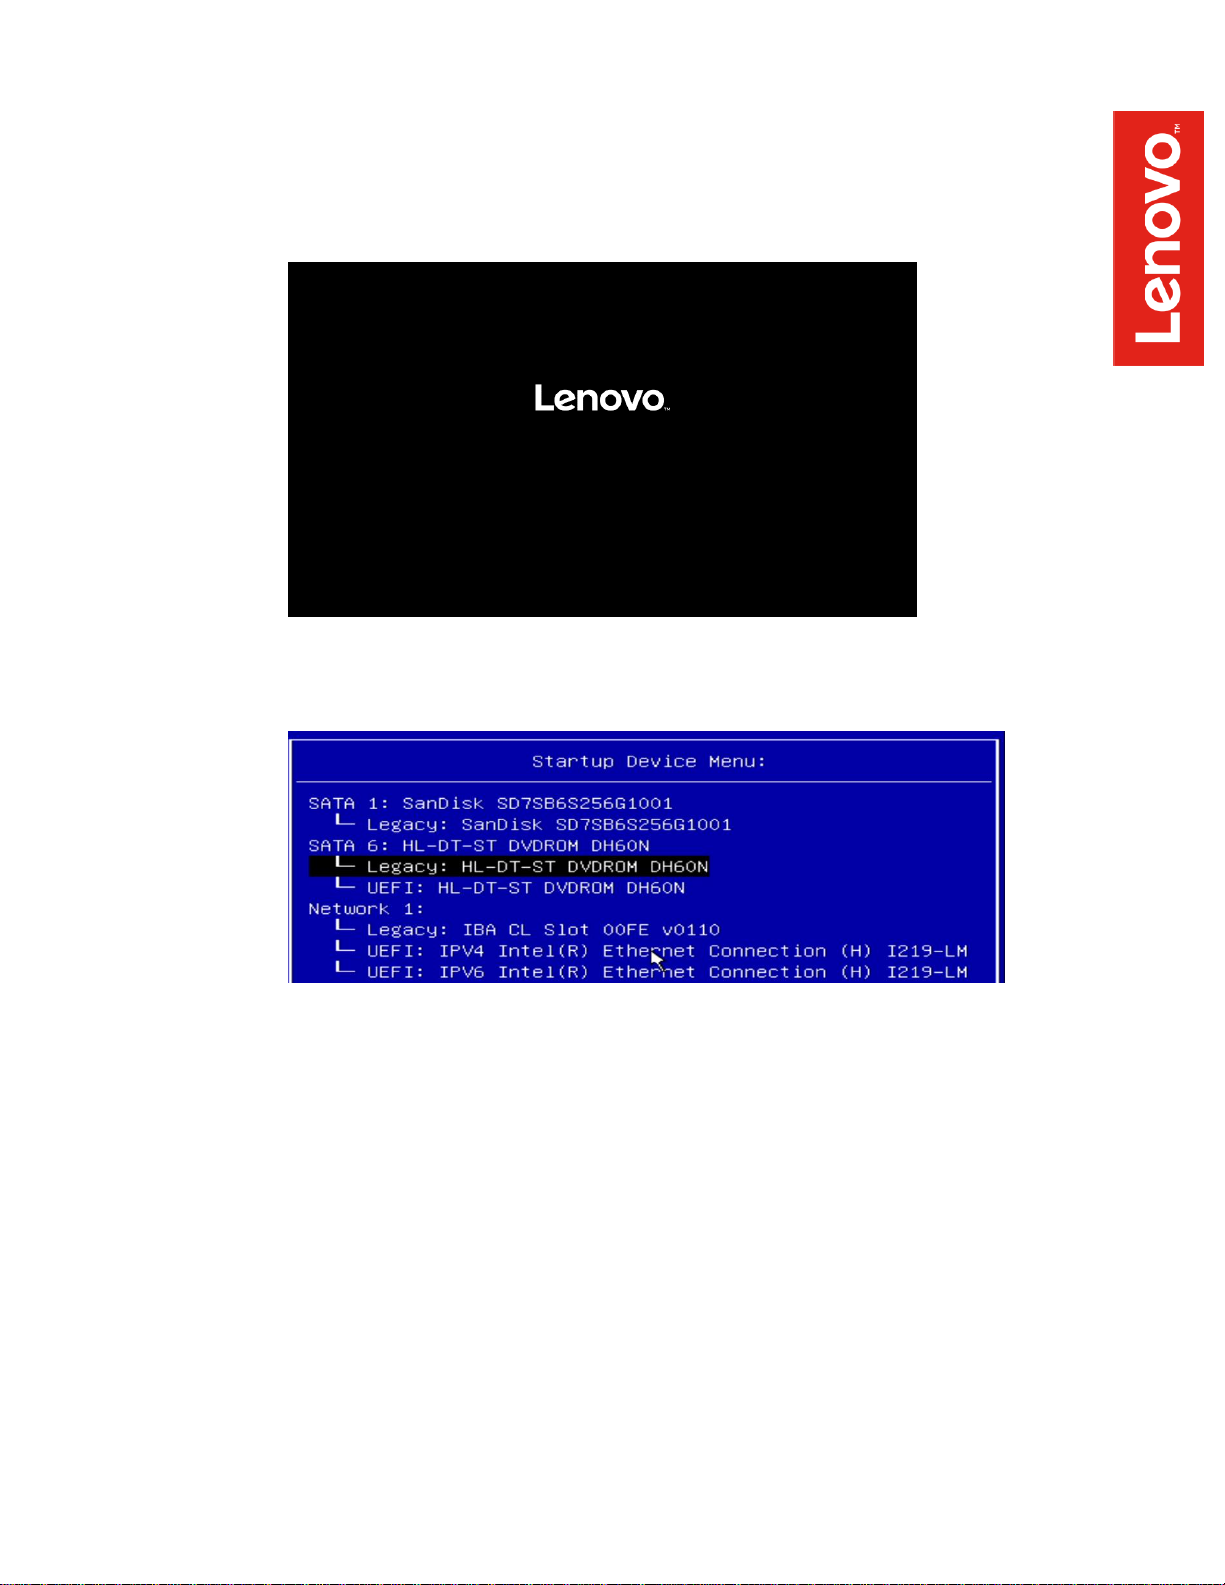
o Power on the system and press the F12 function key whenever the following
Lenovo splash screen appears
o Select the Linux bootable installation media UEFI option from the F12 boot menu
• For Legacy/MBR installations (not recommended):
o Boot into BIOS by pressing the F1 function key at the “Lenovo” splash screen
o Tab over to the Exit menu tab, and set OS Optimized Defaults to Disabled
o Select “Yes” at the confirmation screen indicated below
o Select F10 to “Save and Exit” BIOS
o Insert the Ubuntu installation media (either through USB or CD/DVD)
o Power on the system and press the F12 function key whenever the following
Lenovo splash screen appears
o Select the Linux bootable installation media Legacy option from the F12 boot
menu

Section 2 – Installing Ubuntu 16.04 LTS
Please refer to the following instructions and screenshots on how to install Ubuntu 16.04 LTS on
the ThinkStation P330 workstations
• Highlight the Install Ubuntu from the Installer menu and hit Enter
• With Intel Coffee-Lake CPU’s, the following warning message may appear,
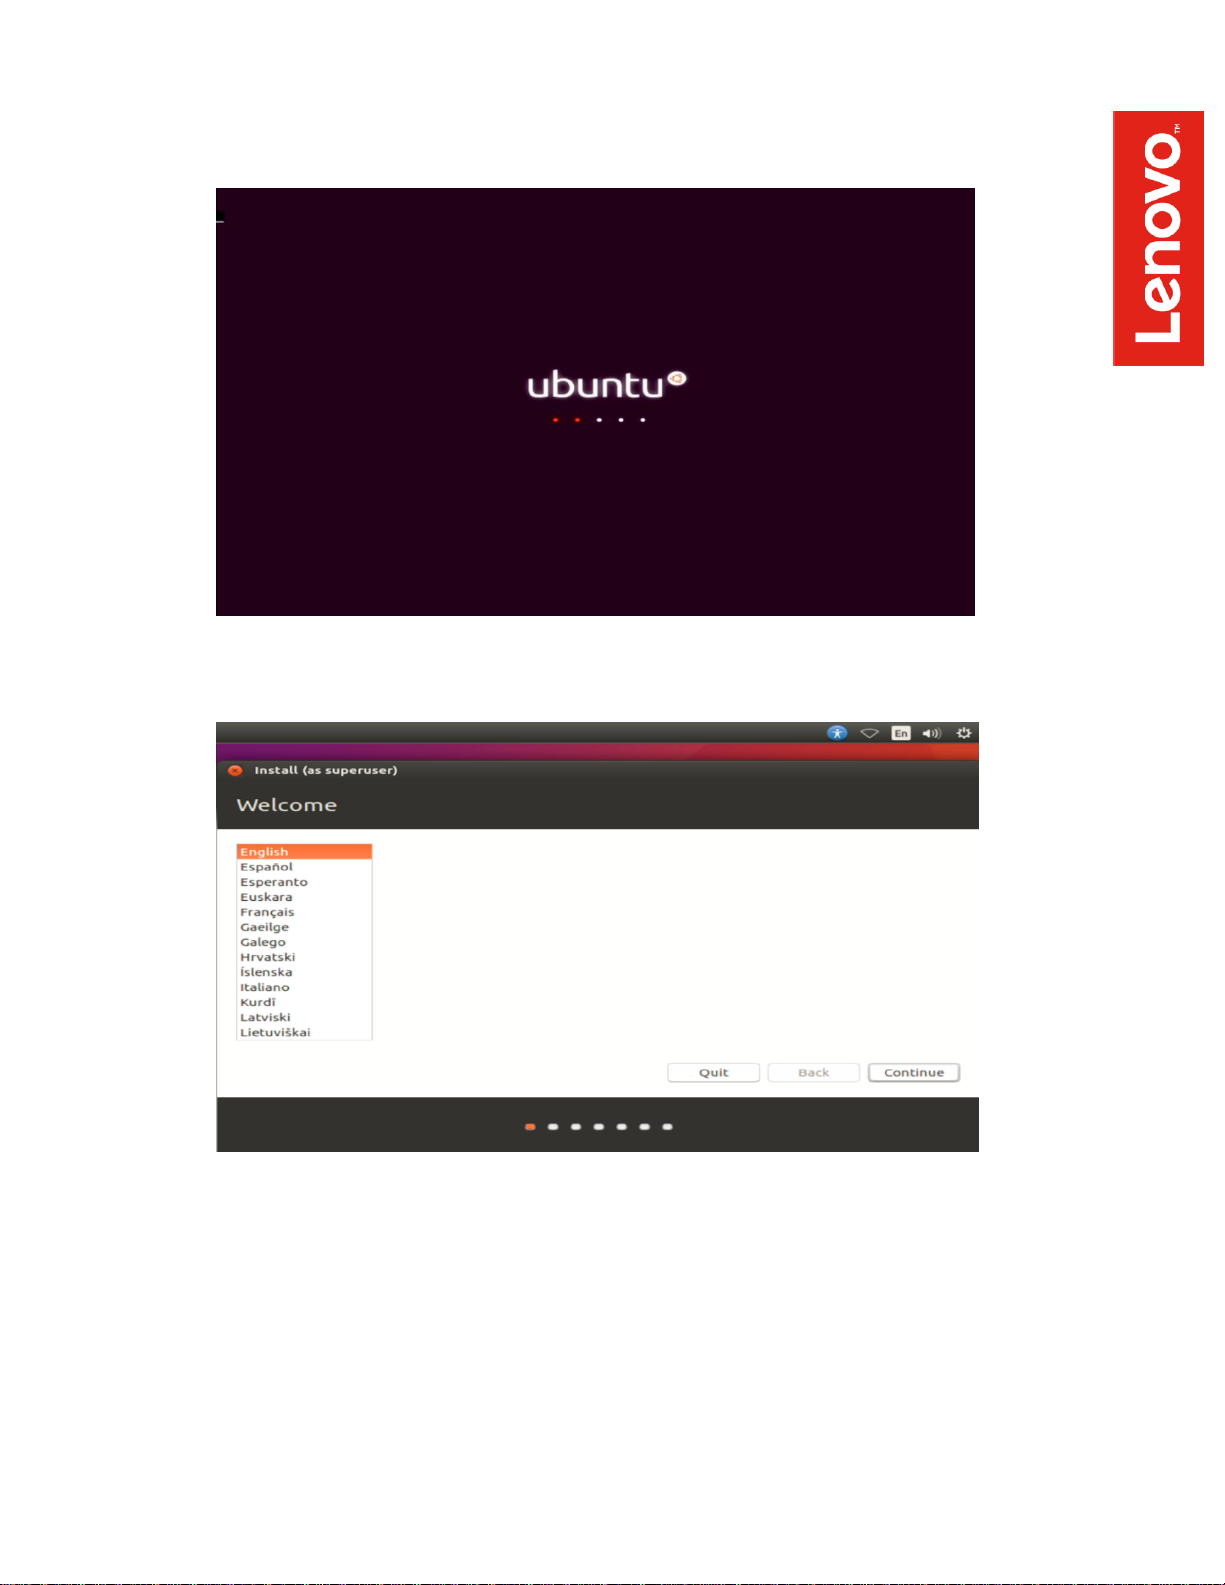
• Ubuntu Boot Screen
• Select the language to use during the installation process

• Optional: Select options to install updates automatically and select “Continue”
• Select Erase disk and install Ubuntu option and “Install Now”

• Select “Continue” to confirm making changes to the disk
• Select your location from the map

• Select your keyboard layout
• Enter a Username and Password and select “Continue”

• Installing Ubuntu
• When the Installation Complete message pops, select “Restart Now”
• Remove installation media and hit Enter

• Ubuntu Boot Screen
• Ubuntu desktop screen

Section 3 – Installing the Nvidia Graphics Driver
In order to get optimal performance out of the Nvidia GPU, it’s a good practice to install the Nvidia
graphics driver
To install the latest Nvidia graphics driver, follow the steps below:
• Step 1:
o Download the Nvidia graphics driver from the link below-
https://www.nvidia.com/Download/index.aspx?lang=en-in
o Fill in details like Product Type, Product Series, Product, Operating System, and
Language according to the graphic card in use, and download it
• Step 2:
o Blacklist the Linux Nouveau driver
▪ Edit /etc/modprobe.d/blacklist.conf and add the line: blacklist nouveau
▪ Run the command from a terminal window: update-initramfs –u
▪ Reboot the system
• Step 3:
o Press Ctrl-Alt-F2, login as root and stop the x-server by running:
service lightdm stop
• Step 4:
o Browse to the directory location to where the Nvidia driver installer is located

• Step 5:
o Run the command from a terminal window:
chmod +x NVIDIA-Linux-x86_64-375.61.run
o Run the Nvidia installer
• Step 6:
o Accept the Nvidia driver license

• Step 7:
o Continue the installation

• Step 8:
o Select OK
• Step 9:
o Select “Yes” to update the X-configuration file

• Step 10:
o Driver installation complete
• Step 11:
o Verify the Nvidia driver is loaded by running: nvidia-smi
• Step 12:
o Reboot the system

• Step 13:
o Verify the Nvidia driver is loaded properly from within X-windows

Section 4 – Installing the Network Wireless Driver
The wireless network device offered for the P330 is native to Ubuntu 16.04 LTS; therefore, you will
not need to install any additional drivers separately
Section 5 – Installing the Network LAN Driver
The network LAN device is native to Ubuntu 16.04 LTS; therefore, you will not need to install any
additional drivers separately
 Loading...