

Lenovo ThinkStation P330 Debian Linux Setup Guide [en, ar, bg, cs, da, de, el, es, es, fi, fr, he, hr, hu, it, ja, ko, nb, nl, pl, pt, pt, ro, ru, sh, sk, sl, sr, sv, th, tr, uk, zc, zh]
Page 1

Debian Linux Setup Guide
For ThinkStation P330
Guidelines for Debian 9.5 and later
Page 2
Section 1 - BIOS Setup and Pre-Installation Steps
The first step before installing Linux is to make sure BIOS is setup correctly
• For UEFI/GPT installations (recommended):
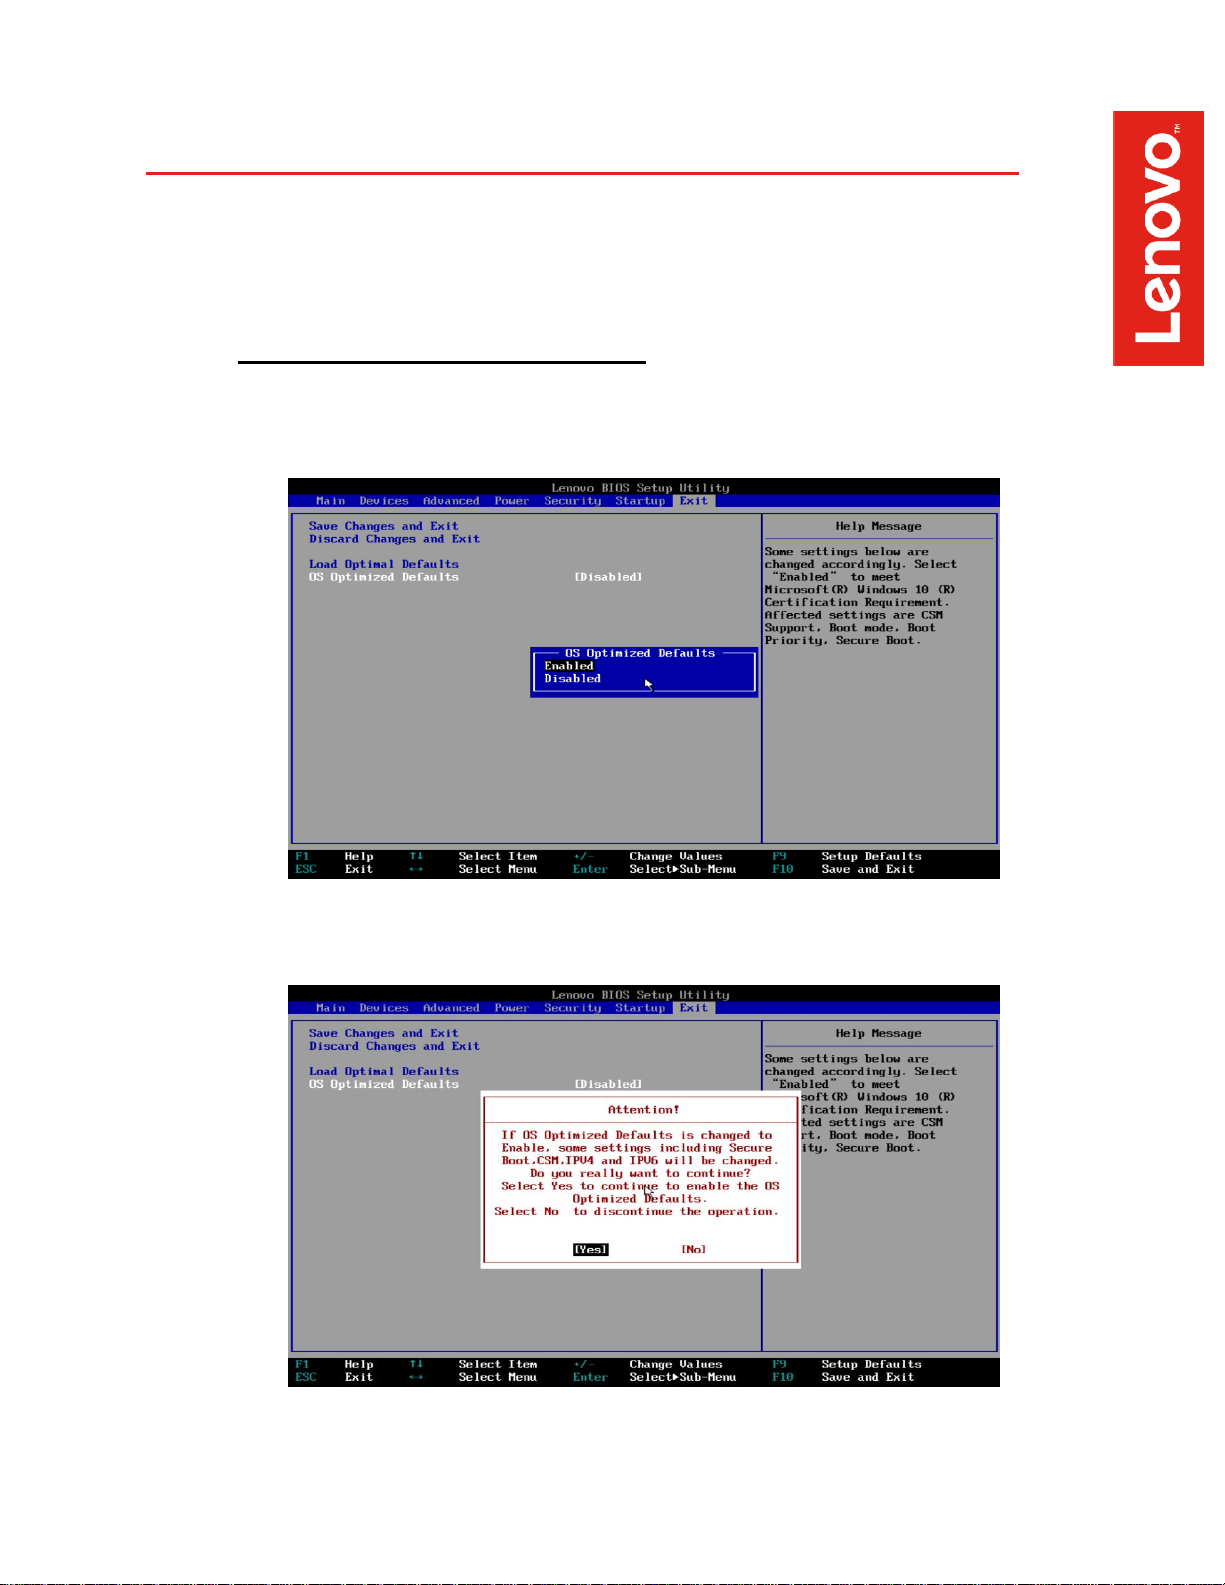
• Boot into BIOS by pressing the F1 function key at the “Lenovo” splash screen
• Tab over to the Exit menu tab, and set OS Optimized Defaults to Enabled
• Select Yes at the confirmation screen indicated below
Page 3
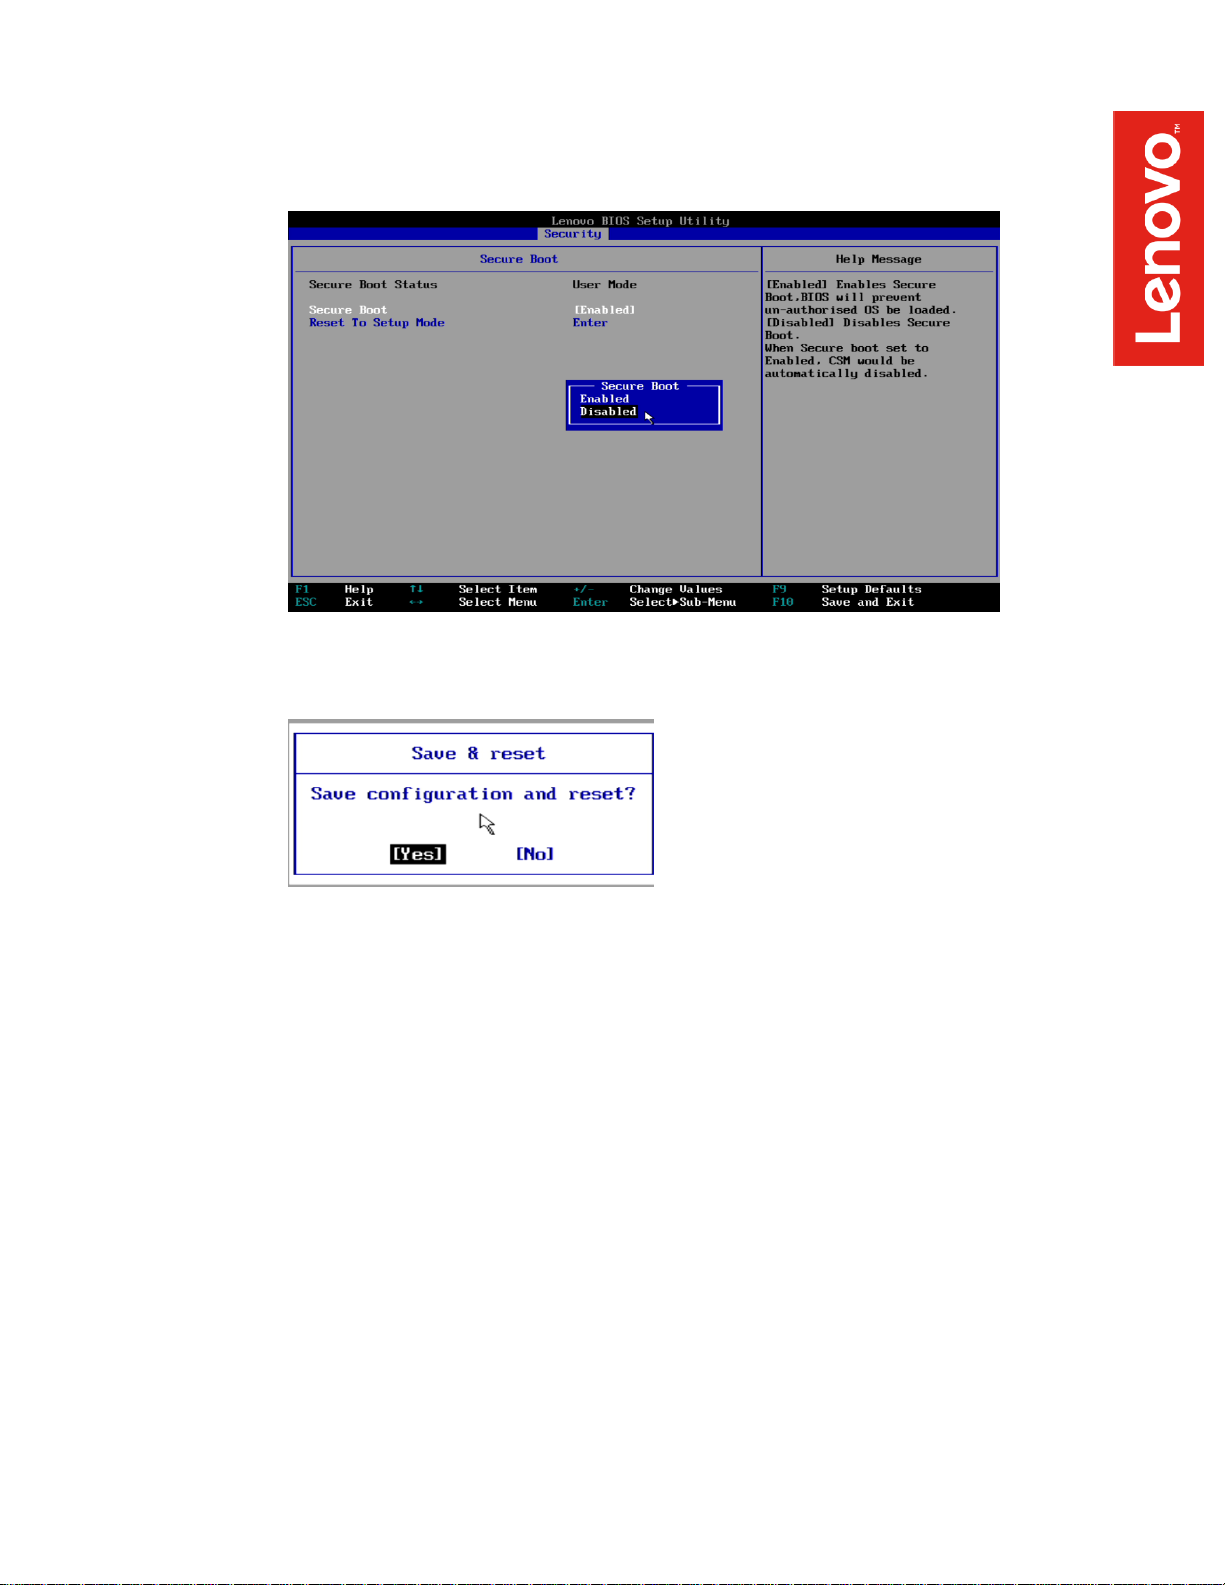
• Tab over to the Security menu tab, select Secure Boot, and set the option to
“Disabled”
• Select F10 to “Save and Exit” BIOS.
• Insert the Debian installation media (either through USB or CD/DVD)
Page 4
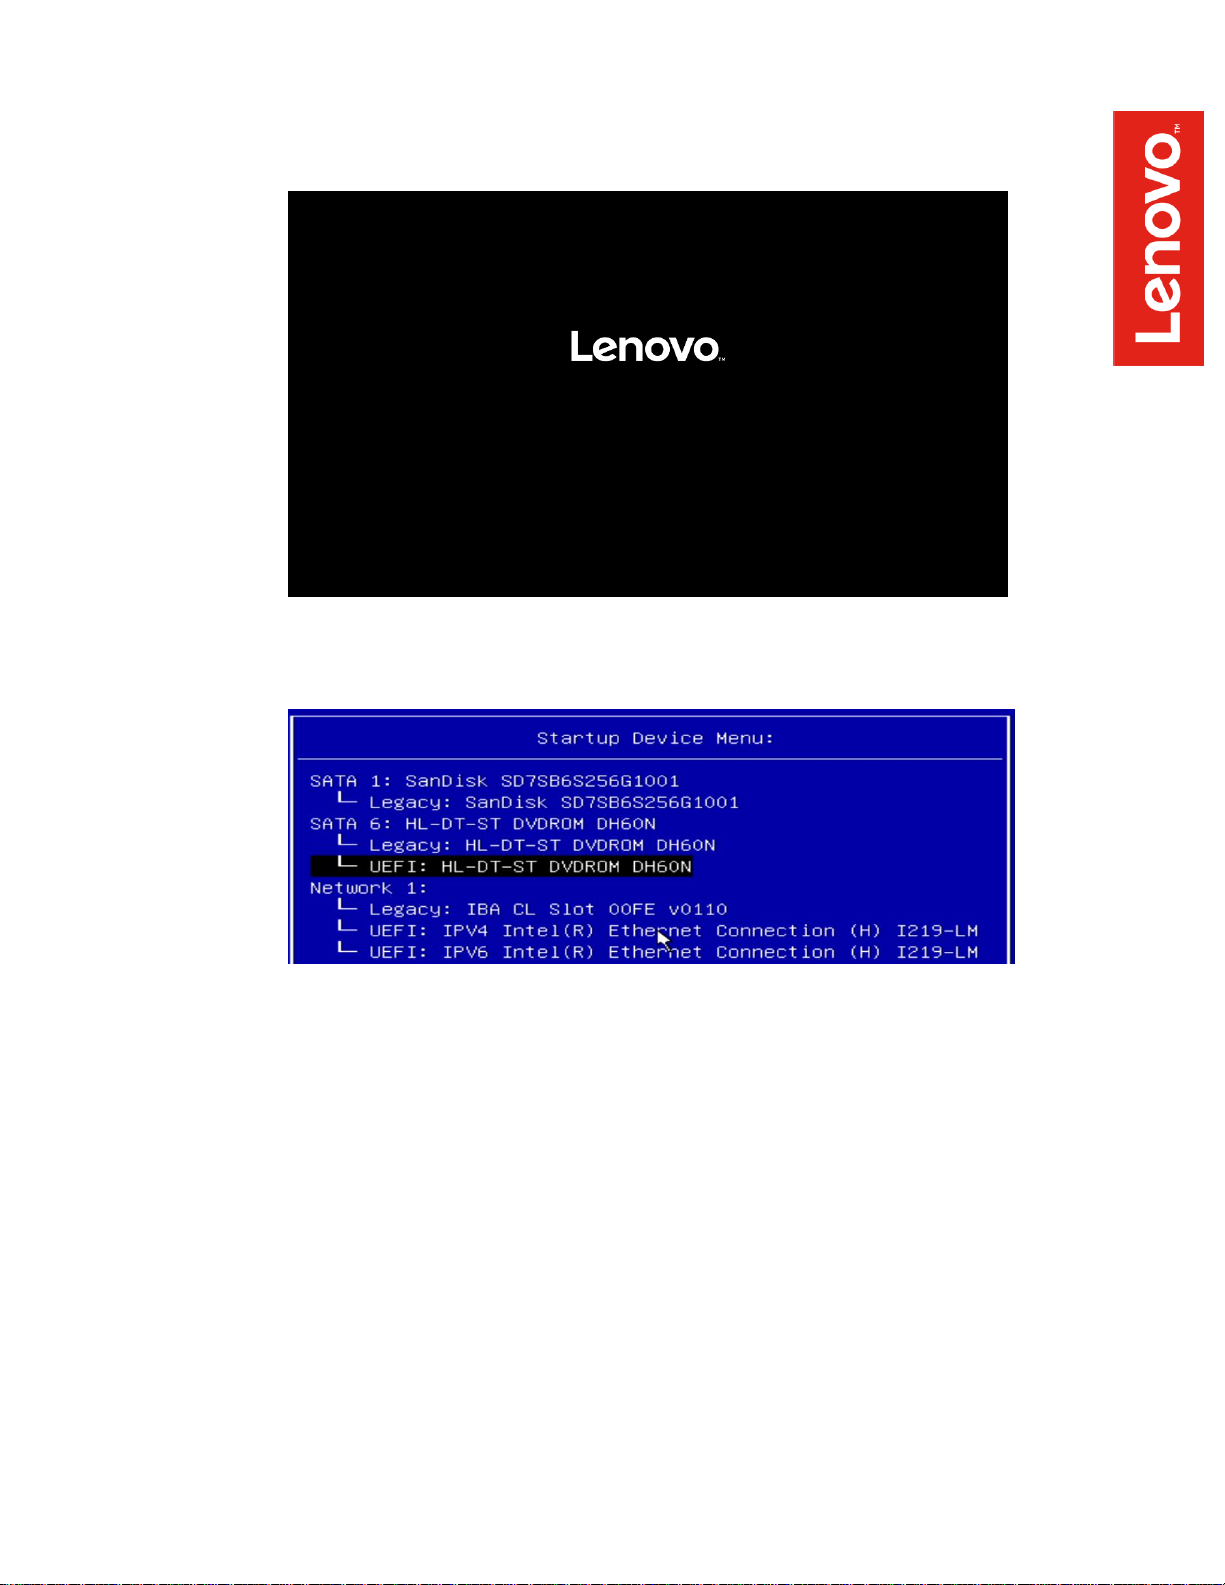
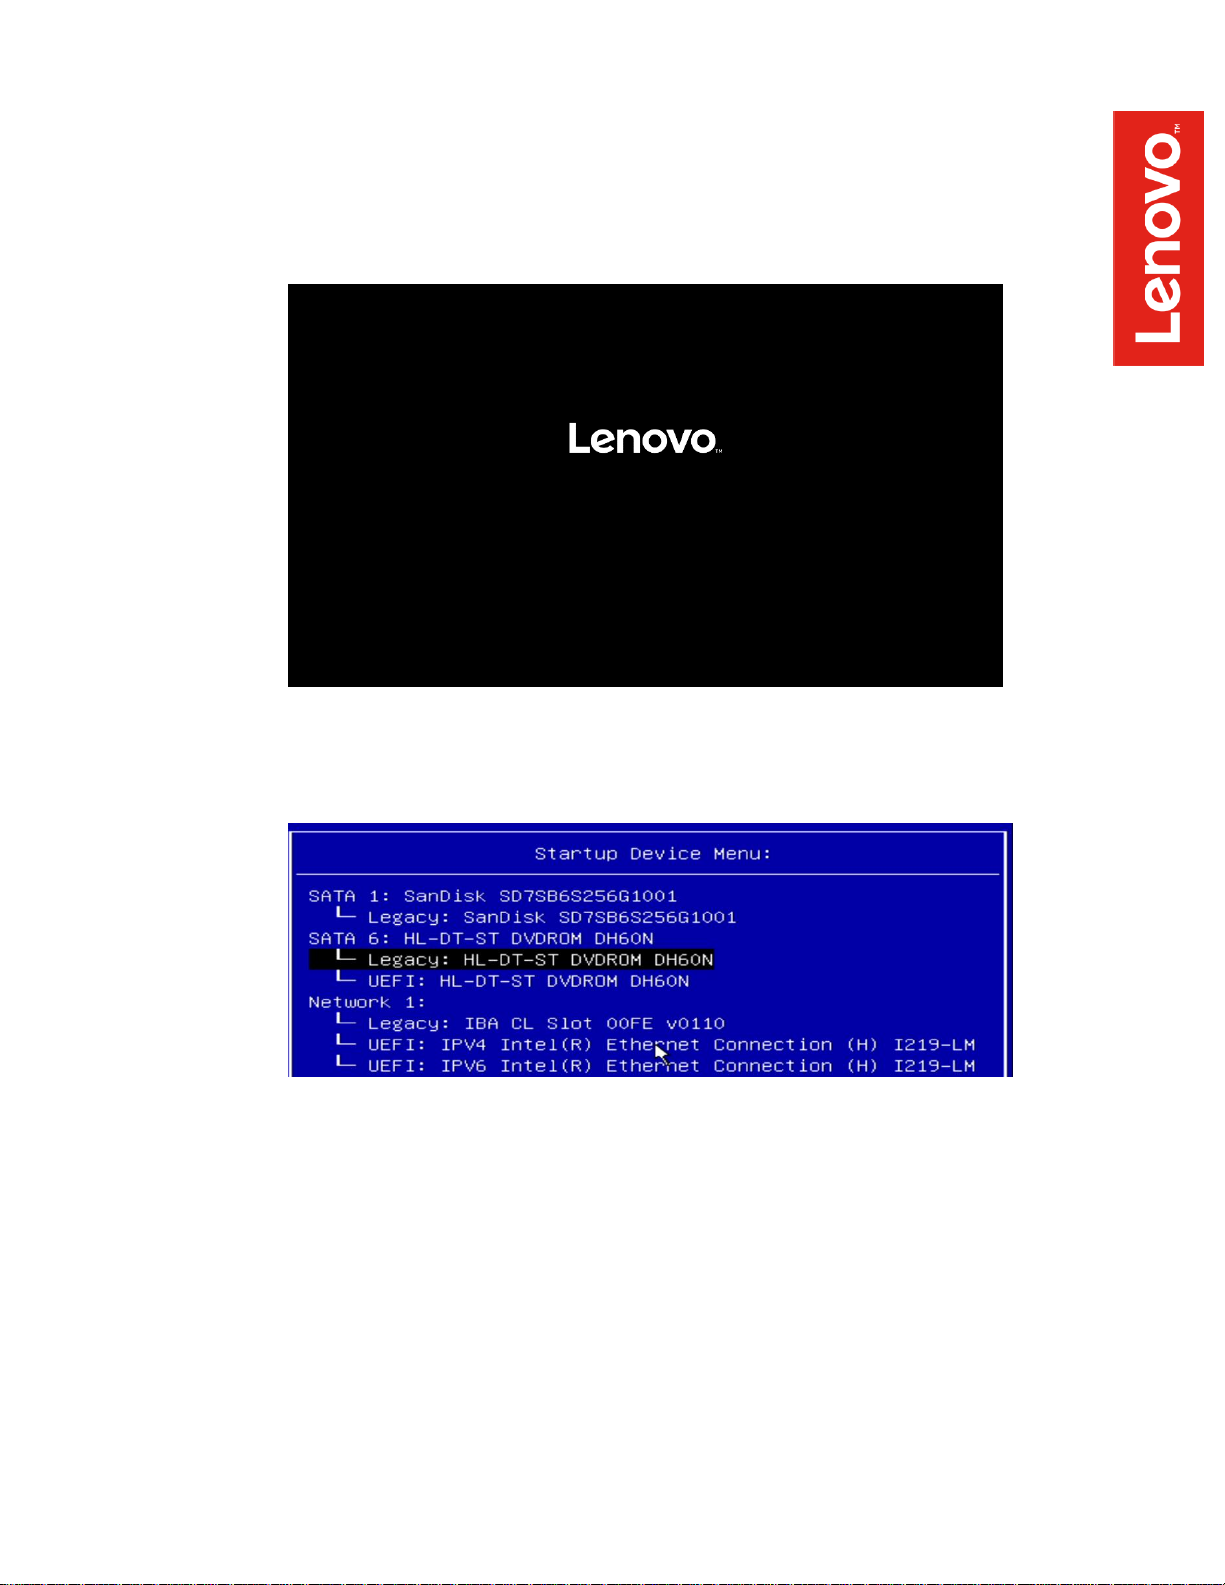
• Power on the system and press the F12 function key whenever the following
Lenovo splash screen appears
• Select the Linux bootable installation media UEFI option from the F12 boot menu
Page 5
• For Legacy/MBR installations (not recommended):
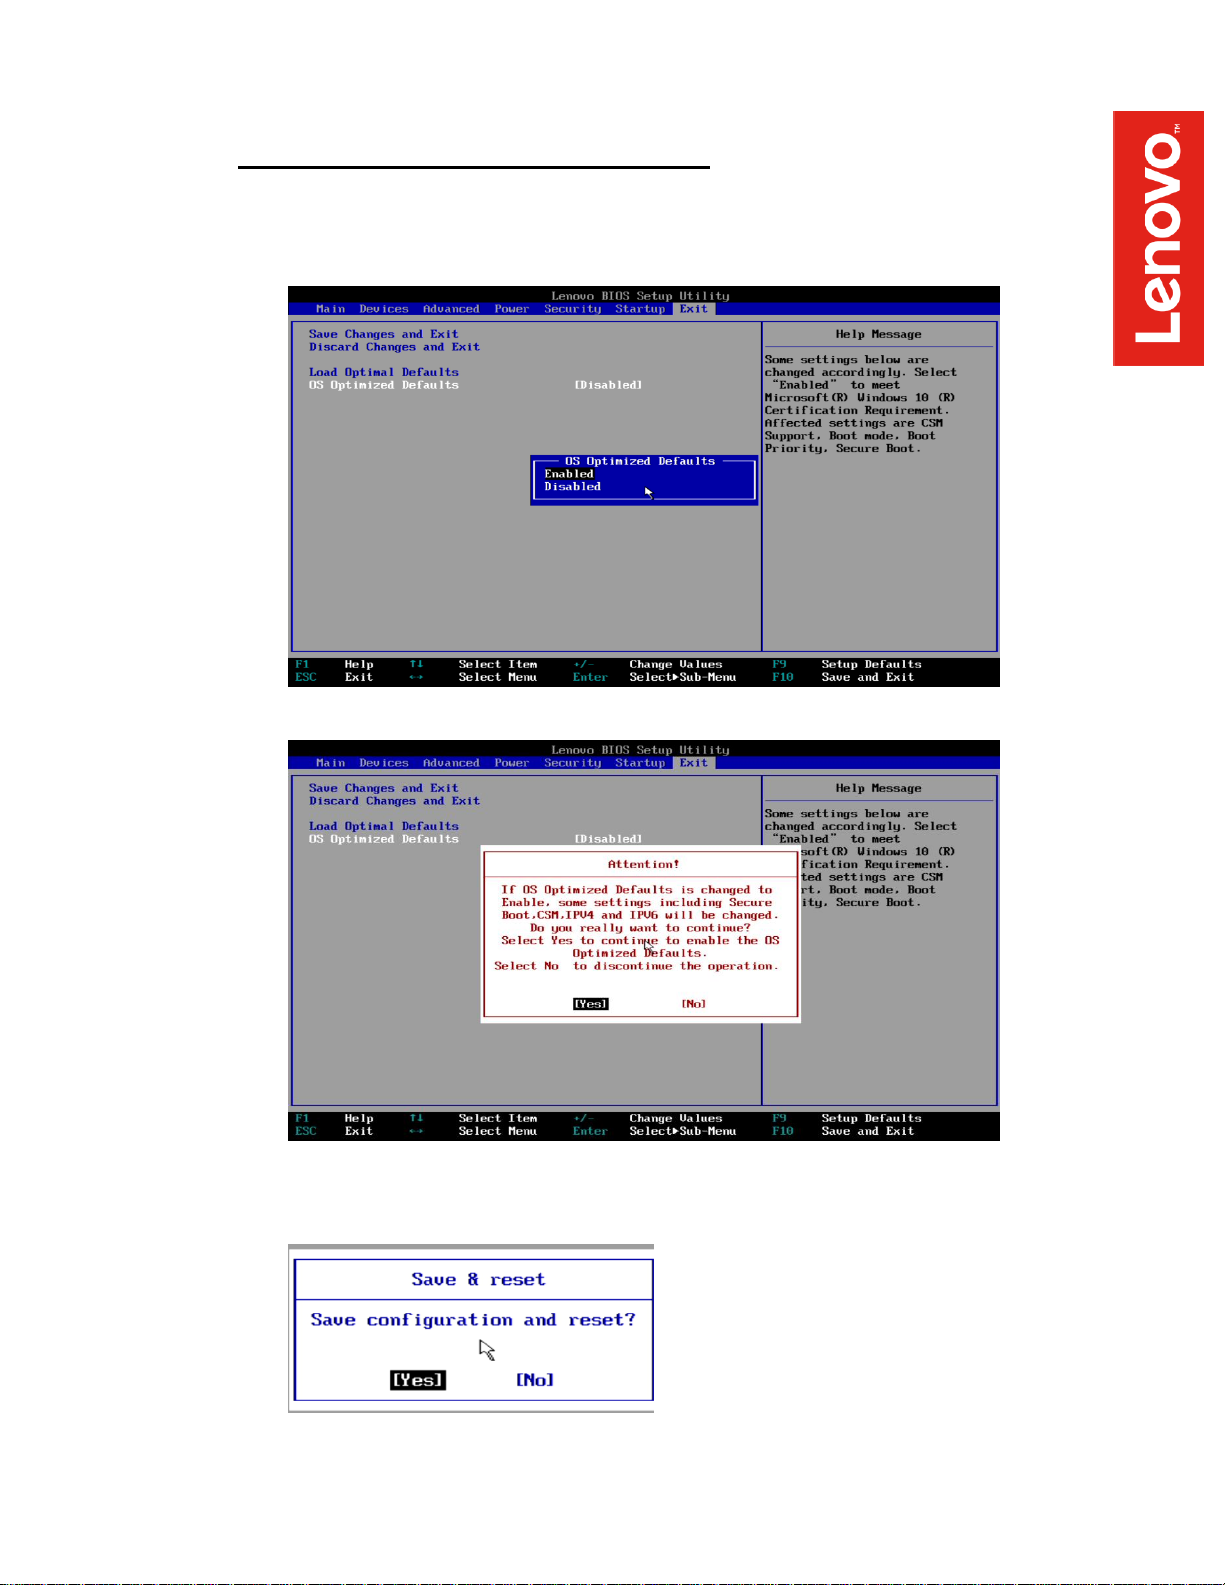
• Boot into BIOS by pressing the F1 function key at the “Lenovo” splash screen
• Tab over to the Exit menu tab, and set OS Optimized Defaults to “Disabled”
• Select Yes at the confirmation screen indicated below
• Select F10 to “Save and Exit” BIOS
Page 6
• Insert the Debian installation media (either through USB or CD/DVD)
• Power on the system and press the F12 function key whenever the following
Lenovo splash screen appears
• Select the Linux bootable installation media Legacy option from the F12 boot
menu
Page 7
Section 2 – Installing Debian Linux 9.5
Please refer to the following instructions and screenshots on how to install Debian 9.5 on the
ThinkStation P330 workstations
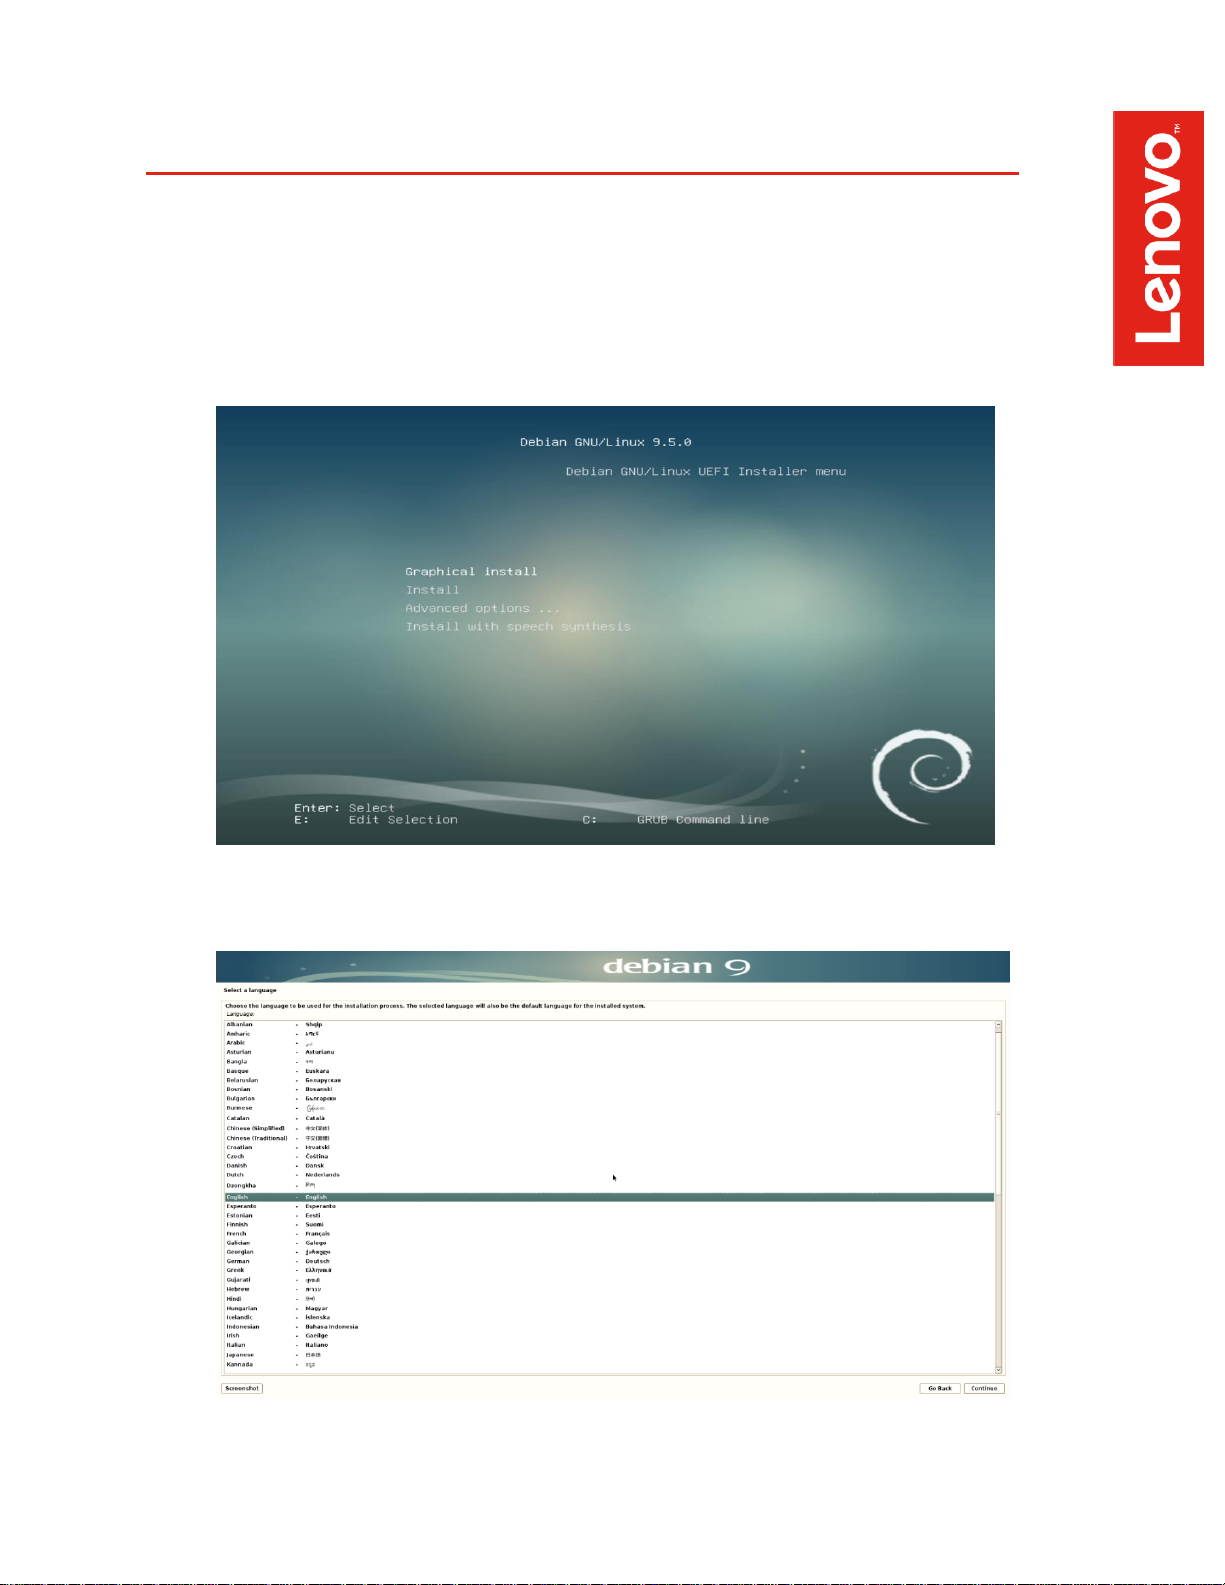
• Select Graphical Install from the Debian GNU/Linux UEFI Installer menu
• Select a language
Page 8
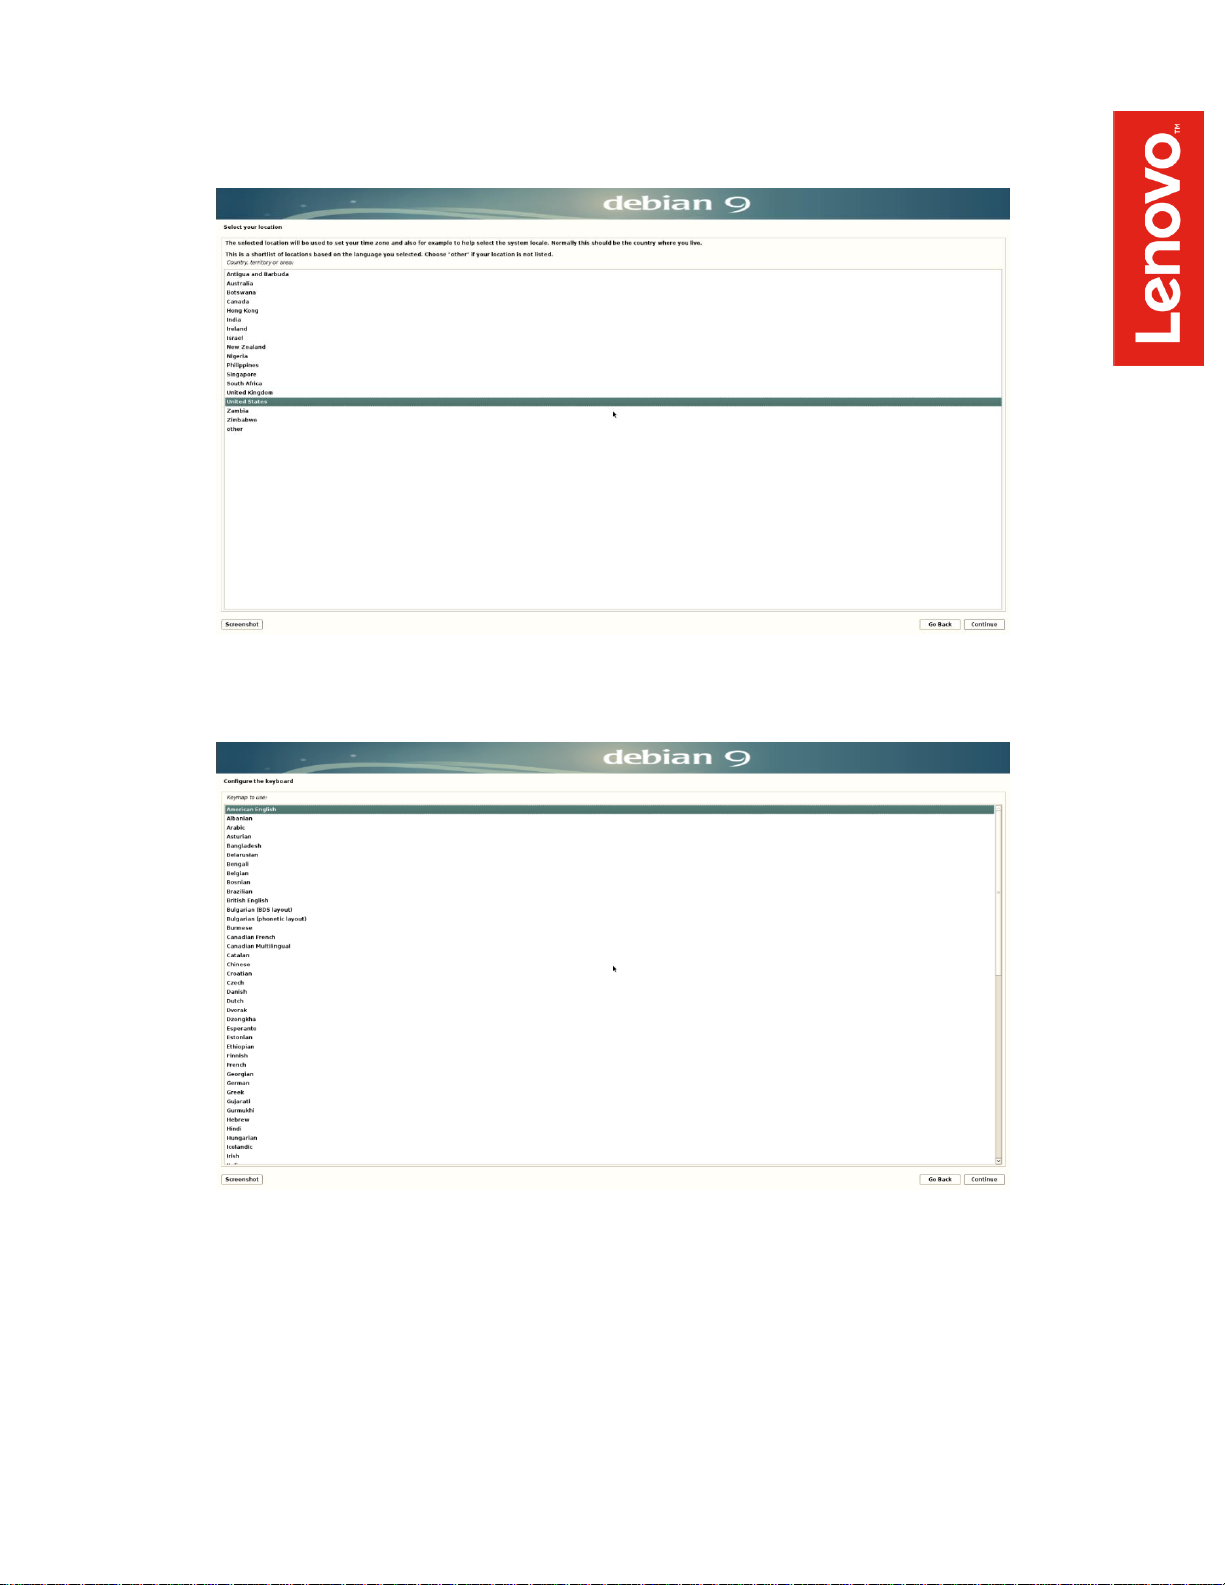
• Select your location
• Configure the keyboard
Page 9
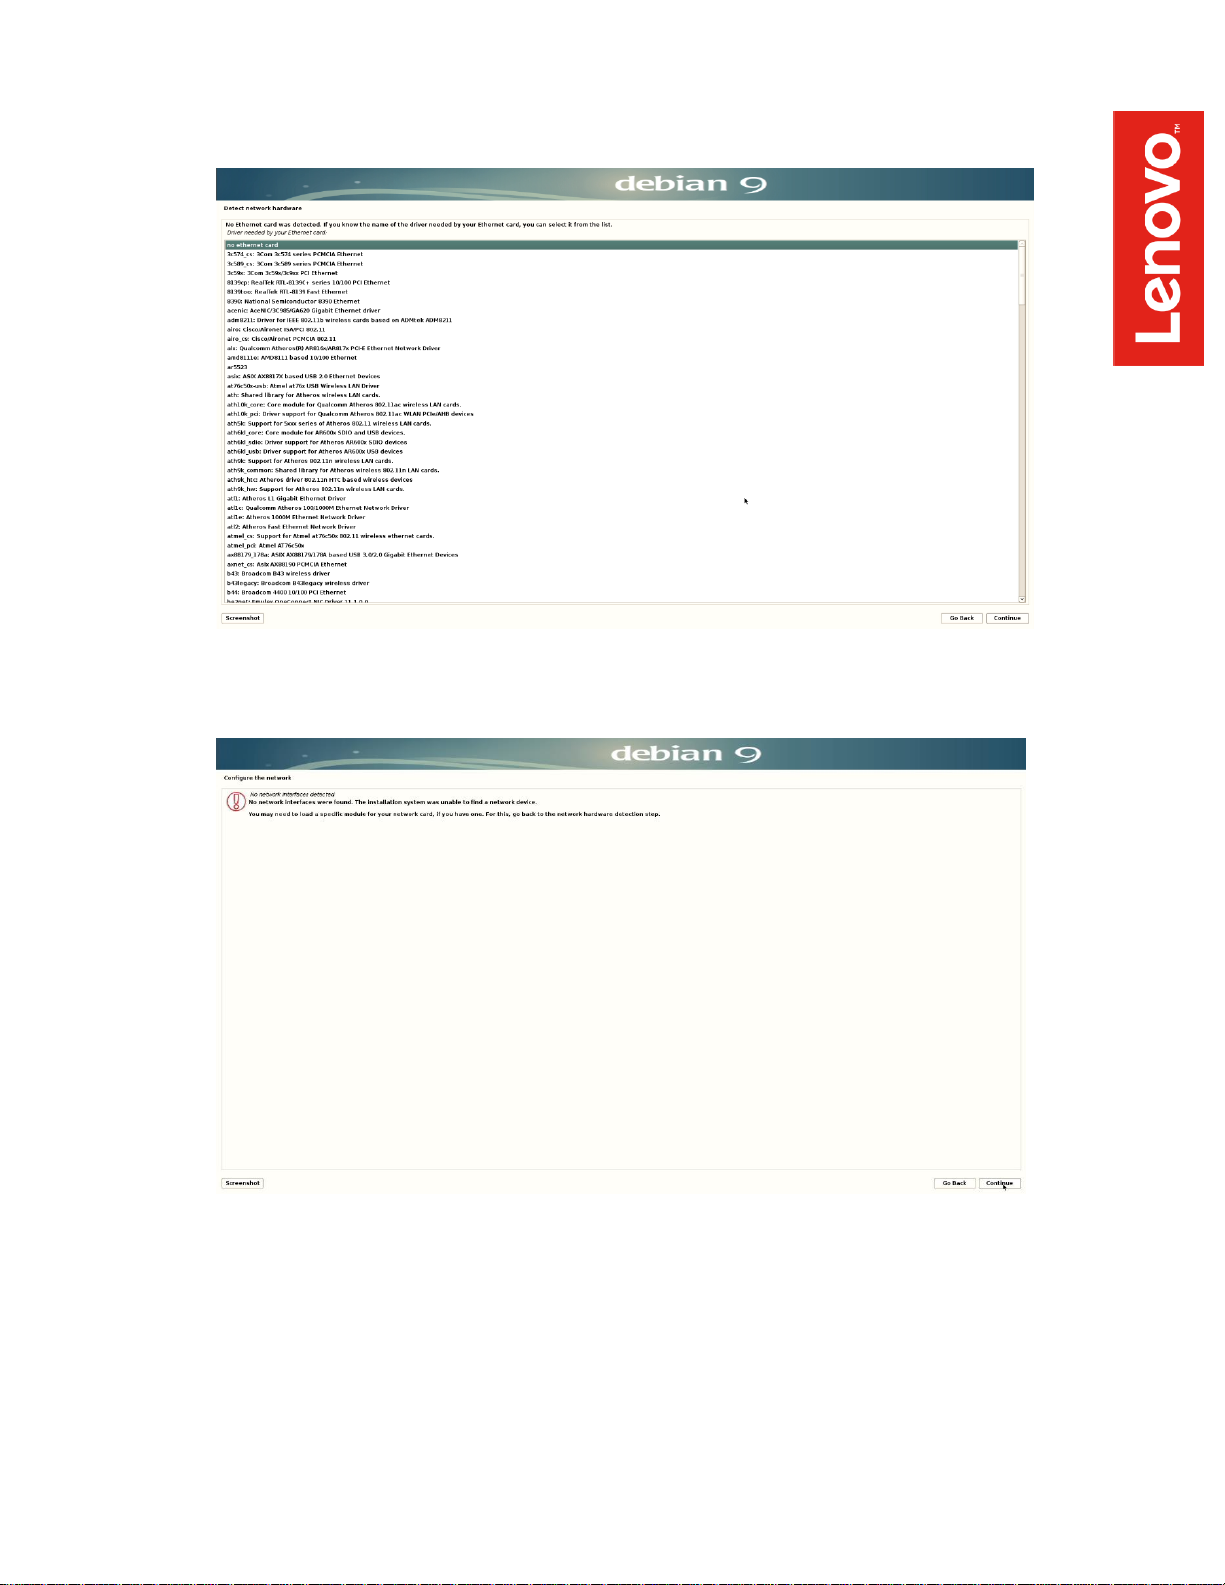
• Detect network hardware: Select no ethernet card and press continue
• A similar window will pop up after the above step, ignore it and move forward by pressing
continue
Page 10
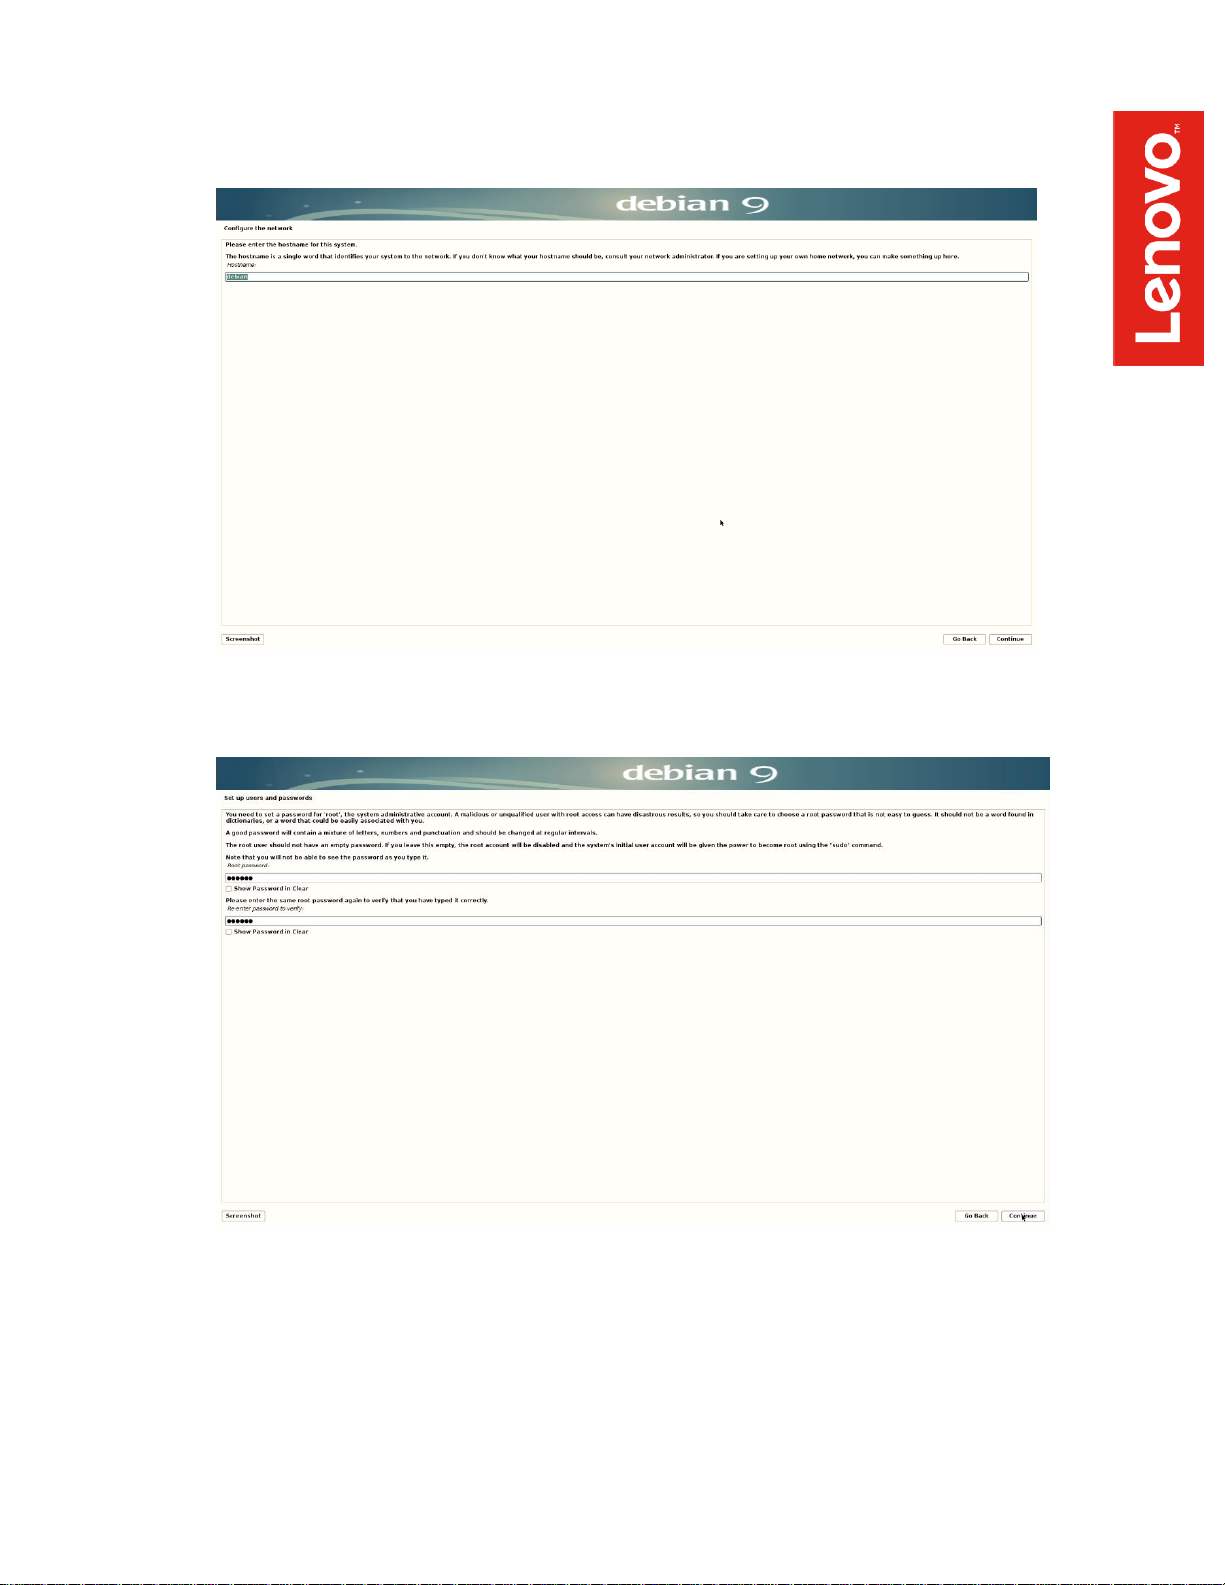
• Configure the network by entering a hostname
• Set up a root password
Page 11

• Set up a user account and password
• Set up a username
Page 12

• Set up a password for the username created above
• Configure the clock according to your time-zone
Page 13

• Select disks partition
▪ Guided – use entire disk option has been selected in this document
▪ Selection can be made according to the user’s need and/or convenience
• Select disk to partition
Page 14

• Choose how to partition the disk
• Select Finish partitioning and write changes to disk and press continue to confirm
partitions
Page 15

• Select Yes to confirm partitions again
• Configure the package manager: Select Yes to use a network mirror
Page 16

• Configure the package manager: Select your country for Debian archive mirror
• Configure the package manager: Select a Debian archive mirror
▪ ftp.us.debian.org is used in this document
Page 17

• Configure the package manager: Enter a HTTP proxy or leave blank if not needed
▪ Note: This option is left blank in this document
• Let the installer start the base installation
Page 18

• Configure the package manager: Select No to scan another CD or DVD
• Popularity contest: Select Yes/No according to the user’s choice
▪ No has been selected in this document
▪ This choice will not affect the performance of your operating system
Page 19

• Select software to install
• Let the installer start the installation
Page 20

• Press continue to reboot the system
• At the boot grub menu, select *Debian GNU/Linux and press “e” to edit the boot
parameters
Page 21

• Add nomodeset at the end of the boot parameter line, and press F10 to boot
• Log in to the system by using your credentials
Page 22

• Debian desktop screen
• Remove the installation media
Page 23

Section 3 – Updating the Source List to use the Debian Repositories
Use the debian repositories to download quick driver and/or software package releases
Step 1:
• Log in as root: su
• Edit the following file ‘/etc/apt/sources.list’ and add the following lines:
deb http://deb.debian.org/debian stretch main
deb-src http://deb.debian.org/debian stretch main
deb http://deb.debian.org/debian stretch-updates main
deb-src http://deb.debian.org/debian stretch-updates main
deb http://security.debian.org/ stretch/updates main
deb-src http://security.debian.org/ stretch/updates main
deb http://deb.debian.org/debian stretch main contrib non-free
deb-src http://deb.debian.org/debian stretch main contrib non-free
deb http://deb.debian.org/debian stretch-updates main contrib non-free
deb-src http://deb.debian.org/debian stretch-updates main contrib non-free
deb http://security.debian.org/ stretch/updates main contrib non-free
deb-src http://security.debian.org/ stretch/updates main contrib non-free
• Uncomment the deb cdrom:[Debian GNU/Linux 9.2.0 _Stretch_ - Official amd64 DVD
Binary-1 20171007-12:11]/ stretch main line from /etc/apt/source.list
Page 24

Step 2:
• Run the following command: ‘apt-get update’
Step 3:
o Install gcc: apt-get install gcc
o Install make: apt-get install make
o Install linux-headers: apt-get install linux-headers*
• Log in as root: su
• Installing gcc
• Installing make
• Installing linux headers
o Run command: apt-get install linux-headers* to install linux headers
o Run command: make install to make the file executable
• Use the make install command to compile files in the above package
Page 25

Section 4 – Installing the Ethernet Driver
▪ Note: There won’t be an internet connection as we have not selected any Ethernet
card driver during the installation. Let us first install an appropriate driver for the
same
▪ In this document a driver package e1000e- 3.4.2.1 is copied and unzipped on the
system using a USB
▪ Mentioned below is a direct link to the Ethernet driver used here:
https://downloadcenter.intel.com/download/15817/Intel-Network-Adapter-Driver-for-PCIe-IntelGigabit-Ethernet-Network-Connections-Under-Linux-
• Locate the Ethernet card package on your system using terminal
• Install linux headers: cd into the src directory and install linux-headers using the following
steps
Page 26

• Execute following steps to load modules for enabling internet from the above Ethernet
package
• Install net-tools package to have the ifconfig utility
• Check your IP address using ifconfig command
Page 27

Section 5 – Installing the Nvidia Graphics Driver
In order to get optimal performance out of the Nvidia GPU, it is a good idea to install the Nvidia
graphics driver
To install the Nvidia driver from Debian repository, use command: apt-get install nvidia-driver
To install the latest Nvidia driver (manually), follow the steps below:
• Download Nvidia driver
o At last, download Nvidia driver for your graphic card from the below link-
https://www.nvidia.com/Download/index.aspx?lang=en-in
o Fill in the details like Product Type, Product Series, Product, Operating System, and
Language as per the graphic card in use and search an appropriate driver
Page 28

o After the download is complete, open the terminal and log in as root: su, and locate
the Nvidia driver
o Execute the driver using: sh NVIDIA–Linux–x86_64–390.87.run
o Accept the Nvidia driver license
Page 29

o Ignore the warning and press OK to continue
o Select No
Page 30

o Select Yes to update your X configuration file
o Driver installation is now complete
Page 31

• Reboot and log in to the system, open the terminal window and ensure if the Nvidia driver
is running properly by using nvidia-smi command
 Loading...