

Lenovo ThinkStation P320 Tiny, ThinkStation P320 Setup Guide [en, ar, bg, cs, da, de, el, es, fi, fr, he, hr, hu, it, ja, ko, nb, nl, pl, pt, pt, ro, ru, sh, sk, sl, sr, sv, th, tr, uk, zc, zh]
Page 1

Red Hat Enterprise Linux Setup Guide
For ThinkStation P320
Page 2
Section 1 – BIOS Setup and Preinstallation Steps
The first step before installing Linux is to make sure BIOS is setup correctly.
For UEFI/GPT installations (recommended):
o Boot into BIOS by pressing the function F1 key at the “Lenovo” splash screen.
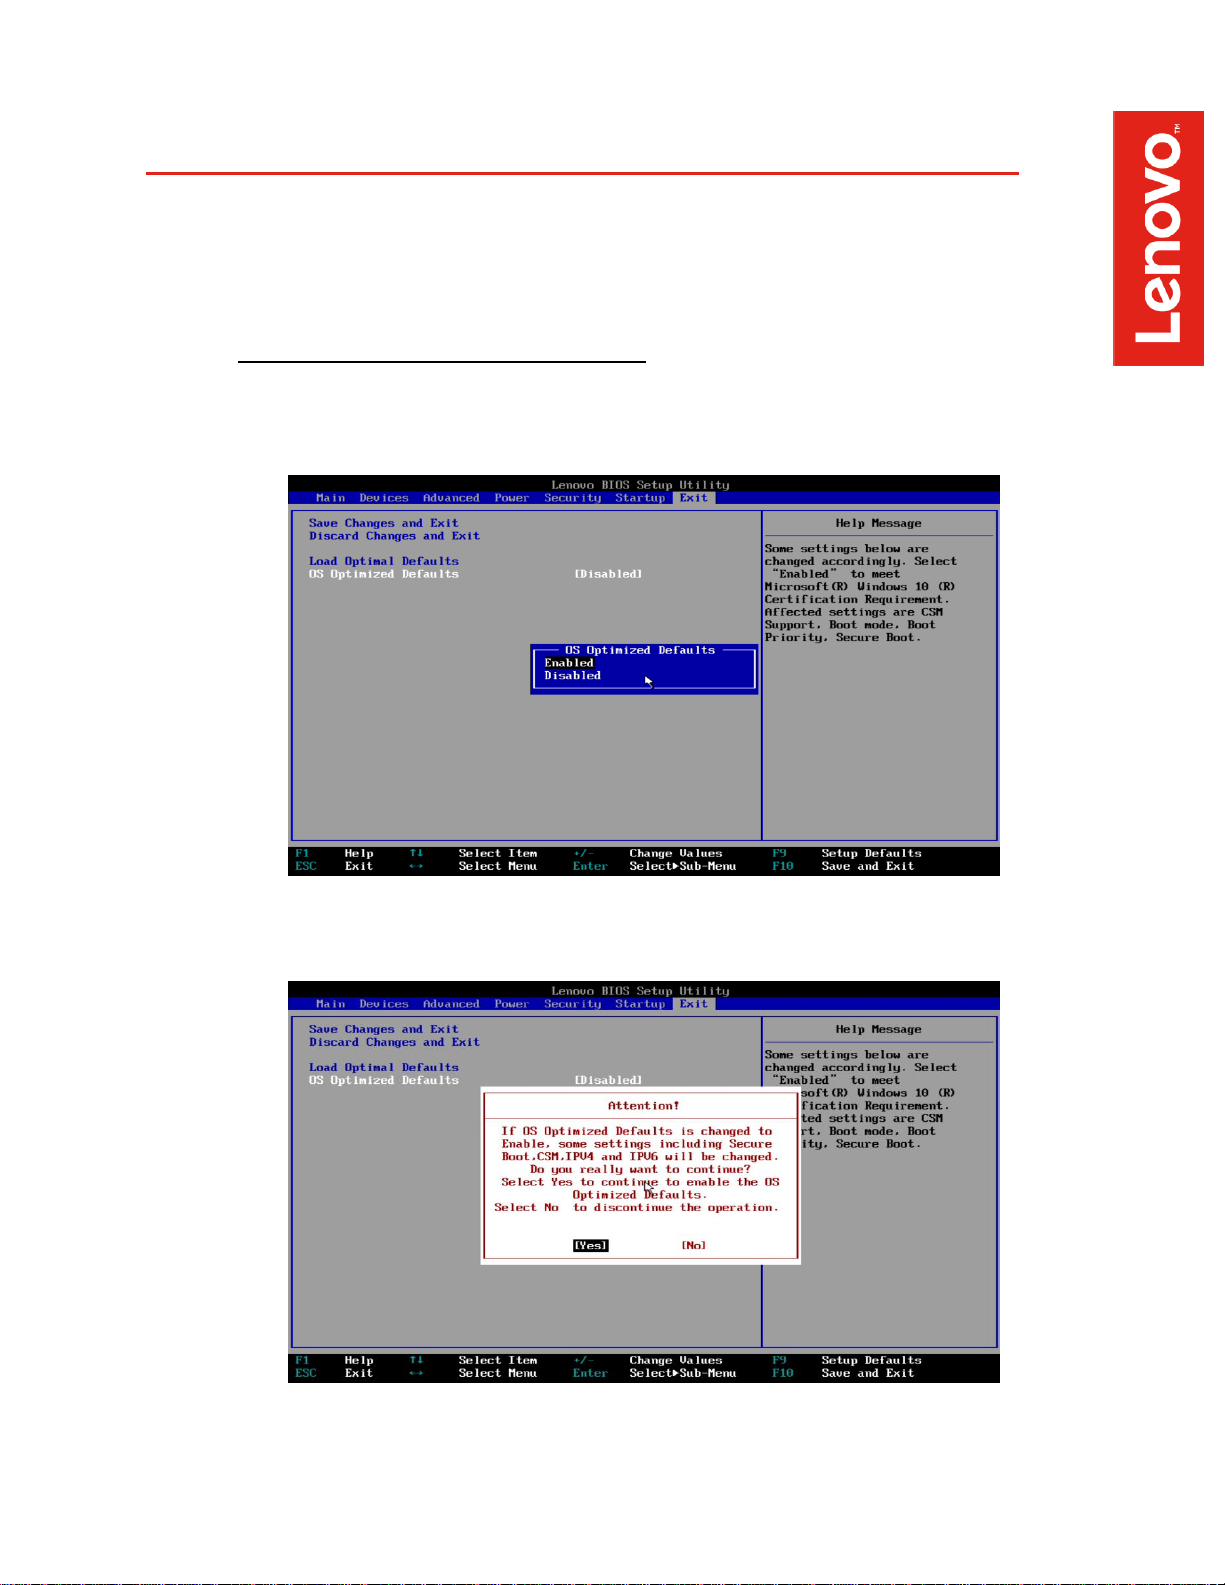
o Tab over to the “Exit” menu tab, and set “OS “Optimized Defaults” to “Enabled”.
o Select “Yes” at the confirmation screen indicated below.
Page 3
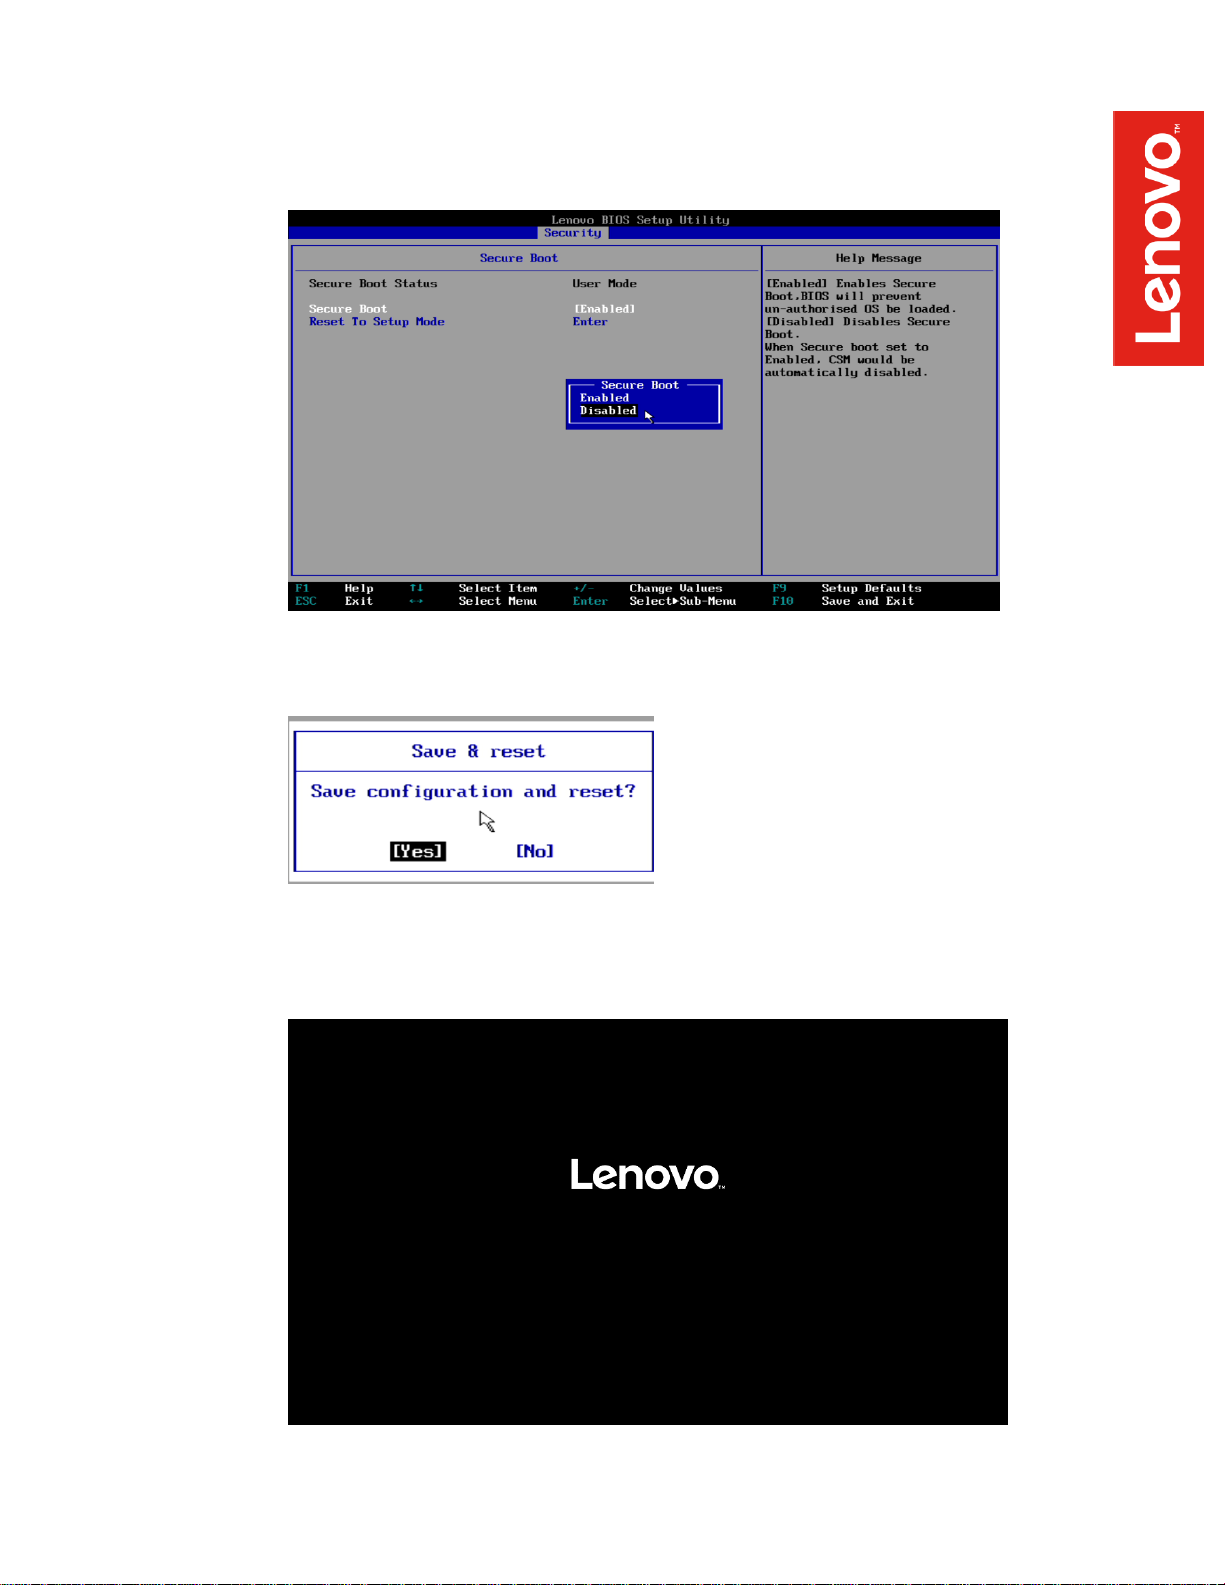
o Tab over to the “Security” menu tab, select “Secure Boot”, and set the option to
“Disabled”.
o Select F10 to “Save and Exit” BIOS.
o Insert the RHEL 7 install media (either through USB or CD/DVD).
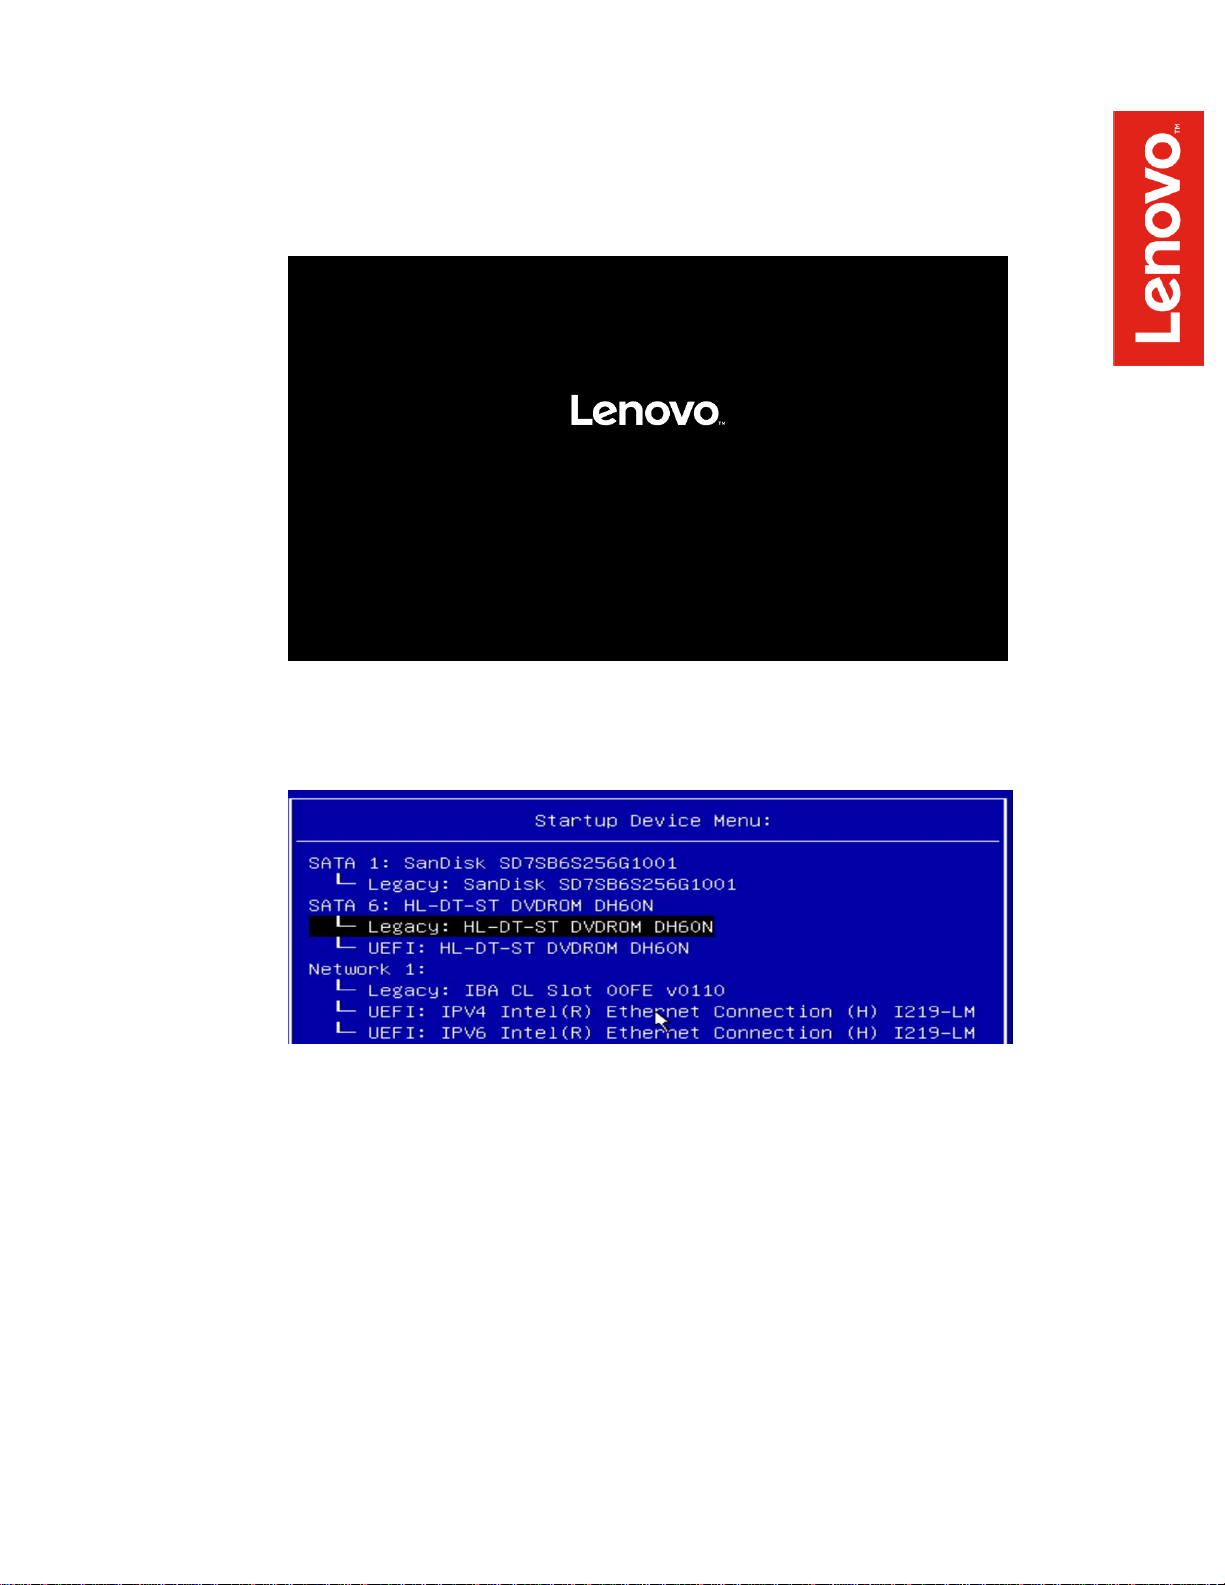
o Power on the system and press the F12 function key whenever the following
Lenovo splash screen appears.
Page 4
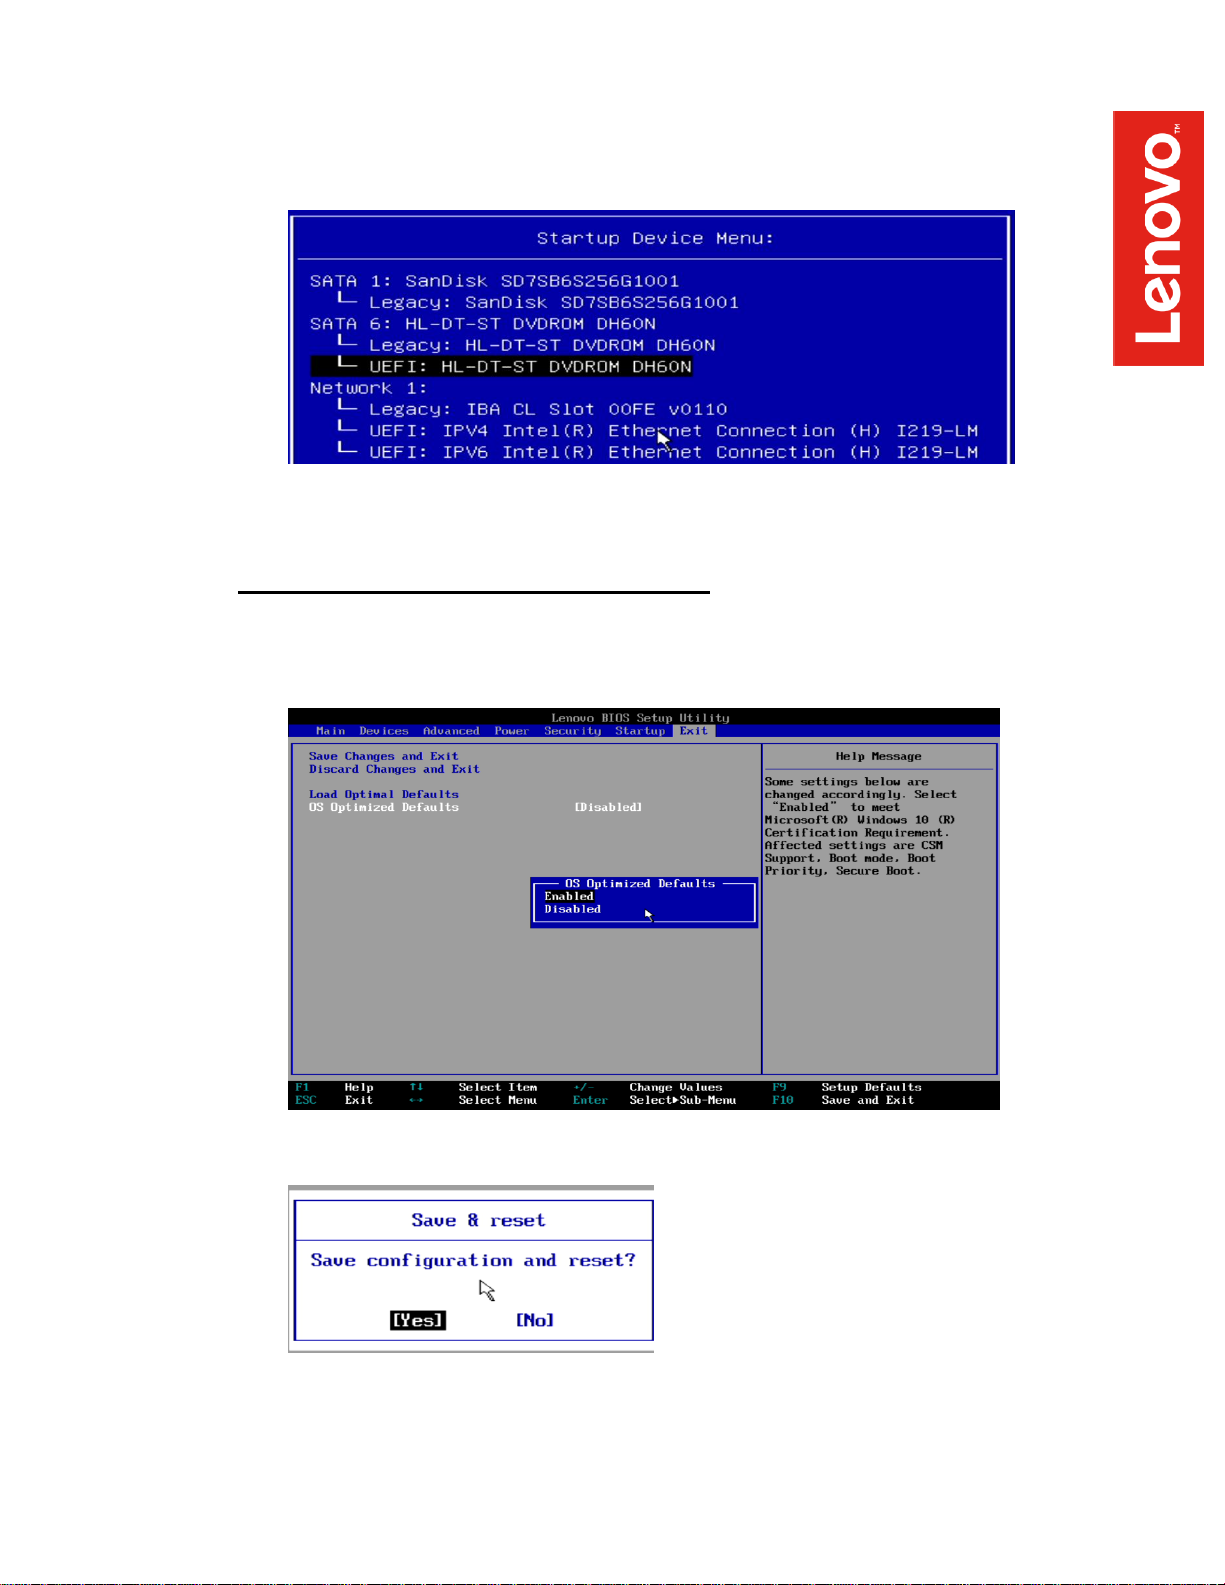
o Select the Linux bootable installation media “UEFI” option from the F12 boot
menu.
For Legacy/MBR installations (not recommended):
o Boot into BIOS by pressing the function F1 key at the “Lenovo” splash screen.
o Tab over to the “Exit” menu tab, and set “OS “Optimized Defaults” to “Disabled”.
o Select F10 to “Save and Exit” BIOS.
Page 5
o Insert the RHEL 7 install media (either through USB or CD/DVD).
o Power on the system and press the F12 function key whenever the following
Lenovo splash screen appears.
o Select the Linux bootable installation media “Legacy” option from the F12 boot
menu.
Page 6
Section 2 – Installing RHEL 7
Please refer to the following instructions and screenshots on how to install RHEL 7 on the
ThinkStation P320 workstations.
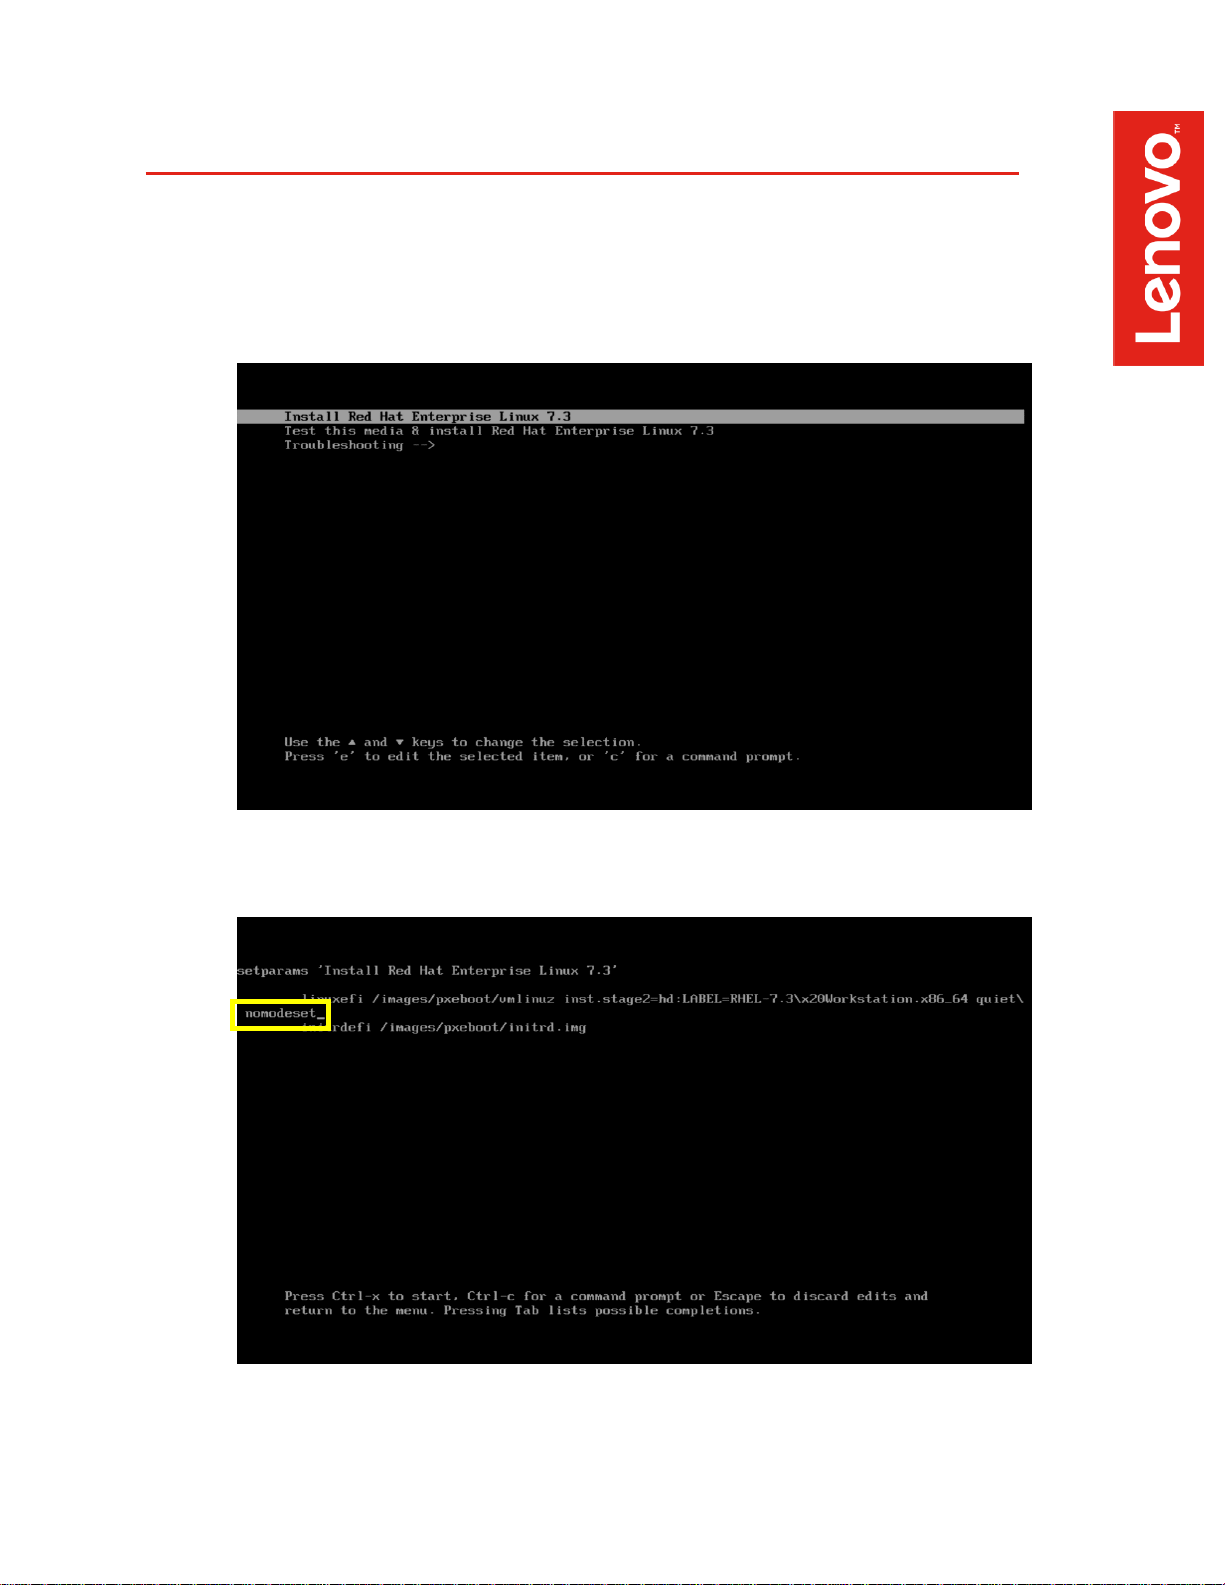
Highlight the “Install Red Hat Enterprise Linux 7” from the installer menu and press “e”.
Add “nomodeset” to the end of the Linux boot image line and press Ctrl-X.
Page 7
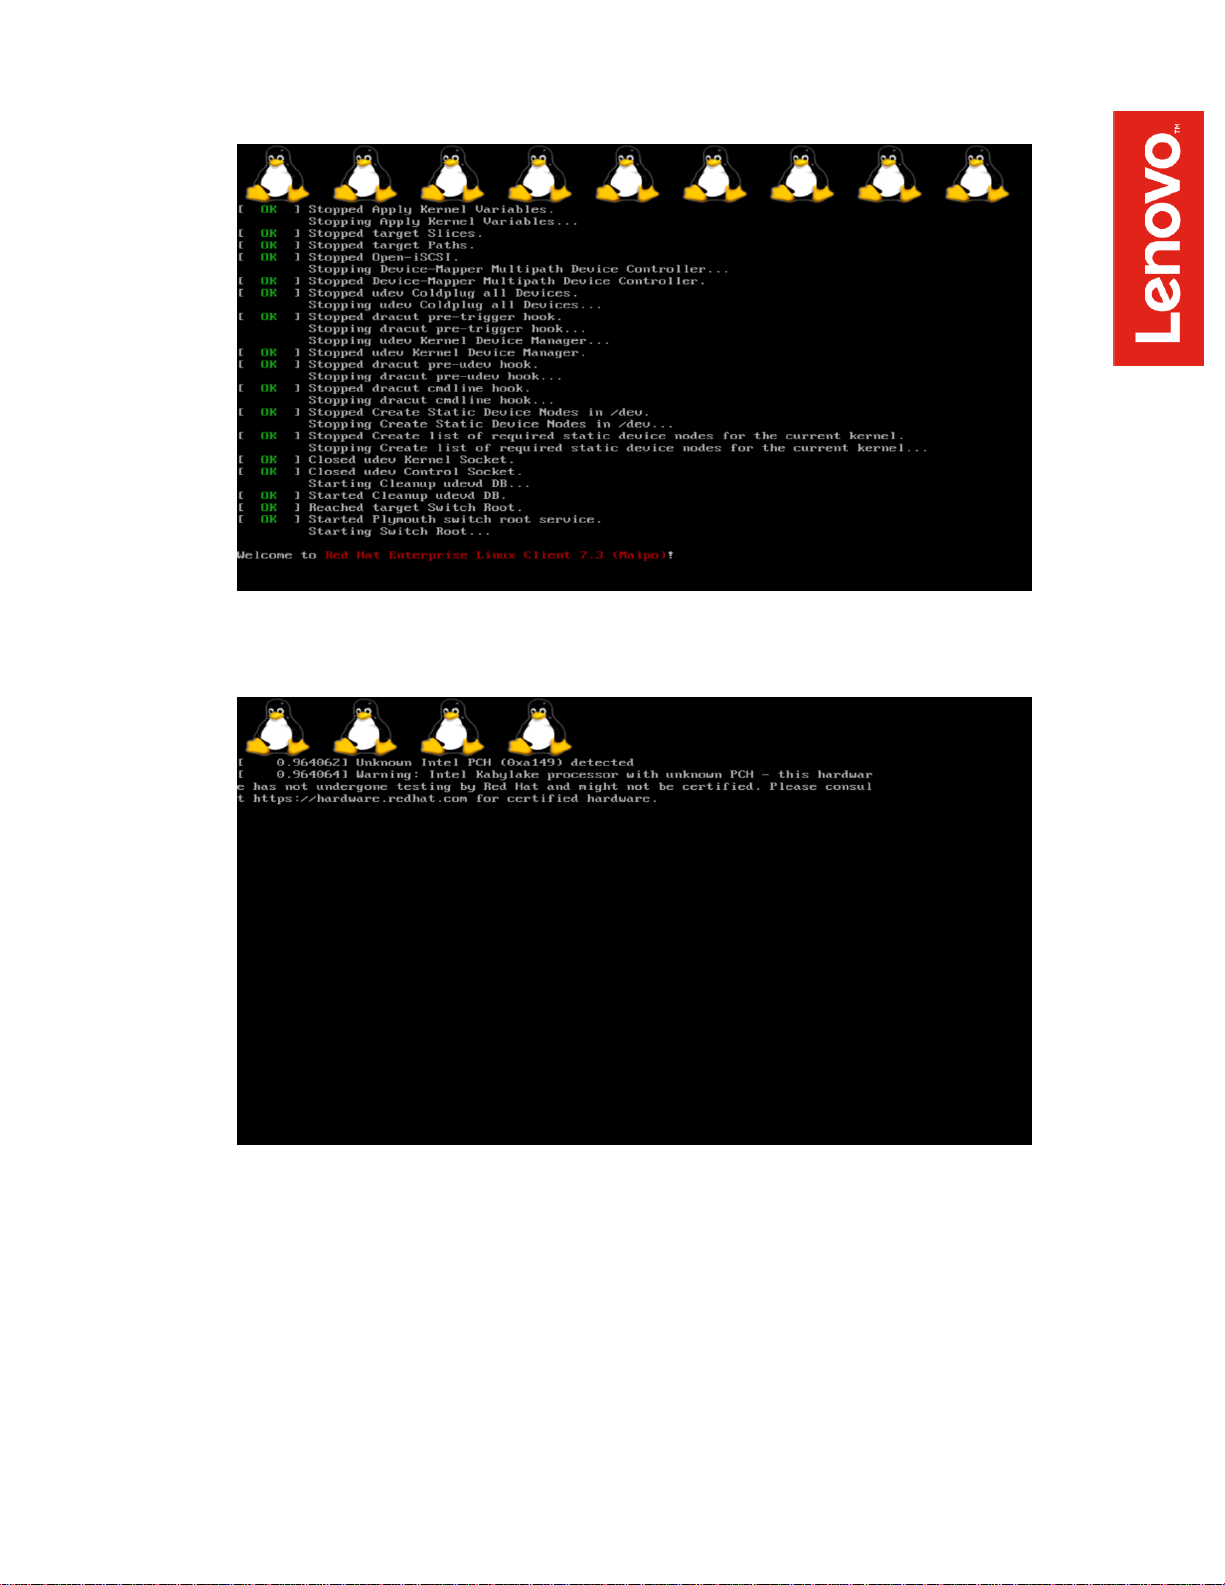
With Intel Kaby-Lake CPU’s, the following warning message may appear.
Page 8

Select the language to use during the installation process.
At the “Installation Summary” screen, feel free to modify any of the default settings for
“Date & Time”, “Keyboard”, and “Language Support” by selecting each one.
o Default settings were used throughout this document.
Page 9

Select “Software Selection” option from the “Installation Summary” screen.
Select a “Base Environment” at the left and the additional Add-on packages at the right
and select “Done” in the upper left corner of the screen.
o “Development and Creative Workstation” was used throughout this document.
Page 10

Select “Installation Destination” option from the “Installation Summary” screen.
Select the device on where to install Red Hat Enterprise Linux 7 and “Done” in the
upper left corner of the screen.
Page 11

Select “Begin Installation” in the bottom right corner of the screen.
Select “Root Password”.
Page 12

Enter a password for the root user and select “Done” in the upper left corner of the
screen.
Select “User Creation”.
Page 13

Enter a Username and Password and select “Done” in the upper left corner of the
screen.
Let the system finish the installation.
Page 14

Once the installation completes, select “Reboot” in the bottom right corner of the screen.
Once the system reboots, select “License Information” from the initial setup screen.
Page 15

Check the box that says “I accept the license agreement” and select “Done” in the upper
left corner of the screen.
Select “Finish Configuration”.
Page 16

Select the user created above.
Enter the password created above and select “Sign In”.
Page 17

Red Hat Enterprise 7 desktop screen.
Page 18

Section 3 – Installing the Nvidia Graphics Driver
In order to get optimal performance out of the Nvidia GPU, it’s a good idea to install the Nvidia
graphics driver.
To install the latest Nvidia graphics driver, follow the steps below.
Step 1:
o Download the Nvidia graphics driver from the Lenovo Support Website.
http://pcsupport.lenovo.com/us/en/products/WORKSTATIONS/THINKSTATION-PSERIES-WORKSTATIONS/THINKSTATION-P320/downloads/DS121444
Step 2:
o Open a terminal window and type “init 3” to stop X-windows.
Step 3:
o Login as root.
Step 4:
o Browse to the directory location to where the Nvidia driver installer is located.
Step 5:
o Run the Nvidia installer.
Page 19

Step 6:
o Accept the Nvidia driver license.
Page 20

Step 7:
o Select “Yes” to Install 32-bit compatibility libraries.
Step 8:
o Select “Yes” to update the X-configuration file.
Page 21

Step 9:
o Driver installation complete.
Step 10:
o Verify the Nvidia driver is loaded by running “nvidia-smi”.
Step 11:
o Reboot the system.
Page 22

Section 4 – Installing the Network Wireless Driver
The wireless network device offered for the P320 is native to RHEL 7.3; therefore, you will not
need to install any additional drivers separately.
Section 5 – Installing the Network LAN Driver
The network LAN device is native to RHEL 7.3; therefore, you will not need to install any additional
drivers separately.
OPTIONAL: Configuring “yum” to use CentOS Repositories
For non-registered subscriptions of Red Hat, you may be able to use the CentOS yum package
server. In order to do so, follow the instructions below.
1. Open a terminal window and login as root.
2. Add the following centos repository.
# vi /etc/yum.repos.d/centos.repo
[centos]
Name=CentOS $releasever - $basearch
baseurl=http://ftp.heanet.ie/pub/centos/7/os/$basearch/
enabled=1
gpgcheck=0
3. Run: “yum update”.
.
 Loading...