

Lenovo ThinkCentre M700 Hardware Maintenance Manual [en, ar, bg, cs, da, de, el, es, fi, fr, he, hr, hu, it, ja, ko, nb, nl, pl, pt, ro, ru, sk, sl, sr, sv, th, tr, zc, zh]
Page 1

ThinkCentreM700
HardwareMaintenanceManual
MachineTypes:10GS,10GT,10KN,and10KQ
Page 2

Note:Beforeusingthisinformationandtheproductitsupports,besuretoreadandunderstandtheChapter
1“Readthisfirst:Importantsafetyinformation”onpage1
andAppendixF“Notices”onpage151.
ThirdEdition(September2016)
©CopyrightLenovo2016.
LIMITEDANDRESTRICTEDRIGHTSNOTICE:IfdataorsoftwareisdeliveredpursuanttoaGeneralServices
Administration“GSA”contract,use,reproduction,ordisclosureissubjecttorestrictionssetforthinContractNo.
GS-35F-05925.
Page 3

Contents
Aboutthismanual............v
Chapter1.Readthisfirst:Important
safetyinformation............1
Powercordsandpoweradapters........1
Generalsafety................1
Electricalsafety...............2
Safetyinspectionguide............4
Handlingelectrostaticdischarge-sensitive
devices..................4
Groundingrequirements............5
Safetynotices(multi-lingualtranslations).....5
Chapter2.Productoverview.....27
Hardwarelocations.............27
Frontview...............27
Rearview...............29
Computercomponents.........32
MajorFRUsandCRUs..........34
Partsonthesystemboard........37
Machinetypeandmodellabel.......38
Features.................38
Specifications...............41
Programs.................41
Accessingaprogramonthecomputer...41
Installingaprogramthatisreadytobe
installed...............42
AnintroductiontoLenovoprograms....42
Chapter3.Usingyourcomputer...45
Registeringthecomputer..........45
Settingthecomputervolume.........45
AddinganicontotheWindowsnotificationarea.45
Usingadisc................45
Guidelinesaboutusingtheopticaldrive...46
Handlingandstoringadisc........46
Playingandremovingadisc.......46
Recordingadisc............47
Connectingtoanetwork...........47
ConnectingtoanEthernetLAN......47
ConnectingtoawirelessLAN.......48
ConnectingtoaBluetooth-enableddevice..48
Chapter4.Youandyourcomputer..49
Arrangingyourworkspace..........49
Glareandlighting............49
Aircirculation.............49
Electricaloutletlocationsandcablelengths.49
Comfort...............49
Accessibilityinformation...........50
Cleaningthecomputer...........53
Maintenance...............53
Basicmaintenancetips.........53
Goodmaintenancepractices.......53
Keepingthecomputercurrent.......54
Movingthecomputer............55
Chapter5.Security..........57
Lockingthecomputer............57
Lockingthecomputercover.......58
AttachingaKensington-stylecablelock...59
Attachingacablelock..........60
Viewingandchangingsecuritysettingsinthe
SetupUtilityprogram............60
Preventingunauthorizedaccesstothecomputer.61
Usingfingerprintauthentication........61
Usingthecoverpresenceswitch.......61
Usingandunderstandingfirewalls.......62
Protectingdataagainstviruses........62
ComputraceAgentsoftwareembeddedin
firmware.................62
TrustedPlatformModule(TPM)........62
Chapter6.Advancedconfiguration..63
UsingtheSetupUtilityprogram........63
StartingtheSetupUtilityprogram.....63
Enablingordisablingadevice.......63
EnablingordisablingtheAutomaticPowerOn
features...............63
EnablingordisablingtheErPLPScompliance
mode................64
EnablingordisablingtheConfiguration
ChangeDetectionfeature........64
UsingBIOSpasswords.........65
Selectingastartupdevice........66
ExitingtheSetupUtilityprogram......66
UpdatingtheBIOS.............67
Chapter7.Troubleshooting,
diagnostics,andrecovery......69
Basicprocedureforresolvingcomputer
problems.................69
Troubleshooting..............69
Startupproblems............69
Audioproblems............70
©CopyrightLenovo2016
i
Page 4

CDproblems.............71
DVDproblems.............71
Intermittentproblems..........72
Storagedriveproblems.........72
Networkingproblems..........73
Performanceproblems..........75
Serialconnectorcannotbeaccessed....76
USBdeviceproblems..........76
Softwareanddriverproblems.......76
Diagnostics................77
LenovoSolutionCenter.........77
UEFIdiagnosticprogram.........77
Recoveryinformation............78
RecoveryinformationforWindows7....78
RecoveryinformationforWindows10....79
Chapter8.Servicecheckoutand
symptom-to-FRUindex........81
Servicecheckout..............81
Problemdeterminationtips........81
Symptom-to-FRUindex...........82
Harddiskdrivebooterror........82
Powersupplyproblems.........83
Beepsymptoms............83
POSTerrorcodes............83
Miscellaneouserrorconditions......84
Undeterminedproblems.........86
Chapter9.Installingorreplacing
hardware...............87
Handlingstatic-sensitivedevices.......87
Installingorreplacinghardware........87
Installingexternaloptions........87
Removingthecomputercover.......88
Replacingthefrontbezel.........88
Replacingtheopticaldrive........91
Pivotingthedrivebayassemblyupwardand
downward..............93
Replacingthestoragedrive........95
Replacingthecoverpresenceswitch....102
Replacingtheinternalspeaker.......104
Replacingthethermalsensor.......105
Replacingthecardreader........106
ReplacingtheUSB2.0assembly.....109
ReplacingthefrontaudioandUSB3.0
assembly...............111
Replacingthepowerbuttonboard.....112
Replacingthepowersupplyassembly...114
Replacingthesystemfan.........115
ReplacingaPCIExpresscard.......117
ReplacingtheWi-Ficard.........118
ReplacingtheWi-Fiantennas.......119
Replacingamemorymodule.......121
Replacingthecoin-cellbattery......123
Replacingtheheatsinkandfanassembly..124
Replacingthemicroprocessor.......126
Replacingthesystemboard.......128
Completingthepartsreplacement.....130
Chapter10.Gettinginformation,help,
andservice.............133
Informationresources............133
Accessingtheuserguideinvarious
languages...............133
Windowshelpsystem..........133
Safetyandwarranty...........133
LenovoWebsite............133
LenovoSupportWebsite.........134
Frequentlyaskedquestions........134
Helpandservice..............134
Callingforservice............134
Usingotherservices..........135
Purchasingadditionalservices......135
AppendixA.Regulatory
information.............137
Exportclassificationnotice..........137
Electronicemissionsnotices.........137
FederalCommunicationsCommission
DeclarationofConformity........137
Eurasiancompliancemark..........139
Brazilaudionotice.............139
Mexicowireless-radiocomplianceinformation..139
Additionalregulatoryinformation.......140
AppendixB.WEEEandrecycling
information.............141
ImportantWEEEinformation.........141
RecyclinginformationforJapan........141
RecyclinginformationforBrazil........142
BatteryrecyclinginformationforT aiwan.....142
BatteryrecyclinginformationfortheEuropean
Union..................143
AppendixC.RestrictionofHazardous
Substances(RoHS)Directive....145
EuropeanUnionRoHS...........145
TurkishRoHS...............145
UkraineRoHS...............145
IndiaRoHS................145
ChinaRoHS................146
AppendixD.ChinaEnergyLabel..147
iiThinkCentreM700HardwareMaintenanceManual
Page 5

AppendixE.ENERGYSTARmodel
information.............149
AppendixF .Notices.........151
Trademarks................152
©CopyrightLenovo2016
iii
Page 6

ivThinkCentreM700HardwareMaintenanceManual
Page 7

Aboutthismanual
ThismanualprovidesserviceandreferenceinformationforLenovo
Usethismanualalongwiththeadvanceddiagnosticteststotroubleshootproblems.
Important:ThismanualisintendedonlyfortrainedservicetechnicianswhoarefamiliarwithLenovo
computers.Usethismanualalongwiththeadvanceddiagnosticteststotroubleshootproblemseffectively.
BeforeservicingaLenovocomputer,besuretoreadandunderstandChapter1“Readthisfirst:Important
safetyinformation”onpage1
.
®
computerslistedonthefrontcover.
©CopyrightLenovo2016
v
Page 8

viThinkCentreM700HardwareMaintenanceManual
Page 9

Chapter1.Readthisfirst:Importantsafetyinformation
CAUTION:
Beforeusingthecomputer,besuretoreadandunderstandalltherelatedsafetyinformationforthis
product.RefertothesafetyinformationinthissectionandintheSafetyandWarrantyGuidethatyou
receivedwiththisproduct.Readingandunderstandingallthesafetyinformationreducestheriskof
personalinjuryanddamagetoyourproduct.IfyounolongerhaveacopyoftheSafetyandWarranty
Guide,youcanobtainaPortableDocumentFormat(PDF)versionfromtheLenovo
siteathttp://www.lenovo.com/UserManuals.
Powercordsandpoweradapters
Useonlythepowercordsandpoweradapterssuppliedbytheproductmanufacturer.Donotusetheac
powercordforotherdevices.
®
SupportWeb
Thepowercordsshallbesafetyapproved.ForGermany,itshallbeH03VV-F,3G,0.75mm
connectedtothepoweradapter),H05VV-F,3G,0.75mm
supplyassembly),orbetter.Forothercountries,thesuitabletypesshallbeusedaccordingly.
Neverwrapapowercordaroundapoweradapterorotherobject.Doingsocanstressthecordinwaysthat
cancausethecordtofray,crack,orcrimp.Thiscanpresentasafetyhazard.
Alwaysroutepowercordssothattheywillnotbewalkedon,trippedover,orpinchedbyobjects.
Protectpowercordandpoweradaptersfromliquids.Forinstance,donotleaveyourpowercordorpower
adapternearsinks,tubs,toilets,oronfloorsthatarecleanedwithliquidcleansers.Liquidscancausea
shortcircuit,particularlyifthepowercordorpoweradapterhasbeenstressedbymisuse.Liquidsalsocan
causegradualcorrosionofpowercordterminalsand/ortheconnectorterminalsonapoweradapter,
whichcaneventuallyresultinoverheating.
Ensurethatallpowercordconnectorsaresecurelyandcompletelypluggedintoreceptacles.
Donotuseanypoweradapterthatshowscorrosionattheacinputpinsorshowssignsofoverheating(such
asdeformedplastic)attheacinputoranywhereonthepoweradapter.
Donotuseanypowercordswheretheelectricalcontactsoneitherendshowsignsofcorrosionor
overheatingorwherethepowercordappearstohavebeendamagedinanyway.
2
(thepowercordconnectedtotheinternalpower
2
(thepowercord
Generalsafety
Followtheserulestoensuregeneralsafety:
•Observegoodhousekeepingintheareaofthemachinesduringandaftermaintenance.
•Whenliftinganyheavyobject:
1.Ensureyoucanstandsafelywithoutslipping.
2.Distributetheweightoftheobjectequallybetweenyourfeet.
3.Useaslowliftingforce.Nevermovesuddenlyortwistwhenyouattempttolift.
4.Liftbystandingorbypushingupwithyourlegmuscles;thisactionremovesthestrainfromthe
musclesinyourback.
©CopyrightLenovo2016
1
Page 10
Attention:
Donotattempttoliftanyobjectsthatweighmorethan16kg(35lb)orobjectsthatyouthinkare
tooheavyforyou.
•Donotperformanyactionthatcauseshazardstothecustomer,orthatmakestheequipmentunsafe.
•Beforeyoustartthemachine,ensurethatotherservicerepresentativesandthecustomer'spersonnelare
notinahazardousposition.
•Placeremovedcoversandotherpartsinasafeplace,awayfromallpersonnel,whileyouareservicing
themachine.
•Keepyourtoolcaseawayfromwalkareassothatotherpeoplewillnottripoverit.
•Donotwearlooseclothingthatcanbetrappedinthemovingpartsofamachine.Ensurethatyoursleeves
arefastenedorrolledupaboveyourelbows.Ifyourhairislong,fastenit.
•Inserttheendsofyournecktieorscarfinsideclothingorfastenitwithanonconductiveclip,approximately
8centimeters(3inches)fromtheend.
•Donotwearjewelry,chains,metal-frameeyeglasses,ormetalfastenersforyourclothing.
Remember:Metalobjectsaregoodelectricalconductors.
•Wearsafetyglasseswhenyouare:hammering,drilling,soldering,cuttingwire,attachingsprings,using
solvents,orworkinginanyotherconditionsthatmightbehazardoustoyoureyes.
•Afterservice,reinstallallsafetyshields,guards,labels,andgroundwires.Replaceanysafetydevice
thatiswornordefective.
•Reinstallallcoverscorrectlybeforereturningthemachinetothecustomer.
CAUTION:
Hazardousmovingparts.Keepfingersandotherbodypartsaway.
CAUTION:
Beforeyouopenthecomputercover,turnoffthecomputerandwaitseveralminutesuntilthe
computeriscool.
Electricalsafety
CAUTION:
Electricalcurrentfrompower,telephone,andcommunicationcablescanbehazardous.T oavoid
personalinjuryorequipmentdamage,disconnecttheattachedpowercords,telecommunication
systems,networks,andmodemsbeforeyouopenthecomputercovers,unlessinstructedotherwise
intheinstallationandconfigurationprocedures.
2ThinkCentreM700HardwareMaintenanceManual
Page 11

Observethefollowingruleswhenworkingonelectricalequipment.
Important:Useonlyapprovedtoolsandtestequipment.Somehandtoolshavehandlescoveredwithasoft
materialthatdoesnotinsulateyouwhenworkingwithliveelectricalcurrents.Manycustomershave,near
theirequipment,rubberfloormatsthatcontainsmallconductivefiberstodecreaseelectrostaticdischarges.
Donotusethistypeofmattoprotectyourselffromelectricalshock.
•Findtheroomemergencypower-off(EPO)switch,disconnectingswitch,orelectricaloutlet.Ifanelectrical
accidentoccurs,youcanthenoperatetheswitchorunplugthepowercordquickly.
•Donotworkaloneunderhazardousconditionsornearequipmentthathashazardousvoltages.
•Disconnectallpowerbefore:
–Performingamechanicalinspection
–Workingnearpowersupplies
–RemovingorinstallingFieldReplaceableUnits(FRUs)
•Beforeyoustarttoworkonthemachine,unplugthepowercord.Ifyoucannotunplugit,poweroffthe
wallboxthatsuppliespowertothemachineandlockthewallboxintheoffposition.
•Ifyouneedtoworkonamachinethathasexposedelectricalcircuits,observethefollowingprecautions:
–Ensurethatanotherperson,familiarwiththepower-offcontrols,isnearyou.
Remember:Anotherpersonmustbetheretoswitchoffthepower,ifnecessary.
–Useonlyonehandwhenworkingwithpowered-onelectricalequipment;keeptheotherhandinyour
pocketorbehindyourback.
Remember:Theremustbeacompletecircuittocauseelectricalshock.Byobservingtheaboverule,
youmaypreventacurrentfrompassingthroughyourbody.
–Whenusingatester,setthecontrolscorrectlyandusetheapprovedprobeleadsandaccessoriesfor
thattester.
–Standonsuitablerubbermats(obtainedlocally,ifnecessary)toinsulateyoufromgroundssuchas
metalfloorstripsandmachineframes.
Observethespecialsafetyprecautionswhenyouworkwithveryhighvoltages;theseinstructionsarein
thesafetysectionsofmaintenanceinformation.Useextremecarewhenmeasuringhighvoltages.
•Regularlyinspectandmaintainyourelectricalhandtoolsforsafeoperationalcondition.
•Donotusewornorbrokentoolsandtesters.
•Neverassumethatpowerhasbeendisconnectedfromacircuit.First,checkthatithasbeenpowered-off.
•Alwayslookcarefullyforpossiblehazardsinyourworkarea.Examplesofthesehazardsaremoistfloors,
nongroundedpowerextensioncables,powersurges,andmissingsafetygrounds.
•Donottouchliveelectricalcircuitswiththereflectivesurfaceofaplasticdentalmirror.Thesurfaceis
conductive;suchtouchingcancausepersonalinjuryandmachinedamage.
•Donotservicethefollowingpartswiththepoweronwhentheyareremovedfromtheirnormaloperating
placesinamachine:
–Powersupplyunits
–Pumps
–Blowersandfans
–Motorgenerators
andsimilarunits.(Thispracticeensurescorrectgroundingoftheunits.)
•Ifanelectricalaccidentoccurs:
–Usecaution;donotbecomeavictimyourself.
–Switchoffpower.
Chapter1.Readthisfirst:Importantsafetyinformation3
Page 12

–Sendanotherpersontogetmedicalaid.
Safetyinspectionguide
Theintentofthisinspectionguideistoassistyouinidentifyingpotentiallyunsafeconditionsonthese
products.Eachmachine,asitwasdesignedandbuilt,hadrequiredsafetyitemsinstalledtoprotectusers
andservicepersonnelfrominjury.Thisguideaddressesonlythoseitems.However,goodjudgmentshould
beusedtoidentifypotentialsafetyhazardsduetoattachmentoffeaturesoroptionsnotcoveredbythis
inspectionguide.
Ifanyunsafeconditionsarepresent,youmustdeterminehowserioustheapparenthazardcouldbeand
whetheryoucancontinuewithoutfirstcorrectingtheproblem.
Considertheseconditionsandthesafetyhazardstheypresent:
•Electricalhazards,especiallyprimarypower(primaryvoltageontheframecancauseseriousorfatal
electricalshock).
•Explosivehazards,suchasadamagedCRTfaceorbulgingcapacitor
•Mechanicalhazards,suchaslooseormissinghardware
Theguideconsistsofaseriesofstepspresentedinachecklist.Beginthecheckswiththepoweroff,and
thepowercorddisconnected.
Checklist:
1.Checkexteriorcoversfordamage(loose,broken,orsharpedges).
2.Power-offthecomputer.Disconnectthepowercord.
3.Checkthepowercordfor:
a.Athird-wiregroundconnectoringoodcondition.Useametertomeasurethird-wireground
continuityfor0.1ohmorlessbetweentheexternalgroundpinandframeground.
b.Thepowercordshouldbetheappropriatetypeasspecifiedinthepartslistings.
c.Insulationmustnotbefrayedorworn.
4.Removethecover.
5.Checkforanyobviousalterations.Usegoodjudgmentastothesafetyofanyalterations.
6.Checkinsidetheunitforanyobviousunsafeconditions,suchasmetalfilings,contamination,wateror
otherliquids,orsignsoffireorsmokedamage.
7.Checkforworn,frayed,orpinchedcables.
8.Checkthatthepower-supplycoverfasteners(screwsorrivets)havenotbeenremovedortamperedwith.
Handlingelectrostaticdischarge-sensitivedevices
Anycomputerpartcontainingtransistorsorintegratedcircuits(ICs)shouldbeconsideredsensitiveto
electrostaticdischarge(ESD).ESDdamagecanoccurwhenthereisadifferenceinchargebetweenobjects.
ToprotectagainstESDdamage,equalizethechargebetweenobjects.Then,themachine,thepart,the
workmat,andthepersonhandlingthepartareallatthesamecharge.
Notes:
1.Useproduct-specificESDprocedureswhentheyexceedtherequirementsnotedhere.
2.MakesurethattheESDprotectivedevicesyouusehavebeencertified(ISO9000)asfullyeffective.
WhenhandlingESD-sensitiveparts:
•Keepthepartsinprotectivepackagesuntiltheyareinsertedintotheproduct.
4ThinkCentreM700HardwareMaintenanceManual
Page 13

•Avoidcontactwithotherpeoplewhilehandlingthepart.
•Wearagroundedwriststrapagainstyourskintoeliminatestaticonyourbody.
•Preventthepartfromtouchingyourclothing.Mostclothingisinsulativeandretainsachargeeven
whenyouarewearingawriststrap.
•Usetheblacksideofagroundedworkmattoprovideastatic-freeworksurface.Thematisespecially
usefulwhenhandlingESD-sensitivedevices.
•Selectagroundingsystem,suchasthoselistedbelow,toprovideprotectionthatmeetsthespecific
servicerequirement.
Note:TheuseofagroundingsystemisdesirablebutnotrequiredtoprotectagainstESDdamage.
–AttachtheESDgroundcliptoanyframeground,groundbraid,orgreen-wireground.
–UseanESDcommongroundorreferencepointwhenworkingonadouble-insulatedor
battery-operatedsystem.Youcanusecoaxorconnector-outsideshellsonthesesystems.
–Usetheroundground-prongoftheacplugonac-operatedcomputers.
Groundingrequirements
Electricalgroundingofthecomputerisrequiredforoperatorsafetyandcorrectsystemfunction.Proper
groundingoftheelectricaloutletcanbeverifiedbyacertifiedelectrician.
Safetynotices(multi-lingualtranslations)
Thecautionanddangersafetynoticesinthissectionareprovidedinthefollowinglanguages:
•English
•Arabic
•Brazilian/Portuguese
•Chinese(simplified)
•Chinese(traditional)
•French
•German
•Hebrew
•Italian
•Korean
•Spanish
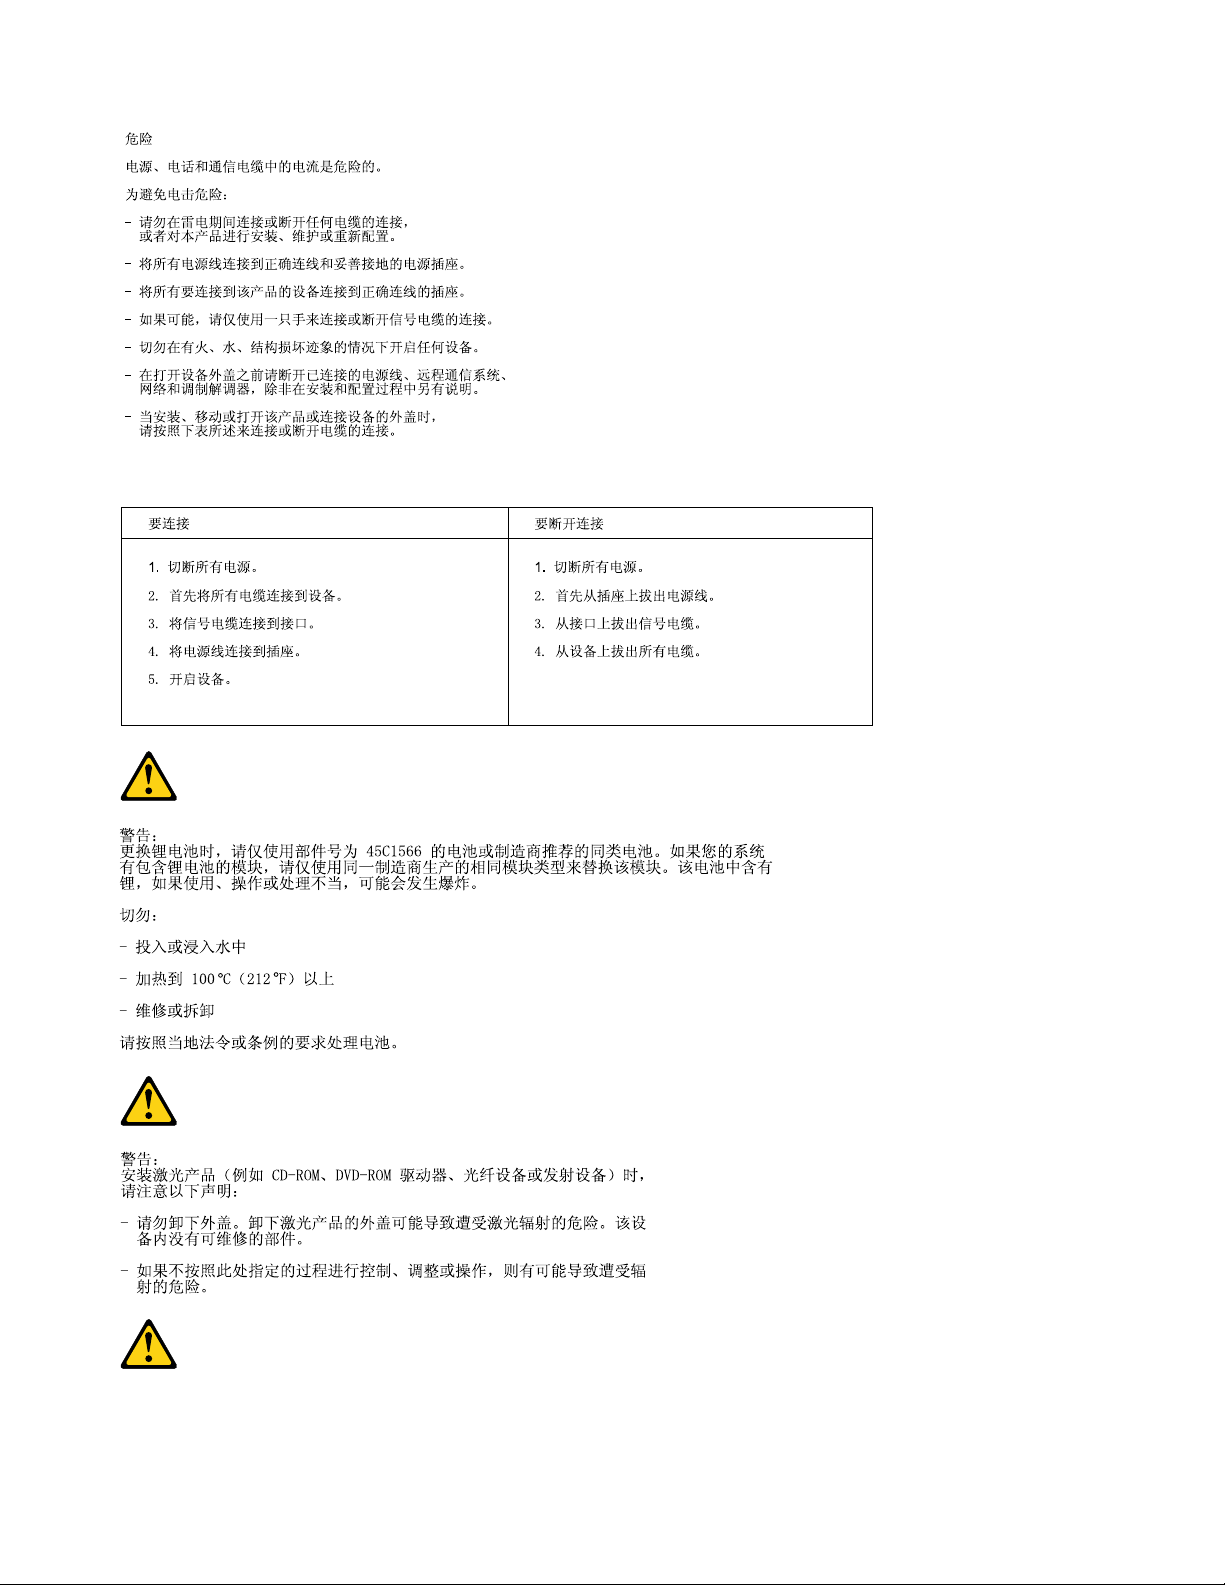
DANGER
Electricalcurrentfrompower,telephoneandcommunicationcablesishazardous.
Toavoidashockhazard:
•Donotconnectordisconnectanycablesorperforminstallation,maintenance,orreconfiguration
ofthisproductduringanelectricalstorm.
Chapter1.Readthisfirst:Importantsafetyinformation5
Page 14
•Connectallpowercordstoaproperlywiredandgroundedelectricaloutlet.
•Connecttoproperlywiredoutletsanyequipmentthatwillbeattachedtothisproduct.
•Whenpossible,useonehandonlytoconnectordisconnectsignalcables.
•Neverturnonanyequipmentwhenthereisevidenceoffire,water,orstructuraldamage.
•Disconnecttheattachedpowercords,telecommunicationssystems,networks,andmodems
beforeyouopenthedevicecovers,unlessinstructedotherwiseintheinstallationandconfiguration
procedures.
•Connectanddisconnectcablesasdescribedinthefollowingtableswheninstalling,moving,or
openingcoversonthisproductorattacheddevices.
ToConnectToDisconnect
1.TurneverythingOFF.
2.First,attachallcablestodevices.
3.Attachsignalcablestoconnectors.
4.Attachpowercordstooutlet.
5.TurndeviceON.
1.TurneverythingOFF.
2.First,removepowercordsfromoutlet.
3.Removesignalcablesfromconnectors.
4.Removeallcablesfromdevices.
CAUTION:
Whenreplacingthelithiumbattery,useonlyPartNumber45C1566oranequivalenttypebattery
recommendedbythemanufacturer.Ifyoursystemhasamodulecontainingalithiumbattery,replace
itonlywiththesamemoduletypemadebythesamemanufacturer.Thebatterycontainslithiumand
canexplodeifnotproperlyused,handled,ordisposedof.Donot:
•Throworimmerseintowater
•Heattomorethan100°C(212°F)
•Repairordisassemble
Disposeofthebatteryasrequiredbylocalordinancesorregulations.
CAUTION:
Whenlaserproducts(suchasCD-ROMs,DVD-ROMdrives,fiberopticdevices,ortransmitters)are
installed,notethefollowing:
•Donotremovethecovers.Removingthecoversofthelaserproductcouldresultinexposureto
hazardouslaserradiation.Therearenoserviceablepartsinsidethedevice.
•Useofcontrolsoradjustmentsorperformanceofproceduresotherthanthosespecifiedherein
mightresultinhazardousradiationexposure.
DANGER
SomelaserproductscontainanembeddedClass3AorClass3Blaserdiode.Notethefollowing:
Laserradiationwhenopen.Donotstareintothebeam,donotviewdirectlywithoptical
instruments,andavoiddirectexposuretothebeam.
6ThinkCentreM700HardwareMaintenanceManual
Page 15
≥18kg(37lb)≥32kg(70.5lb)≥55kg(121.2lb)
1
2
CAUTION:
Usesafepracticeswhenlifting.
CAUTION:
Thepowercontrolbuttononthedeviceandthepowerswitchonthepowersupplydonotturnoff
theelectricalcurrentsuppliedtothedevice.Thedevicealsomighthavemorethanonepower
cord.Toremoveallelectricalcurrentfromthedevice,ensurethatallpowercordsaredisconnected
fromthepowersource.
Chapter1.Readthisfirst:Importantsafetyinformation7
Page 16
8ThinkCentreM700HardwareMaintenanceManual
Page 17
≥18kg(37lb)≥32kg(70.5lb)≥55kg(121.2lb)
1
2
PERIGO
Acorrenteelétricaprovenientedecabosdealimentação,detelefoneedecomunicaçõeséperigosa.
Chapter1.Readthisfirst:Importantsafetyinformation9
Page 18
Paraevitarriscodechoqueelétrico:
•Nãoconectenemdesconectenenhumcaboouexecuteinstalação,manutençãooureconfiguração
desteprodutoduranteumatempestadecomraios.
•Conectetodososcabosdealimentaçãoatomadaselétricascorretamenteinstaladaseaterradas.
•T odoequipamentoqueforconectadoaesteprodutodeveserconectadoatomadascorretamente
instaladas.
•Quandopossível,utilizeapenasumadasmãosparaconectaroudesconectarcabosdesinal.
•Nuncaliguenenhumequipamentoquandohouverevidênciadefogo,águaoudanosestruturais.
•Antesdeabrirtampasdedispositivos,desconectecabosdealimentação,sistemasdetelecomunicação,
redesemodemsconectados,amenosqueespecificadodemaneiradiferentenosprocedimentosde
instalaçãoeconfiguração.
•Conecteedesconecteoscabosconformedescritonatabelaapresentadaaseguiraoinstalar,moverou
abrirtampasdesteprodutooudedispositivosconectados.
ParaConectar:ParaDesconectar:
1.DESLIGUETudo.
2.Primeiramente,conectetodososcabosaos
dispositivos.
3.Conecteoscabosdesinalaosconectores.
4.Conecteoscabosdealimentaçãoàstomadas.
5.LIGUEosdispositivos.
1.DESLIGUETudo.
2.Primeiramente,removaoscabosdealimentaçãodas
tomadas.
3.Removaoscabosdesinaldosconectores.
4.Removatodososcabosdosdispositivos.
CUIDADO:
Aosubstituirabateriadelítio,utilizeapenasumabateriacomNúmerodePeça45C1566ouumtipo
debateriaequivalenterecomendadopeloSeoseusistemapossuiummódulocomumabateriade
lítio,substitua-oapenasporummódulodomesmotipoedomesmofabricante.Abateriacontémlítio
epodeexplodirsenãoforutilizada,manuseadaoudescartadademaneiracorreta.
Não:
•Jogueoucoloquenaágua
•Aqueçaamaisde100°C(212°F)
•Consertenemdesmonte
Descarteabateriaconformerequeridopelasleisouregulamentoslocais.
PRECAUCIÓN:
Quandoprodutosalaser(comounidadesdeCD-ROMs,unidadesdeDVD-ROM,dispositivosdefibraótica
outransmissores)estivereminstalados,observeoseguinte:
•Nãoremovaastampas.Aremoçãodastampasdeumprodutoalaserpoderesultaremexposição
prejudicialàradiaçãodelaser.Nãoexistempeçasquepodemserconsertadasnointeriordodispositivo.
10ThinkCentreM700HardwareMaintenanceManual
Page 19
•Autilizaçãodecontrolesouajustesouaexecuçãodeprocedimentosdiferentesdosespecificadosaqui
1
2
poderesultaremexposiçãoprejudicialàradiação.
PERIGO
AlgunsprodutosalasercontêmdiododelaserintegradodaClasse3AoudaClasse3B.Observeoseguinte:
Radiaçãoalaserquandoaberto.Nãoolhediretamenteparaofeixeaolhonuoucominstrumentosópticose
eviteexposiçãodiretaaofeixe.
≥18kg(37lb)≥32kg(70.5lb)≥55kg(121.2lb)
CUIDADO:
Utilizeprocedimentosdesegurançaparalevantarequipamentos.
CUIDADO:
Obotãodecontroledealimentaçãododispositivoeobotãoparaligar/desligardafontedealimentação
nãodesligamacorrenteelétricafornecidaaodispositivo.Odispositivotambémpodetermaisdeumcabo
dealimentação.Pararemovertodaacorrenteelétricadodispositivo,assegurequetodososcabosde
alimentaçãoestejamdesconectadosdafontedealimentação.
Chapter1.Readthisfirst:Importantsafetyinformation11
Page 20
12ThinkCentreM700HardwareMaintenanceManual
Page 21
1
2
Chapter1.Readthisfirst:Importantsafetyinformation13
Page 22

1
2
14ThinkCentreM700HardwareMaintenanceManual
Page 23
DANGER
Lecourantélectriqueprovenantdel'alimentation,dutéléphoneetdescâblesdetransmissionpeutprésenter
undanger.
Pourévitertoutrisquedechocélectrique:
•Nemanipulezaucuncâbleetn'effectuezaucuneopérationd'installation,d'entretienoudereconfiguration
deceproduitaucoursd'unorage.
•Brancheztouslescordonsd'alimentationsurunsocledeprisedecourantcorrectementcâbléetmisàla
terre.
•Branchezsurdessoclesdeprisedecourantcorrectementcâbléstoutéquipementconnectéàceproduit.
•Lorsquecelaestpossible,n'utilisezqu'uneseulemainpourconnecteroudéconnecterlescâbles
d'interface.
•Nemettezjamaisunéquipementsoustensionencasd'incendieoud'inondation,ouenprésencede
dommagesmatériels.
•Avantderetirerlescartersdel'unité,mettezcelle-cihorstensionetdéconnectezsescordons
d'alimentation,ainsiquelescâblesquilarelientauxréseaux,auxsystèmesdetélécommunicationetaux
modems(saufinstructioncontrairementionnéedanslesprocéduresd'installationetdeconfiguration).
•Lorsquevousinstallez,quevousdéplacez,ouquevousmanipulezleprésentproduitoudespériphériques
quiluisontraccordés,reportez-vousauxinstructionsci-dessouspourconnecteretdéconnecterles
différentscordons.
ConnexionDéconnexion
1.MettezlesunitésHORSTENSION.
2.Commencezparbranchertouslescordonssurles
unités.
3.Branchezlescâblesd'interfacesurdesconnecteurs.
4.Branchezlescordonsd'alimentationsurdesprises.
5.MettezlesunitésSOUSTENSION.
1.MettezlesunitésHORSTENSION.
2.Débranchezlescordonsd'alimentationdesprises.
3.Débranchezlescâblesd'interfacedesconnecteurs.
4.Débrancheztouslescâblesdesunités.
ATTENTION:
Remplacerlapileaulithiumusagéeparunepilederéférenceidentiqueexclusivement,(référence
45C1566),ousuivrelesinstructionsdufabricantquiendéfinitleséquivalences.Sivotresystèmeest
dotéd'unmodulecontenantunepileaulithium,vousdevezleremplaceruniquementparunmodule
identique,produitparlemêmefabricant.Lapilecontientdulithiumetpeutexploserencasde
mauvaiseutilisation,demauvaisemanipulationoudemiseaurebutinappropriée.
Nepas:
•lajeteràl'eau,
•l'exposeràdestempératuressupérieuresà100°C,
•chercheràlaréparerouàladémonter.
Nepasmettrelapileàlapoubelle.Pourlamiseaurebut,sereporteràlaréglementationenvigueur.
Chapter1.Readthisfirst:Importantsafetyinformation15
Page 24
ATTENTION:
Sidesproduitsàlaser(telsquedesunitésdeCD-ROM,deDVD-ROM,desunitésàfibresoptiques,ou
desémetteurs)sontinstallés,prenezconnaissancedesinformationssuivantes:
•Neretirezpaslecarter.Enouvrantl'unitédeCD-ROMoudeDVD-ROM,vousvousexposezau
rayonnementdangereuxdulaser.Aucunepiècedel'unitén'estréparable.
•Pourévitertoutrisqued'expositionaurayonlaser,respectezlesconsignesderéglageet
d'utilisationdescommandes,ainsiquelesprocéduresdécritesdansleprésentmanuel.
DANGER
Certainsproduitsàlasercontiennentunediodeàlaserintégréedeclasse3Aou3B.Prenez
connaissancedesinformationssuivantes:
Rayonnementlaserlorsquelecarterestouvert.Eviteztouteexpositiondirecteaurayonlaser.Evitez
deregarderfixementlefaisceauoudel'observeràl'aided'instrumentsoptiques.
≥18kg(37lb)≥32kg(70.5lb)≥55kg(121.2lb)
ATTENTION:
Soulevezlamachineavecprécaution.
ATTENTION:
L'interrupteurdecontrôled'alimentationdel'unitéetl'interrupteurdublocd'alimentationnecoupent
paslecourantélectriquealimentantl'unité.Enoutre,lesystèmepeutêtreéquipédeplusieurs
cordonsd'alimentation.Pourmettrel'unitéhorstension,vousdevezdéconnectertouslescordons
delasourced'alimentation.
16ThinkCentreM700HardwareMaintenanceManual
Page 25
1
2
VORSICHT
AnNetz-,Telefon-undDatenleitungenkönnengefährlicheSpannungenanliegen.
AusSicherheitsgründen:
•BeiGewitterandiesemGerätkeineKabelanschließenoderlösen.FernerkeineInstallations-,
Wartungs-oderRekonfigurationsarbeitendurchführen.
•GerätnuraneineSchutzkontaktsteckdosemitordnungsgemäßgeerdetemSchutzkontakt
anschließen.
•AlleangeschlossenenGeräteebenfallsanSchutzkontaktsteckdosenmitordnungsgemäß
geerdetemSchutzkontaktanschließen.
•DieSignalkabelnachMöglichkeiteinhändiganschließenoderlösen,umeinenStromschlagdurch
BerührenvonOberflächenmitunterschiedlichemelektrischemPotenzialzuvermeiden.
•Geräteniemalseinschalten,wennHinweiseaufFeuer,WasseroderGebäudeschädenvorliegen.
•DieVerbindungzudenangeschlossenenNetzkabeln,T elekommunikationssystemen,Netzwerken
undModemsistvordemÖffnendesGehäuseszuunterbrechen,sofernindenInstallations-und
KonfigurationsprozedurenkeineanderslautendenAnweisungenenthaltensind.
•ZumInstallieren,TransportierenundÖffnenderAbdeckungendesComputersoderder
angeschlossenenEinheitendieKabelgemäßderfolgendenT abelleanschließenundabziehen.
ZumAnschließenderKabelgehenSiewiefolgtvorZumAbziehenderKabelgehenSiewiefolgtvor
1.SchaltenSiealleEinheitenAUS.
2.SchließenSieerstalleKabelandieEinheitenan.
3.SchließenSiedieSignalkabelandieBuchsenan.
4.SchließenSiedieNetzkabelandieSteckdosean.
5.SchaltenSiedieEinheitEIN.
1.SchaltenSiealleEinheitenAUS.
2.ZiehenSiezuerstalleNetzkabelausden
Netzsteckdosen.
3.ZiehenSiedieSignalkabelausdenBuchsen.
4.ZiehenSiealleKabelvondenEinheitenab.
CAUTION:
EineverbrauchteLithiumbatterienurdurcheineBatteriemitderTeilenummer45C1566odereine
gleichwertige,vomHerstellerempfohleneBatterieersetzen.EnthältdasSystemeinModulmiteiner
Lithiumbatterie,diesesnurdurcheinModuldesselbenTypsundvondemselbenHerstellerersetzen.
DieBatterieenthältLithiumundkannbeiunsachgemäßerVerwendung,HandhabungoderEntsorgung
explodieren.
DieBatterienicht:
•mitWasserinBerührungbringen.
Chapter1.Readthisfirst:Importantsafetyinformation17
Page 26
•über100Cerhitzen.
•reparierenoderzerlegen.
DieörtlichenBestimmungenfürdieEntsorgungvonSondermüllbeachten.
ACHTUNG:
BeiderInstallationvonLasergeräten(wieCD-ROM-Laufwerken,DVD-aufwerken,Einheitenmit
LichtwellenleitertechnikoderSendern)Folgendesbeachten:
•DieAbdeckungennichtentfernen.DurchEntfernenderAbdeckungendesLasergerätskönnen
gefährlicheLaserstrahlungenfreigesetztwerden.DasGerätenthältkeinezuwartendenTeile.
•WerdenSteuerelemente,EinstellungenoderDurchführungenvonProzedurenandersalshier
angegebenverwendet,kanngefährlicheLaserstrahlungauftreten.
VORSICHT
EinigeLasergeräteenthalteneineLaserdiodederKlasse3Aoder3B.BeachtenSieFolgendes:
LaserstrahlungbeigeöffneterVerkleidung.NichtindenStrahlblicken.KeineLupenoderSpiegel
verwenden.Strahlungsbereichmeiden.
≥18kg≥32kg≥55kg
ACHTUNG:
ArbeitsschutzrichtlinienbeimAnhebenderMaschinebeachten.
ACHTUNG:
MitdemNetzschalteranderEinheitundamNetzteilwirddieStromversorgungfürdieEinheit
nichtunterbrochen.DieEinheitkannauchmitmehrerenNetzkabelnausgestattetsein.Umdie
StromversorgungfürdieEinheitvollständigzuunterbrechen,müssenallezumGerätführenden
NetzkabelvomNetzgetrenntwerden.
18ThinkCentreM700HardwareMaintenanceManual
Page 27
1
2
Chapter1.Readthisfirst:Importantsafetyinformation19
Page 28
1
2
20ThinkCentreM700HardwareMaintenanceManual
Page 29
PERICOLO
Lacorrenteelettricaprovenientedaicavidialimentazione,deltelefonoedicomunicazionepuòessere
pericolosa.
Perevitareilrischiodiscosseelettriche:
•Noncollegareoscollegarequalsiasicavooppureeffettuarel'installazione,lamanutenzioneola
riconfigurazionedelprodottoduranteuntemporale.
•Collegaretuttiifilielettriciaunapresadialimentazionecorrettamentecablataedotatadimessaa
terra.
•Collegareallepreseelettricheappropriatetutteleapparecchiaturecheverrannoutilizzateper
questoprodotto.
•Sepossibile,utilizzaresolounamanopercollegareoscollegareicavidisegnale.
•Nonaccendereassolutamenteapparecchiatureinpresenzadiincendi,perdited'acquaodanno
strutturale.
•Scollegareicavidialimentazione,isistemiditelecomunicazione,leretieilmodemprimadi
aprireicoperchideldispositivo,salvoistruzionicontrarierelativealleprocedurediinstallazionee
configurazione.
•Collegareescollegareicavicomedescrittonellaseguentetabellaquandovengonoeffettuate
operazionidiinstallazione,spostamentooaperturadeicoperchidiquestoprodottoodelleunità
collegate.
PercollegarsiPerscollegarsi
1.SPEGNEREleapparecchiature.
2.Innanzitutto,collegaretuttiicavialleunità.
3.Collegareicavidisegnaleaiconnettori.
4.Collegareicavidialimentazioneallapresa.
5.Accenderel'unità.
1.SPEGNEREleapparecchiature.
2.Innanzitutto,rimuovereicavidialimentazionedalla
presa.
3.Rimuovereicavidisegnaledaiconnettori.
4.Rimuoveretuttiicavidalleunità.
ATTENZIONE:
Quandosisostituiscelabatteriaallitio,utilizzaresoloilNumeroparte45C1566ountipodibatteria
equivalenteconsigliatodalproduttore.Sesulsistemaèpresenteunmodulochecontieneunabatteria
allitio,sostituirlosoloconuntipodimodulodellostessotipodellastessacasadiproduzione.La
batteriacontienelitioepuòesplodereseusata,maneggiataosmaltitainmodononcorretto.
Non:
•Gettareoimmergerelabatterianell'acqua
•Riscaldarlaadunatemperaturasuperioreai100gradiC(212gradiF)
•Smontarla,ricaricarlaotentarediripararla
Lebatterieusatevannosmaltiteinaccordoallanormativainvigore(DPR915/82esuccessive
disposizioniedisposizionilocali).
Chapter1.Readthisfirst:Importantsafetyinformation21
Page 30
ATTENZIONE:
1
2
Quandovengonoinstallatiprodottilaser(qualiCD-ROM,unitàDVD-ROM,unitàafibreotticheo
trasmittenti),tenerpresentequantosegue:
•Nonrimuovereglisportelli.L'aperturadiun'unitàlaserpuòdeterminarel'esposizionearadiazioni
laserpericolose.All'internodell'unitànonvisonopartisucuieffettuarel'assistenzatecnica.
•L'utilizzodicontrolli,regolazioniol'esecuzionediprocedurenondescrittinelpresentemanuale
possonoprovocarel'esposizionearadiazionipericolose.
PERICOLO
AlcuneunitàlasercontengonoundiodolaserdiClasse3AoClasse3B.Tenerpresentequantosegue:
Aprendol'unitàvengonoemesseradiazionilaser.Nonfissareilfascio,nonguardarlodirettamente
construmentiotticiedevitarel'esposizionealfascio.
≥18kg≥32kg≥55kg
ATTENZIONE:
Prestareattenzionenelsollevarel'apparecchiatura.
ATTENZIONE:
Ilpulsantedicontrollodell'alimentazionepresentesull'unitàel'interruttoredell'alimentatorenon
disattivanol'alimentazionecorrentefornitaall'unità.E'possibilechel'unitàdispongadipiùcavidi
alimentazione.Perdisattivarel'alimentazionedall'unità,accertarsichetuttiicavidialimentazione
sianoscollegatidallafontedialimentazione.
22ThinkCentreM700HardwareMaintenanceManual
Page 31

Chapter1.Readthisfirst:Importantsafetyinformation23
Page 32

1
2
PELIGRO
Lacorrienteeléctricaprocedentedecablesdealimentación,teléfonosycablesdecomunicaciónpuede
serpeligrosa.
Paraevitarelriesgodedescargaeléctrica:
•Noconectenidesconecteloscablesnirealiceningunatareadeinstalación,mantenimientoo
reconfiguracióndeesteproductoduranteunatormentaeléctrica.
•Conectetodosloscablesdealimentaciónatomasdecorrientedebidamentecableadasy
conectadasatierra.
•Cualquierequipoqueseconecteaesteproductotambiéndebeconectarseatomasdecorriente
debidamentecableadas.
•Siemprequeseaposible,utiliceunasolamanoparaconectarodesconectarloscablesdeseñal.
24ThinkCentreM700HardwareMaintenanceManual
Page 33

•Noenciendanuncaunequipocuandohayseñalesdefuego,aguaodañosestructurales.
•Desconecteloscablesdealimentación,lossistemasdetelecomunicaciones,lasredesylos
módemsconectadosantesdeabrirlascubiertasdelosdispositivos,amenosqueseindiquelo
contrarioenlosprocedimientosdeinstalaciónyconfiguración.
•Conecteydesconecteloscables,comosedescribeenlatablasiguiente,cuandoinstale,muevao
abralascubiertasdeesteproductoodelosdispositivosconectados.
ParaconectarParadesconectar
1.APÁGUELOtodo.
2.Enprimerlugar,conectetodosloscablesalos
dispositivos.
3.Conecteloscablesdeseñalalosconectores.
4.Enchufeloscablesdealimentaciónalastomasde
corriente.
5.Enciendaeldispositivo.
1.APÁGUELOtodo.
2.Enprimerlugar,desenchufeloscablesdealimentación
delastomasdecorriente.
3.Desconecteloscablesdeseñaldelosconectores.
4.Desconectetodosloscablesdelosdispositivos.
PRECAUCIÓN:
Cuandosustituyaunabateríadelitio,utilicesolamenteunabateríanúmerodepieza45C1566uotra
detipoequivalenterecomendadaporelfabricante.Sisusistemadisponedeunmóduloquecontiene
unabateríadelitio,reemplácelosóloconelmismotipodemódulo,delmismofabricante.Labatería
contienelitioypuedeexplotarsinoseutiliza,manipulaodesechacorrectamente.
Nodebe:
•Arrojarlaalaguaosumergirlaenella
•Exponerlaatemperaturassuperioresa100°C(212°F)
•Repararlaodesmontarla
Deshágasedelabateríasegúnespecifiquenlasleyesonormaslocales.
PRECAUCIÓN:
Cuandohayaproductosláser(comounidadesdeCD-ROM,unidadesdeDVD,dispositivosdefibra
ópticaotransmisores)instalados,tengaencuentalosiguiente:
•Noquitelascubiertas.Siquitalascubiertasdelproductoláser,podríaquedarexpuestoaradiación
láserpeligrosa.Dentrodeldispositivonoexisteningunapiezaquerequieraserviciotécnico.
•Siusacontrolesoajustesorealizaprocedimientosquenoseanlosespecificadosaquí,podría
exponersearadiacionespeligrosas.
PELIGRO
Chapter1.Readthisfirst:Importantsafetyinformation25
Page 34

Algunosproductoslásertienenincorporadoundiodoláserdeclase3Aoclase3B.T engaencuentalo
1
2
siguiente:
Cuandoseabre,quedaexpuestoaradiaciónláser.Nomiredirectamentealrayoláser,nisiquieracon
instrumentosópticos,yeviteexponersedirectamentealrayoláser.
≥18kg≥32kg≥55kg
PRECAUCIÓN:
Adopteprocedimientossegurosallevantarelequipo.
PRECAUCIÓN:
Elbotóndecontroldealimentacióndeldispositivoyelinterruptordealimentacióndelafuentede
alimentaciónnodesconectanlacorrienteeléctricasuministradaaldispositivo.Además,eldispositivo
podríatenermásdeuncabledealimentación.Parasuprimirtodalacorrienteeléctricadeldispositivo,
asegúresedequetodosloscablesdealimentaciónesténdesconectadosdelatomadecorriente.
26ThinkCentreM700HardwareMaintenanceManual
Page 35

Chapter2.Productoverview
Thischapterprovidesinformationaboutthefollowingtopics:
•“Hardwarelocations”onpage27
•“Features”onpage38
•“Specifications”onpage41
•“Programs”onpage41
Hardwarelocations
Thissectionprovidesinformationaboutthelocationsofthecomputerhardware.
Note:Thecomputerhardwaremightlookslightlydifferentfromtheillustrations.
Frontview
Figure1.Frontview
1Powerbutton2Powerindicator
3Storagedriveactivityindicator4USB3.0connector
5Microphoneconnector6Headphoneconnector
7USB3.0connector8Internalspeaker(somemodels)
©CopyrightLenovo2016
27
Page 36

9Cardreaderslot(somemodels)10USB2.0connectors(2)(somemodels)
11Opticaldriveactivityindicator12Opticaldriveeject/closebutton
•Cardreaderslot
Usedtoholdacard-shapedstoragemediumsothatthecardreadercanreadthedataonthestorage
medium.
•Headphoneconnector
Usedtoconnectheadphonestoyourcomputer.
•Internalspeaker
Usedtolistentothesoundsfromyourcomputerwithoutusingaheadsetorheadphones.
•Microphoneconnector
Usedtoconnectamicrophonetoyourcomputer.Youcanusethemicrophonetorecordsoundsoruse
speech-recognitionsoftware.
•Opticaldriveactivityindicator
Whentheopticaldriveactivityindicatorison,theopticaldriveisinuse.
•Opticaldriveeject/closebutton
Usedtoejectthetrayoftheopticaldrivefromthedrive.Afteryouinsertadiscintothetray,press
theeject/closebuttontoclosethetray.
•Powerbutton
Usedtoturnonyourcomputer.Youalsocanusethepowerbuttontoturnoffyourcomputeronlywhen
youcannotuseanyMicrosoft
®
Windows
®
shutdownproceduretoturnoffyourcomputer.
•Powerindicator
Whenthepowerindicatorison,thecomputerison.
•Storagedriveactivityindicator
Whenthestoragedriveactivityindicatorison,thestoragedriveisinuse.
•USB2.0connector
UsedtoconnectadevicethatrequiresaUSB2.0connection,suchasakeyboard,amouse,ascanner,a
printer,orapersonaldigitalassistant(PDA).
•USB3.0connector
UsedtoconnectadevicethatrequiresaUSB2.0orUSB3.0connection,suchasakeyboard,amouse,a
scanner,aprinter,oraPDA.
28ThinkCentreM700HardwareMaintenanceManual
Page 37

Rearview
Figure2.Rearview
1Powercordconnector
3PS/2keyboardconnector
5Serialconnector6VGA-outconnector
7USB3.0connectors(2)8USB2.0connectors(2)
9Microphoneconnector10Audioline-outconnector
11Audioline-inconnector
2PS/2mouseconnector
4DisplayPort
12PCIExpresscardarea(differentcardsprovide
®
-outconnector
differentconnectors)
13Ethernetconnector
15Padlockloop
14Security-lockslot
16Cablelockslots(2)
Note:Adiscretegraphicscard,networkinterfacecard,oraudiocardmightbeinstalledinthePeripheral
ComponentInterconnect(PCI)Expresscardarea.Ifsuchacardisinstalled,ensurethatyouusethe
connectorsonthecardinsteadofthecorrespondingconnectorsonthecomputer.
•Audioline-inconnector
Usedtoreceiveaudiosignalsfromanexternalaudiodevice,suchasastereosystem.Whenyouattach
anexternalaudiodevice,acableisconnectedbetweentheaudioline-outconnectorofthedevice
andtheaudioline-inconnectorofthecomputer.
Chapter2.Productoverview29
Page 38

•Audioline-outconnector
Usedtosendaudiosignalsfromthecomputertoexternaldevices,suchaspoweredstereospeakers,
headphones,ormultimediakeyboards.Toattachastereosystemorotherexternalrecordingdevice,a
cableisconnectedbetweentheaudioline-inconnectorofthedeviceandtheaudioline-outconnector
ofthecomputer.
Note:Ifyourcomputerhasbothanaudioline-outconnectorandaheadsetconnectororheadphone
connector,alwaysusetheheadsetconnectororheadphoneconnectorforearphones,headphones,ora
headset.However,aheadphoneconnectordoesnotsupportthemicrophoneofaheadset.
•Cable-lockslots(2)
Usedtosecureacablelock.Formoreinformation,see“Attachingacablelock”onpage60
.
•DisplayPort-outconnector
Usedtosendaudioandvideosignalsfromyourcomputertoanotheraudioorvideodevice,suchas
ahigh-performancemonitor.
•Ethernetconnector
UsedtoconnectanEthernetcableforalocalareanetwork(LAN).
Note:TooperatethecomputerwithinFederalCommunicationsCommission(FCC)ClassBlimits,usea
Category5eorbetterEthernetcable.
•Microphoneconnector
Usedtoconnectamicrophonetoyourcomputerwhenyouwanttorecordsoundorifyouuse
speech-recognitionsoftware.
•Padlockloop
Usedtosecureapadlock.Formoreinformation,see“Lockingthecomputercover”onpage58
.
•PCIExpresscardarea(differentcardsprovidedifferentconnectors)
Toimprovetheoperatingperformanceofyourcomputer,youcanconnectPCIExpresscardsintothis
area.Dependingonyourcomputermodel,theconnectorsinthisareamightvary.
•Powercordconnector
Usedtoconnectthepowercordtoyourcomputerforpowersupply.
•PS/2keyboardconnector
UsedtoconnectakeyboardthatusesaPersonalSystem/2(PS/2)keyboardconnector.
•PS/2mouseconnector
Usedtoconnectamouse,atrackball,orotherpointingdevicesthatuseaPS/2mouseconnector.
•Serialconnector
Usedtoconnectanexternalmodem,aserialprinter,orotherdevicesthatuseaserialconnector.
•Security-lockslot
UsedtosecureaKensington-stylecablelock.Formoreinformation,see“AttachingaKensington-style
cablelock”onpage59
.
•USB2.0connector
UsedtoconnectadevicethatrequiresaUSB2.0connection,suchasakeyboard,amouse,ascanner,a
printer,orapersonaldigitalassistant(PDA).
•USB3.0connector
UsedtoconnectadevicethatrequiresaUSB2.0orUSB3.0connection,suchasakeyboard,amouse,a
scanner,aprinter,oraPDA.
30ThinkCentreM700HardwareMaintenanceManual
Page 39

•VGA-outconnector
Usedtosendvideosignalsfromyourcomputertoanothervideodevice,suchasamonitor.
Chapter2.Productoverview31
Page 40

Computercomponents
Note:Dependingonyourcomputermodel,someofthefollowingcomponentsmightnotbeavailable.
Figure3.Computercomponents
1Computercover
3Memorymodule
5Opticaldrive6Opticaldrivebezel
7Secondarystoragedrive(a2.5-inchstoragedrive)8Secondarystoragedrivebracket
9Powerbuttonboard
11Cardreader12CardreaderandUSB2.0assemblybracket
13FrontaudioandUSB3.0assembly
15Systemfan
17Internalspeaker
2Powersupplyassembly
4Opticaldrivebracket
10USB2.0assembly
14FrontWi-Fiantenna
16Thermalsensor
18Coverpresenceswitch(alsocalledintrusionswitch)
32ThinkCentreM700HardwareMaintenanceManual
Page 41

19Coin-cellbattery
20Primarystoragedrivebracketandprimarystorage
drive(a2.5-inchor3.5-inchstoragedrive)
21PCIExpresscard
23Wi-Ficard24M.2solid-statedrive
25Heatsinkandfanassembly(withthemicroprocessor
22RearWi-Fiantenna
26Frontbezel
underneath)
27Powercord
Chapter2.Productoverview33
Page 42

MajorFRUsandCRUs
29
32
Note:Dependingonyourcomputermodel,someofthefollowingcomponentsmightnotbeavailable.
Figure4.MajorFRUsandCRUs
ThefollowingtableliststhemajorFRUsshownintheillustrationaboveandidentifieswhichFRUsare
alsoself-serviceCRUsoroptional-serviceCRUs.
34ThinkCentreM700HardwareMaintenanceManual
Page 43

Notes:
•Self-serviceCRUs:TheseCRUsunplugoraresecuredbynomorethantwoscrews.Examplesof
thesetypesofCRUsincludethekeyboard,themouse,anyUSBdevice,andthepowercord.Other
self-serviceCRUsdependingonproductdesignmightincludememorymodules,adaptercards,hard
diskdrives,andopticaldrives.
•Optional-serviceCRUs:TheseCRUsareisolatedpartswithinthecomputerandareconcealedbyan
accesspanelthatistypicallysecuredbymorethantwoscrews.Oncetheaccesspanelisremoved,the
specificCRUisvisible.
NumberFRUdescription
1
2
3
4
5
6
7
8
9
10
11
12
13
14
15
16
17
Computercover
Opticaldrivebracket
Opticaldrive
Opticaldrivebezel
PowersupplyassemblyNoYes
Secondarystoragedrive(a2.5-inchstoragedrive)
Secondarystoragedrivebracket
USB2.0assembly
Cardreader
CardreaderandUSB2.0assemblybracket
PowerbuttonboardNoNo
FrontaudioandUSB3.0assembly
FrontWi-FiantennaNoNo
Systemfan
ThermalsensorNoNo
InternalspeakerNoNo
Coverpresenceswitch(alsocalledintrusion
switch)
18
19
PrimarystoragedrivebracketYesNo
Primarystoragedrive(a2.5-inchor3.5-inch
storagedrive)
20
21
22
23
24
25
26
27
28
29
30
Chassis
RearWi-FiantennaNoNo
M.2solid-statedriveYesNo
Wi-FicardNoNo
PCIExpresscard
Systemboard
Coin-cellbattery
MicroprocessorNoNo
MemorymoduleYesNo
Heatsinkfanduct
Heatsinkandfanassembly
Self-serviceCRUOptional-serviceCRU
YesNo
YesNo
YesNo
YesNo
YesNo
YesNo
NoNo
NoNo
NoNo
NoNo
NoNo
NoNo
YesNo
NoNo
YesNo
NoNo
YesNo
NoNo
NoYes
Chapter2.Productoverview35
Page 44

NumberFRUdescription
31
32
FrontbezelYesNo
PowercordYesNo
Self-serviceCRUOptional-serviceCRU
FordetailedFRUinformation,suchastheFRUpartnumbersandsupportedcomputermodels,goto:
http:/www.lenovo.com/serviceparts-lookup
36ThinkCentreM700HardwareMaintenanceManual
Page 45

Partsonthesystemboard
Note:Forthepartsthataredisplayedonthefollowingfigurebutnotintroducedinthefollowingtable,see
“Frontview”onpage27and“Rearview”onpage29.
Figure5.Partsonthesystemboard
14-pinpowerconnector
3Memoryslot(DIMM1)4Memoryslot(DIMM2)
5Thermalsensorconnector610-pinpowerconnector
7Auxiliaryfanconnector2(forconnectingthefanonthe
2Microprocessorfanconnector
8SATApowerconnectors(2)
secondarystoragedrivebracket)
9FrontUSB3.0connector10Coin-cellbattery
11SATA3.0connectors(3)
13Auxiliaryfanconnector1
15Cardreaderconnector16FrontUSB2.0connector
17PCH
19Serial(COM2)connector
21Internalspeakerconnector
12Parallelconnector
14Powerbuttonboardconnector
18Buzzer
20Frontaudioconnector
22Coverpresenceswitchconnector(Intrusionswitch
connector)
23PCIExpressx1cardslot(2)24PCIExpressx16graphicscardslot
25Systemfanconnector
Chapter2.Productoverview37
Page 46

Machinetypeandmodellabel
Themachinetypeandmodellabelidentifiesyourcomputer.WhenyoucontactLenovoforhelp,themachine
typeandmodelinformationhelpssupporttechnicianstoidentifyyourcomputerandprovidefasterservice.
Themachinetypeandmodellabelisattachedonthesideofyourcomputerasshown.
Figure6.Machinetypeandmodellabel
Features
Thecomputerfeaturesintroducedinthissectionapplytovariousmodels.
Informationaboutyourcomputer
•T oviewbasicinformation(suchasmicroprocessorandmemoryinformation)aboutyourcomputer,
dothefollowing:
1.ClicktheStartbuttontoopentheStartmenu.
2.DependingonyourWindowsversion,dooneofthefollowing:
–ForWindows7:Right-clickComputer,andthenclickProperties.
–ForWindows10:ClickSettings➙System➙About.
•T oviewdetailedinformationaboutthedevices(suchastheopticaldriveandnetworkadapters)onyour
computer,dothefollowing:
1.DependingonyourWindowsversion,dooneofthefollowing:
–ForWindows7:ClicktheStartbuttontoopentheStartmenu.Right-clickComputer,andthen
clickProperties.
–ForWindows10:Right-clicktheStartbuttontoopentheStartcontextmenu.
2.ClickDeviceManager.Typetheadministratorpasswordorprovideconfirmationifprompted.
38ThinkCentreM700HardwareMaintenanceManual
Page 47

Preinstalledoperatingsystem
YourcomputerispreinstalledwithWindows7orWindows10operatingsystem.Additionaloperating
systemsmightbeidentifiedbyLenovoascompatiblewithyourcomputer.Todetermineifanoperating
systemhasbeencertifiedortestedforcompatibility,checktheWebsiteoftheoperatingsystemprovider.
Powersupply
•180-wattautomaticvoltage-sensingpowersupply
•210-wattautomaticvoltage-sensingpowersupply
Storagedrives
Yourcomputersupportsuptotwostoragedrives.
Toviewtheamountofstoragedrivespace,dothefollowing:
1.DependingonyourWindowsversion,dooneofthefollowing:
•ForWindows7:ClicktheStartbuttontoopentheStartmenu.Right-clickComputer,andthenclick
Manage.
•ForWindows10:Right-clicktheStartbuttontoopentheStartcontextmenu.
2.ClickDiskManagement.
Videofeatures
•Theintegratedgraphicscardsupportsthefollowingdisplayconnectorsonyourcomputer:
–DisplayPort-outconnector
–VGA-outconnector
•Thediscretegraphicscard,whichisavailableonsomemodels,providesenhanceddisplaycapability
andexperience.
Audiofeatures
•Theintegratedaudiocardsupportsthefollowingaudioconnectorsanddevicesonyourcomputer:
–Audioline-inconnector
–Audioline-outconnector
–Headphoneconnector
–Internalspeaker(availableonsomemodels)
–Microphoneconnector
•Thediscreteaudiocard,whichisavailableonsomemodels,providesenhancedaudiocapabilityand
experience.
Input/Output(I/O)features
•Audioconnectors(audioline-inconnector,audioline-outconnector,headphoneconnector,and
microphoneconnector)
•Cardreaderslot(availableonsomemodels)
•Displayconnectors(DisplayPort-outconnectorandVGA-outconnector)
•Ethernetconnector
•PS/2keyboardconnector(availableonsomemodels)
•PS/2mouseconnector(availableonsomemodels)
•Serialconnector
Chapter2.Productoverview39
Page 48

•USBconnector
Expansion
•Cardreader(availableonsomemodels)
•Memoryslot
•Opticaldrive
•PCIExpressx1cardslot
•PCIExpressx16graphicscardslot
•Storagedrivebay
Networkfeatures
•EthernetLAN
–TheintegratednetworkinterfacecardsupportstheEthernetconnectoronyourcomputer.
–Thediscretenetworkinterfacecard,whichisavailableonsomemodels,providesanadditional
Ethernetconnector.
•WirelessLAN(availableonsomemodels)
•Bluetooth(availableonsomemodels)
Securityfeatures
Formoreinformation,seeChapter5“Security”onpage57.
Systemmanagementfeatures
•Abilitytostorepower-onself-test(POST)hardwaretestresults
•DesktopManagementInterface(DMI)
DesktopManagementInterfaceprovidesacommonpathforuserstoaccessinformationaboutall
aspectsofacomputer.Theinformationincludesprocessortype,installationdate,connectedprintersand
otherperipherals,powersources,maintenancehistory,andsoon.
•ErPLPScompliancemode
Theenergy-relatedproductsdirective(ErP)lowestpowerstate(LPS)compliancemodereducesthe
consumptionofelectricitywhenyourcomputerisinsleeporoffmode.Formoreinformation,see
“EnablingordisablingtheErPLPScompliancemode”onpage64
•Intel
®
StandardManageability
.
IntelStandardManageabilityishardware-andfirmware-basedtechnologythatmakescomputerseasier
andlessexpensiveforbusinessestomonitor,maintain,update,upgrade,andrepair.
•IntelActiveManagementTechnology(AMT)(availableonsomemodels)
IntelActiveManagementT echnologyishardware-andfirmware-basedtechnologythatmakescomputers
easierandlessexpensiveforbusinessestomonitor,maintain,update,upgrade,andrepair.
•PrebootExecutionEnvironment(PXE)
PrebootExecutionEnvironmentenablescomputerstostartthroughanetworkinterfaceindependentof
datastoragedrives(suchasharddiskdrives)orinstalledoperatingsystems.
•SystemManagement(SM)BasicInput/OutputSystem(BIOS)andSMsoftware
TheSMBIOSspecificationdefinesdatastructuresandaccessmethodsthatcanbeusedtoread
managementdatastoredintheBIOSofacomputer.
40ThinkCentreM700HardwareMaintenanceManual
Page 49

•WakeonLAN
WakeonLANisanEthernetcomputernetworkingstandardthatallowsacomputertobeturnedon
orwokenupbyanetworkmessage.Themessageusuallyissentbyaprogramrunningonanother
computeronthesameLAN.
•WakeonRing
WakeonRing,sometimesreferredtoasWakeonModem,isaspecificationthatallowssupported
computersanddevicestoresumefromsleeporhibernationmode.
•WindowsManagementInstrumentation(WMI)
WindowsManagementInstrumentationisasetofextensionstotheWindowsDriverModel.Itprovidesan
operatingsysteminterfacethroughwhichinstrumentedcomponentsprovideinformationandnotification.
Specifications
Thissectionliststhephysicalspecificationsforyourcomputer.
Dimensions
Width:92.8mm(3.7inches)
Height:342.8mm(13.5inches)
Depth:363.7mm(14.3inches)
Weight(withoutthepackage)
Maximumconfigurationasshipped:5.6kg(12.3lb)
Environment
•Airtemperature:
Operating:From10°C(50°F)to35°C(95°F)
Storageinoriginalshippingpackage:From-40°C(-40°F)to60°C(140°F)
Storagewithoutpackage:From-10°C(14°F)to60°C(140°F)
•Humidity:
Operating:20%–80%(non-condensing)
Storage:20%–90%(non-condensing)
•Altitude:
Operating:From-15.2m(-50ft)to3048m(10000ft)
Storage:From-15.2m(-50ft)to10668m(35000ft)
Electricalinput
Inputvoltage:From100Vacto240Vac
Inputfrequency:50/60Hz
Programs
Thissectionprovidesinformationabouttheprogramsonthecomputer.
Accessingaprogramonthecomputer
Toaccessaprogramonthecomputer,dooneofthefollowing:
•FromWindowsSearch:
1.DependingonyourWindowsversion,dooneofthefollowing:
Chapter2.Productoverview41
Page 50

–ForWindows7:ClicktheStartbuttontoopentheStartmenu,andthentypetheprogramname
intothesearchbox.
–ForWindows10:T ypetheprogramnameintothesearchboxnexttotheStartbutton.
2.Inthesearchresults,clickthenameofthedesiredprogramtolaunchtheprogram.
•FromtheStartmenuorControlPanel:
1.ClicktheStartbuttontoopentheStartmenu.
2.DependingonyourWindowsversion,dooneofthefollowing:
–ForWindows7:ClickAllProgramstodisplaytheprogramlist.Fromthelistorafolderinthelist,
clickthenameofthedesiredprogramtolaunchtheprogram.
–ForWindows10:Fromtheprogramlistorafolderinthelist,clickthenameofthedesiredprogram
tolaunchtheprogram.
3.IftheprogramnameisnotdisplayedontheStartmenu,dooneofthefollowing:
–ForWindows7:ClickControlPanelontheStartmenu.
–ForWindows10:Right-clicktheStartbuttontoopentheStartcontextmenu,andthenclick
ControlPanel.
4.ViewControlPanelusinglargeiconsorsmallicons,andthenclickthenameofthedesiredprogram
tolaunchtheprogram.
Installingaprogramthatisreadytobeinstalled
Note:ForWindows7,dependingonthecomputermodel,someoftheLenovoprogramsmightbereadyto
beinstalled,soyouneedtoinstallthemmanually.Then,youcanaccessandusetheseprograms.
Toinstallaprogramthatisreadytobeinstalled,dothefollowing:
1.OpentheLenovoThinkVantage
page41.
2.ViewtheprogramiconsusingTiles.
3.Followtheinstructionsundergreyed-outiconstolocatetheiconforthedesiredprogram.Then,
double-clicktheicontoinstalltheprogram.
®
Toolsprogram.See“Accessingaprogramonthecomputer”on
AnintroductiontoLenovoprograms
ThissectionprovidesinformationaboutthemajorLenovoprogramsavailableonyouroperatingsystem.
Note:Dependingonyourcomputermodel,someofthefollowingprogramsmightnotbeavailable.
•ForWindows7only:
–CreateRecoveryMedia
TheCreateRecoveryMediaprogramenablesyoutorestoreonlytheCdriveortheentirestorage
drivetothefactory-defaultsettings.
–FingerprintManagerProorThinkVantageFingerprintSoftware
TheFingerprintManagerProorThinkVantageFingerprintSoftwareprogramenablesyoutousea
fingerprintreader.Theintegratedfingerprintreaderprovidedonsomekeyboardsenablesyoutoenroll
yourfingerprintandassociateitwithyourpower-onpassword,harddiskpassword,andWindows
password.Asaresult,fingerprintauthenticationcanreplacepasswordsandenablesimpleandsecure
useraccess.
42ThinkCentreM700HardwareMaintenanceManual
Page 51

–LenovoBluetoothLock
TheLenovoBluetoothLockprogramenablesyoutouseaBluetoothdevice(suchasyoursmartphone)
asaproximity-basedunitforlockingorunlockingyourcomputerautomatically.Bydetectingthe
distancebetweenyourcomputerandthepredefinedBluetoothdevicethatyouarecarrying,theLenovo
BluetoothLockprogramautomaticallylocksyourcomputerwhenyouwalkawayandunlocksyour
computerwhenyoucomeback.Thisisasimplewaytoprotectyourcomputeragainstunauthorized
accessincasethatyouforgettolockyourcomputer.
–LenovoPowerENGAGE
TheLenovoPowerENGAGEprogramenablesyoutoregisteryourcomputerwithLenovo.
–PasswordManager
ThePasswordManagerprogramautomaticallycapturesandfillsinauthenticationinformationfor
WindowsprogramsandWebsites.
–PowerManager
ThePowerManagerprogramprovidesconvenient,flexible,andcompletepowermanagementfor
yourcomputer.Itenablesyoutoadjustyourcomputerpowersettingstoachievethebestbalance
betweenperformanceandpowersaving.
–RescueandRecovery
®
TheRescueandRecoveryprogramisaone-buttonrecoveryandrestoresolution.Itincludesaset
ofself-recoverytoolstohelpyoudiagnosecomputerproblems,gethelp,andrecoverfromsystem
crashes,evenifyoucannotstarttheWindowsoperatingsystem.
–SystemUpdate
TheSystemUpdateprogramprovidesregularaccesstothesystemupdatesforyourcomputer,such
asdevicedriverupdates,softwareupdates,andBIOSupdates.Theprogramgathersinformationfrom
theLenovoHelpCenteraboutnewupdatesforyourcomputer,thensortsanddisplaystheupdatesfor
downloadandinstallation.Y ouhavecompletecontrolofwhichupdatestodownloadandinstall.
•ForWindows10only:
–LenovoCompanion
Yourcomputer’sbestfeaturesandcapabilitiesshouldbeeasytoaccessandunderstand.WithLenovo
Companion,theyare.UseLenovoCompaniontodothefollowing:
–Optimizeyourcomputer’sperformance,monitoryourcomputer’shealth,andmanageupdates.
–Accessyouruserguide,checkwarrantystatus,andviewaccessoriescustomizedforyourcomputer.
–Readhow-toarticles,exploreLenovoforums,andstayup-to-dateontechnologynewswitharticles
andblogsfromtrustedsources.
LenovoCompanionisfilledwithexclusiveLenovocontenttohelpyoulearnmoreaboutwhatyou
candowithyourcomputer.
–LenovoID
TheLenovoIDprogramenablesyoutocreateyourLenovoIDandaccessallsupportedLenovo
programsandwebportalswithsinglesign-on.
•ForWindows7andWindows10:
–LenovoDeviceExperienceorLenovoPCExperience
TheLenovoDeviceExperienceorLenovoPCExperienceprogramhelpsyouworkmoreeasilyand
securely.TheprogramprovideseasyaccesstoLenovoThinkVantageToolsorLenovoTools,important
settingsandinformationaboutyourcomputer,theLenovoSupportWebsite,andsoon.
Chapter2.Productoverview43
Page 52

–LenovoSolutionCenter
TheLenovoSolutionCenterprogramenablesyoutotroubleshootandresolvecomputerproblems.It
combinesdiagnostictests,systeminformationcollection,securitystatus,andsupportinformation,
alongwithhintsandtipsformaximumsystemperformance.
44ThinkCentreM700HardwareMaintenanceManual
Page 53

Chapter3.Usingyourcomputer
Thischaptercontainsthefollowingtopics:
•“Registeringthecomputer”onpage45
•“Settingthecomputervolume”onpage45
•“AddinganicontotheWindowsnotificationarea”onpage45
•“Usingadisc”onpage45
•“Connectingtoanetwork”onpage47
Registeringthecomputer
WhenyouregisterthecomputerwithLenovo,youenterrequiredinformationintoaLenovodatabase.The
informationenablesLenovotocontactyouwhenthereisarecallorothersevereproblemandprovide
quickerservicewhenyoucallLenovoforhelp.Inaddition,somelocationsofferextendedprivilegesand
servicestoregisteredusers.
ToregisterthecomputerwithLenovo,ensurethatthecomputerisconnectedtotheInternet.Then,goto
http://www.lenovo.com/registerandfollowtheinstructionsonthescreen.
Settingthecomputervolume
Tosetthecomputervolume,dothefollowing:
1.ClickthevolumeiconintheWindowsnotificationareaonthetaskbar.
Note:IfthevolumeiconisnotdisplayedintheWindowsnotificationarea,addtheicontothe
notificationarea.See“AddinganicontotheWindowsnotificationarea”onpage45.
2.Followtheinstructionsonthescreentoadjustthevolume.Clickthespeakericontomutetheaudio.
AddinganicontotheWindowsnotificationarea
ToaddanicontotheWindowsnotificationarea,dothefollowing:
1.Clickthearrownexttothenotificationareatoviewhiddenicons.Then,clickthedesirediconand
dragittothenotificationarea.
2.Iftheiconisnotdisplayed,turnontheicon.
a.ClicktheStartbuttontoopentheStartmenu.
b.DependingonyourWindowsversion,dooneofthefollowing:
•ForWindows7:ClickControlPanel.ViewControlPanelusinglargeiconsorsmallicons,and
thenclickNotificationAreaIcons➙Turnsystemiconsonoroff.
•ForWindows10:ClickSettings➙Personalization➙Taskbar➙Turnsystemiconsonoroff.
c.Turnonthedesiredicon.
3.IftheiconisstillnotdisplayedintheWindowsnotificationarea,repeatstep1.
Usingadisc
Thissectionprovidesinformationaboutusingadiscandtheopticaldrive.
©CopyrightLenovo2016
45
Page 54

Guidelinesaboutusingtheopticaldrive
Whenusingtheopticaldrive,followtheseguidelines:
•Donotplacethecomputerinalocationwherethedriveisexposedtoanyofthefollowingconditions:
–Hightemperature
–Highhumidity
–Excessivedust
–Excessivevibrationorsuddenshock
–Aninclinedsurface
–Directsunlight
•Donotinsertanyobjectotherthanadiscintothedrive.
•Donotinsertdamageddiscsintothedrive.Warped,scratched,ordirtydiscscandamagethedrive.
•Beforemovingthecomputer,removethediscfromthedrive.
Handlingandstoringadisc
Whenhandlingandstoringadisc,followtheseguidelines:
•Holdthediscbyitsedges.Donottouchthesurfaceofthesidethatisnotlabeled.
•T oremovedustorfingerprints,wipethediscwithaclean,softclothfromthecentertotheoutside.Wiping
thediscinacirculardirectionmightcauselossofdata.
•Donotwriteorstickpaperonthedisc.
•Donotscratchormarkthedisc.
•Donotplaceorstorethediscindirectsunlight.
•Donotusebenzene,thinners,orothercleanerstocleanthedisc.
•Donotdroporbendthedisc.
Playingandremovingadisc
Toplayadisc,dothefollowing:
1.Withthecomputeron,presstheeject/closebuttononthefrontoftheopticaldrive.Thetrayslides
outofthedrive.
2.Insertadiscintothetray.Someopticaldrivehasasnaphubinthecenterofthetray.Ifyourdrivehasa
snaphub,supportthetraywithonehandandthenpushcenterofthediscuntilitsnapsintoplace.
3.Presstheeject/closebuttonagainorgentlypushthetrayforwardtoclosethetray.Thediscplayer
programstartsautomatically.Formoreinformation,refertothehelpsystemofthediscplayerprogram.
Toremoveadiscfromtheopticaldrive,dothefollowing:
1.Withthecomputeron,presstheeject/closebuttononthefrontoftheopticaldrive.Thetrayslides
outofthedrive.
2.Carefullyremovethediscfromthetray.
3.Presstheeject/closebuttonagainorgentlypushthetrayforwardtoclosethetray.
Note:Ifthetraydoesnotslideoutofthedrivewhenyoupresstheeject/closebutton,turnoffthecomputer.
Then,insertastraightenedpaperclipintotheemergency-ejectholeadjacenttotheeject/closebutton.
Usetheemergencyejectonlyinanemergency.
46ThinkCentreM700HardwareMaintenanceManual
Page 55

Recordingadisc
Ifyouropticaldrivesupportsrecording,youcanrecordadisc.
RecordingadiscusingWindowstools
TorecordadiscusingWindowstools,dooneofthefollowing:
•BurnadiscusingtheAutoPlaywindow.
1.Ensurethatthediscisplayedautomatically.
a.ClicktheStartbuttontoopentheStartmenu.
b.DependingonyourWindowsversion,dooneofthefollowing:
–ForWindows7:ClickControlPanel.ViewControlPanelusinglargeiconsorsmallicons,
andthenclickAutoPlay.
–ForWindows10:ClickSettings➙Devices➙AutoPlay.
c.SelectorturnonUseAutoPlayforallmediaanddevices.
2.Insertarecordablediscintotheopticaldrivethatsupportsrecording.TheAutoPlaywindowopens.
3.Followtheinstructionsonthescreen.
•BurnadiscusingWindowsMedia
1.Insertarecordablediscintotheopticaldrivethatsupportsrecording.
2.OpenWindowsMediaPlayer.See“Accessingaprogramonthecomputer”onpage41.
3.Followtheinstructionsonthescreen.
•BurnadiscfromanISOfile.
1.Insertarecordablediscintotheopticaldrivethatsupportsrecording.
2.Double-clicktheISOfile.
3.Followtheinstructionsonthescreen.
®
Player.
Recordingadiscusingpreinstalledprograms
Torecordadiscusingpreinstalledprograms,dothefollowing:
1.Insertarecordablediscintotheopticaldrivethatsupportsrecording.
2.OpenthePowerDVDCreate,PowerProducer,orPower2Goprogram.See“Accessingaprogramon
thecomputer”onpage41.
3.Followtheinstructionsonthescreen.
Connectingtoanetwork
Thissectionprovidesinformationaboutconnectingtoanetwork.Ifyoucannotconnectthecomputertoa
network,see“Networkingproblems”onpage73.
ConnectingtoanEthernetLAN
YoucanconnectthecomputertoanEthernetLANbyconnectinganEthernetcabletotheEthernetconnector.
DANGER
Toavoidtheriskofelectricalshock,donotconnectthetelephonecabletotheEthernetconnector.
Chapter3.Usingyourcomputer47
Page 56

ConnectingtoawirelessLAN
YoucanconnectthecomputertoawirelessLANwithouttheuseofanEthernetcablebutbymeansof
radiowavesonly.
Note:ThewirelessLANfeatureisoptional.
Toestablishawireless-LANconnection,dothefollowing:
1.EnsurethatawirelessLANisavailableandthewirelessLANfeatureonthecomputerisworking.
2.Clickthewireless-network-connection-statusiconintheWindowsnotificationareatodisplayavailable
wirelessnetworks.
Note:Ifthewireless-network-connection-statusiconisnotdisplayedintheWindowsnotificationarea,
addtheicontothenotificationarea.See“AddinganicontotheWindowsnotificationarea”onpage45
3.ClickawirelessLAN,andthenclickConnecttoconnectthecomputertoit.Providerequired
informationifneeded.
ConnectingtoaBluetooth-enableddevice
Bluetoothisashort-rangewirelesscommunicationstechnology.UseBluetoothtoestablishawireless
connectionbetweenthecomputerandanotherBluetooth-enableddevicewithinadistanceofabout10
m(32.8ft).
Note:TheBluetoothfeatureisoptional.
.
ToconnecttoaBluetooth-enableddevice,dothefollowing:
1.EnsurethattheBluetoothfeatureonthecomputerisworkingandtheBluetooth-enableddeviceis
locatedwithinadistanceofabout10m(32.8ft)fromthecomputer.
2.ClicktheBluetoothiconintheWindowsnotificationareaonthetaskbar.Then,clickAddaDeviceand
followtheinstructionsonthescreen.
Note:IftheBluetoothiconisnotdisplayedintheWindowsnotificationarea,addtheicontothe
notificationarea.See“AddinganicontotheWindowsnotificationarea”onpage45.
48ThinkCentreM700HardwareMaintenanceManual
Page 57

Chapter4.Youandyourcomputer
Thischaptercontainsthefollowingtopics:
•“Arrangingyourworkspace”onpage49
•“Accessibilityinformation”onpage50
•“Cleaningthecomputer”onpage53
•“Maintenance”onpage53
•“Movingthecomputer”onpage55
Arrangingyourworkspace
Arrangeyourworkspacetosuityourneedsandthekindofworkyoudo.Thissectionprovidesinformation
aboutthefactorsthataffectthewayyouarrangeyourworkspace.
Glareandlighting
Positionthemonitortominimizeglareandreflectionsfromoverheadlights,windows,andotherlightsources.
Reflectedlightfromshinysurfacescancauseannoyingreflectionsonyourscreen.Whenpossible,place
themonitoratrightanglestowindowsandotherlightsources.Ifnecessary,reduceoverheadlighting
byturningofflightsorusinglowerwattagebulbs.Ifyouinstallthemonitornearawindow,usecurtains
orblindstoblockthesunlight.Youcanadjustthebrightnessandcontrastcontrolsonthemonitorasthe
roomlightingchangesthroughouttheday.
Whereitisimpossibletoavoidreflectionsortoadjustthelighting,anantiglarefilterplacedoverthescreen
mightbehelpful.However,thesefiltersmightaffecttheclarityoftheimageonthescreen;trythemonlyafter
youhaveexhaustedothermethodsofreducingglare.
Aircirculation
Thecomputerproducesheat.Thecomputerhasafanthatpullsinfreshairandforcesouthotairthrough
theairvents.Blockingtheairventscancauseoverheating,whichmightresultinamalfunctionordamage.
Positionthecomputersothatnothingblockstheairvents;usually,51mm(2inches)ofairspaceissufficient.
Ensurethattheventedairisnotblowingonpeople.
Electricaloutletlocationsandcablelengths
Thefollowingfactorsmightdeterminethefinalplacementofthecomputer:
•Locationsofelectricaloutlets
•Lengthofpowercordsorpoweradapters
•Lengthofthecablesthatareconnectedtootherdevices
Formoreinformationaboutpowercordsorpoweradapters,see“Powercordsandpoweradapters”on
page1
.
Comfort
Althoughnosingleworkingpositionisidealforeveryone,hereareafewguidelinestohelpyoufindaposition
thatsuitsyoubest.Thefollowingfiguresetsanexampleforyourreference.
©CopyrightLenovo2016
49
Page 58

•Screenposition:Keepthescreenatacomfortableviewingdistance,usually51-61cm(20-24inches).
Then,adjustthescreensothatthetopofthescreenisatorslightlybeloweyelevelandyoucanviewit
withouttwistingyourbody.
•Chairposition:Useachairthatgivesyougoodbacksupportandseatheightadjustment.Usechair
adjustmentstobestsuityourdesiredposture.
•Headposition:Keepyourheadandneckinacomfortableandneutral(verticalorupright)position.
•Armandhandpositions:Keepyourforearms,wrists,andhandsinarelaxedandneutral(horizontal)
position.Typewithasofttouchwithoutpoundingthekeys.
•Legposition:Keepyourthighsparalleltothefloorandyourfeetflatonthefloororonafootrest.
Makeminormodificationsinyourworkingposturetodetertheonsetofdiscomfortcausedbylongperiodsof
workinginthesameposition.Frequent,shortbreaksfromyourworkalsohelptopreventminordiscomfort
associatedwithyourworkingposture.
Accessibilityinformation
Lenovoiscommittedtoprovidinguserswhohavehearing,vision,andmobilitylimitationswithgreater
accesstoinformationandtechnology.Thissectionprovidesinformationaboutthewaystheseuserscanget
themostoutoftheircomputerexperience.Youalsocangetthemostup-to-dateaccessibilityinformation
fromthefollowingWebsite:
http://www.lenovo.com/accessibility
Keyboardshortcuts
Thefollowingtablecontainskeyboardshortcutsthatcanhelpmakethecomputereasiertouse.
Note:Dependingonyourkeyboard,someofthefollowingkeyboardshortcutsmightnotbeavailable.
KeyboardshortcutFunction
Windowslogokey+U
RightShiftforeightseconds
ShiftfivetimesTurnonorturnoffStickyKeys
NumLockforfivesecondsTurnonorturnoffToggleKeys
LeftAlt+LeftShift+NumLock
LeftAlt+LeftShift+PrtScn(orPrtSc)TurnonorturnoffHighContrast
OpenEaseofAccessCenter
TurnonorturnoffFilterKeys
TurnonorturnoffMouseKeys
Formoreinformation,gotohttp://windows.microsoft.com/,andthenperformasearchusinganyofthe
followingkeywords:keyboardshortcuts,keycombinations,shortcutkeys.
50ThinkCentreM700HardwareMaintenanceManual
Page 59

EaseofAccessCenter
EaseofAccessCenterontheWindowsoperatingsystemenablesuserstoconfiguretheircomputersto
suittheirphysicalandcognitiveneeds.
TouseEaseofAccessCenter,dothefollowing:
1.ClicktheStartbuttontoopentheStartmenu.
2.DependingonyourWindowsversion,dooneofthefollowing:
•ForWindows7:ClickControlPanel.ViewControlPanelusinglargeiconsorsmallicons,and
thenclickEaseofAccessCenter.
•ForWindows10:ClickSettings➙EaseofAccess.
3.Choosetheappropriatetoolbyfollowingtheinstructionsonthescreen.
EaseofAccessCentermainlyincludesthefollowingtools:
•Magnifier
Magnifierisausefulutilitythatenlargestheentirescreenorpartofthescreensothatyoucansee
theitemsbetter.
•Narrator
Narratorisascreenreaderthatreadsaloudwhatisdisplayedonthescreenanddescribeseventssuchas
errormessages.
•On-ScreenKeyboard
Ifyouprefertotypeorenterdataintothecomputerusingamouse,joystick,orotherpointingdevice
insteadofaphysicalkeyboard,youcanuseOn-ScreenKeyboard.On-ScreenKeyboarddisplaysavisual
keyboardwithallthestandardkeys.
•HighContrast
HighContrastisafeaturethatheightensthecolorcontrastofsometextandimagesonyourscreen.Asa
result,thoseitemsaremoredistinctandeasiertoidentify.
•Personalizedkeyboard
Adjustkeyboardsettingstomakeyourkeyboardeasiertouse.Forexample,youcanuseyourkeyboard
tocontrolthepointerandtypecertainkeycombinationseasier.
•Personalizedmouse
Adjustmousesettingstomakeyourmouseeasiertouse.Forexample,youcanchangethepointer
appearanceandmakeiteasiertomanagewindowswiththemouse.
SpeechRecognition
SpeechRecognitionenablesyoutocontrolthecomputerbyvoice.
Usingonlyyourvoice,youcanstartprograms,openmenus,clickobjectsonthescreen,dictatetextinto
documents,andwriteandsende-mails.Everythingyoudowiththekeyboardandmousecanbedonewith
onlyyourvoice.
TouseSpeechRecognition,dothefollowing:
1.DependingonyourWindowsversion,dooneofthefollowing:
•ForWindows7:ClicktheStartbuttontoopentheStartmenu.
•ForWindows10:Right-clicktheStartbuttontoopentheStartcontextmenu.
2.ClickControlPanel.ViewControlPanelusinglargeiconsorsmallicons,andthenclickSpeech
Recognition.
Chapter4.Youandyourcomputer51
Page 60

3.Followtheinstructionsonthescreen.
Screen-readertechnologies
Screen-readertechnologiesareprimarilyfocusedonsoftwareprograminterfaces,helpinformationsystems,
andvariousonlinedocuments.Foradditionalinformationaboutscreenreaders,seethefollowing:
•UsingPDFswithscreenreaders:
http://www.adobe.com/accessibility.html?promoid=DJGVE
•UsingtheJAWSscreenreader:
http://www.freedomscientific.com/jaws-hq.asp
•UsingtheNVDAscreenreader:
http://www.nvaccess.org/
Screenresolution
Youcanmakethetextandimagesonyourscreeneasiertoreadbyadjustingthescreenresolutionofthe
computer.
Toadjustthescreenresolution,dothefollowing:
1.Right-clickablankareaonthedesktop.
2.DependingonyourWindowsversion,dooneofthefollowing:
•ForWindows7:ClickScreenresolution.
•ForWindows10:ClickDisplaysettings.OntheDisplaytab,clickAdvanceddisplaysettings.
3.Followtheinstructionsonthescreen.
Note:Settingtheresolutiontoolowmightpreventsomeitemsfromfittingonthescreen.
Customizableitemsize
Youcanmaketheitemsonyourscreeneasiertoreadbychangingtheitemsize.
•T ochangetheitemsizetemporarily,usetheMagnifiertoolinEaseofAccessCenter.See“Easeof
AccessCenter”onpage51.
•T ochangetheitemsizepermanently,dothefollowing:
–Changethesizeofalltheitemsonyourscreen.
1.Right-clickablankareaonthedesktop.
2.DependingonyourWindowsversion,dooneofthefollowing:
–ForWindows7:ClickScreenresolution➙Maketextandotheritemslargerorsmaller.
–ForWindows10:ClickDisplaysettings.
3.Changetheitemsizebyfollowingtheinstructionsonthescreen.
–ChangethesizeoftheitemsonaWebpage.
PressandholdCtrl,andthenpresstheplus-signkey(+)toenlargeortheminus-signkey(-)to
reducethetextsize.
–Changethesizeoftheitemsonthedesktoporawindow.
Note:Thisfunctionmightnotworkonsomewindows.
Ifyourmousehasawheel,pressandholdCtrl,andthenscrollthewheeltochangetheitemsize.
Industry-standardconnectors
Thecomputerprovidesindustry-standardconnectorsthatenableyoutoconnectassistivedevices.
52ThinkCentreM700HardwareMaintenanceManual
Page 61

TTY/TDDconversionmodem
Thecomputersupportstheuseofatexttelephone(TTY)orthetelecommunicationsdeviceforthedeaf(TDD)
conversionmodem.ThemodemmustbeconnectedbetweenthecomputerandaTTY/TDDtelephone.
Then,youcantypeamessageonthecomputerandsendittothetelephone.
Documentationinaccessibleformats
Lenovoprovideselectronicdocumentationinaccessibleformats,suchasproperlytaggedPDFfilesor
HyperTextMarkupLanguage(HTML)files.Lenovoelectronicdocumentationisdevelopedtoensure
thatvisuallyimpaireduserscanreadthedocumentationthroughascreenreader.Eachimageinthe
documentationalsoincludesadequatealternativetextsothatvisuallyimpaireduserscanunderstandthe
imagewhentheyuseascreenreader.
Cleaningthecomputer
CAUTION:
Removeanymediafromthedrivesandturnoffallconnecteddevicesandthecomputer.Then,
disconnectallpowercordsfromelectricaloutletsanddisconnectallcablesthatareconnected
tothecomputer.
Itisagoodpracticetocleanthecomputerperiodicallytoprotectthesurfacesandensuretrouble-free
operation.Useonlymildcleaningsolutionsandadampclothtocleanthepaintedsurfacesofthecomputer.
Dustbuildupcompoundsproblemsassociatedwithglare,soremembertocleanthescreenperiodically.
Wipethescreensurfacegentlywithasoft,drycloth,orblowonthescreentoremovegritandotherloose
particles.Dependingonthetypeofthescreen,moistenasoft,lint-freeclothwithanLCDcleanerorliquid
glasscleanerandthenwipethescreensurface.
Maintenance
Withappropriatecareandmaintenance,thecomputerwillserveyoureliably.Thissectionprovides
informationaboutmaintainingthecomputersothatitcankeepworkingintoporder.
Basicmaintenancetips
Herearesomebasicpointsaboutkeepingthecomputerfunctioningproperly:
•Keepthecomputerinaclean,dryenvironment.Ensurethatthecomputerrestsonaflat,steadysurface.
•Donotcoveranyofairvents.Theseairventsprovideairflowtokeepthecomputerfromoverheating.
•Keepfoodanddrinksawayfromallpartsofthecomputer.Foodparticlesandspillsmightmakethe
keyboardandmousestickandunusable.
•Donotgetthepowerswitchesorothercontrolswet.Moisturecandamagethesepartsandcausean
electricalhazard.
•Alwaysdisconnectapowercordbygraspingthepluginsteadofthecord.
Goodmaintenancepractices
Byperformingafewgoodmaintenancepractices,youcanmaintaingoodcomputerperformance,protect
yourdata,andbepreparedincaseofacomputerfailure.
•Keepthecomputersoftware,devicedrivers,andoperatingsystemup-to-date.See“Keepingthe
computercurrent”onpage54
•Emptyyourrecyclebinonaregularbasis.
•CleanoutyourInbox,SentItems,andDeletedItemsfoldersinyoure-mailapplicationonaregularbasis.
.
Chapter4.Youandyourcomputer53
Page 62

•Cleanupfilesandfreeupstoragedrivespaceandmemoryspaceoccasionallytopreventperformance
problems.See“Performanceproblems”onpage75
•Keepalogbook.Entriesmightincludemajorsoftwareorhardwarechanges,device-driverupdates,
intermittentproblemsandwhatyoudidtoresolvethem,andotherissuesyoumighthaveexperienced.
Thecauseofaproblemmightbechangeinhardware,changeinsoftware,oranyotheractionsthatmight
havetakenplace.AlogbookcanhelpyouoraLenovotechniciandeterminethecauseofaproblem.
•Backupyourdataonthestoragedriveregularly.Youcanrestorethestoragedrivefromabackup.
Tobackupyourdata,dooneofthefollowing:
–ForWindows7:OpentheRescueandRecoveryprogram.See“Accessingaprogramonthecomputer”
onpage41
–ForWindows10:Right-clicktheStartbuttontoopentheStartcontextmenu,andthenclickControl
Panel.ViewControlPanelusinglargeiconsorsmallicons,andthenclickFileHistory.Followthe
instructionsonthescreen.
•Createarecoverymediumasearlyaspossible.Y oucanusetherecoverymediumtorecoveryour
operatingsystemevenifWindowsfailstostartup.
Tocreatearecoverymedium,dooneofthefollowing:
–ForWindows7:OpentheCreateRecoveryMediaprogram.See“Accessingaprogramonthe
computer”onpage41
systemoftheprogram.
–ForWindows10:Right-clicktheStartbuttontoopentheStartcontextmenu,andthenclickControl
Panel.ViewControlPanelusinglargeiconsorsmallicons,andthenclickRecovery.Followthe
instructionsonthescreen.
•ForWindows7,createarescuemediumasearlyaspossible.Y oucanusetherescuemediumto
recoverfromfailuresthatpreventyoufromgainingaccesstotheRescueandRecoveryworkspace
onyourstoragedrive.
Tocreatearescuemedium,opentheRescueandRecoveryprogram.See“Accessingaprogramonthe
computer”onpage41
oftheprogram.
.Formoreinformationaboutbackingupyourdata,refertothehelpsystemoftheprogram.
.Formoreinformationaboutcreatingarecoverymedium,refertothehelp
.Formoreinformationaboutcreatingarescuemedium,refertothehelpsystem
.
Keepingthecomputercurrent
Inmostcases,itisagoodpracticetohavethemostup-to-dateoperatingsystemupdatepatches,software
programs,anddevicedrivers.Thissectionprovidesinformationabouthowtogetthelatestupdatesforthe
computer.
Gettingthelatestdevicedrivers
Attention:Reinstallingdevicedriverswillchangethecurrentconfigurationofthecomputer.
Togetthelatestdevicedriversforthecomputer,dooneofthefollowing:
•Downloadthedevicedriversthatarepreinstalledonthecomputer.Gotohttp://www.lenovo.com/drivers.
•UsetheLenovoprogramorWindowsUpdate.See“Gettingthelatestsystemupdates”onpage54.
Note:ThedevicedriversprovidedbyWindowsUpdatemightnotbetestedbyLenovo.Itisrecommended
thatyougetdevicedriversfromLenovo.
Gettingthelatestsystemupdates
Togetthelatestsystemupdatesforthecomputer,ensurethatthecomputerisconnectedtotheInternet
anddooneofthefollowing:
•UseoneofthefollowingLenovoprogramstogetthesystemupdates:
54ThinkCentreM700HardwareMaintenanceManual
Page 63

–ForWindows7:UsetheSystemUpdateprogram.
–ForWindows10:UsetheLenovoCompanionprogram.
ToopentheSystemUpdateorLenovoCompanionprogram,see“Accessingaprogramonthecomputer”
onpage41.Formoreinformationaboutusingtheprogram,refertothehelpsystemoftheprogram.
•UseWindowsUpdatetogetthesystemupdates.
1.ClicktheStartbuttontoopentheStartmenu.
2.DependingonyourWindowsversion,dooneofthefollowing:
–ForWindows7:ClickControlPanel.ViewControlPanelusinglargeiconsorsmallicons,and
thenclickWindowsUpdate.
–ForWindows10:ClickSettings➙Update&security➙WindowsUpdate.
3.Followtheinstructionsonthescreen.
Movingthecomputer
Beforemovingthecomputer,takethefollowingprecautions:
1.Backupyourdataonthestoragedrive.See“Goodmaintenancepractices”onpage53.
2.Removeanymediafromthedrivesandturnoffallconnecteddevicesandthecomputer.Then,
disconnectallpowercordsfromelectricaloutletsanddisconnectallcablesthatareconnectedtothe
computer.
3.Ifyousavedtheoriginalshippingcartonsandpackingmaterials,usethemtopacktheunits.Ifyouare
usingdifferentcartons,cushiontheunitstoavoiddamage.
Movingthecomputertoanothercountryorregion
Whenyoumovethecomputertoanothercountryorregion,youmusttakelocalelectricalstandardsinto
consideration.Ifthelocalelectricaloutletstyleisdifferentfromthetypeyouarecurrentlyusing,contactthe
LenovoCustomerSupportCentertopurchaseeitheranelectricalplugadapteroranewpowercord.Fora
listofLenovoSupportphonenumbers,gotohttp://www.lenovo.com/support/phone.Ifyoucannotfindthe
supporttelephonenumberforyourcountryorregion,contactyourLenovoreseller.
Chapter4.Youandyourcomputer55
Page 64

56ThinkCentreM700HardwareMaintenanceManual
Page 65

Chapter5.Security
Thischaptercontainsthefollowingtopics:
•“Lockingthecomputer”onpage57
•“ViewingandchangingsecuritysettingsintheSetupUtilityprogram”onpage60
•“Preventingunauthorizedaccesstothecomputer”onpage61
•“Usingfingerprintauthentication”onpage61
•“Usingthecoverpresenceswitch”onpage61
•“Usingandunderstandingfirewalls”onpage62
•“Protectingdataagainstviruses”onpage62
•“ComputraceAgentsoftwareembeddedinfirmware”onpage62
•“TrustedPlatformModule(TPM)”onpage62
Lockingthecomputer
Thissectionprovidesinformationaboutlockingthecomputerwiththelockingdevicestokeepthecomputer
safe.
©CopyrightLenovo2016
57
Page 66

Lockingthecomputercover
Lockingthecomputercoverhelpspreventunauthorizedpeoplefromgainingaccesstotheinsideofyour
computer.Yourcomputercomeswithapadlockloopsothatthecomputercovercannotberemoved
whenapadlockisinstalled.
Figure7.Installingapadlock
58ThinkCentreM700HardwareMaintenanceManual
Page 67

AttachingaKensington-stylecablelock
YoucanuseaKensington-stylecablelocktosecureyourcomputertoadesk,table,orothernon-permanent
fixture.Thecablelockconnectstothesecurity-lockslotattherearofyourcomputer.Dependingonthetype
selected,thecablelockcanbeoperatedwithakeyorcombination.Thecablelockalsolocksthebuttons
usedtoopenthecomputercover.Thisisthesametypeoflockusedwithmanynotebookcomputers.Y ou
canordersuchacablelockdirectlyfromLenovobysearchingforKensingtonat:
http://www.lenovo.com/support
Figure8.Kensington-stylecablelock
Chapter5.Security59
Page 68

Attachingacablelock
Acablelockcanbeusedtosecuredevices,suchasthekeyboardandthemouse,bylockingthedevice
cablestoyourcomputer.Thecablelockconnectstothecable-lockslotsontherearofyourcomputer.
Toinstallacablelock,dothefollowing:
1.Inserttheclip1intothecable-lockslot4.
2.Pullthecablesyouwanttolockthroughthedentsinthecablelock.
3.Presstheclip2intothecable-lockslot3untilitsnapsintoposition.
Figure9.Installingacablelock
ViewingandchangingsecuritysettingsintheSetupUtilityprogram
ToviewandchangesecuritysettingsintheSetupUtilityprogram,dothefollowing:
1.StarttheSetupUtilityprogram.See“StartingtheSetupUtilityprogram”onpage63.
2.SelectSecurity.
3.Followtheinstructionsontherightsideofthescreentoviewandchangesecuritysettings.Y oucan
referto“UsingtheSetupUtilityprogram”onpage63
securitysettings.
4.ExittheSetupUtilityprogram.See“ExitingtheSetupUtilityprogram”onpage66.
60ThinkCentreM700HardwareMaintenanceManual
togetbasicinformationaboutsomemajor
Page 69

Preventingunauthorizedaccesstothecomputer
YoucanuseBIOSpasswordsandWindowsaccountstopreventunauthorizedaccesstothecomputerand
data.
•T ouseBIOSpasswords,see“UsingBIOSpasswords”onpage65.
•T ouseWindowsaccounts,dothefollowing:
1.ClicktheStartbuttontoopentheStartmenu.
2.DependingonyourWindowsversion,dooneofthefollowing:
–ForWindows7:ClickControlPanel➙UserAccounts.
–ForWindows10:ClickSettings➙Accounts.
3.Followtheinstructionsonthescreen.
Usingfingerprintauthentication
Ifyourkeyboardhasafingerprintreader,youcanusefingerprintauthenticationtoreplacepasswordsfor
simpleandsecureuseraccess.Tousefingerprintauthentication,firstenrollyourfingerprintsandassociate
themwithyourpasswords(suchasthepower-onpassword,harddiskpassword,andWindowspassword).
Usethefingerprintreaderandthefingerprintprogramtocompletethisprocedure.
Tousefingerprintauthentication,dooneofthefollowing:
•ForWindows7:OpentheFingerprintManagerProorThinkVantageFingerprintSoftwareprogram
providedbyLenovo.See“Accessingaprogramonthecomputer”onpage41
aboutusingtheprogram,refertothehelpsystemoftheprogram.
•ForWindows10:ClicktheStartbuttontoopentheStartmenu,andthenclickSettings➙Accounts➙
Sign-inoptions.Followtheinstructionsonthescreen.
.Formoreinformation
Tousethefingerprintreader,refertothedocumentationshippedwiththefingerprintkeyboardorlocatedon
theLenovoSupportWebsiteathttp://www.lenovo.com/support/keyboards.
Usingthecoverpresenceswitch
Thecoverpresenceswitchpreventsthecomputerfromloggingintotheoperatingsystemwhenthe
computercoverisnotproperlyinstalledorclosed.
Toenablethecover-presence-switchconnectoronthesystemboard,dothefollowing:
1.StarttheSetupUtilityprogram.See“StartingtheSetupUtilityprogram”onpage63.
2.SelectSecurity➙ChassisIntrusionDetectionandpressEnter.
3.SelectEnabledandpressEnter.
4.ExittheSetupUtilityprogram.See“ExitingtheSetupUtilityprogram”onpage66.
Whenthecover-presence-switchconnectoronthesystemboardisenabled,ifthecoverpresenceswitch
detectsthatthecomputercoverisnotcorrectlyinstalledorclosed,anerrormessagewillbedisplayedwhen
youturnonthecomputer.Tobypasstheerrormessageandlogintotheoperatingsystem,dothefollowing:
1.Properlyinstallorclosethecomputercover.
2.StartandthenexittheSetupUtilityprogram.See“StartingtheSetupUtilityprogram”onpage63and
“ExitingtheSetupUtilityprogram”onpage66.
Chapter5.Security61
Page 70

Usingandunderstandingfirewalls
Afirewallcanbehardware,software,oracombinationofbothdependingonthelevelofsecurityrequired.
Firewallsworkonasetofrulestodeterminewhichinboundandoutboundconnectionsareauthorized.Ifthe
computerispreinstalledwithafirewallprogram,ithelpsprotectagainstcomputerInternetsecuritythreats,
unauthorizedaccess,intrusions,andInternetattacks.Italsoprotectsyourprivacy.Formoreinformation
abouthowtousethefirewallprogram,refertothehelpsystemofyourfirewallprogram.
TouseWindowsFirewall,dothefollowing
1.DependingonyourWindowsversion,dooneofthefollowing:
•ForWindows7:ClicktheStartbuttontoopentheStartmenu.
•ForWindows10:Right-clicktheStartbuttontoopentheStartcontextmenu.
2.ClickControlPanel.ViewControlPanelusinglargeiconsorsmallicons,andthenclickWindows
Firewall.
3.Followtheinstructionsonthescreen.
Protectingdataagainstviruses
Thecomputerispreinstalledwithanantivirusprogramtohelpyouguardagainst,detect,andeliminate
viruses.
Lenovoprovidesafullversionofantivirussoftwareonthecomputerwithafree30-daysubscription.After30
days,youmustrenewthelicensetocontinuereceivingtheantivirussoftwareupdates.
Note:Virusdefinitionfilesmustbekeptup-to-datetoguardagainstnewviruses.
Formoreinformationabouthowtouseyourantivirussoftware,refertothehelpsystemofyourantivirus
software.
ComputraceAgentsoftwareembeddedinfirmware
TheComputraceAgentsoftwareisanITassetmanagementandcomputertheftrecoverysolution.The
softwaredetectsifchangeshavebeenmadeonthecomputer,suchashardware,software,orthecomputer
call-inlocation.YoumighthavetopurchaseasubscriptiontoactivatetheComputraceAgentsoftware.
TrustedPlatformModule(TPM)
TPMisasecurecryptoprocessorthatcanstorecryptographickeysthatprotectinformationstoredinthe
computer.
62ThinkCentreM700HardwareMaintenanceManual
Page 71

Chapter6.Advancedconfiguration
Thischaptercontainsthefollowingtopics:
•“UsingtheSetupUtilityprogram”onpage63
•“UpdatingtheBIOS”onpage67
UsingtheSetupUtilityprogram
TheSetupUtilityprogramisusedtoviewandchangetheconfigurationsettingsofthecomputer.This
sectionprovidesinformationaboutonlythemajorconfigurationsettingsavailableintheprogram.
Note:TheoperatingsystemsettingsmightoverrideanysimilarsettingsintheSetupUtilityprogram.
StartingtheSetupUtilityprogram
TostarttheSetupUtilityprogram,dothefollowing:
1.T urnonorrestartthecomputer.
2.BeforeWindowsstartsup,repeatedlypressandreleasetheF1keyuntiltheSetupUtilityprogram
opens.IfaBIOSpasswordhasbeenset,theSetupUtilityprogramwillnotopenuntilyouenterthe
correctpassword.Formoreinformation,see“UsingBIOSpasswords”onpage65
Note:Forsomekeyboards,youmightneedtopressFn+F1toopentheSetupUtilityprogram.
.
Toviewandchangetheconfigurationsettings,followtheinstructionsontherightsideofthescreen.The
keysusedtoperformvarioustasksaredisplayedatthebottomofthescreen.
Enablingordisablingadevice
Thissectionprovidesinformationabouthowtoenableordisableuseraccesstohardwaredevices(such
asUSBconnectorsorstoragedrives).
Toenableordisableadevice,dothefollowing:
1.StarttheSetupUtilityprogram.See“StartingtheSetupUtilityprogram”onpage63.
2.SelectDevices.
3.SelectthedeviceyouwanttoenableordisableandpressEnter.
4.SelectthedesiredsettingandpressEnter.
5.ExittheSetupUtilityprogram.See“ExitingtheSetupUtilityprogram”onpage66.
EnablingordisablingtheAutomaticPowerOnfeatures
IfyouenabletheAutomaticPowerOnfeatures,thecomputerwillstartupautomatically.
ToenableordisabletheAutomaticPowerOnfeatures,dothefollowing:
1.StarttheSetupUtilityprogram.See“StartingtheSetupUtilityprogram”onpage63.
2.SelectPower➙AutomaticPowerOnandpressEnter.
3.SelectthefeatureyouwanttoenableordisableandpressEnter.
4.SelectthedesiredsettingandpressEnter.
5.ExittheSetupUtilityprogram.See“ExitingtheSetupUtilityprogram”onpage66.
©CopyrightLenovo2016
63
Page 72

EnablingordisablingtheErPLPScompliancemode
Lenovocomputersmeettheeco-designrequirementsoftheErPLot3regulation.Formoreinformation,go
to:
http://www.lenovo.com/ecodeclaration
YoucanenabletheErPLPScompliancemodeintheSetupUtilityprogramtoreducetheconsumptionof
electricitywhenthecomputerisofforinsleepmode.
ToenableordisabletheErPLPScompliancemode,dothefollowing:
1.StarttheSetupUtilityprogram.See“StartingtheSetupUtilityprogram”onpage63.
2.SelectPower➙EnhancedPowerSavingModeandpressEnter.
3.DependingonwhetheryouselectEnabledorDisabled,dooneofthefollowing:
•IfyouselectEnabled,pressEnter.Then,disabletheWakeonLANfeature.See“Enablingor
disablingtheAutomaticPowerOnfeatures”onpage63.
•IfyouselectDisabled,pressEnter.Then,gotothenextstep.
4.ExittheSetupUtilityprogram.See“ExitingtheSetupUtilityprogram”onpage66.
WhentheErPLPScompliancemodeisenabled,youcanwakeupthecomputerbydoingoneofthe
following:
•Pressthepowerbutton.
•EnabletheWakeUponAlarmfeaturetomakethecomputerwakeupatasettime.See“Enablingor
disablingtheAutomaticPowerOnfeatures”onpage63.
•EnabletheAfterPowerLossfeaturetomakethecomputerwakeupwhenthepowersupplyresumesafter
asuddenlossofelectricity.
1.StarttheSetupUtilityprogram.See“StartingtheSetupUtilityprogram”onpage63.
2.SelectPower➙AfterPowerLossandpressEnter.
3.SelectPowerOnandpressEnter.
4.ExittheSetupUtilityprogram.See“ExitingtheSetupUtilityprogram”onpage66.
EnablingordisablingtheConfigurationChangeDetectionfeature
IfyouenabletheConfigurationChangeDetectionfeature,whenthePOSTdetectstheconfigurationchanges
ofsomehardwaredevices(suchasstoragedrivesormemorymodules),anerrormessagewillbedisplayed
whenyouturnonthecomputer.
ToenableordisabletheConfigurationChangeDetectionfeature,dothefollowing:
1.StarttheSetupUtilityprogram.See“StartingtheSetupUtilityprogram”onpage63.
2.SelectSecurity➙ConfigurationChangeDetectionandpressEnter.
3.SelectthedesiredsettingandpressEnter.
4.ExittheSetupUtilityprogram.See“ExitingtheSetupUtilityprogram”onpage66.
Tobypasstheerrormessageandlogintotheoperatingsystem,dooneofthefollowing:
•PresstheF2key.
Note:Forsomekeyboards,youmightneedtopressFn+F2tobypasstheerrormessage.
•StartandthenexittheSetupUtilityprogram.See“StartingtheSetupUtilityprogram”onpage63and
“ExitingtheSetupUtilityprogram”onpage66.
64ThinkCentreM700HardwareMaintenanceManual
Page 73

UsingBIOSpasswords
ByusingtheSetupUtilityprogram,youcansetpasswordstopreventunauthorizedaccesstothecomputer
anddata.
Youdonothavetosetanypasswordstousethecomputer.However,usingpasswordsimprovescomputer
security.Ifyoudecidetosetanypasswords,readthefollowingtopics.
SetupUtilityprogrampasswordtypes
Thefollowingtypesofpasswordsareavailable:
•Power-onpassword
Whenapower-onpasswordisset,youarepromptedtoenteravalidpasswordeachtimethecomputeris
turnedon.Thecomputercannotbeuseduntilthevalidpasswordisentered.
•Administratorpassword
Settinganadministratorpassworddetersunauthorizedusersfromchangingconfigurationsettings.Ifyou
areresponsibleformaintainingtheconfigurationsettingsofseveralcomputers,youmightwanttoset
anadministratorpassword.
Whenanadministratorpasswordisset,youarepromptedtoenteravalidpasswordeachtimeyou
trytoaccesstheSetupUtilityprogram.TheSetupUtilityprogramcannotbeaccesseduntilavalid
passwordisentered.
Ifboththepower-onpasswordandadministratorpasswordareset,youcanentereitherpassword.
However,youmustuseyouradministratorpasswordtochangeanyconfigurationsettings.
•Harddiskpassword
Settingaharddiskpasswordpreventsunauthorizedaccesstothedataonthestoragedrive.Whena
harddiskpasswordisset,youarepromptedtoenteravalidpasswordeachtimeyoutrytoaccess
thestoragedrive.
Notes:
–Afteryousetaharddiskpassword,yourdataonthestoragedriveisprotectedevenifthestoragedrive
isremovedfromonecomputerandinstalledinanother.
–Iftheharddiskpasswordisforgotten,thereisnowaytoresetthepasswordorrecoverdatafrom
thestoragedrive.
Passwordconsiderations
Apasswordcanbeanycombinationofupto64alphabeticandnumericcharacters.Forsecurityreasons,it
isrecommendedtouseastrongpasswordthatcannotbeeasilycompromised.
Note:TheSetupUtilityprogrampasswordsarenotcasesensitive.
Tosetastrongpassword,considerthefollowingguidelines:
•Haveatleasteightcharactersinlength
•Containatleastonealphabeticcharacterandonenumericcharacter
•Notbeyournameoryourusername
•Notbeacommonwordoracommonname
•Besignificantlydifferentfromyourpreviouspasswords
Setting,changing,anddeletingapassword
Toset,change,ordeleteapassword,dothefollowing:
1.StarttheSetupUtilityprogram.See“StartingtheSetupUtilityprogram”onpage63.
2.SelectSecurity.
Chapter6.Advancedconfiguration65
Page 74

3.Dependingonthepasswordtype,selectSetPower-OnPassword,SetAdministratorPassword,or
HardDiskPasswordandpressEnter.
4.Followtheinstructionsontherightsideofthescreentoset,change,ordeleteapassword.
Note:Apasswordcanbeanycombinationofupto64alphabeticandnumericcharacters.Formore
information,see“Passwordconsiderations”onpage65
5.ExittheSetupUtilityprogram.See“ExitingtheSetupUtilityprogram”onpage66.
.
Selectingastartupdevice
Ifthecomputerdoesnotstartupfromadeviceasexpected,youcanchoosetochangethestartupdevice
sequencepermanentlyorselectatemporarystartupdevice.
Changingthestartupdevicesequencepermanently
Tochangethestartupdevicesequencepermanently,dothefollowing:
1.Dependingonthetypeofthestoragedevice,dooneofthefollowing:
•Ifthestoragedeviceisinternal,gotostep2.
•Ifthestoragedeviceisadisc,ensurethatthecomputerisonorturnonthecomputer.Then,insert
thediscintotheopticaldrive.
•Ifthestoragedeviceisanexternaldeviceotherthanadisc,connectthestoragedevicetothe
computer.
2.StarttheSetupUtilityprogram.See“StartingtheSetupUtilityprogram”onpage63.
3.SelectStartup.
4.Followtheinstructionsontherightsideofthescreentochangethestartupdevicesequence.
5.ExittheSetupUtilityprogram.See“ExitingtheSetupUtilityprogram”onpage66.
Selectingatemporarystartupdevice
Note:Notalldiscsandstoragedrivesarebootable.
Toselectatemporarystartupdevice,dothefollowing:
1.Dependingonthetypeofthestoragedevice,dooneofthefollowing:
•Ifthestoragedeviceisinternal,gotostep2.
•Ifthestoragedeviceisadisc,ensurethatthecomputerisonorturnonthecomputer.Then,insert
thediscintotheopticaldrive.
•Ifthestoragedeviceisanexternaldeviceotherthanadisc,connectthestoragedevicetothe
computer.
2.T urnonorrestartthecomputer.BeforeWindowsstartsup,repeatedlypressandreleasetheF12key
untilStartupDeviceMenuisdisplayed.
Note:Forsomekeyboards,youmightneedtopressFn+F12todisplayStartupDeviceMenu.
3.SelectthedesiredstoragedeviceandpressEnter.Thecomputerwillstartupfromthedeviceyouselect.
Ifyouwanttoselectapermanentstartupdevice,selectEnterSetuponStartupDeviceMenuandpress
EntertostarttheSetupUtilityprogram.Formoreinformationabouthowtoselectapermanentstartup
device,see“Changingthestartupdevicesequencepermanently”onpage66
.
ExitingtheSetupUtilityprogram
ToexittheSetupUtilityprogram,dooneofthefollowing:
66ThinkCentreM700HardwareMaintenanceManual
Page 75

•Ifyouwanttosavethenewsettings,presstheF10key.Then,selectYesinthewindowdisplayed
andpressEnter.
Note:Forsomekeyboards,youmightneedtopressFn+F10toexittheSetupUtilityprogram.
•Ifyoudonotwanttosavethenewsettings,selectExit➙DiscardChangesandExitandpressEnter.
Then,selectYesinthewindowdisplayedandpressEnter.
UpdatingtheBIOS
Whenyouinstallanewprogram,hardwaredevice,ordevicedriver,youmightbeinformedtoupdate
theBIOS.YoucanupdatetheBIOSfromyouroperatingsystemoraflashupdatedisc(supportedonly
onsomemodels).
ToupdatetheBIOS,dothefollowing:
1.Gotohttp://www.lenovo.com/drivers.
2.DownloadtheflashBIOSupdatedriverfortheoperatingsystemversionortheISOimageversion(used
tocreateaflashupdatedisc).Then,downloadtheinstallationinstructionsfortheflashBIOSupdate
driveryoudownload.
3.PrinttheinstallationinstructionsyoudownloadandfollowtheinstructionstoupdatetheBIOS.
Note:IfyouwanttoupdatetheBIOSfromaflashupdatedisc,theinstallationinstructionsmightnotprovide
theinformationabouthowtorecordtheupdatedisc.See“Usingadisc”onpage45.
Chapter6.Advancedconfiguration67
Page 76

68ThinkCentreM700HardwareMaintenanceManual
Page 77

Chapter7.Troubleshooting,diagnostics,andrecovery
Thischapterprovidessolutionstoresolvethecomputerproblems.Followthestepsinthebasicprocedure
forresolvingcomputerproblems,whichhelpsyoumakegooduseofthetroubleshooting,diagnostics,
andrecoveryinformation.
•“Basicprocedureforresolvingcomputerproblems”onpage69
•“Troubleshooting”onpage69
•“Diagnostics”onpage77
•“Recoveryinformation”onpage78
Basicprocedureforresolvingcomputerproblems
Itisrecommendedthatyouusethefollowingproceduretoresolvecomputerproblemsyouareexperiencing:
1.Ensurethat:
a.Thecablesforallconnecteddevicesareconnectedcorrectlyandsecurely.
b.Allconnecteddevicesthatrequireacpowerareconnectedtoproperlygrounded,functioning
electricaloutlets.
c.AllconnecteddevicesareenabledintheBIOSsettingsofthecomputer.See“Enablingordisabling
adevice”onpage63
Iftheseactionsdonotresolveyourproblem,continuewiththenextstep.
2.Useanantivirusprogramtoseeifthecomputerhasbeeninfectedbyavirus.Iftheprogramdetects
avirus,removethevirus.Iftheantivirusprogramdoesnotresolveyourproblem,continuewiththe
nextstep.
3.Goto“Troubleshooting”onpage69andfollowtheinstructionsforthetypeofproblemyouare
experiencing.Ifthesetroubleshootinginstructionsdonotresolveyourproblem,continuewiththe
nextstep.
4.Runthediagnosticprogram.See“Diagnostics”onpage77.Ifthediagnosticprogramdoesnotresolve
yourproblem,continuewiththenextstep.
5.Recoveryouroperatingsystem.See“Recoveryinformation”onpage78.
6.Ifnoneoftheseactionssolveyourproblem,contacttheLenovoCustomerSupportCenter.Foralistof
LenovoSupportphonenumbers,gotohttp://www.lenovo.com/support/phone.Formoreinformation
abouthelp,service,andtechnicalassistance,seeChapter10“Gettinginformation,help,andservice”
onpage133.
.
Troubleshooting
Attention:Donotopenthecomputerorattemptanyrepairbeforereadingandunderstanding“Readthis
first:Importantsafetyinformation”inthisdocument.
Usethetroubleshootinginformationtofindsolutionstoproblemsthathavedefinitesymptoms.
Startupproblems
Thissectionprovidessolutionstostartup-relatedproblems.
Thecomputerdoesnotstartupwhenyoupressthepowerbutton
Solutions:Ensurethat:
•Thepowercordiscorrectlyconnectedtotherearofthecomputerandtoaworkingelectricaloutlet.
©CopyrightLenovo2016
69
Page 78

•Ifthecomputerhasasecondarypowerswitchontherearofthecomputer,ensurethatitisswitchedon.
•Thepowerindicatoronthefrontofthecomputerison.
•Thecomputervoltagematchesthevoltageavailableattheelectricaloutletforyourcountryorregion.
Theoperatingsystemfailstostartup
Solution:Ensurethatthestartupsequenceincludesthedevicewheretheoperatingsystemresides.Usually,
theoperatingsystemisonthestoragedrive.Formoreinformation,see“Changingthestartupdevice
sequencepermanently”onpage66.
Thecomputerbeepsmultipletimesbeforetheoperatingsystemstartsup
Solution:Ensurethatnokeysarestuck.
Audioproblems
Thissectionprovidessolutionstoaudio-relatedproblems.
NoaudioinWindows
Solutions:
•IfyouareusingpoweredexternalspeakersthathaveanOn/Offcontrol,ensurethat:
–TheOn/OffcontrolissettotheOnposition.
–Thespeakerpowercableisconnectedtoaproperlygrounded,functionalacelectricaloutlet.
•Ifyourexternalspeakershaveavolumecontrol,ensurethatthevolumeisnotsettoolow.
•ClickthevolumeiconintheWindowsnotificationareaonthetaskbar.Ensurethatthemutespeakers
settingsarenotselectedandnoneofthevolumesettingsissettoolow.
Note:IfthevolumeiconisnotdisplayedintheWindowsnotificationarea,addtheicontothenotification
area.See“AddinganicontotheWindowsnotificationarea”onpage45.
•Somemodelshaveafrontaudiopanelyoucanusetoadjustvolume.Ifyouhaveafrontaudiopanel,
ensurethatthevolumeisnotsettoolow.
•Ensurethatyourexternalspeakers(andheadphones,ifused)areconnectedtothecorrectaudio
connectoronthecomputer.Mostspeakercablesarecolor-codedtomatchtheconnector.
Note:Whenexternal-speakerorheadphonecablesareconnectedtotheaudioconnector,theinternal
speaker,ifpresent,isdisabled.Inmostcases,ifanaudioadapterisinstalledinoneoftheexpansion
slots,theaudiofunctionbuiltintothesystemboardisdisabled.Therefore,youmustusetheaudio
connectorsontheaudioadapter.
•EnsurethattheprogramyouarerunningisdesignedforuseintheMicrosoftWindowsoperatingsystem.
IftheprogramisdesignedtoruninDOS,theprogramdoesnotusetheWindowssoundfeature.The
programmustbeconfiguredtouseSoundBlasterProorSoundBlasteremulation.
•Ensurethattheaudiodevicedriversarecorrectlyinstalled.
Soundcomesonlyfromoneexternalspeaker
Solutions:
•Ensurethatthespeakercableisinsertedcompletelyintotheconnectoronthecomputer.
•Ensurethatthecablethatconnectstheleftspeakertotherightspeakerissecurelyconnected.
•ClickthevolumeiconintheWindowsnotificationareaonthetaskbar.Then,clickthespeakericonontop
ofthevolumecontrol.ClicktheLevelstabandensurethattheBalancesettingsaresetcorrectly.
70ThinkCentreM700HardwareMaintenanceManual
Page 79

Note:IfthevolumeiconisnotdisplayedintheWindowsnotificationarea,addtheicontothenotification
area.See“AddinganicontotheWindowsnotificationarea”onpage45
.
CDproblems
ThissectionprovidessolutionstoCD-relatedproblems.
ACDorDVDdoesnotwork
Solutions:
•IfyouhavemultipleCDorDVDdrivesinstalled(oracombinationofCDandDVDdrives),tryinsertingthe
discintotheotherdrive.Insomecases,onlyoneofthedrivesisconnectedtotheaudiosubsystem.
•Ensurethatthediscisinsertedcorrectly,withitslabelup.
•Ensurethatthediscyouareusingisclean.T oremovedustorfingerprints,wipethedisccleanwithasoft
clothfromthecentertotheoutside.Wipingadiscinacircularmotionmightcauselossofdata.
•Ensurethatthediscyouareusingisnotscratchedordamaged.T ryinsertinganotherdiscthatyou
knowisgood.Ifyoucannotreadfromaknown-gooddisc,youmighthaveaproblemwithyouroptical
driveorthecablingtoyouropticaldrive.Ensurethatthepowercableandsignalcablearesecurely
connectedtothedrive.
Unabletouseabootablerecoverymedium,suchastheProductRecoveryCD,to
startthecomputer
Solution:EnsurethattheCDorDVDdriveisinthestartupsequencebeforethestoragedrive.Referto
“Selectingatemporarystartupdevice”onpage66forinformationonviewingandchangingthestartup
sequence.Notethatonsomemodelsthestartupsequenceispermanentlysetandcannotbechanged.
DVDproblems
ThissectionprovidessolutionstoDVD-relatedproblems.
BlackscreeninsteadofDVDvideo
Solutions:
•RestarttheDVDplayerprogram.
•T ryalowerscreenresolutionorcolordepth.
•Closeanyopenfiles,andthenrestartthecomputer.
DVDmoviedoesnotplay
Solutions:
•Ensurethatthediscsurfaceiscleanandnotscratched.
•Checkthediscorpackageforregionalcoding.Youmightneedtopurchaseadiscwithcodingforthe
regionwhereyouareusingthecomputer.
NoaudioorintermittentaudiowhileplayingaDVDmovie
Solutions:
•Checkthevolumecontrolsettingsonthecomputerandonyourspeakers.
•Ensurethatthediscsurfaceiscleanandnotscratched.
•Checkallcableconnectionstoandfromthespeakers.
•UsetheDVDmenuforthevideotoselectadifferentaudiotrack.
Chapter7.Troubleshooting,diagnostics,andrecovery71
Page 80

Playbackissloworchoppy
Solutions:
•Disableanybackgroundprograms,suchasAntiVirusorDesktopThemes.
•Ensurethatvideoresolutionissettolessthan1152x864pixels.
Invaliddiscornodiscfoundmessage
Solutions:
•EnsurethataDVDdiscisinthedrivewiththeshinysideofthediscfacingdown.
•Ensurethatvideoresolutionissettolessthan1152x864pixels.
•OncomputersthathaveaCD-ROMorCD-RWdriveinadditiontoaDVD-ROMdrive,ensurethatthe
DVDdiscisinthedrivelabeled“DVD”.
Intermittentproblems
Someproblemsoccuronlyoccasionallyandaredifficulttorepeat.
Solutions:
•Ensurethatallcablesandcordsaresecurelyconnectedtothecomputerandconnecteddevices.
•Ensurethatwhenthecomputerison,thefangrillisnotblocked(thereisairflowaroundthegrill),andthe
fansareworking.Ifairflowisblockedorthefansarenotworking,thecomputermightoverheat.
•IfSmallComputerSystemInterface(SCSI)devicesareinstalled,ensurethatthelastexternaldevicein
eachSCSIchainisterminatedcorrectly.Formoreinformation,seeyourSCSIdocumentation.
Storagedriveproblems
Selectyoursymptomfromthefollowinglist:
•“SomeorallstoragedrivesmissingfromtheSetupUtilityprogram”onpage72
•“"NoOperatingSystemFound"messageorthesystemnotstartingupfromthecorrectstoragedrive”
onpage72
SomeorallstoragedrivesmissingfromtheSetupUtilityprogram
Symptom:SomeorallstoragedrivesmissingfromtheSetupUtilityprogram
Solutions:
•Ensurethatallstoragedrivesignalcablesandpowercablesareconnectedcorrectly.
•Ensurethatthecomputerisconfiguredcorrectlytosupportthestoragedrives.
–IfthecomputerisinstalledwithfiveSATAstoragedrives,ensurethattheSATAstoragedrive
enablementmodule(onetofivestoragedrives)isinstalled.
–IfthecomputerisinstalledwithSASstoragedrives,ensurethattheSASstoragedriveenablement
module(onetofivestoragedrives)ortheLSIMegaRAIDSASadapterisinstalled.
"NoOperatingSystemFound"messageorthesystemnotstartingupfromthe
correctstoragedrive
Symptom:"NoOperatingSystemFound"messageorthesystemnotstartingupfromthecorrectstorage
drive
Solutions:
•Ensurethatallstoragedrivesignalcablesandpowercablesareconnectedcorrectly.
72ThinkCentreM700HardwareMaintenanceManual
Page 81

•EnsurethatthestoragedrivethecomputerstartsupfromislistedasthefirststartupdeviceintheSetup
Utilityprogram.Referto“Changingthestartupdevicesequencepermanently”onpage66
Note:Inrarecases,thestoragedrivewiththeoperatingsystemmightgetcorruptedordamaged.Insuch
cases,youmightneedtoreplacethestoragedrive.
.
Networkingproblems
Thissectionprovidessolutionstonetworking-relatedproblems.
EthernetLANproblems
MycomputercannotbeconnectedtoanEthernetLAN
Solutions:
•ConnectthecablefromtheEthernetconnectortotheRJ45connectorofthehub.
•EnabletheEthernetLANfeatureintheSetupUtilityprogram.See“StartingtheSetupUtilityprogram”on
page63.Then,followtheinstructionsonthescreen.
•EnabletheEthernetLANadapter.
1.DependingonyourWindowsversion,dooneofthefollowing:
–ForWindows7:ClicktheStartbuttontoopentheStartmenu.
–ForWindows10:Right-clicktheStartbuttontoopentheStartcontextmenu.
2.ClickControlPanel.ViewControlPanelusinglargeiconsorsmallicons,andthenclickNetwork
andSharingCenter➙Changeadaptersettings.
3.Right-clicktheEthernetLANadaptericonandclickEnable.
•UpdateorreinstalltheEthernetLANdriver.See“Keepingthecomputercurrent”onpage54.
•Installallnetworkingsoftwarethatisnecessaryforyournetworkenvironment.CheckwithyourLAN
administratorforthenecessarynetworkingsoftware.
•Setthesameduplexfortheswitchportandtheadapter.Ifyouconfiguredtheadapterforfullduplex,
ensurethattheswitchportisalsoconfiguredforfullduplex.Settingthewrongduplexmodemight
degradeperformance,causedataloss,orresultinlostconnections.
MycomputerisaGigabitEthernetmodelandIuseaspeedof1000Mbps,buttheconnectionfails
orerrorsoccur
Solution:ConnectthenetworkcabletotheEthernetconnectorusingCategory5wiringanda100BASE-T
hub/switch(not100BASE-X).
MycomputerisaGigabitEthernetmodel,butitcannotbeconnectedtothenetworkat1000Mbps,
butatonly100Mbps
Solutions:
•T ryanothercable.
•Setthelinkpartnertoauto-negotiate.
•Settheswitchtobe802.3ab-compliant(gigabitovercopper).
TheWakeOnLANfeaturedoesnotwork
Solution:EnabletheWakeOnLAN(WOL)featureintheSetupUtilityprogram.See“StartingtheSetupUtility
program”onpage63.Then,followtheinstructionsonthescreen.
WirelessLANproblem
Note:ThewirelessLANfeatureisoptional.
Chapter7.Troubleshooting,diagnostics,andrecovery73
Page 82

ThewirelessLANfeaturedoesnotwork
Solutions:
•EnablethewirelessLANfeatureintheSetupUtilityprogram.See“StartingtheSetupUtilityprogram”on
page63.Then,followtheinstructionsonthescreen.
•ForWindows10,enablethewirelessLANfeatureinWindowsSettings.ClicktheStartbuttontoopenthe
Startmenu,andthenclickSettings➙Network&Internet➙Wi-Fi.TurnontheWi-Fifeature.
•EnablethewirelessLANadapter.
1.DependingonyourWindowsversion,dooneofthefollowing:
–ForWindows7:ClicktheStartbuttontoopentheStartmenu.
–ForWindows10:Right-clicktheStartbuttontoopentheStartcontextmenu.
2.ClickControlPanel.ViewControlPanelusinglargeiconsorsmallicons,andthenclickNetwork
andSharingCenter➙Changeadaptersettings.
3.Right-clickthewirelessLANadaptericonandclickEnable.
•UpdateorreinstallthewirelessLANdriver.See“Keepingthecomputercurrent”onpage54.
Bluetoothproblems
Note:TheBluetoothfeatureisoptional.
TheBluetoothfeaturedoesnotwork
Solutions:
•EnabletheBluetoothfeatureintheSetupUtilityprogram.See“StartingtheSetupUtilityprogram”on
page63.Then,followtheinstructionsonthescreen.
•T urnontheBluetoothradios.
1.DependingonyourWindowsversion,dooneofthefollowing:
–ForWindows7:ClicktheStartbuttontoopentheStartmenu.Right-clickComputer,andthen
clickProperties.
–ForWindows10:Right-clicktheStartbuttontoopentheStartcontextmenu.
2.ClickDeviceManager.Typetheadministratorpasswordorprovideconfirmationifprompted.
3.Right-clicktheBluetoothradiosunderBluetoothorBluetoothRadios,andthenclickEnable.
•EnabletheBluetoothadapter.
1.DependingonyourWindowsversion,dooneofthefollowing:
–ForWindows7:ClicktheStartbuttontoopentheStartmenu.
–ForWindows10:Right-clicktheStartbuttontoopentheStartcontextmenu.
2.ClickControlPanel.ViewControlPanelusinglargeiconsorsmallicons,andthenclickNetwork
andSharingCenter➙Changeadaptersettings.
3.Right-clicktheBluetoothadaptericonandclickEnable.
•UpdateorreinstalltheBluetoothdriver.See“Keepingthecomputercurrent”onpage54.
SounddoesnotcomefromtheBluetoothheadsetorheadphones
Solution:SettheBluetoothheadsetorheadphonesasthedefaultdevice.
1.Exittheapplicationthatusesthesounddevice(forexample,WindowsMediaPlayer).
2.Right-clickthevolumeiconintheWindowsnotificationareaonthetaskbar.
Note:IfthevolumeiconisnotdisplayedintheWindowsnotificationarea,addtheicontothe
notificationarea.See“AddinganicontotheWindowsnotificationarea”onpage45
74ThinkCentreM700HardwareMaintenanceManual
.
Page 83

3.ClickPlaybackdevices.
4.IfyouareusingtheHeadsetprofile,selectBluetoothHands-freeAudio,andthenclickSetDefault.If
youareusingtheAVprofile,selectStereoAudio,andthenclickSetDefault.
5.ClickOK.
Performanceproblems
Thissectionprovidessolutionstoperformance-relatedproblemsofthecomputer.
Excessivenumberoffragmentedfiles
Solution:UsetheWindowsdiskdefragmentationordiskoptimizationfeaturetocleanupthefiles.
Note:Dependingonthevolumeofthestoragedrivesandamountofdatastoredonthestoragedrives,the
disk-defragmentationprocessmighttakeuptoseveralhours.
1.Closeanyopenprogramsandwindows.
2.ClicktheStartbuttontoopentheStartmenu.
3.DependingonyourWindowsversion,dooneofthefollowing:
•ForWindows7:ClickComputer.
•ForWindows10:ClickFileExplorer➙ThisPC.
4.Right-clickyourCdriveandthenclickProperties.
5.ClicktheToolstab.
6.DependingonyourWindowsversion,dooneofthefollowing:
•ForWindows7:ClickDefragmentnow.
•ForWindows10:ClickOptimize.Selectthedesireddrive,andthenclickOptimize.
7.Followtheinstructionsonthescreen.
Insufficientfreestoragedrivespace
Solutions:Freeupstoragedrivespace.
•CleanoutyourInbox,SentItems,andDeletedItemsfoldersfromyoure-mailapplication.
•CleanupyourCdrive.
1.ClicktheStartbuttontoopentheStartmenu.
2.DependingonyourWindowsversion,dooneofthefollowing:
–ForWindows7:ClickComputer.
–ForWindows10:ClickFileExplorer➙ThisPC.
3.Right-clickyourCdriveandthenclickProperties.
4.Checktheamountoffreespace,andthenclickDiskCleanup.
5.Alistofunnecessaryfilecategoriesisdisplayed.Selecteachfilecategoryyouwanttodelete,
andthenclickOK.
•T urnsomeWindowsfeaturesofforremovesomeunnecessaryprograms.
1.DependingonyourWindowsversion,dooneofthefollowing:
–ForWindows7:ClicktheStartbuttontoopentheStartmenu.
–ForWindows10:Right-clicktheStartbuttontoopentheStartcontextmenu.
2.ClickControlPanel.ViewControlPanelusinglargeiconsorsmallicons,andthenclickPrograms
andFeatures.
3.Dooneofthefollowing:
Chapter7.Troubleshooting,diagnostics,andrecovery75
Page 84

–T oturnsomeWindowsfeaturesoff,clickTurnWindowsfeaturesonoroff.Followthe
instructionsonthescreen.
–T oremovesomeunnecessaryprograms,selecttheprogramyouwanttoremove,andthenclick
Uninstall/ChangeorUninstall.
Insufficientfreememoryspace
Solutions:
•Right-clickablankareaonthetaskbarandopenTaskManager.Then,endsometasksyouarenot
performing.
•Installadditionalmemorymodules.Topurchasememorymodules,goto
http://www.lenovo.com.
Serialconnectorcannotbeaccessed
Solutions:
•Connecttheserialcabletotheserialconnectoronthecomputerandtotheserialdevice.Iftheserial
devicehasitsownpowercord,connectthepowercordtoagroundedelectricaloutlet.
•T urnontheserialdeviceandkeepthedeviceonline.
•Installanyapplicationprogramssuppliedwiththeserialdevice.Refertothedocumentationthatcomes
withtheserialdeviceformoreinformation.
•Ifyouaddedoneserial-connectoradapter,installtheadaptercorrectly.
USBdeviceproblems
ThissectionprovidessolutionstoUSBdevice-relatedproblems.
MyUSBdevicecannotbeaccessed
Solutions:
•ConnecttheUSBcablefromtheUSBconnectortotheUSBdevice.IftheUSBdevicehasitsownpower
cord,connectthepowercordtoagroundedelectricaloutlet.
•T urnontheUSBdeviceandkeepthedeviceonline.
•InstallanydevicedriversorapplicationprogramssuppliedwiththeUSBdevice.Refertothe
documentationthatcomeswiththeUSBdeviceformoreinformation.
•DetachandreconnecttheUSBconnectortoresettheUSBdevice.
IcannotinstalltheWindows7operatingsystemusinganexternalUSBdevice
Solution:Gotohttp://www.lenovo.com/supporttodownloadandinstallUSBdrivers.
Softwareanddriverproblems
Thissectionprovidessolutionstosoftware-anddriver-relatedproblems.
Forsomeprograms,datescannotbesortedincorrectorder
Solution:Someprogramsdevelopedbeforetheyear2000useonlythelasttwodigitsofayeartosortdates,
assumingthefirsttwodigitsare19.Consequently,datescannotbesortedincorrectordernowadays.
Checkwithyoursoftwaremanufacturertoseeifanyupdatesareavailable.Manysoftwaremanufacturers
makeupdatesavailablefromtheWorldWideWeb.
76ThinkCentreM700HardwareMaintenanceManual
Page 85

Someapplicationprogramsdonotworkasexpected
Solutions:
1.Checkwhethertheproblemiscausedbyanapplicationprogram.
a.Ensurethatthesoftwareiscompatiblewiththecomputer.Refertotheinformationsuppliedwith
thesoftwareformoreinformation.
b.Verifythatothersoftwareworkscorrectlyonthecomputer.
c.Verifythatthesoftwareyouareusingworksonanothercomputer.
2.Iftheproblemiscausedbyanapplicationprogram:
•Refertotheprinteddocumentationthatcomeswiththeprogramorthehelpsystemoftheprogram.
•Updatetheprogram.See“Keepingthecomputercurrent”onpage54
•Uninstalltheprogramandthenreinstallit.T odownloadaprogramthatispreinstalledonthe
computer,gotohttp://www.lenovo.com/supportandfollowtheinstructionsonthescreen.
.
Adevicedoesnotworknormallyduetodevicedriverproblems
Solution:Updatethedevicedriver.See“Keepingthecomputercurrent”onpage54.
Diagnostics
Note:IfyouareusingaWindowsoperatingsystemotherthanWindows7orWindows10,goto
http://www.lenovo.com/diagsforthediagnosticsinformationforthecomputer.
Thediagnosticprogramisusedtotesthardwarecomponentsofthecomputer.Thediagnosticprogramalso
canreportoperating-system-controlledsettingsthatinterferewiththecorrectoperationofthecomputer.
LenovoSolutionCenter
TheLenovoSolutionCenterprogramisthediagnosticprogrampreinstalledonthecomputer.Theprogram
enablesyoutotroubleshootandresolvecomputerproblems.Itcombinesdiagnostictests,system
informationcollection,securitystatus,andsupportinformation,alongwithhintsandtipsformaximum
systemperformance.
ToopentheLenovoSolutionCenterprogram,see“Accessingaprogramonthecomputer”onpage41
moreinformationaboutusingtheprogram,refertothehelpsystemoftheprogram.
IfyouareunabletoisolateandrepairtheproblemyourselfafterrunningLenovoSolutionCenter,save
andprintthelogfilescreatedbytheprogram.Y oumightneedthelogfileswhenyouspeaktoaLenovo
technicalsupportrepresentative.
UEFIdiagnosticprogram
TheUEFIdiagnosticprogramenablesyoutotesthardwaredevices(suchasmemorymodulesorstorage
drives)andprovidesthefollowingtools:
•Systeminformation
•Recoverbadsectorstool
•Generateconfigurationfile
•Executefromconfigurationfile
TousetheUEFIdiagnosticprogram,dothefollowing:
1.T urnonorrestartyourcomputer.
.For
Chapter7.Troubleshooting,diagnostics,andrecovery77
Page 86

2.BeforeWindowsstarts,repeatedlypressandreleasetheF10keyuntiltheUEFIdiagnosticprogram
opens.
Note:IfaBIOSpasswordhasbeenset,theSetupUtilityprogramwillnotopenuntilyouenterthe
correctpassword.Formoreinformation,see“UsingBIOSpasswords”onpage65
3.Followtheinstructionsonthescreentousethediagnosticprogram.
.
Recoveryinformation
Thissectionprovidesinstructionsabouthowtorecoveryouroperatingsystem.
Note:Ifadevicedoesnotworknormallyafterrecoveringtheoperatingsystem,updatethedevicedriver.
See“Keepingthecomputercurrent”onpage54.
RecoveryinformationforWindows7
TorecoveryourWindows7operatingsystem,usethefollowingsolutions:
•UseWindowsrecoverysolutions.
–UseSystemRestoretorestoresystemfilesandsettingstoanearlierpoint.
1.ClicktheStartbuttontoopentheStartmenu.
2.ClickControlPanel.ViewControlPanelusinglargeiconsorsmallicons,andthenclickRecovery
➙OpenSystemRestore.
3.Followtheinstructionsonthescreen.
–UsetheWindowsrecoveryenvironmentbydoingoneofthefollowing:
–Afterseveralconsecutivefailedbootattempts,theWindowsrecoveryenvironmentmightstart
automatically.Followtheinstructionsonthescreentochoosetheappropriaterecoverysolution.
–T urnonorrestartthecomputer.Then,repeatedlypressandreleasetheF8keyuntiltheAdvanced
BootOptionswindowopens.SelectRepairY ourComputer,pressEnter,andfollowtheinstructions
onthescreentochoosetheappropriaterecoverysolution.
Note:Forsomekeyboards,youmightneedtopressFn+F8toopentheAdvancedBootOptions
window.
•UsetheRescueandRecoveryprogramtorestorethestoragedrivefromabackup,orrestoretheC
drivetothefactory-defaultsettings.
Notes:
–Dependingonthecomputermodel,theRescueandRecoveryprogrammightnotbepreinstalled.You
needtoinstalleditmanuallyearlier.
–IfyouusetheRescueandRecoveryprogramtorestorethestoragedrivefromabackup,ensurethat
youbackedupyourdataearlierwiththeprogram.
TousetheRescueandRecoveryprogram,dooneofthefollowing:
–OpentheRescueandRecoveryprogram.See“Accessingaprogramonthecomputer”onpage41.
Formoreinformationaboutusingtheprogram,refertothehelpsystemoftheprogram.
–OpentheRescueandRecoveryworkspace.
1.T urnoffthecomputer.PressandholdtheEnterkeyandthenturnonthecomputer.Releasethe
EnterkeywhenStartupInterruptMenuisdisplayed.Then,pressF11toopentheRescueand
Recoveryworkspace.
2.IftheRescueandRecoveryworkspacefailstoopen,usetherescuemediumyoucreatedearlierto
resolvetheproblem.Selecttherescuemediumasthestartupdevice.See“Selectingatemporary
78ThinkCentreM700HardwareMaintenanceManual
Page 87

startupdevice”onpage66.Whentherescuemediumstarts,theRescueandRecoveryworkspace
opens.Followtheinstructionsonthescreen.
•UsetherecoverymediumyoucreatedearlierwiththeCreateRecoveryMediaprogramtorestoreonly
theCdriveortheentirestoragedrivetothefactory-defaultsettings.
Note:Tocreatearecoverymedium,see“Goodmaintenancepractices”onpage53
1.Selecttherecoverymediumasthestartupdevice.See“Selectingatemporarystartupdevice”
onpage66
2.Followtheinstructionsonthescreentochoosetheappropriaterecoverysolution.
•UsetherecoverydiscsetprovidedbyLenovotorestoretheentirestoragedrivetothefactory-default
settings.
–Ifthecomputercomeswiththerecoverydiscset,followtheinstructionsshippedwiththediscset.
–Ifthecomputerdoesnotcomewiththerecoverydiscset,contacttheLenovoCustomerSupport
Centertoorderarecoverydiscset.See“Callingforservice”onpage134.
.
.
RecoveryinformationforWindows10
TorecoveryourWindows10operatingsystem,usethefollowingsolutions:
•UseWindowsrecoverysolutions.
–UserecoverysolutionsinWindowsSettings.
1.ClicktheStartbuttontoopentheStartmenu.
2.ClickSettings➙Update&security➙Recovery.
3.Choosetheappropriaterecoverysolutionbyfollowingtheinstructionsonthescreen.
–UseSystemRestoretorestoresystemfilesandsettingstoanearlierpoint.
1.Right-clicktheStartbuttontoopentheStartcontextmenu.
2.ClickControlPanel.ViewControlPanelusinglargeiconsorsmallicons,andthenclickRecovery
➙OpenSystemRestore.
3.Followtheinstructionsonthescreen.
–UsetheFileHistorytooltorestoreyourfilesfromabackup.
Note:IfyouusetheFileHistorytooltorestoreyourfilesfromabackup,ensurethatyoubackedup
yourdataearlierwiththetool.
1.Right-clicktheStartbuttontoopentheStartcontextmenu.
2.ClickControlPanel.ViewControlPanelusinglargeiconsorsmallicons,andthenclickFile
History➙Restorepersonalfiles.
3.Followtheinstructionsonthescreen.
–UsetheWindowsrecoveryenvironmentbydoingoneofthefollowing:
–Afterseveralconsecutivefailedbootattempts,theWindowsrecoveryenvironmentmightstart
automatically.Followtheinstructionsonthescreentochoosetheappropriaterecoverysolution.
–SelecttherecoverymediumyoucreatedearlierwiththeWindowstoolasthestartupdevice.See
“Selectingatemporarystartupdevice”onpage66
tochoosetheappropriaterecoverysolution.
Note:Tocreatearecoverymedium,see“Goodmaintenancepractices”onpage53.
•UsetherecoveryUSBkeyprovidedbyLenovotorestoretheentirestoragedrivetothefactory-default
settings.
.Then,followtheinstructionsonthescreen
Chapter7.Troubleshooting,diagnostics,andrecovery79
Page 88

–IfthecomputercomeswiththerecoveryUSBkey,followtheinstructionsshippedwiththeUSBkey.
–IfthecomputerdoesnotcomewiththerecoveryUSBkey,contacttheLenovoCustomerSupport
CentertoorderarecoveryUSBkey.See“Callingforservice”onpage134.
80ThinkCentreM700HardwareMaintenanceManual
Page 89

Chapter8.Servicecheckoutandsymptom-to-FRUindex
Thischapterprovidesinformationaboutgeneralservicecheckoutandsymptom-to-FRUindex.
Servicecheckout
Attention:Thedrivesinthecomputeryouareservicingmighthavebeenrearrangedorthedrivestartup
sequencechanged.Beextremelycarefulduringwriteoperationssuchascopying,saving,orformatting.
Dataorprogramscanbeoverwrittenifyouselectanincorrectdrive.
Generalerrormessagesappearifaproblemorconflictisfoundbyanapplicationprogram,theoperating
system,orboth.Foranexplanationofthesemessages,refertotheinformationsuppliedwiththatsoftware
package.
BeforereplacinganyFRUs,ensurethatthelatestlevelofBIOSisinstalledonthesystem.Adown-levelBIOS
mightcausefalseerrorsandunnecessaryreplacementofthesystemboard.
Usethefollowingproceduretohelpdeterminethecauseoftheproblem:
1.Power-offthecomputerandallexternaldevices.
2.Checkallcablesandpowercords.
3.Setalldisplaycontrolstothemiddleposition.
4.Power-onallexternaldevices.
5.Power-onthecomputer.
•Lookfordisplayederrorcodes
•Listenforbeepcodes
•Lookforreadableinstructionsoramainmenuonthedisplay.
Ifyoudidnotreceivethecorrectresponse,gotostep6.
Ifyoudoreceivethecorrectresponse,gotostep7.
6.Lookatthefollowingconditionsandfollowtheinstructions:
•IfyouhearbeepcodesduringPOST,goto“Beepsymptoms”onpage83
•IfthecomputerdisplaysaPOSTerror,goto“POSTerrorcodes”onpage83.
•Ifthecomputerhangsandnoerrorisdisplayed,gotostep7.
7.RuntheDiagnosticprograms.See“Diagnostics”onpage77.
•Ifyoureceiveanerror,replacethepartthatthediagnosticprogramcallsout.
•Iftheteststopsandyoucannotcontinue,replacethelastdevicetested.
.
Problemdeterminationtips
Duetothevarietyofhardwareandsoftwarecombinationsthatcanbeencountered,usethefollowing
informationtoassistyouinproblemdetermination.Ifpossible,havethisinformationavailablewhen
requestingassistancefromServiceSupportandEngineeringfunctions.
•Machinetypeandmodel
•Processororharddiskdriveupgrades
•Failuresymptom
–Dodiagnosticsindicateafailure?
–What,when,where,single,ormultiplesystems?
©CopyrightLenovo2016
81
Page 90

–Isthefailurerepeatable?
–Hasthisconfigurationeverworked?
–Ifithasbeenworking,whatchangesweremadepriortoitfailing?
–Isthistheoriginalreportedfailure?
•Diagnosticsversion
–T ypeandversionlevel
•Hardwareconfiguration
–Print(printscreen)configurationcurrentlyinuse
–BIOSlevel
•Operatingsystemsoftware
–T ypeandversionlevel
Notes:Toeliminateconfusion,identicalsystemsareconsideredidenticalonlyifthey:
1.Aretheexactmachinetypeandmodels
2.HavethesameBIOSlevel
3.Havethesameadapters/attachmentsinthesamelocations
4.Havethesameaddressjumpers/terminators/cabling
5.Havethesamesoftwareversionsandlevels
6.HavethesameDiagnosticDiskettes(version)
7.Havethesameconfigurationoptionssetinthesystem
8.Havethesamesetupfortheoperatingsystemcontrolfiles
Comparingtheconfigurationandsoftwareset-upbetween“workingandnon-working”systemswilloften
leadtoproblemresolution.
Symptom-to-FRUindex
TheSymptom-to-FRUindexlistserrorsymptomsandpossiblecauses.Themostlikelycauseislistedfirst.
Alwaysbeginwith“Servicecheckout”onpage81
.Thisindexcanalsobeusedtohelpyoudecidewhich
FRUstohaveavailablewhenservicingacomputer.Ifyouareunabletocorrecttheproblemusingthis
index,goto“Undeterminedproblems”onpage86.
Notes:
•TheSymptom-to-FRUindexisnotspecifictoanymachinetypeandareapplicabletoallLenovocomputers.
•Ifyouhavebothanerrormessageandanincorrectaudioresponse,diagnosetheerrormessagefirst.
•Ifyoucannotrunthediagnostictestsorgetadiagnosticerrorcodewhenrunningatest,firstdiagnosethePOST
errormessageyoureceive.
•Ifyoudidnotreceiveanyerrormessage,lookforadescriptionofyourerrorsymptomsinthefirstpartofthisindex.
Harddiskdrivebooterror
Aharddiskdrivebooterrorcanhavethefollowingcauses.
ErrorFRU/Action
Thestart-updriveisnotinthebootsequencein
configuration.
Nooperatingsysteminstalledonthebootdrive.Installanoperatingsystemonthebootdrive.
Checktheconfigurationandensurethestart-updriveis
inthebootsequence.
82ThinkCentreM700HardwareMaintenanceManual
Page 91

ErrorFRU/Action
Thebootsectoronthestartupdriveiscorrupted.
Thedriveisdefective.
Thedrivemustbeformatted.Dothefollowing:
1.Attempttobackupthedataonthefailingharddisk
drive.
2.Usingtheoperatingsystemprograms,formatthe
harddiskdrive.
Replacetheharddiskdrive.
Powersupplyproblems
Ifyoususpectapowerproblem,usethefollowingprocedures.
Check/VerifyFRU/Action
Checkthefollowingforproperinstallation.
•Powercord
•On/Offswitchconnector
•On/Offswitchpowersupplyconnector
•Systemboardpowersupplyconnectors
•Microprocessor(s)connection
Checkthepowercordforcontinuity.
Checkthepower-onswitchforcontinuity.
Reseatconnectors
Powercord
Power-onswitch
Beepsymptoms
Beepsymptomsaretonesoraseriesoftonesseparatedbypauses(intervalswithoutsound)duringPOST.
Thefollowingtabledescribesthebeepsymptoms.
BeepsymptomFRU/Action
2shortbeepsCMOSsettingerrorCommonerrorcode,seethedetailfailureinformationin
“POSTerrorcodes”onpage83.
3shortand1longbeepsDRAMmemoryerror
Performthefollowingactionsinorder.
1.Makesurethememorymodule(s)areproperlyseated
intheconnector(s).
2.Replacethememorymodule(s).
3.Replacethesystemboard.
POSTerrorcodes
Eachtimeyoupower-onthesystem,itperformsaseriesofteststhatchecktheoperationofthesystem
andsomeoptions.ThisseriesoftestsiscalledthePower-OnSelf-Test,orPOST.POSTdoesthefollowing
operations.
•Checkssomebasicsystem-boardoperations
•Checksthememoryoperation
•Startsthevideooperation
•Verifiesthatthebootdriveisworking
Chapter8.Servicecheckoutandsymptom-to-FRUindex83
Page 92

IfthePOSTdetectsaproblem,anerrormessageappearsonthescreen.Asingleproblemcancauseseveral
errormessagestoappear.Whenyoucorrectthecauseofthefirsterrormessage,theothererrormessages
probablywillnotbedisplayednexttimeyouturnonthesystem.
ErrorcodePOSTerrormessageDescription/Action
0135
0211
0164MemorysizedecreasedPressF10toexit.
1762
1820
1962
Fanfailure
Keyboardnotfound
Configurationchangehasoccurred
Morethanoneexternalfingerprint
readerareattached.Poweroffand
removeallbutthereaderthatyouset
upwithinyourmainoperatingsystem.
Nooperatingsystemfound.Press
anykeytorepeatbootsequence.
Thesystemmightbeoverheating.
PressF10toexit.
Note:Iftheproblemiscausedbythe
microprocessorfan,pressF10will
notsolvetheproblem.
Whenthereisnokeyboarddetected,
theerrormessagewillbedisplayed.
Thiserrormessageisdisplayedwhen
aharddiskdriveoropticaldrive
changehasbeenmade.
PressF10toexit.
Ifmorethanoneexternalfingerprint
readerareconnectedtoacomputer,
thiserrormessagewillbedisplayed.
Removeallofthefingerprint
keyboardsexcepttheonecompatible
withthefingerprintapplicationon
yourcomputer.
ThiserroroccursonlyafterthePOST
iscompleted.
Miscellaneouserrorconditions
Message/SymptomFRU/Action
ChangingdisplaycolorsDisplay/Monitor
Computerwillnotpower-off.See“Harddiskdriveboot
error”onpage82
ComputerwillnotRPLfromserver
.
1.PowerSwitch
2.SystemBoard
3.Risercard,ifinstalled.
1.Ensurethatnetworkisinstartupsequenceasfirst
deviceorfirstdeviceafterdiskette.
2.EnsurethatnetworkadapterisenabledforRPL.
3.Networkadapter(Advisenetworkadministratorof
newMACaddress)
Pressanykeytorepeatboot
sequence.
84ThinkCentreM700HardwareMaintenanceManual
Page 93

Message/SymptomFRU/Action
ComputerwillnotperformaWakeOnLAN
®
(ifapplicable)1.Checkpowersupplyandsignalcableconnections
tonetworkadapter.
2.Ensurethattheoperatingsystemsettingsaresetto
enableWakeonLAN.
3.EnsureWakeOnLANfeatureisenabledin
Setup/Configuration(see“StartingtheSetupUtility
program”onpage63
4.EnsurenetworkadministratorisusingcorrectMAC
address.
5.EnsurenointerruptorI/Oaddressconflicts.
6.Networkadapter(advisenetworkadministratorof
newMACaddress)
Deadcomputer.See“Harddiskdrivebooterror”onpage
82
.
Diskettedrivein-uselightremainsonordoesnotlight
whendriveisactive.
1.PowerSupply
2.SystemBoard
1.DisketteDrive
2.SystemBoard
3.DisketteDriveCable
Blankscreenexceptforflashingcursor.
1.SystemBoard
2.PrimaryHardDiskDrive
3.HardDiskDriveCable
IncorrectmemorysizeduringPOST
1.RuntheMemorytests.
2.MemoryModule
3.SystemBoard
"InsertaDiskette"iconappearswithaknown-good
diagnosticsdisketteinthefirst3.5-inchdiskettedrive.
1.SystemBoard
2.DisketteDriveCable
3.NetworkAdapter
Intensityorcolorvariesfromlefttorightofcharacters
andcolorbars
1.Display
2.Videoadapter(ifpresent)
3.SystemBoard
Nopowerorfannotrunning
Non-systemdiskordiskerror-typemessagewitha
known-gooddiagnosticdiskette.
1.See“Harddiskdrivebooterror”onpage82.
1.DisketteDrive
2.SystemBoard
3.DisketteDriveCable
Otherdisplaysymptomsnotlistedabove(includingblank
orillegibledisplay)
Power-onindicatororharddiskdrivein-uselightnoton,
butcomputerworkscorrectly
1.Display
2.SystemBoard
1.Powerswitch/LEDassembly
2.SystemBoard
Printerproblems1.Printer
2.SystemBoard
)
Chapter8.Servicecheckoutandsymptom-to-FRUindex85
Page 94

Message/SymptomFRU/Action
Programloadsfromtheharddiskwithaknown-good
diagnosticsdisketteinthefirst3.5-inchdiskettedrive
RPLcomputercannotaccessprogramsfromitsownhard
disk.
RPLcomputerdoesnotRPLfromserver
Serialorparallelconnectordevicefailure(systemboard
connector)
Serialorparallelconnectordevicefailure(adapter
connector)
Someorallkeysonthekeyboarddonotwork
1.RuntheSetupUtilityprogramandcheckStartup
sequence.
2.DisketteDrive
3.DisketteDriveCable
4.SystemBoard
5.PowerSupply
1.IfnetworkadministratorisusingLCCMHybridRPL,
checkstartupsequence:
a.Firstdevice-network
b.Seconddevice-harddisk
2.Harddiskdrive
1.Checkstartupsequence.
2.CheckthenetworkadapterLEDstatus.
1.ExternalDeviceSelf-TestOK?
2.ExternalDevice
3.Cable
4.SystemBoard
1.ExternalDeviceSelf-TestOK?
2.ExternalDevice
3.Cable
4.AlternateAdapter
5.SystemBoard
1.Keyboard
2.KeyboardCable
3.SystemBoard
Undeterminedproblems
Thissectionprovidesinstructionsonhowtofindoutthefailingdevicesoradapters.
1.Power-offthecomputer.
2.Removeordisconnectthefollowingcomponents(ifinstalled)oneatatime.
a.Externaldevices(modem,printer,ormouse)
b.Anyadapters
c.Memorymodules
d.Extendedvideomemory
e.ExternalCache
f.ExternalCacheRAM
g.Harddiskdrive
h.Diskettedrive
3.Power-onthecomputertore-testthesystem.
4.Repeatsteps1through3untilyoufindthefailingdeviceoradapter.
Ifalldevicesandadaptershavebeenremoved,andtheproblemcontinues,replacethesystemboard.
See“Replacingthesystemboard”onpage128.
86ThinkCentreM700HardwareMaintenanceManual
Page 95

Chapter9.Installingorreplacinghardware
Thischaptercontainsthefollowingtopics:
•“Handlingstatic-sensitivedevices”onpage87
•“Installingorreplacinghardware”onpage87
Handlingstatic-sensitivedevices
Donotopenthestatic-protectivepackagecontainingthenewpartuntilthedefectiveparthasbeenremoved
andyouarereadytoinstallthenewpart.Staticelectricity,althoughharmlesstoyou,canseriouslydamage
computercomponentsandparts.
Whenyouhandlepartsandothercomputercomponents,taketheseprecautionstoavoidstatic-electricity
damage:
•Limityourmovement.Movementcancausestaticelectricitytobuilduparoundyou.
•Alwayshandlepartsandothercomputercomponentscarefully.HandlePCI/PCI-Expresscards,memory
modules,systemboards,andmicroprocessorsbytheedges.Nevertouchanyexposedcircuitry.
•Preventothersfromtouchingthepartsandothercomputercomponents.
•T ouchthestatic-protectivepackagecontainingtheparttoametalexpansion-slotcoverorother
unpaintedmetalsurfaceonthecomputerforatleasttwoseconds.Thisreducesstaticelectricityfrom
thepackageandyourbodybeforeyouinstallorreplaceanewpart.
•Whenpossible,removethenewpartfromthestatic-protectivepackage,andinstallitdirectlyinthe
computerwithoutsettingthepartdown.Whenthisisnotpossible,placethestatic-protectivepackage
thatthepartcameinonasmooth,levelsurfaceandplacethepartonthepackage.
•Donotplacethepartonthecomputercoverorothermetalsurface.
Installingorreplacinghardware
Thissectionprovidesinstructionsonhowtoinstallorreplacehardwareforthecomputer.Y oucanexpand
thecapabilitiesofthecomputerandmaintainthecomputerbyinstallingorreplacinghardware.
Attention:DonotopenthecomputerorattemptanyrepairbeforereadingandunderstandingtheChapter1
“Readthisfirst:Importantsafetyinformation”onpage1
Notes:
•Someofthehardwarepartsinthissectionareoptional.
•UsecomputerpartsprovidedonlybyLenovo.
•Wheninstallingorreplacinganoption,usetheappropriateinstructionsinthissectionalongwiththe
instructionsthatcomewiththeoption.
•Inmostareasoftheworld,LenovorequiresthereturnofthedefectiveCRU.Informationaboutthiswill
comewiththeCRUorwillcomeafewdaysaftertheCRUarrives.
.
Installingexternaloptions
Youcanconnectexternaloptionstothecomputer,suchasexternalspeakers,aprinter,orascanner.For
someexternaloptions,youmustinstalladditionalsoftwareinadditiontomakingthephysicalconnection.
Wheninstallinganexternaloption,see“Hardwarelocations”onpage27toidentifytherequiredconnector.
©CopyrightLenovo2016
87
Page 96

Usetheinstructionsshippedwiththeoptiontohelpyoumaketheconnectionandinstallanysoftware
ordevicedriversthatarerequiredfortheoption.
Removingthecomputercover
Attention:DonotopenyourcomputerorattemptanyrepairbeforereadingandunderstandingtheChapter
1“Readthisfirst:Importantsafetyinformation”onpage1.
CAUTION:
Beforeyouopenthecomputercover,turnoffthecomputerandwaitseveralminutesuntilthe
computeriscool.
Toremovethecomputercover,dothefollowing:
1.Removeanymediafromthedrivesandturnoffallconnecteddevicesandthecomputer.Then,
disconnectallpowercordsfromelectricaloutletsanddisconnectallcablesthatareconnectedtothe
computer.
2.Unlockanylockingdevicethatsecuresthecomputercover.
3.Holdthesidesofyourcomputerandgentlylayitdownsothatthecomputercoverisfacingup.
4.Removethetwoscrewsthatsecurethecomputercoverandslidethecomputercovertotherearto
removeit.
Figure10.Removingthecomputercover
Replacingthefrontbezel
Attention:DonotopenyourcomputerorattemptanyrepairbeforereadingandunderstandingtheChapter
1“Readthisfirst:Importantsafetyinformation”onpage1.
Toreplacethefrontbezel,dothefollowing:
1.Removeanymediafromthedrivesandturnoffallconnecteddevicesandthecomputer.Then,
disconnectallpowercordsfromelectricaloutletsanddisconnectallcablesthatareconnectedtothe
computer.
2.Removethecomputercover.See“Removingthecomputercover”onpage88.
88ThinkCentreM700HardwareMaintenanceManual
Page 97

3.Ifadustshieldhasbeeninstalled,pullitoutwardtoremoveitfromthefrontbezel.
Figure11.Removingthedustshield
4.Releasethethreeplastictabsonthetopofthefrontbezel,andthenpivotthefrontbezeldownward.
Figure12.Removingthefrontbezel
Chapter9.Installingorreplacinghardware89
Page 98

5.Alignthethreeplastictabsonthebottomofthenewfrontbezelwiththecorrespondingholesinthe
chassis.Then,pivotthefrontbezelupwarduntilitsnapsintoposition.
Figure13.Installingthefrontbezel
6.Reinstallthedustshieldifyouhaveremovedit.Aligntheedgesofthedustshieldwiththeedgesofthe
frontbezel.Then,pressthedustshieldinwarduntilitsnapsintoposition.
Figure14.Installingthedustshield
Whattodonext:
•T oworkwithanotherpieceofhardware,gototheappropriatesection.
•T ocompletetheinstallationorreplacement,goto“Completingthepartsreplacement”onpage130.
90ThinkCentreM700HardwareMaintenanceManual
Page 99

Replacingtheopticaldrive
Attention:DonotopenyourcomputerorattemptanyrepairbeforereadingandunderstandingtheChapter
1“Readthisfirst:Importantsafetyinformation”onpage1.
Toreplacetheopticaldrive,dothefollowing:
1.Removeanymediafromthedrivesandturnoffallconnecteddevicesandthecomputer.Then,
disconnectallpowercordsfromelectricaloutletsanddisconnectallcablesthatareconnectedtothe
computer.
2.Removethecomputercover.See“Removingthecomputercover”onpage88.
3.Removethefrontbezel.See“Replacingthefrontbezel”onpage88.
4.Locatetheopticaldrive.See“Computercomponents”onpage32.
5.Disconnectthesignalcableandthepowercablefromtherearoftheopticaldrive.
6.Pressandholdthebluereleasetabs1and2ontheopticaldrivebracketasshown.Pushtheoptical
drivetowardtherearofthecomputertoremovetheopticaldrivewiththebracketfromthechassis.
Figure15.Removingtheopticaldrivewiththebracket
7.Flextheopticaldrivebracketasshowntoremovetheopticaldrivefromthebracket.
Figure16.Removingtheopticaldrivefromthebracket
Chapter9.Installingorreplacinghardware91
Page 100

8.Insertastraightenedpaperclipintotheemergency-ejecthole1adjacenttotheeject/closebutton
sothatthetrayslidesoutoftheopticaldrive.Then,removetheopticaldrivebezelfromtheoptical
driveasshown.
Figure17.Removingtheopticaldrivebezelfromtheopticaldrive
9.Insertthetab1ontheopticaldrivebezelintothecorrespondingholeinthenewopticaldrive.Then,
inserttheotherthreetabs2intothecorrespondingholesintheopticaldrive.Gentlypushthetray
forwardtoclosethetray.
Figure18.Installingtheopticaldrivebezeltotheopticaldrive
10.Flextheopticaldrivebracketandinsertthetwopinsonthebracketintothecorrespondingholesinthe
opticaldrive.Then,pivottheopticaldrivedownwarduntilitsnapsintoposition.
Figure19.Installingtheopticaldriveintothebracket
92ThinkCentreM700HardwareMaintenanceManual
 Loading...