

Page 1
Digital Mini Component System
(
RADIO CASSETTE RECORDER CD/MP3 PLAYER
with USB/SD/MMC card system)
Digitales Mini-Komponenten-System
(
RADIO KASSETTEN RECORDER CD/MP3-SPIELER
mit
USB/SD/MMC-Karten
system)
Mini C
haîne numérique
(RADIO-CASSETTE ENREG
ISTREUR LECTEUR CD/MP3
Avec car te sy stè m e USB/ SD/ M MC)
Sistema digital de minicomponentes
(
RADIO CASETE Y REPRODUCTOR DE CD/MP3
con sistema de tarjeta
USB/SD/MMC)
Digitaal mini-audiosysteem
(
RADIOCASSETTERECORDER CD/MP3 SPELER
met
USB/SD/MMC
kaartsyste
em
)
Model: MC-
133
Users Guide
Benutzerhandbuch
Mo de d Em ploi
Guía de usuario
Gebruiksaanwijzing
Page 2
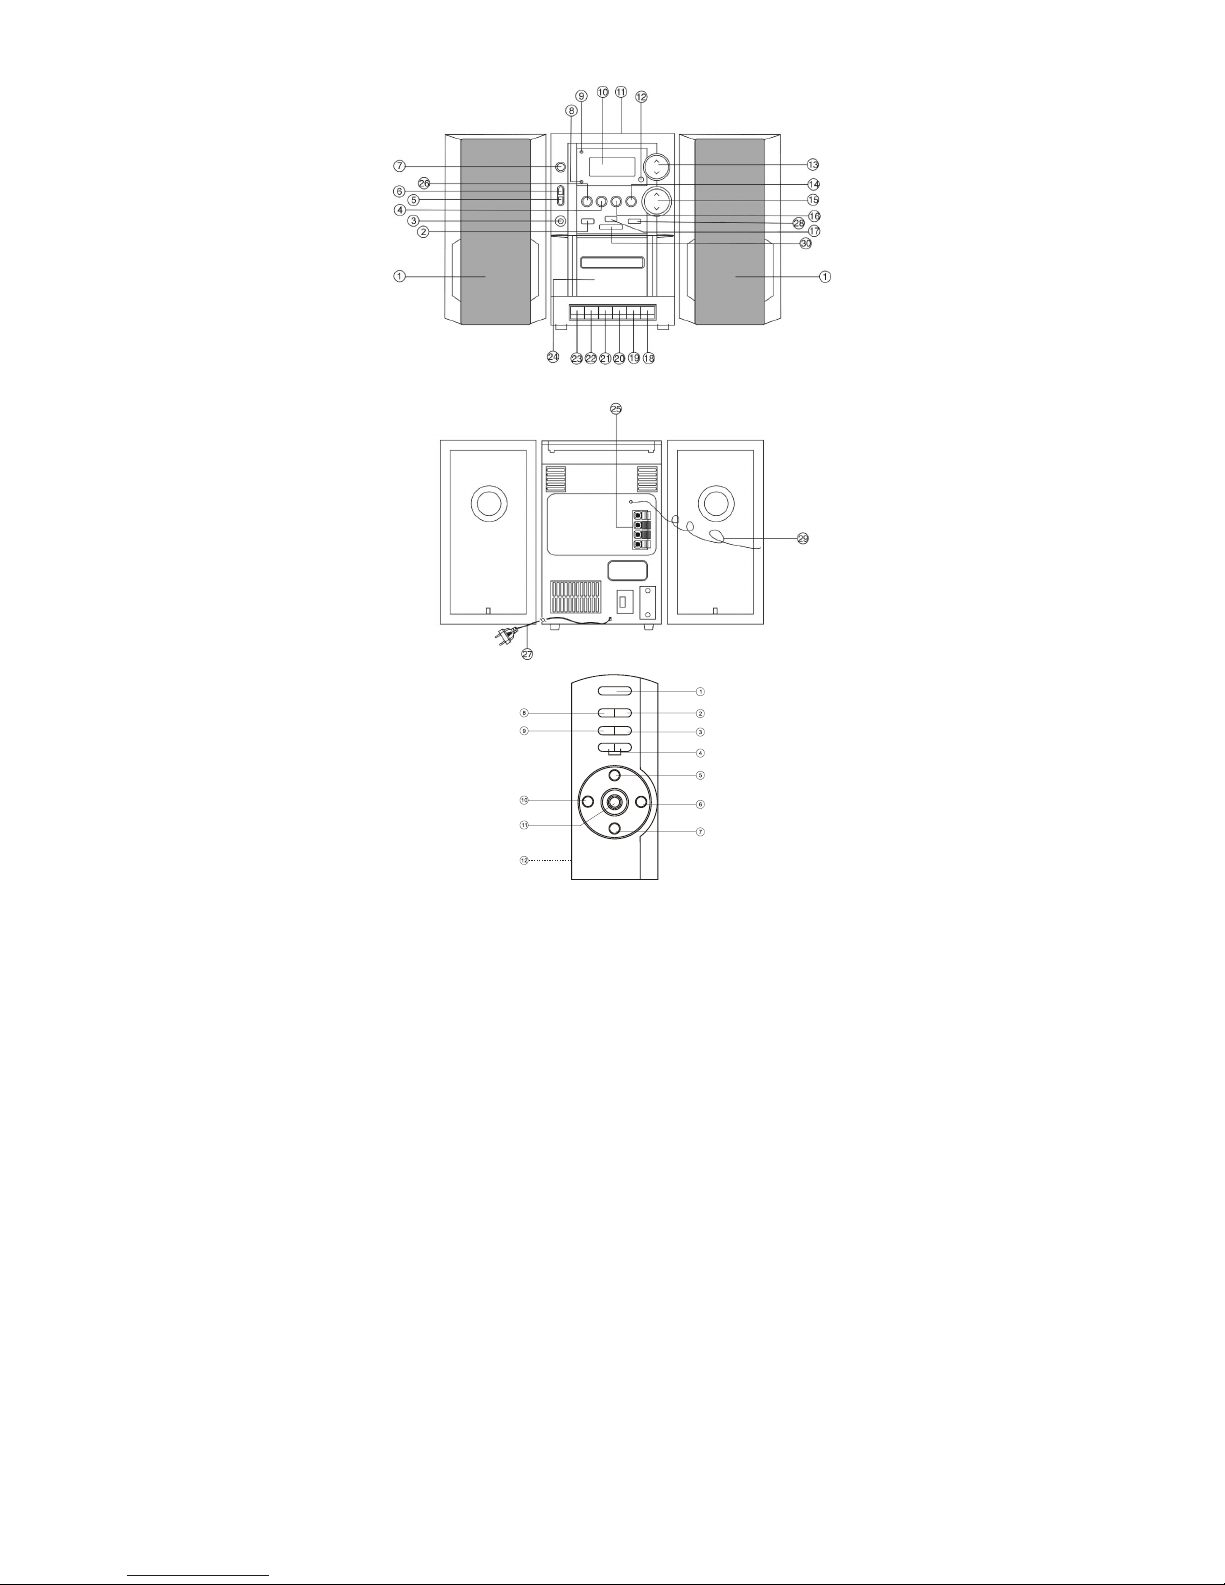
LOCATION OF CONTROLS
Page 3
E-
1
ENGLISH
IMPORTANT SAFETY INSTRUCTIONS
WARNING:
TO PREVENT FIRE OR SHOCK HAZARD DO NOT USE THIS PLUG WITH AN EXTENSION
CORD, RECEPTACLE OR OTHER OUTLET UNLESS THE BLADES CAN BE FULLY
INSERTED TO PRESENT BLADE EXPOSURE. TO PREVENT FIRE OR SHOCK HAZARD. DO
NOT EXPOSE THIS APPLIANCE TO RAIN OR MOISTURE.
1. Read these instructions.
2. Keep these instructions.
3. Heed all warnings.
4. Follow all instructions.
5. Do not use this apparatus near water.
6. Clean only with dry cloth.
7.
Do not block any ventilation openin gs. Install in accordan ce with the manufactures
instructions.
8.
Do not install near any heat sources such as radiators, heat registers, stoves, or other
apparatus (including amplifiers) that produce heat.
9. Do not defeat the safety purpose of the
polarized or grounding type plug. A polarized plug
has two blades with one wider than the other. A grounding type plug has two blades and a
third grounding prong. The wide blade or the third prong are provided for your safety. If
the provided plug does not fit into your outlet, consult an electrician for replacement of
the obsolete outlet.
10.
Protect the power cord from being walked on or pinched particularly at the plugs,
convenience receptacles, and at the point where the exit from the apparatus.
11. Only use at
tachments/accessories specified by the manufacturer.
12. Unplug the apparatus during lightening s
torm
s or when unused for long periods of time.
13.
Refer all servicing to qualified personnel. Servicing is required when the apparatus has
been
damaged in any way, such as power supply cord or plug is dam aged, liquid has been
spilled or objects have fallen into the apparatus, the apparatus has been exposed to rain
or moisture, does not operate normally, or has been dropped.
14.
This appliance shall not be exposed to dripping or splashing water and that not object
filled with liquids such as vases shall be placed on apparatus .
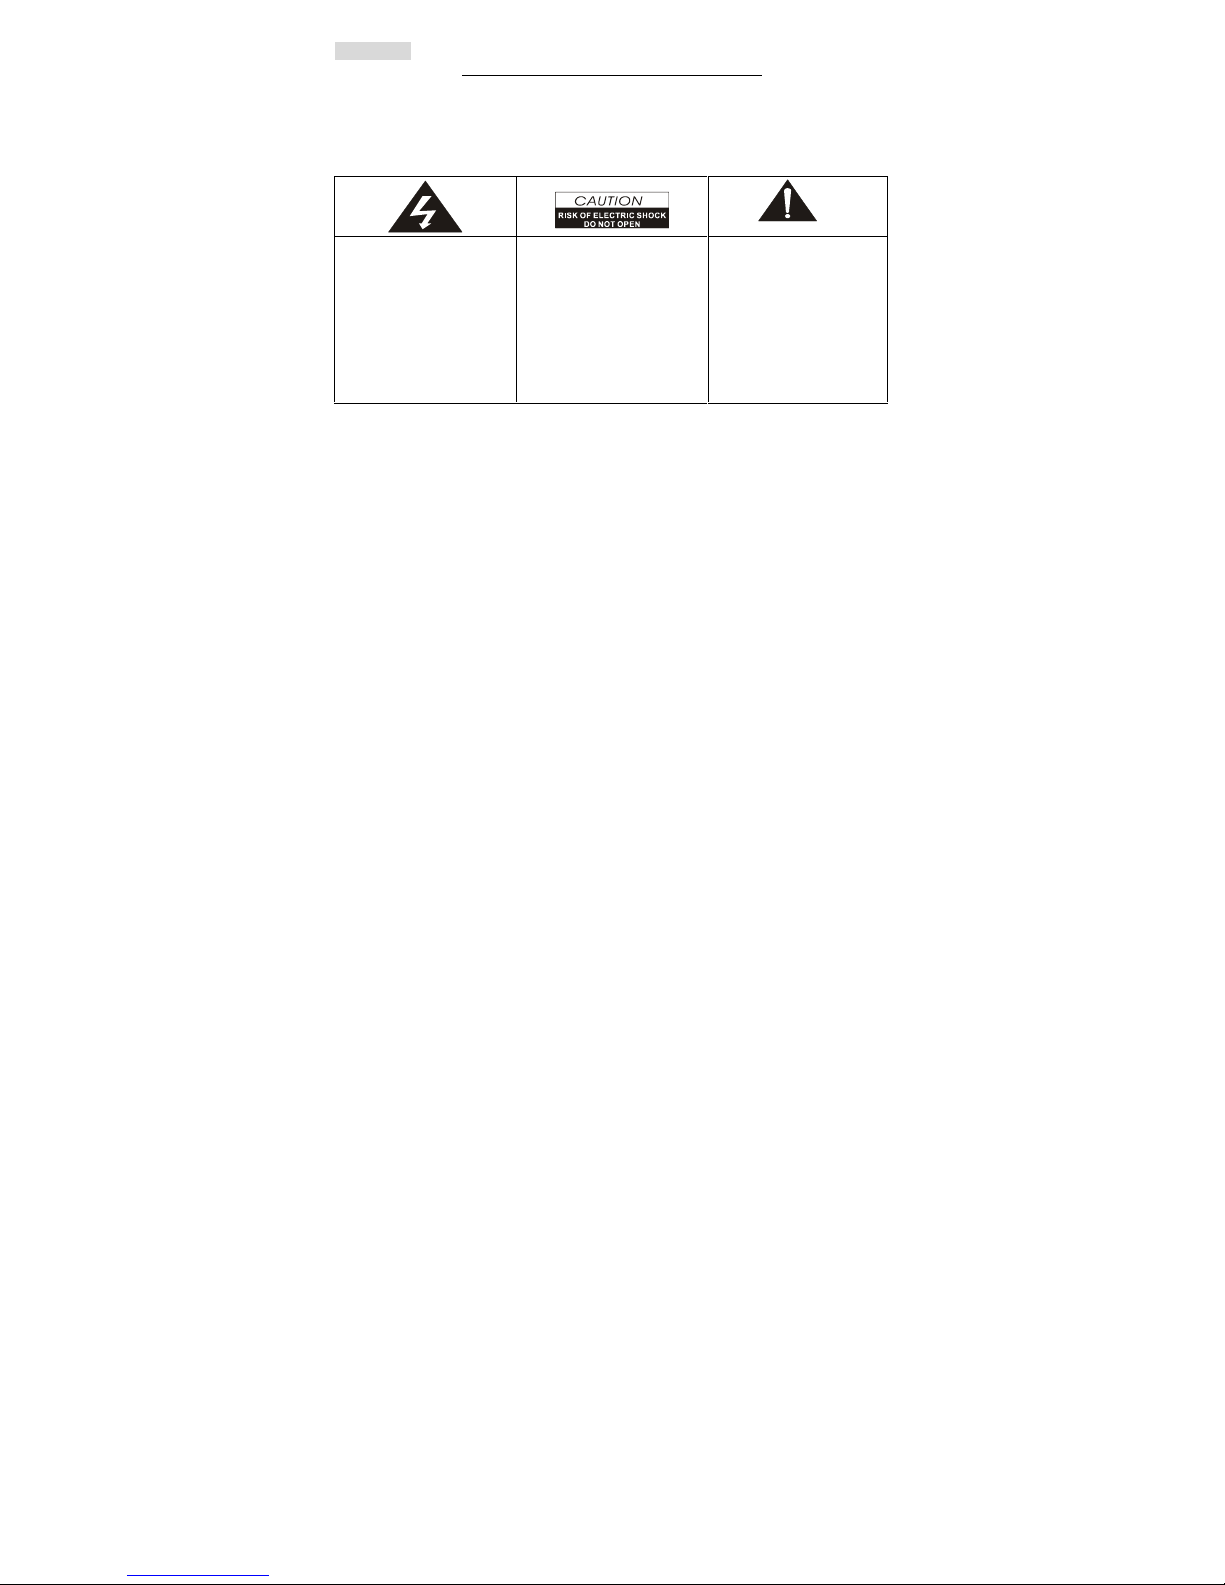
This lightning flash with
arrowhead sym bol, within an
equilateral trian gle, is
inten ded to alert th e user to
the presence of insulated
dangerous voltage within the
products enclosure that m ay
be of sufficient m agnitude to
constitu te a risk of electric
shock presents
Warning: to reduce the risk of
electric shock, do n ot r emove
cove r (or ba ck ) no u ser s e r vi ce a b l e p a r t in s i d e .
Refe r ser vicing to q u a lifie d
service personnel.
The exclamation point
with in an equilateral triangle
is inten ded to alert the user
to the presen ce of important
operating and maintenan c
e
(servicing) instructions in
the literature accom panyin g
the appliance.
Page 4
E-
2
NAMES OF CONTROLS
1. SPEAKERS (L & R)
2. FUNCTION SWITCH
3. PHONES JACK
4. CD
RANDOM/RDS
BUTTON
5. CD REPEAT
/PTY
BUTTON
6. EQUALIZER
BUTTON
7. POWER ON/OFF BUTTON
8. USB
INDICATOR
9. STANDBY
INDICATOR
10. LCD DISPLAY
11. CD
COMPARTMENT
12. REMOTE SENSOR
13. VOLUME
UP/DOWN
CONTROL
14. CD PLAY/PAUSE BUTTON
15.
CD SKIP UP/ DOWN
/RADIO
TUNING
UP/DOWN
CONTROL
16. CD STOP BUTTON
17. USB PORT
18. CASS. PAUSE KEY
19. CASS. STOP/EJECT KEY
20. CASS. FAST FORWARD KEY
21. CASS. R
EWIND KEY
22. CASS. PLAY KEY
23. CASS. RECORD KEY
24. CASSETTE COMPARTMENT
25. SPEAKER CONNECTORS
26. CD
ESP/FIND
BUTTON
27. AC POWER PLUG
28. BAND S
WITCH
29. FM ANTENNA WIRE
30. SD/MMC CARD SLOT
REMOTE CONTROL
1. POWER SWITCH
2. MEMORY BUTTON (CD & RADIO)
3. MEMORY UP BUTTON
4. VOLUME UP/
DOWN BUTTON
5. CD PLAY/PAUSE BUTTON
6. CD SKIP NEXT/TUNING UP
BUTTON
7. CD STOP BUTTON
8. FUNCTION BUTTON
9. MEMORY DOWN BUTTON
10. CD SKIP BACK/TUNING DOWN
BUTTON
11. MUTE BUTTON
12. BATTERY COMPARTMENT
INTRODUCTION
Thank you for purchasing this product.
Please read through these operating instructions, so you will know how to operate your
equipment properly. After you finished reading the instructions manual, put it away in a safe
place for future reference.
CAUTION:
Do not block the ventilation openings or hol
es.
Do not place any naked flame sources, such as lighted candles, on the apparatus.
Invisible laser radiation when open and interlock failed or defeated. Avoid direct exposure to
beam.
To prevent fire or shock hazard, do not expose this appliance to rain
or moisture.
NOTE:
The manufacturer is not responsible for any radio or TV in terferen ce caused by
unauthorized modifications could void the user's authority to operate the equipment.
IMPORTANT FOR LASER PRODUCTS
REPRODUCTION OF LABELS
1. CLASSIFICATION L
ABEL, PLACED ON REAR ENCLOSURE
Page 5

E-
3
2. WARNING LABEL, PLACED INSIDE THE UNIT
CAUTION:
Do not open the unit. There are no user serviceable parts inside the unit; consult
all servicing to qualified service personnel.
Discs for Playback
This system can playback all digital audio CD, finalized digital audio CD-Recordable (CD-
R)
discs
, finalized digital audio CD-Rewritable (CD-RW) discs and CD-DA form at digital audio
CD/CD
-R/CD-
RW discs.
POWER SOURCE
This unit is designed to be operated on AC.
Plug the power
cord into standard household AC wall outlet.
BASIC FUNCTION
SWITCHING ON THE UNIT
Note: Before switching on the unit, Please make sure that all connections have been got ready.
Press the POWER ON-OFF button, the LCD display will illum in ate and show
HELLO moving
.
Press FUNCTION switch to select playing mode (CD/TUNER/TAPE/USB-CARD).
TO ADJUST VOLUME
Press and/ or hold the
electronic
VOLUME
UP/ DOWN CONTROL to increase or decrease
volume.
Press MUTE button on remote control to switch off the sound. Press a
gain to turn on.
HEADPHONES
For private listening, plug the headphones/ earphones (not included) in to PHONES jack
(3.5
mm diameter).
CAUTION:
Long tim e listening with headphones/ earphones at high volume may cause
harmful damage to users ears.
USI
NG THE RADIO
TUNING IN RADIO STATIONS
1. Press
the FUNCTION switch to
select
RADIO
mode, the display will show
TUNER
.
2. Press
the BAND switch to select the desired wave band: AM
(MW)/FM/
FM ST..
3.
Tune to
des
ired station by
press
ing the TUNING CONTROL/ CD SKIP UP/ DOWN
CONTROL, the display will show the band frequency. Example:
FM 97.10 MHz
4. Adjust
the ELECTRONIC
VOLUME CONTROL to desired volume level.
5.
Extend ANTENNA WIRE to its full len gth if you are listening to FM broadcasting. Gently
rock the un it back and forth to get the best reception when you are listening to AM
programme, or place the unit in an open location.
Note: When you are receiving FM stereo programme
, the display will show
((ST))
.
6. Turn off the radio
, press the FUNCTION switch to enter CD or TAPE
operation, or switch off
the unit by pressing POWER ON/OFF button (the display will say
GOOD BYE
to you).
RADIO AUTO SCAN (SEARCH)
Press and hold the
TUNING
UP/ DOWN CONTROL/ CD SKIP UP/ DOWN CONTROL for 1 or 2
seconds and release, the un it will auto scan un til searched a strong sign al programme. Press
and hold again to search other stations.
Page 6

E-
4
RDS(RADIO DATA SYSTEM) OPERATION
Press the FUNCTION button to select TUNER mode, press RANDOM/ RDS button, PS shows
on the display, and the broadcasting station name an
d details also appear on the display.
Note: If no RDS signal received, the display will show NO PS.
PTY OPERATION
Press the FUNCTION button to select TUNER mode, press REPEAT/PTY button, PTY shows
on the display, an d the broadcast program type appears on the display. Each time you press,
the display will show a category for different style broadcasting program.
Note: If no RDS signal received, the display will show NO PTY.
RADIO STATION MEMORY OPERATION
You may pre-store 10 for AM and 30 for FM radio stations in mem ory for your preference
controlled by remote handset, so as you can listen to your desired station directly and quickly,
no need to tuning and search for.
1. Set the unit to TUNER mode.
2. Press BAND button to select band (AM or FM), Tune into a stati
on.
3.
Press MEMORY button,
MEMORY
shows on the display. then press M (m emory) UP or
M(memory) DOWN button to select the first storing location.
4. Press MEMORY button again to store.
5.
Search an other station, repeat steps (3) & (4) until all desired stations stored. Up to 40
stations can be programmed( 10 for AM and 30 for FM).
6. Press M (memory) UP or M (memory) DOWN button to listen to the stored
station
directly.
USING THE CASSETTE
Note:
Before starting to operate cassette, remember to flip over the cassette cover which hides
all cassette keys in front panel.
UNDERSTANDING THE BUTTONS
RECORD - Press to record from the radio or CD player.
PLAY - Press to play cassettes.
REWIND - From stop mode, press to rewind the tape toward the beginning.
F.FWD - Fro
m stop mode, press to advance the tape toward the end.
STOP/EJ.
- Press to stop current tape activity or to open the cassette compartment door
when no buttons are active.
PAUSE
- Press to interrupt tape play or record mode. Press the second time to resum e tape
play or tape record mode.
PLAYING A CASSETTE TAPE
1. Press
the FUNCTION switch to
select
TAPE
, the display will show
TAPE
.
2. Flip over the cassette cover and p
ress STOP/EJ. key to open the cassette compartment door.
3.
Insert cassette tape in to the compartment with the open edge facing down and the full reel
on the left.
4. Close the door securely.
5. Press REWIND or F.FWD to move tape to the desired starting point.
6. Press PLAY key to begin playing the tape.
7. Adjust the volume to your desired listening level.
Page 7

E-
5
AUTOMATIC STOP FEATURE
When the cassette deck is operating in play or record mode and the end of the tape is reached,
the unit automatically shuts itself off and returns all buttons to the off position.
RECORDING FROM THE RADIO
1. Load a cassette tape in
to the tape deck and close the door.
2.
Tune in to desired station by
press
ing the TUNING CONTROL/ CD SKIP UP/ DOWN
CONTROL
.
3.
Depress RECORD key to begin recording. RECORD key and PLAY key are engaged
simultaneously.
4. Press STOP/EJ. key to end recording.
5.
To hear what you recorded, press the REWIND key to start recording point, follow
instructions in PLAYING A CASSETTE TAPE.
NOTE:
PAUSE FOR A MOMENT - Using the PAUSE key on the cassette deck instead of the
STOP/EJ. key to momentarily interrupt recording gives you a
much clear recording.
RADIO RECORDING TIPS
To temporarily pause the recording, press PAUSE key on the cassette deck. Press PAUSE key
again to resume recording.
RECORDING FROM CD/MP3
1. Insert a blank cassette tape into the tape deck.
2. Press
the FUNCTION swi
tch to
select CD/MP3 playing mode.
3. Open the disc compartment and l
oad a disc and select the desired track you want to record.
4.
Press CD PLAY/PAUSE button to start CD playback. Press RECORD key and the PLAY key
will automatically engage to begin recording.
5. Press PAUSE key to interrupt or edit recording. Press it again to resume recording.
6. Press STOP/EJ. key to end recording.
7.
To hear what you recorded, press the REWIND key to start recording point, follow
instructions in PLAYING A CASSETTE TAPE.
CARD-USB REC
ORDING
1. Install a blank tape into cassette compartment.
2.
Press the FUNCTION button to
CARD-USB
mode, connect the USB or CARD to the input
port, start playback by pressing the CD PLAY/PAUSE button after the unit finished reading.
3. Depress the RECORD BUTTON
and PLAY BUTTON simultaneously. Recording starts. Press
the STOP/ EJ ECT BUTTON lightly to end recording, or the unit will stop recording
automatically while the tape reaches its end.
4.
To listen to the recording, press the FUNCTION button to select
TAPE
playing mode, then
start tape playback.
AUTOMATIC LEVEL CONTROL (ALC)
This unit has the latest circuitry-Auto Level Control (ALC), While recording, adjusting the
VOLUME control will not affect the recording volume, it keeps in a right and flat volume.
Page 8

E-
6
U
SING THE CD/MP3
LOADING A DISC
1. Press
the FUNCTION switch to
select CD/MP3 playing mode
.
2. Open the CD door.
3. Place an audio CD
/MP3
into the tray with the label side facing up.
4. Close the CD door.
The display will show
CD READ
, then the to
tal number of tr
acks
and playing time
will
appear in the display after 5 seconds
.
Example :
11
47: 12
5.
To rem ove the CD, press OPEN to open CD compartm ent lid, the display will show
OPEN
.
G
rasp the CD by its edges, and carefully take it out.
Note:
To ensure good system
performance; wait until the disc tray completely reads the disc before
proceeding.
If no disc loaded into the com partment, or the disc is unreadable, the display will show no
disc
.
PLAYING A DISC
1.
Press PLAY/ PAUSE button to start playback. The playback starts from track 1, PLAY
appears in the display.
2.
To interrupt playback, press PLAY/PAUSE button. The elapsed time will flash on and off in
the
display
. Example:
00:57
flashes on and off.
3. To resume playback, press PLAY/PAUSE button again.
4.
To stop playback, press STOP button, the total number of tracks and playing time will
appear in the display
SELECTING A DESIRED TRACK/PASSAGE
To select a desired track
Press TUNING CONTROL/ CD SKIP UP/ DOWN CONTROL button repeatedly in stop mode
or during playing until the
desired track appears on the display.
Press PLAY/PAUSE button to start play.
To s earch for a particu lar pas sage during playback ( track scann in g at high
speed)
Press and hold TUNING CONTROL/ CD SKIP UP/ DOWN CONTROL button to scan the
current playing track a
t high speed until desired point (passage), then release the button.
Playback will start again from this point.
PROGRAM TRACKS
Program tracks of disc are possible when playback is stopped. Up to 64 tracks can be stored in
the memory in any order.
1.
In stop m ode, press
MEMORY
button on the remote handset to enter program setting, the
display
will show
00 P -- 01
.
2.
Press TUNING CONTROL/ CD SKIP UP/ DOWN CONTROL to select the first desired track
to be programmed.
(example: track 6)
3. Press
MEMORY
button to enter. Th
e display
changes to
show
00 P -- 02
.
4. Repeat steps 2 & 3 to store other desired tracks until all tracks programmed.
5.
Press PLAY/PAUSE button to start playback from the first programmed track. The display
will show
06 00:01
.
Page 9

E-
7
6. Press STOP button to stop program
playback.
To Erase the Memory(Program)
To clear the program, you may have two ways:
1. Press STOP button when the disc stopped, or
2. Open the CD compartment lid, program will be erased.
REPEAT
You can play one track or all tracks on the disc repeatedly.
To R
epeat a Single Track
1.
Press REPEAT button once in play, " REPEAT
"
appears in upper left corner of
the display.
The current track will be played over and over again till you press STOP button.
2. To cancel repeat play, press REPEAT button twice. "
REPEAT
" g
oes off from display.
To repeat all the Tracks
1.
Press REPEAT button twice in play, "REPEAT ALL" shows in the display, all tracks on
the disc will be played over and over again till you press STOP button.
2. To cancel repeat play, press REPEAT button once. " REPEAT
" goes off from display.
Note: Repeat function also can be done in stop mode.
RANDOM PLAY
Press RANDOM/ RDS button in stop mode, the unit will start playback automatically in
random order,
RANDOM
will b shown on the display.
40 Seconds ESP (El
ectronic Shock Protection) System
This unit has a built-in 40 seconds shock protection system to prevent sound skipping and
distorting when the unit is shocked and rocked to vibrate. Press ESP/ FIND button to activate
this function. Press again to cancel.
Note: The ESP/ FIND button has com bined another function Title and subtitle displaying. To
view the title and/or subtitle of a song, press and hold the ESP/FIND button for 1 or 2 seconds.
Built-in Different Equalizer System
This unit has a built-in equalizer system, Press EQ button on the main unit while playing to
select different music style (sound tone): PASS, CLASSIC, ROCK, POP and JAZZ.
LISTEN
ING
TO USB/SD/MMC CARD
USB PLAYBACK
1.
Press the FUNCTION button un til the display shows
CARD-USB
to enter USB pl
aying
mode.
2.
Conn ect the USB to the USB INPUT. The LCD will display total number of tracks stored
inside the USB and the USB indicator will light up. Example,
019 stop
3.
Press the PLAY/PAUSE button to start playing. Press the PLAY/PAUSE button once again
to t
emporarily stop. The elapsed time will flash.
4.
Press the STOP button to stop playing. The display will show total number of tracks and
STOP.
5.
Proceed repeat play (repeat 1-repeat all-repeat album)/ program play/ random play/ skip up
and down operation as the sa
me described in above
USING THE CD/ MP3 .
Note: If insert SD/ MMC card and USB at the same time, the unit will play SD/ MMC card only.
If select to play USB, please remove the SD/MMC card.
Page 10

E-
8
SD/MMC CARD INSTALLATION AND REMOVE
Press the card towards the SD/ MMC CARD slot, when the installation is well done, a
click
sound will be heard. To remove the SD/ MMC card, press the card gently the card will flick out.
Now you can remove the card out of the card slot.
SD/MMC CARD PLAYBACK
1. Press the FUNCTION button to
select CARD-USB playing mode.
2.
Conn ect the SD/ MMC card to the SD/ MMC CARD INPUT slot. The LCD will display total
number of tracks stored inside the card and STOP. Example,
019 stop
3.
Press the PLAY/PAUSE button to start playing. Press the PLAY/PAUSE button once again
to temporarily stop. The elapsed time will flash.
4.
Press the STOP button to stop playing. The display will show total number of tracks and
STOP.
5.
Proceed repeat play (repeat 1-repeat all-repeat album)/ program play/ random play/ skip up
and down operat
ion follow the steps described in above
USING THE CD/MP3
.
Note: If insert SD/ MMC card and USB at the same time, the unit will play SD/ MMC card only.
If select to play USB, please remove the SD/MMC card.
PROGRAM TRACKS
ON USB
Program tracks on USB are possible when playback is stopped in USB mode. Up to 64 tracks
can be stored in the memory in any order.
1.
In stop m ode, press
MEMORY
button on the remote handset to enter program setting, the
display
will show album number/track number flashing
.
2.
Press TUNI
NG
CONTROL/ CD SKIP UP/ DOWN CONTROL to change to desire album
(
MP3
).
3. Press
MEMORY
button
, the track number within this album is flashing (MP3
).
4.
Press TUNING CONTROL/ CD SKIP UP/ DOWN CONTROL to select the first desired track
to be programmed. (Example: track
6).
Press
MEMORY
button
to confirm.
Note: Press the MEMORY button again to return to select other album
(
MP3
).
5. Repeat step 4 to store other desired tracks until all tracks programmed.
6. Press
the PLAY/PAUSE button to start playback from the first programmed track. The
display will show
06
00:01
.
Memory
indicator will light up on LCD display
7. Press
the
STOP button to stop program playback.
Note: Switch the unit to CARD-USB or CD/ MP3 playing mode, follow the above steps to
proceed PROGRAM TRACKS ON SD/MM
C CARD or ON MP3 disc.
TO FIND A DESIRED TRACK (not for CD)
To listen to the desired track, press the ESP/ FIND button once to search FILE, press again to
search ALBUM, p
ress
MEMORY
button, the track number within this album is flashing, p
ress
TUNING
CONTR
OL/ CD SKIP UP/ DOWN CONTROL to select the desired track, then press
PLAY/PAUSE button to start playback.
REMOTE HANDSET
LOADING THE BATTERIES INTO THE REMOTE HANDSET
Open the battery compartment cover.
Insert two
AAA
batteries (not included) as indicated
inside the battery compartment.
Close the cover.
Page 11

E-
9
REMOTE CONTROL OPERATION
To operate the unit with the rem ote control, point the remote handset at the remote sensor on
the front panel and press the appropriate button on the remote handset.
The rem ote works best within a range of 6 ~ 7 meters from the fron t panel and on an angle of
30 degrees. Bright sunlight or room light conditions can interfere with the remote control. If
the remote operation is unsatisfactory or stops working entirely, first try replacing the remote
batteries, then try reducing the room lighting conditions.
SPEAKER CONNECTION
Connect each speaker to the corresponding speaker terminals
on the back panel of the main unit. Make sure that the left
speaker is connected to the left pair of speaker terminals and
the right speaker to the right pair of speaker terminals. Also
make sure that the speaker wires are correctly connected: that
the red wires are connected to the red terminals and the black
wires to the black terminals.
GENERA
L INFORMATION
MAINTENANCE
Types of Cassette
Use only good quality cassettes (IEC TYPE 1) for making recordings. May be used to replay
other types of cassette but is unable to make proper recordin gs on these more specialized
tapes.
The use of C120 cassettes
is NOT recommended in this machine.
Protecting Recording
Normally, anything recorded on the tape is automatically erased when n ew recording is
made. It is possible to protect your recording from accidental erasure by removing the tabs
found on the rear o
f the cassette.
When the cassette is held with the recorded side uppermost and exposed tape facing the
front, the protective tab will be found on the left rear of the cassette.
All prerecorded cassette are protected in this way to prevent acciden tal erasure of the
commercial recording. "Protected" cassette will prevent the record button from being
operated.
Cleaning discs
When a disc becomes dirty, clean it with a cleaning cloth, wipe the disc from the cen ter out.
Do not wipe in circular motion.
Do not use solvents such as benzene, thinner commercially available cleaners, or an tistatic
spray intended for analogue records.
Cleaning the disc lens
After prolonged use, dirt or dust may accum ulate at the disc lens. To ensure good playback
Page 12

E-
10
quality, clean the disc lens with CD lens cleaner or any commercially available cleaner: Follow
the instructions supplied with cleaner.
Cleaning the heads and tape path
To en sure good recording and playback quality, clean the heads, the capstan(s) and pressure
roller(s) af
ter every 50 hours of tape operation.
Use a cotton swab slight moistened with cleaning fluid or alcohol.
Demagnetizing the heads
Use a demagnetizing tape available at your dealer.
SPECIFICATIONS
GENERAL
Power Requirement ...............................
............................ .
...AC2
30V ~ 50Hz
Remote Handset
...................................................................
.3V UM - 4 size x 2
Power consumption ............................................ ....
.... AC 22 Watts
Weight.............
...................................................... .......
Approx.
4.4
kg
Unit Dimension
..........................................................Approx.
410
mm(W)x
235
mm(H)x
215
mm(D)
Operation temperature...............................................
............... +5 o C - +35 o C
RECEIVER SECTION
Receiving Bands................................................................... ... AM/FM
Tuning Range .................................................... .. AM 530 - 160 0 KHz
FM 8
7.5
- 108 MHz
COMPACT DISC SECTION
Optical Pickup............................................................................3-Beam Laser
Frequency Response................................................................. 100 Hz - 16KH z
CA
SSETTE SECTION
Recording System ...................................................................
.,
2 Tracks 2 Channels (Stereo)
Biasing System......................................................................... .
DC bias
Frequency Response ........
........................................................ 125
-
6.3 K H z
Wow And Flutter ........................................................................ 0.35%
WRMS (JIS)
AUDIO SECTION
Power output ............................................................................. Maximum
2.
5 Watts x 2
Headphone Im pedance ............................................................. 4 ~ 32 Ohms
ACCESSOR
IES
Instruction Booklet......................................................................
1
Specifications are subject to change for continuous improvement, we reserve the rights to
modification without prior notice.
If at any time in the future you should need to dispose of this product please
note that Waste
electrical
products should not be disposed of with household
waste. Please recycle where facilities exist. Check with your Local Authority or
Page 13

E-
11
retailer for recycling advice. (Waste Electrical and Electronic Equipmen t
Directive).
 Loading...