

Page 1
USER MANUAL
DV D /MPEG4/CD/MP3/PLA YER
Please read this User Manual carefully to e nsure prope r use of this
For information and support, www.lenco.eu
prod uct and k eep t his manual for future r eference.
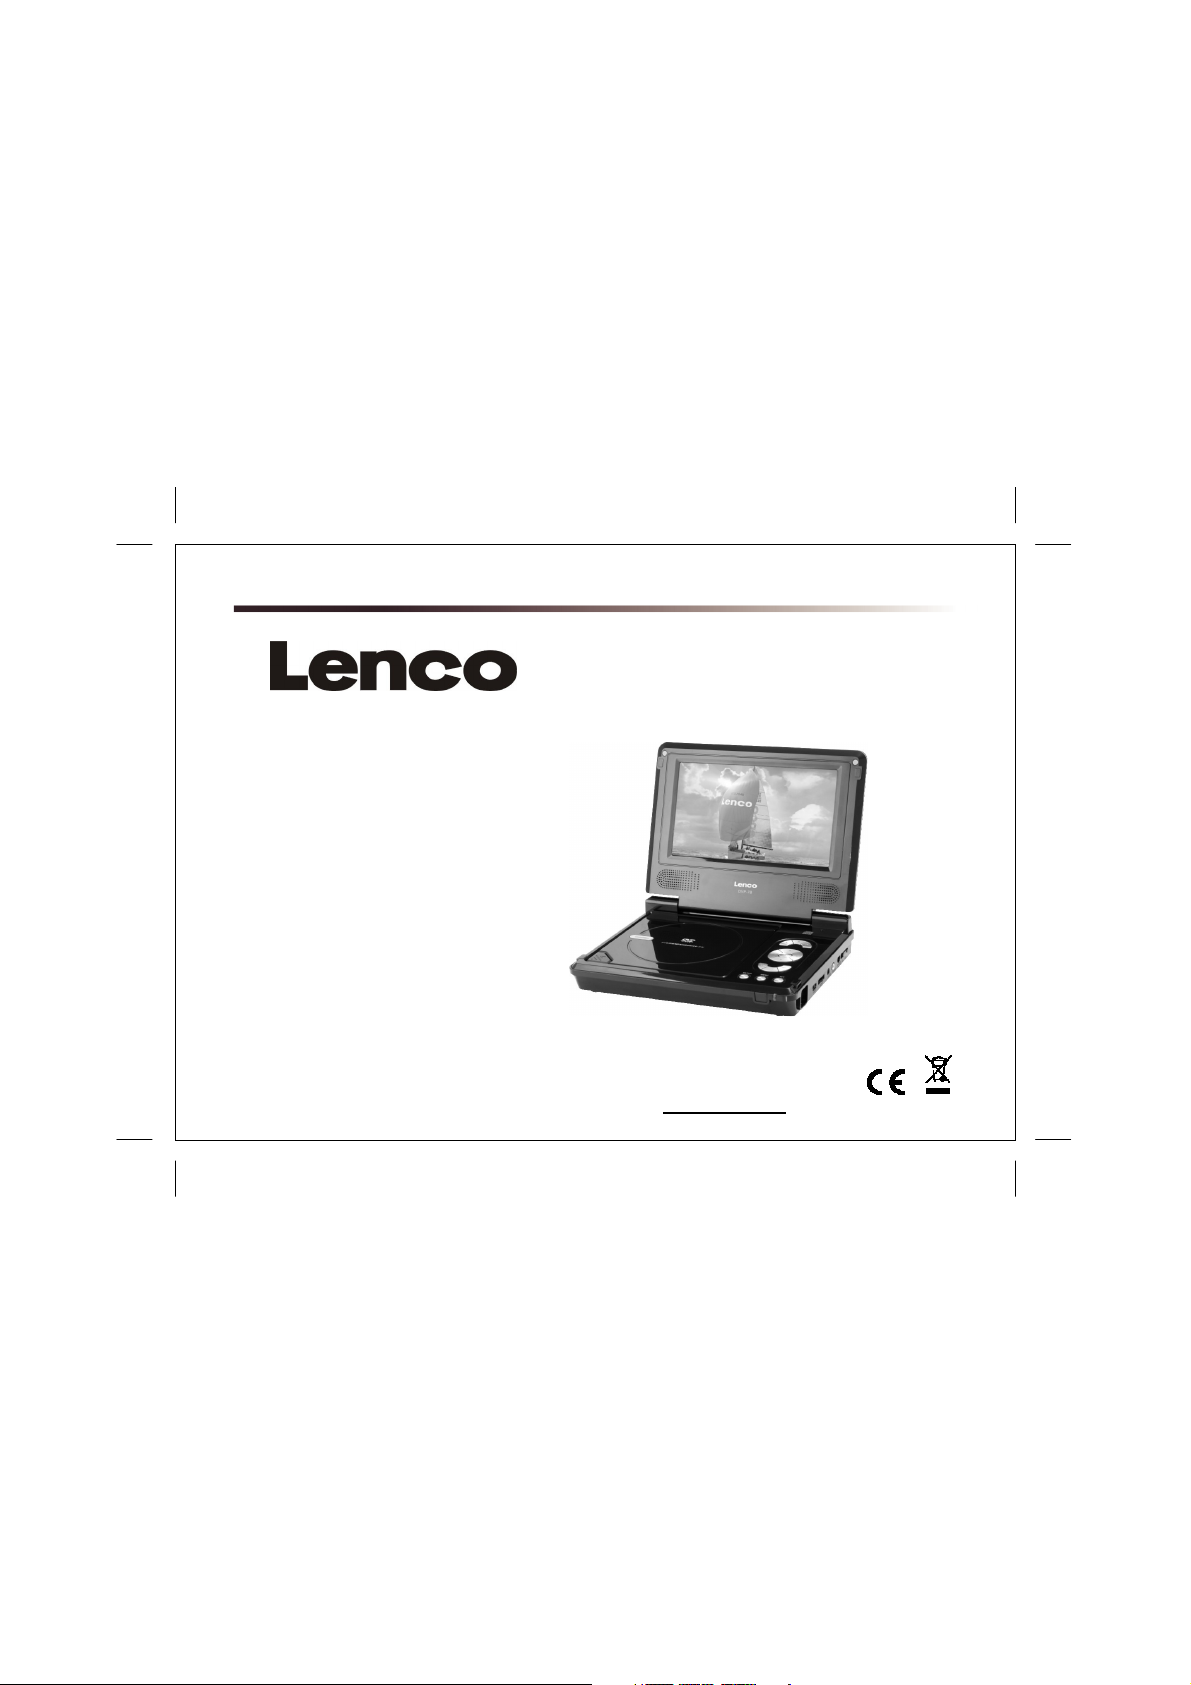
DVP-75
Page 2

Cont ent
INTR ODUCT ION
Safety Precauti ons
Panel Illustration
Remote Control
CONN EC T IO NS
Connecting to a TV set
1
2
3
4
Advanced Featur es
MP3/WMA/MPEG4 playing
PICTUR E CD PLAYBACK
SYSTEM SETUP
OTHERS
Specifications
Accessories
5
6
6
8
8
Page 3
Sa fe ty Pre cau ti ons
CAUT IO N
OF ELE CTRIC S HOCK
DO NOT OP EN
RISK
Saf ety i s Im por tan t
The symbol indicates that dangerous voltages constituting a risk of
electric shock are present within this unit.
The symbol indicates that there are important operating and
maintenance instructions in the literature accompanying this unit.
Keep this information in a safe place for future reference.
Please read all the safety information before using the product.
Safety Considerations.
Position the cables so that they cannot be walked on or pinched by
items placed on or against them.
Do not use the portable DVD Player in humid or damp conditions.
Do not allow the portable DVD Player to get wet.
Do not expose the portable DVD Player t o dripping or splashing.
Do not place water filled objects such as vases on top of the portable
DVD Player.
Do not place naked flame sources, such as candles, on the top of
the portable DVD Player.
Cle aning
ALWAYS unplug the portable DVD Player before you clean it.
Do not use liquid or aerosol cleaners.
Clean the portable DVD Player with a soft, damp (not wet) cloth.
Ve nti la tio n
The slots and openin gs on the set top bo x are for ven tila tion .
Do not cover or block them as it may cause overh eat ing.
NEVE R let childre n p ush anythi ng into the holes or slo ts on
the case.
Ser vicin g
The re are no u ser se rvi ceabl e pa rts in th is porta bl e DV D
Pla yer.
Wh en s er vic ing, r ef er t o qu al ifi ed ser vice p er son ne l.
Con sult y ou r de aler i f yo u ar e ever in doub t ab ou t th e
ins talla ti on, op era tion o r s afety of th is uni t.
Bat tery D ispos al
Ple ase en su re b atter ies ar e dis posed of s afel y.
Nev er dis po se o f batt er ies in a f ir e or with ot he r ho use hold
was te.
Che ck wit h y ou r lo ca l aut ho rit y for d is pos al reg ulat ion s.
Thi s symb ol ind icates t hat th is pro duct inco rpor ate s doub le
insu lation be twee n haz ardo us ma ins v olta ge and u ser
acce ssi ble pa rts. When s erv icin g use only ide ntic al
rep lace ment part s.
WAR NING : To redu ce the ris k of fi re or e lect ric shock , do
not e xpos e thi s app arat us to rain or co rds.
1. The a ppara tus shall not be exposed to drippin g or Spla shing
and that no objects filled with liquids, such as Vase s, shall be
place d th e appa ratus .
2. The mains plug is u sed as th e discon nect dev ice, th e disco nnect
devic e shal l rema in read ily op erabl e.
3. To be complete ly d iscon nect the p ower in put, th e mains p lug
of ap para tus sha ll be disc onne cted fro m the main s.
4. The mains plug of a ppara tus sh ould not be obstructe d or sho uld
be easi ly acce ssed d uring i ntend ed use.
A few highlights or dark spots may occur on the LCD screen. It is a very common
phenomenon of the active matrix displ ay technology, and does not mean any defects
or faults. Never try to repair this machi ne by yourself. In case of any faults. Please
turn off the unit at once, and notif y our Company or the corresponding dealer. The
display is made up of many precision electronic components. Any disassembly or
modification may lead to further dam age.
1
Special notice
Page 4
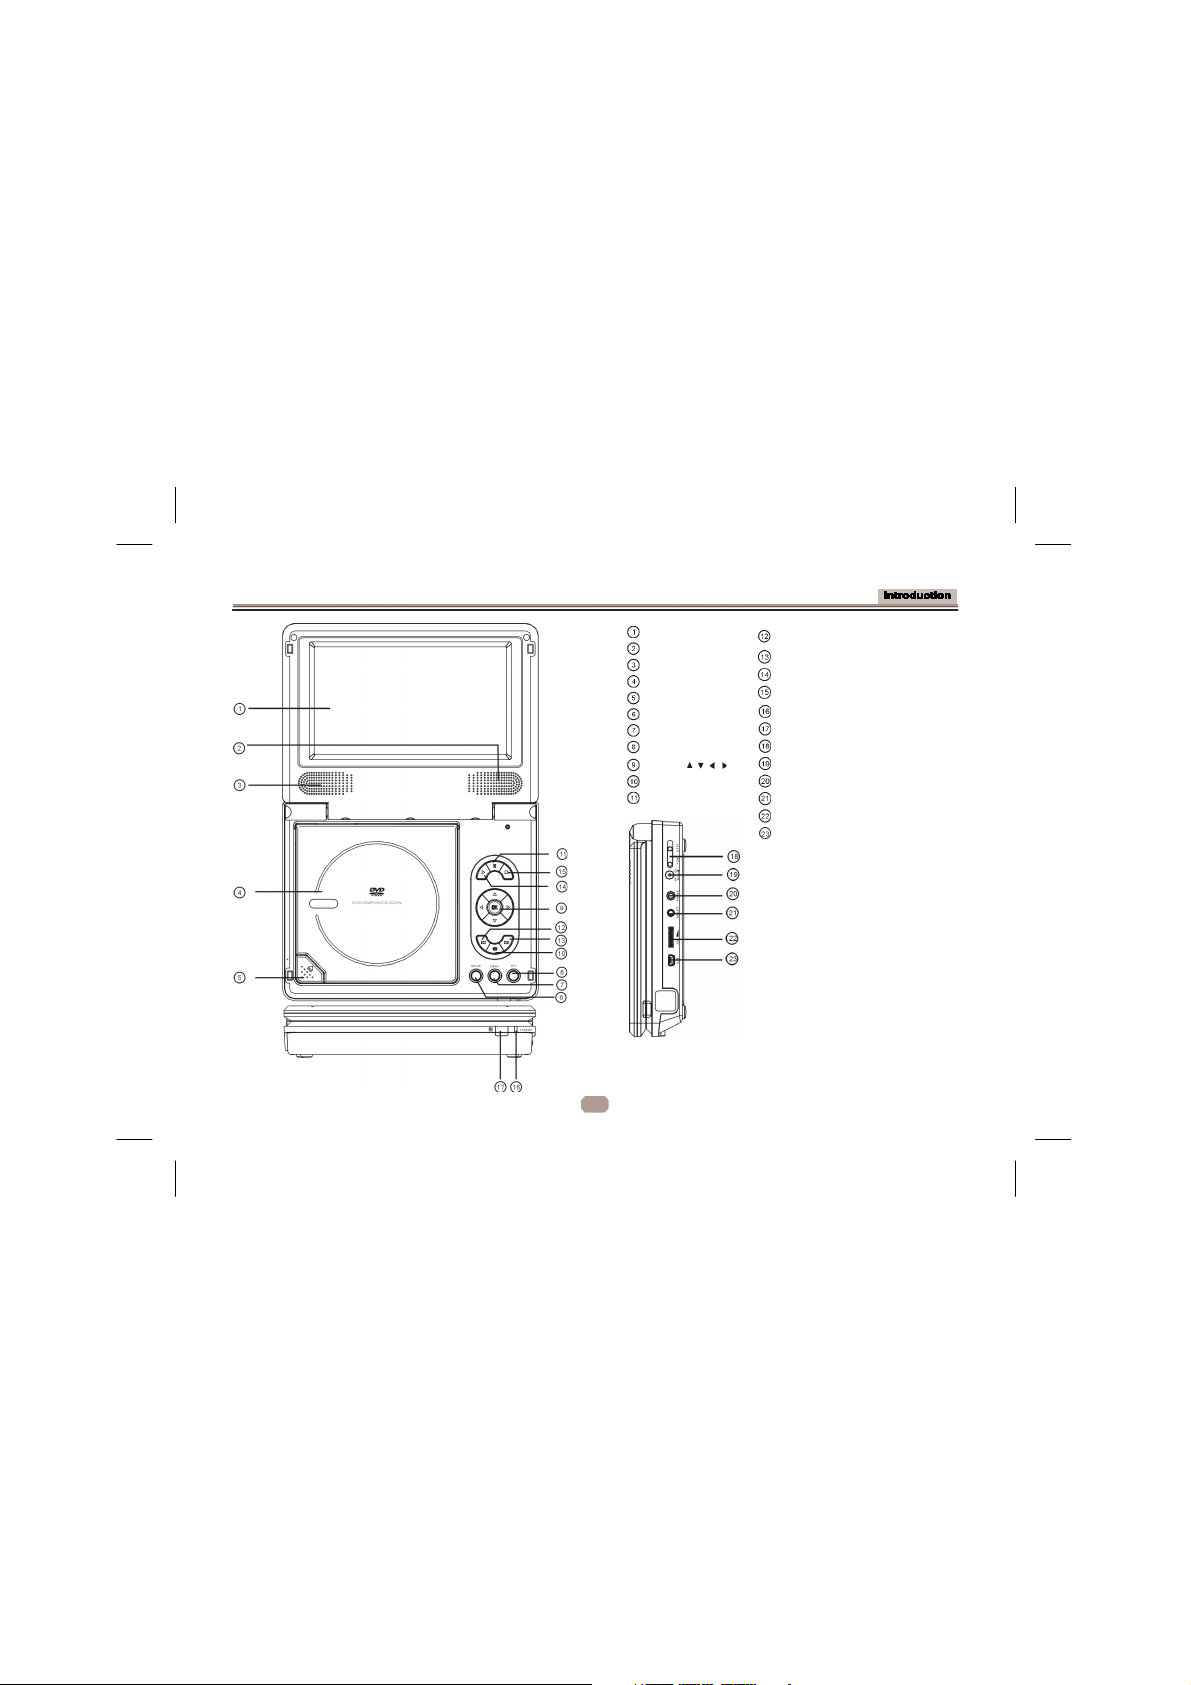
Panel Illustration
LCD DISPLAY
RIGHT SPEAKER
LEFT SPEAKER
DISC DOOR
OPEN DISC TOP
SETUP BUTTON
MENU BUTTON
TFT ON/OFF
MOVE ( )
SOURCE
PAUSE
PREVIOUS BUTTON
NEXT
PLAY
STOP
BATTERY CHARGE INDUCATOR
SENSOR
POWER (ON/OFF) SWITCH
DC 12V INPUT JACK (power supply)
PHONE JACK
AV OUTPUT JACK
VOLUME CONTROLL
USB
2
Page 5

)
Remote Control
Remote Control
Not e:
1. In th is man ual, wi ll b e use d t o repr es en t
the dif fere nt NAVI GATION ARROW S on th e re mot e con tr ol.
2 In o rder to ope rat e any of th e re mote f unct io ns . F ir st push t he
Po we r s wit ch i n “O N” posi ti on .
3.
TITLE Function : The content of a DVD is often divided into several
titles that contain multiple menus. Press for approx. 2 Seconds in the
menu button, the title is displayed. Using the buttons or
the numerical buttons (0-9) on the remote control, you can select the
desired title or the desired option. Confirm with OK.
ANGLE
MENU(TITLE)
NUMBER KEY SEL ECT
STOP
GOTO
FWD
NEXT
PREV
ZOOM
DISPLAY
AUDIO
SUBTITLE
REPEAT
SETUP
MOVE (
REV
ENTER
PLAY/PAUSE
BATTERIES
INCORRECT USE O F BATTERIES MAY CAUS E THEMTO LEAK,
CORRODE OR EXP LODE.
Be sure to place the ba tteries in the correct d irection.
It is dangerous to cha rge/heat/open or short-c ircuit the batteries.
Do not leave dead o r expired batteries or mix old/new batteries.
When not using the remote control for a long time, remove the
batteries. When ope rating range becomes red uced, replace all
batteries with new, f resh ones.
If leakage from the ba ttery occurs, wipe the ba ttery liquid from the
battery compartment , then replace.
3
HOW TO REPLACE THE BATTERY
STEP 1: PUSH THE BUTTON TOWARD LEFT;
STEP 2: PULL THE BATTERY LOADER OUT
Page 6

C
on ne cti ng to a TV Se t
Connections
Phone Ja ck F unc tion
Ins er t t he ea rphon e int o the earph one j ack, to lis ten t he mu si c
or movie p riv ate ly.
Battery charging
Wh en the u nit batt ery is powe red o ut, conn ect t he AC ad apter
on to the unit . the ba ttery wi ll ch arg e aut om ati ca lly .
Volume adjust
Use VOL UME CO NTROL L in the side of the uni t to ad jus t t he
vol um e.
4
Page 7

MP 3/ WM A /M PEG 4 P LAYING
In se rt the M P3 /W MA/MP EG4 d isc, use navigation keys to open the desired direct ory.
Pr es s EN TE R t o ent er the su b d ire ctor y. Use t he na viga tion ke ys to sel ec t
the desired track and then ENTER to play the file. Press the PLAY/PAUSE key to
pause the playback, pre ss the stop key to stop the play. To ret ur n t o t he up pe r
me nu , pre ss navigation key to ch oo se th e i co n an d pre ss E NTE R to confirm.
Op en the op ti on m en u u sing th e na viga tio n keys
Fi lte r: Al lo ws se lec ting the c at eg or ies of file s di sp lay ed in th e b ro ws er list .
Re pe at : To sw itc h dif fe re nt repe at pl ay in g m od e
Mo de : S ele ct di ff er en t pl ayin g mo de
Normal: Normal playback
Music Intro: In this mode, the unit will play the first 10 seconds of the file and then skip
Edit Mode: Use this option to enable programmed playback mode. Select the mode,
Program view: Display directory/folder.
Brower view: Display playback list directory.
Add to program: Use this in combination with Edit Mode to create a play list.
Clear program: When entered the Browser View and in complete stop state (press
Sel ec t s ingle o pti on to en able on e fil e rep eat, selec t fo lde r o pt ion to
Shuffle: Shuffle mode enabled. When playback reaches the end of the
current chapter/track, playback jumps to a random chapter/track.
ena ble a ll th e f iles in th e fol de r rep ea t.
to the next file.
press LEFT Navigation key to directory and press ENTER to choose the
desired track and press Add to program to program the playback list.
STOP button twice), use this option in combination with Edit Mode to
delete tracks from the playback list.
5
Page 8

PICT UR E CD PLAYBACK
Pr es s Na vi ga ti on k ey to c ho os e t he roo t d ir ec to ry an d
pr es s E NT ER bu tt on to en te r t he su b direc tory . P re ss
Na viga ti on ke y to ch oo se t he d es ir ed pi ct ur e an d pr es s
ENTE R to v ie w t he pi ct ure. If yo u want to re tu rn t o th e
up pe r me nu, pr es s Navig at io n ke y to choo se an d
pr es s ENT ER.
Ima ge rot at io n
In pic tu re pl ay sta te , pre ss Navig at io n key t o rotati on
th e pic tu re , pres s AN GL E butt on to ch ange the pic tu re
sc an mo de.
SYST EM S ETUP
MEN U O PE RAT ION
Pr es s t he
SET UP
SE TUP MEN U wi ll b e dis pl ay ed . Us e th e d ire ctio n bu tto ns
fo r u p and do wn move me nt to sel ec t th e de si red ite m,
the n pre ss th e
Pr es s
LEF T
th e se tup, pr es s t he
enter the submenu.
LAN GUAG E SET UP
Se le ct
OSD La nguage
Use thi s it em t o sel ec t the l ang uag e of the set up menu an d sc ree n
dis pla y.
Sub title
Set th e d efa ult su bti tle.
Note : n ot e ver y di sc s uppo rts this functio n.
MPEG 4 Su btit le
Set de fau lt MPE G4 su bt itle enc od ing o pti on.
Note : n ot e ver y di sc s uppo rts this functio n.
Audi o
Set th e d efa ult aud io lan gua ge.
Note : n ot e ver y di sc s uppo rts this functio n.
6
bu tto n on t he remot e cont ro l a nd th e
ENT ER
bu tt on to con firm .
di re cti on bu tt on re tu rn to the m ai n me nu. T o e xi t
SE TUP
bu tto n. Press right navigation key to
Lan guage
in t he se tu p m en u.
La ngua ge
La ngua ge
Video
Ra ting
Misc
Su btitle
MPE G4 Su bti tle
Au dio
DV D Men u
Page 9

SYST EM S ETUP
DVD Me nu
Se t the def au lt DVD menu la ngua ge .
Note : n ot e ver y di sc s uppo rts this functio n.
VID EO SET UP
Se le ct
Vid eo
in t he se tu p m en u, and d ispla y the
Lan guage
Vid eo
Rat ing
Mis c
Aspect Ratio
Select the aspect ra tio.: 16:9 , 4:3 PS, 4:3LB
Notes:
The image display ratio is related to the recorded disc format. Some disc
can not display images in the aspect ratio you choose. If you play a disc
recorded in 4:3 format on a wide screen TV, black bars will appear on the
left and right side of the screen. You must adjust the screen setting
depending on the type of the television you have.
TV S yste m
Thi s p rod uc t su ppo rts ou tpu t of vari ou s sy stems (
Wh en conne cti ng to a TV se t mak e sur e tha t b oth u nit s ha ve the
sam e PAL / NT SC se tt ing s.
Sma rt pi ctu re
Ad jus t di sp lay eff ect:
Sta ndard : de fault e ffect .
Bri gh t: i nte rnal s ett ing fo r br igh t vie w ef fect.
Sof t: int ern al s ettin g fo r so ft view ef fect.
Dyn amic: user ad jus ts b rig ht nes s, con trast , co lor etc.
Asp ect Ratio
TV Sys tem
Sma rt Pic ture
Vi deo
sub menu :
NTS C, P AL).
RATING SETUP
Se le ct
No te : No t al l DV D su pp ort ra ti ng s.
Par en tal Co ntr ol
Se t the des ir ed le vel.
Note : n ot e ver y di sc s uppo rts this functio n.
Set Pas swor d
Use the 0- 9 ke ys to in put f our d igi ts( pa ssw ord), the n pres s
to con fir m.
Note : If you f org et y our pass wor d, p lea se u se th e un ive rsa l
pas swo rd 6666 to un lock.
MIS C S ET UP
Se le ct
* U se Def ault Se tting s
Re se t da ta to fact ory d ef au lt.
7
Ra ti ng
in
th e se tu p me nu, an d disp lay th e Ra ti ng su bm en u:
La ngu age
Vid eo
Ra ting
Mi sc
MIS C
in t he se tu p m en u, and d ispla y the subm en u:
Pa renta l Con tro l
Se t Pa sswor d
ENT ER
Page 10

Specifications
Play mode
Disc mode
Video characteristic
Video S/N ratio
Resolution AV Out
Audio characteristic
Frequency response
Audio S/N ratio
Dynamic range
Distortion
D/A Converter
Accessories
NTSC/PAL
DVD, VCD, CD, MP3, CD-R , CD-R W, JPEG ,
DVD+ -R/W, MPEG4 ,
65dB.
500 lines.
fs 96KHz: 20Hz-20KHz:+/-1dBI
90dB
80dB
< 0.01%
96KHz/24bit
Output characteristic
Display Device
Screen Size
Video out put
Audio ou tput
Power Voltage
Power c onsum ption
Size
Weight
Specifications are subject to change without notice.
8
Color T FT-LCD
7 inche s
1Vp-p(7 5 Ω)
2CH
DC IN 1 2V
206x160 x40m m
1.0kg
15W
Other
Page 11

Caution: Danger of explosion if battery is incorrectly replaced. Replace
only with the same or equivalent type.
Warning: The battery (battery or batteries or battery pack) shall not
be exposed to excessive heat such as sunshine, fire or the like.
Warning: To reduce the risk of fire or electric shock, do not expose
this apparatus to rain or moisture. The apparatus shall not be exposed
to dripping or splashing and that no objects filled with liquids, such as
vases, shall not be placed on apparatus.
Warning: Only use attachments/accessories specified provided
by the manufacturer, the Portable DVD Player is supplied by AC
adapter, the AC adapter is used as disconnect device, the disconnect
device shall remain readily operable.
If at any time in the future you should need to dispose of this product please
note that: Waste electrical products should not be disposed of with household
waste. Please recycle where facilities exist. Check with your Local Authority or
retailer for recycling advice. (Waste Electrical and Electronic Equipment Di rective)
 Loading...