

Page 1
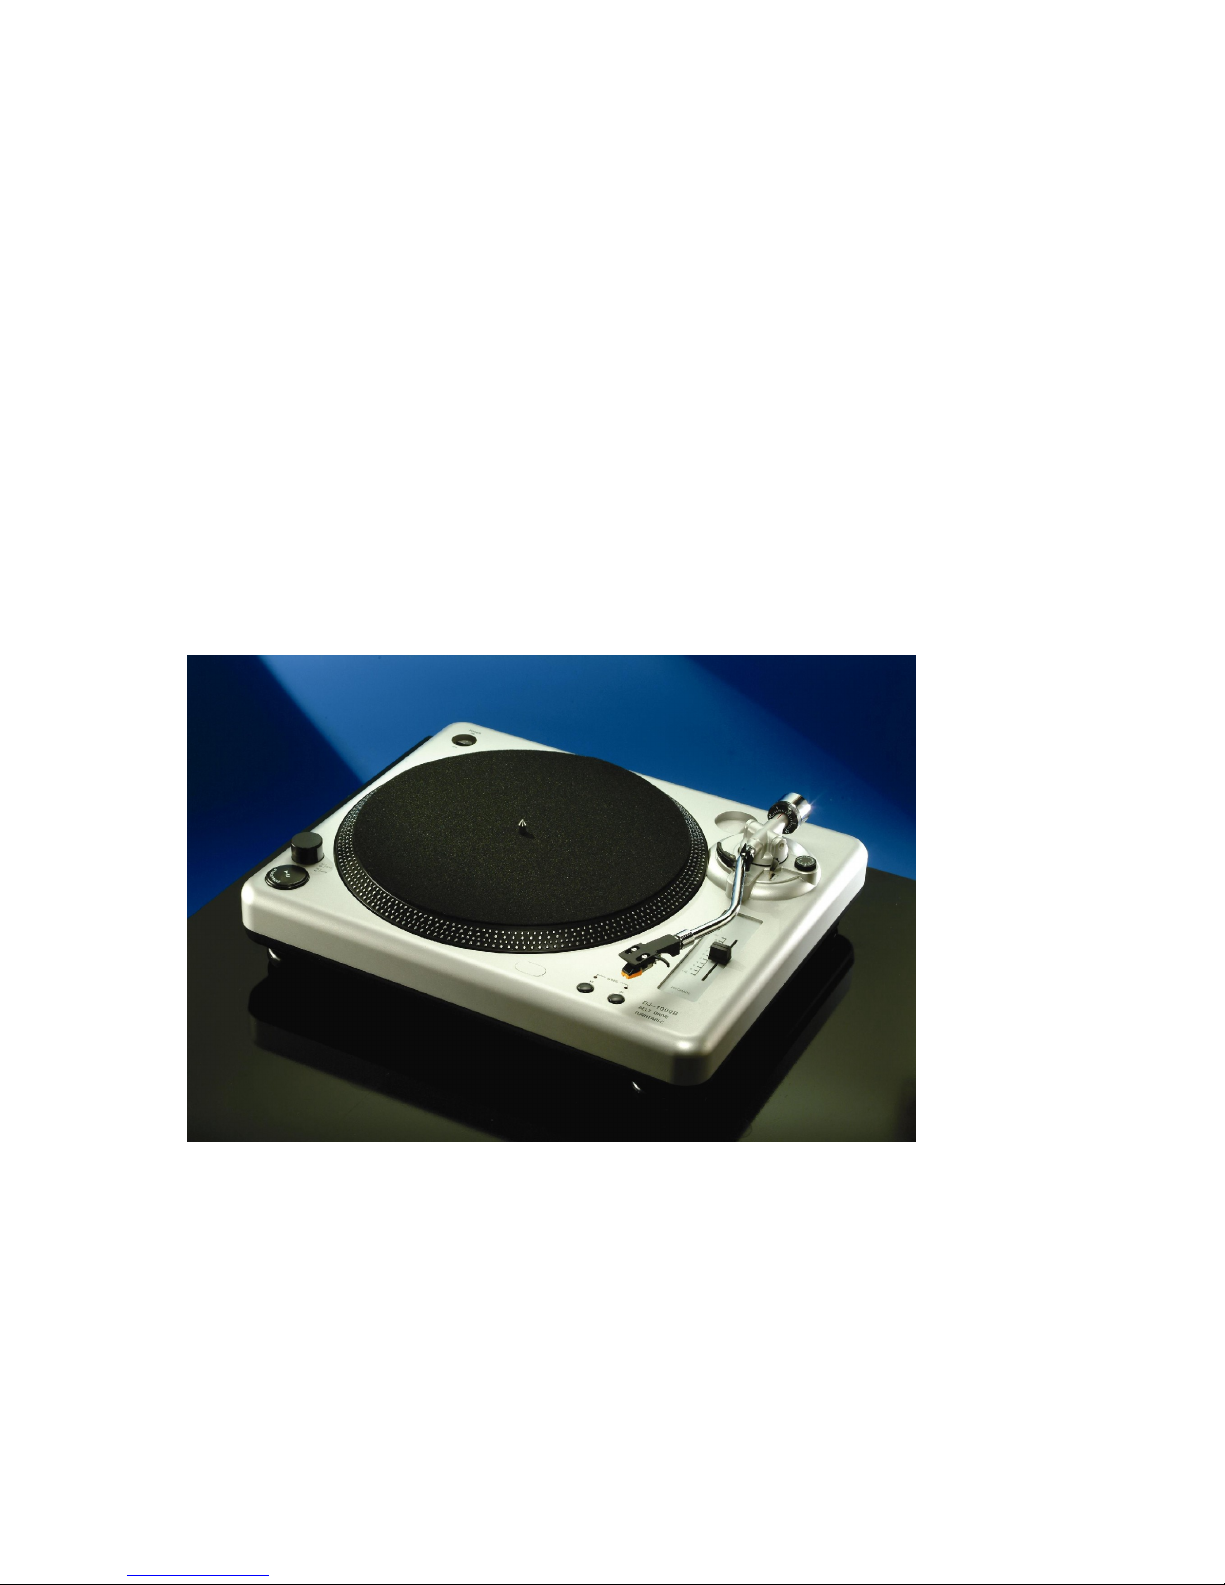
Professional
Belt-Dive Turntable
___________________________________________________________________________
INSTRUCTION MANUAL
Page 2
PAGE
2
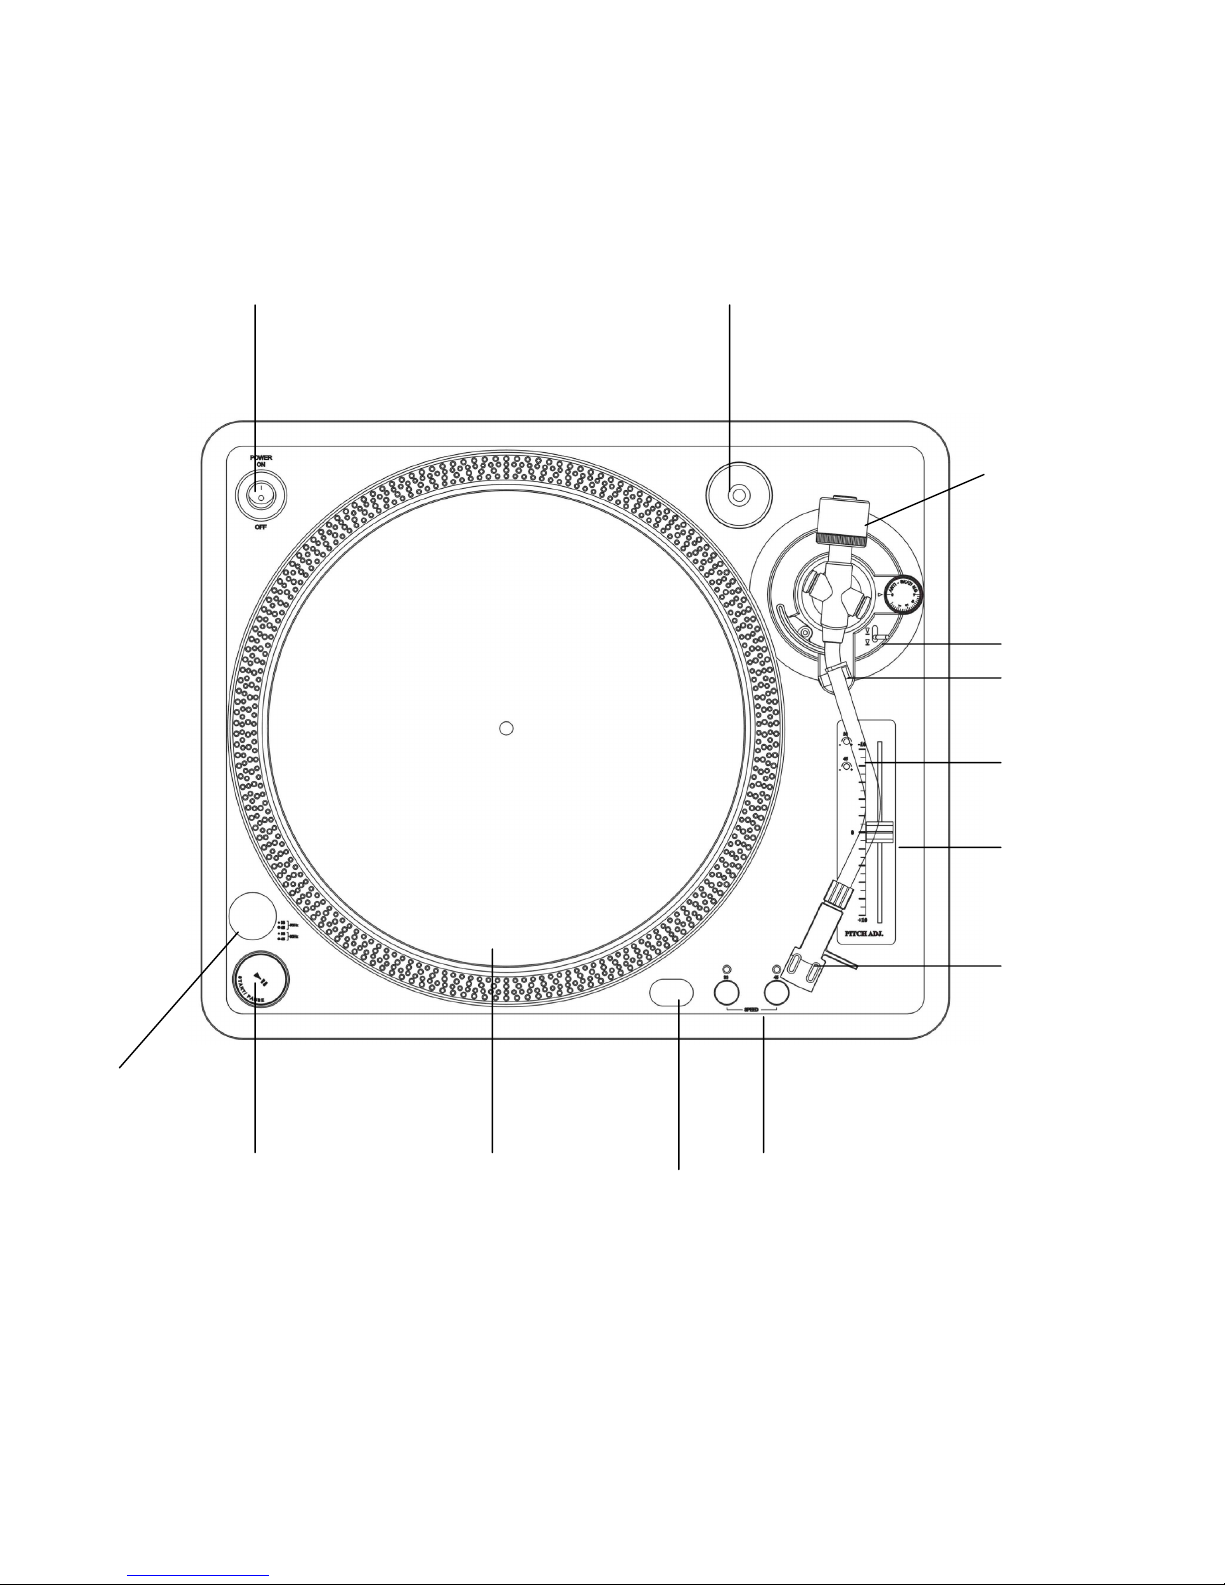
Counter weight
Cueing lever
Arm rest
Tone arm
Pitch adjustment
Headshell
Strobe
Illuminator
Start / Stop Platter Target Pitch
Light Speed
(Optional)
Power Switch 45 RPM Adaptor
Page 3

PAGE
3
Table of Contents
Precaution
-----------------------------------------------------
---------------------------------------
3
Check list
-----------------------------------------------------------------------------------------.4
Assembly and setting
-------------------------------------------------------------------------------
4
Installa
tion of turntable platter
-----------------------------------------------------------------
4
Installation of cartridge
--------------------------------------------------------------------------
4
Installation of headshell
-------------------------------------------------------------------------
4
Installation of counter weight------------------------------------------------------------------4
Placement
--------------------------------------------------------------------------------------------
4
Connections
-----------------------------------------------------------------------------------------5
How to operate
--------------------------------------------------------------------------------------5
How to suspend play----------------------------------------------------------------------------5
How to use manual cueing
---------------------------------------------------------------------
5
Target Light (Optional )
-----------------------------------------------------------------------
5
Remote control of Start
/ Stop( Optional )
---------------------------------------------------
5
Adjustments
-----------------------------------------------------------------------------------------
5
Adjustments of horizontal zero balance and stylus pressure
----------------------
--------
5
Adjustments of anti-
skating control
----------------------------------------------------------6
Adjustments of platter speed------------------------------------------------------------------6
Specifications
-------------------------------------
---------------------------------------------------
7
PRECAUTION
Read the manual carefully before operation.
Do not remove cover or back to prevent electrical shock. NO USER REPLACEABLE
PARTS INSIDE.
The apparatus shall not be exposed to dripping or splashing and that no objects filled
with liquids, such as vases, shall be placed on the apparatus.
Use the unit on a flat surface.
Be sure not to connect the power or cables before moving the unit.
Do not use chemical solvents on the unit.
Page 4

PAGE
4
Checklist of Parts:
Turntable unit . 1
Turntable platter .
1
Turntable mat . 1
45 RPM adapter ..1
Counter weight ... .1
Headshell 1
ASSEMBLY AND SET-UP
Installation of turntable platter
Set the turntable base on a flat level surface. After checking to make sure all packing
materials have been removed, carefully place the platter on the center spindle. Then put the
mat on the platter.
Installation of cartridge
While installing a cartridge, refer to the instructions of that cartridge.
During
installation, attach the stylus protector to guard the stylus tip from damage.
Connect the lead wires to the cartridge terminals. The terminals of most cartridges are
color coded. Connect each lead wire to the terminal of the same color.
White ( L
)
----
--------------------
Left channel
Blue ( L
)
--------------------------
Left channel
Red ( R
)
--------------------------
Right channel
Green ( R
)
------------------------Right channel
Install a cartridge to the headshell, and tighten it with screws provided with the
cartridge.
Installation of headshell
Insert the headshell into the front end of the tubular tone arm.
Turn the locking nut counter-clockwise while the head shell firmly held horizontally.
Installation of counter weight
Slide counter weigh
t onto the rear of the tone arm.
Twist the counter weight counter-clockwise and it will screw onto the rear of the tone
arm.
PLACEMENT
Place the turntable on a flat surface.
Locate the turntable as far away from the speakers as possible and isolate the unit from
sound radiation from them.
Page 5

PAGE
5
Do not expose the turntable to direct sun, dust, moisture or heat.
Keep the turntable in a place with good ventilation.
The interference may happen when a radio is placed too close to the turntable and both
radio and turn
table are playing.
CONNECTIONS
Connect the AC power plug to a proper outlet.
HOW TO OPERATE
Place a record on the turntable mat.
Depress the 33 or 45 speed select button to choose the desired speed.
Turn the power switch to the ON position, where the strobe illuminator will light up.
Remove the stylus protector if your cartridge has one attached.
Release the arm clamp.
Push the start / stop button and then the turntable will begin rotating.
Set the cueing lever to the up position.
Position the tone arm over the desired position on the record and push down the cueing
lever. Then the tone arm will slowly lower onto the record and play will start.
When play is over, raise the tone arm, move it to the arm rest and lock it with the arm
clamp.
How to suspend
play
Setting the cueing lever to the up position will lift the tone arm and then the play stops.
How to use manual cueing
The cueing lever is used when you want to momentarily interrupt the tone arm. Move the
lever gently to the UP position to interrupt the playing and to the DOWN position to
resume playing.
Keep the cueing lever in the down position when you are not using it.
Target Light ( Optional )
This unit is provided with the fixed target light for illuminating the stylus tip during play.
Remot
e control of Start / Stop ( Optional )
It allows the function of start / stop to be remote-controlled by a separate switch such as a
fader start.
* Note: If starting / stopping of the turntable is operated by both methods of pressing the
button on the unit
and remote control, malfunctions may happen.
Page 6

PAGE
6
ADJUSTMENTS
Adjustments of horizontal zero (0) balance and stylus pressure
If your cartridge has a detachable stylus protector, remove it and be careful not to touch
the stylus tip.
Release the arm clamp and
lift the tone arm from the arm rest.
Turn the counterweight clockwise or counter-clockwise until the tone arm is balanced
horizontally as floating freely. During adjusting the horizontal zero (0) balance, be
careful that the stylus tip does not contact t
he turntable mat or turntable base.
After the tone arm is horizontally zero (0) balanced temporarily, place the tone arm on
the arm rest and lock it with the arm clamp.
While rotating the stylus-pressure ring, hold the counterweight steady with one hand
until 0 on the ring aligns with center line on the tone arm rear shaft. Now the
adjustment of the horizontal zero (0) balance should be complete.
After adjusting the horizontal zero (0) balance, turn the balanced counterweight
counter
-clockwise to get the proper stylus pressure as the cartridge manufacturer s
recommendation when it meets center line on the tone arm rear shaft.
Adjustment of anti-skating control
Set the anti-skate control to a position which corresponds to the adjust tracking force. If the
cartridge tracking force is 2 grams, the anti-skate control should also be set to 2.
Adjustment of the platter speed.
Set the arm lift lever to the up position.
Set the speed select switch to 33
Press start button, platter start revolving. Release the arm clip and tone arm toward the
turntable platter.
Observe the appropriate strip of strobe calibration dots from the strobe lens. The lower
strip is for 60HZ power supply. The upper one is for 50 Hz.
If the strobe dots appear to flow to the right which means the platter is revolving slower
than rated speed, turn the pitch control knob in + direction until the strobe dots so
appear to flow to the left which means the platter is revolving faster than rated speed,
turn the pitch control knob, in direction until the strobe dots do appear to be
stationary.
After the platter speed has been adjusted correctly return the torn arm to the arm rest and
fix the arm clip.
Page 7

PAGE
7
SPECIFICATIONS
General
Power supply
AC 230V~50Hz
Power consumption
5 Watts
Dimensions
(W x H x D) 450 x130x372 (mm)
Weight
3.0 kgs
Turntable section
Type
Belt Drive Full manual turntable
Drive Motor
DC EG MOTOR
Turntable platter
Plastic platter
Diameter
332mm
Turntable speed 33-1/3rpm and 45rpm
Wow and flutter
Less than 0.2%
Tonearm section
Type
Statically balanced S-shaped tonearm
According to the manufacturer-Specification subject to change without notice.
 Loading...