

Page 1
Model Lenco Concerto DIR-2000
User manual (2.1 WiFi Internet Radio with Bluetooth®, DAB+ and
Spotify Connect)
Gebruiksaanwijzing (2.1 WiFi Internet radio with Bluetooth®, DAB+
en Spotify Connect)
Benutzerhandbuch (2.1 WiFi Internet Radio mit Bluetooth®, und
Spotify Connect)
Mode d’emploi (Radio Internet 2.1 avec Bluetooth®, DAB+ et Sportify
Connect)
Manual del usuario (Radio Internet WI-FI 2.1 con Bluetooth®, DAB+ y
Spotify Connect)
Page 2

Index
English.............................................................................(Page Number)
Nederlands......................................................................(Page Number)
Deutsch...........................................................................(Page Number)
Français...........................................................................(Page Number)
Español............................................................................(Page Number)
Version 1.0
Page 3

1. Network Requirements
A broadband connection in combination with a wireless access point,
router or similar network device is required.
Ensure the network device supports WiFi (802.11a/b/g/n) wireless
connection.
Ensure the network which is connected with your PC, tablet or
smartphone, etc. is the same as equipped with the device.
2. Safety Warnings
Do not use this device near water.
Clean only with a slightly damp cloth.
Do not cover or block any ventilation openings. When placing the device
on a shelf, leave 5 cm (2”) free space around the whole device.
Install in accordance with the supplied user manual.
Don’t step on or pinch the power adaptor. Be very careful, particularly
near the plugs and the cable’s exit point. Do not place heavy items on
the power adaptor, which may damage it. Keep the entire device out of
children’s reach! When playing with the power cable, they can seriously
injure themselves.
Unplug this device during lightning storms or when unused for a long
period.
Keep the device away from heat sources such as radiators, heaters,
stoves, candles and other heat-generating products.
Avoid using the device near strong magnetic fields.
Electrostatic discharge can disturb normal usage of this device. If so,
simply reset and restart the device following the instruction manual.
During file transmission, please handle with care and operate in a
static-free environment.
Warning! Never insert an object into the product through the vents or
openings. High voltage flows through the product and inserting an
object can cause electric shock and/or short circuit internal parts. For
the same reason, do not spill water or liquid on the product.
Do not use in wet or moist areas such as bathrooms, steamy kitchens or
near swimming pools.
Do not use this device when condensation may occur.
Although this device is manufactured with the utmost care and checked
several times before leaving the factory, it is still possible that problems
may occur, as with all electrical appliances. If you notice smoke, an
excessive build-up of heat or any other unexpected phenomena, you
3
Page 4

should disconnect the plug from the main power socket immediately.
This device must be well ventilated at all time!
This device must operate on a power source as specified on the
specification label. If you are not sure of the type of power supply used
in your home, consult your dealer or local power company.
The socket outlet must be installed near the equipment and must be
easily accessible.
Do not overload ac outlets or extension cords. Overloading can cause
fire or electric shock.
Keep away from rodents. Rodents enjoy biting on power cords.
Always hold the plug when pulling it out of the main supply socket. Do
not pull the power cord. This can cause a short circuit.
Avoid placing the device on any surfaces that may be subject to
vibrations or shocks.
To protect the device during a thunderstorm, unplug the ac power
adaptor.
When the device is not in use for long periods, unplug the ac power
adaptor for safety reasons.
To clean the device, use a soft dry cloth. Do not use solvents or petrol
based fluids. To remove severe stains, you may use a damp cloth with
dilute detergent.
The supplier is not responsible for damage or lost data caused by
malfunction, misuse, modification of the device or battery replacement.
The apparatus shall not be exposed to dripping or splashing and make
sure that no objects filled with liquids, such as vases, are placed on or
near the apparatus.
To completely disconnect the power input, the mains plug of the
apparatus shall be disconnected from the mains, as the disconnect
device is the mains plug of apparatus.
The mains plug of the apparatus should not be obstructed or should be
easily accessed during intended use.
Battery shall not be exposed to excessive heat such as sunshine, fire or
the like.
Minimum distance of 10cm around the apparatus is needed for
sufficient ventilations.
The ventilation should not be impeded by covering the ventilation
openings with items such as newspapers, table-cloths, curtains etc.
No naked flame sources such as lighted candles should be placed on the
apparatus.
Attention should be drawn to the environmental aspects of battery
4
Page 5

disposal.
The apparatus can only be used in moderate extremely cold or climates
warm environments should be avoided.
The rating label has been marked on the bottom panel of the apparatus.
This device is not intended for use by people (including children) with
physical, sensory or mental disabilities, or a lack of experience and
knowledge, unless they’re under supervision or have received
instructions about the correct use of the device by the person who is
responsible for their safety.
This product is intended for household use only and not for commercial
or industrial use.
Make sure the unit is adjusted to a stable position. Damage caused by
using this product in an unstable position or by failure to follow any
other warning or precaution contained within this user manual will not
be covered by warranty.
Never remove the casing of this apparatus.
Never place this apparatus on other electrical equipment.
Do not use or store this product in a place where it is subject to direct
sunlight, heat, excessive dust or vibration.
Do not clean this product with water or other liquids.
Do not block or cover the slots and holes in the product.
Do not push foreign objects into the slots or holes in the product.
Do not allow children access to plastic bags.
Please check that the voltage on the type plate of your appliance
corresponds with your house electricity supply (type plate is located on
the back of the unit).
Protect the power cord from being walked on or pinched, particularly at
plugs, convenience receptacles, and the point where they exit from the
apparatus.
Only use attachments/accessories specified by the manufacturer.
Refer all servicing to qualified service personnel. Servicing is required
when the apparatus has been damaged in any way, such as the power
supply cord or the plug, when liquid has been spilled or objects have
fallen into the apparatus, when the apparatus has been exposed to rain
or moisture, does not operate normally, or has been dropped.
Do not use a damaged power cord or plug or a loose outlet. Doing so
may result in fire or electric shock.
Warning: prolonged exposure to loud sounds from personal music
players may lead to temporary or permanent hearing loss.
To reduce the risk of electric shock, do not remove screws. The device
5
Page 6

does not contain any user-serviceable parts. Please leave all
maintenance work to qualified personnel.
It is not recommended to use headphone with the
device via 3.5mm Audio Out socket. In case of using
the headphones, be reminded that excessive sound
pressure or volumes from headphones or earphones
can lead to damage to the hearing. Always adjust the
volume to a pleasant, not too loud level. If you have adjusted the
volume of the headphones to be too high and use that for an extended
period, it can damage the listener’s hearing.
Where the mains plug is used as the disconnect device, the disconnect
device shall remain readily operable.
The cell batteries shall not be exposed to excessive heat such as
sunshine, fire or the like.
INSTALLATION
• Unpack all parts and remove protective material.
• Do not connect the unit to the mains before checking the mains
voltage and before all other connections have been made.
• Do not cover any vents and make sure that there is a space of
several centimeters around the unit for ventilation.
6
Page 7
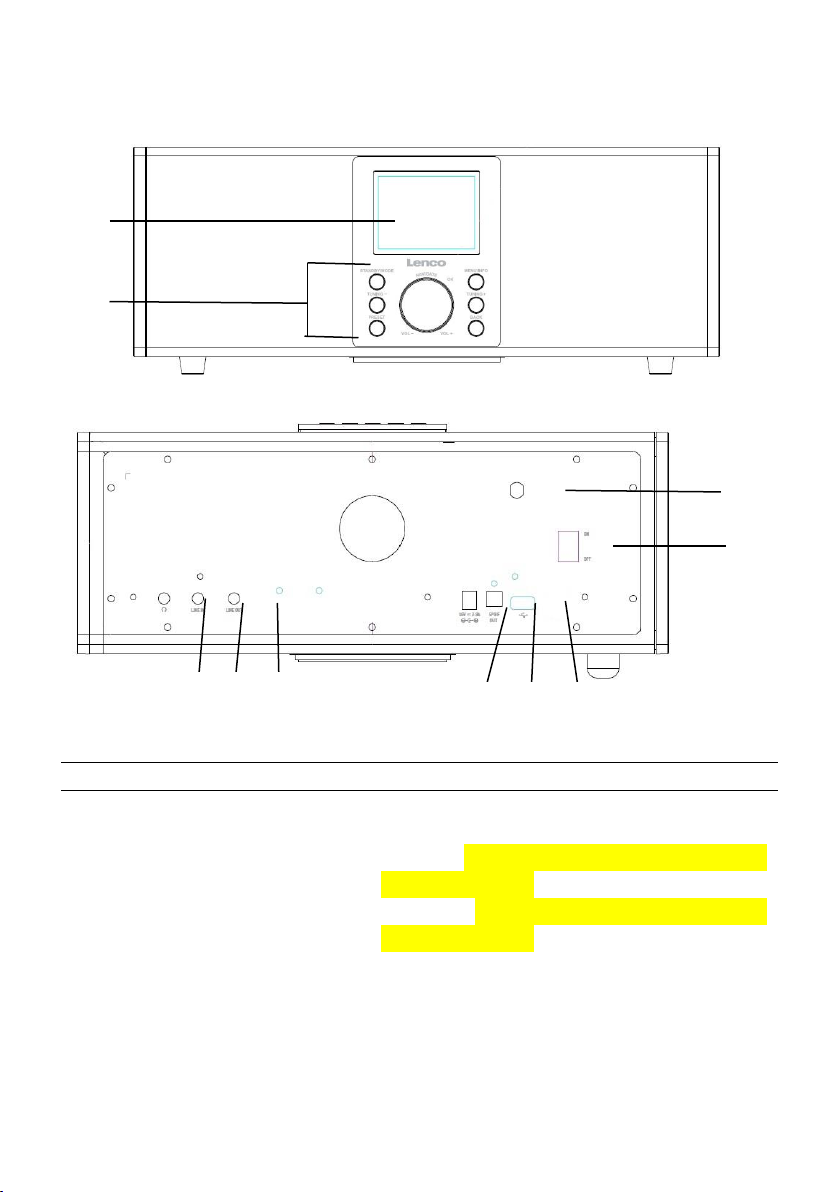
1
2
No.
Description
Functions
1
3.2” TFT Screen
Color display
2
Buttons and Controls
Standby/Mode
Menu/Info
Tuning- : FM Tuning- / Downward selection
on the sub-menu
Tuning+ : FM Tuning+ / Upward selection
on the sub-menu
Preset
Back
Reel: Volume and Navigate and press to OK
3
4
5 6 7
8 9 10
3. Identification of Parts and Controls
7
Page 8

3
Antenna
Rod antenna
4
On/Off switch
Power On/off
5
Earphone socket
3.5mm socket for earphone connection
6
Line In
3.5mm socket for line in
7
Line Out
3.5mm socket for line out
8
DC IN
Power supply
9
SPDIF OUT
SPDIF socket for audio in connection to
Hi-Fi system
10
USB port
Plug the USB drive, portable hard disk or
MP3 player for music playback
Remote Control
Open the battery compartment of the remote control. Insert a CR2025 type
3V battery. Make sure the positive (+) sign of the battery is facing up. Close
the battery compartment cover.
Caution: Improper or incorrect use of batteries may cause corrosion or
battery leakage, which could cause fire, personal injury or damage to
property.
8
Page 9

Warnings
- Do not ingest the battery, Chemical Burn Hazard
The included remote control:
- This product contains a coin/button cell battery. If the coin/button cell
battery is swallowed, it can cause severe internal burns in just 2 hours
and can lead to death.
- Keep new and used batteries away from children.
- If the battery compartment does not close securely, stop using the
product and keep it away from children.
- If you think batteries might have been swallowed or placed inside any
part of the body, seek immediate medical attention.
9
Page 10

4. Getting Started
Remove all packaging from the device. Retain the packaging. If you dispose of
it please do so according to local regulations.
The following items are included:
2.1 Wifi internet radio with Bluetooth and DAB+.
Power adaptor
3.5mm audio cable
Instruction manual
Spotify flyer
Connect the power adapter (included) to the DC IN socket at the rear of the
device and the mains socket.
Get the network environment ready
For wireless WiFi
Make sure you have setup the wireless network and you have the WEP,
WPA or WPA2 security password to activate the connection.
You may also use the WPS (WiFi Protected Setup) function for an easy
pairing between the network device and the device itself. Check if the
light indicators on the network device are in an operational state.
Connect the device to the power supply.
The first time you turn the device on, it will go straight into the Wizard Setup
menu. Select YES to continue the setup. For the details of the Wizard Setup,
you may refer to Section 5.2.1. If NO is selected, you will be asked if you
would like to run the wizard next time.
Once you have successfully set up the network, the device will automatically
10
Page 11
connect to the network the next time when you turn the device on again. In
case you would like to change the network, enter System Setting to configure
the corresponding connection. You may refer to Section 5.2.1 and 5.2.3 for
details.
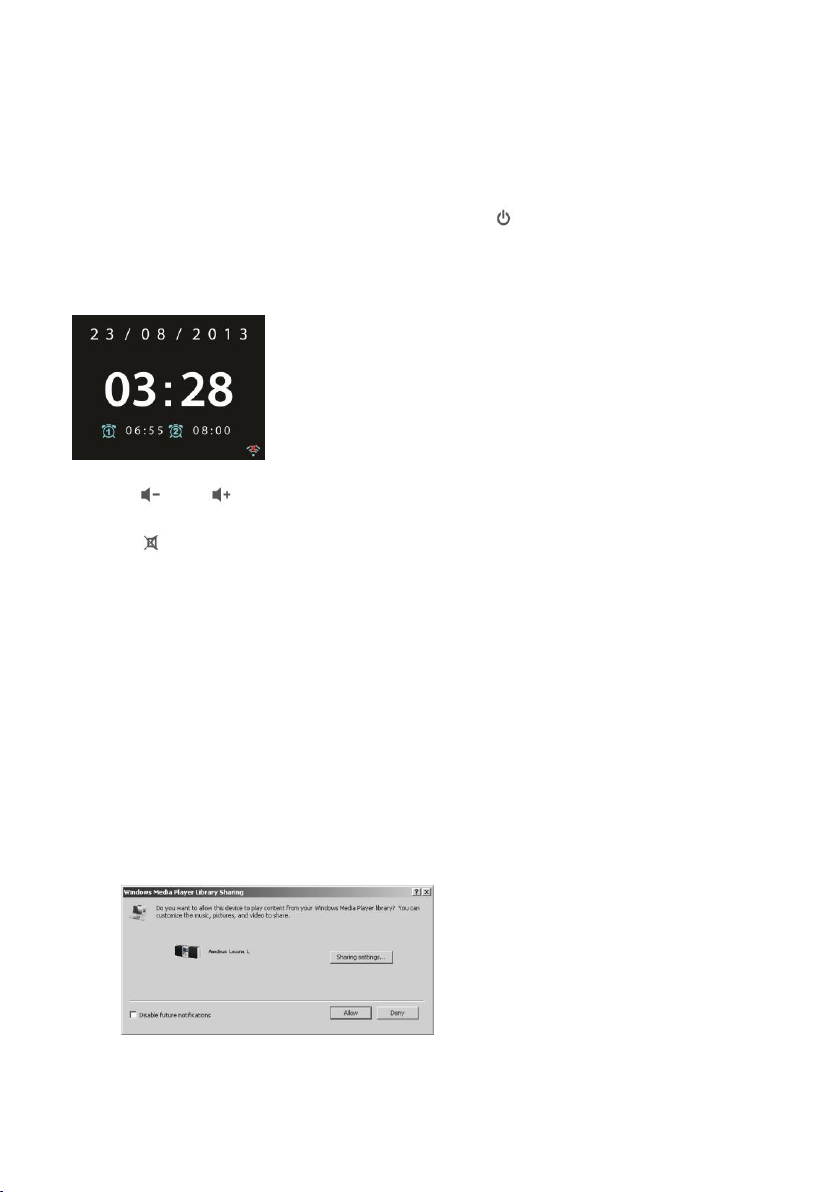
Press the STANDBY/MODE on the device or on the remote control to
enter the operation mode, and press again to enter the standby mode.
Time, date and any active alarm times will be displayed on the screen.
Press / on the remote control or rotate the volume control on
the device to adjust the volume. If you wish to switch the sound off,
press , press again to resume audio listening.
Music Sharing from PC
To share music files from your PC, follow the steps below:
- Connect the PC to the network.
- Ensure the device is powered on and connected to the same
network.
- Open the UPnP platform Windows Media Player (version 11 or
later). Alternatively, other platforms or server such as Windows
Media Connection may be used.
The following is an example of setting up with the Windows XP and Windows
Media Player 11.
11
Page 12
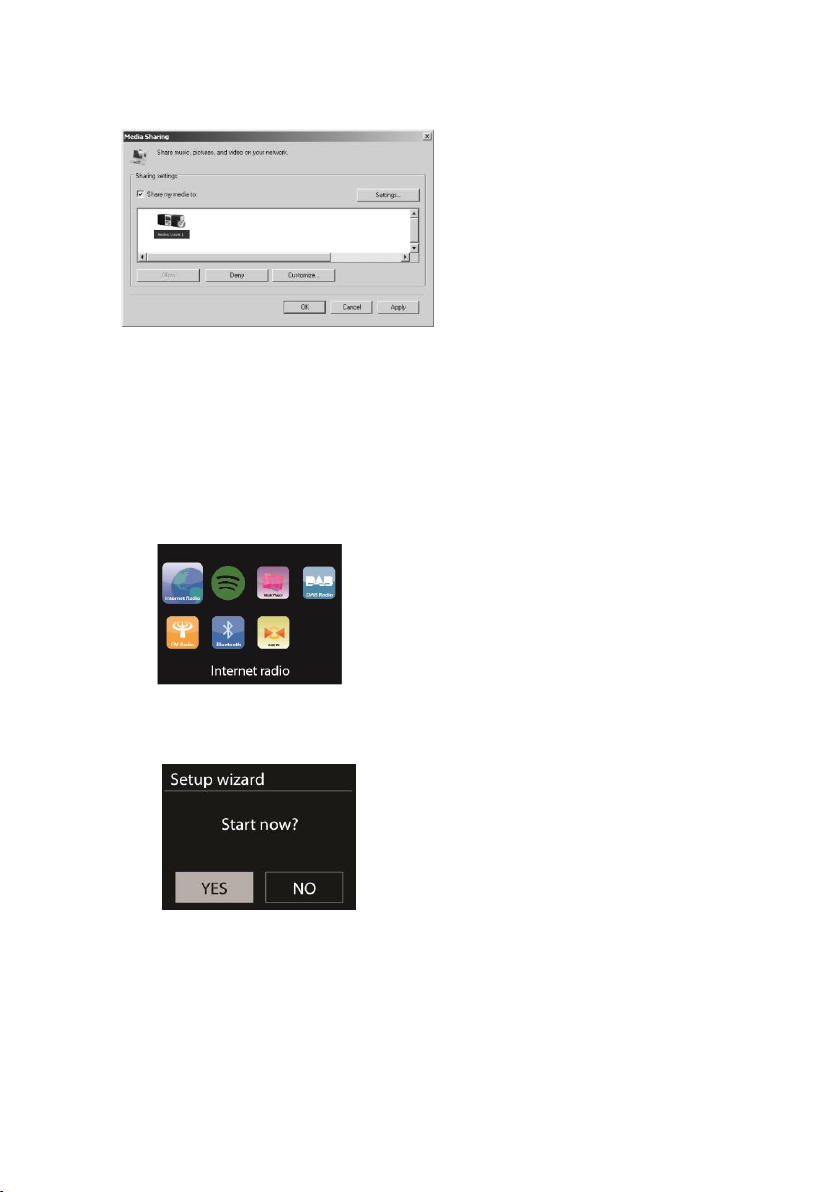
- Allow to share your media to the device (default name: Lenco
Concerto)
- Add the audio files and folders that you want to share with the
device to the media library.
5. Operations
5.1 Main Menu
In the main menu, you can select the following modes: Internet Radio, Spotify
Connect, Media Player, DAB, FM, Bluetooth, AUX IN, Sleep and Alarm
5.2 System Settings
5.2.1 Setup Wizard
Time/date
Display format
Select 12 or 24 as your desired time format.
Auto-update
12
Page 13

The time and date can be updated manually or automatically
from DAB, FM or network. Auto-update is available in DAB, FM or
Internet mode. The time will only be updated when in a
corresponding mode, so it is best to select a mode that you use
regularly.
DAB+ and FM use time signals broadcast with radio
transmissions. The network uses a time signal sent from the
Internet radio portal in any network-connected mode.
For Network setting only
Time zone, daylight
Set your time zone (default time zone GMT +1:00). Turn on
the Daylight savings option if daylight saving is in effect in your
country.
Manual update
If you select No update, the wizard prompts you to set the
time and date manually. The date and time are displayed as
dd-mm-yyyy and hh:mm.
The adjustable digit will flash. Adjust each digit with the
Navigation Control on the device or up/down on the remote control.
Once the digit is set, press the reel on the device or press
on the remote control to continue.
Network
Wlan region
Select the Wlan region to obtain the optimal Wlan
connectivity: Most of Europe.
Scanning for the network
The device is compatible with all common network protocols
and encryption methods. It searches and lists out all available
networks.
There are hints for the type of network – if your network
device supports the WPS function, it will display [WPS] before the
13
Page 14
SSID (the name of network device). Select the one you want to
11
connect.
For the wireless connection, input encryption is required in the
next step.
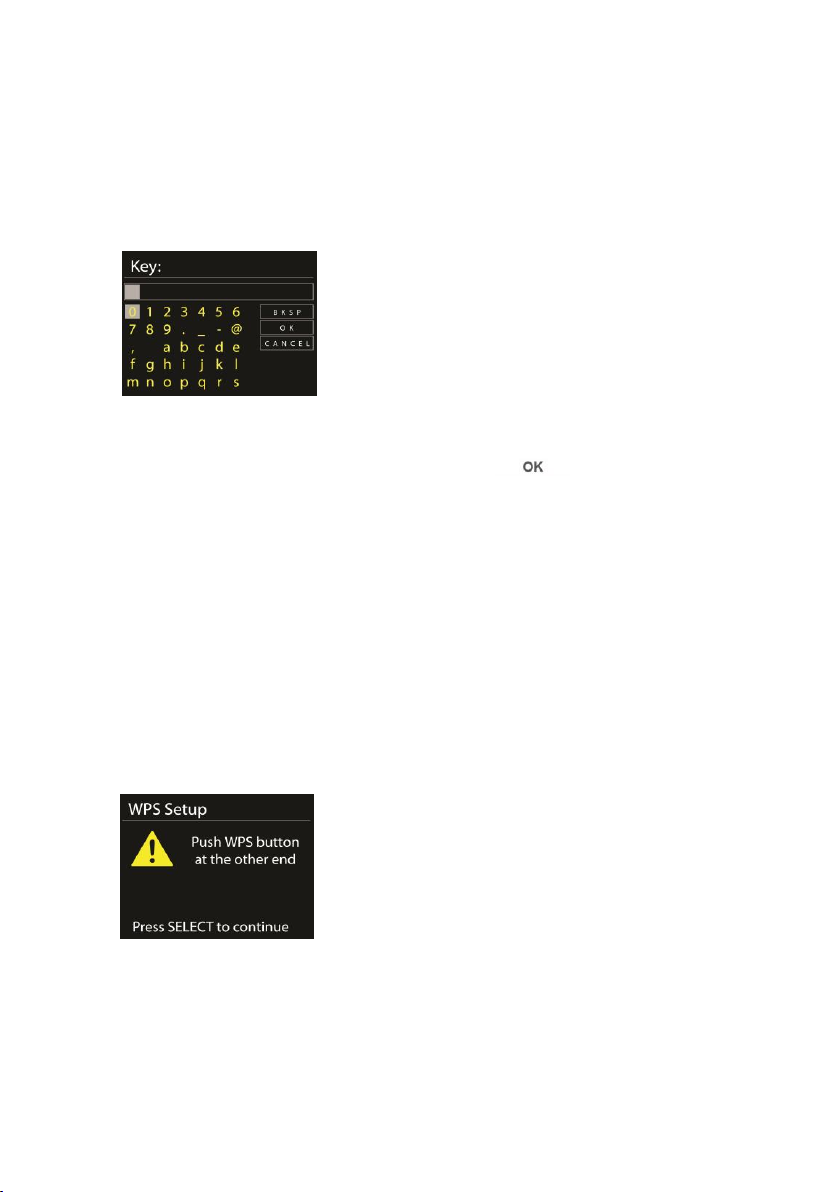
Standard encrypted network
To enter the network’s key, use the Navigation Control on the
device or direction keys on the remote control to move the cursor
through the characters and press to confirm. As each
character is selected, the key is displayed near the top of the
display.
There are three options accessible by turning the Navigation
Control on the device back before the first character – (BKSP), OK
and Cancel.
WPS encrypted network
WPS encrypted networks are identified by WPS at the
beginning of the network name when the device searches the
available AP. Use one of the following methods for connection:
o Push button
The device prompts you to press the connect button on the
router. It then scans for a ready Push Button Connect network
and connects.
14
Page 15
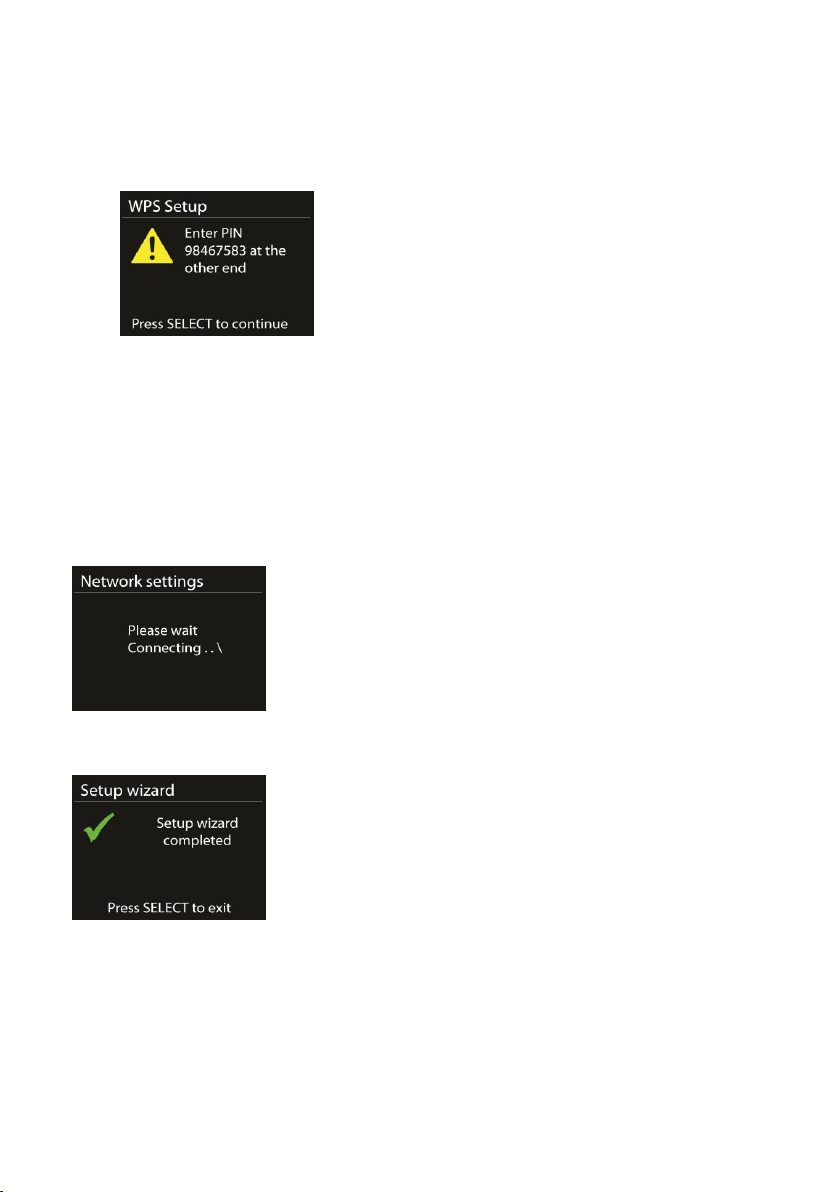
o Pin
The device generates an 8-digit code number, which you
enter into the wireless router, access point, or an external
registrar.
o Skip WPS
Enter key as for a standard encrypted network.
For more information on setting up a WPS encrypted network,
please refer to your WPS router’s instructions.
Completion
The device attempts to connect to the selected network.
It will show ‘Setup wizard completed’ on screen if the setup is done
successfully. If the connection has failed, the device returns to a
previous screen for you to try again. Press OK to exit the setup wizard.
15
Page 16

5.2.2 Equalizer
Allows you to select different equalizers: Normal, Flat, Jazz, Rock,
Movie, Classic, Pop and News.
You may also create your own equalizers with customized bass,
treble and loudness.
Press on the remote control to enter the equalizer menu quickly.
5.2.3 Network
Network wizard
PBC Wlan setup
V iew settings
Wlan region
Manual settings
Enter to search AP SSID, then input the WEP / WPA key or
choose Push Button/Pin/Skip WPS to connect to the wireless
network.
Push Button Configuration, it is to connect the AP that
supports WPS (Wi-Fi Protected Setup).
View the information of the current connected network:
Active connection, MAC address, Wlan region, DHCP, SSID, IP
address, Subnet mask, Gateway address, Primary DNS and
Secondary DNS.
Select the Wlan region to obtain the optimal Wlan
connectivity: Canada, Spain, France, Japan, Singapore,
Australia, and Republic of Korea.
Choose a wireless network connection and enable or disable
16
Page 17

DHCP (Dynamic Host Configuration Protocol).
Network profile
The device has memory function to memorize the last four
wireless networks that it has been connected to. The device
will automatically connect to one of them whichever could be
found and is available.
The list of registered networks will be displayed. You can
delete some unwanted networks by turning and pressing OK
and then choose YES to confirm.
Keep the network connected
If you choose to keep the network connected, the WiFi will not
disconnect even if the device is in standby mode. Otherwise, the
connection will only available when the device is switched on. This
option allows the device to be ready for DLNA streaming in any
operating mode. Details for DLNA streaming, please refer to Section
5.6.
5.2.4 Time/Date
Set the time manually or auto update the time format, time zone and
daylight.
5.2.5 Language
English is set as the default language. You may select your own
desired language.
5.2.6 Factory reset
A factory reset resets all user settings back to default settings. All the
presets, time, date and network configuration will be lost.
17
Page 18

However, the current software version of the device can be stored as
it is registered with the internal radio portal. All favorites in the
Internet radio are also stored. Unless you re-register your device with
another account on the portal website.
5.2.7 Software update
Software upgrade to fix bugs and/ or additional features will be
available.
The device is set with the default to automatically check for updates'
availability periodically. You may also check the updates' availability
manually. If a newer software is available, you will be informed. Then
you may decide if you want to download and install the new software.
After a software upgrade, all user settings are maintained.
NOTE: Before starting the software upgrade, ensure that the device is
plugged into a stable main power connection. Disconnecting power
during the upgrade may permanently damage the device.
5.2.8 Info
View the firmware version and the radio ID.
5.2.9 Backlight
Allows you to change the backlight level to High, Medium or Low in
the power on mode. The timeout duration can be adjusted, which
allows the radio to turn to the standby backlight level when it has not
been used.
5.3 Internet Radio
The device can be channeled to radio stations and podcasts from
around the world through a broadband Internet connection.
When you select Internet radio, the device directly contacts the
Frontier Silicon Internet radio portal (which is supported by v-tuner)
and will obtain a list of stations.
The portal also allows you to personalize multiple lists of your favorite
18
Page 19

stations.
While listening to an Internet radio station, you can press the Back button on
the device/remote control to quickly return to the last visited branch of the
menu tree. You may also press MENU/INFO on the device or MENU on the
remote control to go to the first menu of the Internet radio mode.
5.3.1 Last listened
When the Internet radio mode restarts, the last-listened station is
selected. To select another recently used station, enter here to select
the listed station. Most recent stations appear at the top of the list.
5.3.2 Station list
Browse Internet broadcasts that are categorized into different
categories, Location, Genre, Popular and New. You can also search the
station with keywords.
19
Page 20

5.3.3 Favorites
Favorites are stored in the Internet radio portal, and are available
through all Internet radios registered on the same account. Before the
favorites can be used, the radio has to be registered with the Internet
radio portal.
To register your device, choose Station list > Help > Get access code to
get your radio’s unique portal access code. (Do not confuse the portal
access code with the Radio ID from System settings.
Visit the portal website at www.wifiradio-frontier.com
If this is your first time visit to the portal, register for a new account,
by entering the following information:
o access code,
o your e-mail address,
o password,
o radio model.
If you already have an account and wish to add an additional radio,
log in to your account and select My preferences > Add another Wi-Fi
radio.
Once your radio is registered with the portal, you can immediately
use the Internet radio’s favorites and add stations.
To store a playing station as a favorite, press and hold OK until the
display shows ‘Favorite added’. The station will appear in the default
favorites list Stations.
5.3.4 My added stations
Even though the Internet radio portal contains thousands of stations,
20
Page 21

you may want to listen to stations not listed. You can add your own
station via the portal.
5.3.5 Presets
Presets are stored in the radio and cannot be accessed by other
radios.
To store an Internet radio preset, press and hold PRESET on the device
or on the remote control until the display shows the Save
preset screen. Select one of the 10 presets to save the currently
playing station by pressing the OK key for a long time.
To select a preset, press PRESET on the device or on the remote
control, then select one of the listed preset stations. When a preset
station is playing, it shows n ( 1, 2 etc.) at the bottom of the
screen.
You can store up to 10 of your favorite stations to the memory. This
will enable you to access your favorite stations 0-9 quickly and easily
by using the number buttons on the remote control.
5.3.6 Now playing information
While the stream is playing, the screen shows its name and
description. To view further information, press MENU/INFO on the
device or INFO on the remote control.
Each time you press INFO, another set of information is displayed,
which cycles through name/description, genre/location, reliability,
codec/sampling rate, playback buffer and today’s date.
5.4 Spotify Connect
Using This Device With Spotify Connect
A better way to listen at home
Spotify Connect lets you play Spotify through your home speakers or TV,
using the Spotify app as remote.
You’ll need Spotify Premium to use Connect, see details overleaf.
21
Page 22

Step 1. Add your new device to the same WiFi network as your phone,
tablet or PC (see product user instructions for details).
Step 2. Open the Spotify app on your phone, tablet or PC, and play any
song.
Step 3. If you’re using the app on a phone - tap the song image in the
bottom left of the screen. For tablet and PC move to step 4.
Step 4. Tap the Connect icon
Step 5. Pick your device from the list. If you can’t see it, just check it’s
connected to the same WiFi network as your phone, tablet or PC.
All done! Happy listening.
Licenses
The Spotify Software is subject to third party licenses found here:
www.spotify.com/connect/third-party-licenses.
5.5 Music Player
Music player mode plays audio files in MP3, WMA, WAV or AAC format
from a computer on the local network.
While playing music, you can press on the device or on
the remote control. You may also press and hold MENU/INFO on the
device or press on the remote control to quickly return to the last
visited branch of the menu tree.
You can use or on the remote control to play the
previous or next track, press and hold to rewind or fast forward (x1, x2,
x4). Press on the remote control to play or pause. Press
on the remote control to stop playback and return to the music
list.
22
Page 23

5.5.1 Shared media
If you have set up shared media, an entry consisting of <computer
name>: <Shared media name> will be displayed.. If you have more
than one computer sharing media, the alternatives are listed. Select
the shared media that you want to play.
The menus are now generated from the shared media server.
The first menu shows a list of media types, for example Music, Video,
Pictures and Playlists. The device can only play music and playlists.
A search function is available to find tracks in a similar way to
Internet radio search.
For Music, there are numerous ways of selecting tracks including
Genre, Artist, Album, Composer and Rating.
Press OK to play your desired track. A short press will play the track
immediately.
5.5.2 USB playback
From this point on, menus are generated from the folders on the USB
device. Browse folders with the navigate reel and Back button, or
direction keys on the remote control. The display shows folder and
file names (not necessarily track names).
Once you have found a track you want to play, press the navigate reel
on the device or press OK on the remote control.
23
Page 24

Noted : The USB port is not support charging.
5.5.3 Repeat/shuffle
Allows you to repeat tracks or play them in a random order. Press
REPEAT/SHUFFLE on the remote control for shortcut.
5.5.4 Now playing information
While a track is playing, the screen shows its track and artist (UPnP).
There is also a progress bar with figures for elapsed and total track
time. At the bottom of the screen, an icon indicates UPnP depending
on the source. To view further information, press MENU/INFO on the
device or INFO on the remote control.
Each time you press INFO, another set of information is displayed,
which cycling through the information:
UPnP: track/artist/progress bar/track times, album, codec/sampling
rate, playback buffer and today’s date.
5.6 DMR (DLNA Streaming)
Shared music in Section 5.5.1 is a way of music streaming in which you look
for the music list and control playback from the device. This topic will
introduce another way to do the music streaming which is not necessary to
control playback on the device.
You can share the music files from a PC, Android mobile or tablet, and directly
use your PC, Android mobile, tablet or iPhone / iPad to control music
playback on the device. It is called DLNA streaming.
24
Page 25

5.6.1 Control on PC
The PC system requirements for DLNA are Windows 7 and Windows
Media Player 12. Setup as below:
Firstly, share the media on your PC to the device.
Control Panel > Network and Internet > Network and Sharing Center
> Change advanced sharing settings > Media streaming options
Open Windows Media Player to enable Allow remote control of my
Player.
Select any music in the library and choose Play to “Lenco Concerto”
25
Page 26

A box of music playback pops up for the streaming.
5.6.2 Control on Smartphone / Tablet
You may search (with keyword: DLNA) and install any free or
commercial DLNA apps from Google Play or Apple Store if you are
using Android mobile, tablet or iPhone / iPad.
It is suggested to use BubbleUPnp or Twonky Beam on Android
mobile, tablet; or use Twonky Beam on iPhone/iPad.
26
Page 27

Procedures for playing shared music on the app are as follows:
Select player
Select server
(BubbleUPnp)
(TwonkyBeam)
1. Select the device as the player.
2. Select music server and choose the music.
NOTE: Some apps may not support streaming music from iPhone/iPod but
Some apps may allow you to play music to multi players at the same
the iPhone/iPod can still be used to control streaming music from
other servers.
27
Page 28

time.
Some apps can create a playlist if you choose several songs.
If you want more details, please refer to your own instruction of the
software or apps that you used for DLNA streaming.
5.7 DAB
DAB mode receives DAB/DAB+ digital radio and displays information about
the station, stream and track playing.
5.7.1 Scanning for stations
The first time you select DAB radio mode, or if the station list is empty,
the device will automatically perform a full station scan. You may also
perform a scan manually to update the list of stations for the
following possible reasons:
o Available stations might change from time to time.
o An empty or incomplete list of available stations might be the
result of poor reception during the scan.
o To store the stations with good signal strength in the list only.
To start a scan manually, choose Full scan. To scan only stations with
good signal strength, select Local scan.
Once the scan is completed, the radio shows a list of available
stations.
28
Page 29

To remove stations that are listed but not unavailable, choose Prune
invalid.
Turn on the Navigation Control on the device to view a list of stations
and press OK to confirm. The screen will show information of the
selected station, track or shown as broadcast.
5.7.2 Presets
To store a DAB+ preset, press and hold PRESET on the device or
on the remote control until the display shows the Save preset screen
by pressing the OK key for a longer time. Select one of the 10
presets to save the currently playing station.
To select a preset, press PRESET on the device or on the remote
control, then select one of the listed preset stations. When a preset
station is playing, it shows n ( 1, 2 etc.) at the bottom of the
screen.
You can store up to 10 of your favorite stations to the memory. This
will enable you to access your favorite stations 0-9 quickly and easily
by using the numbered buttons on the remote control.
5.7.3 Now playing information
While the stream is playing, the screen shows its name and DLS
(Dynamic Label Segment) information broadcast by the station and
the real-time information such as program name, track title and
contact details. Stereo broadcasts are indicated with an icon at the
top and bottom of the screen. To view further information, press
MENU/INFO on the device or INFO on the remote control.
Each time you press INFO, another set of information is displayed,
which are DLS text, program type, ensemble name/frequency, signal
strength/error rate, bite rate/codec/channels and today’s date.
5.7.4 Settings
Dynamic range compression (DRC)
Allows you to compress the audio dynamic range (off/ low/
high), if you are listening to music with a high dynamic range in
a noisy environment.
29
Page 30

Station order
Allow you to rearrange the order of the DAB+ station list to be
either Alphanumeric, Ensemble or Valid.
Ensemble lists groups of stations that are broadcasted together
on the same ensemble. Valid lists and valid stations first,
alphanumerically, then off-air stations.
5.8 FM
FM radio mode receives analogue radio from the FM band and displays RDS
(Radio Data System) information about the station and broadcast's location.
To search for a station, press OK. The frequency display starts to run up as the
device scans the FM band. Alternatively, you can scan up or down by pressing
and holding the buttons TUNING- or TUNING+ on the device.
5.8.1 Preset
To store a FM preset, press and hold PRESET on the device or on
the remote control until the display shows the Save preset screen by
pressing the OK key for a longer time. Select one of the 10 presets to
save the currently playing station.
To select a preset, press PRESET on the device or on the remote
control, then select one of the listed preset stations. When a preset
station is playing, it shows n ( 1, 2 etc.) at the bottom of the
screen.
You can store up to 10 of your favorite stations to the memory. This
will enable you to access your favorite stations 0-9 quickly and easily
by using the numbered buttons on the remote control.
30
Page 31
5.8.2 Now playing information
23
While the stream is playing, the screen shows its frequency, or if RDS
information is available, station name and any further RDS
information such as program name, track title and contact details will
also be shown. Stereo broadcasts are indicated with an icon at the
top of the screen. To view further information about the broadcast,
press MENU/INFO on the device or INFO on the remote control.
Each time you press INFO, another set of information is displayed,
which is cycling through RDS text, further RDS text (station/program
type), frequency and today’s date.
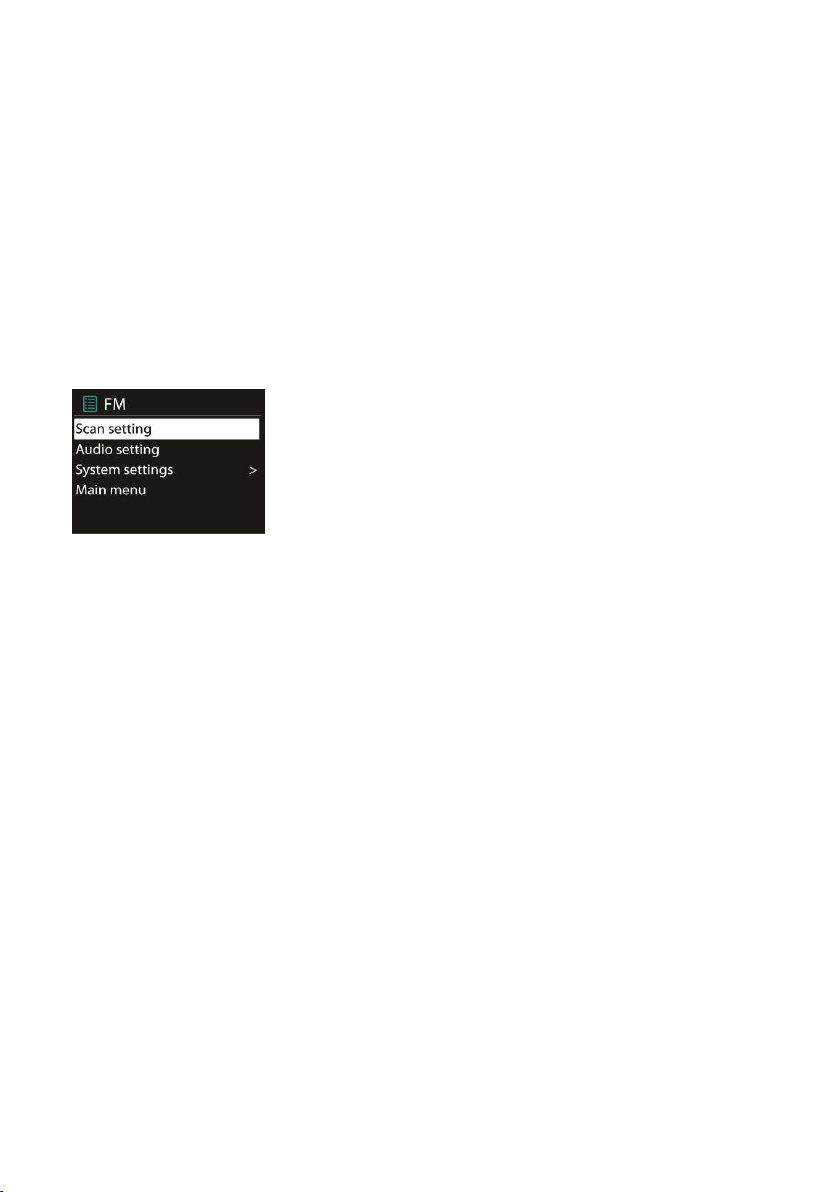
5.8.3 Settings
Scan settings
FM scans is default to stop at any available station. This
may result in a poor signal-to-noise ratio (hiss) from weak
stations. To change the scan settings to stop only at stations
with good signal strength, select Yes after choosing Strong
station only.
Audio settings
All stereo stations are reproduced in stations, this may
result in a poor signal-to-noise ratio (hiss). To play weak
stations in mono, select FM weak reception: Listen in mono
only and then YES.
5.9 Bluetooth
When you go to the Bluetooth mode, it is under pairing (the BT icon on the
bottom is flashing). You can turn on your smart phone/ tablet/ other
Bluetooth device for pairing. The Bluetooth pairing name is “Lenco
Concerto”. You can control the music playback on your BT device. It is
supported by play/pause, Next track/Prev track on the remote control.
31
Page 32

Press and hold to release BT pairing.
5.10 AUX IN
Aux in mode plays audio files from an external source such as an MP3 player.
To play an audio file with the Aux in mode follow the steps below:
o Turn the volume low on both the device and, if adjustable, the
audio source device.
o Connect the external audio source to the 3.5mm Audio in socket at
the rear of the device.
o Press MODE or select AUX IN in the Main menu.
o Adjust the volume of the device (and, if necessary, the audio
source device) as required.
5.11 Sleep
To set the sleep timer, select Sleep in the Main menu or press SLEEP on the
remote control. Choose sleep period option from Sleep OFF, 15 MINS, 30
MINS, 45 MINS or 60 MINS.
The system returns to the main menu after you selected a desired sleep
period option. Press and hold MENU/INFO on the device or on the
remote control to return to the now playing screen.
5.12 Alarm
There are two available wake-up alarms with snooze function, and a sleep
32
Page 33

function which can turn the system off after a set period. Each alarm can be
set in a particular mode.
Select Alarms in the Main menu or press Alarm on the remote control to set
or change an alarm.
Select the alarm number (1 or 2) then configure the following parameters:
o Enable: on/off,
o Frequency: Daily, Once, Weekends or Weekdays,
o Time
o Mode: Buzzer, Internet Radio, DAB, FM or Spotify (If alarm wake
up set by Spotify, it is activated by buzzer and then press play
Spotify connect apps to play.)
o Preset: Last listened 1-10,
o Volume: 0-20
To activate the new settings, scroll down and select Save.
The screen shows active alarms with an icon at the bottom left.
When the alarm sounds, press Menu/Info; Tuning +/-, back and OK button on
the device or press Mode, Up/Down cursor; OK, Sleep/Snooze, Number 1-0
button on the remote control to temporarily switch off the alarm for a set
period of time. The snooze icon will flash to indicate that snooze is on.
5.13 Extra Features
33
Page 34

5.13.1 Audio out socket
Error
Remedy
The device does not switch
on.
Check if the power adaptor is connected
properly.
No sound.
1. Turn on the sound as it may be muted
2. Increase the volume.
3. Pull any connected headphone or
speaker from the connector sockets.
No network connection can
be established.
1. Check the WLAN function.
2. Try to set an IP address at the device.
3. Activate the DHCP function on the router
and make the connection again at the
device.
4. Check if the firewall is activated on the
network – set the respective program in
such a way that access is possible.
5. Reboot the router
WiFi connection cannot be
established.
1. Check the availability of WLAN network
on the router.
2. Place the device closer to the router.
3. Make sure the password is correct.
No station is found.
1. Check the network as well as the access
point and firewall.
It allows you to connect an audio cable from the device to your
own HiFi speaker system to enhance sound performance.
5.13.2 Earphone out socket
It allows you to connect an audio cable from the device to your
earphone.
5.13.3 SPDIF out socket
It allows you to connect an Optical audio cable from the device to
your own HiFi speaker system to enhance sound performance.
6. Troubleshooting
34
Page 35

2. The station may not be available
currently, try it again later or select
another station.
3. The link of the station is changed or the
station no longer transmits – ask the
provider for information.
4. The link of the manually added station is
not correct, make sure it is correct and
re-enter.
Hiss in FM mode
1. Check/move the FM aerial.
2. Move the radio.
No stations available /
burbling / intermittent in
DAB mode.
1. Move the radio.
2.Rescan local stations only (high-strength).
3. Check the local DAB+ coverage.
Alarm does not work.
1. Switch on the alarm.
2. This might be caused by the volume
setting, refer to the solutions of “No
sound”.
3. This may be caused by a network
connection failure if the source of alarm
was set to be radio station. Change the
source of alarm or reconfigure the
connection.
The device cannot be
selected from the Spotify
app
1. Make sure that the device is connected
to the same wireless network as your
Smartphone or tablet.
2. You’ll need a Spotify Premium account to
use Spotify Connect.
Music continues streaming
on the device, when you
close the Spotify app.
Restart the Spotify app.
All other undetermined
cases.
The device may be processing a large
amount of data after a period of operation,
no matter in which mode, it will cause
malfunction. Reboot the device if
35
Page 36

necessary.
Strong electromagnetic interference may
interfere and cause malfunctions to the
device. If the display indicates a problem,
move the device away from near devices
which cause electromagnetic interference
or reset the device.
Model number
Lenco Concerto
Description
Internet radio with DAB/DAB+/FM/Bluetooth
Display
3.2", 320 x 240, TFT colour display
Network supported
IEEE 802.11 b/g/n wireless (WiFi)
Encrypted key
WEP, WPA, WPA2 (PSK), WPS
Streaming
UPnP, DLNA
Supported playback formats
MP3, WMA, WAV, AAC, FLAC
DAB / DAB+
Band III (170 – 240 MHz)
FM
87.5 – 108.0 MHz, with RDS
Power adaptor
16V 2800mA
Standby mode power
consumption
<1W
Speaker power output
Total 34W
Connections
3.5mm line in socket
3.5mm line out socket
3.5mm earphone socket
SPDIF Out
USB port (Not support charging)
DC IN power supply socket
Dimensions
396 x 140 x 150mm
Weight
3.75 kg
7. Specification
36
Page 37

Power supply adaptor: (For EU only)
Manufacturer: KUANTECHIN CORPORATED COMPANY
Model number: KSA0451600280HE
Use only original AC adaptor
Use only the power supply listed in the user instructions
This product operates under Wi-Fi mode at 2.412-2.472GHZ and is designated
only to be used inside a normal household environment. This product is
suited for this purpose within all EU counties.
Guarantee
Lenco offers service and warranty in accordance with the European law,
which means that in case of repairs (both during and after the warranty
period) you should contact your local dealer.
Important note: It is not possible to send products that need repairs to Lenco
directly.
Important note: If this unit is opened or accessed by a non-official service
center in any way, the warranty expires.
This device is not suitable for professional use. In case of professional use, all
warranty obligations of the manufacturer will be voided.
The damaged speaker cone will be excepted from warranty.
Disclaimer
Updates to Firmware and/or hardware components are made regularly.
Therefore some of the instruction, specifications and pictures in this
documentation may differ slightly from your particular situation. All items
described in this guide for illustration purposes only and may not apply to
particular situation. No legal right or entitlements may be obtained from the
description made in this manual.
Disposal of the Old Device
This symbol indicates that the relevant electrical product or battery should
not be disposed of as general household waste in Europe. To
ensure the correct waste treatment of the product and battery,
please dispose them in accordance to any applicable local laws of
requirement for disposal of electrical equipment or batteries. In
so doing, you will help to conserve natural resources and improve
37
Page 38

standards of environmental protection in treatment and disposal of electrical
waste (Waste Electrical and Electronic Equipment Directive).
CE Marking
Products with the CE marking comply with the EMC Directive
(2004/108/EC) and the Low Voltage Directive (2006/95/EC)
issued by the Commission of the European Community.
Hereby, Lenco Benelux BV, Thermiekstraat 1a, 6361 HB Nuth,
The Netherlands, declares that this product is in compliance with the
essential requirements and other relevant provisions of Directive 1999/5/EC.
The declaration of conformity may be consulted via techdoc@lenco.com
Service
For more information and helpdesk support, please visit www.lenco.com
Lenco Benelux BV, Thermiekstraat 1a, 6361 HB, The Netherlands.
38
Page 39

39
 Loading...